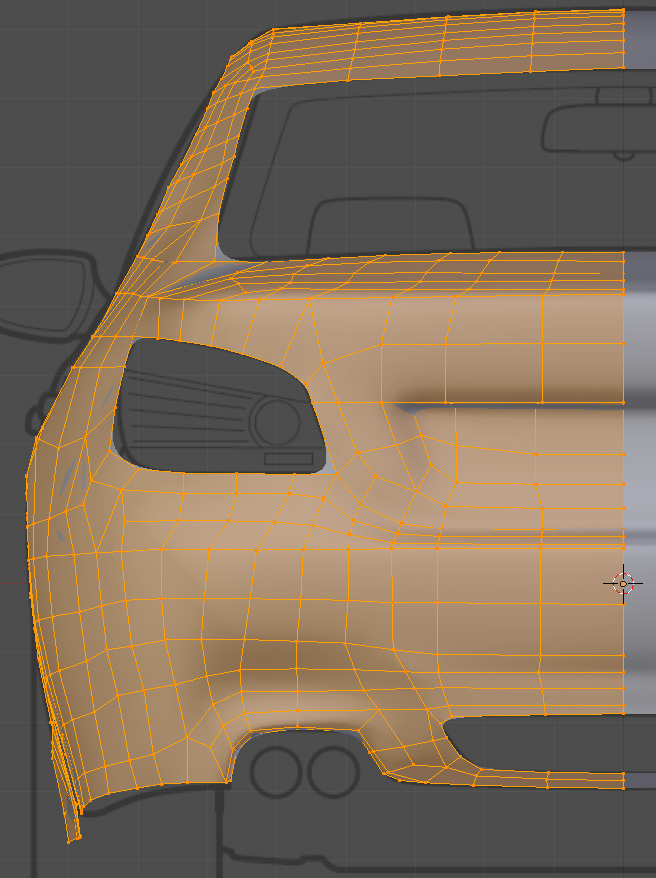
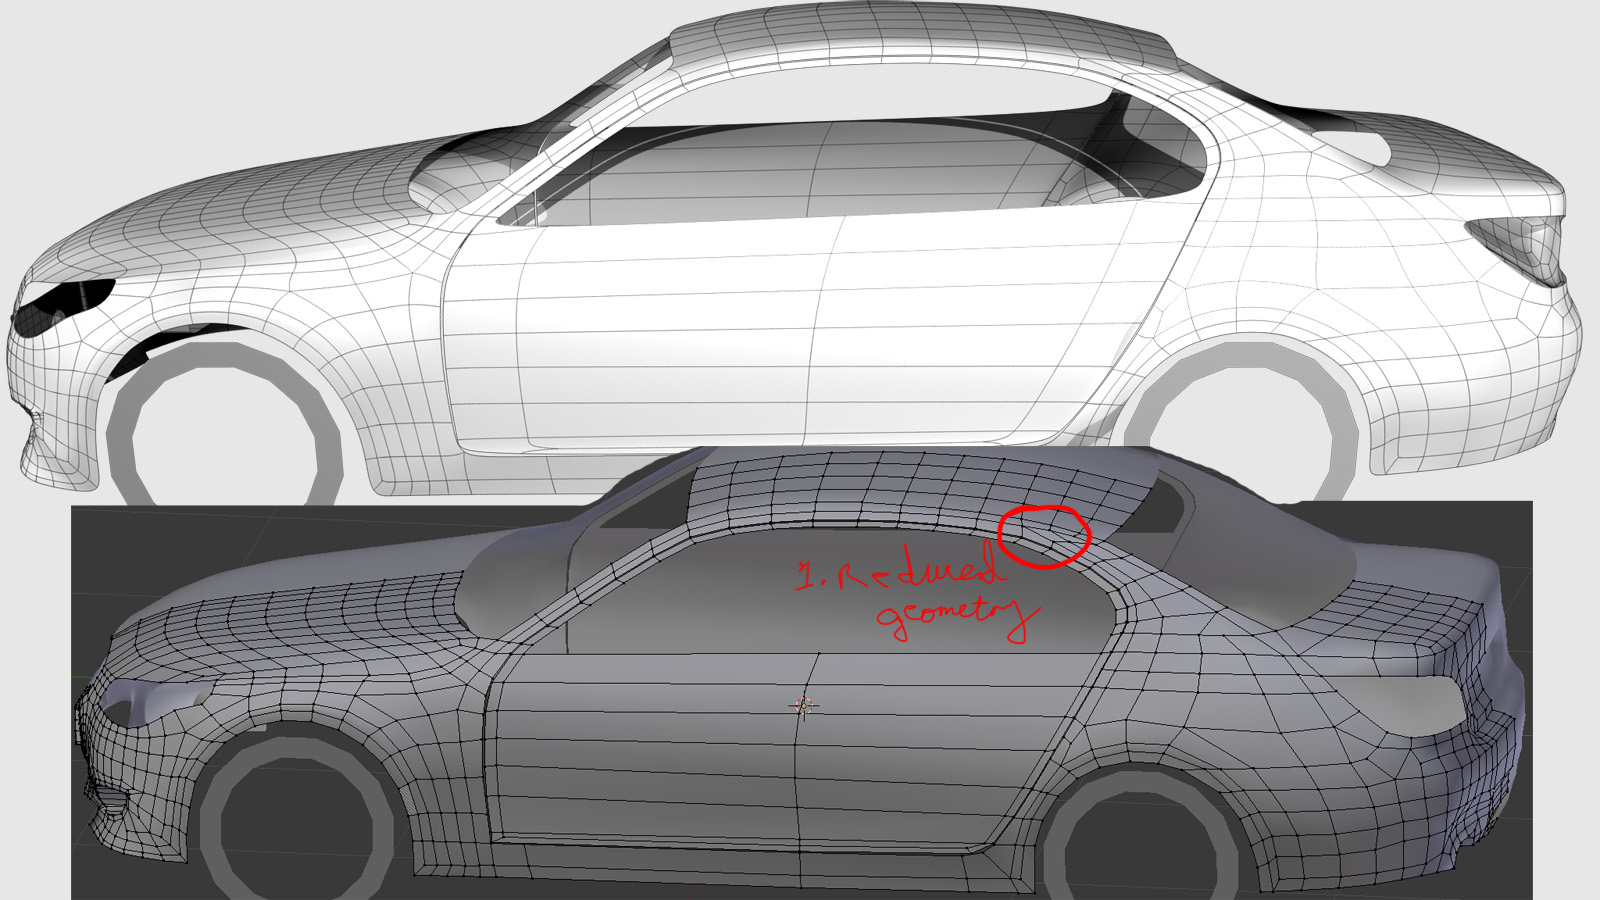
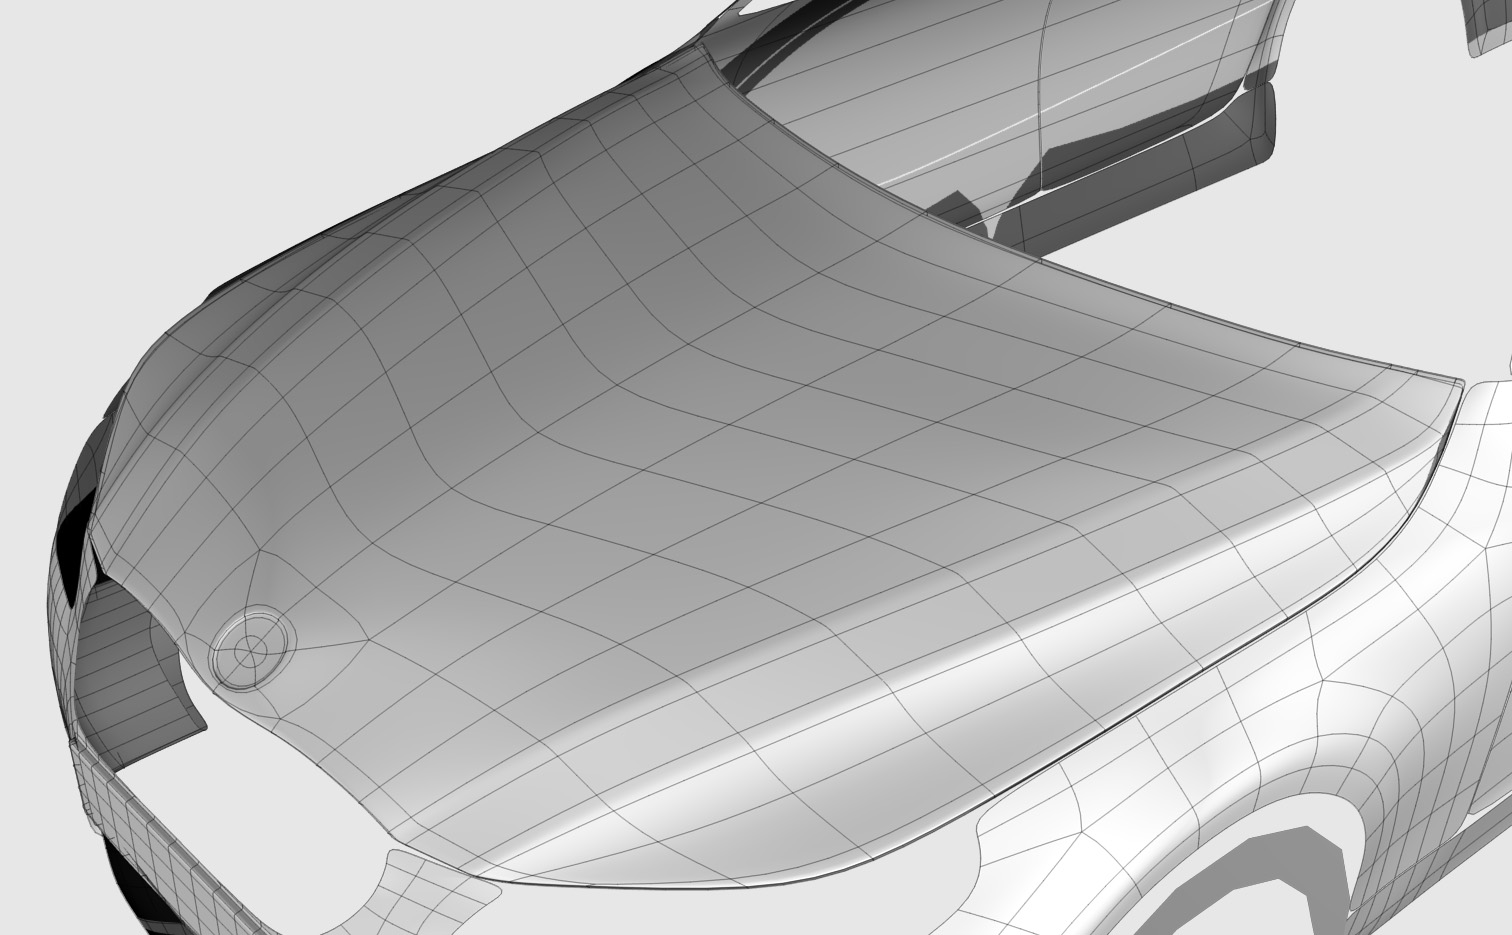
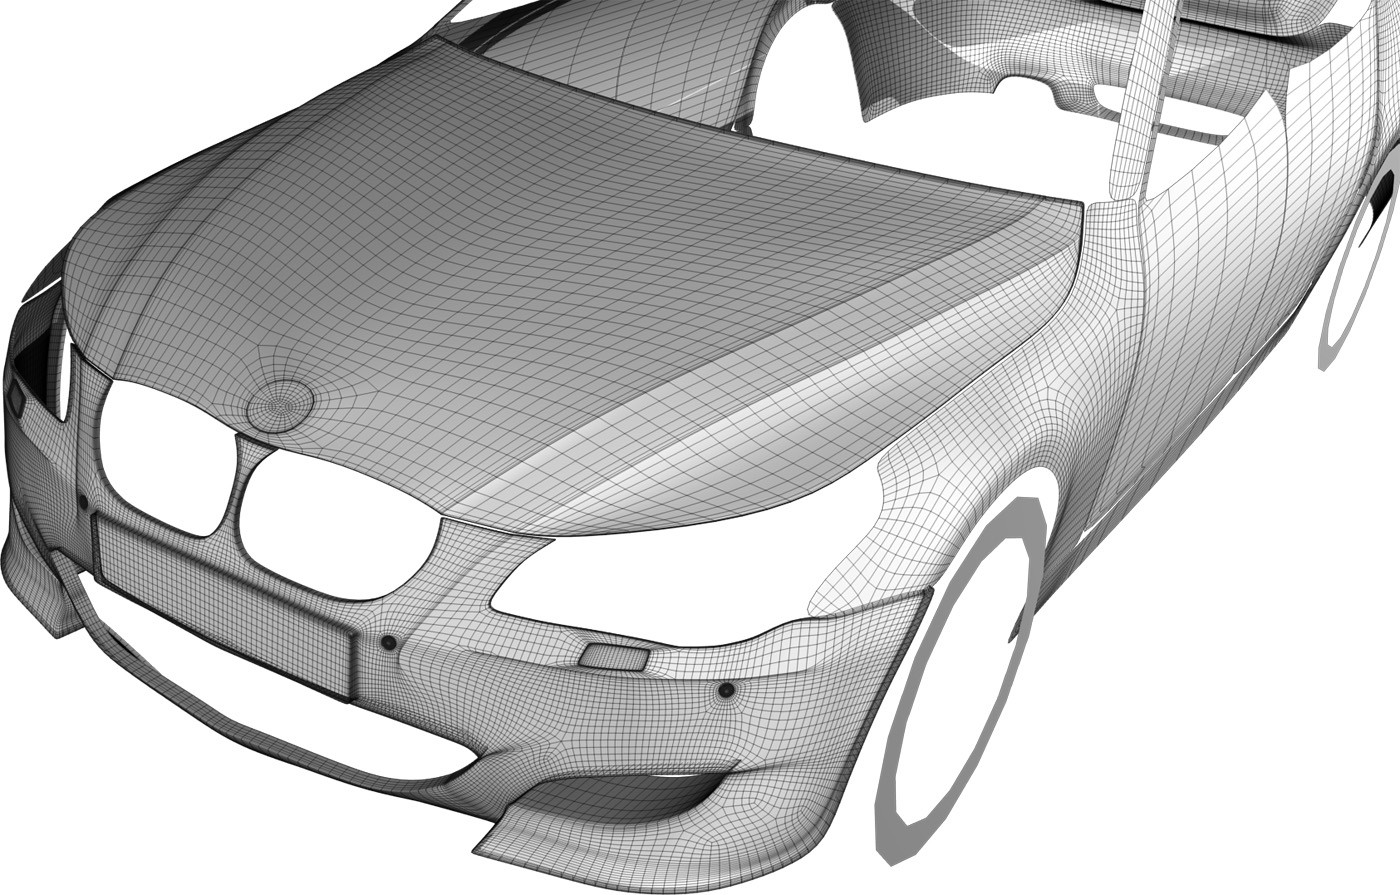
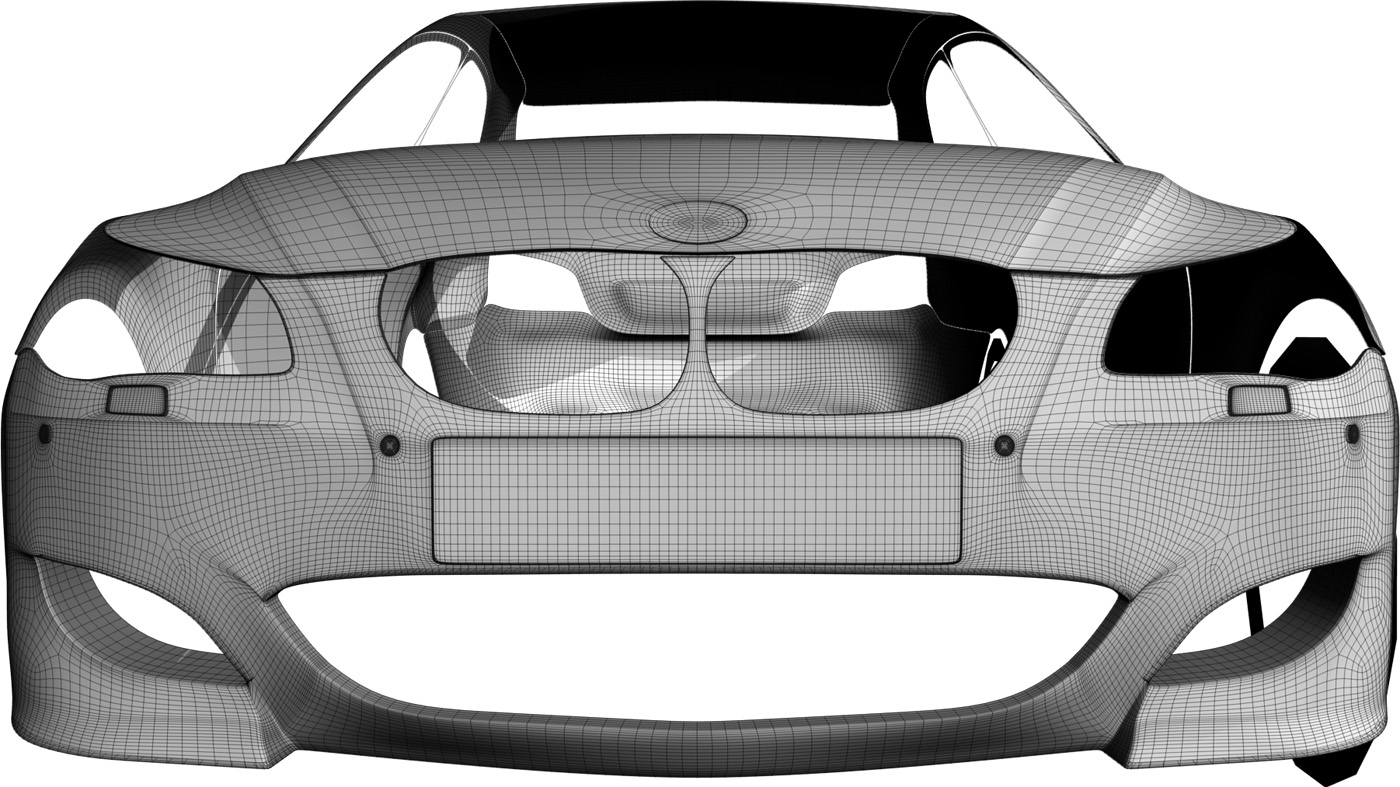
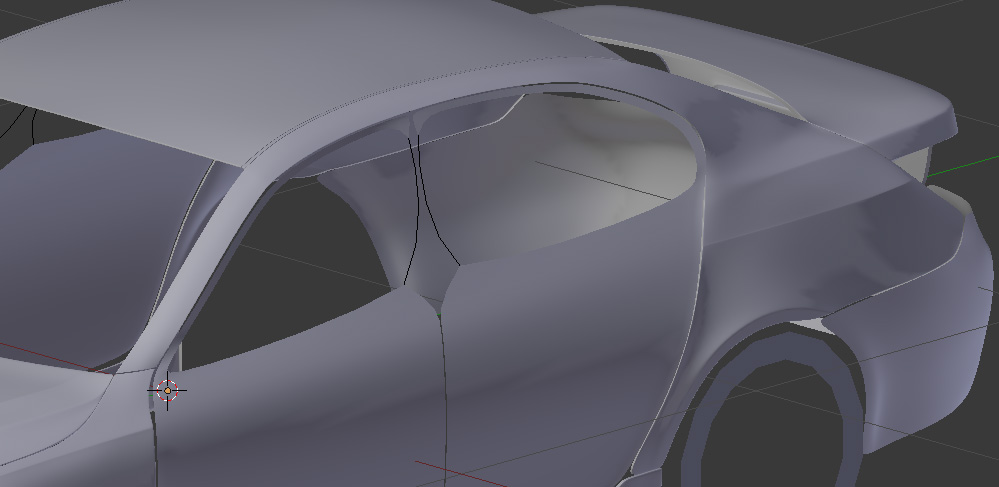
post wires in object mode, front…side, back. My quick verdict right now you have gone too dense too quickly and in short order are going to run into smoothing problem.
How do guys like Jonathan Williamson demonstrate how to build up a high-poly model, http://cgcookie.com/blender/2012/02/03/citizen-exclusive-series-modeling-a-high-poly-car-part-06/. I am not a fun of his accuracy obvious bumps and pinches. but if the general steps are correct than I could just point people to his tutorial. I don’t like recommending tutorials I have not watched myself.
I think I sound unhelpful when I say you have gone too dense too quickly without offering any tips or a tutorial. Now am regretting not finishing my z4 time-lapse. I only have a video of me modelling the hood and that is not exactly too complex a part to get my point across.
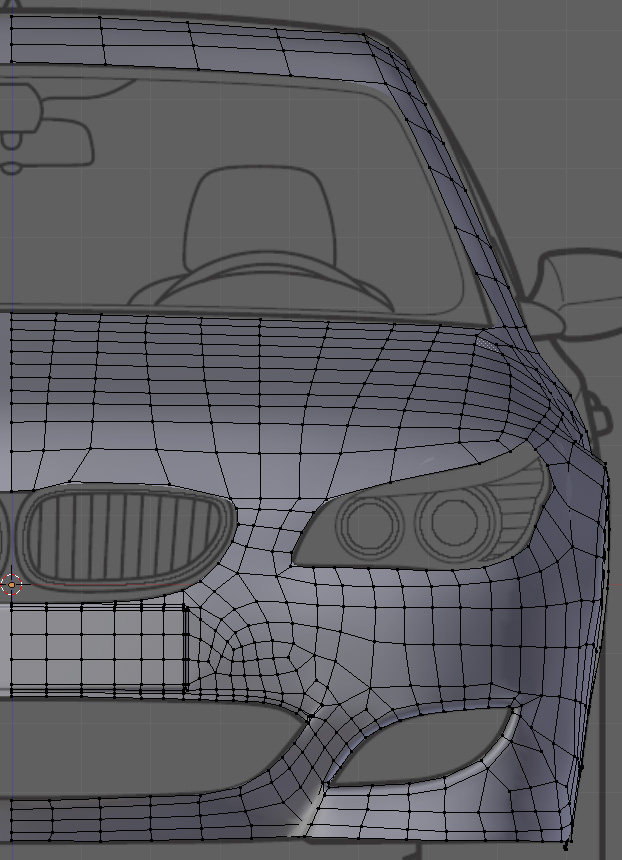
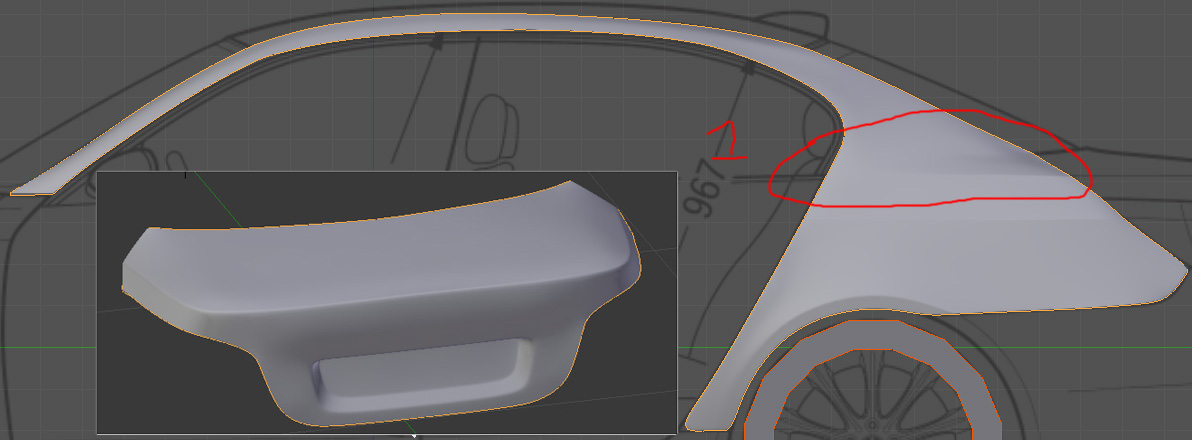
You are not looking at your photos. That bonnet is not an M5 bonnet, it is the latest car you are modelling no? The number plate should not be part of your mesh model at all. it is a separate object in real life and it should be a separate object when you model it. But what I definitely picking up is that you are not looking at photos as you modelling parts wrong.
there is over 254 hi-res photos on netcarshow alone so you should have enough photographic references
that bonnet should take me 25 minutes to model I will download the blueprints and model it and will upload my first time lapse on vimeo,
I’m doing the E60 M5, although I did say in opening post that I wasn’t stressed if I amalgamated or changed slightly; I didn’t however plan on changing to such an exteme.
… with the exception of a tiny cut-out on the left as you view the front; it will have to wait for the mirror to be applied.
Getting those creases something like accurate was definitely fun. /nod I’m fairly happy with them but will be curious to see how they render.:RocknRoll:
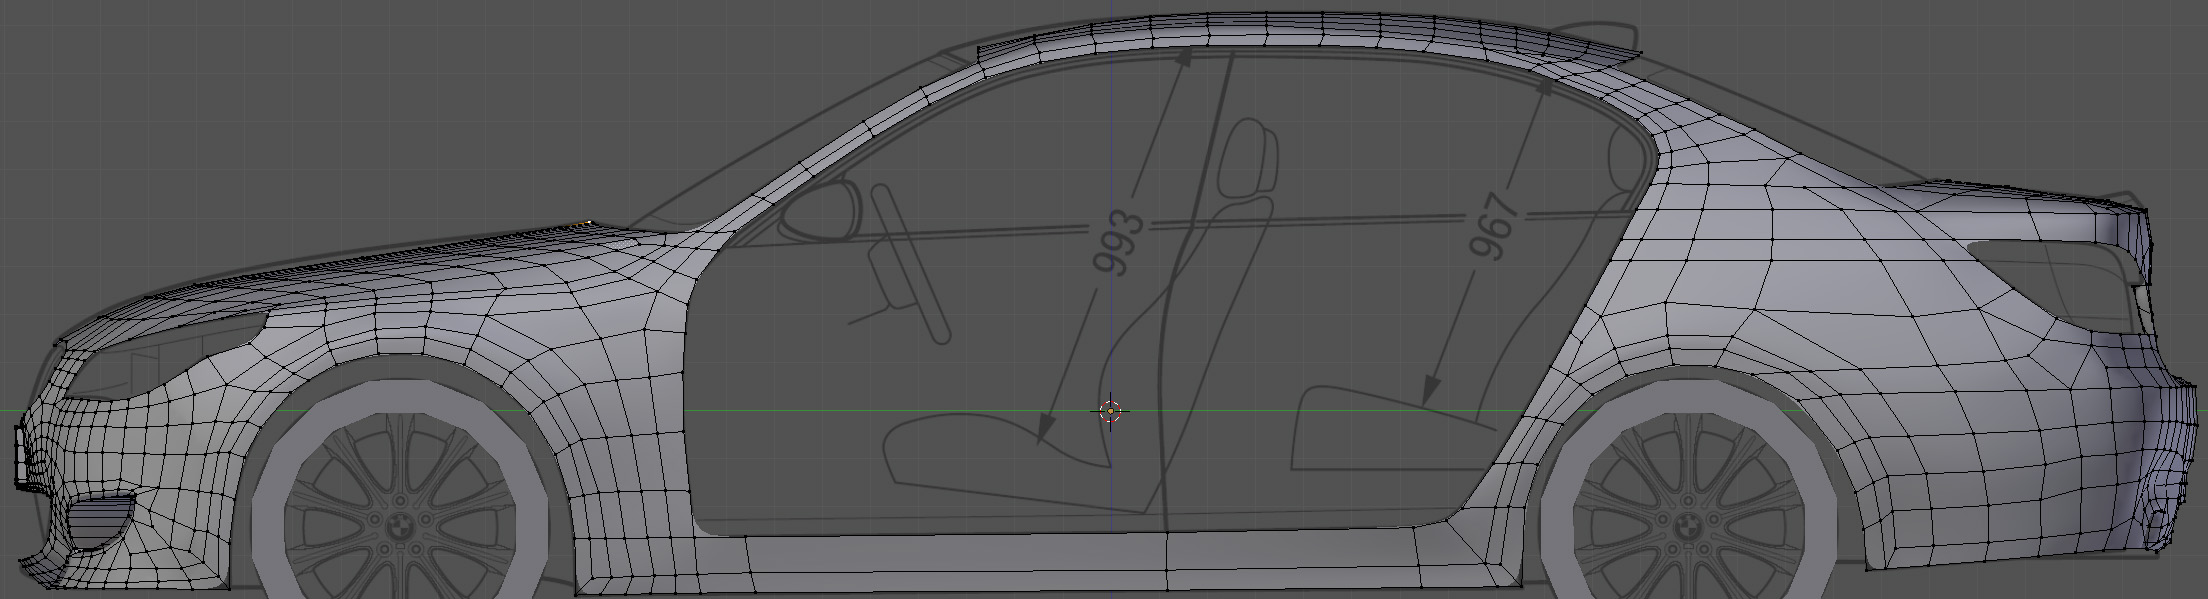
Shot to show the lines; it also highlighted the issue I feel there is in 1. Doors are basically PH; wanted to get the edges and creases in place of the surrounding body before I tried these. Cars are very much a learning experience for me and I can certainly understand the fascination with modelling them.
with wires so dense its a bit tough to say another thing, I also think you are rushing the is a good base of a very good car but the general rush means it been ruined by inaccurate bits and pieces.
The boot around the number plate is wrong for this particular model; I’m leaving ‘as is’ as it looks ok.
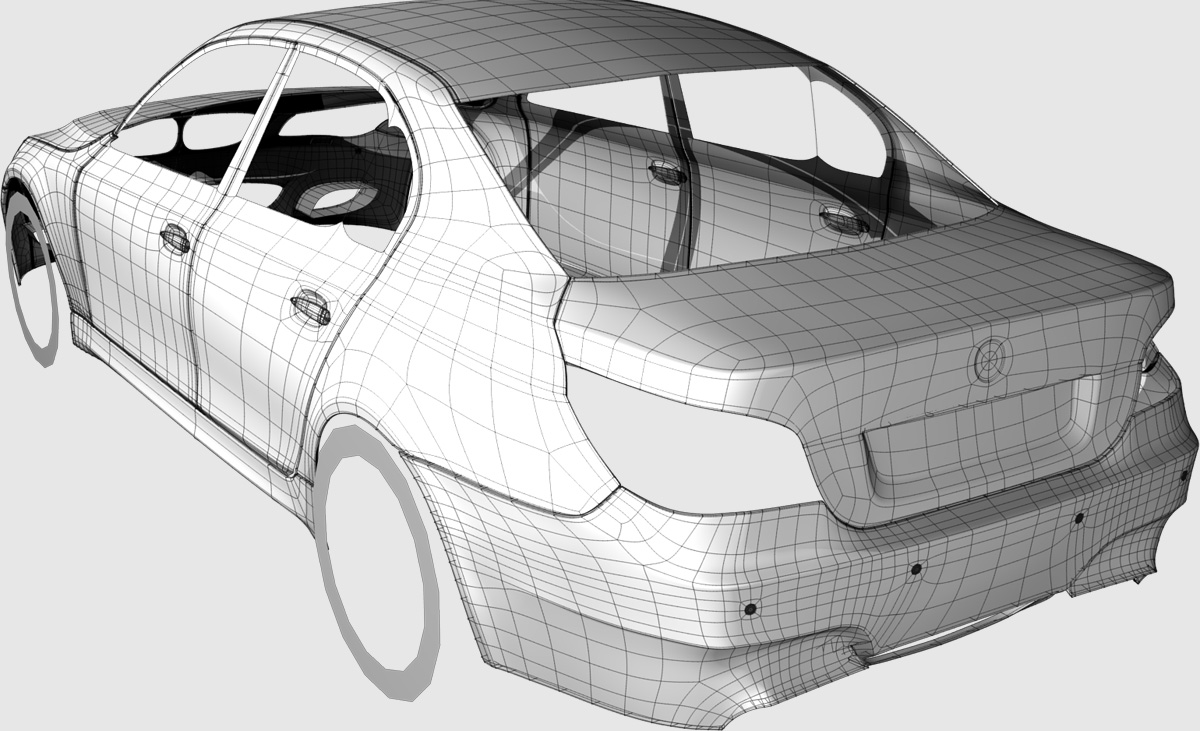
Finished lower part of rear; I was actually going to post last night but just before I did noticed a bad error, so I scrapped it completely and redid. This is much better; only the four tiny bolt caps(?) to do now, and the square cap on the mirrored side which will wait.
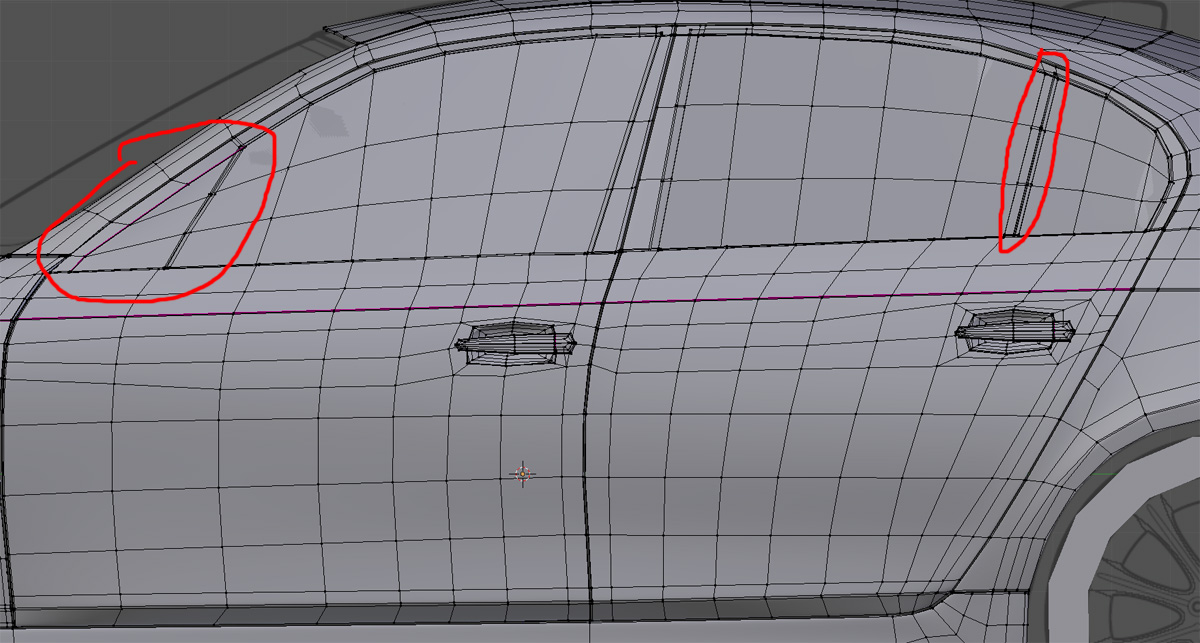
Completed the doors; I know the two areas circled in red, and especially the front window section are not accurate (sorry TM) but for this model I am living with it. It is still a learning process for me.
if you are living with inaccuracy you ainn’t learning. Learn to hate inaccuracy and you are going to soar. Most of the inaccuracy you are living with currently is not hard to sort out.
…I got the Blender bug its nice and over cast here with lots of rain so I can concentrate well as its not hellish hot. I will post a new car WIP, Audi A5 on Saturday. Keep an eye out I think you will see all the stuff I usually go on about in play.