The tv show just looks like animated puppet-warp to me. Can be done with bones and bendy bones and lattice.
go to 9 minutes 46 seconds and play it in slow motion
All I see is artwork drawn and colored/textures to be intentionally as flat as possible and then cut into many layers of separate images with transparent backgrounds. Simple keyframe animation to move things around, the hair motion is maybe bendy bones or lattices. It’s the same kind of setup as South Park but with the choice of smoother animation.
10:05 on the hands are some painted on the fly curves made to glow and then probably clipped to the shape of the hand. Such things are much easier to achieve and customize on the fly something layer based like adobe after effects.
10:37 if you go frame by frame looking at the guy falling off of the wall you can see they just switch through a few different drawings for different body parts and move them around a bit with keyframes.
10:43 you can clearly see how the arm is a separate picture from the rest of the body.
it is puppet warp, and the flatness is something that I am trying to emulate with the textures. I don’t create a 2d rig because I still want the fluidity of manual or traditional animation, while still keeping the textures flat looking.
Thank you for the example, it does look like a starting point for a flat looking texture. And yes, I should consider making a progress thread (this question thread is one of the many puzzle pieces I have, and I guess i’m trying to put them together before showcasing anything for now I guess?).
Is it possible to have a normal map that only affects the shadows? I know you can combine normal maps, so maybe one can affect the light only and the other shadow only.
Good question. In theory, there is Input - Light Path - Is Shadow Ray node. In practice, it only returns zero , even in Cycles. No idea when it actually works
It would be cool to get that to work. You can even animate the form shadows with different effects… I also wonder if custom normals would affect the normal maps in a weird way (i’ve heard from other forums of this case). The main takeaway for the painterly effect is using normal maps, animating it, and using the textures in screen space. If I add custom normals to the equation, I would hope it doesn’t mess things up.
It turned out more complicated than that. Light Path - based effects can not not affect how the material receives shadows. Only how the object is “perceived” by other objects during render. So even for simple task like making a shadow colored, you’ll need to Mix Shader the main material with colored Transparent BSDF shader. So no idea if controlling normal map strength with shadow is possible
Maybe mixing it with some other shader would work? But Normal mapping is similar, in a sense it only affects how light and shadow is perceived, it doesn’t actually change the geometry. I’ve seen a ball or cube placed on a plane with normal mapping on, and the shadows cast onto the plane were following the geometry of the plane, not the effect of the normal map. I just need “filter” for the shadows, just like normal maps in a sense are also filters.
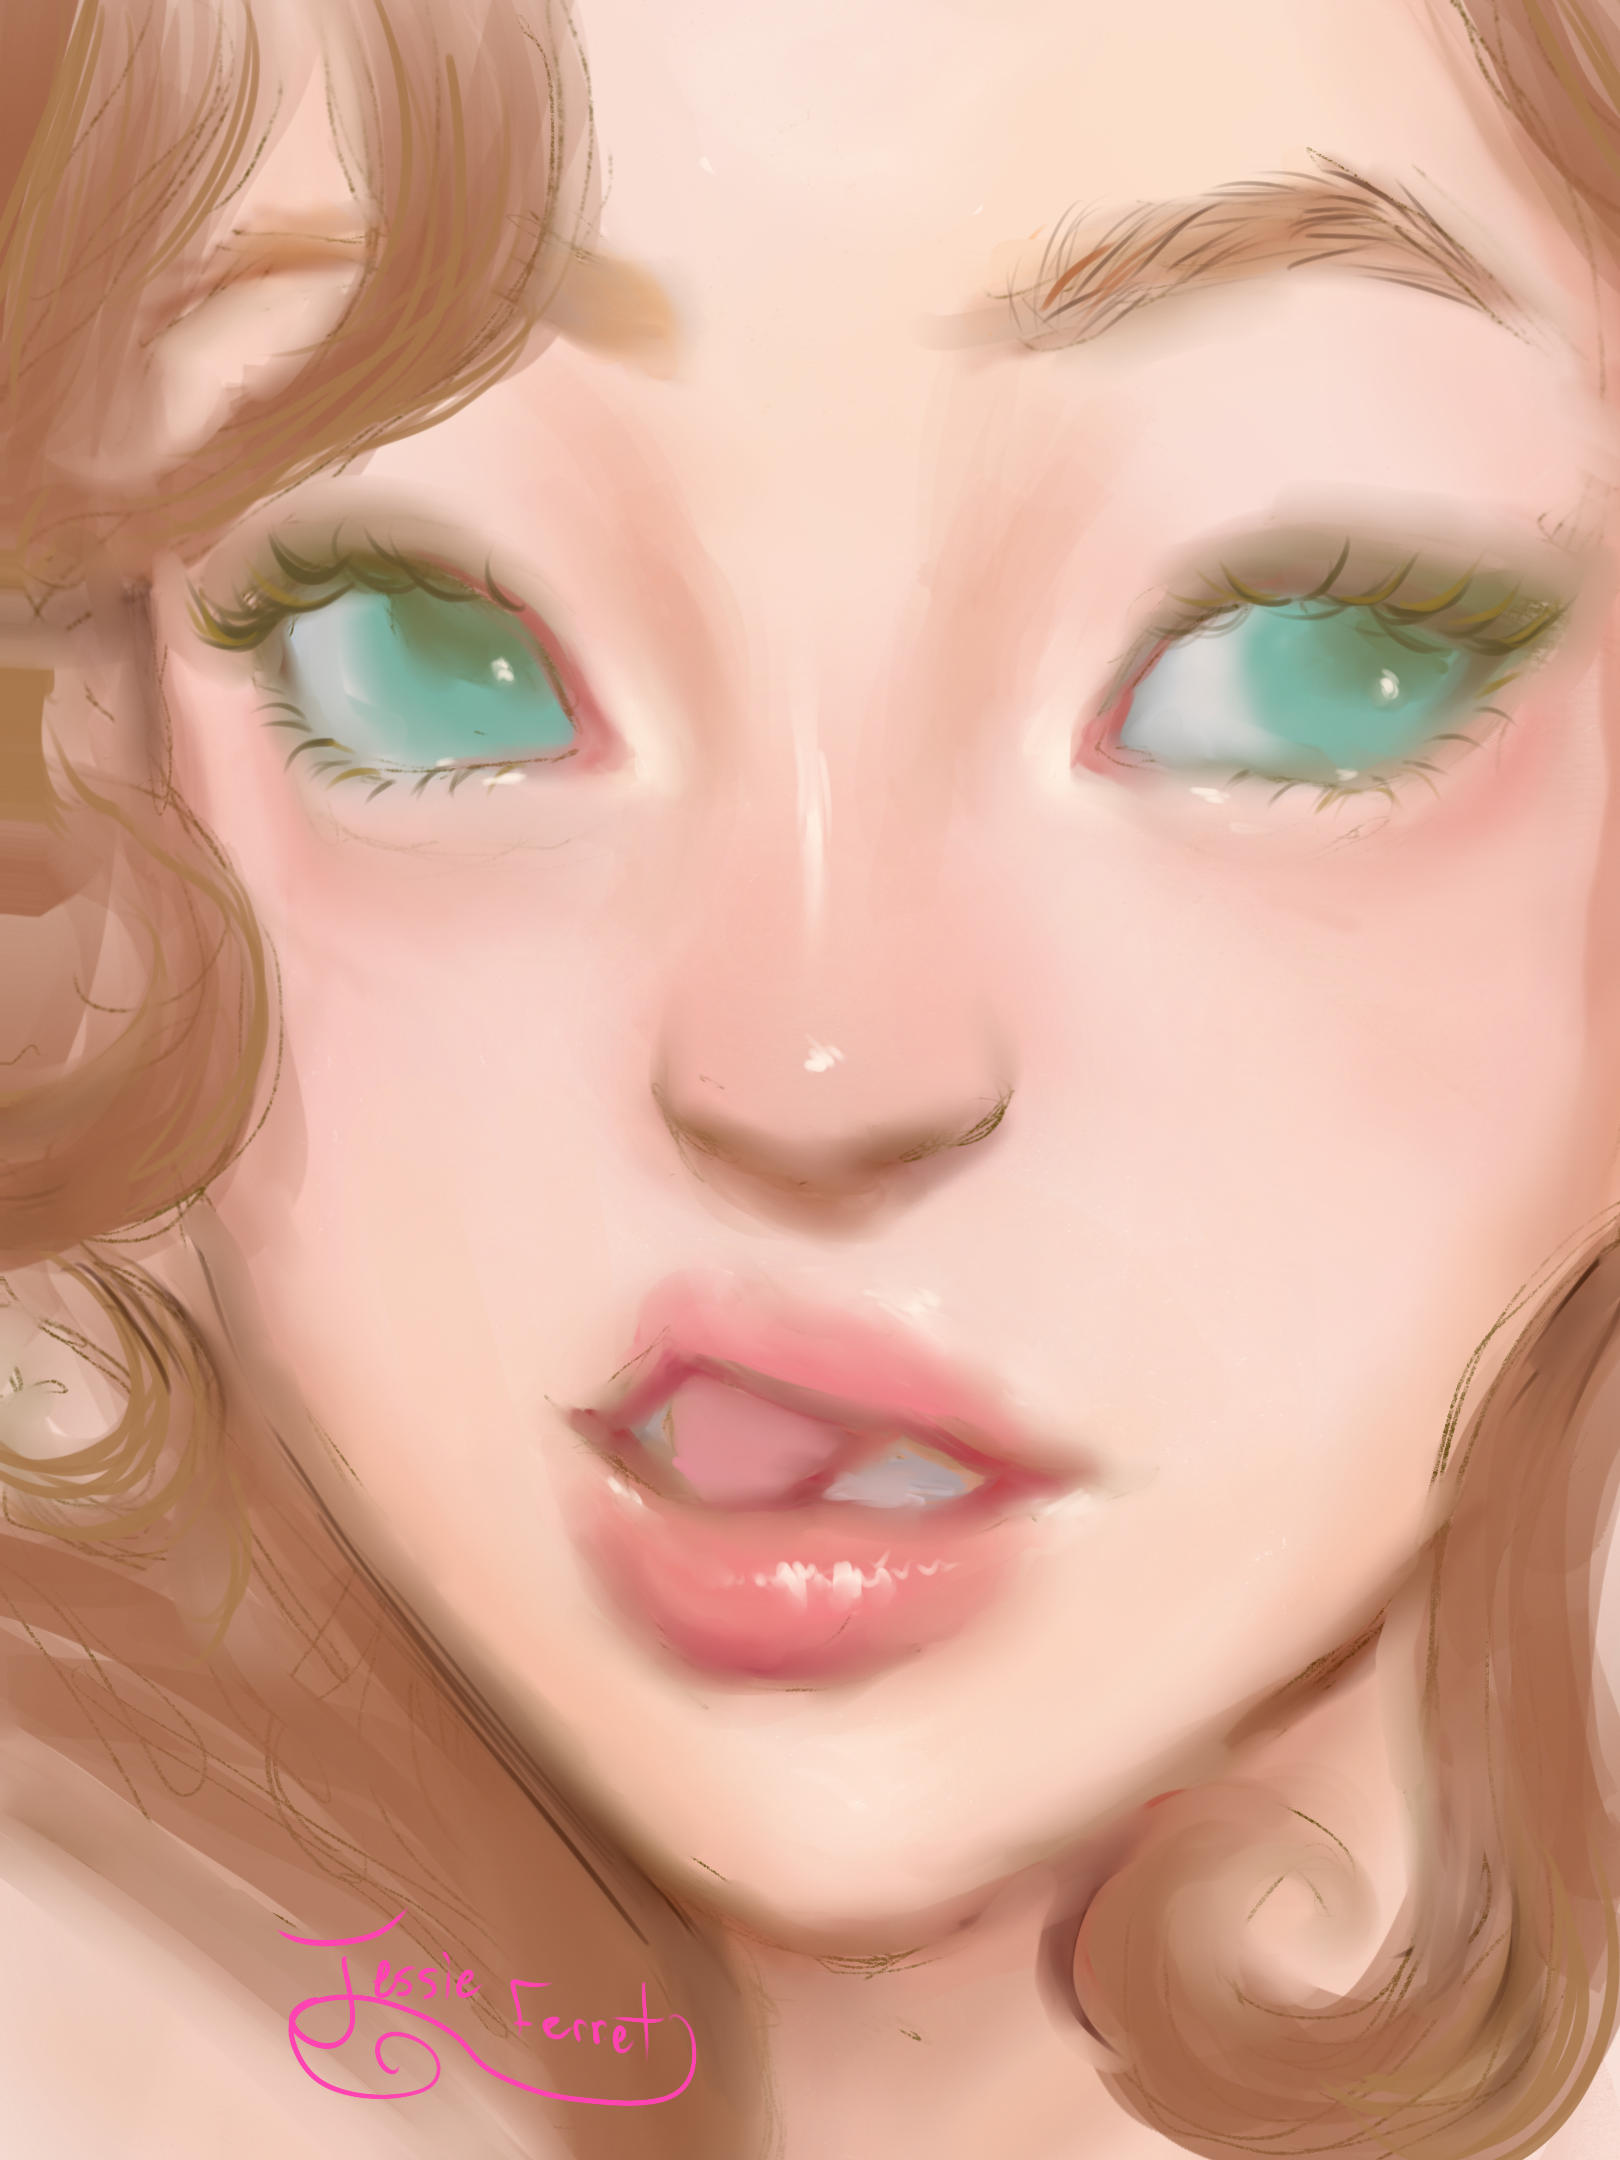
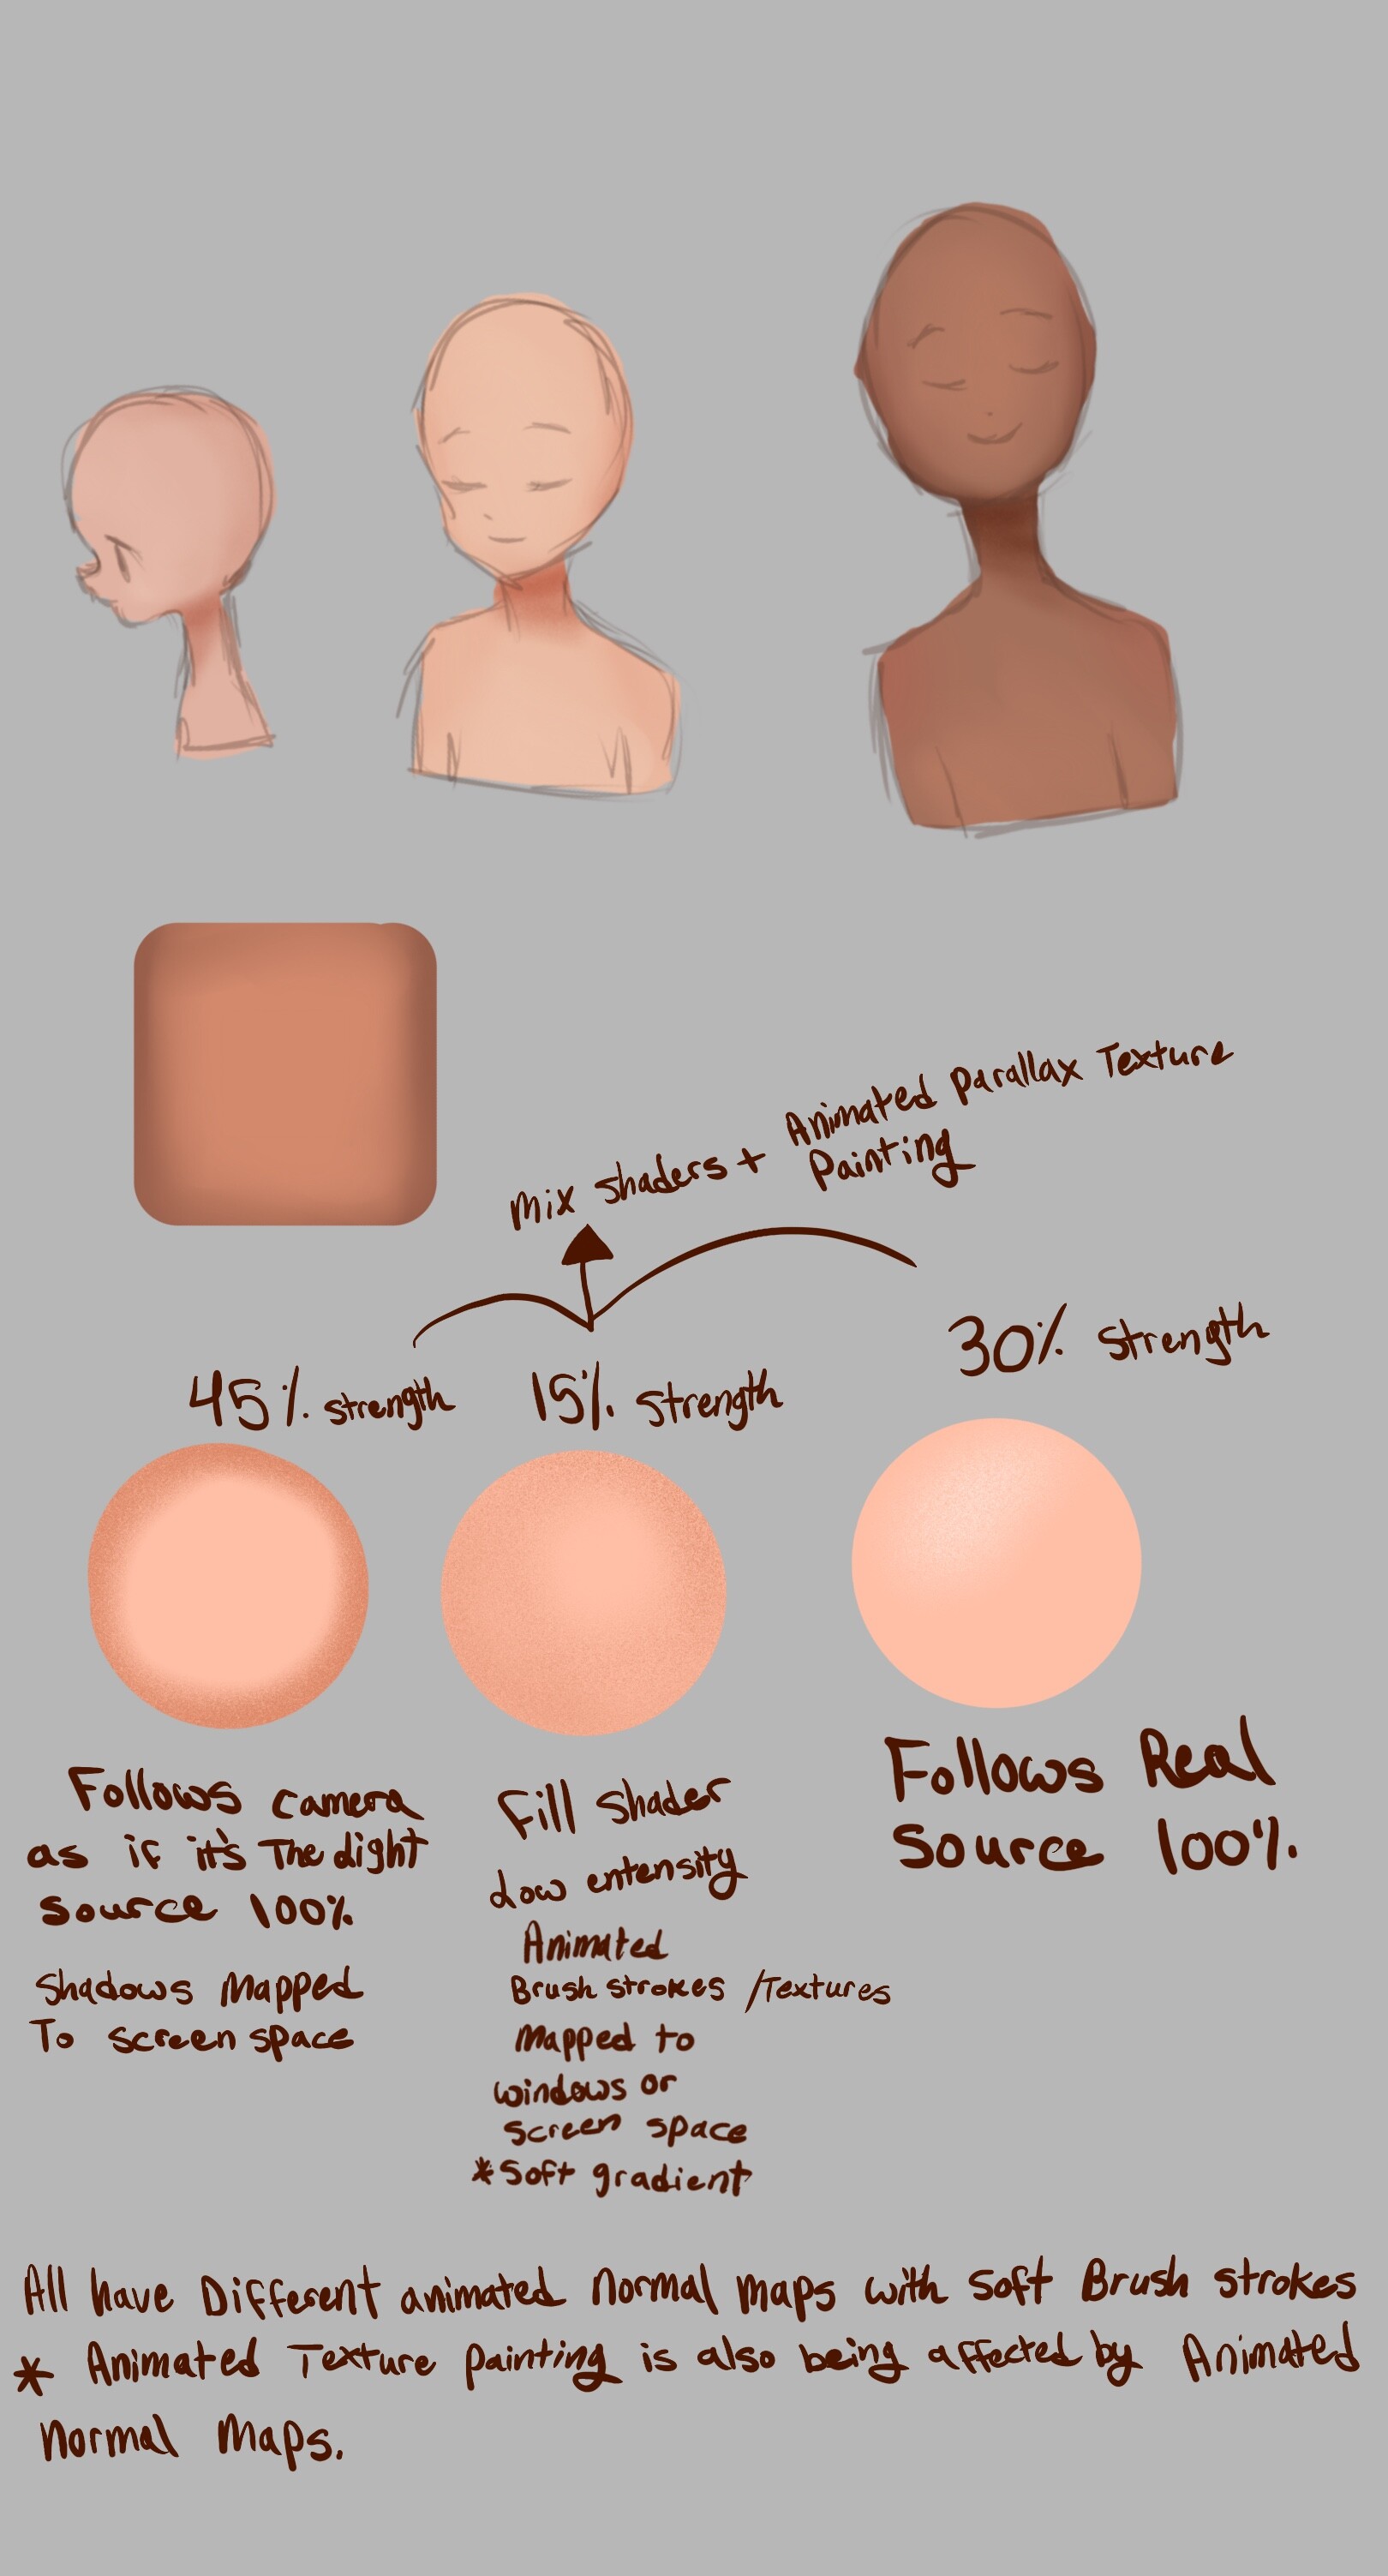
I’ve thought of this before, when making a 2d style shader, I think it is best to think like a painter. For semi realism, I notice how art works are often rendered like shading a cut out or paper cut out. This gives the effect that the light is always in the front, and as if the camera were the light source, even with an extreme lighting, you still notice this effect. This is also seen in Klaus, although you can make something with extreme lighting, it still carried that paper cut out shape look to it. I came up with a theory node tree after I completed a quick and fun style study from a YouTube artist. I was thinking of how to replicate this style in 3D:
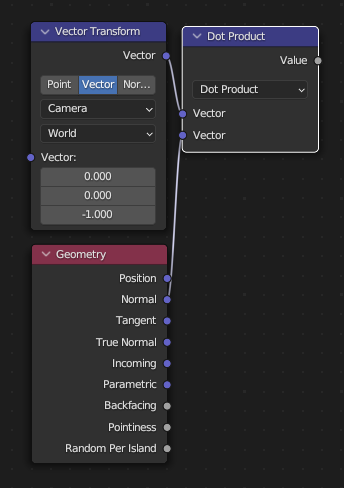
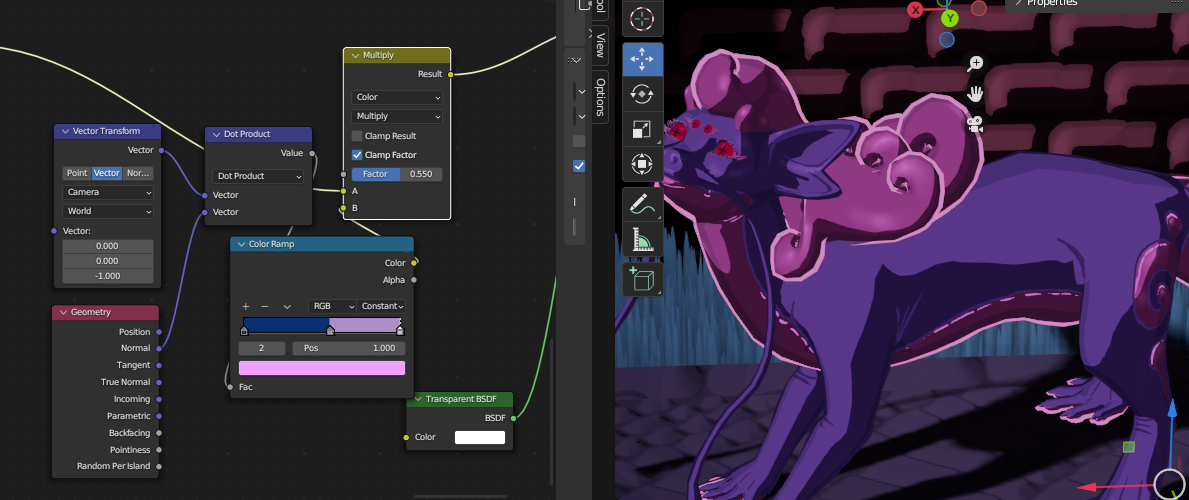
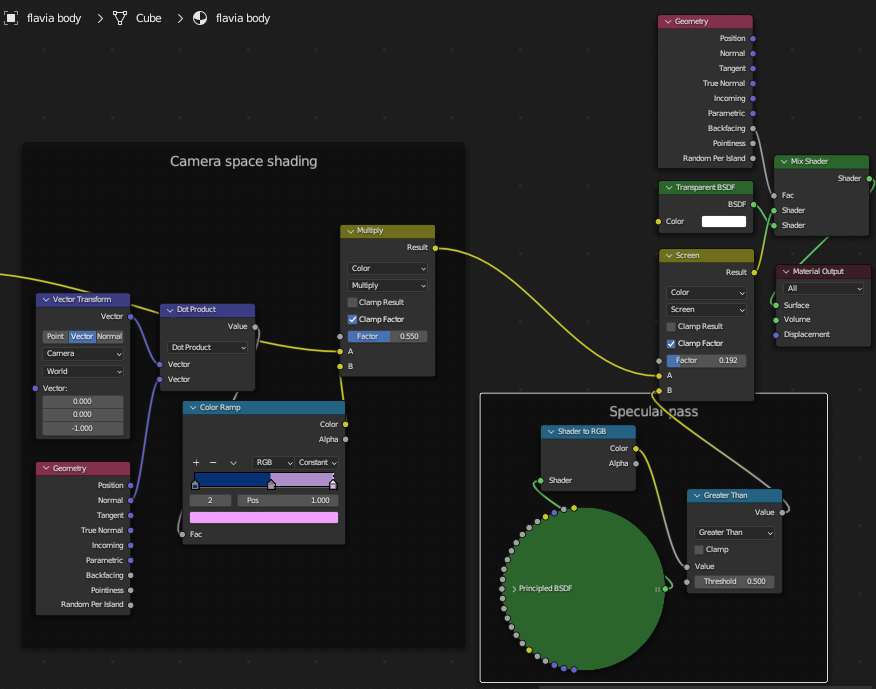
For your camera aligned lights, first you can define the camera direction by using Vector - Vector Transform. Input 0,0,-1 vector and choose Camera to World as transform spaces. Then, you calculate dot product of the result (Vector - Vector Math - Dot product), which in this situation gives you the measure of how much normal matches this camera direction. Then you can map your fake light gradient on the dot product (Converter - Color Ramp, and put the dot product into Fac input)
And for the “real” specular, make a Principled shader with pure black color and desired specular/roughness parameter. Plug it into Shader - Shader to RGB. Then you can color mix the result with your fake lights using different blend modes. Screen, Overlay and so on
Thank you so much for this. I am still trying to remember all the nodes and what they do, thats why It would take me a bit of time to put this together. Would you mind showing the whole tree? I’m having a hard time seeing where they are connected…
It is overcomplicated. Biggest part of the tree is just composing Flavia’s color texture based on multiple masks and mix nodes. The node groups I’ve shown you are composed with the color texture through Mix nodes (yellow line from the left is the color), and finally the resulting RGB color goes directly into output, without a shader
For the textures (one of the biggest features of the artstyle) is it possible to have a normal mapped to screen space? I want the animated textures moving with the help of the normal maps and being in screen space, giving a similar effect to the 2d painterly render examples I gave earlier. Making a textured painterly effect is easy on planes than rounded surfaces because you have to account for the 3d ness rounded geometry have when looking at it. This is the same reason why hand painted textures on 3d models typically look 3d when rotating them (sometimes it’s just a light blush on the cheeks but its still so noticable ).
It should be. Can’ be sure if you’ll be satisfied with result, but we’ll see. I found a model which I am willing to share, and will try to assemble a shader from the passes you’ve described



 .
. ).
).