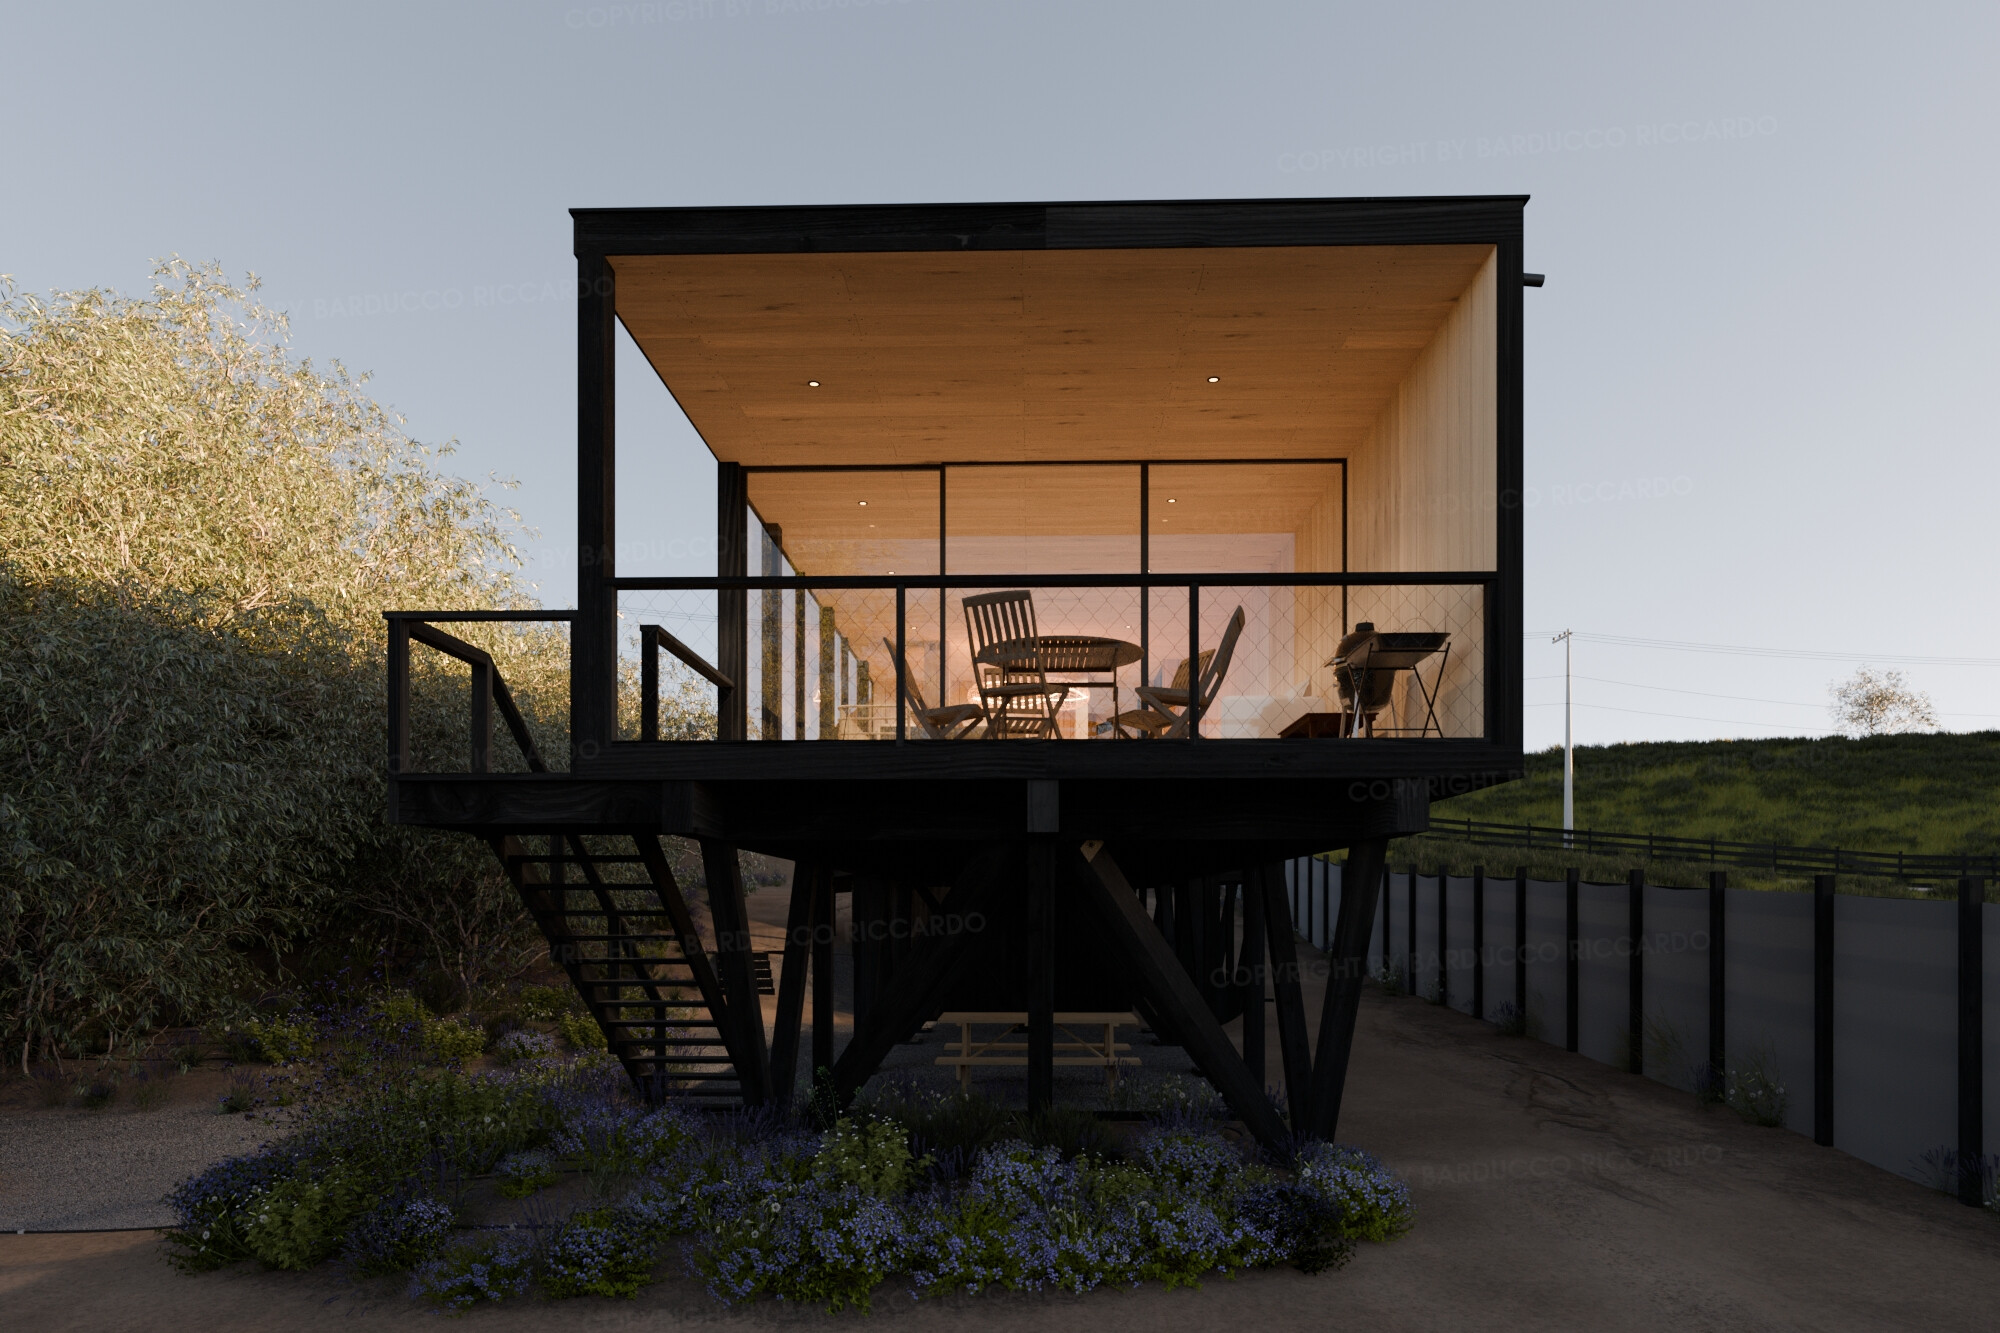
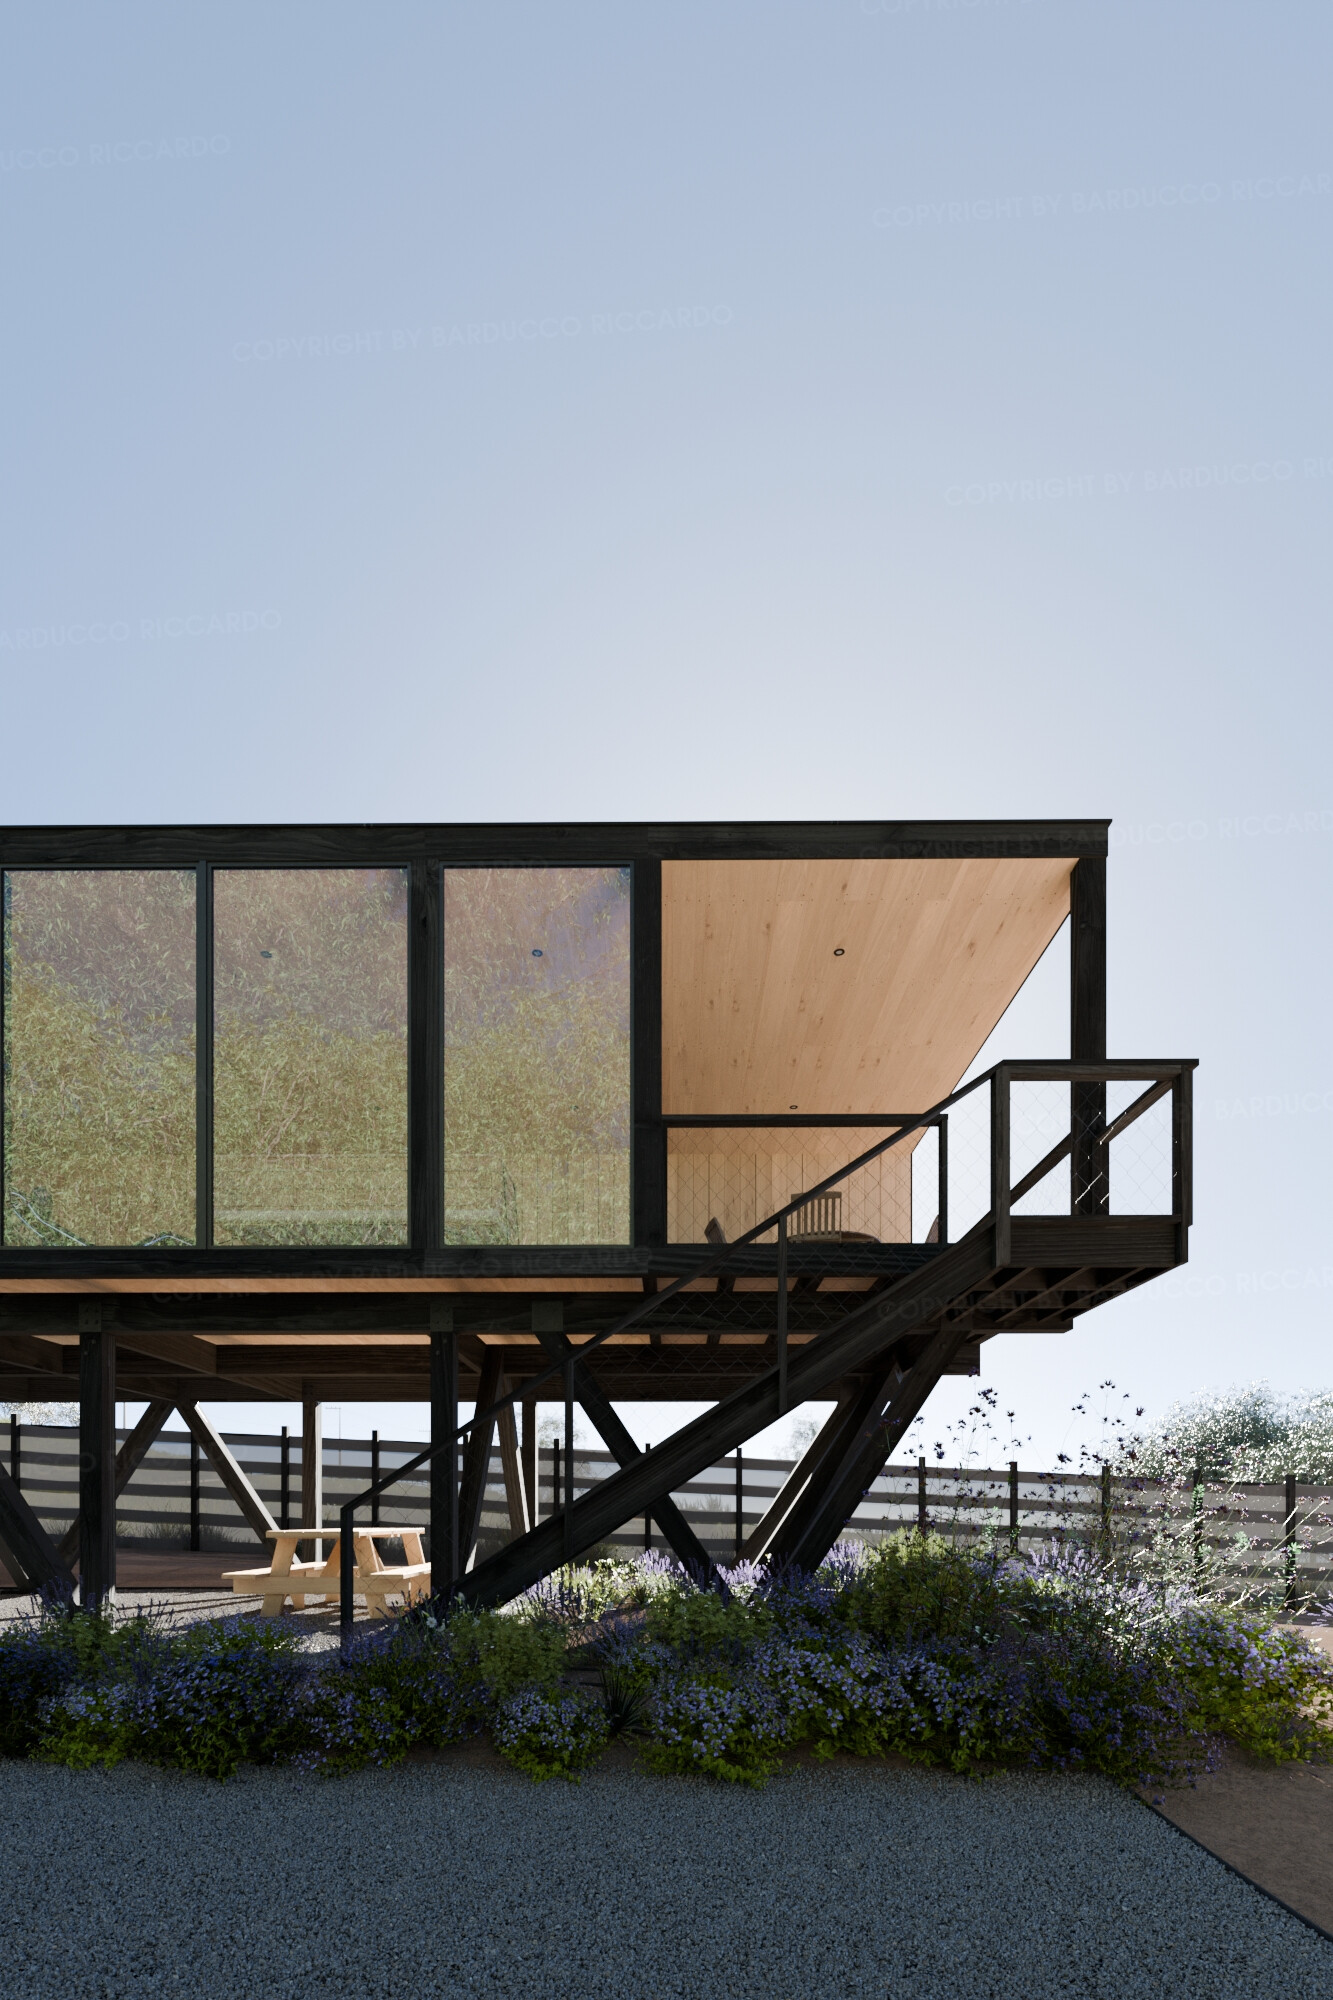
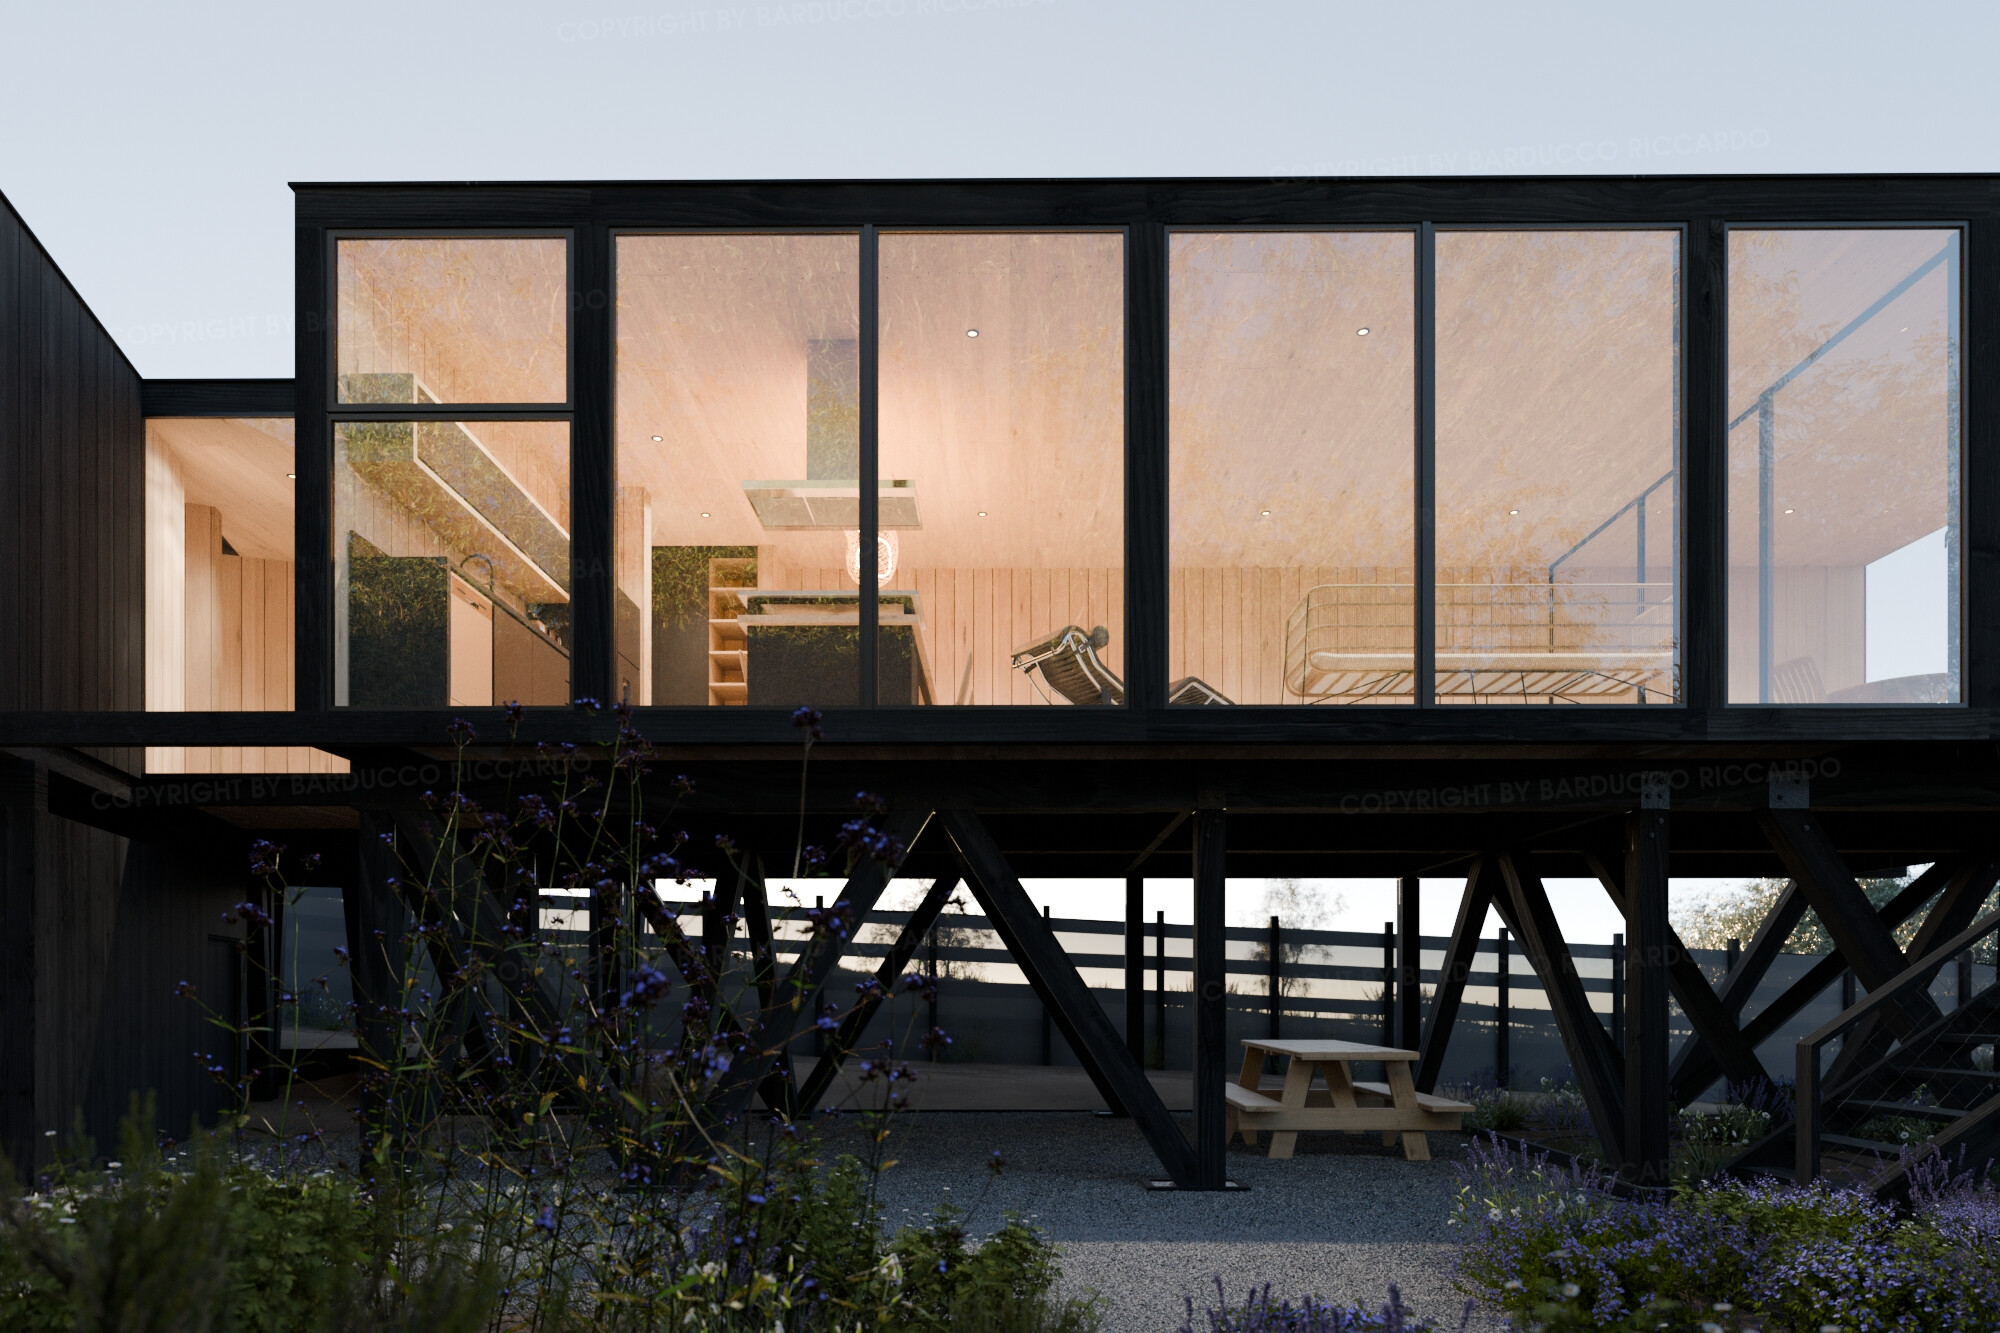

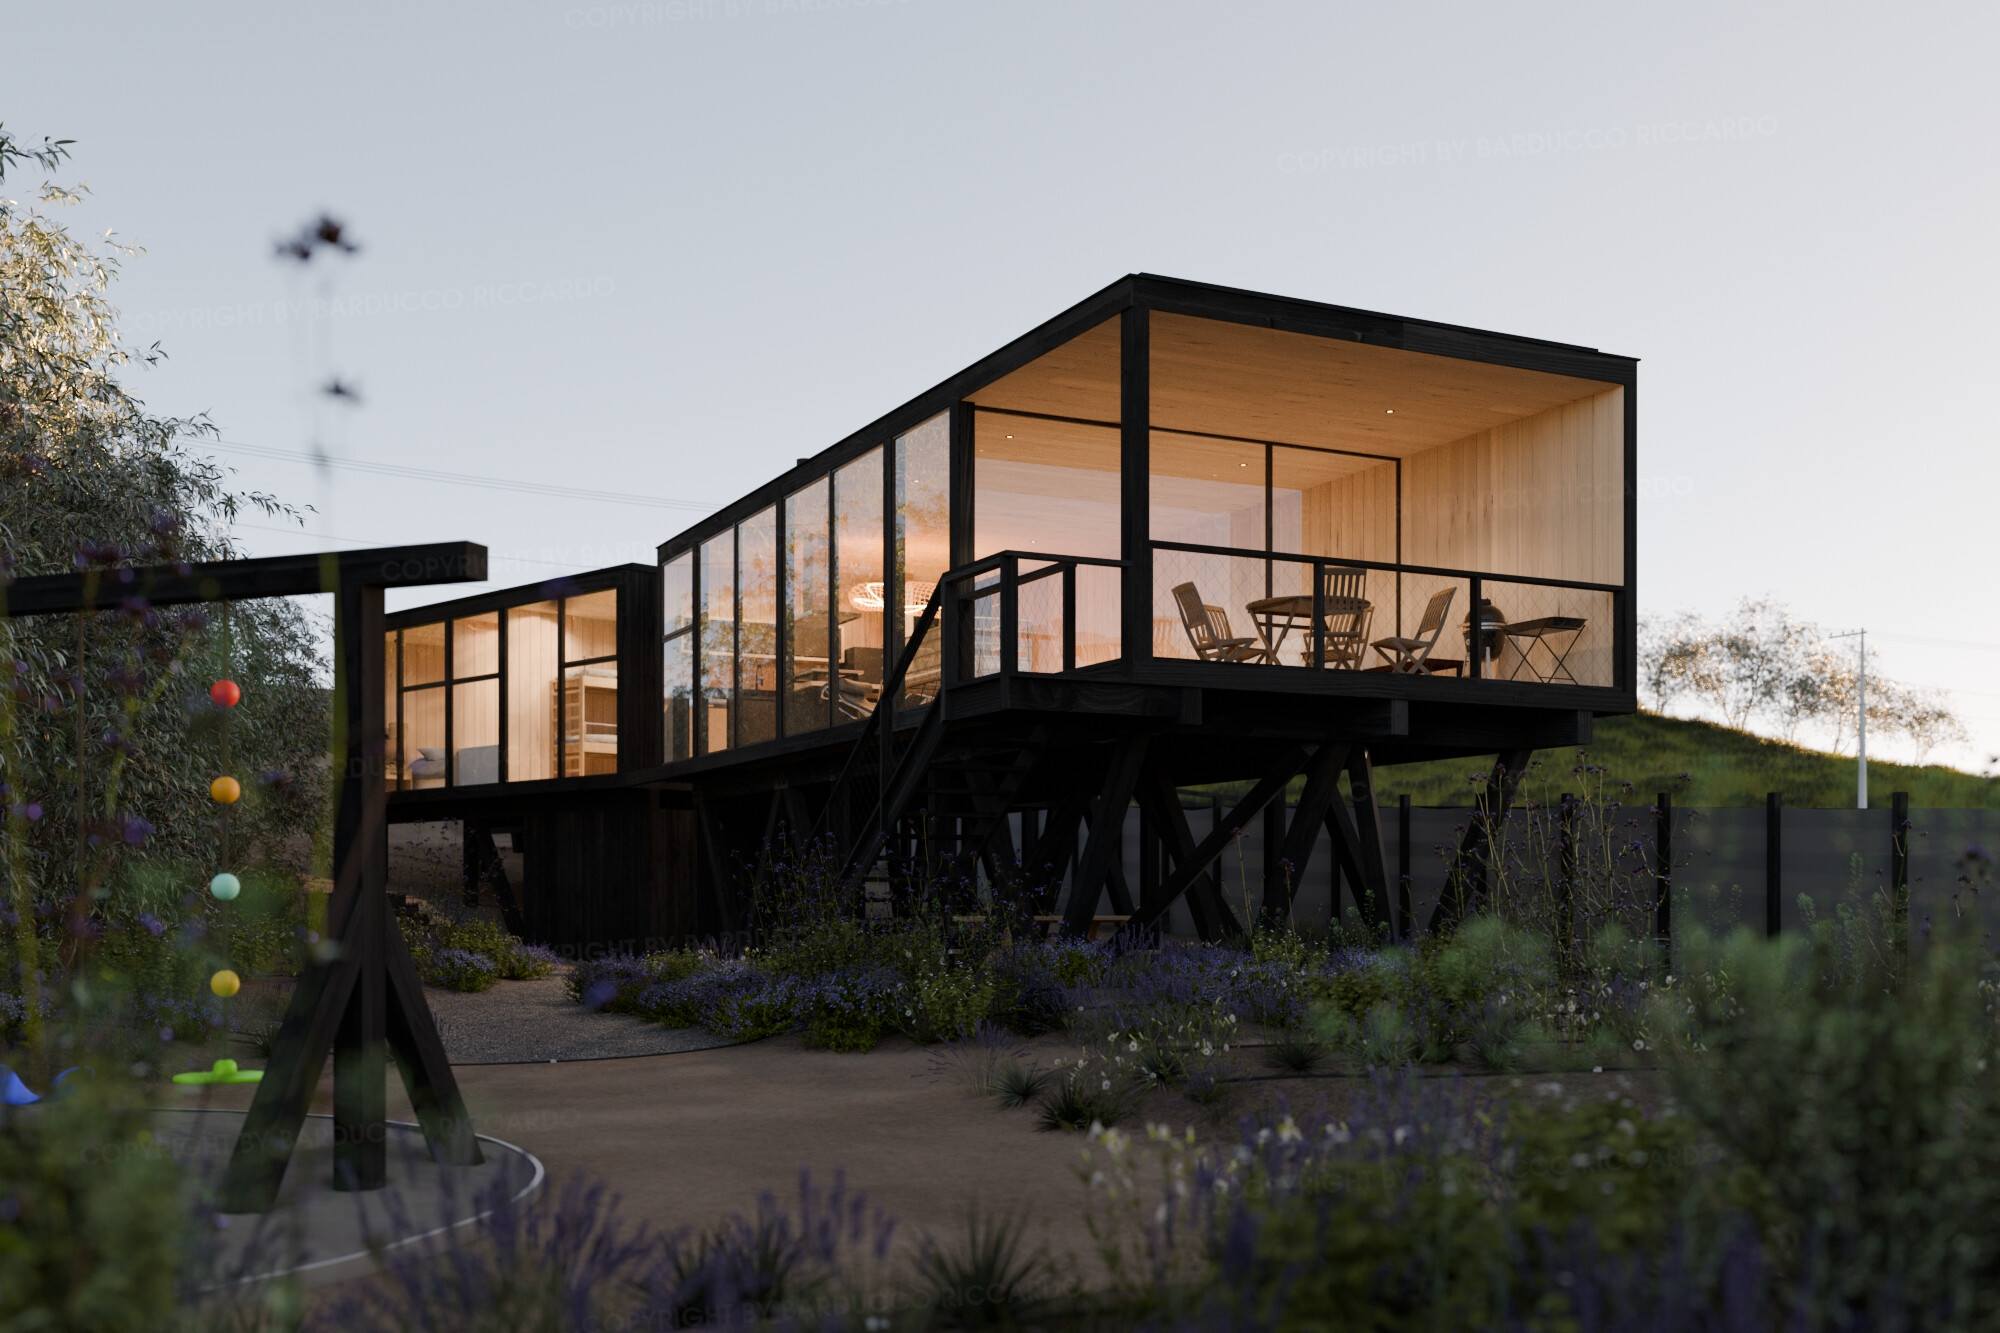
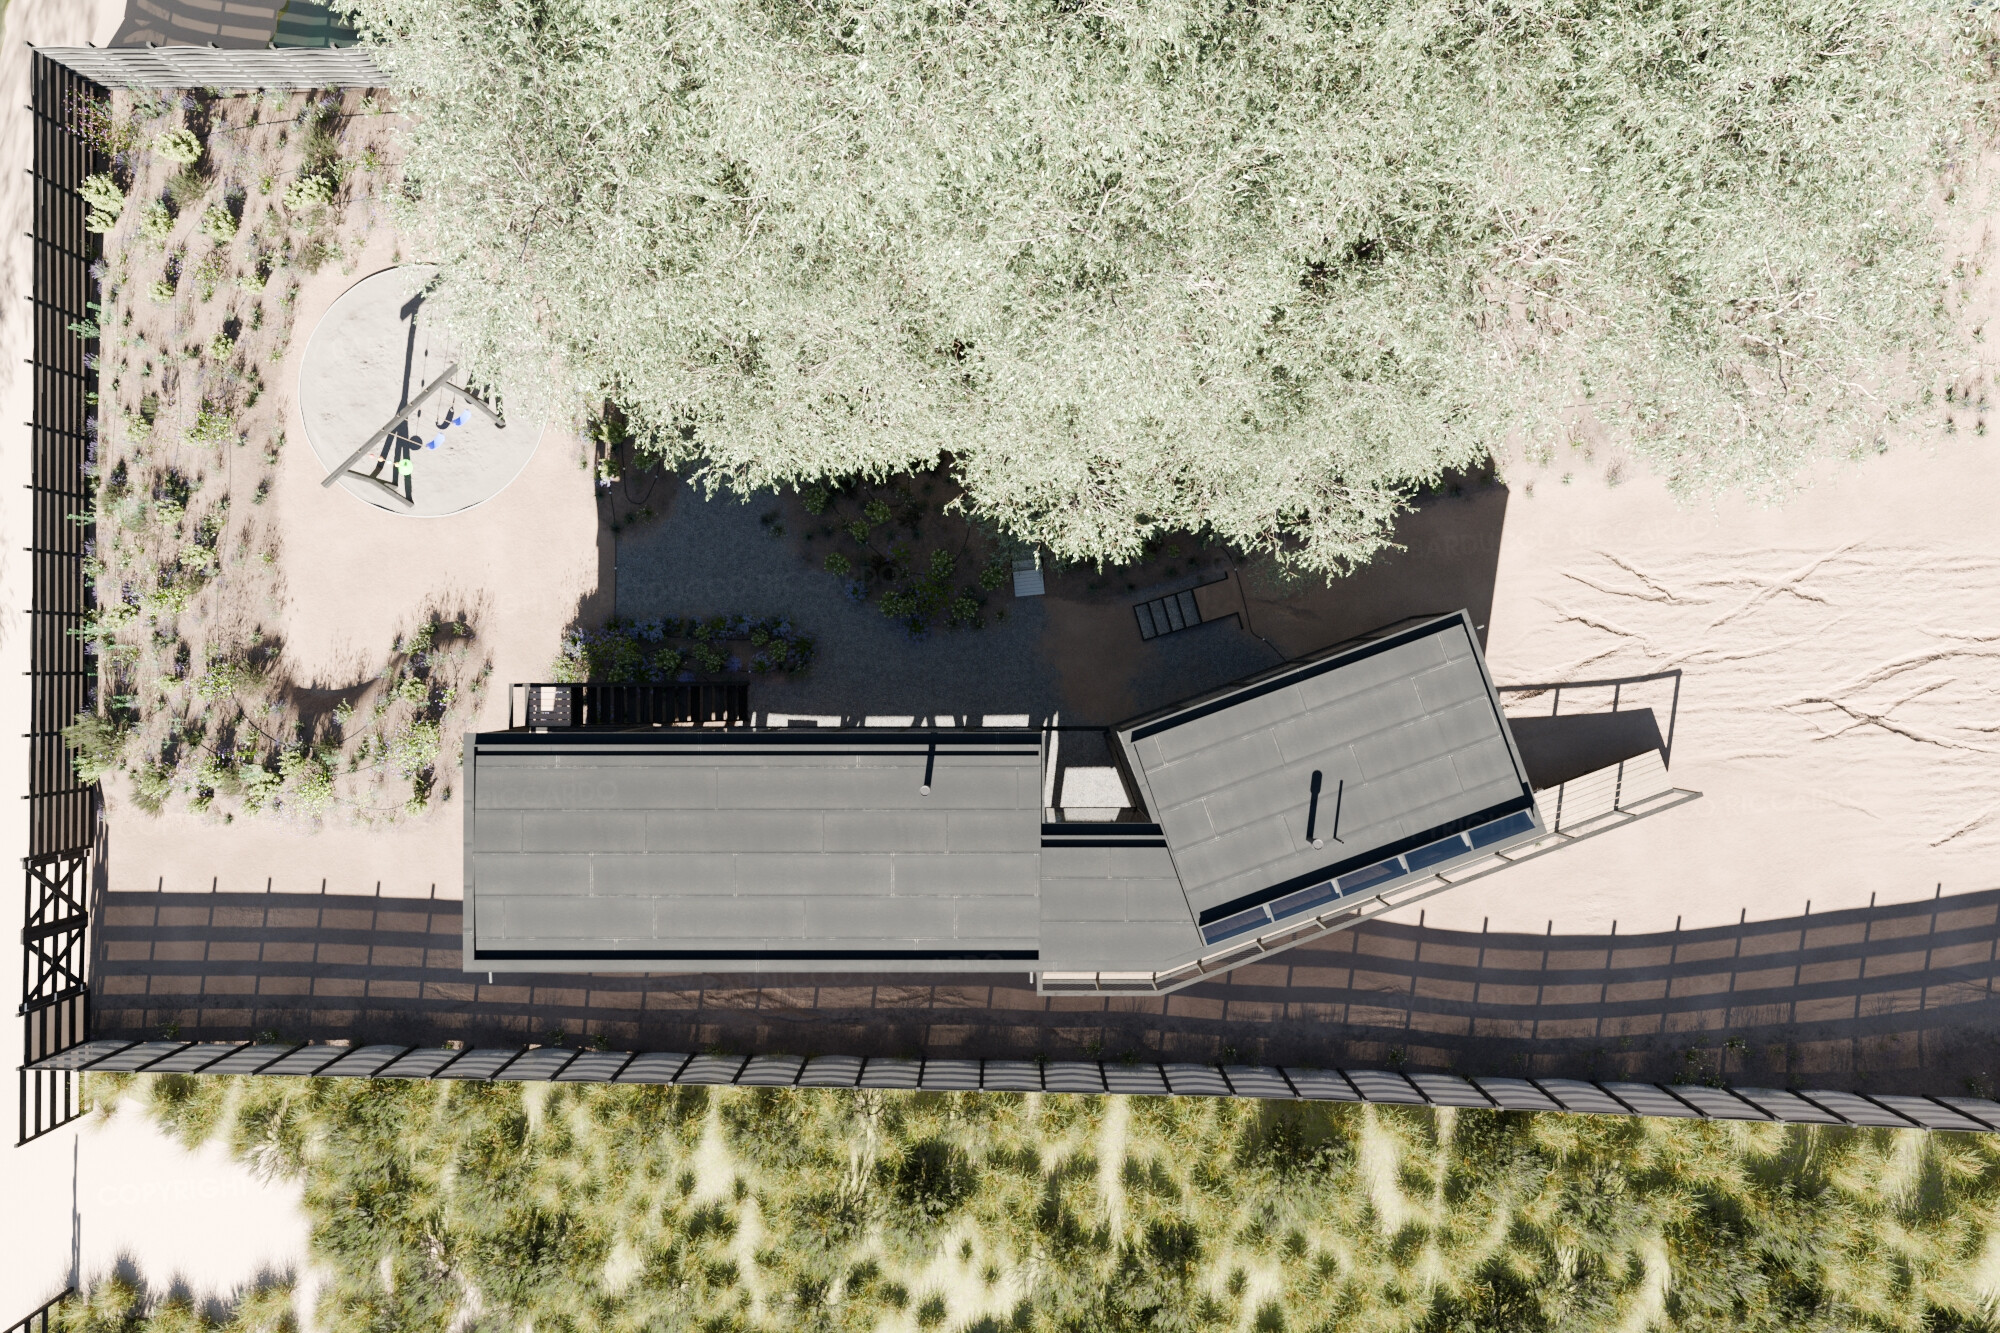
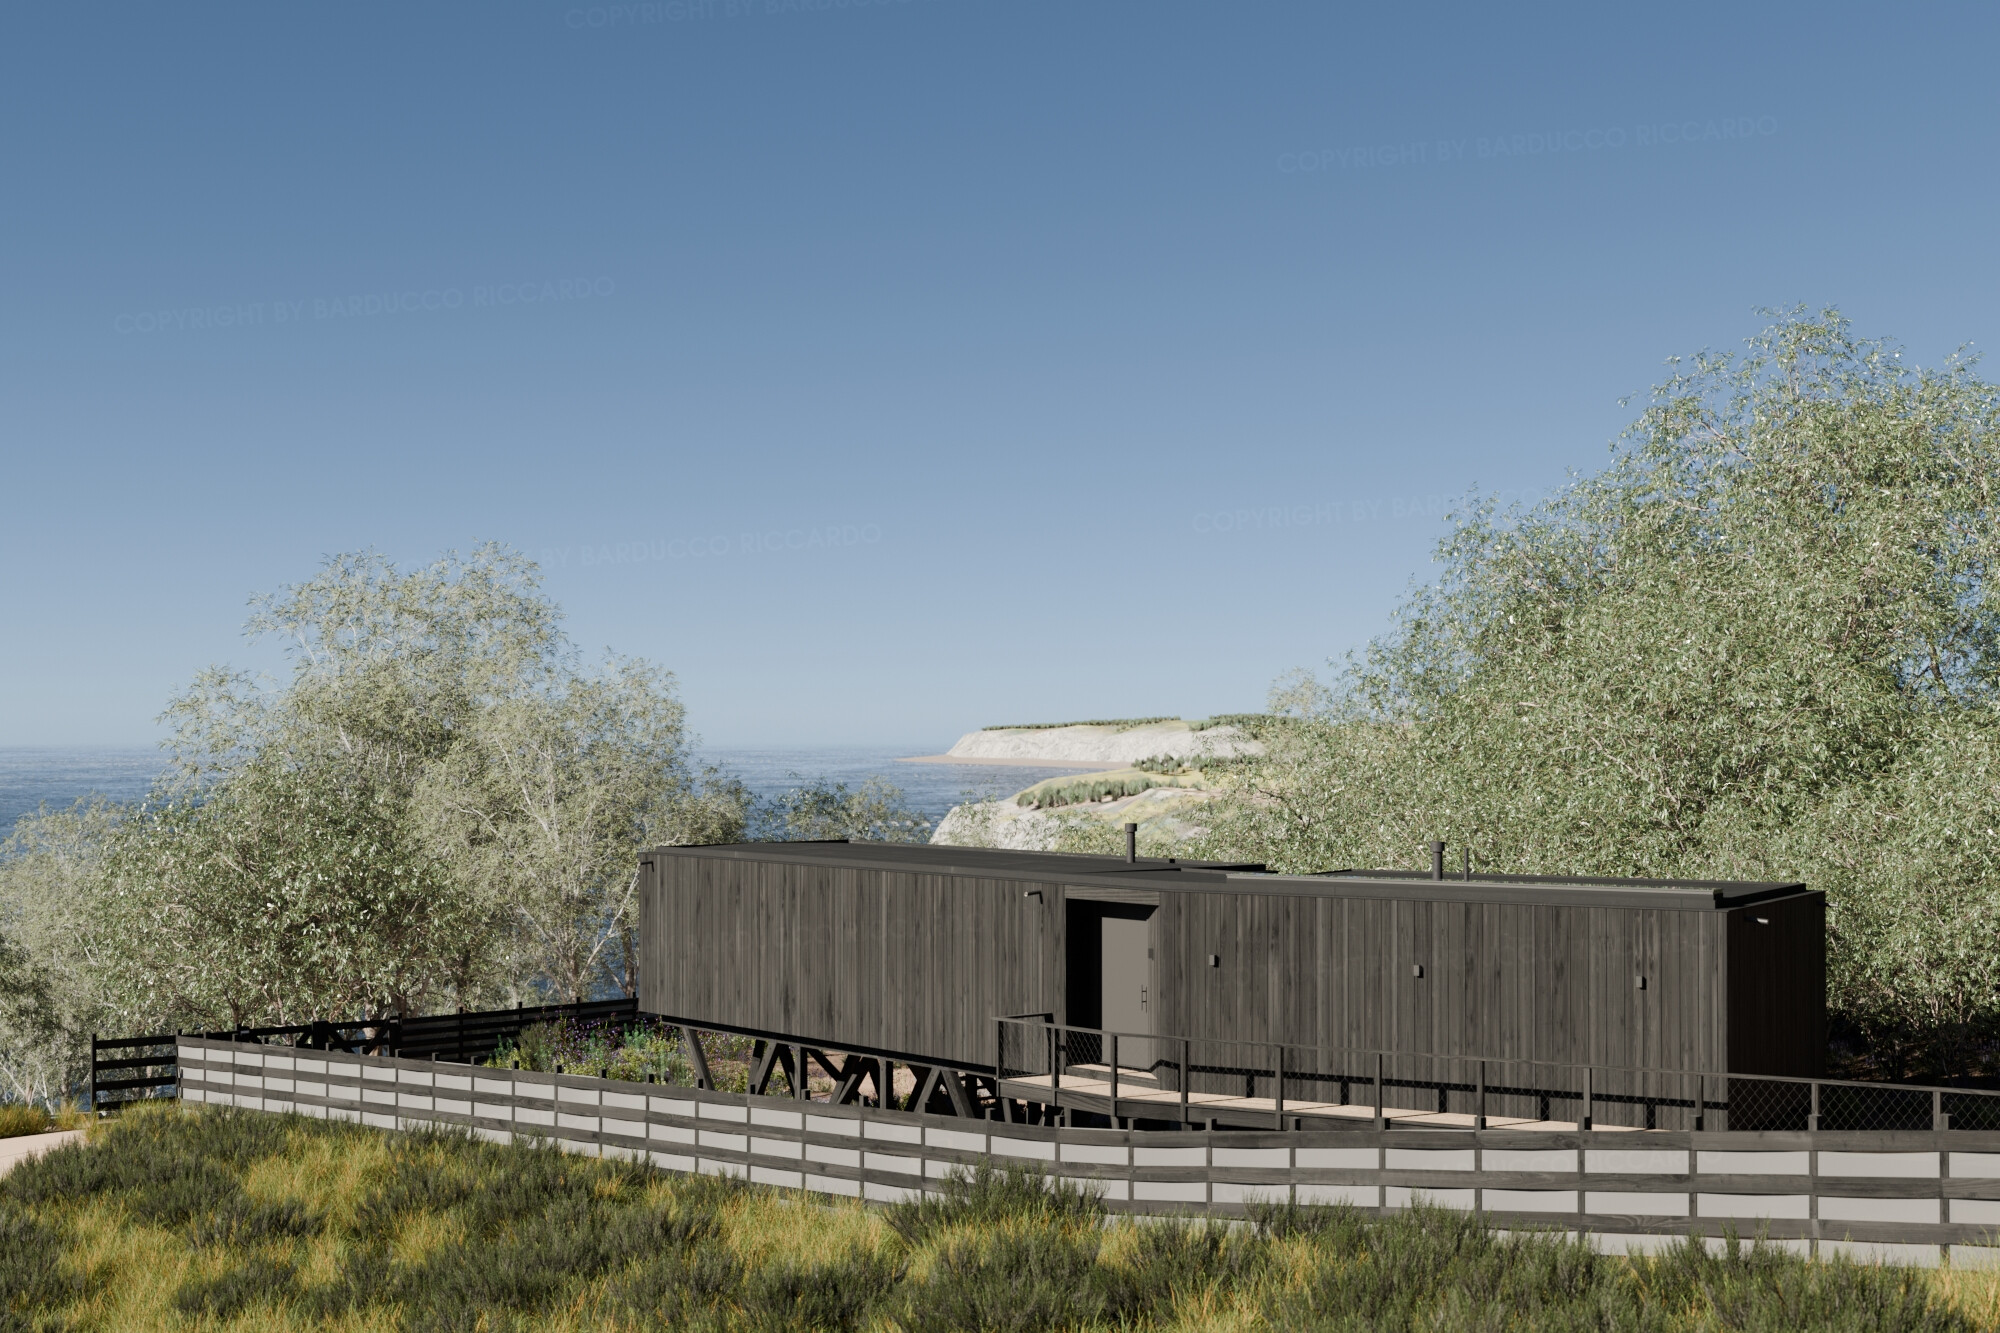
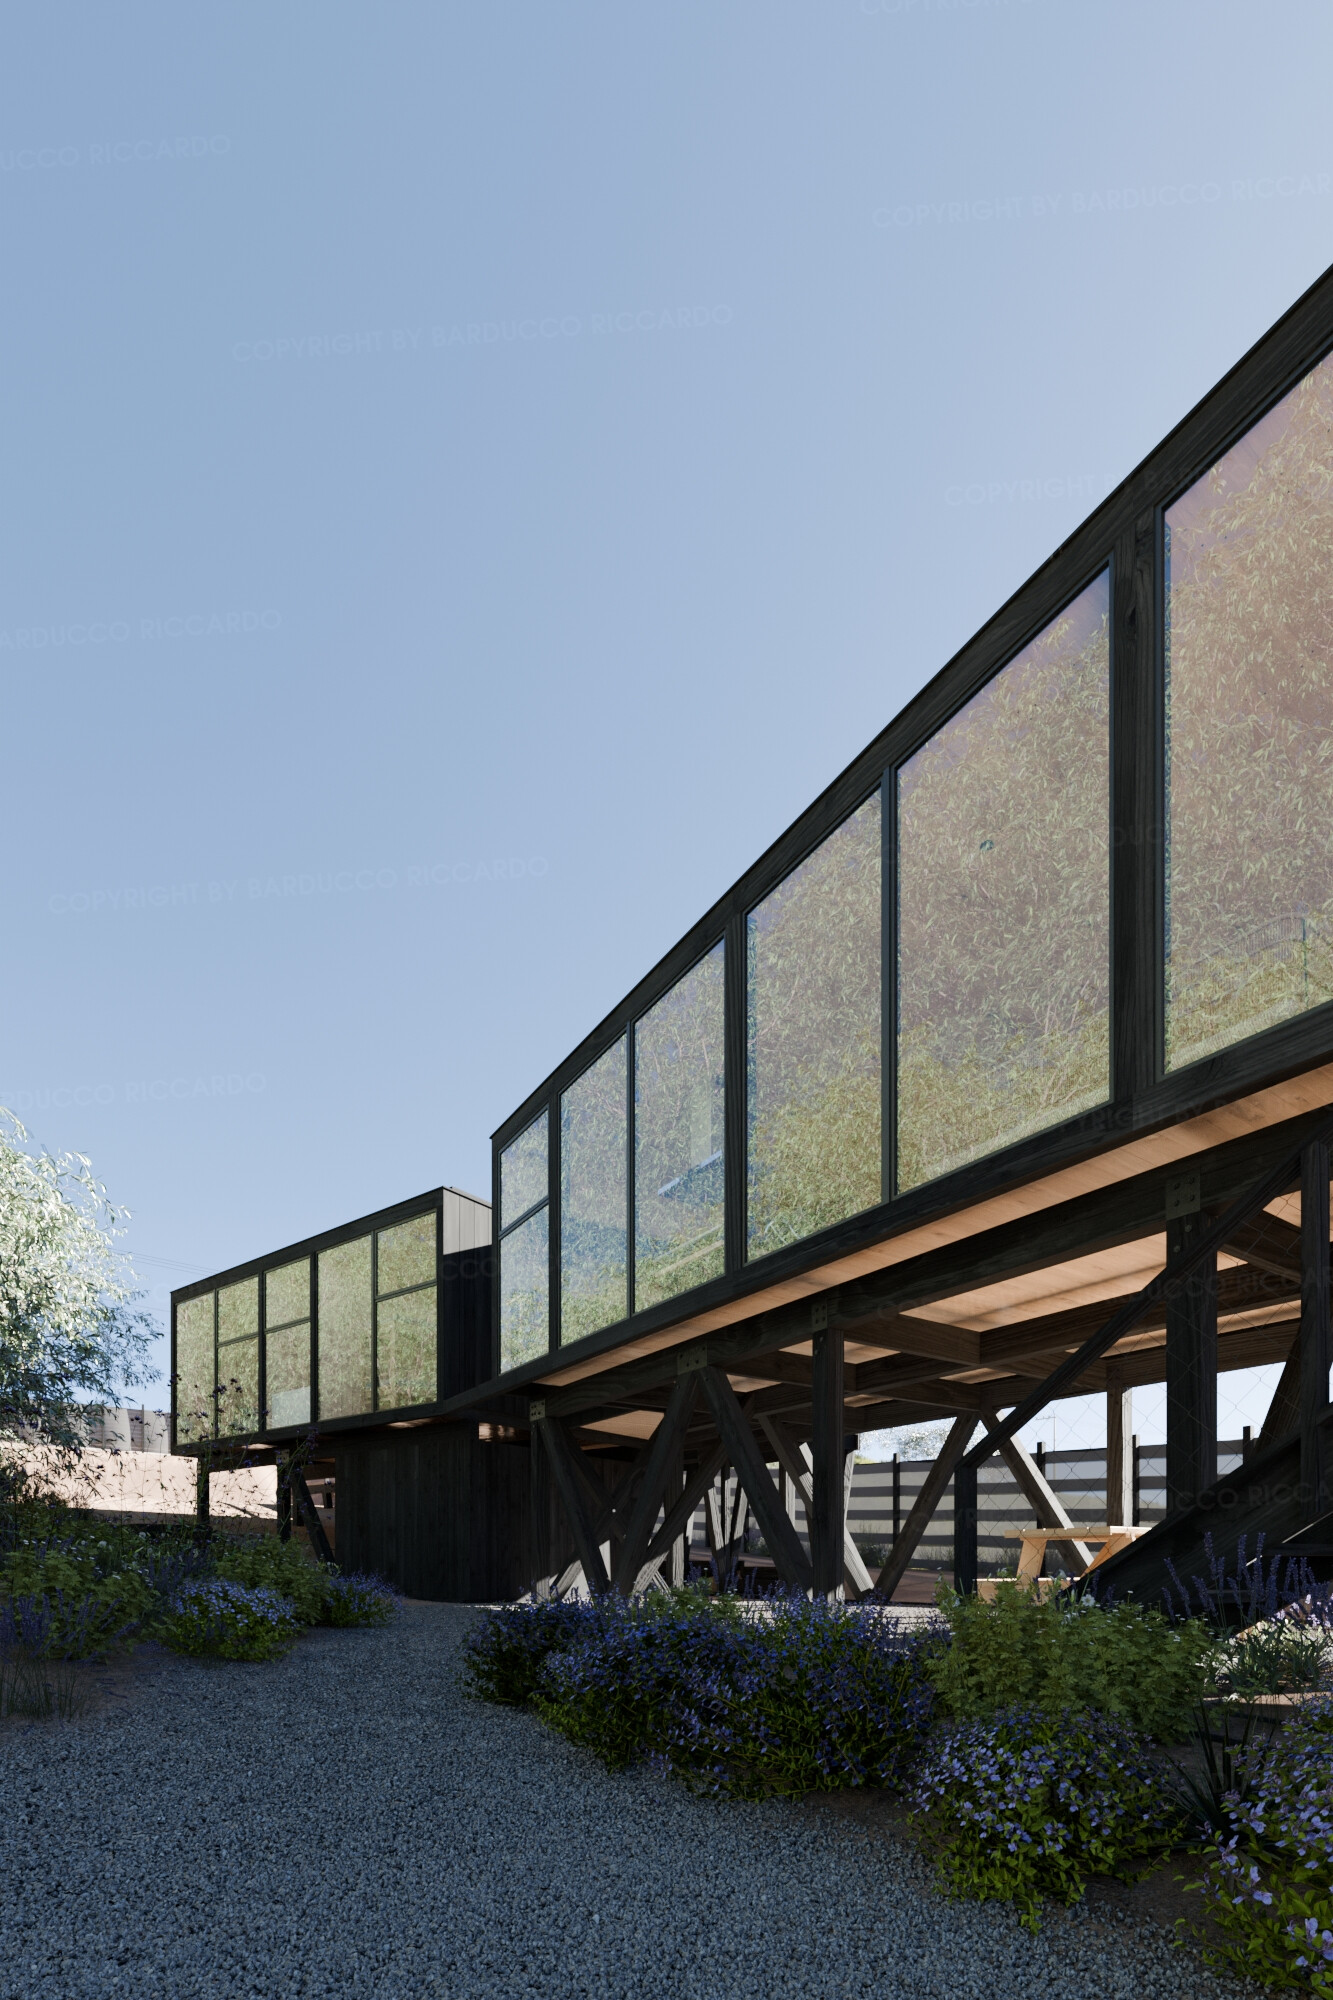
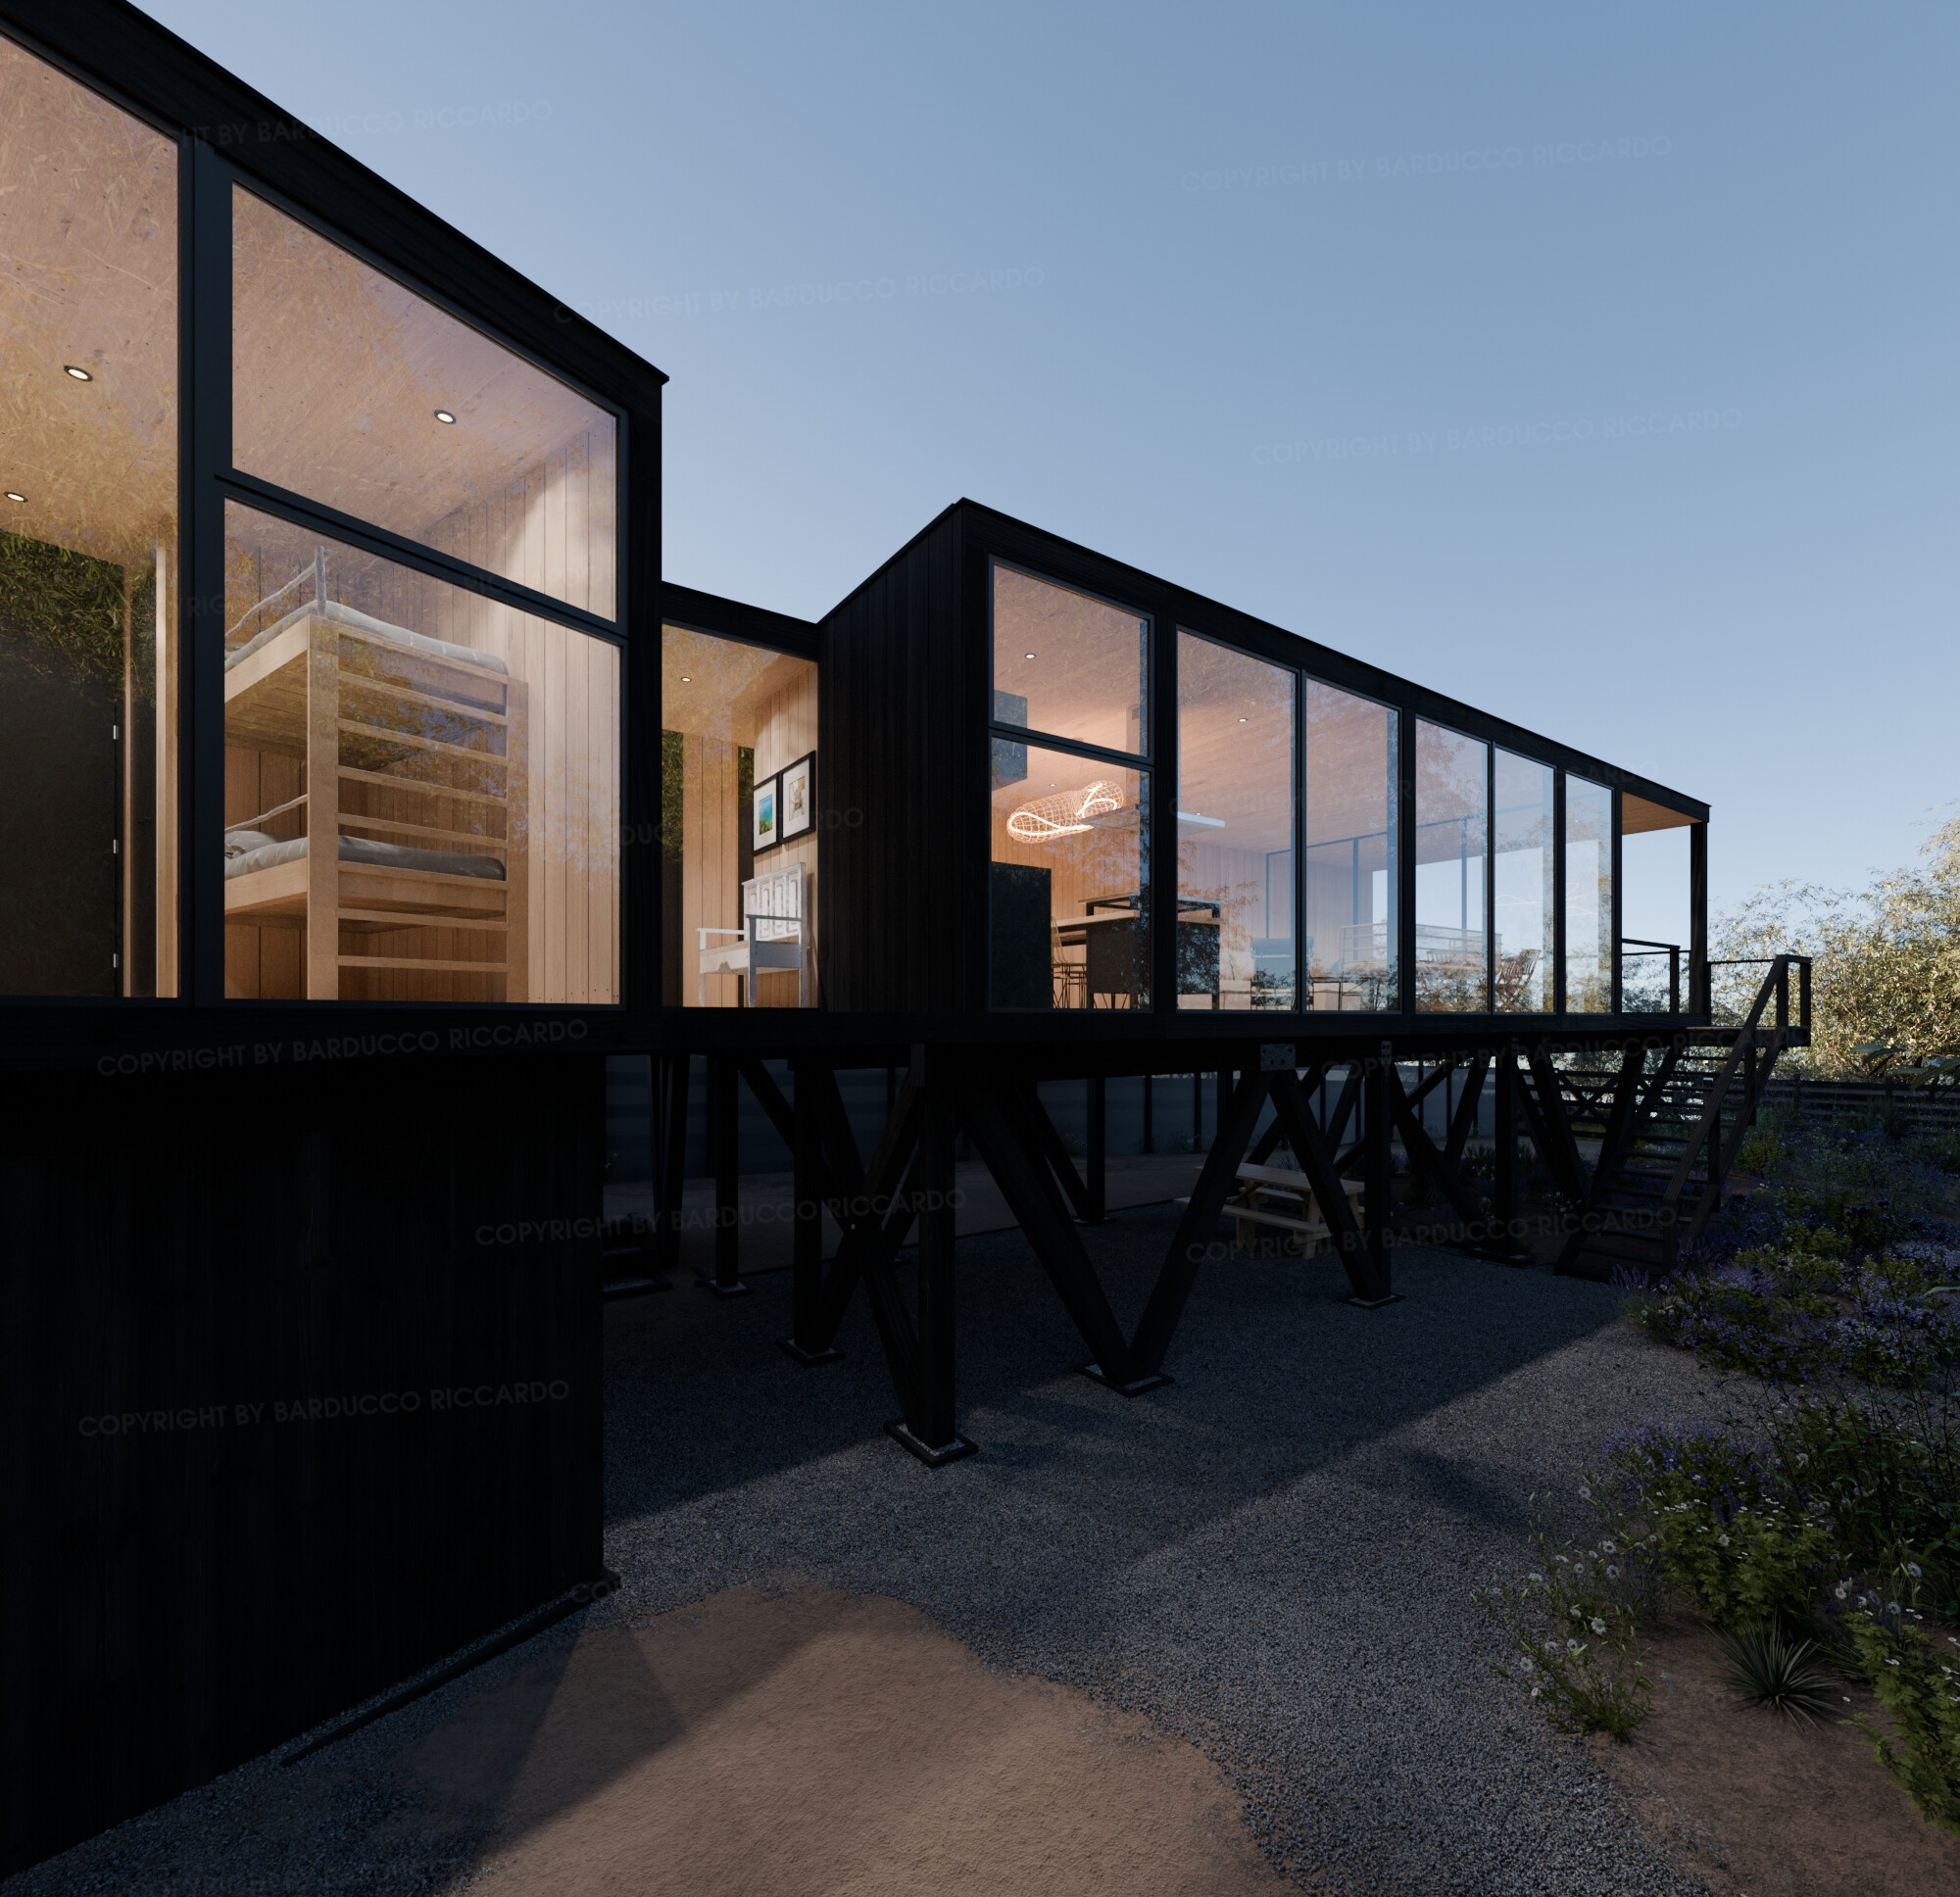


Some additional images


![]() Clicca qui per la descrizione delle fasi del progetto
Clicca qui per la descrizione delle fasi del progetto
(scusatemi per quel “d_e_i” ma Discourse non ama la grammatica italiana)
![]() Click here for the description of the project steps
Click here for the description of the project steps
COM’E’ INIZIATA
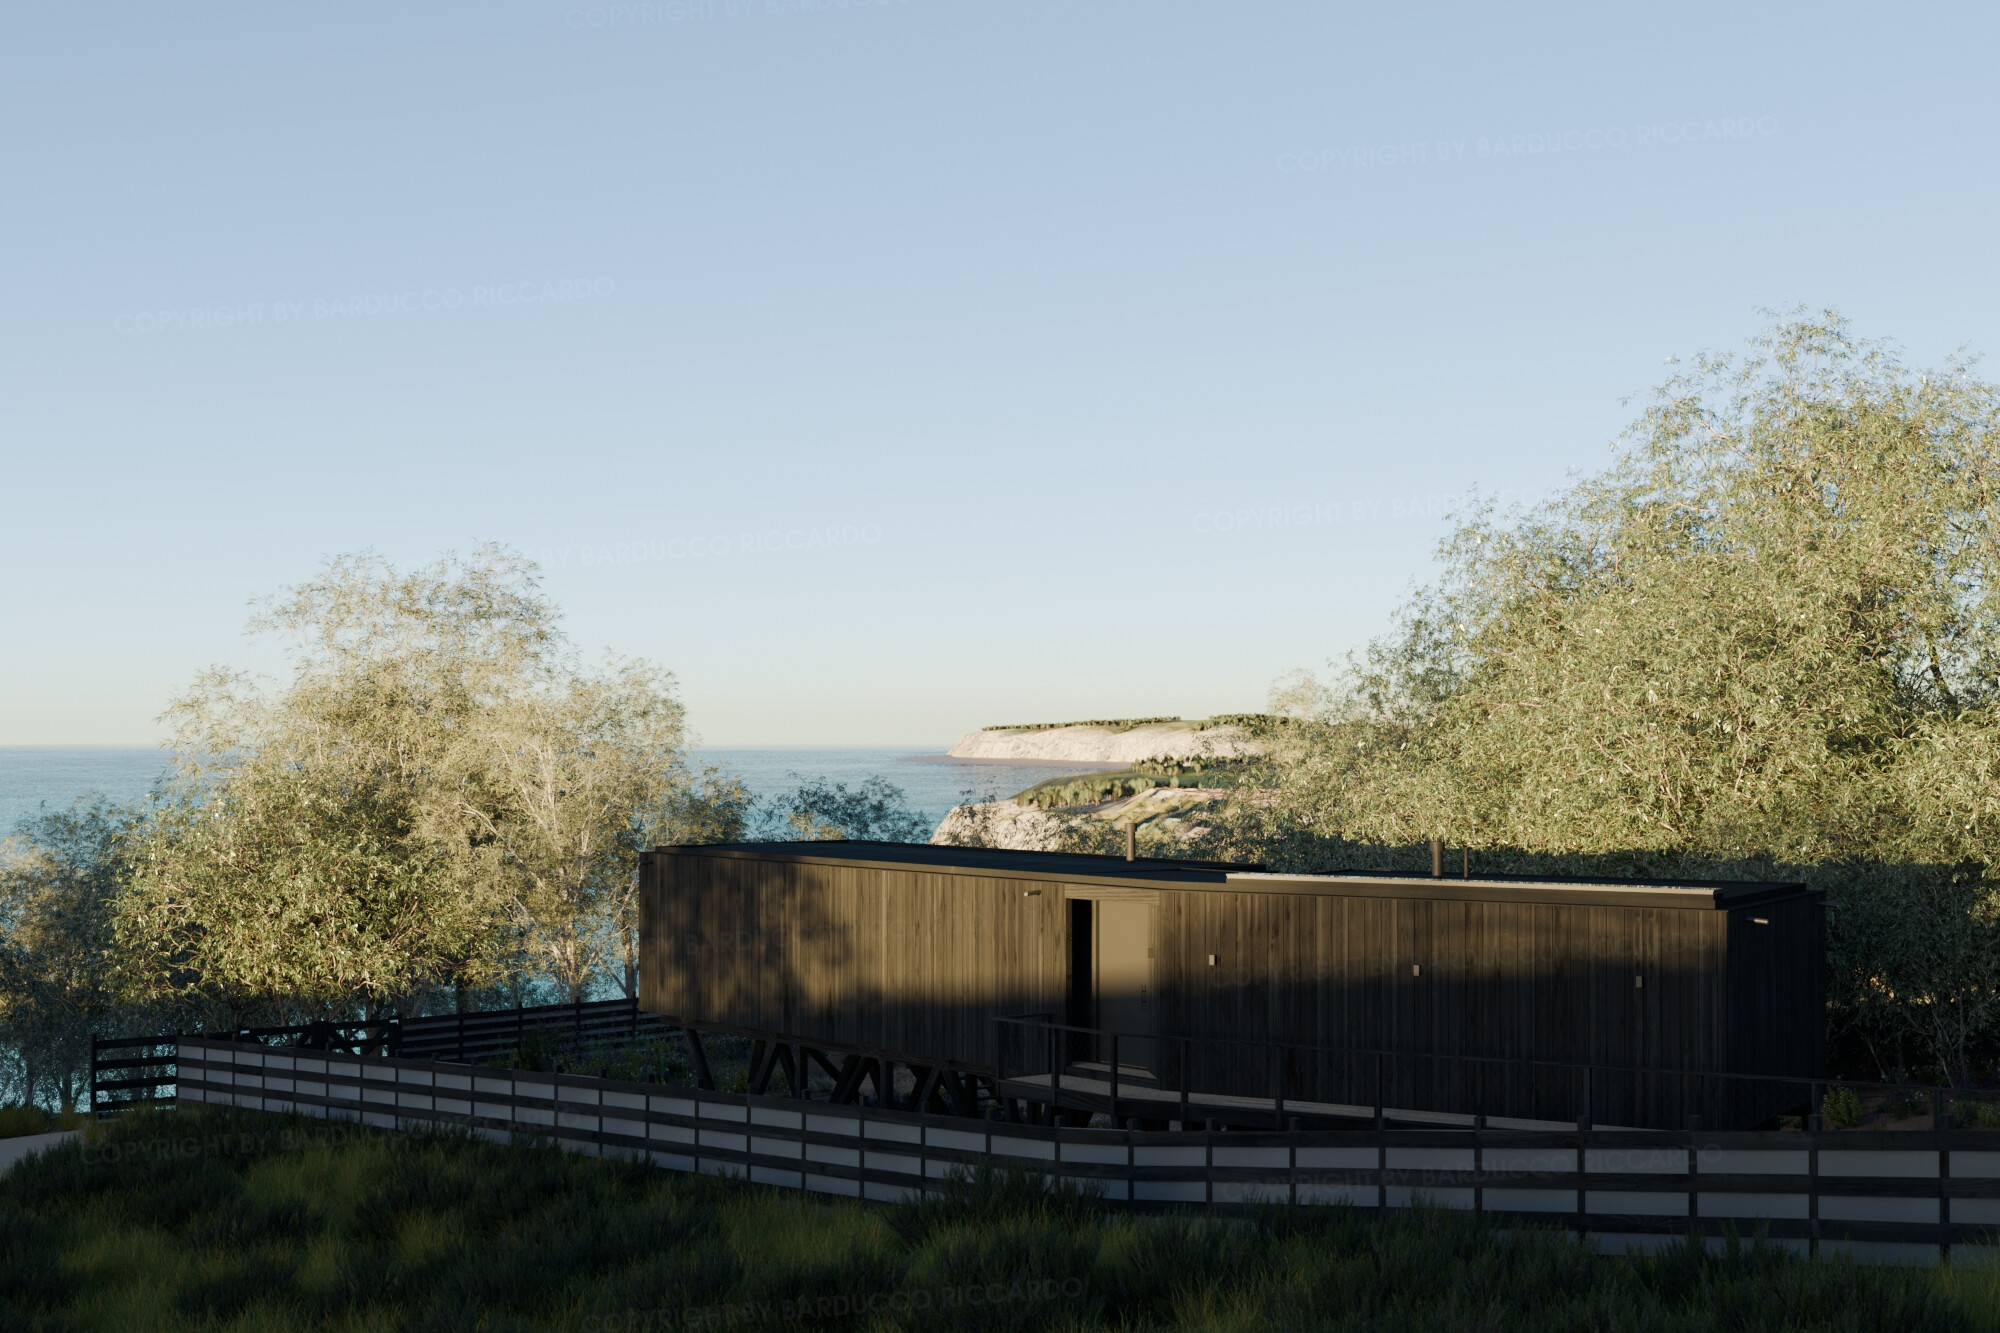
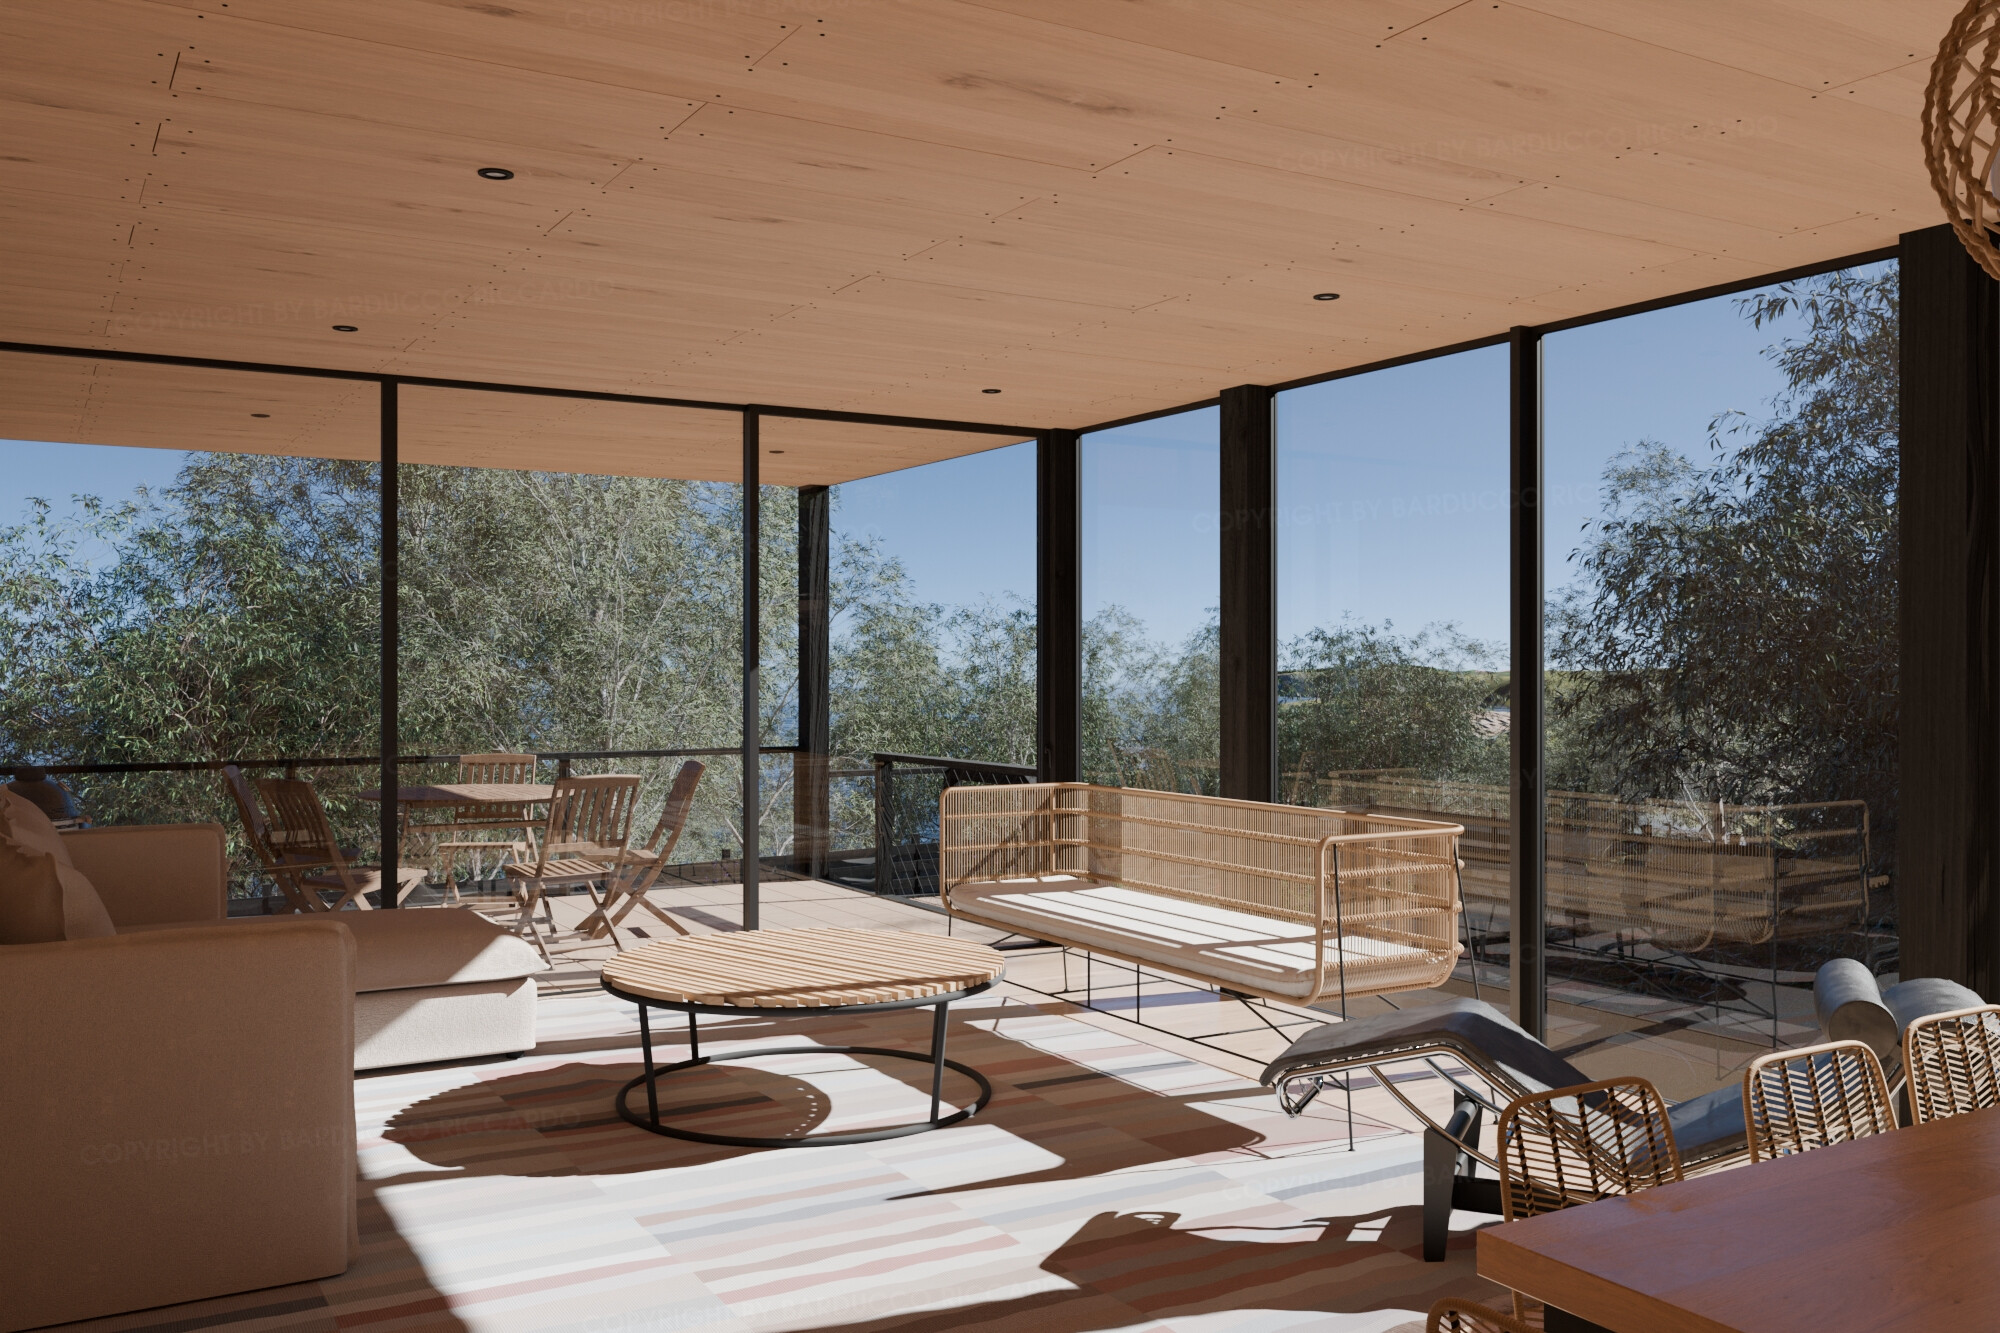
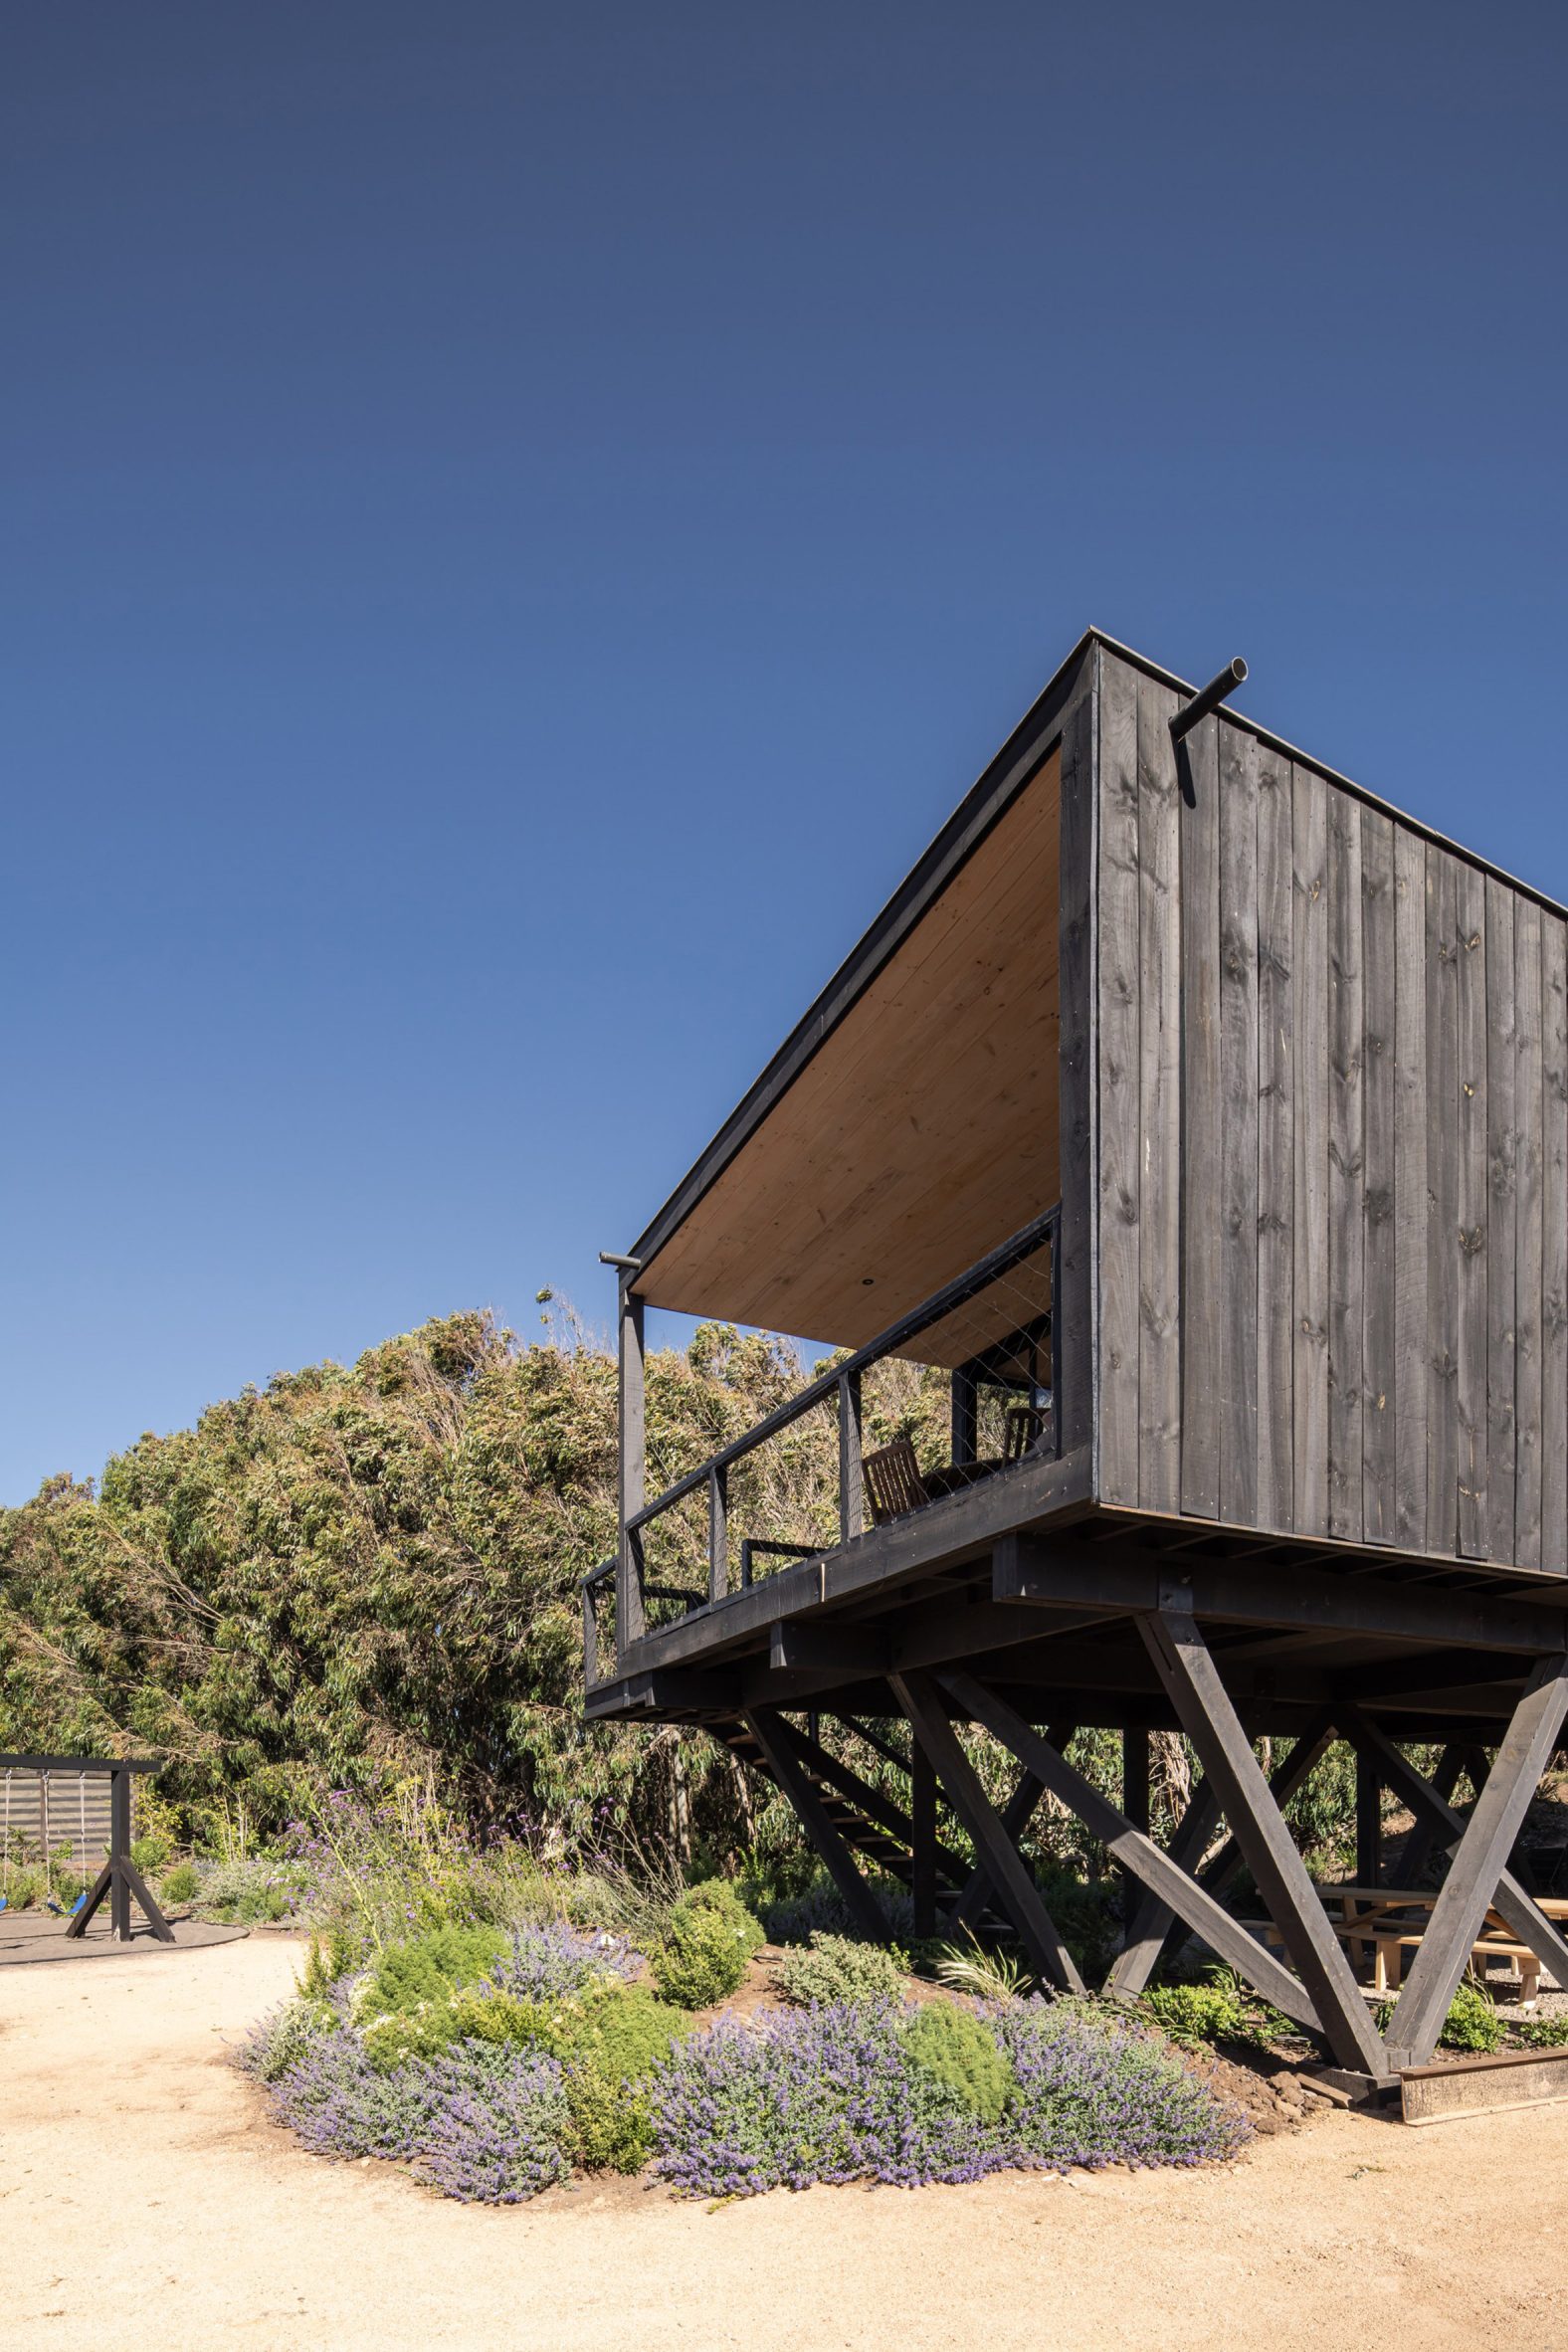
Un anno fa ho pensato di creare un progetto personale di visualizzazione architettonica che fosse ambientato in ambiente vicino al mare.
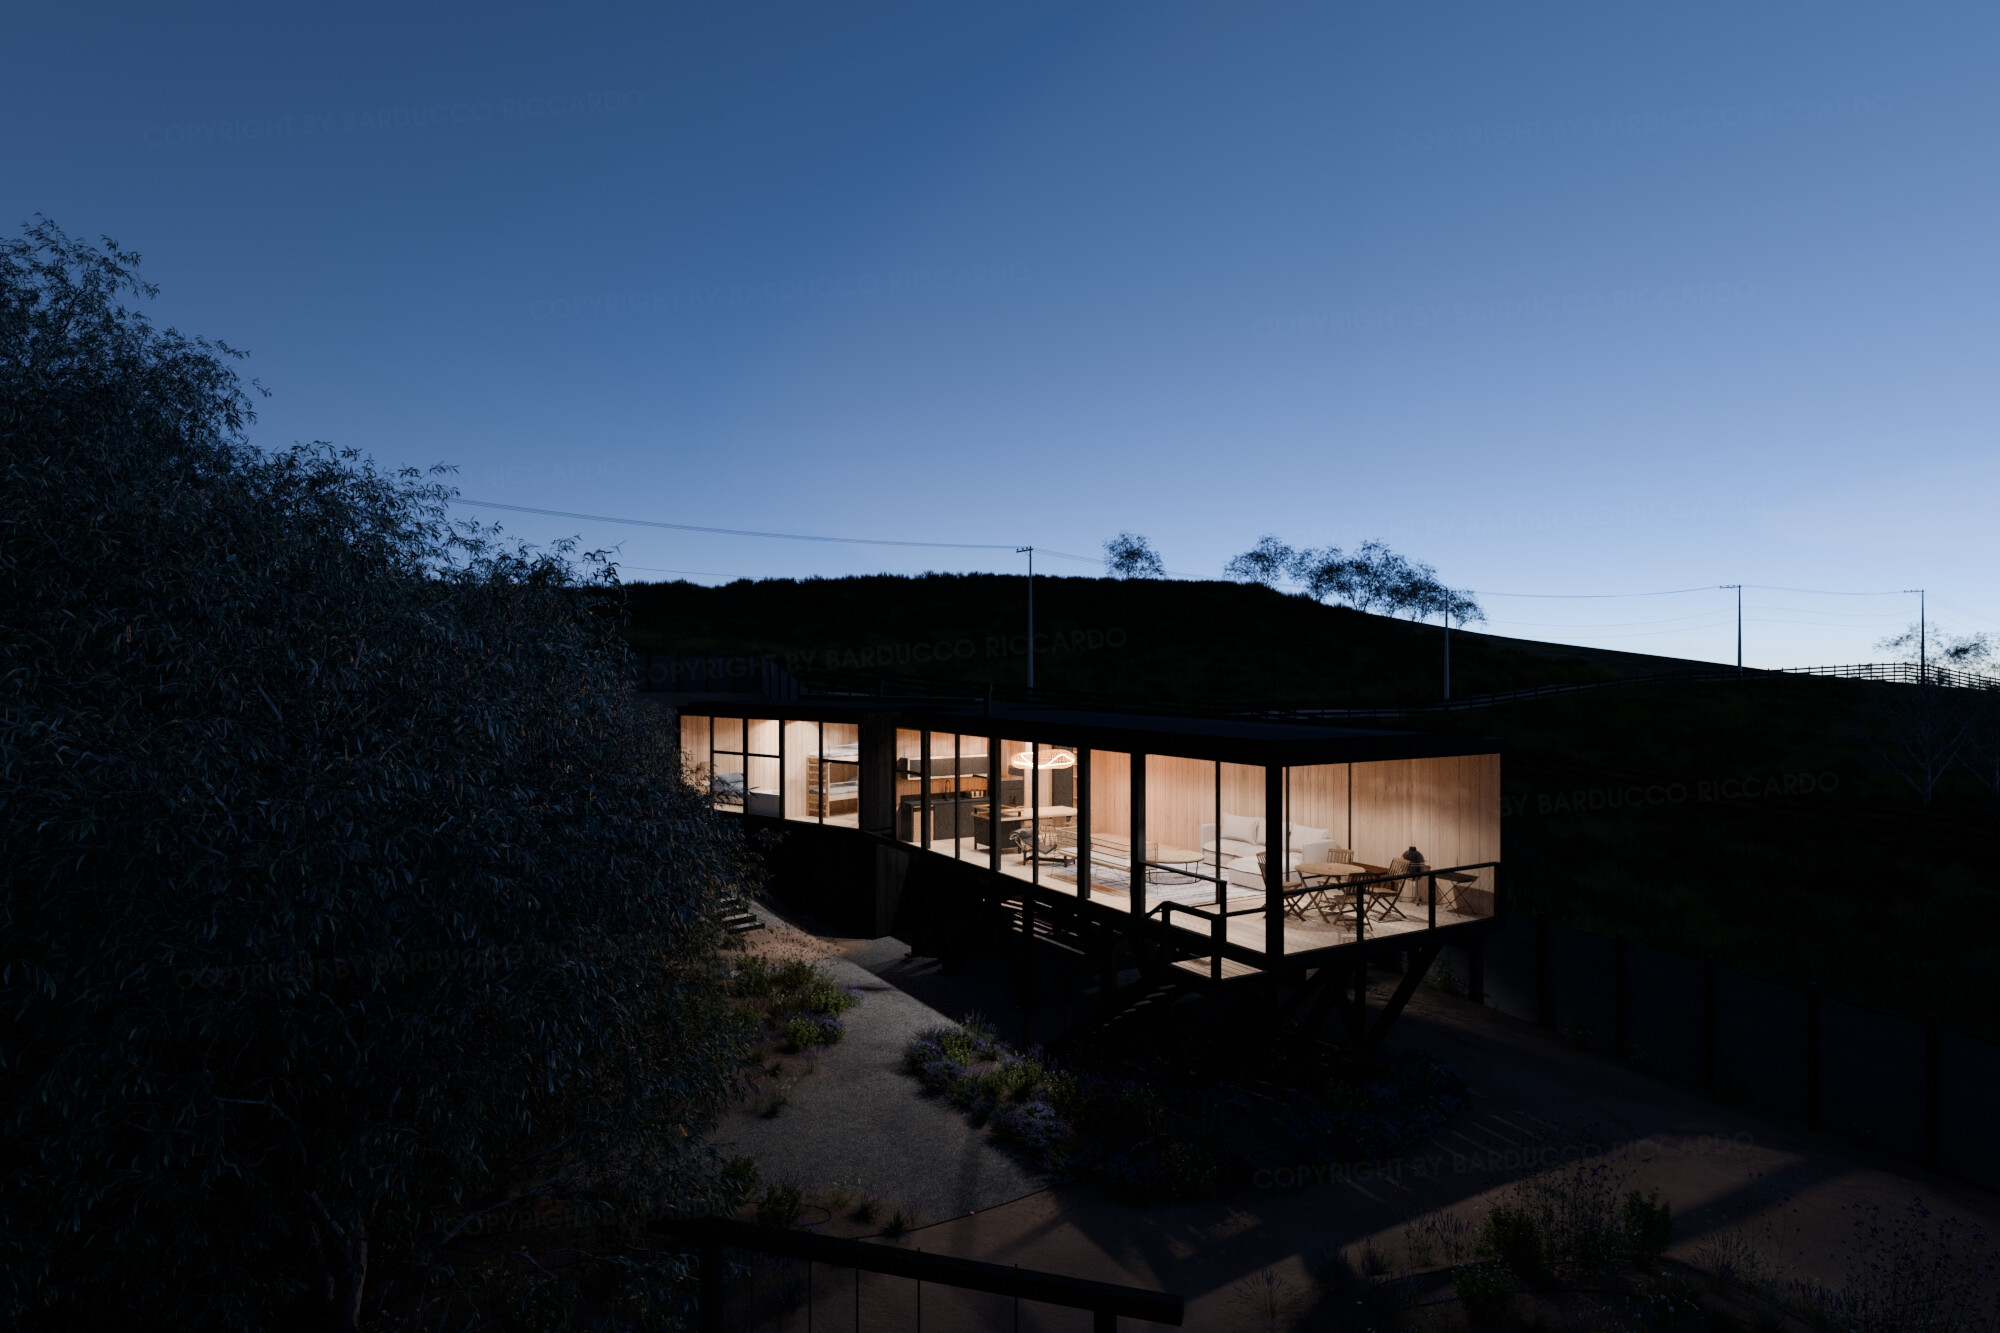
Ho iniziato facendo una ricerca su diverse riviste web di architettura e il mio occhio è caduto su questo progetto https://www.dezeen.com/2023/06/07/erre-arquitectos-prat-house-stilts-chile/ .
Tutti i riferimenti fotografici e dimensionali che ho trovato li ho salvati su un progetto PureRef.

FASE DI CREAZIONE
Prima di tutto vorrei ringraziare gli utenti di BlenderArtists che, direttamene o indirettamente, mi hanno aiutato con il loro messaggi, recenti o meno.
E’ stato un viaggio lungo e per ogni tappa ho dovuto imparare qualcosa di nuovo, questo soggetto ha alcuni elementi chiave che erano perfetti per forzarmi ad imparare qualcosa di nuovo su Blender e sugli strumenti aggiuntivi che descriverò più avanti…e questo mi ha dato grande soddisfazione.
Per quanto riguarda Blender ho scoperto alcune caratteristiche che non avevo mai usato prima così a fondo ed è stato piacevole usarle.
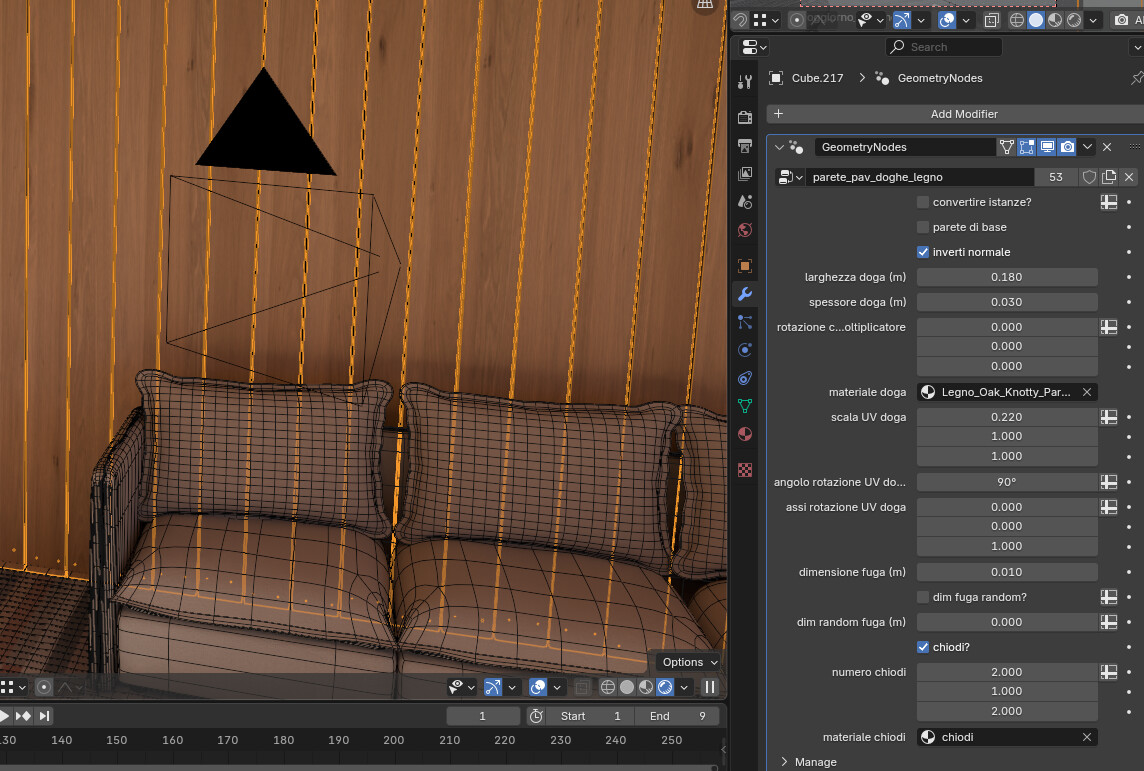
Una di queste sono i Geometry Nodes che ho usato in diverse situazioni.
La prima e principale è stata la creazione di un generatore di assi di legno.
Non appena ho iniziato a studiare le fotografie del progetto, ho capito che le assi di legno sarebbero state l’elemento principale del progetto e ho pensato che avrei dovuto concentrare l’attenzione su questo elemento per raggiungere il miglior risultato finale e che una semplice applicazione di texture su semplici geometrie non sarebbe stata un’opzione: “devo modellarle tutte!”.
Dopo aver capito questo, il pensiero successivo è stato “una casa fatta completamente di assi di legno che si ripetono è il soggetto perfetto per studiare i Geometry Nodes”, così ho iniziato a progettare come questo schema GN avrebbe dovuto funzionare e ho deciso che avrei modellato solo le facce delle pareti e successivamente lo schema GN avrebbe generato le assi di legno.
Sono partito dalla creazione del sistema per le pareti e successivamente, quando il sistema era funzionante, l’ho modificato per applicarlo al pavimento e al soffitto.
Il generatore di assi di legno può creare assi di legno utilizzando controlli per le dimensioni, gli scostamenti, le rotazioni delle assi, le UV con scala e orientamento e anche la quantità e la distribuzione d_e_i chiodi per ogni asse, se presenti.
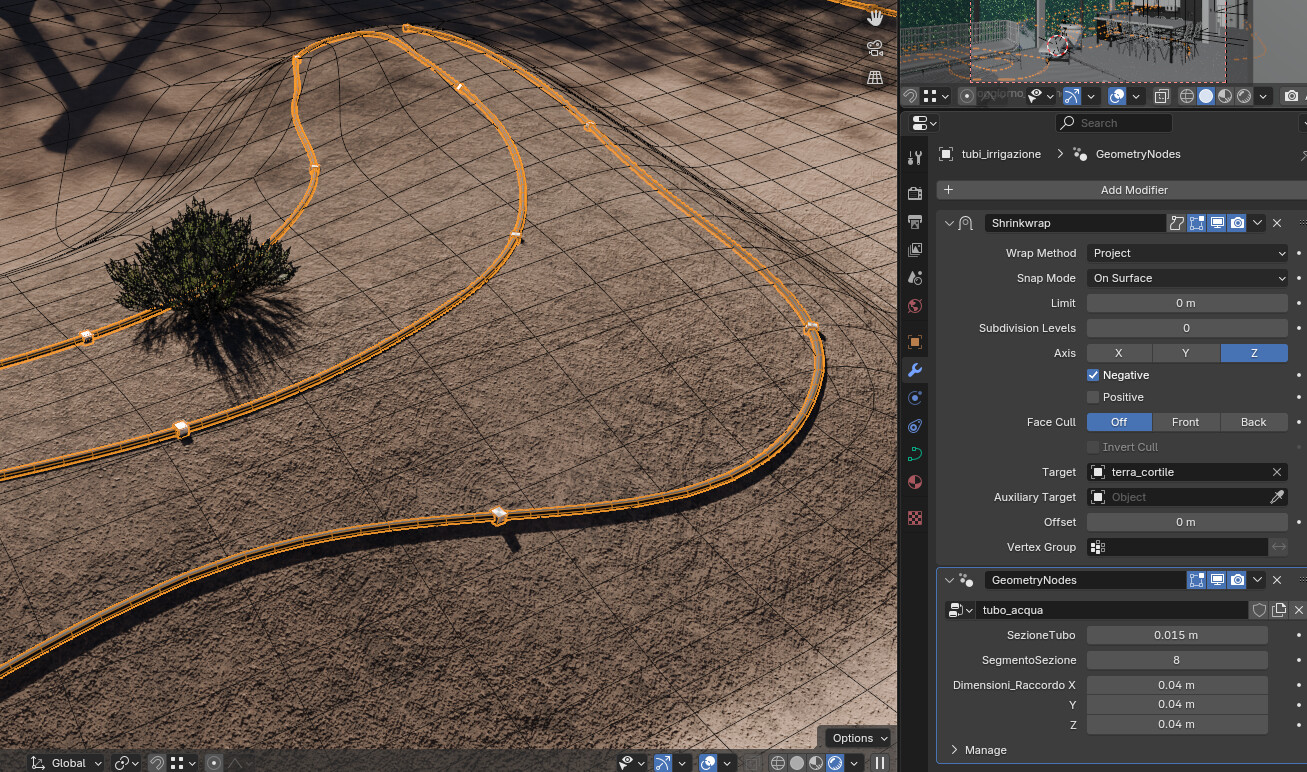
GN è stato usato anche per creare il sistema d’irrigazione e la staccionata.
Il primo è stato abbastanza semplice.
Ho disegnato una curva che descrivesse il percorso delle tubazioni per l’irrigazione e poi, usando GN ho impostato il diametro del tubo e il posizionamento d_e_i connettori. Un modificatore Shrinkwrap proietta la curva sul terreno.
Il secondo è stato un po’ più sfidante.
Uso una curva come percorso della staccionata e poi si possono impostare il numero di assi orizzontali, la distanza tra loro, la distanza dal terreno e dalla parte superiore, le dimensioni del montante e, se si vuole, un telo ombreggiante.
Per creare questo GN ho dovuto studiare diverse fonti e devo ringraziare @Andrea_Ciani per i suoi preziosi video tutorials.

Altri strumenti di Blender che ho dovuto approfondire sono stati la simulazione e lo scolpire i vestiti.
Dove il primo fallisce, or almeno, dove il primo necessita di troppo tempo nella definizione delle impostazioni per avere il risultato finale, il secondo offre un buon aiuto per aggiungere gli ultimi ritocchi.
Ho usato la simulazione d_e_i vestiti per i piumini d_e_i letti, sia il singolo che matrimoniale.
Successivamente, ottenuto il modello corretto, ho usato lo strumento per scolpire i vestiti per aggiungere le pieghe dove necessario.
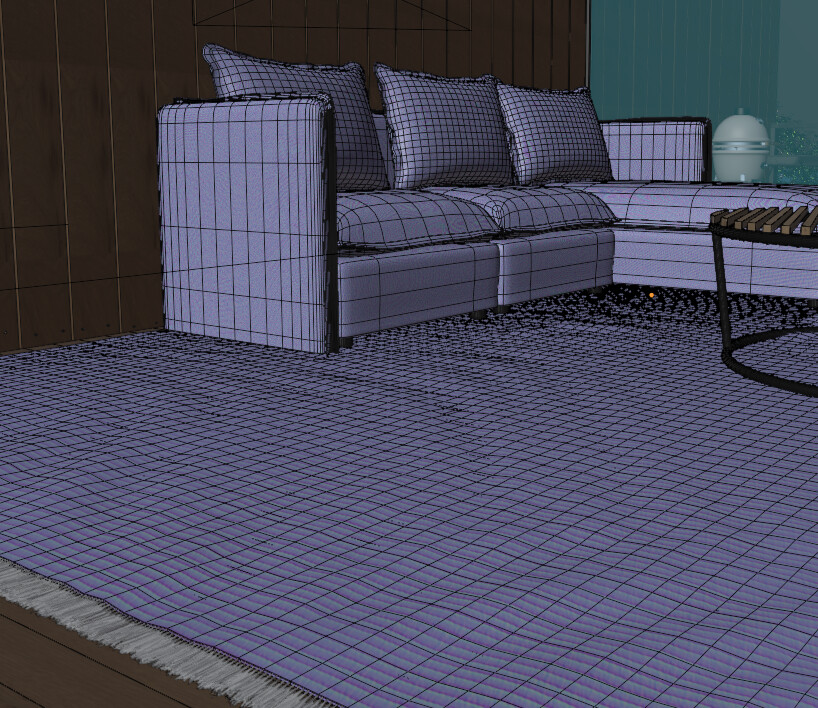
La simulazione d_e_i vestiti è stata usata anche per il profilo d_e_i cuscini del divano e per i cuscini stessi, sia del divano che d_e_i letti.
Lo strumento per scolpire i vestiti è stata utilizzata per creare le pieghe del tappeto
La modellazione non è stata l’unico aspetto che ho dovuto approfondire ma anche per la creazione d_e_i materiali ho dovuto realizzare qualcosa che non avevo mai fatto prima, come avere una trasparenza guidata dalla distanza dalla camera, utilizzata per sfumare la mesh del mare all’orizzonte o la trasparenza guidata dalla vicinanza con un’altra geometria che ho utilizzato per la zona del mare vicino alla battigia.
Ho sperimentato anche l’utilizzo di una curva di Fresnel per regolare la riflessione sfocata di alcuni legni.
Ho testato anche lo strumento di pittura su texture per dipingere alcune pieghe per il cuscino del divano in rattan e per la parte in pelle della poltrona chaise longue.

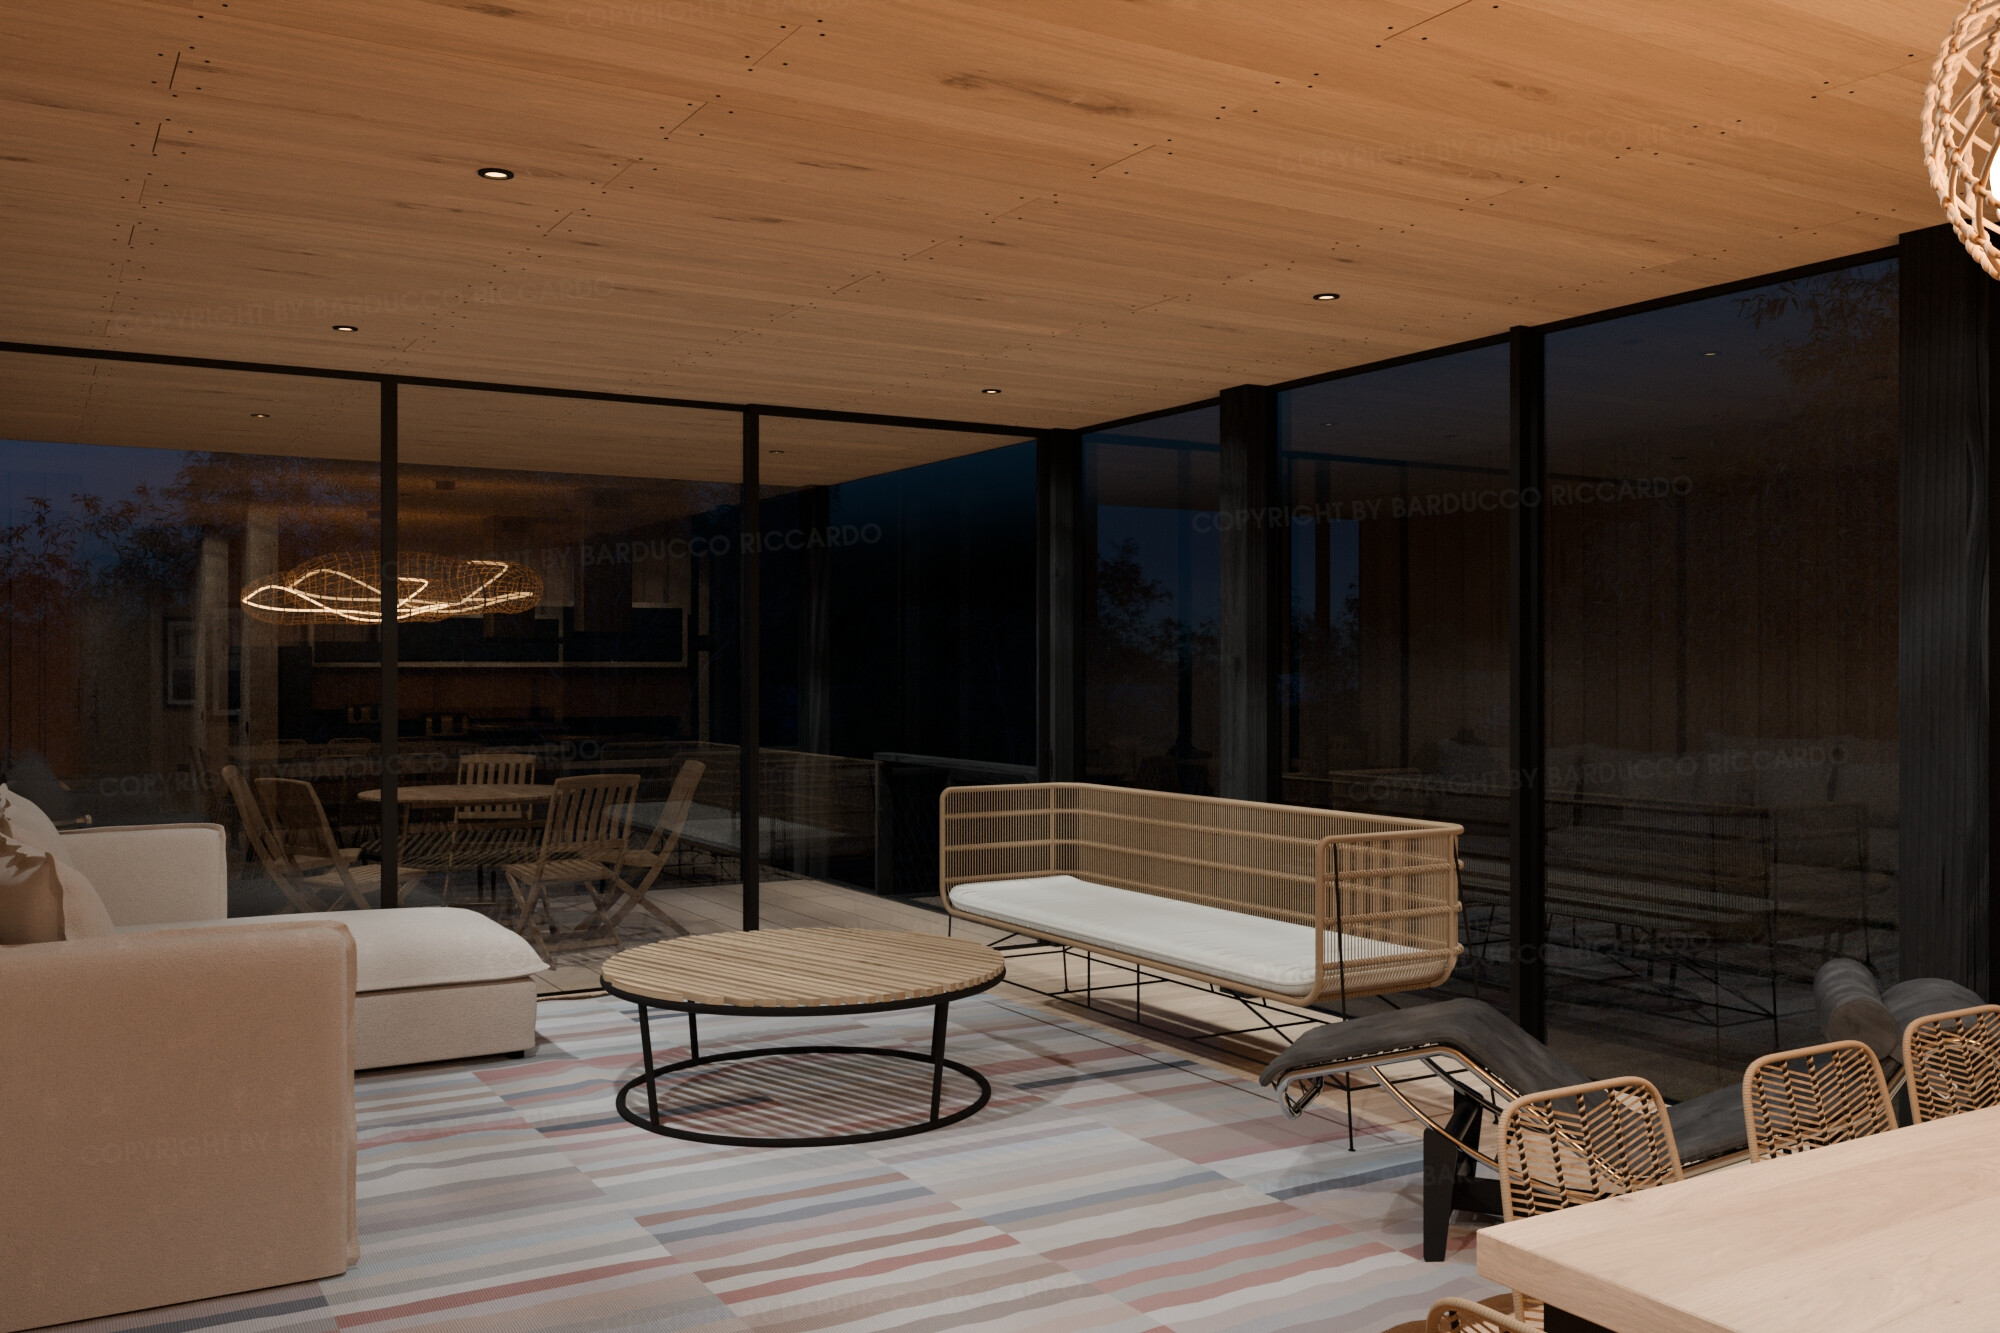
Considerato che il mio obiettivo era di ricreare l’illuminazione visibile nelle fotografie, avrei dovuto usare un modo per avere più tipologie di illuminazione nello stesso file (e scena).
Per fare questo, ho usato per la prima volta lo strumento ViewLayer per gestire le variazioni di luce e materiali ed è stato veramente utile per raggiungere questo scopo.
Per quanto riguarda l’uso di addon, non posso fare a meno di Photographer e Geo-Scatter.
Photographer è stato molto utile sia nell’impostare la fotocamera che nella gestione d_e_i ViewLayer, d_e_i diversi set World e della coda di render.
Geo-Scatter ha reso possibile poter gestire tutte le distribuzioni d_e_i modelli di piante e della ghiaia. Le due sue diverse modalità di generare gli oggetti sono perfette per distribuzioni di origine naturale e artificiale, con diversi modi per regolare la scala, la densità, la rotazione e così via. Ha una grande flessibilità.
Come strumenti esterni aggiuntivi non di Blender, menzioni speciali vanno a Tree-it e MaterialMaker.
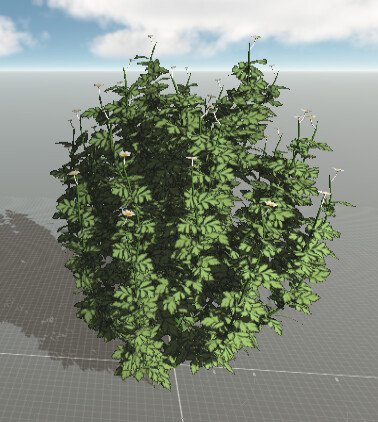
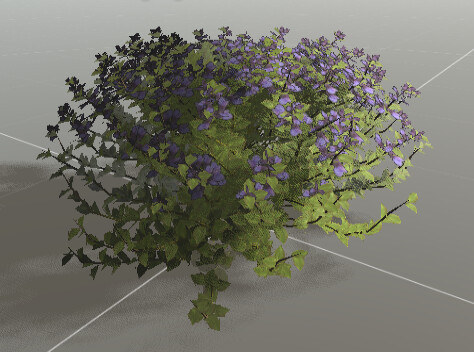
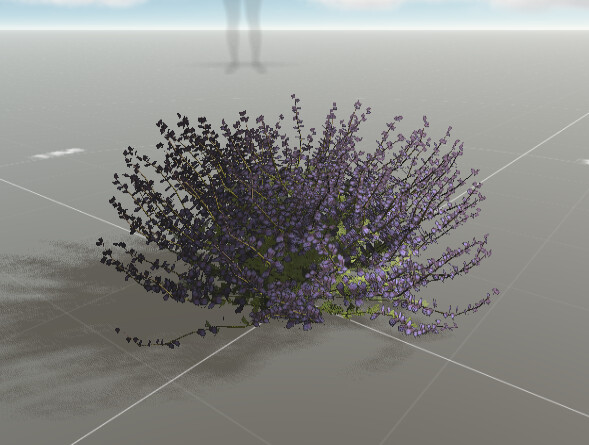
Ho usato Tree-it per creare alcune piante che rappresentassero le controparti reali.
E’ un software gratuito per generare proceduralmente la vegetazione. Penso sia progettato pensando ad applicazioni in tempo reale ma è possibile creare anche modelli ad alta densità geometrica.
Queste sono le specie che ho creato.
Questo software gratuito lo puoi trovare sul suo sito. Se vuoi, puoi comprarlo su Steam e aiutarne lo sviluppo, non costa molto.
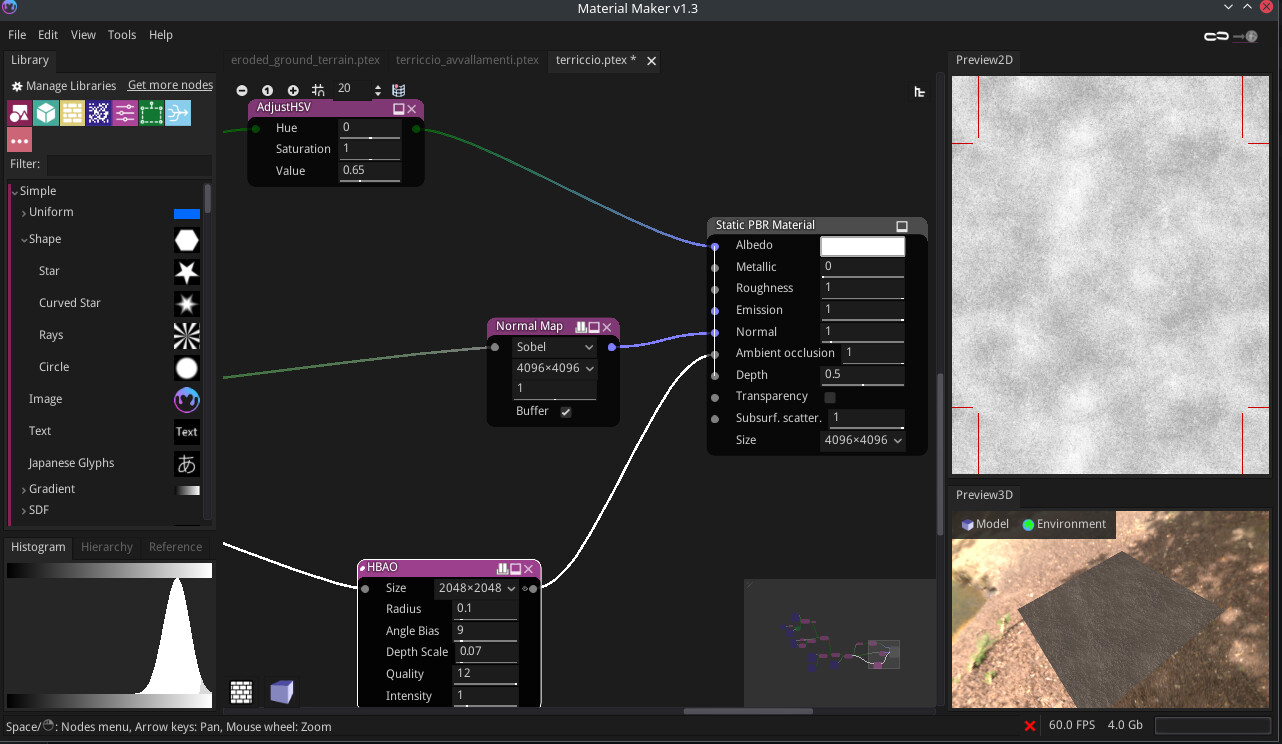
Per quanto riguarda MaterialMaker l’ho usato per creare un set di texture per il terreno, per il materiale del tetto e per la texture del colore del tappeto del soggiorno.
Per chi non lo conoscesse, MaterialMaker è un programma gratuito di generazione procedurale di texture simile a Substance Designer.
Non lo avevo mai usato prima e sono stato soddisfatto del risultato.
Potete trovare il materiale del terreno con i segni dell’erosione sulla libreria d_e_i materiali presente sul sito ufficiale.
Ovviamente ho usato anche alcuni modelli 3d e texture derivanti dal librerie esterne.
Per la vegetazione ne ricordo alcuni provenienti da Poligoniq e altri da GlobePlants.
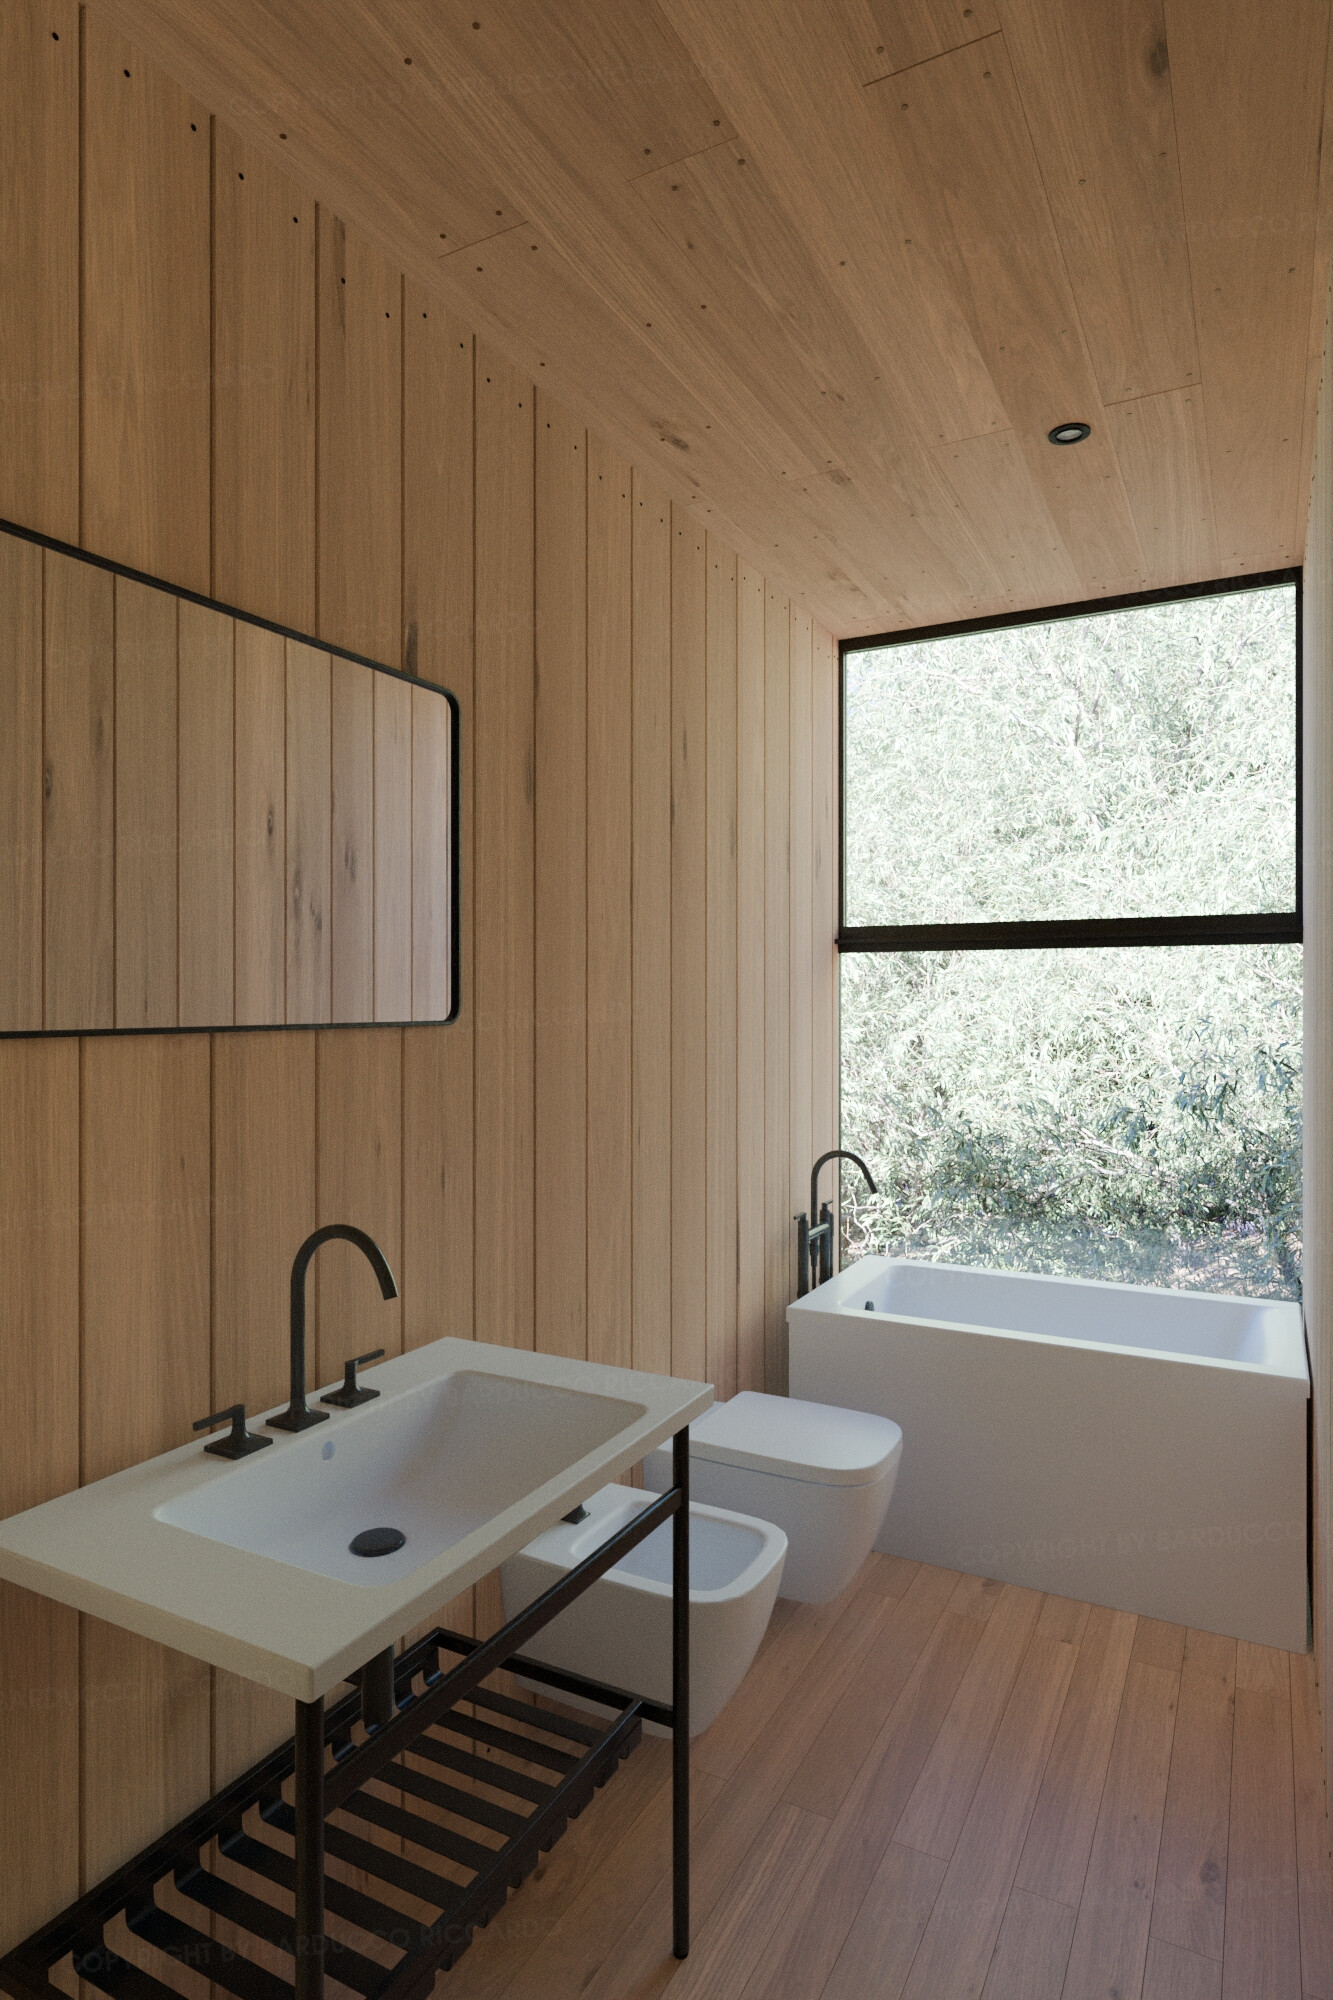
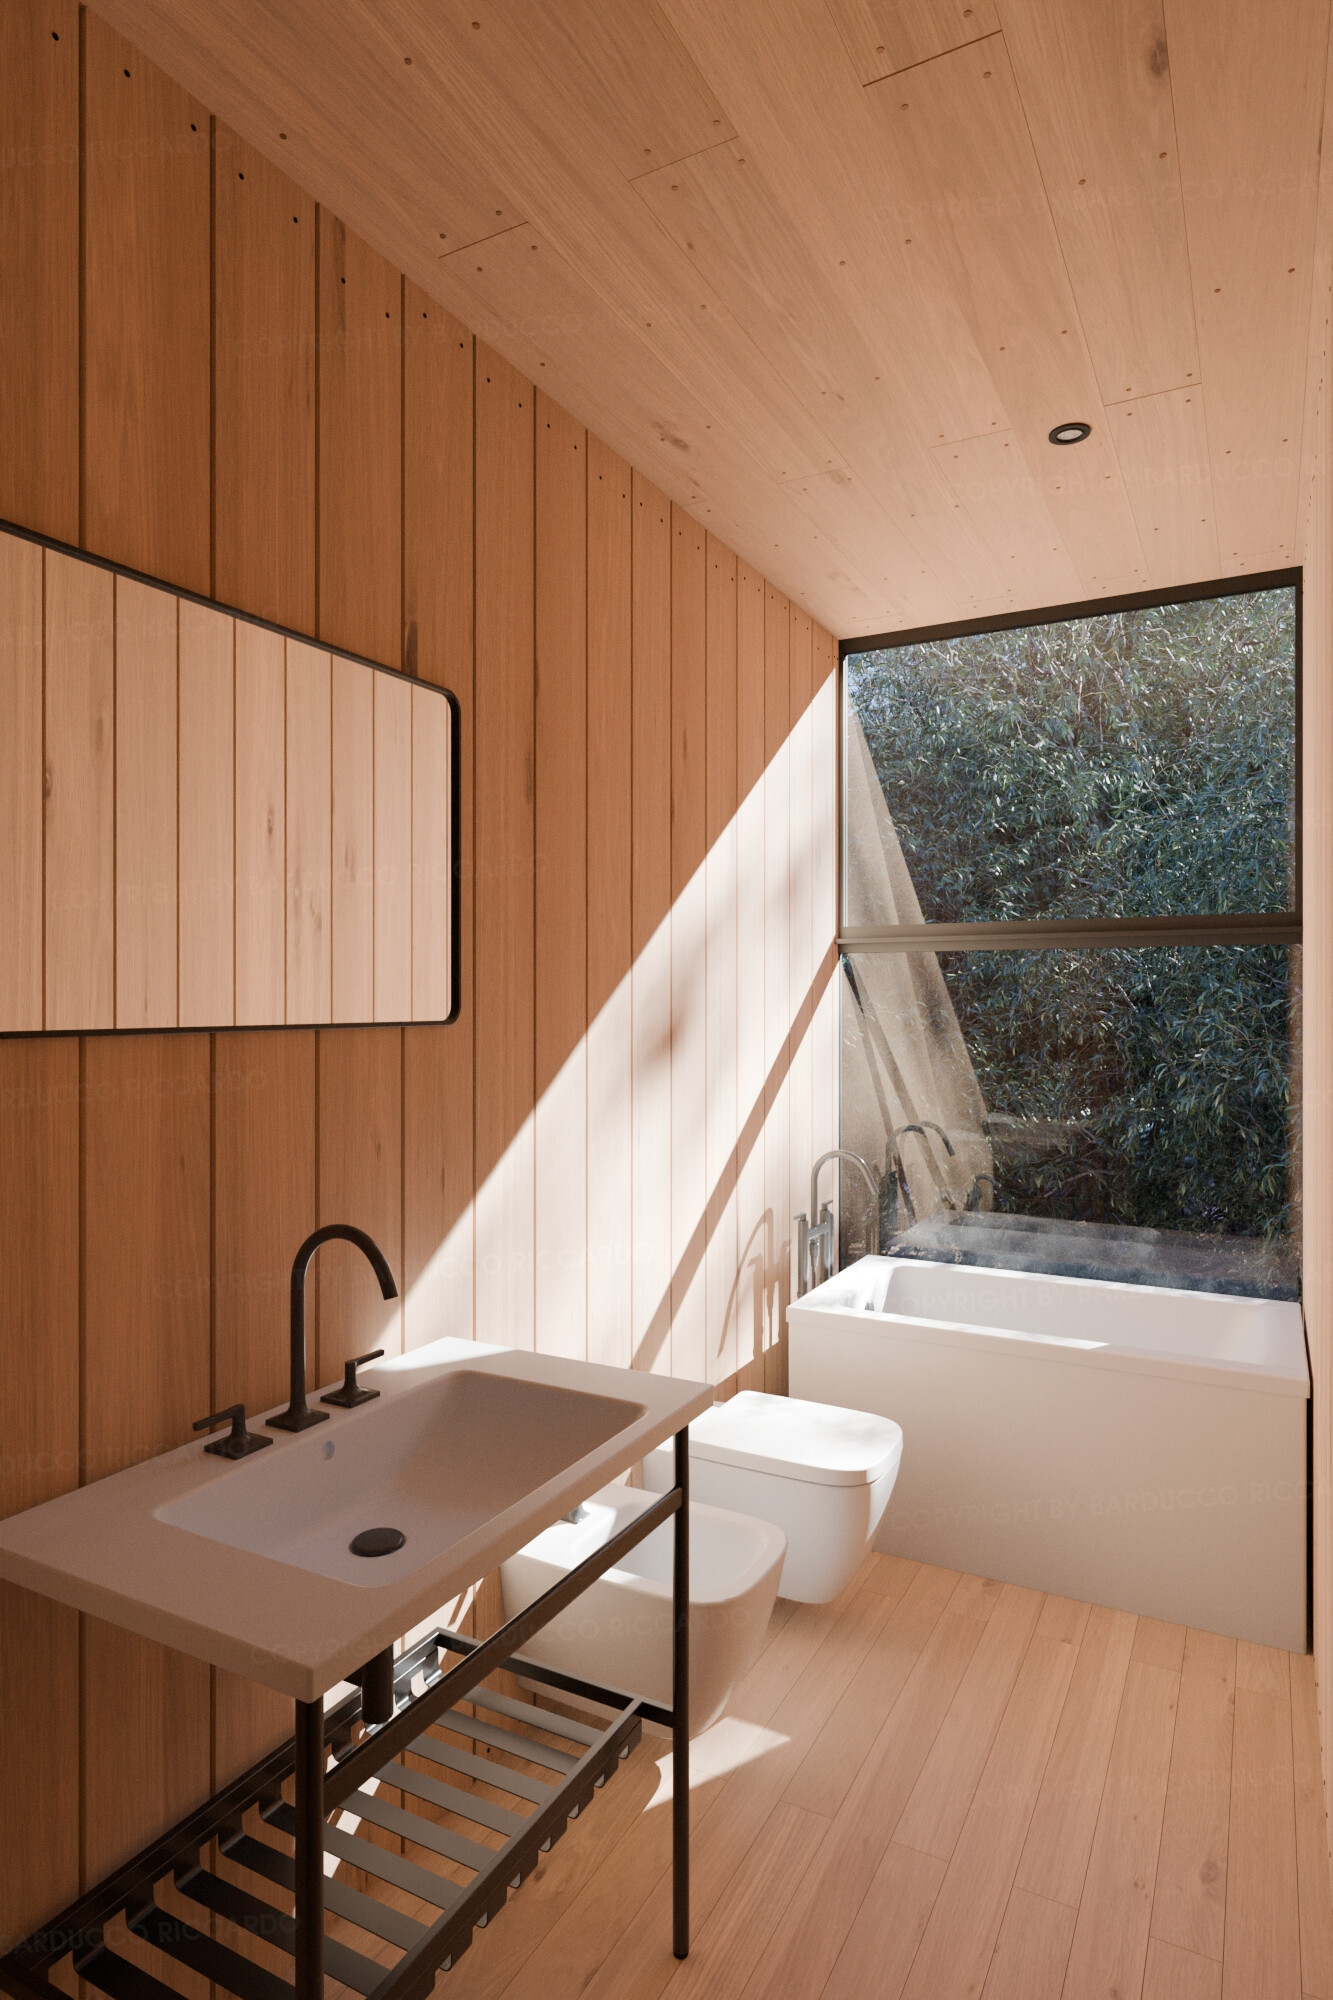
Alcuni elementi di arredo come quelli del bagno e i rubinetti provengono dal sito di IdealStandard a cui ho poi effettuato delle correzioni delle geometrie.
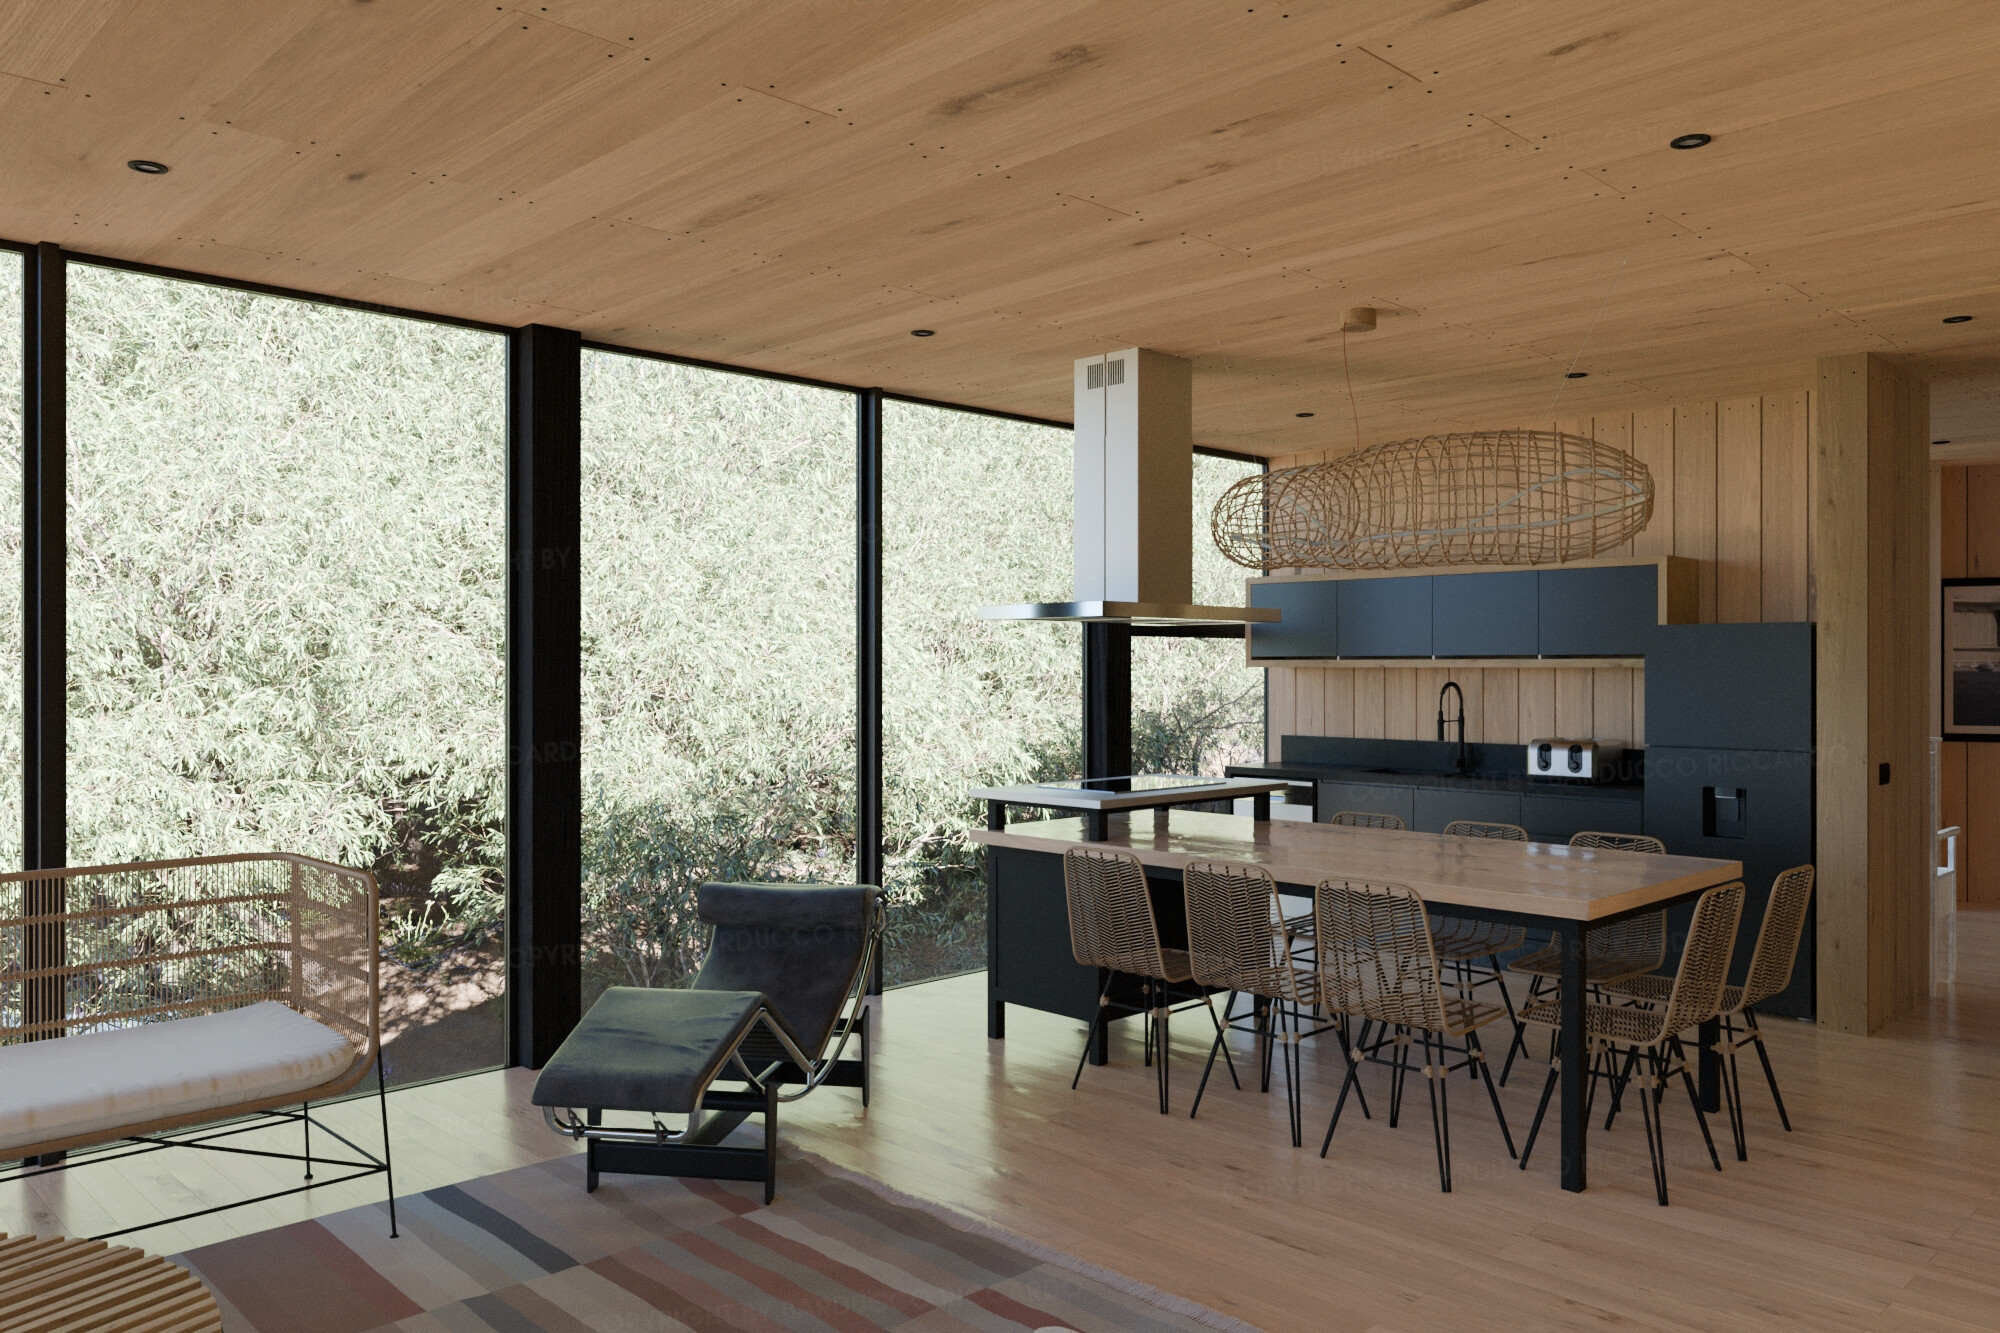
Tutti gli elementi di arredo come la poltrona chaise loungue, la cucina, i lampadari, il set del tavolo da esterni, la griglia per il barbecue e gli altri sono stati completamente modellati da me.
CONSIDERAZIONI FINALI
Mi sono molto divertito a realizzare questo progetto che mi ha dato l’opportunità di testare Blender più approfonditamente.
Sono abbastanza contento del risultato finale, qualcosa poteva essere migliorato per assomigliare di più alle foto reali ma nel momento in cui ho iniziato a percepire che mi stavo infilando nel tunnel infinito della ricerca della perfezione, ho deciso di mettere un punto fermo e ho cercato di chiudere questo progetto.
Vi ringrazio anticipamente per ogni commento e critica.
ALCUNE INFORMAZIONI
Tempo di rendering da 3 a meno di 9 minuti, a seconda della vista
Occupazione Ram: meno 10Gb
Occupazione VRam: tra 10 - 11Gb
Specifiche del PC: AMD Ryzen 9 7900X, 64Gb, RTX4080
Sistema Operativo: KDE Neon
Programmi usati: Blender, GIMP, MaterialMaker, Tree-it, PureRef
HOW IT STARTED
One year ago I thought I’d like to create an archviz personal project set on a seaside environment.
So, I started to do a bit of research on several architectural web magazines and my eyes fell on this project https://www.dezeen.com/2023/06/07/erre-arquitectos-prat-house-stilts-chile/ .
I liked the use of few and natural materials, expressing simplicity that conceal the building in the environment.
I created a PureRef project where I put all the references I’ve found.
MAKING OF
First of all I want to thank BlenderArtists users as, directly or indirectly, they helped me with their posts, recent and not.
It was a long journey and for every stage I had to learn something new, this subject has some key elements that were perfect to force me on learning something new about Blender and additional tools I’ll describe later…and this it was a real satisfaction.
About Blender I’ve discovered some features I haven’t used before in depth and it was a pleasure to work with.
One of these is Geometry Nodes and I’ve used it in some scenarios.
The main and first scenario was the wooden planks generator.
As soon as I’ve start studying the project pictures, I recognized that the wooden planks will be one of the heroes of the project and I thought I should be really focused on this in order to get the best final result and a simple texturing on plain surfaces will not be an option: “I have to model all of them!”.
After realized this, the next thought was “an house completely made by wooden planks is the perfect subject to study Geometry Nodes”, so I started to design how this GN network should work and I decided that I should model just the single faces of the walls and then the GN network will generate the wooden planks.
I’ve started creating a system for the planks of the walls and, when the system was working I’ve modified it for flooring and ceiling.
The planks generator can spawn wooden planks with controls for dimensions, offset, planks rotation, UVs with scale and orientation and also the quantity and distribution of the nails per plank, if they’re present.
GN was used also to create the irrigation system and the wooden fence.
The first one was quite simple.
On top I’ve draw a curve for the irrigation pipe and then, using GN I set the pipe diameter and the pipe connectors positioning. A Shrinkwrap modifier projects the curve to the terrain.
The second one was a bit more challenging.
It uses a curve as fence path and you can set the number of horizontal planks, the distance between them, the distance from the terrain and from the top, the vertical pole dimensions and if you want a fabric for shading. To create this I had to make some studies and I have to thanks @Andrea_Ciani for his precious video tutorials.
Another Blender tools I had to examine in depth were Cloth simulation and cloth sculpting tool.
Where first fails, or at least, where first becomes too much time spending on setup to get the desired result, the latter offer a good help to add the needed final touches.
I uses cloth simulation with the duvets of the beds, singles and double.
Then, when the mesh was fine, I’ve used cloth tool on sculpt mode to add some wrinkles where needed.
Cloth simulation was used for the thick edge of the couch pillow, for the couch and beds pillows.
Cloth sculpting tool was used to create the carpet wrinkles.
Modelling wasn’t the only aspect I had to examine in-depth but also for shading I had to create something I’ve never done before like a transparency driven by the camera distance for the sea horizon or driven by mesh occlusion for the sea near the shore.
I’ve also experimented with the use of a Fresnel curve to drive the reflection roughness of some wooden material.
I’ve also tested the use of the texture paint tool to paint some wrinkles for the pillow of rattan style couch and for the leather part of the chaise longue chair.
As my goal was to replicate the lighting of the pictures, I would use a way to have different lighting state in the same file (and scene).
To do this I used, for the first time, the ViewLayer feature to manage lighting and materials variations and it was really useful and helpful to reach this goal.About use of addons, I can’t live without Photographer and Geo-Scatter.
Photographer was really helpful both on set camera parameters and management of ViewLayers, Per Camera World overrides and the render queue.
Geo-Scatter make it possible to easily manage all the distribution of vegetation and gravel models. Its different ways to scatter objects are perfect for natural and artificial distribution, with many ways to fine tune scale, density, rotation and so on. Great flexibility.
As not Blender additional tools, some special mentions to Tree-it and MaterialMaker.
I use Tree-it to create some custom plants trying to mimic the real ones.
It’s a free software to procedurally generate vegetation. I think it’s designed with realtime application in mind but it’s possible also to create high poly models. These are the species I’ve created by myself.
You can find on its website. If you want can buy it on Steam and help the development, it costs few bucks.
About MaterialMaker I’ve used it to create the texture sets of the ground terrain, for the roof material and for the albedo texture of the carpet of the living.
For people that don’t know it, MaterialMaker is a free procedural texture creator similar to Substance Designer.
I’ve never used it before and it left me happy about the result.
You can find the terrain material with eroded paths on the material library on its website.
Obviously I had also to use some 3d models and textures from libraries.
For vegetation I remember some from Poligoniq and some from GlobePlants.
Some furniture pieces like the ones of the bathroom and the faucets come from IdealStandard website and then I’ve made some mesh corrections.
The other furniture pieces like the chaise longue chair, the kitchen, the hanged lamps, the external table set, the barbecue grill and all the other furniture elements are completely modeled by me.
FINAL THOUGHTS
I enjoyed very much this personal project that gives me the opportunity to test more deeply Blender. I’m quite happy with the final result, something could be improved to match the real one but when I was suspecting that I was going to put myself in the infinity tunnel of the research of perfection, I decided to make a stop and try to close it.
Thank you in advance for comments and critiques.
SOME DATA
Rendertime from 3 to 9 minutes, depending on view.
Ram usage: less then 10Gb
Vram usage: about 10 - 11Gb
PC specs: AMD Ryzen 9 7900X, 64Gb, RTX4080
OS: KDE Neon
Softwares used: Blender, GIMP, MaterialMaker, Tree-it, PureRef