CG Effects for live action Feature Film

Thumb update…

Hello Blender Artists,

In this topic I want to write about how I decided to do all the CG effects for a full length, live action feature film by myself….without having any previous experience in CG, at all!!

But let me quickly introduce myself. I’m not actually a 3D artist.
I’m a TV commercial and feature film director.
I bumped into blender, when I was looking for a software to do some very rough layouts for the post production of my arthouse feature film, a few month ago. And BANG….butterflies & angel voices…. I fell in love….with blender! I was totally seduced by all the sweet possibilities it offers.
So….just like that, I decided to do the whole post of the feature by myself. Obviously a totally insane and naive decision.

I do have a long history with compositing - worked as a compositor about two centuries ago. But learning CG from scratch and creating dozens of photorealistic SFX shots, mostly set creation & character animations, was a crazy task to take on…as a newbie!!
Oh well, it’s exciting… and I love to do it! So why not!
Let’s see if an old dog can learn some new tricks?! :wink:

I thought it might be interesting to share some WIP, experiences and issues I ran and am still running into. It might be especially interesting, because my demands are very high… and my knowledge is very low. Everything I do has to stand up perfectly well in cinema! I don’t want to ruin the film with cheap CG! So I need to get to a very high level of quality…. quickly.
(On the other hand, as a compositor, I know, that SFX are a lot about cheating. Like magic - distraction is key. It’s all about finding the right balance between quality and effort. Especially in film, when you see a scene for a few seconds only, it does not need the same quality in details as for print work.)

Oh, and please, all you blender cracks out there, don’t laugh about the way I do things. I’m just happy if they work….somehow. Please never ask me to show the geometry of my models! :stuck_out_tongue_winking_eye:
And please keep in mind, that everything I post here is WIP. Final renders and compositing I will only start late autumn/beginning of winter.

Now I quickly want to take a moment to thank the great blender community. Everything I learned so far, is thanks to your free tutorials and tips and tricks.
And I still got soooo much to learn….

Some words about the softwares I’m using:
Blender for all main CG work.
AfterEffects & Element3D for compositing. Premiere Pro for editing.
Daz3D for character animations. (I find it faster to animate the basic moves. I then export the animations with fbx to Blender and refine it there.)
My computer: 10 core iMac Pro, 64GB Ram , Vega64 16GB GPU (which I can’t use…yeahhie).

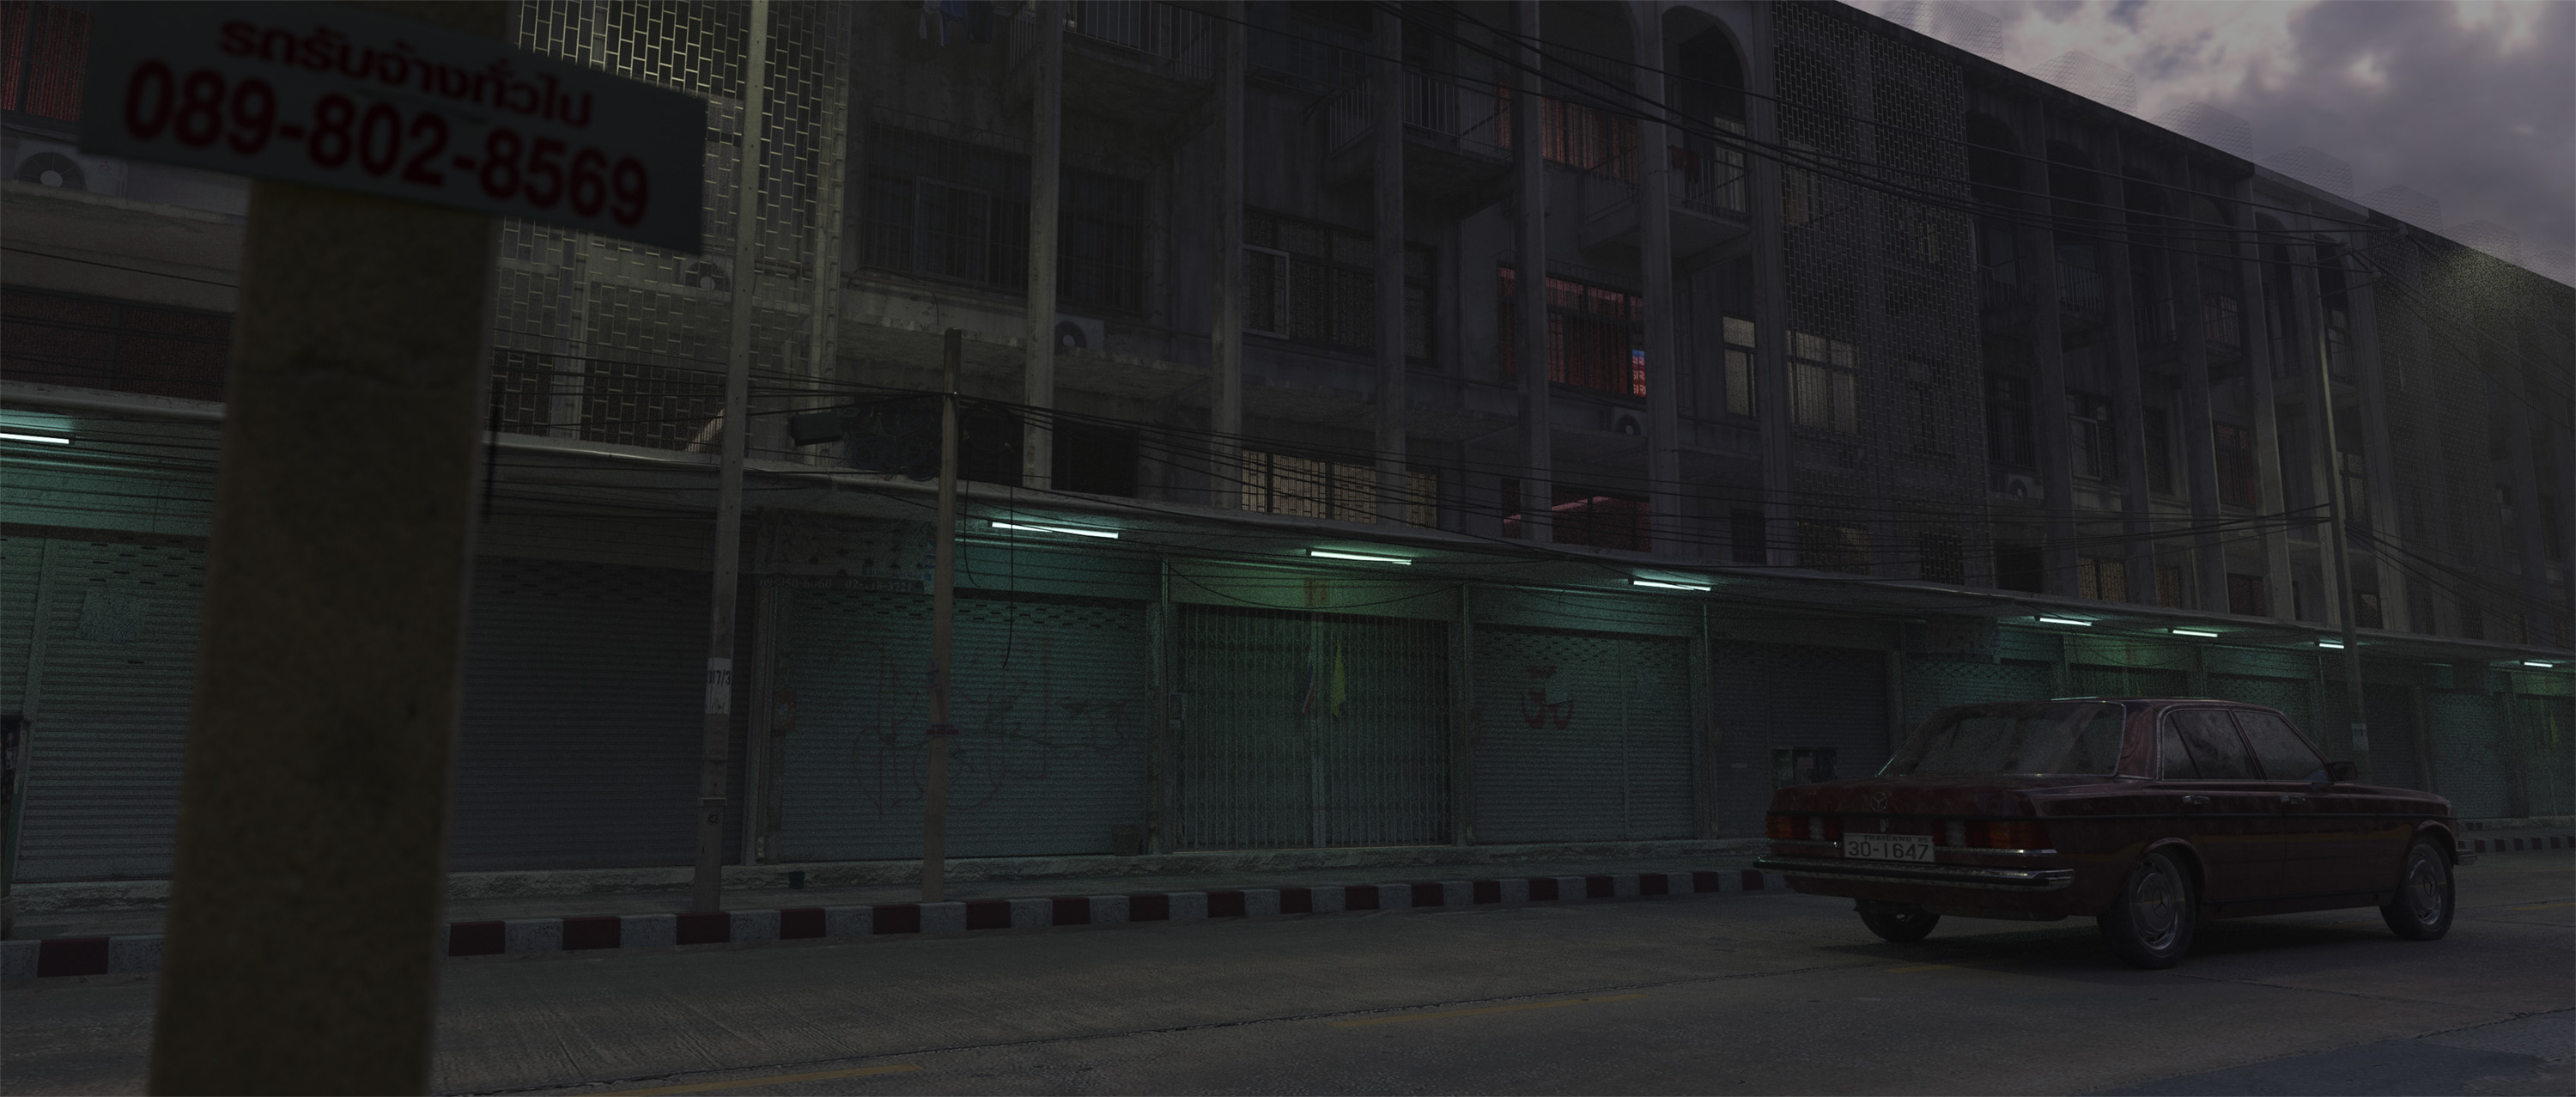
So let’s start with the first WIP, something simple - ‘The Medusa Hotel’. One of several buildings I’m working on.


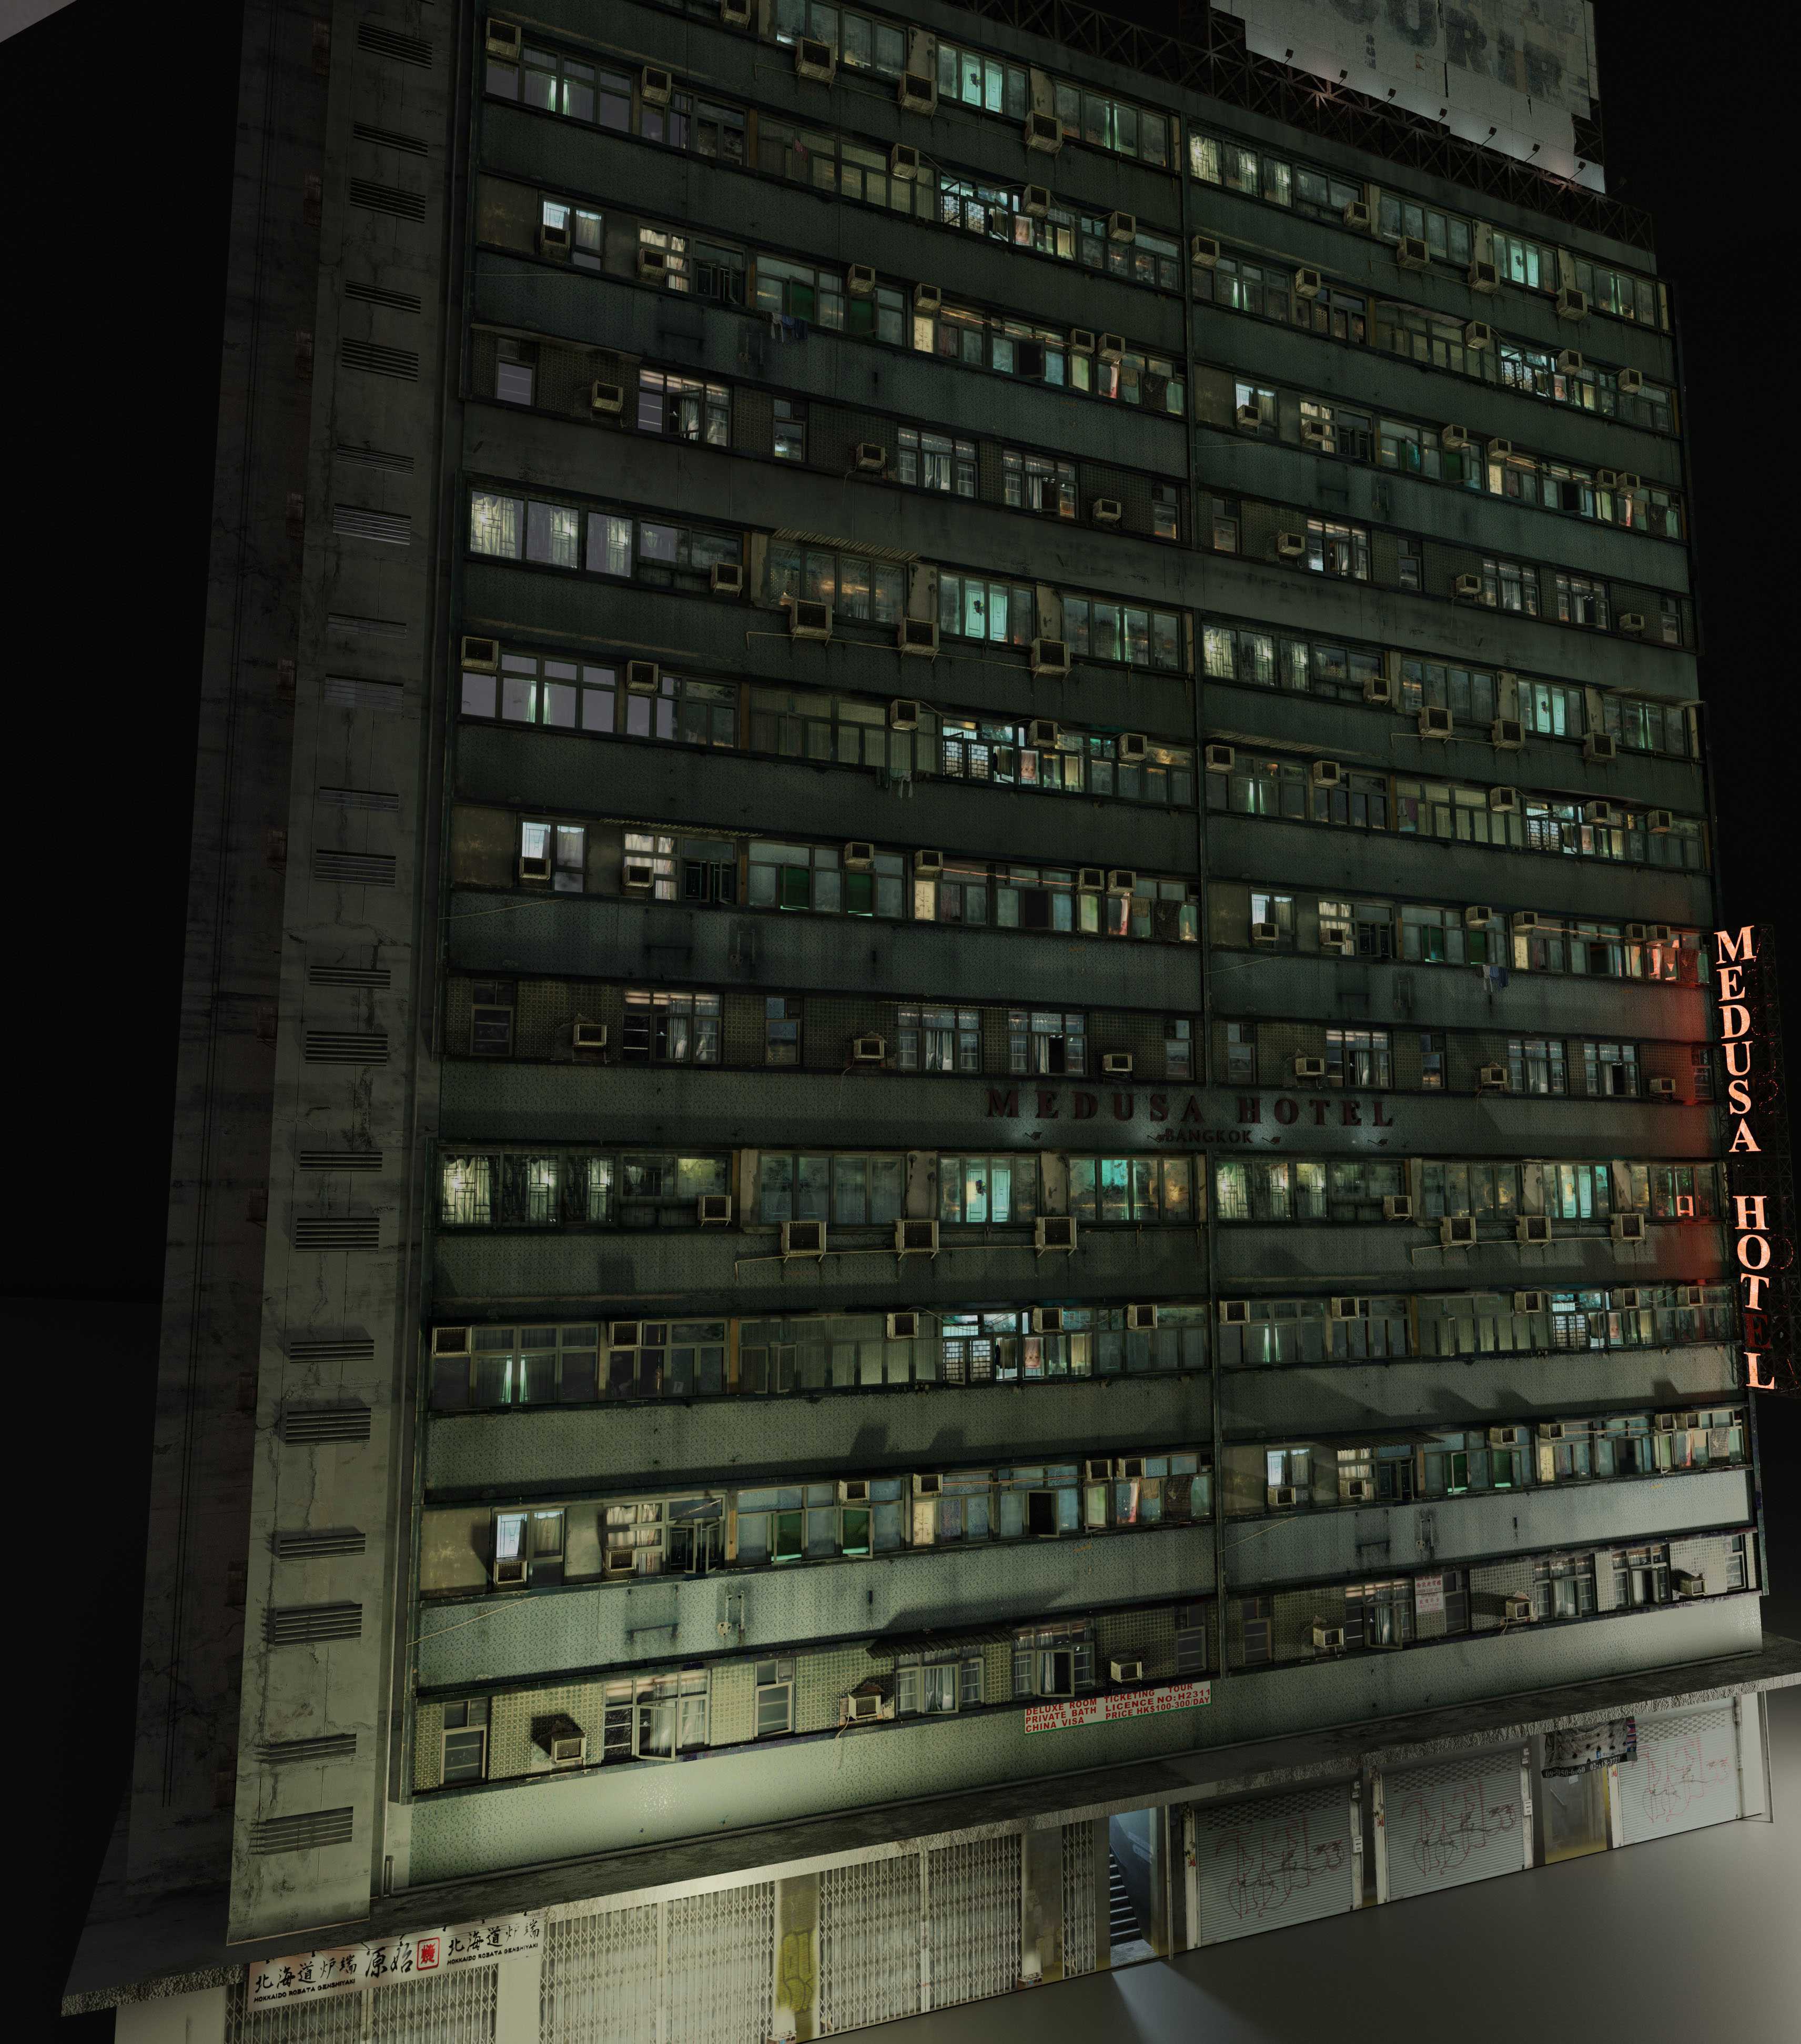
The Medusa Hotel I made from scratch. It’s not finished yet. The ground floor is only a quick layout texture and and I’m not happy with the roof part yet. (especially with the textures.) And the rear, which features a dilapidated pool area is also not finished yet.
But other than that it’s pretty ok, I think.
Since I might only need the front, I will keep the rest for later. Gotta save time somewhere.
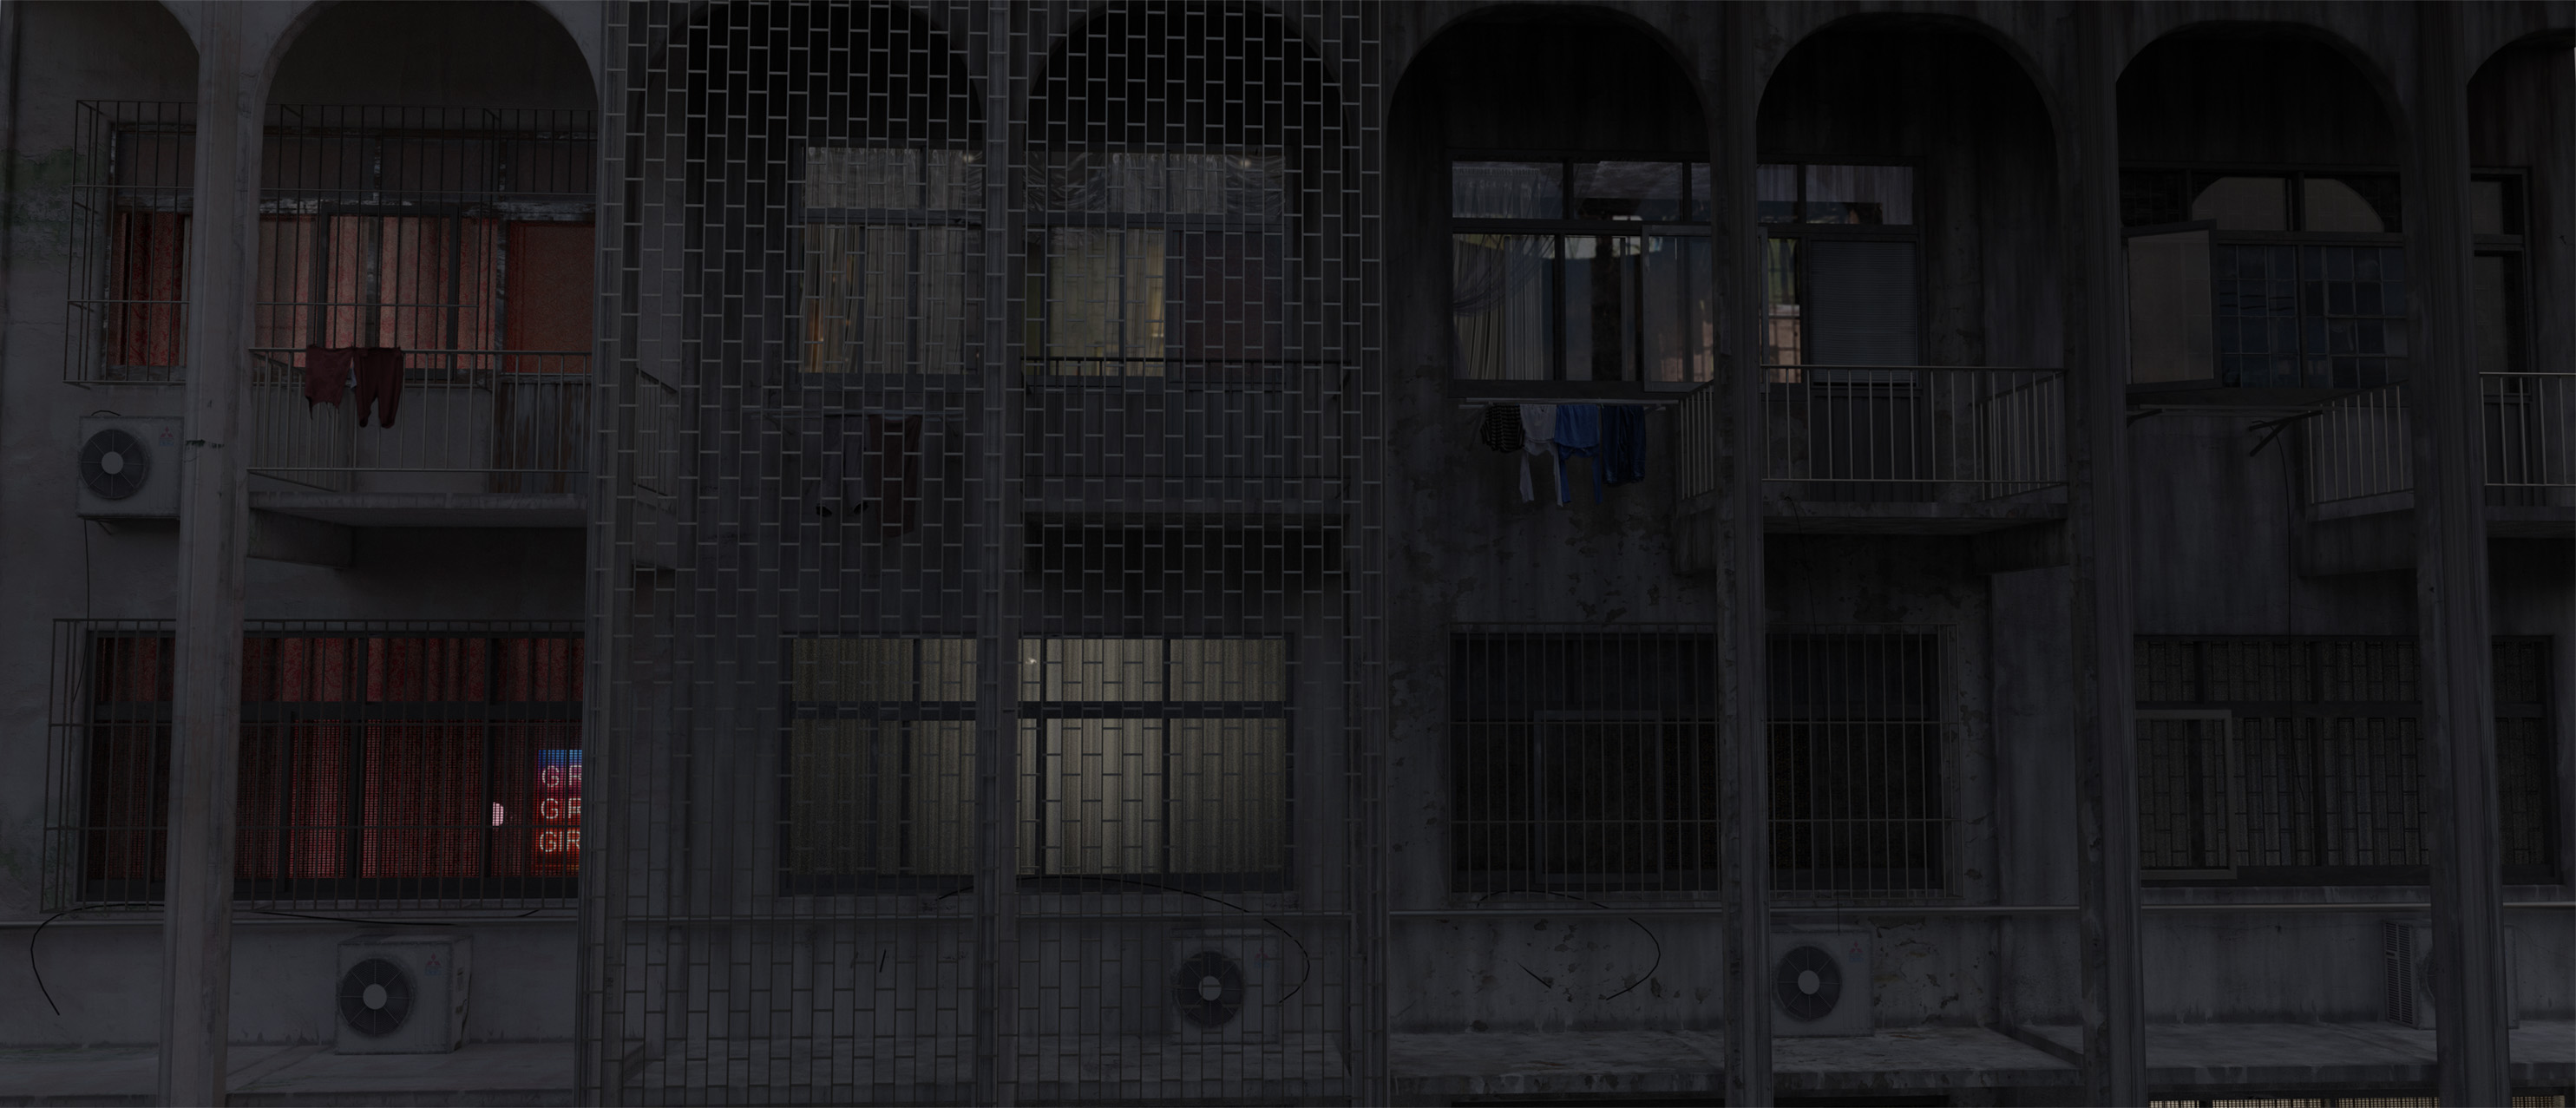
Most textures are from me. The window/facade texture is from a free CC0 texture site (I don’t remember which one.) I retouched the windows in photoshop. Removed all the open ones in the picture, cause I was building them in CG, and changed many of the interiors, which were slightly burned out. I also added one room ‘for real’ behind one row of windows. With curtains, lights and some ‘light-breakers’. Then I added aircons, tubes, clothes and so on.
I made one part of the facade and instanced it. (including air cons and windows.)


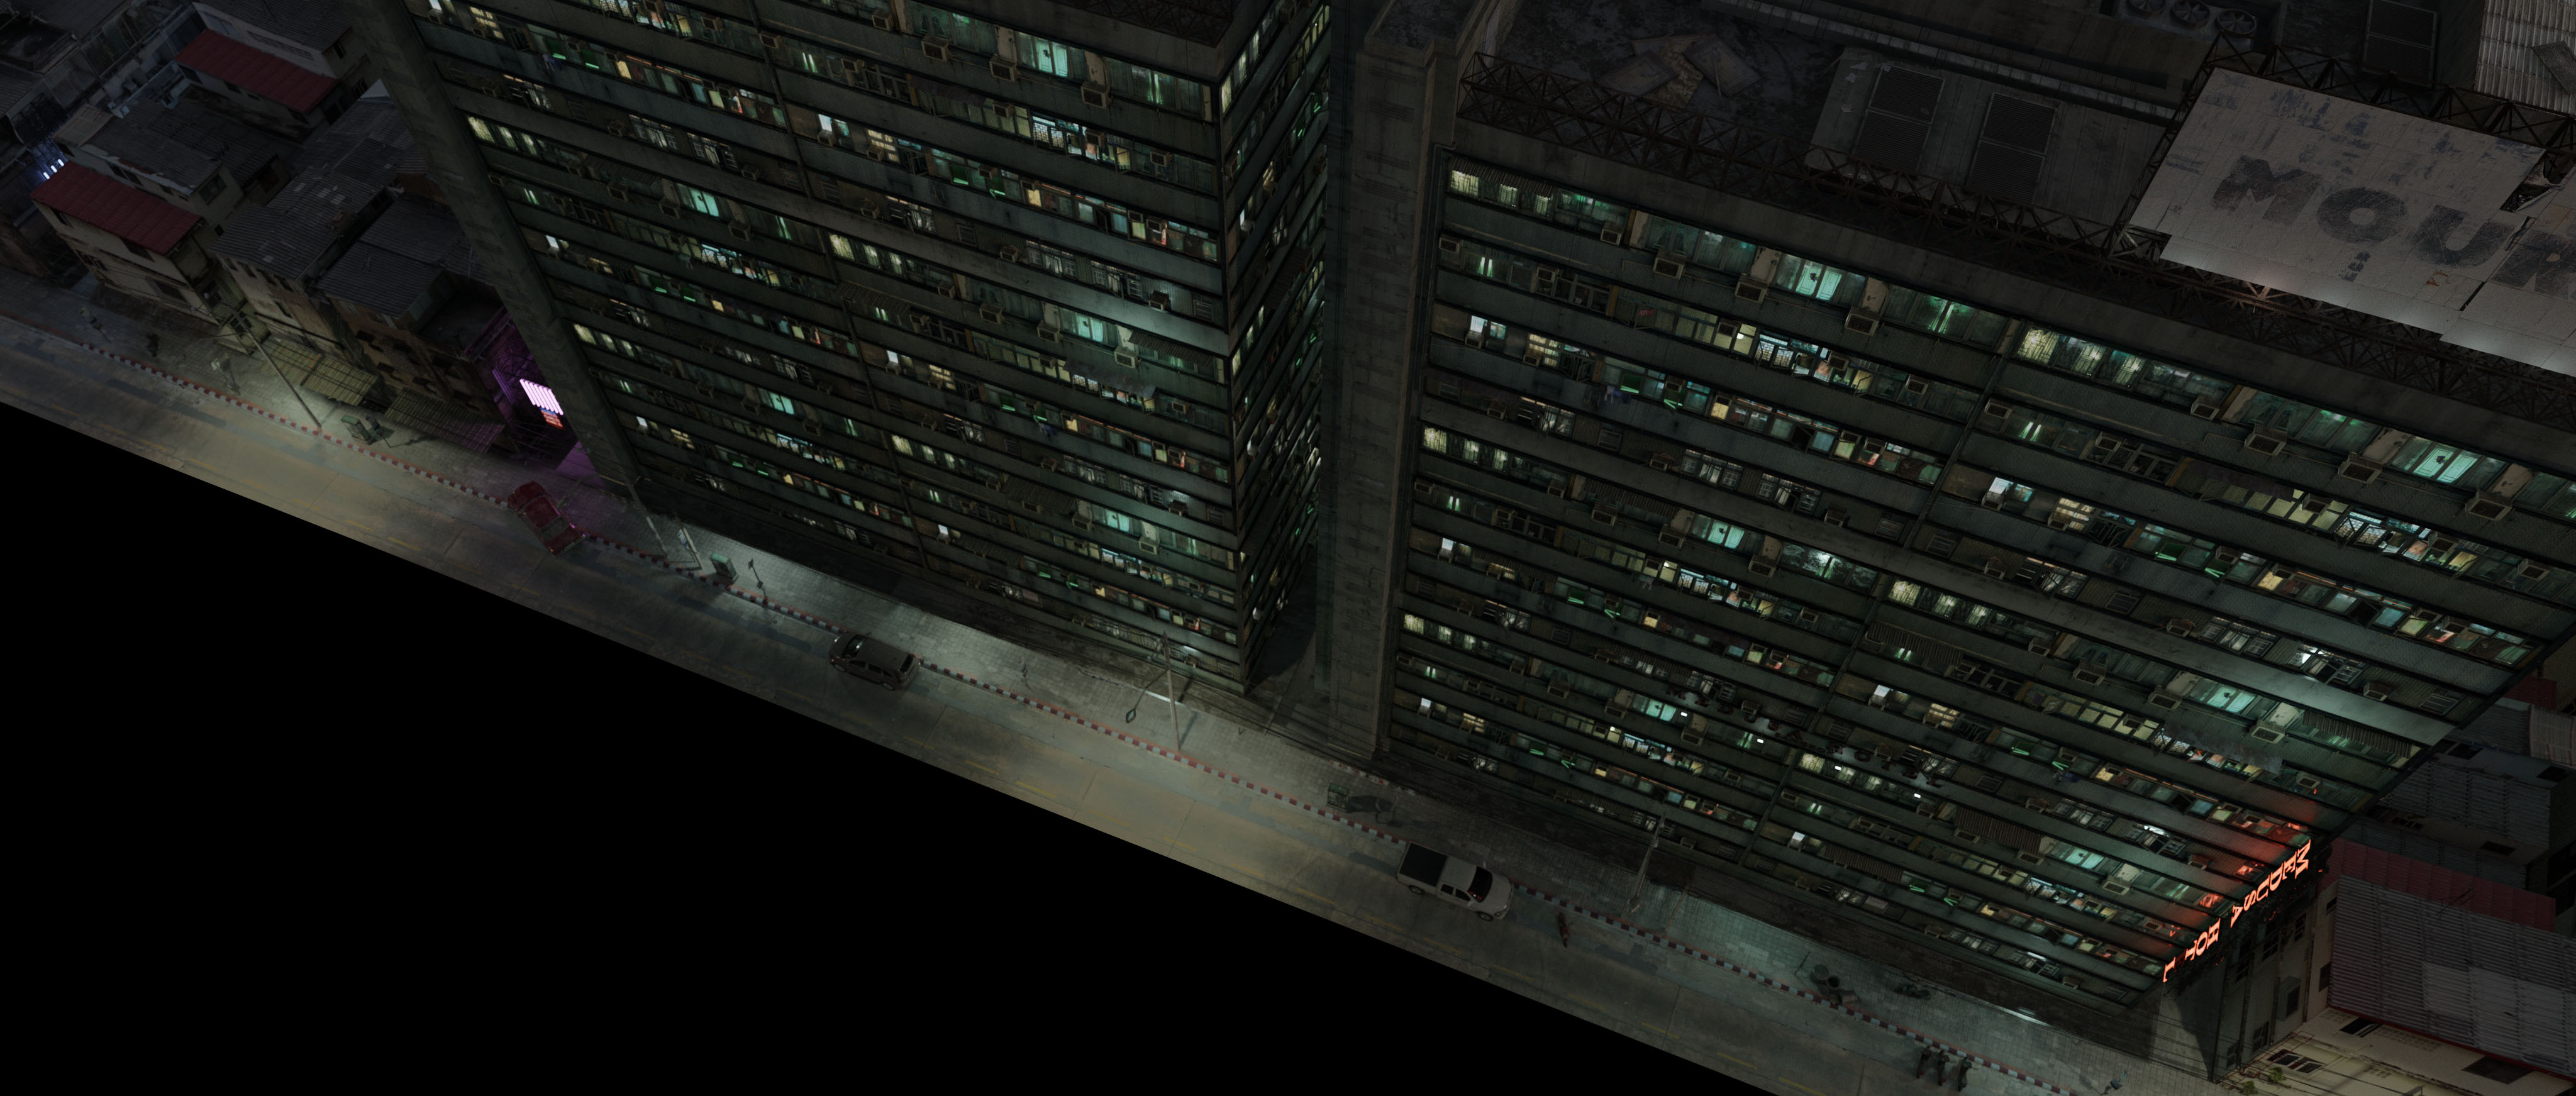
(The cars I bought. The buildings on the sides I quickly extruded from a photo I took. Sidewalk and street are textures I shot.)

This scene leads me to my biggest issue - apart of me being a total noob - render times!
Since I’m working on a Mac (Mojave), I can’t use the GPU with cycles. So it’s CPU rendering only, for now.
The movie format is 4K cinemascope. I was planning to render some scenes in 2K and blow them up, since CG renders tend to be too sharp anyway. But for some scene, like this one, I really want to keep the details. So I have to go full 4K. And since it’s a night scene, I need quite some samples. This ads up to enormous render times - about 5 hours for one frame! (With Cycles.)
I have to admit, in my naivety I was hoping for RadeonProRender to be ready in reasonable time. But I loosely followed the development and tried it now and then. It’s nowhere near being usable for such a project. At least not for me. It would need so much fiddling around to make it work….and I already have one moody render diva to handle - EEVEE.

I hate Eevee for how it’s treating me - but I desperately need it (for one scene)! And I’m super thankful it’s there.
But more about this in a later post.

I was trying to get this scene to work in eevee, as well. But it somehow always looked fake. I think the biggest problem are the contact & soft shadows, which are obviously fake. (It might get better in 2.81. But so far I had no time to check that.)


An early light test with eevee (and baked indirect light).

I like to use my wife as a judge. I show her two renders (eevee & cycles) and ask her what she thinks. In this case she instantly pointed at the eevee pic: ‘this one looks fake’.
So I got to stick with cycles for this one. Don’t dare to argue with my wife.

I might have to live with only rendering a few background stills and ‘animate’ them with mosquitos, smoke and so on. I could get away with it as this building is only used as a background for some green screen live action scenes.


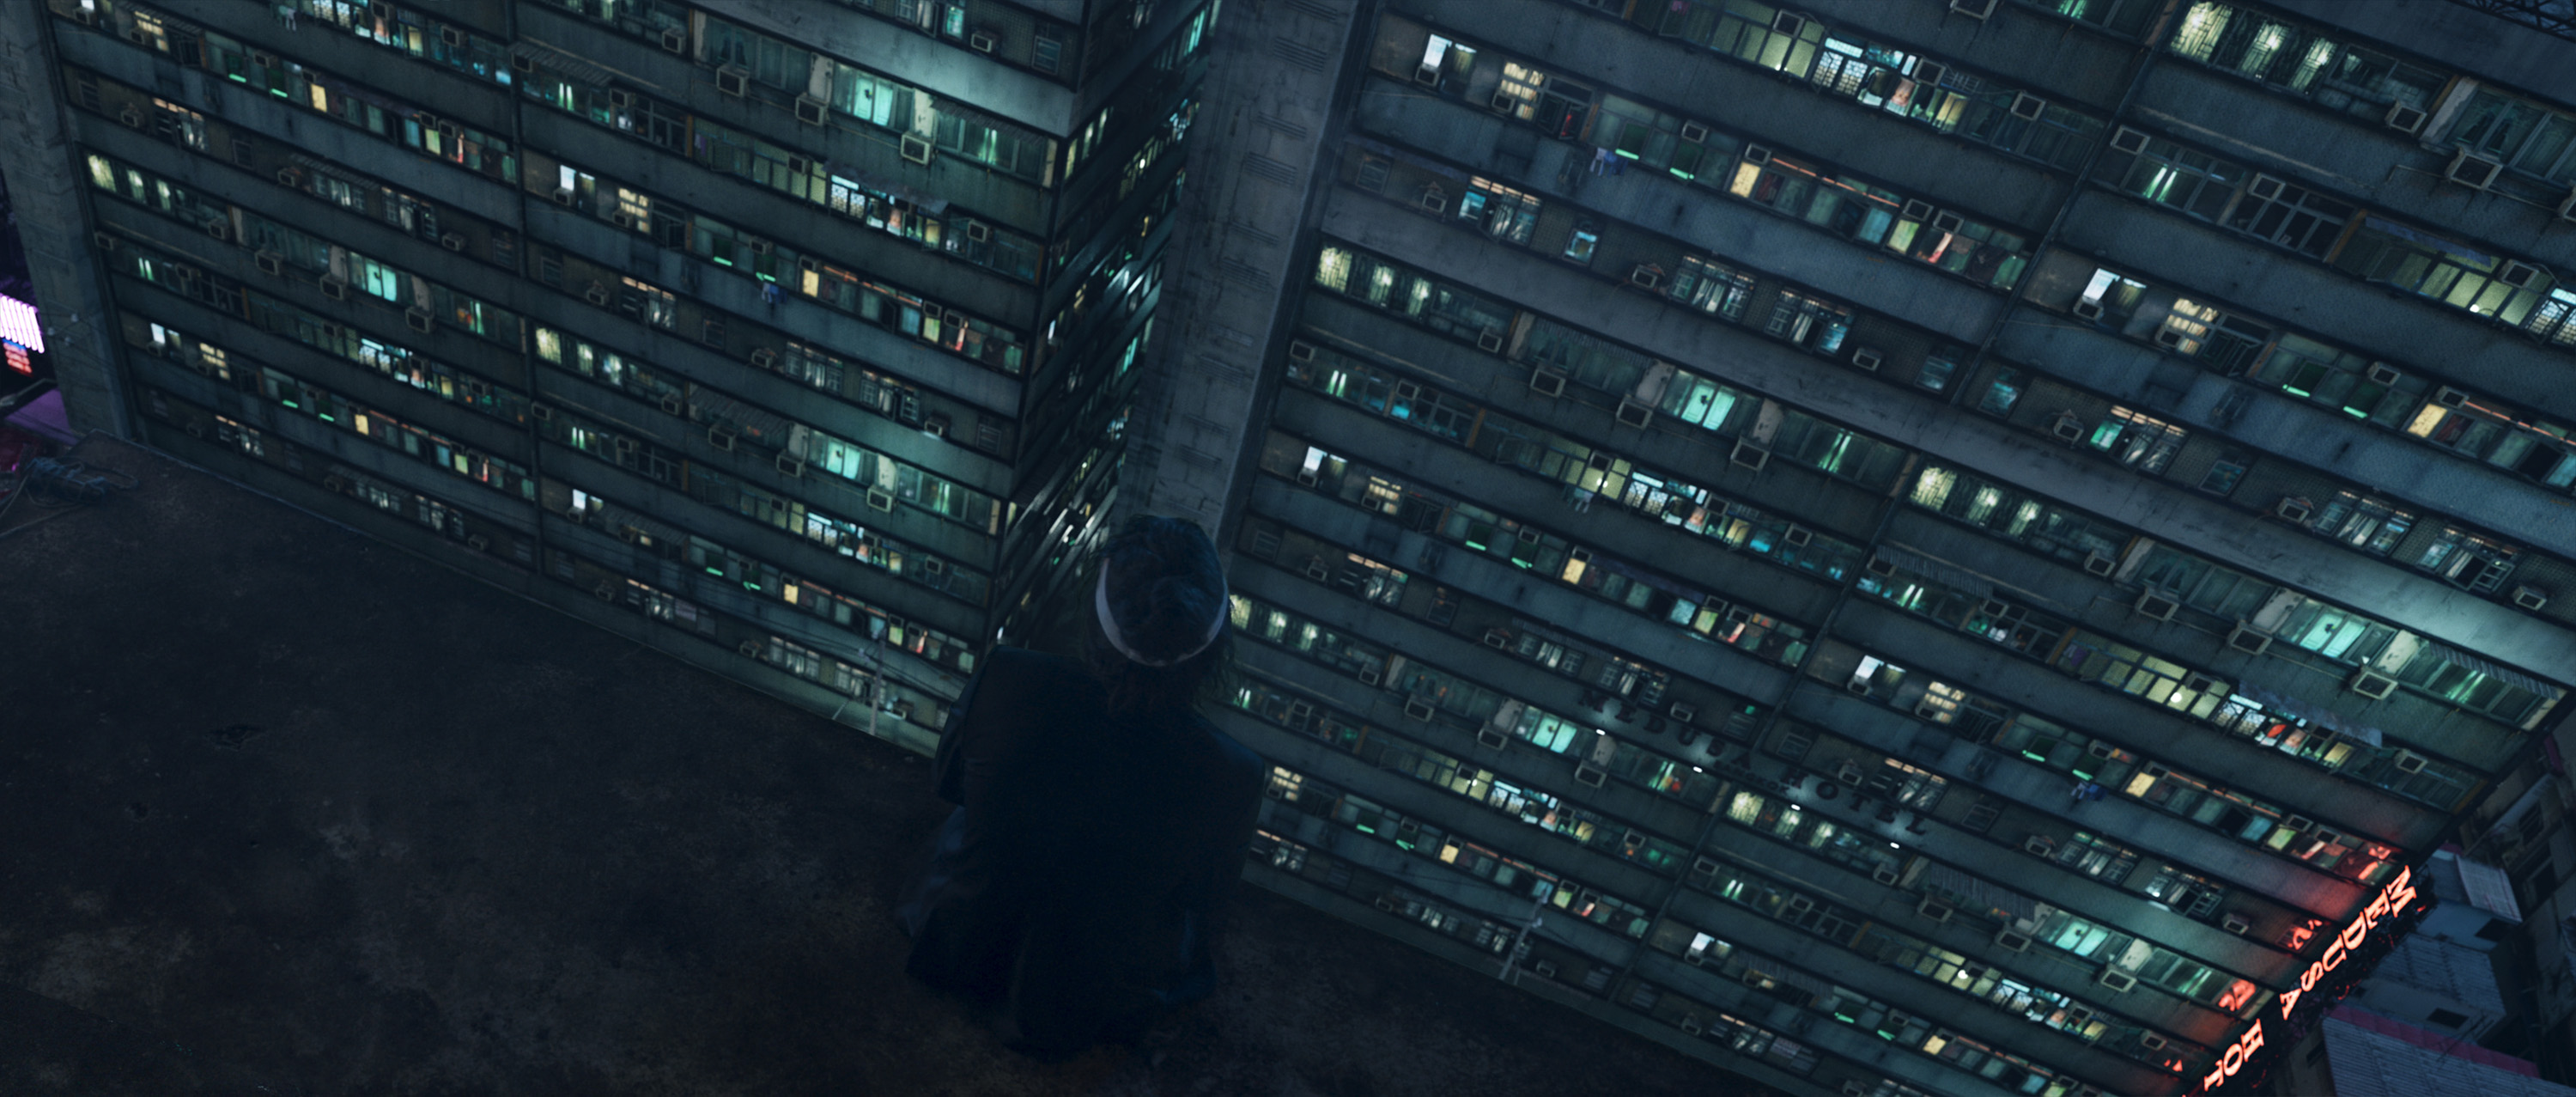
A first rough test composite.

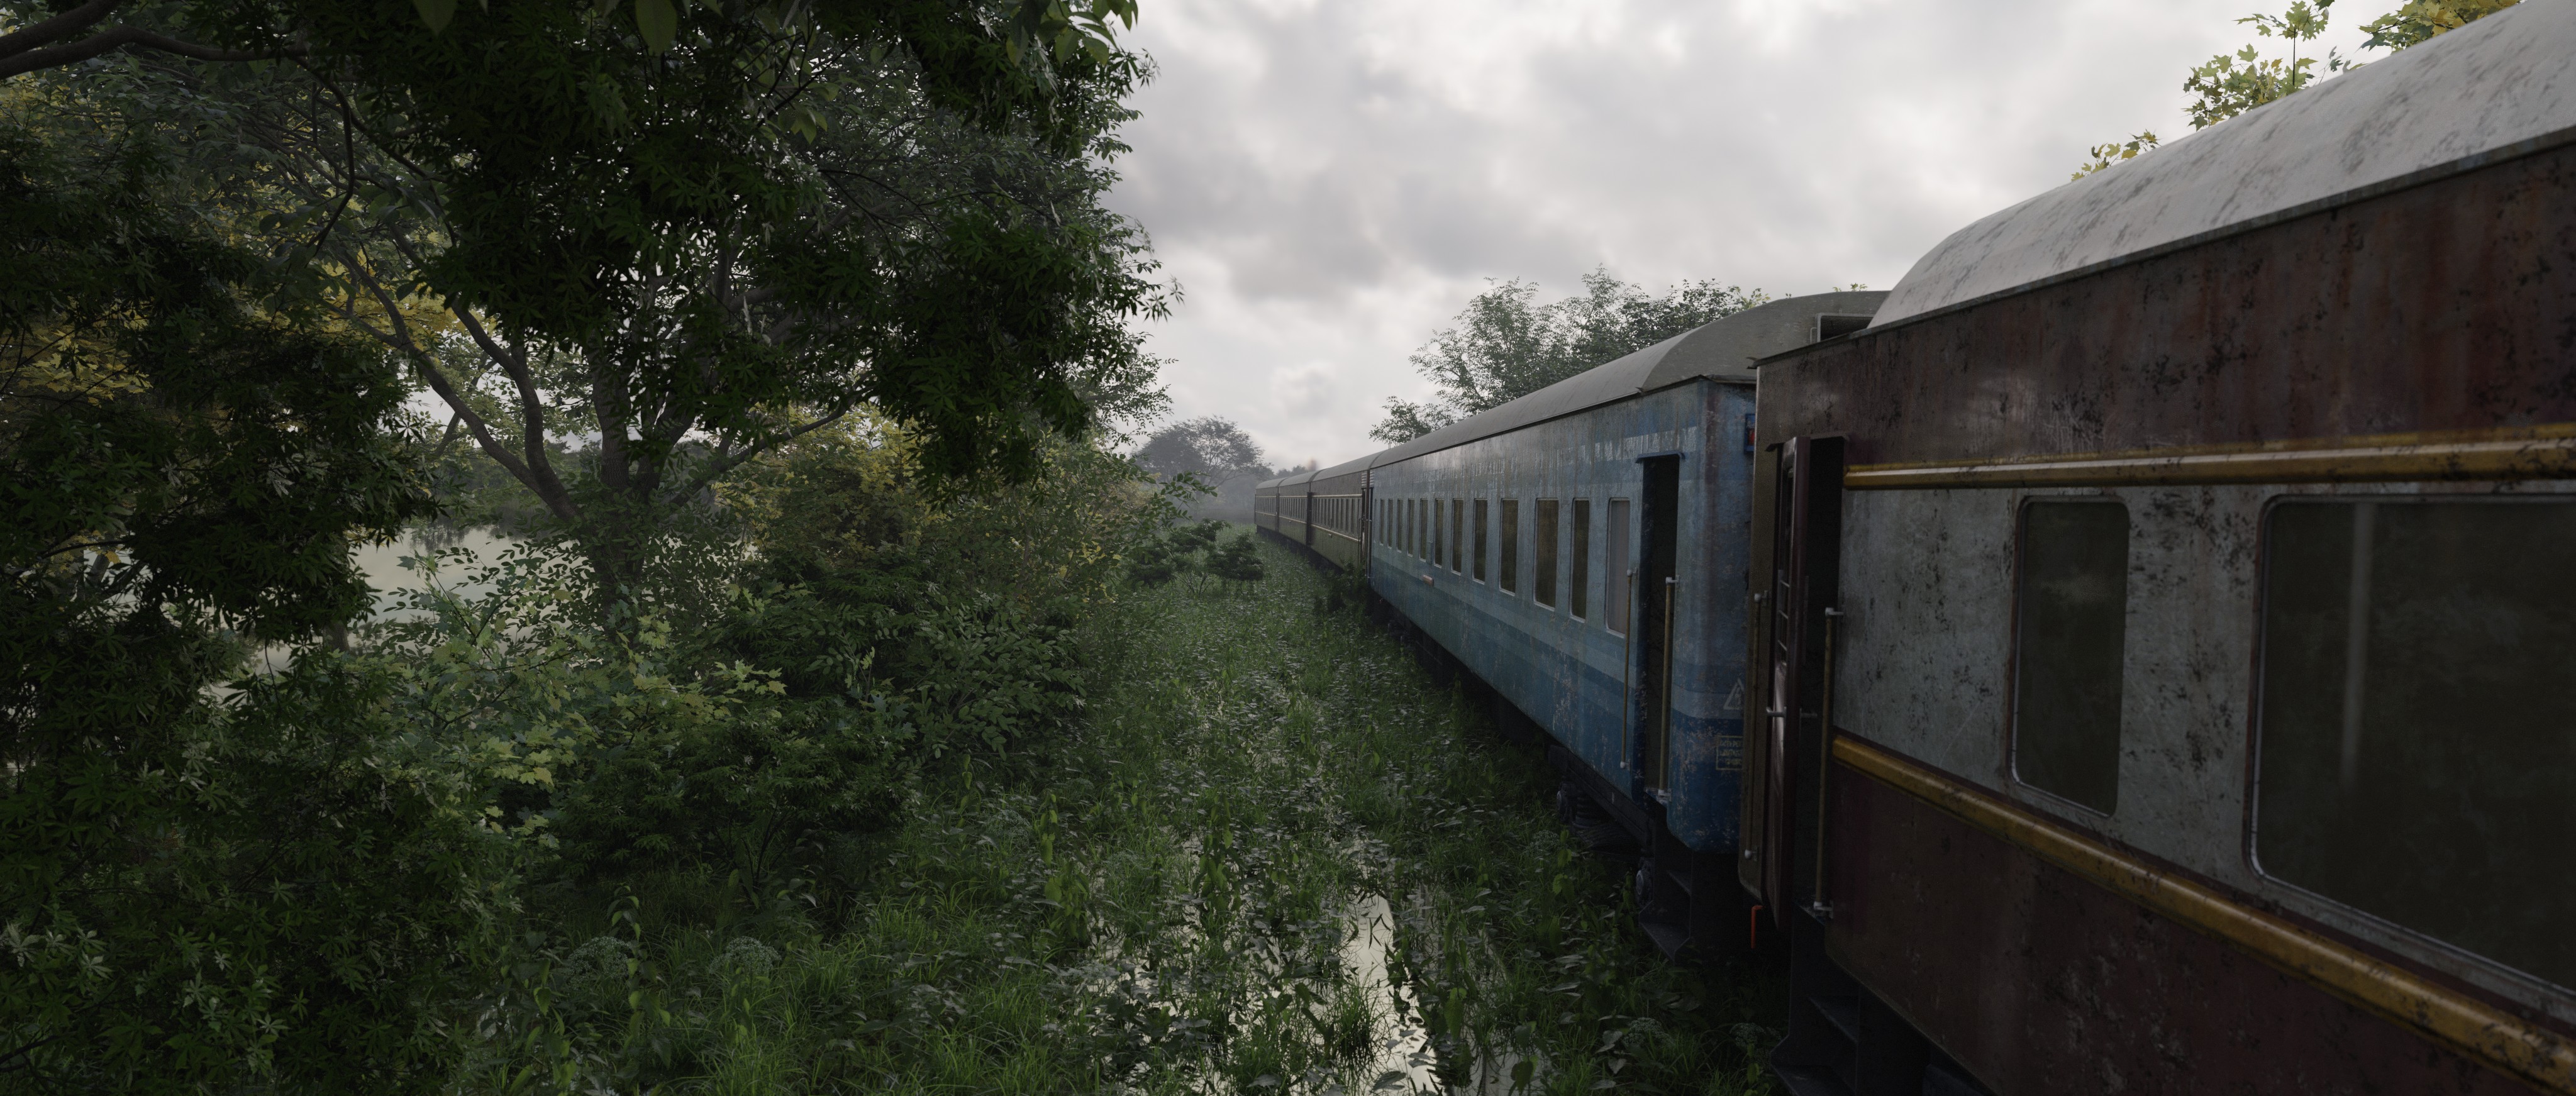
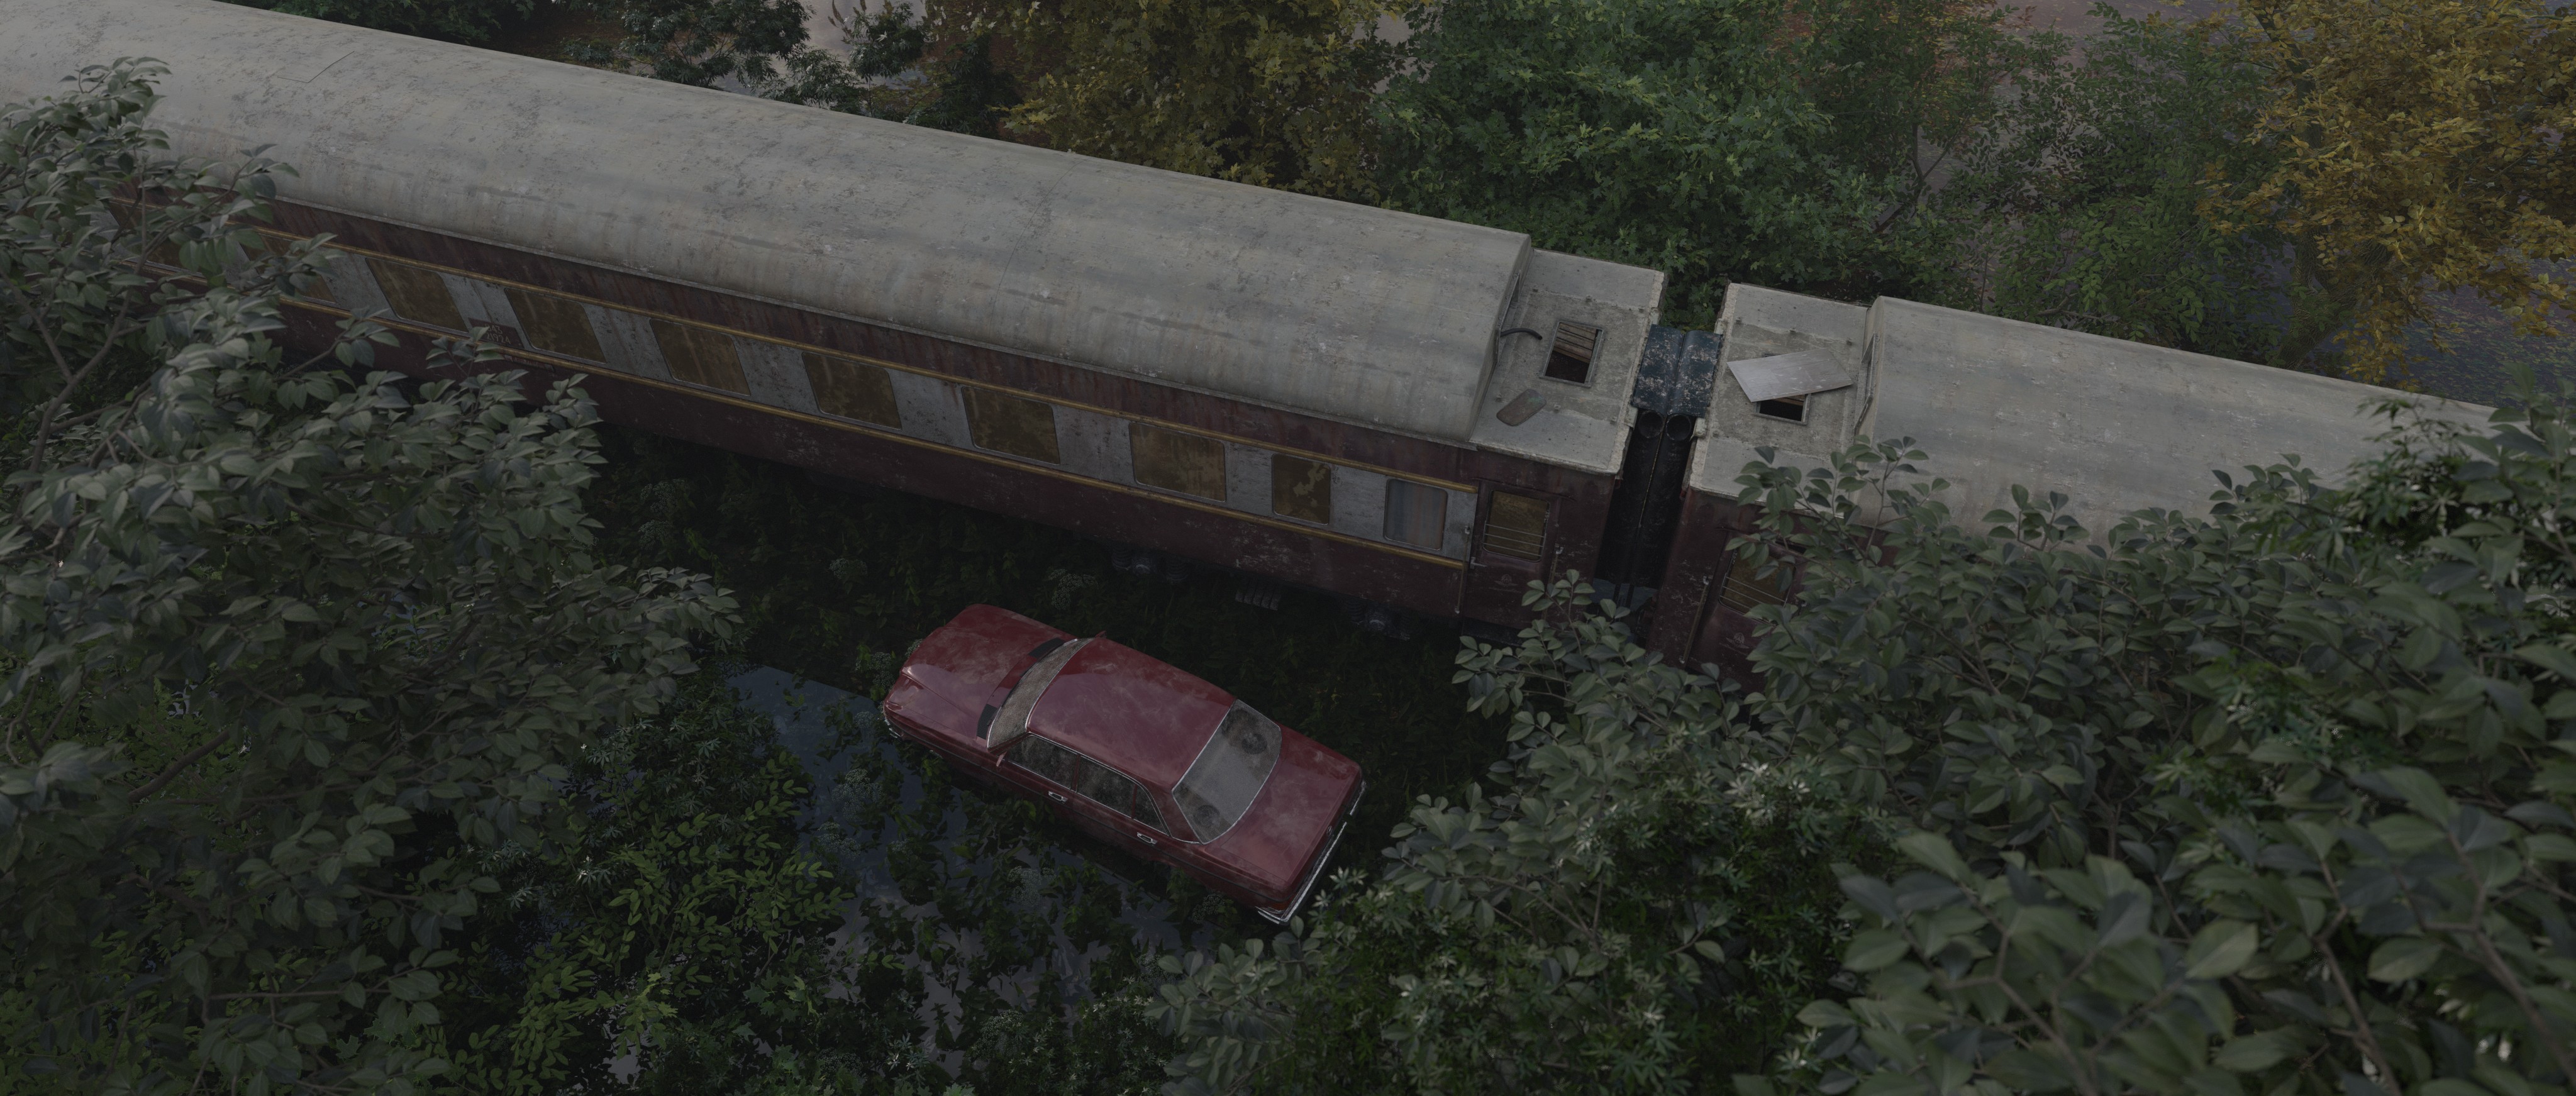
In the next part I’ll write about an animated scene which I’ll render entirely with eevee…and all the challenges this created.

50 Likes

It looks like you’re grasping CG work fast…
3 months and you’ve got a solid grasp on Blender, large scale architectural modeling, texturing, lighting, and animation.
The shot looks good so keep it up!
Welcome aboard.

Tim

4 Likes

Thanks Tim.
I will have to keep it up for quite a while…still loads of work to do! :wink:

cheers

2 Likes

wow ,this is super impressive!

2 Likes

Thanks Pengyu, that’s very kind.

1 Like

Great work so far… and welcome to Blender!

There have been changes to Eevee for 2.81, including updates which help with contact shadows and performance of soft shadows. So you might want to download the alpha and check them out.

(As an experimental build, it’s best to open a copy of your scene and not the original - just in case.)

Looking forward to your updates.

2 Likes

Look&feel of the asset are spot on. Nothing i would change, welcome :slight_smile:

1 Like

Thanks Cire.
Yep, I read about 2.81. I’m really looking forward to eevee getting improved. I think there is still a lot of headroom. Even though it’s not a real ray-tracer and just uses some tricks. Unfortunately at the moment there are also some issues with depth of field and light leaks, which I’m not sure if they get improved in 2.81. (These are two issues which are handled much better by element3d in after effects. Which is also a ‘real time engine’, I think. So I’m sure they’ll sort that out for eevee as well, at some point.)
When I’ll get some time I’ll surely have a look at 2.81. Especially when it reaches beta. (2.8 was already super stable for me in beta stage.)
For now I got to finish a scene in 2.8 with eevee first, though. I was wrangling with it for a while and am happy it looks pretty decent now. So I don’t want to start it over all again… :wink:

1 Like

Thanks for your kind words Linolafett. Great to hear.

1 Like

This is looking really great so far, amazing progress for only several months! I’m definitely curious to hear about your experiences with eevee, I tried a while back to animate a large city scene in eevee and really struggled to get an acceptable result. I have no doubt that it will improve, but for now I’m sticking with cycles. Also, are you able to elaborate on the overall project as a whole?

1 Like

hi ben. I have to admit, I’m not a big fan of eevee, myself. it surely has it’s advantages and some guys create surprisingly good results in archviz. but for photorealistic, organic visuals there’s no way around cycles. unfortunately I have a 45" animation which would take ages to render in cycles. it’s a relatively small location, so it’s much easier to control than a whole city. and I can live with the results. (more on that soon.)

my project is an indie art-house movie, which we shot in Bangkok. Luckily I could convince two great thai actors to star in it. And, since I have many contacts from my commercial work, I had a wonderful crew working on it, as well.
If you like to get some more infos about the film - here’s a teaser trailer on my page:

The trailer I made with element3D in after effects, by the way. it was my very first experience with 3d.

I might write more about the project here…let’s see. I don’t want to bore anyone… :wink:

Thanks for the response, hardly boring at all, I assure you. It’s always fascinating to hear about blender being implemented into projects of this scope. Sounds like you’ll have your hands pretty full, handling all of the post work yourself, but I imagine that it will be an incredibly rewarding experience. Best of luck, looking forward to updates!

And here we go with part 2 - ‘A little Tale about Eevee’

I have to admit, I’m not a huge fan of eevee. There are still too many issues, which make it a real struggle to do some serious work with it. BUT in some cases it seems the only option (render times). And in such cases I’m grateful it’s here.

I want to create a 45" seconds travelling through a dark tunnel. With cycles I would still render when I’m retired - so… Eevee is the knight in the shining armour! Or…is it? :smirk:

For the location I re-modelled an existing tunnel, in which we were shooting some live action in. This allows me to create additional shots. Anything becomes possible. A dream for a director.


This was a first quick render-test with a WIP model in cycles.

Working with eevee means embracing compromises. Some things are simply not possible - and sometimes you just got to accept what eevee offers you.
Eevee reminds me of a stubborn pony, I was once riding as a child. It would completely ignore my directions and simply walk to wherever it wanted. Not amazing for a little boy’s self-esteem…but, hell…I still felt like a cowboy! Only had to pretend that this is exactly where I wanted to go to, as well…and everything was perfect. :grin:

With eevee it’s a similar story. I learned not to try to force my will on it at all cost, but accept what it offers me.
On the picture above I had this subtle warm light shining through the stone patterns on the top of the right wall. I wrangled eevee like an alligator…but light leaks simply made it impossible to achieve a great result. And yes, I was reading a lot about light leaks and tried all the tricks I could find. (Solid walls. Even double walls. Changed the contact shadows…and some other things I don’t remember any more.)
So I decided to simply remove that light. Actually I removed ALL the light outside, which could cause leaking issues. Problem solved. Not an amazing solution. But a solution nonetheless. And it’s not a deal breaker in this case.

So this is what my animation looks like with eevee: (sorry no video, as it’s still WIP)


I kept the pictures (almost) pure eevee, so the render quality is clear to see. (Just added a bit of film grain.) For the final version I will add some subtle glows, lense flares, maybe even a bit of lense distortion in after effects. Also mosquitos under the lights and maybe some wafts of myst.
Keeping this in mind, I’m pretty ok with the result.

I’m not happy with the animation of the creature, yet. But that’s a different story.
Talking about the ‘creature’ - The look of the creature will change quite a bit. I will add several effects on it in after effects. To make it less ‘in the face’. Heat-haze, special blurs and so on.
As a reference I can show this scene, which I composited with after effects and element3D:


(I exported the animation of the creature as OBJ sequence in blender. Textured, lit and tracked it in element3D.)

Back to eevee. Apart of the light leaks there were some other issues:


The one on the left is a light (and shadow line), which I have no idea, where it’s coming from. There is no logical explanation. But…it creates more details in the picture…so, why not. If the pony wants to head this way…let’s go. I simply accept it and …like it.
The red ellipse on the right marks a more serious problem - DOF. Depth of field is cheated a bit too cheaply in eevee, in my view. In some cases it might work. But here it creates a weird ‘blur wash’ on layers which are closer to camera. I can imagine why this happens, but it would take too long to go into this right here. (I might write about in another post.) Anyway, this is something I can’t live with. So I had to close the f-stop to get a wider focus range. This is something, which I’m not happy about, to be honest. But it’s part of working with eevee.

Another known issue of eevee is the missing node displacement. As work around I used a displacement modifier. That’s surely better than nothing. (Element3d does not offer that.) But I couldn’t figure out, how to match the modifier displacement perfectly to the shader texture. I did not try very hard, though, as I’ll only show the creature from far away. So it’s not essential. (If someone knows how to get the mapping data into the displacement modifier, I would be happy to learn.) The UV is also very roughly done. Again…far away…save time. :smirk:

Another limitation of eevee, which I choose to ignore, is not to animate lights, if indirect light is baked. I’ll still do it…a bit. I’ll keep one light flickering. Yep, it will create some wrong shadows on the walls. But they won’t be obvious. It’s a pity I can’t have a swinging light dangling from the ceiling, though.

A cute little ‘feature’ of the baking of indirect lights is, that we can place a lamp in the frame - bake it. And then remove the lamp. So we still have the light, but no lamp in the frame. Can be useful in some cases.

This was my little eevee tale. I hope I can show some cycles render in the posts to come… :stuck_out_tongue_winking_eye:

2 Likes

Just to avoid any misunderstandings - It was not my idea to criticise Eevee in my last post.
I’m fully aware, that it was not intended to and can never replace Cycles.
It has a different purpose and it’s great it’s here.

But since it is very tempting to use Eevee instead of Cycles for long animations, I wanted to find out, if it was possible to get convincing photorealistic results - also for more ‘trashy, dark and dirty’ scenes.
Which actually does mean… to replace Cycles with Eevee…kind of. :wink:

And I think in some cases, it really works. (In other cases I tried, it didn’t work at all.)

Nevertheless I think Eevee still has a lot of potential for improvement. Which seems only natural, as it’s quite a new engine. I’m really looking forward to see what the blender devs achieve to squeeze out of it in the future. And I’m also curious to see, what other artists manage to do with it.

1 Like

Here’s another scene I’m working on. A row of Bangkok townhouses.
Since the render times are extremely long - I also tried to convert this scene for Eevee.
But here it did not work at all, unfortunately. It looked too fake.
So I got to stick with Cycles for this one.
Again - this is just WIP. (Street is way too empty, roof parts not done yet, lights not right, and so on.)
Since this scene is not essential for the movie, I’m not sure, if I’ll ever finish it.
I did learn a lot by making it though. It was one of the first buildings I made in blender.


(All textures I shot on location - apart of one which is from texture-haven.)

6 Likes

And here are some early WIP pictures of yet another scene I’m building - a train graveyard.
My first nature scene.
We did shoot in an amazing train graveyard in Bangkok. The train graveyard was completely flooded at the time of the shoot, which made it look even more unusual. (The talents were brought to the trains in small rafts.) Interior shots and exterior shots on the ground all worked out great. But unfortunately there were some technical issues with the drone shots.
So… Blender for the rescue!
I will recreate a big part of the train graveyard in CG. Which gives me the freedom to adapt it and make it work even better with the story.

Since I’m waiting for the release of the final 2.80 version of Graswald (which I dearly love!), I only did some rough, first tests, to see if I’ll be able to achieve an acceptable level of realism. I also tested some trees and plants.
The final versions will have much more variety of plants, ivy on the trains, dry leaves, insects in the air and so on. I also plan to animate the leaves of the tree with a displacement modifier. I think it’ll be ok.
(I tested animations with the sapling tree generator. But to achieve a ‘real’ looking sapling tree, I needed so many level of branches, that animation basically retired my computer.)

So these are just very early WIP tests…


The basic train model I bought (https://www.turbosquid.com/3d-models/4-axle-railcar-lvz-railroad-3d-model/1060508).
I adapted it to match Thai trains and completely redid the roof parts. All the textures I made in Photoshop.
The renders are done with Cycles.

6 Likes

These look really good! Nice to see more natural and brighter scenes coming out so well. The freaky creature stuff is cool, too, though.

Keep up that struggle with those tools! (you’ll both get better :slight_smile: )

2 Likes

Thanks for the kind words, Cire.
The great thing about brighter scenes is that less samples are needed and the render times are lower.

To be honest, when I started to use Blender I would have never thought, I’ll be able to achieve these kind of results. But plug-ins like Graswald make it possible pretty easily. :smirk:
Everything just looks real with it. Really impressing and great fun to work with.

My biggest ‘struggle’ are the render times…the rest is a treat.
It might sound overly dramatic, but creating landscapes and locations almost feels a bit ‘metaphysical’ to me. It’s like creating your own world. :wink:

1 Like

You should have seen the work of someone in the community to have heard those angel voices. Do you remember what page/video was it?
Cheers.
Perfect amazing work , it shows your experience as director.

1 Like

Thanks a lot David.

Not sure what page/video you mean? You mean the tutorials I watched? Or how I got to know Blender?