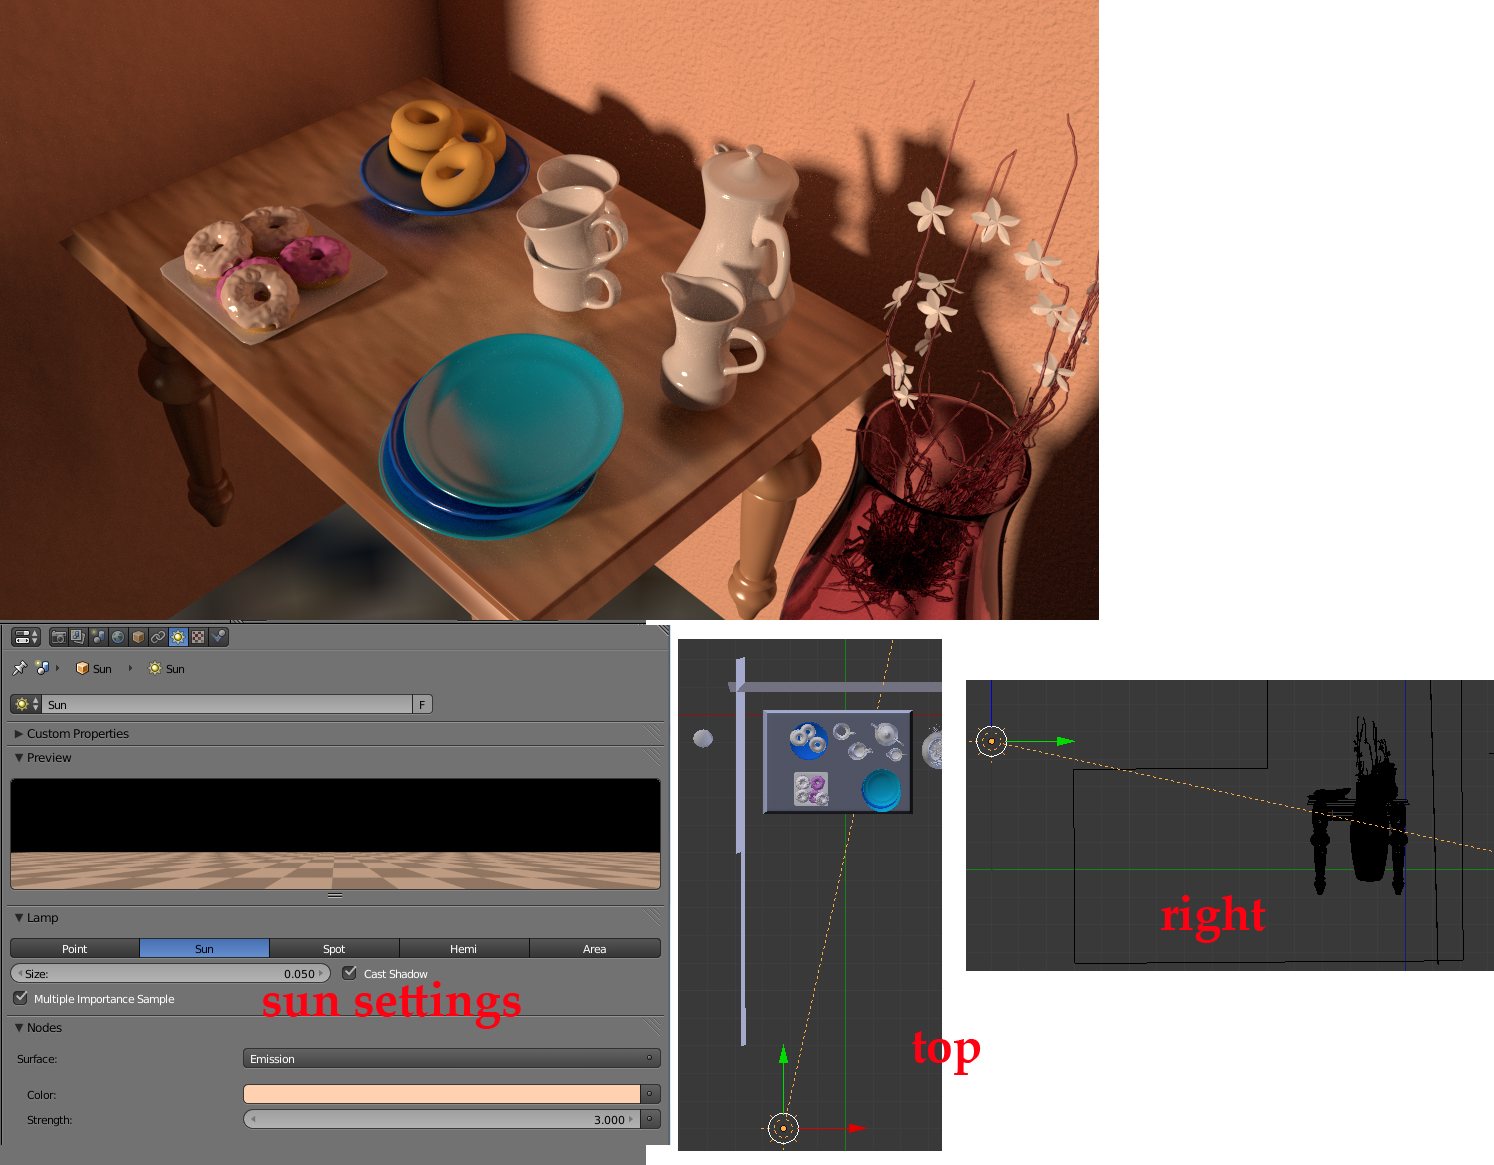
Excellent. That looks much closer to a varnished wood table. Let’s take a detour and look at lighting. The materials are coming together. You will need to look into uv unwrapping for image texture, as you haven’t unwrapped your meshes. But forget about that for a bit and experiment with some of the other lamps available. Hide your key and fill light in the outliner, thats is click the eyeball and camera icon so they are greyed out and will not be used in renders. Add a sun lamp just as you would add a cube to the scene. Go top view and move it and rotate it so it is more or less where it is my screenshots. Go to right view and move/roatate to match that one. Now go to the lamp settings and change the settings to match mine (more or less) Make the size about .05. This setting controls how “hard” or “soft” the shadows will be. If you make this number really low (.01 or lower) you get incredible crisp shadows. set the strength to 3 and make it a light yellow/orange like the morning sun. check the checkbox “multiple importnace samples” Experiemnt with different values especially the size strength andf color of the lamp. See if you can get a nice “morning” look as the donuts do suggests it is early.
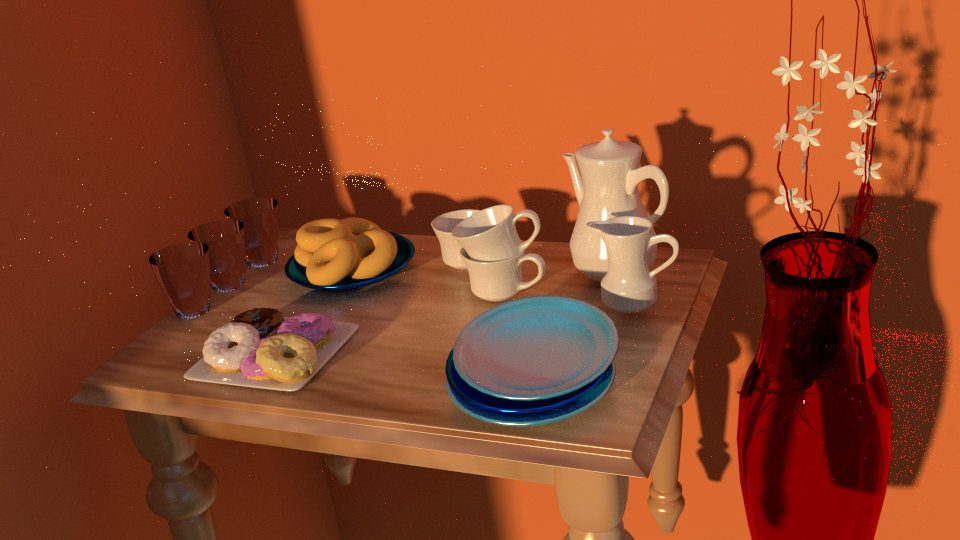
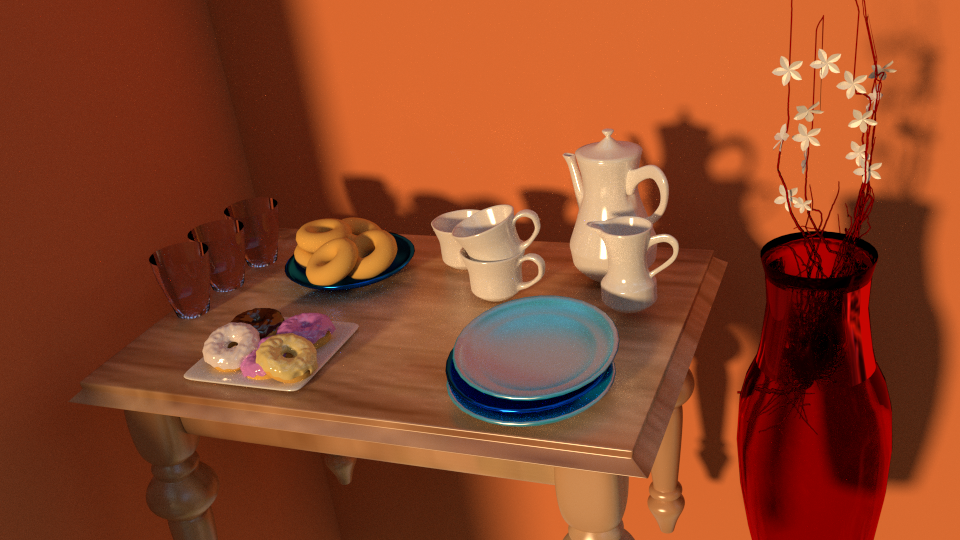
Wow what a difference that made. I compared it to my glass render without the changes.
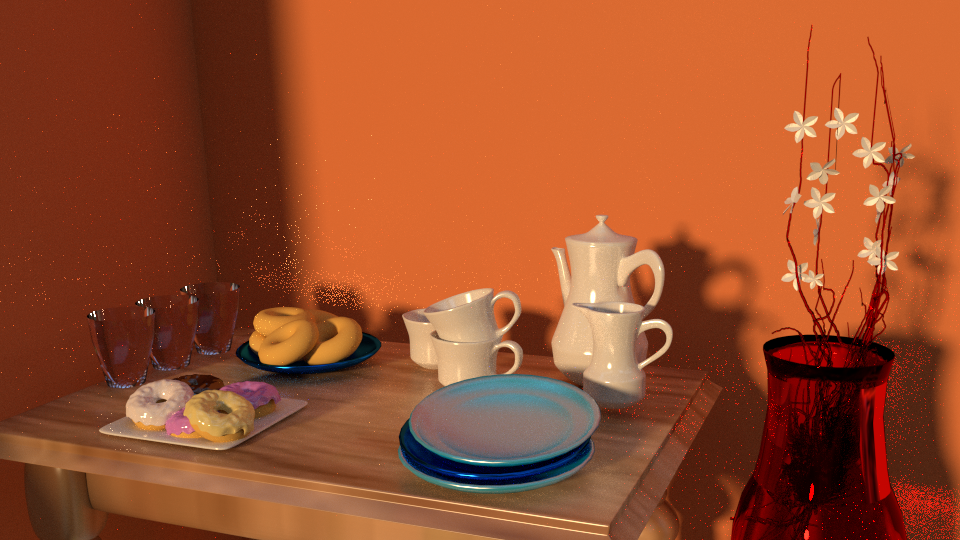
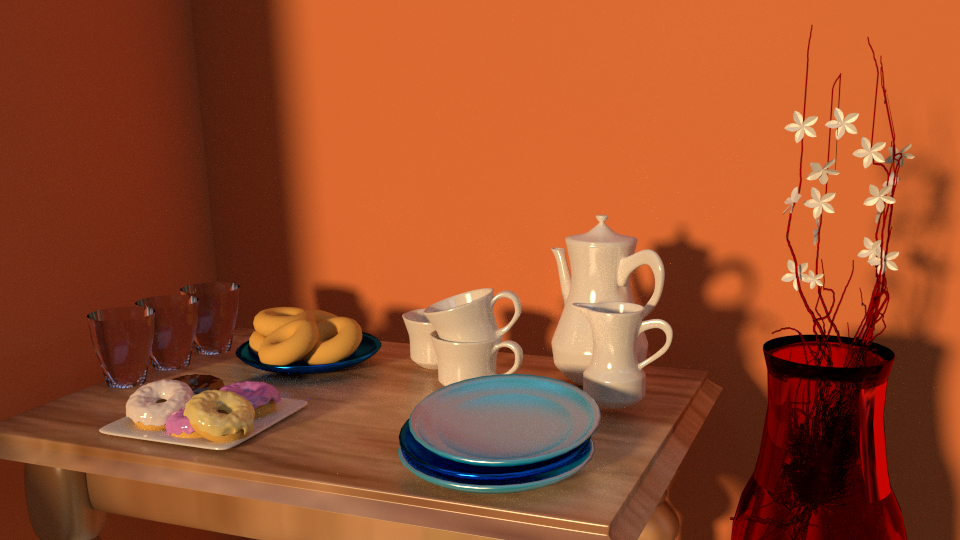
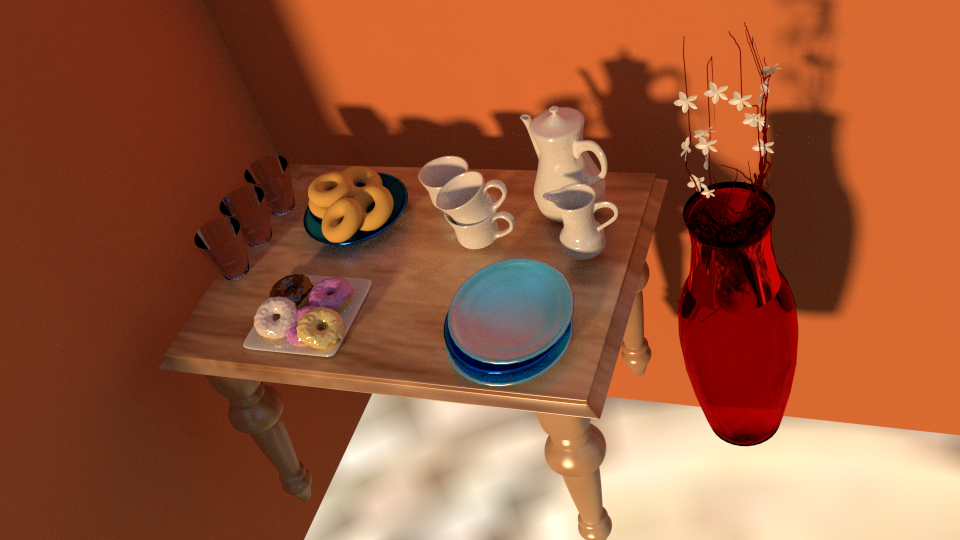
The first image has the “multiple importance samples” wirh your recommended settings. The second and third had it unchecked
Attachments
I have also lowered the settings from .05 to .02 they are crisper.
then I changed back to .05 for the shadows
About uvmapping I did the table but I was having problems with it I will need to do it again… As for the walls I didn’t do it. But I will work on doing them I have some plaster images from cgtextures.
Thanks Photox I really appreciate your help in this.
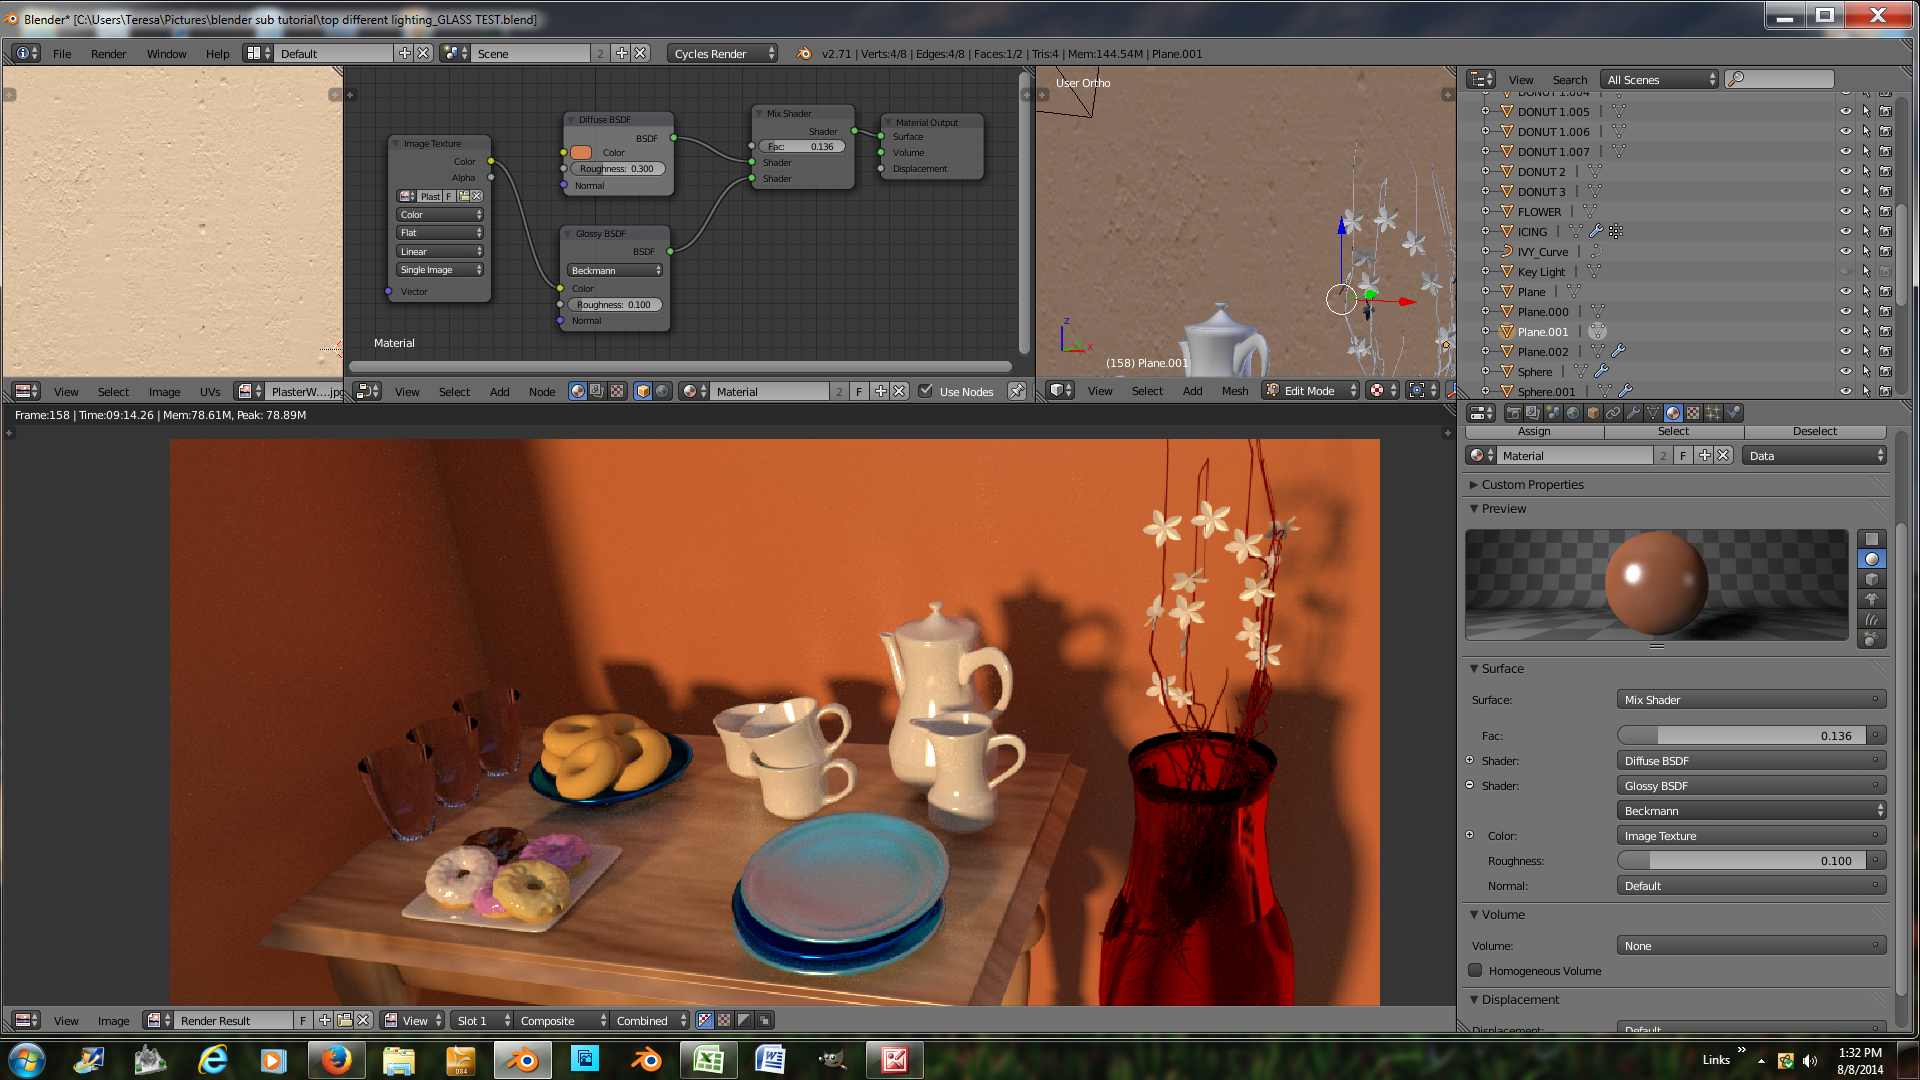
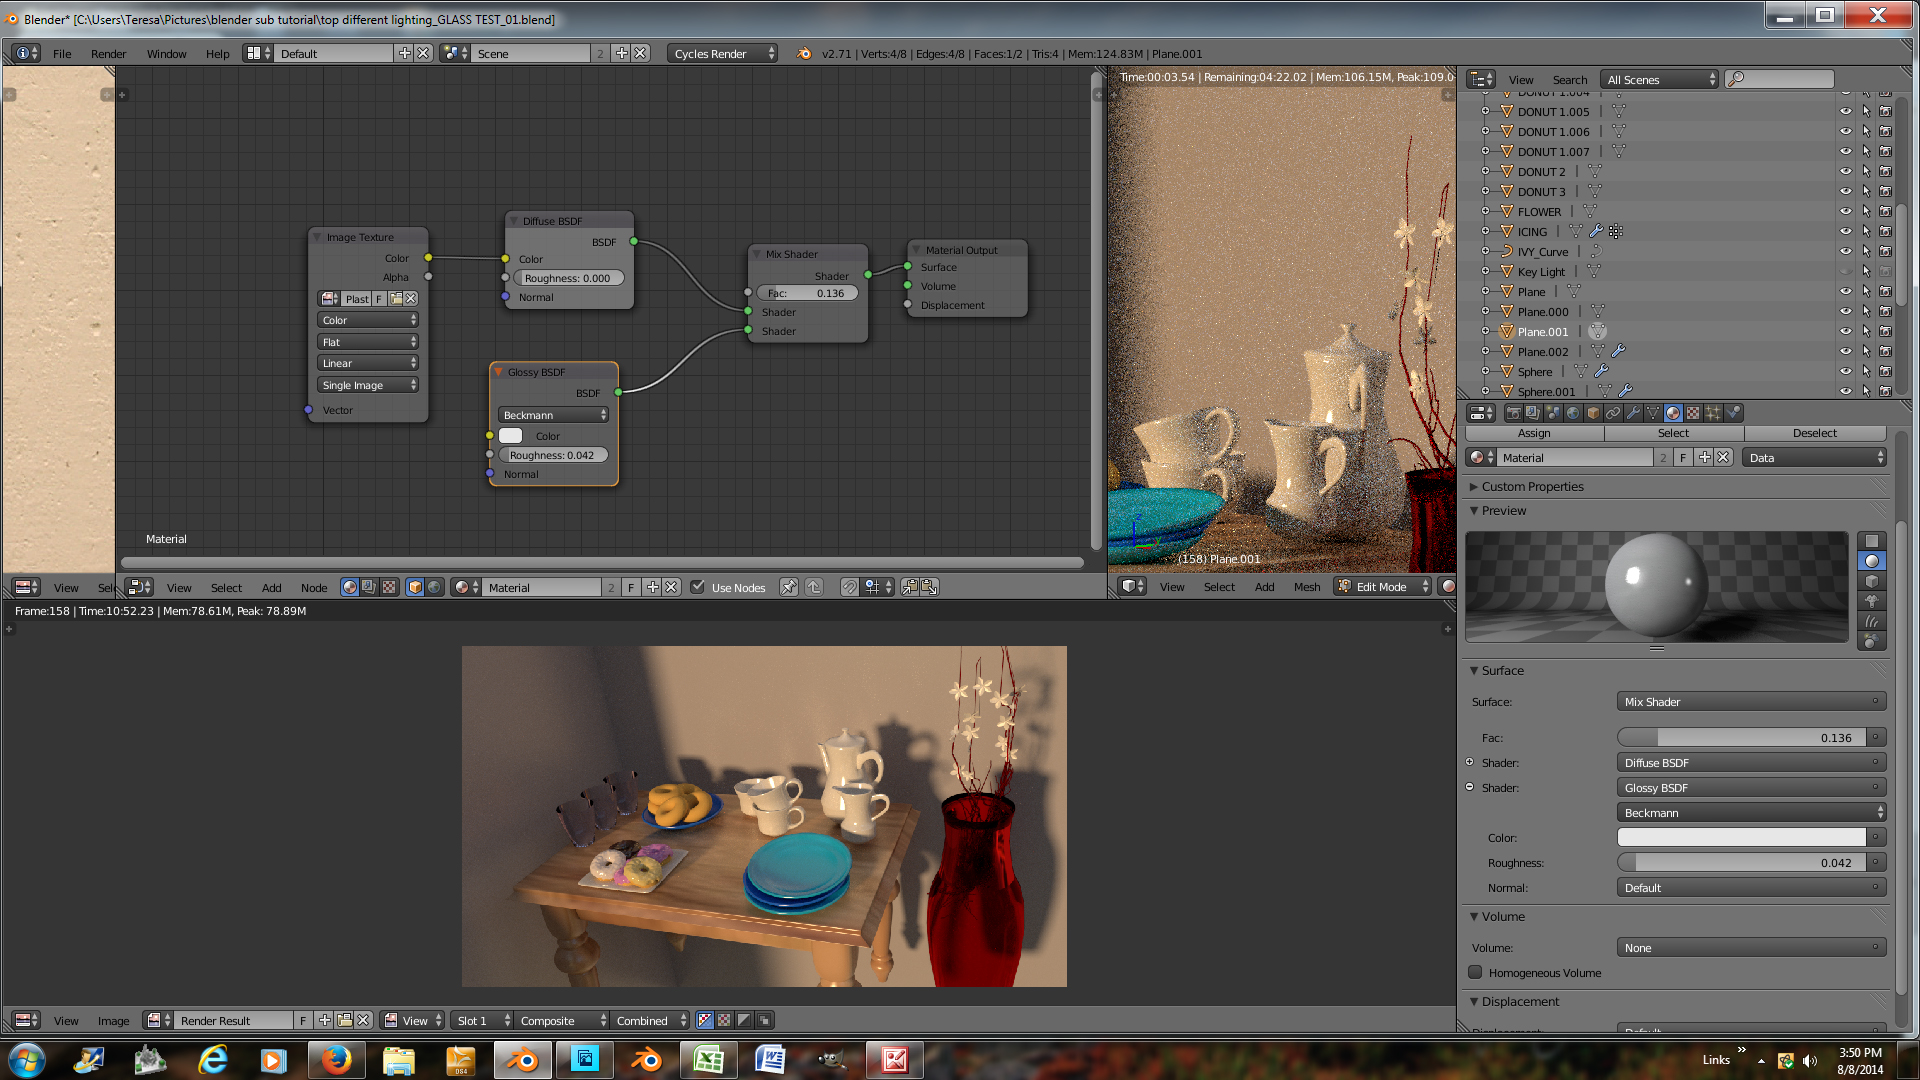
Looks very nice. I think you still have the mix factor on the plates really high, and you may still have a colored glossy. Remember glossy is usually white.
Who knows where to go with it. You could set a couple keyframes on the camera, and prepare an overnight render of a few seconds of video.
What do you want to do with the scene?
I have been trying to do the uvmapping on the walls. I want to maintain that color that I have. The texture that I have is plasterwihte0074 from cg textures.
I also want to do that table it looks stretched so I want to redo that. Also I want to do the uvmap the donuts on that back plate I have a texture that I did and it is not showing the way I want it to.
I also changed the gloss on the plates it wasn’t pure white so I changed that as well.
You could set a couple keyframes on the camera, and prepare an overnight render of a few seconds of video.
That would be great to do but I don’t know how to do it. I haven’t animated anything yet.
You’ve done it again on the wall. You should feed the image texture into the color input of the diffuse, NOT the glossy.
Remember glossy is almost always white.
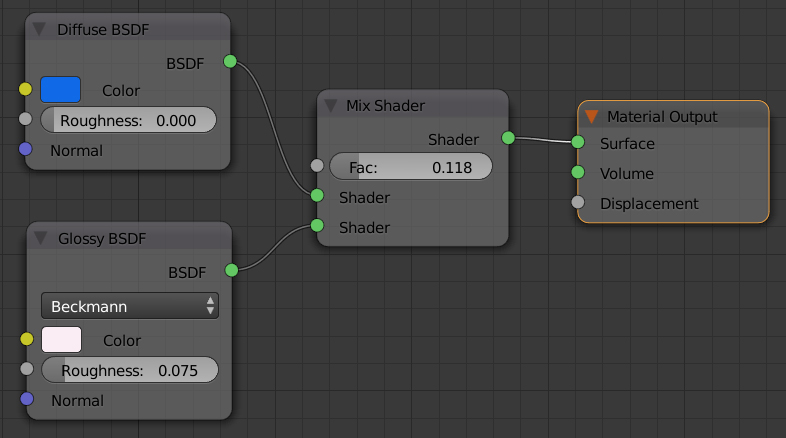
Change the plate nodes to look more like this:
Make those changes and I can give you some stesp to set up a few second of video if you want to try an overnight video render.
I did do that and it changed its color. I want the original color.
How do i maintain that color that I want?
Edit: read post #50
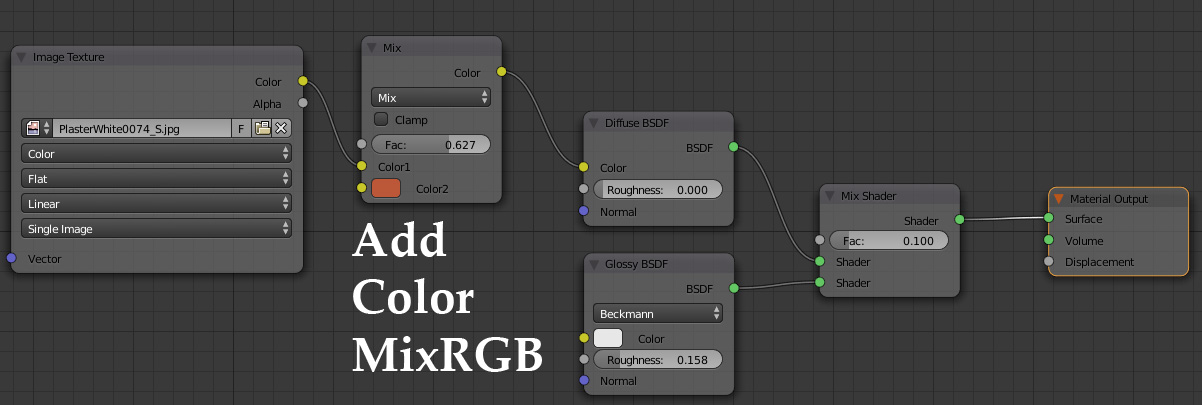
Well it’s funny. If the image texture of the wall were blue, you could shift it’s hue to orange. But since it’s white it’s a bit more tricky. You could create a normal map from it and use that, you could use procedural bump, but for right now we’ll take the easy way out. Just mix a bit of orange into the image texture color using a a mixrgb node. The more orange you make it (the higher the mix factor) the less you will see the image texture.
Looks like this:
Edit (Top image is correct)
Ignore this image
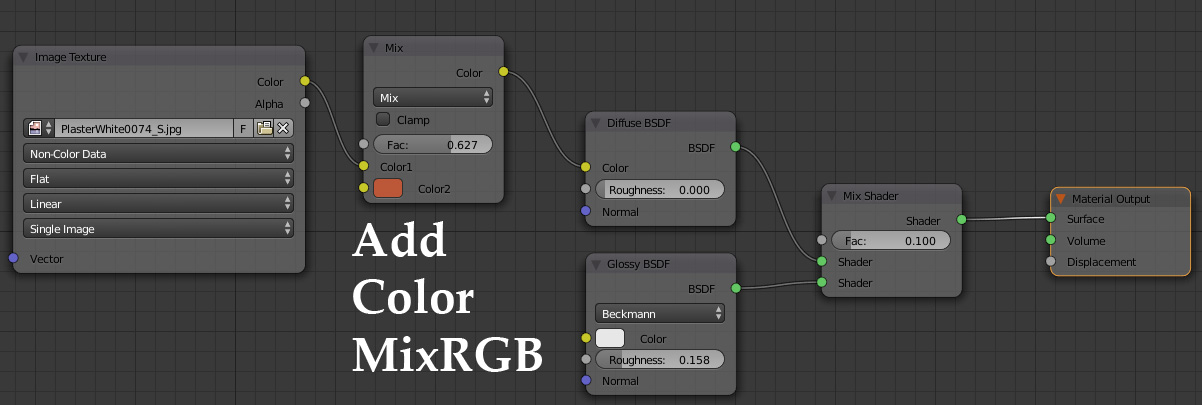
Actually You can convert it in blender, I don’t know what I was thinking. The mixrgb node is useful to know too though. This uses a colorramp (convert->colorramp) from dark orange/black to orange, like this:
That worked for me. Thanks.
Now what about the key frames step by step. That will be interesting
There is an old saying, a rhyme, in animation and it goes like this: Repeat this rhyme and memorize it. The order of the steps is crucial.
Go to the Frame.
Make the Change.
Insert the Keyframe.
When you animate objects in blender (or other programs) you do so using key frames. These are frames where you specify the location and rotation (and possibly scale) of the object. So imagine a cube at the origin, (0,0,0) on frame 1. We keyframe it’s location. Then we go to frame 100. Move the object 5 units on x and insert another location keyframe. Blender then calculates where the object should be during the middle (or interpolated) frames.
We’ll start simple and see if you can get a donut sliding across the table.
First split your main 3-d view window. There are some lines running at a 45 degree angle on the top right of the windows. Hover your mouse unti it turns into a + sign. Drag it down about 3/4 of way to make room for your tiemline. change the newly created window to ‘timeline’ Should look like this:
The timeline has a green line which represents the frame you are currently on. Left click and drag it to “scrub the timeline” or move through your frames. Nothing happens becuase you don’t have any keyframed movement. Move it back to frame 1, or click in the current frame box and type 1.
Hide the frosting on one of the flat donuts.
Select the donut to be animated.
And the mantra:
Go to the frame – (well we should already be on frame 1 which is the frame we want)
Make the change – (well we’re not really changing anything, it’s allready where we want it)
Insert the keyframe – hit ‘i’ and choose “LocRot”. (location/rotation) We’re saying this donut on frame 1, is going to be located and rotated like this.
And the mantra again for the second keyframe.
Go to the frame. – Scrub the timeline, or enter in the frame number you want. We’ll go to frame 100.
Make the change – with the donut still selected, hit g x to move it along the x axis to the edge of the table. hit r z to rotate it a little on z.
Insert the keyframe. – Hit ‘i’ and choose ‘LocRot’
Congratulations you’re an animator! Scrube the timeline (drag the green line between frames 1 and 100) the donut should be moving acorss the table.
Let me know if you can get this far, and if so I can get you started on a short video render.
It is so cool It worked for me. While going across the table it was rotting. Super awesome. Now for the short film
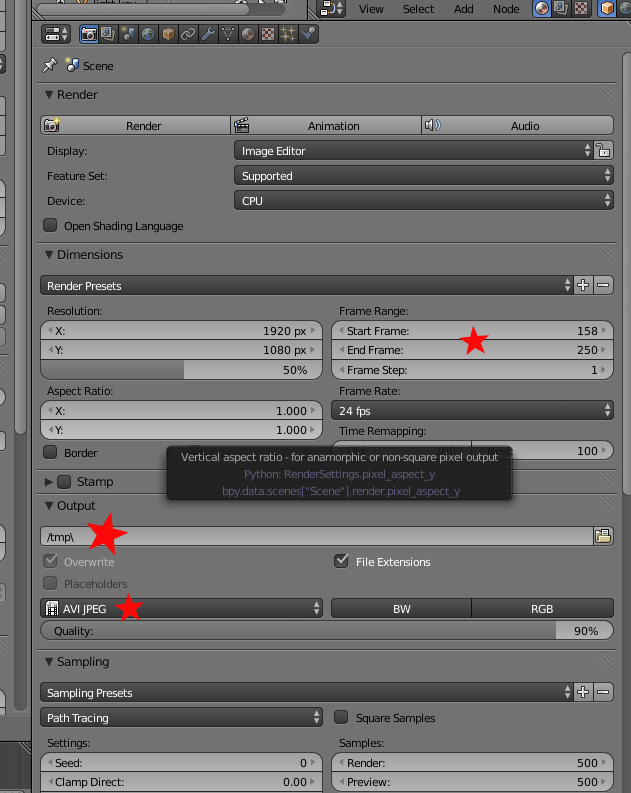
The time line on mine started to 158 to 250 so i started at 158 and went to 250.
Ok, it was supposed to start on frame 1 and end at 100, but at least it’s animating. On the timeline set your start frame to 158 and end frame to 250. that gives you about 100 frames. By default there are 25 frames per second so you should have about 4 seconds of video.
Setting it up for video is pretty simple. You set the output type to a video format: I have AVI JPEG chosen. Make sure your start and end frames are correct, and notice where the video file will be written to. In my case it’s C: mp
You should do a quick opengl test which should complete in a minute or two.
At the very top of blender on the main menu, click ‘Render’ - > ‘OpenGl render animation’ After it’s done, look in that output folder to see if the .avi video is there. Blender used to have a built in video player to watch your stuff, but I haven’t seen it in the latest couple releases. I use a external (downloaded) video player called VLC media player.
If the open GL render looks good, then under the render tab, just to the right of the render button , there is a button called ‘animation’ click it and the frames will start rendering one by one.
You need to make sure your samples/size are low enough so that 100 frames will render in less than 8 hours or so. Basically redner 1 frame and find out how much time it takes, and multiply that by 100.
I have the same setting for avi jpeg the first time the frames rendered it was 9.40 so I went to the samples and changed it to preview and render to 50 it does have some noise but it is now taking 1.40 to render frame by frame. It is on frame 162 but the donut is not moving is that normal.
Will that move after the 100 frames have rendered?
never mind the donut is moving.
I clicked on the mp\ on the folder I see all the numbered frames but i don’t see a avi video.
It should, I’ll explain tomorrow why the donut starts out slow and speeds up in the middle. I believe it will create the avi at the end after all frames render. Did you try the OpenGL render? Talk tomorrow. Good luck.
Yes I did the OpenGL I will do it tomorrow and finish the rendering. Until tomorrow then. Thanks
Did the video render?
It’s still rendering. Will let you know when it is finished. Should have moved the plates. By the way you were going to explain why the donut starts slow Now thinking about what I am going to work on next
Ok, how many frames left?
An artist always needs a new project!
Any suggestions on what to model next. It is on frame 184.