Edit: Updating with the final thumbnail from sketchfab
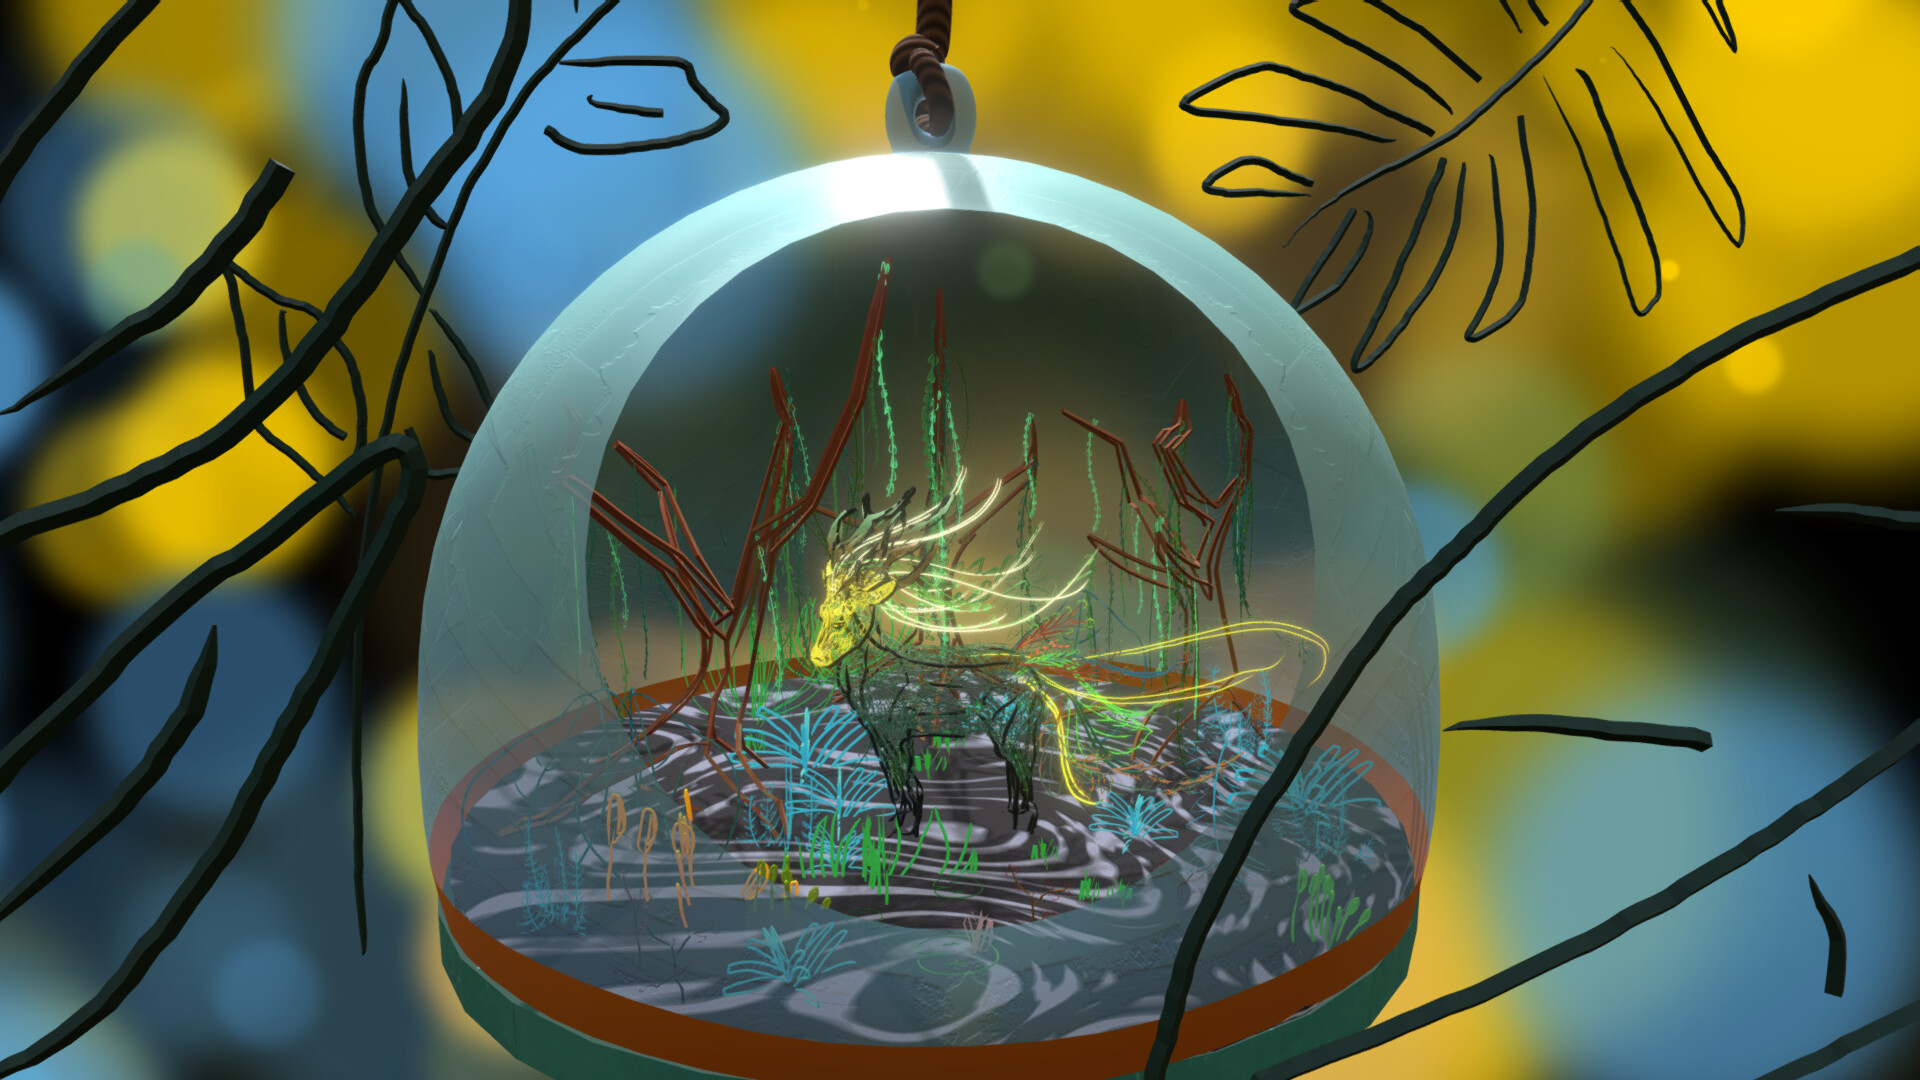
Previous grease pencil render:
Hello,
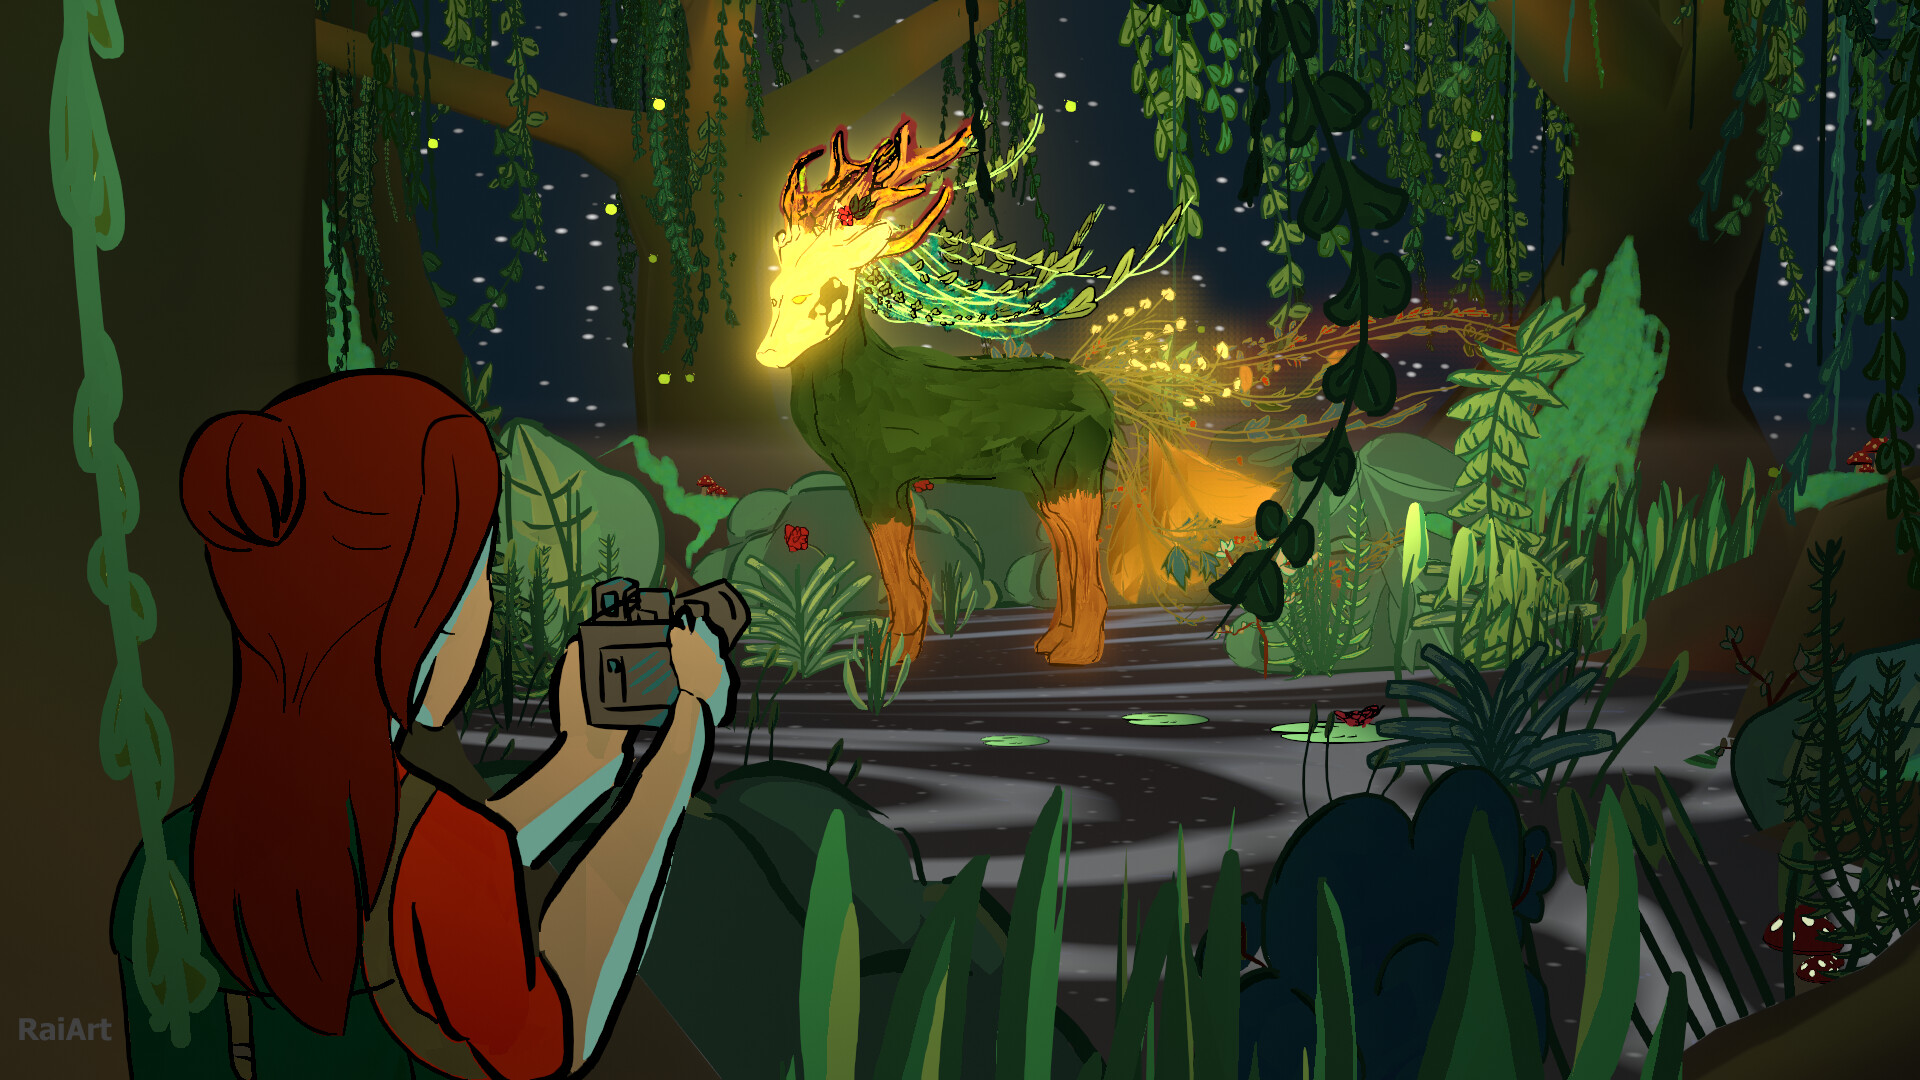
I’d thought to show how I went about making this rendered scene here with the piece by Lorenzo Aiello I’ve chosen to remix / recreate here in blender. My initial plans were to make a grease pencil / 3D mix and add a person taking the picture of the magnificent forest creature in the foreground. Since I am relatively new to grease pencil I wanted to try my hand at using it as a tool to create bigger 2d pieces within 3d space. Given my inexperience I did go through trial and error along the way.
Currently, I’ve hit a bit of a snag since my initial plans now that I’ve learned you can’t export that out to Sketchfab in the way that it appears within blender which is a little frustrating since I didn’t realize this till really late into my progress but my fault for not initially doing my research.
As a note, I’ve tried known methods to convert the lines into meshes but the results have been less than stellar to be frank and that may be in part to the way I drew everything with too many overlapping lines, points, and vertices. I’m aware of the convert to mesh option in blender but again the results have not been great, which also again my fault for not being conscious of the steps I would have to take to convert this.
However, even if I don’t end up submitting to the contest by the end because I haven’t found a way to export it, I still thought to share the progress I’ve made so far. Eventually I might upload a semi turnaround video on artstation if that’s allowed and not violating any rules or licenses, and of course giving the proper credits.
So I started by creating a base mesh of the deer using deer references and mballs before remeshing and then fixing it up in sculpt mode. The initial deer on the right and then the end result on the left.
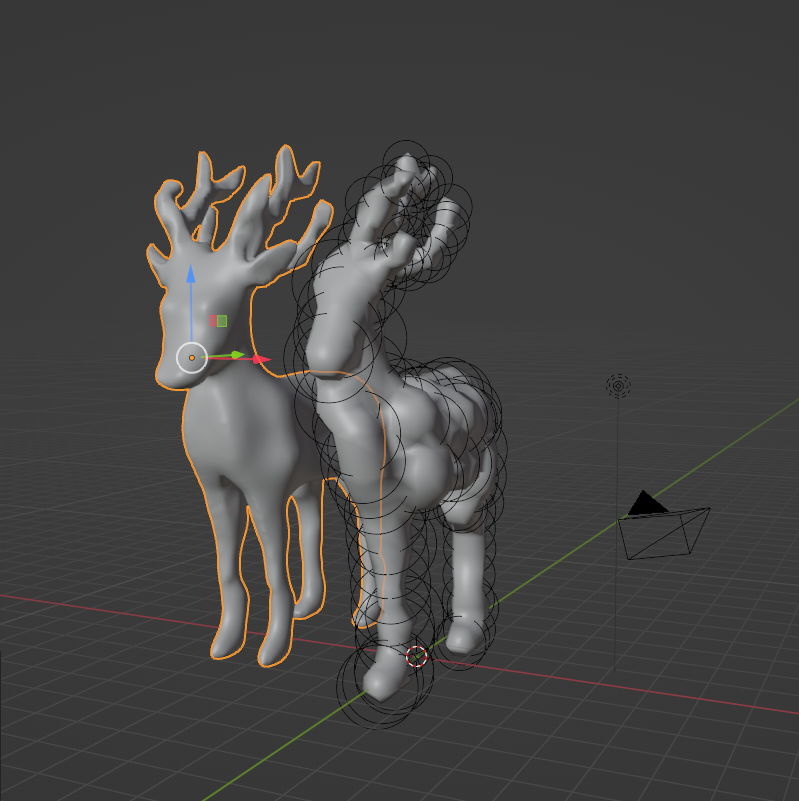
Once I finished sculpting I then added a horse rigify rig to be able to pose the deer’s head a little better to my liking.

All in all, the actual reference sculpt for the deer was the easiest step
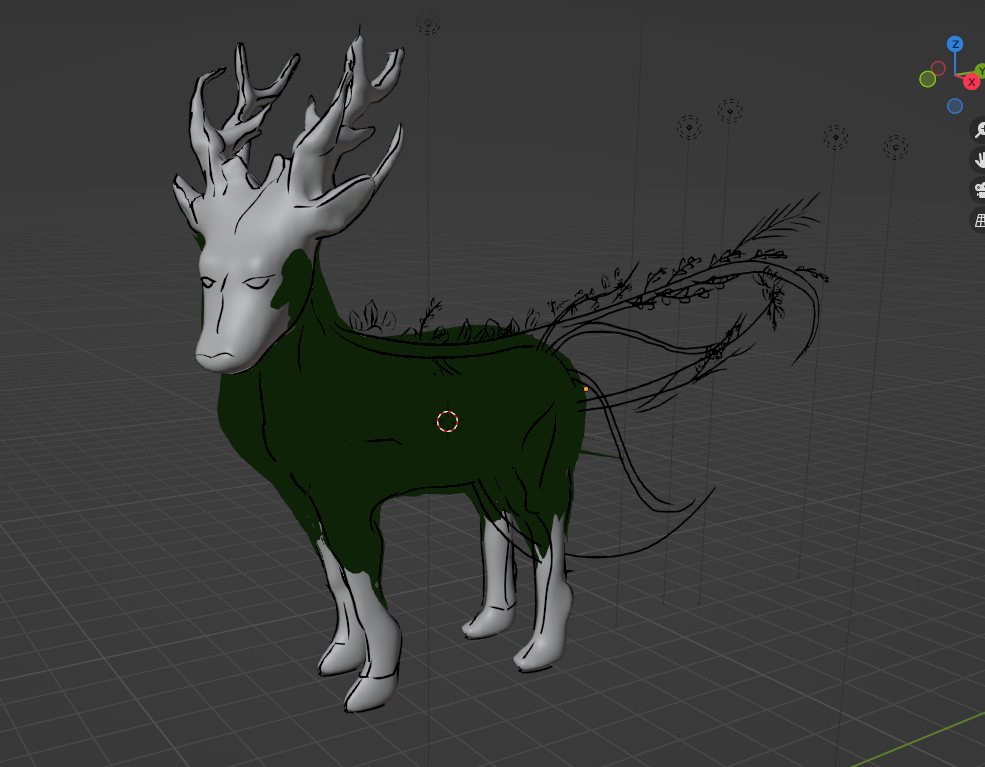
Next I started the rough sketch of him in grease pencil and mapped lines around the surface to get a 3d effect. Occasionally the lines would end up all over the place or in weird spaces but I just made sure to clean it up from time to time and catch an loose geometry
From there I started to build out what would be his “fur”
Learning that I could use gradients in my fills, I made a sort of leaf effect that I came to really like.
Though this is also where I started to encounter issues clipping through the holdout material, even with the solidify on negate having to work with too much offset on the surface.

Tried displacement modifier instead by simply shrinking the mesh by -.1, which not ideal but it worked well enough that I went with that method instead.
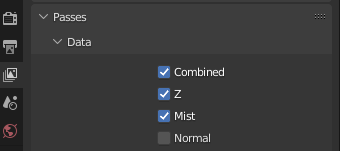
I also had the initial problem of the lineart being seen even through the mesh. I actually found in a blender forum (either blender stack exchange or here on blender artists I really can’t recall) but I needed to have Z checked in the render passes which solved that issue nicely.
Once I got done with the coat of leaves, I moved onto the legs. Here I wanted to give them a wood like texture. I also utilized the mask modifier to help the fills not get pulled into different directions or be influenced by the other legs.

Once done with the legs, I kind of went crazy on the little vine details for the antlers and the tails.
I did have a lot of issues for the antlers’ fill colors as they often stuck to the different parts of the mesh and were causing breakage and just genuinely didn’t look very good. But I worked around it using one of the textured leaf brushes you can download from blender directly using the grease pencil addon. So that really helped a lot so that it didn’t look like I painted it drunk plus it gave it a nice texture so I think it worked out ok.

I really had a lot of fun putting in the leaf and flower details, def went overboard but idk I liked the result of it.
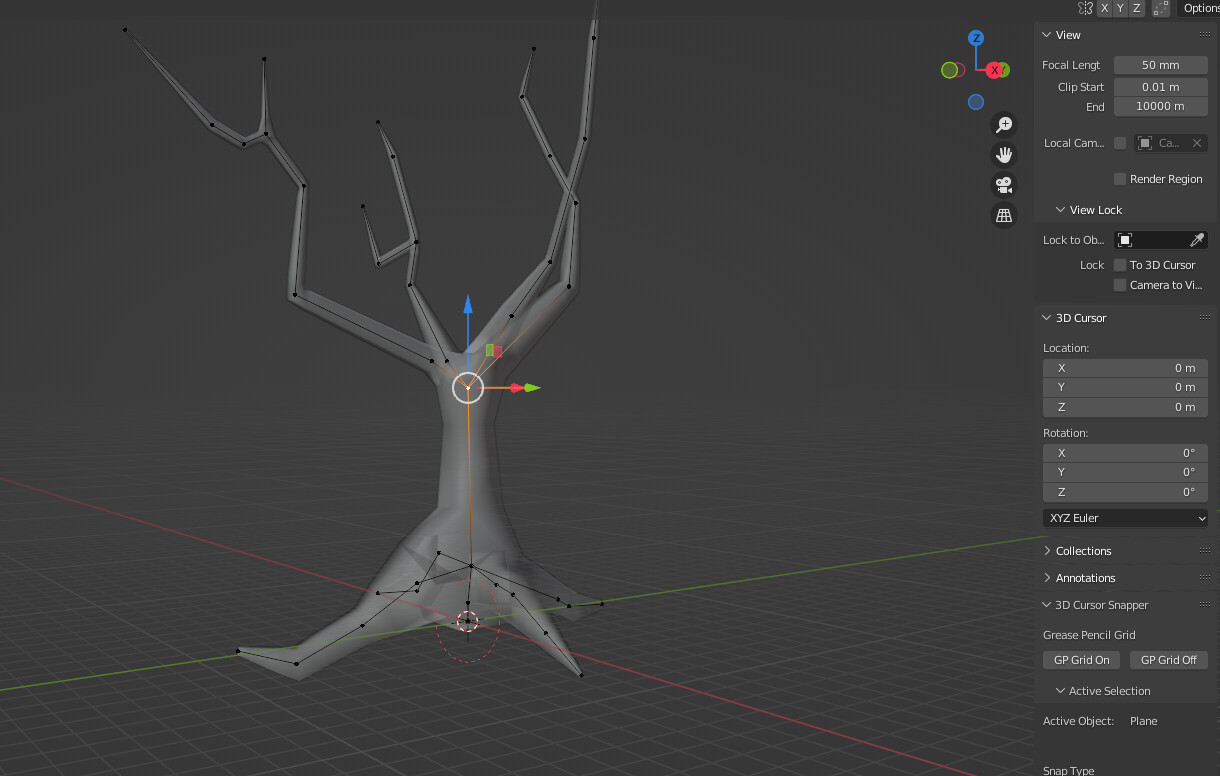
Next I built the surrounding area. I made four trees using vertices and the skin modifier, which I put into their own collection.
After I applied the modifiers I converted them into grease pencil objects, marking only the seams of the objects that I wanted to be translated into lines.
However, I found that I had to undo that as I came to realize that I wouldn’t be able to use the grease pencil version of the tree to have other foliage objects be distributed onto it.
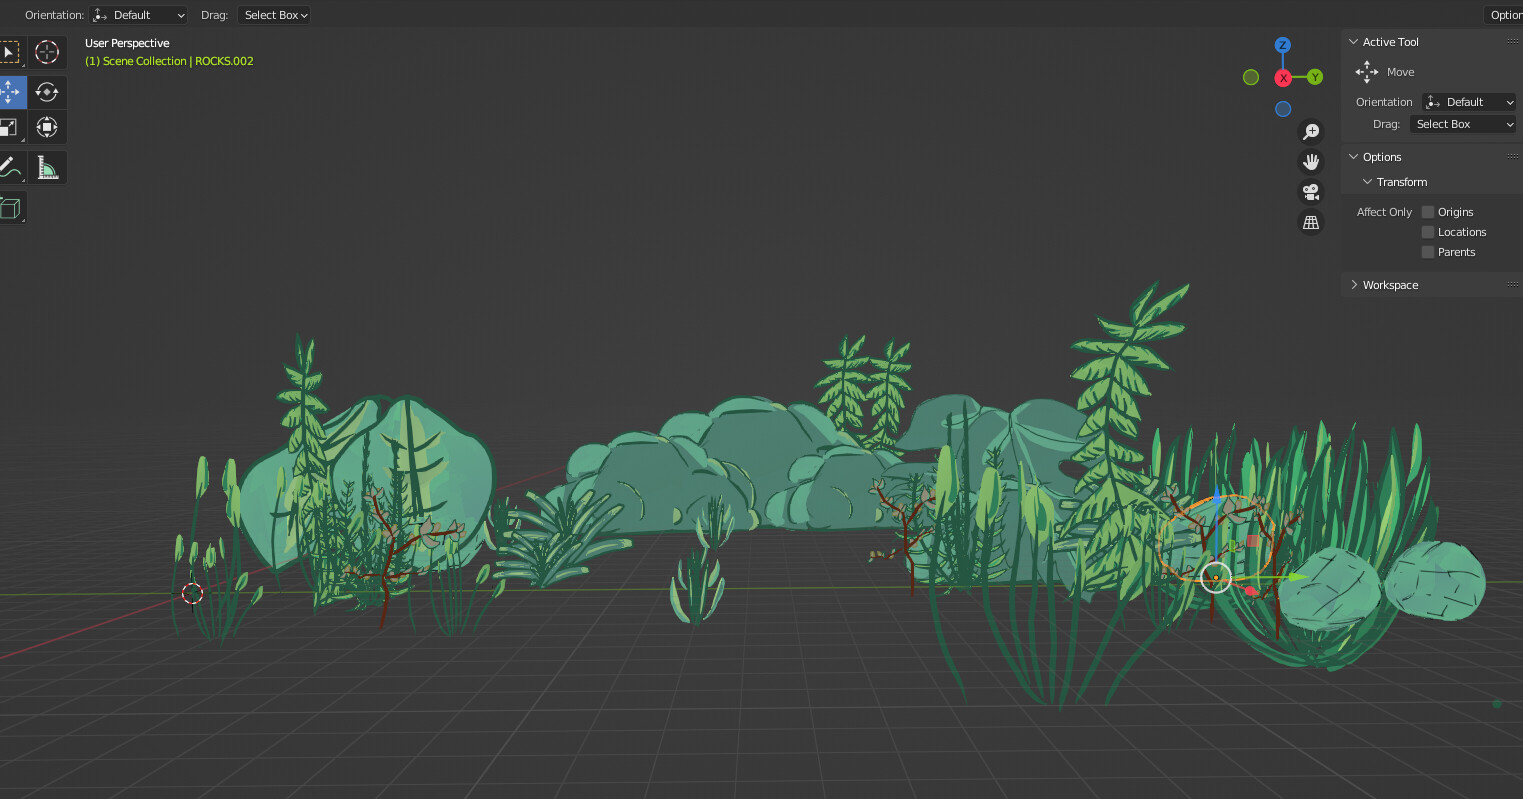
Which I thought ok makes sense in that case so I kept the trees as meshes and continued to make the other foliage elements with grease pencil. These I distributed within the scene manually.
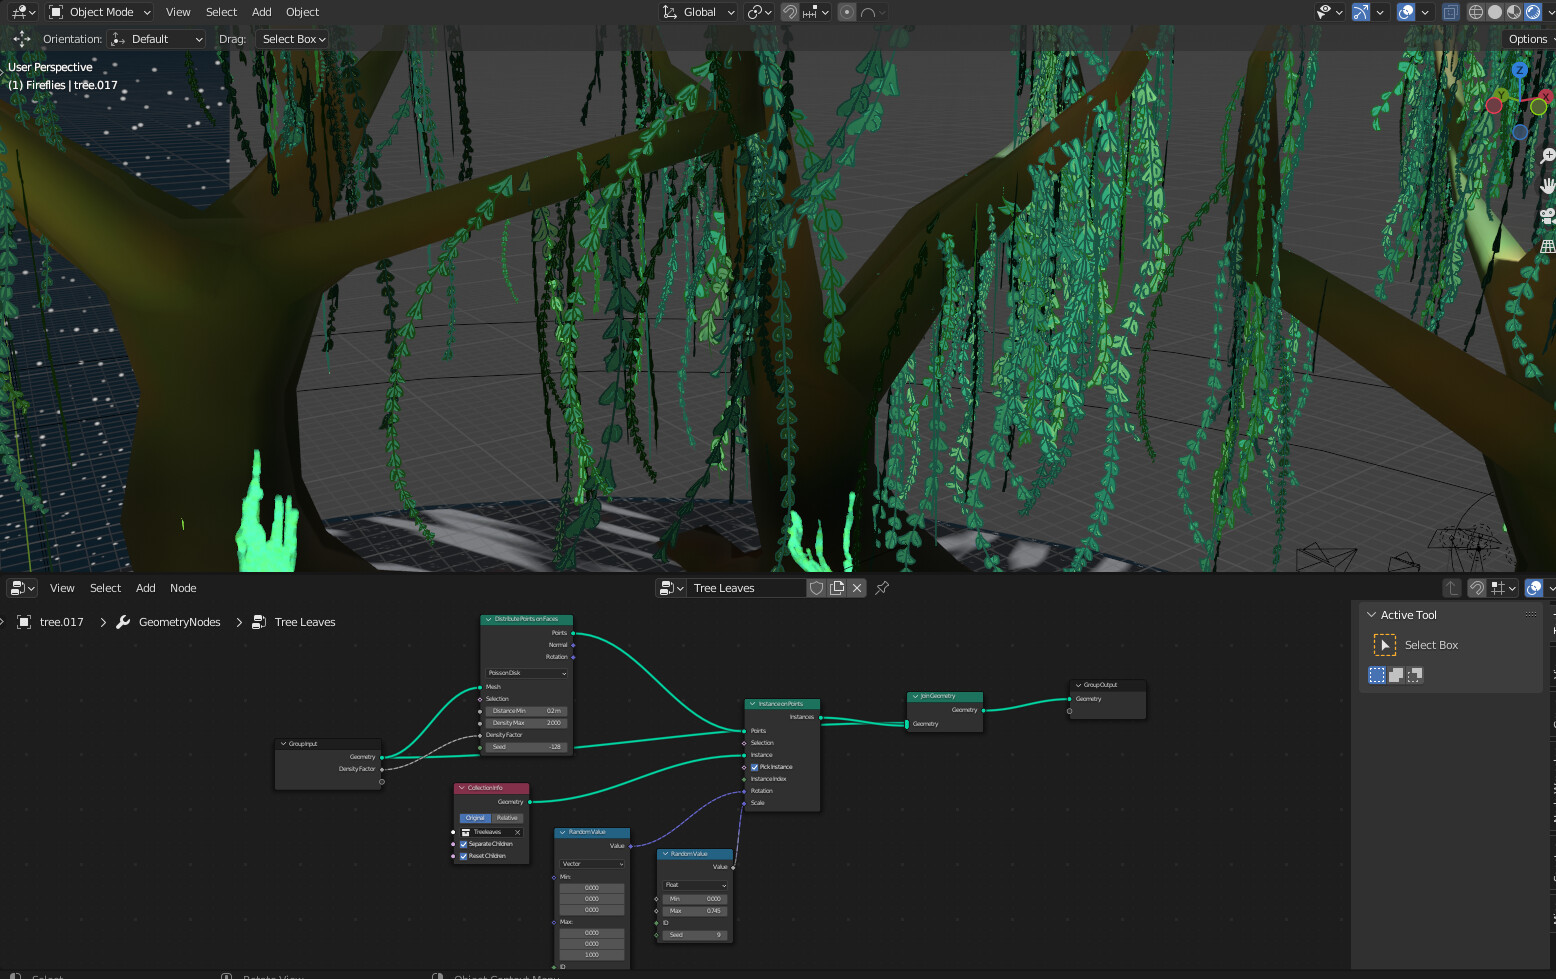
For the leaves of the willow tree I made about twenty different grease pencil variants in a separate collection that I then used geometry nodes to distribute them among the trees.
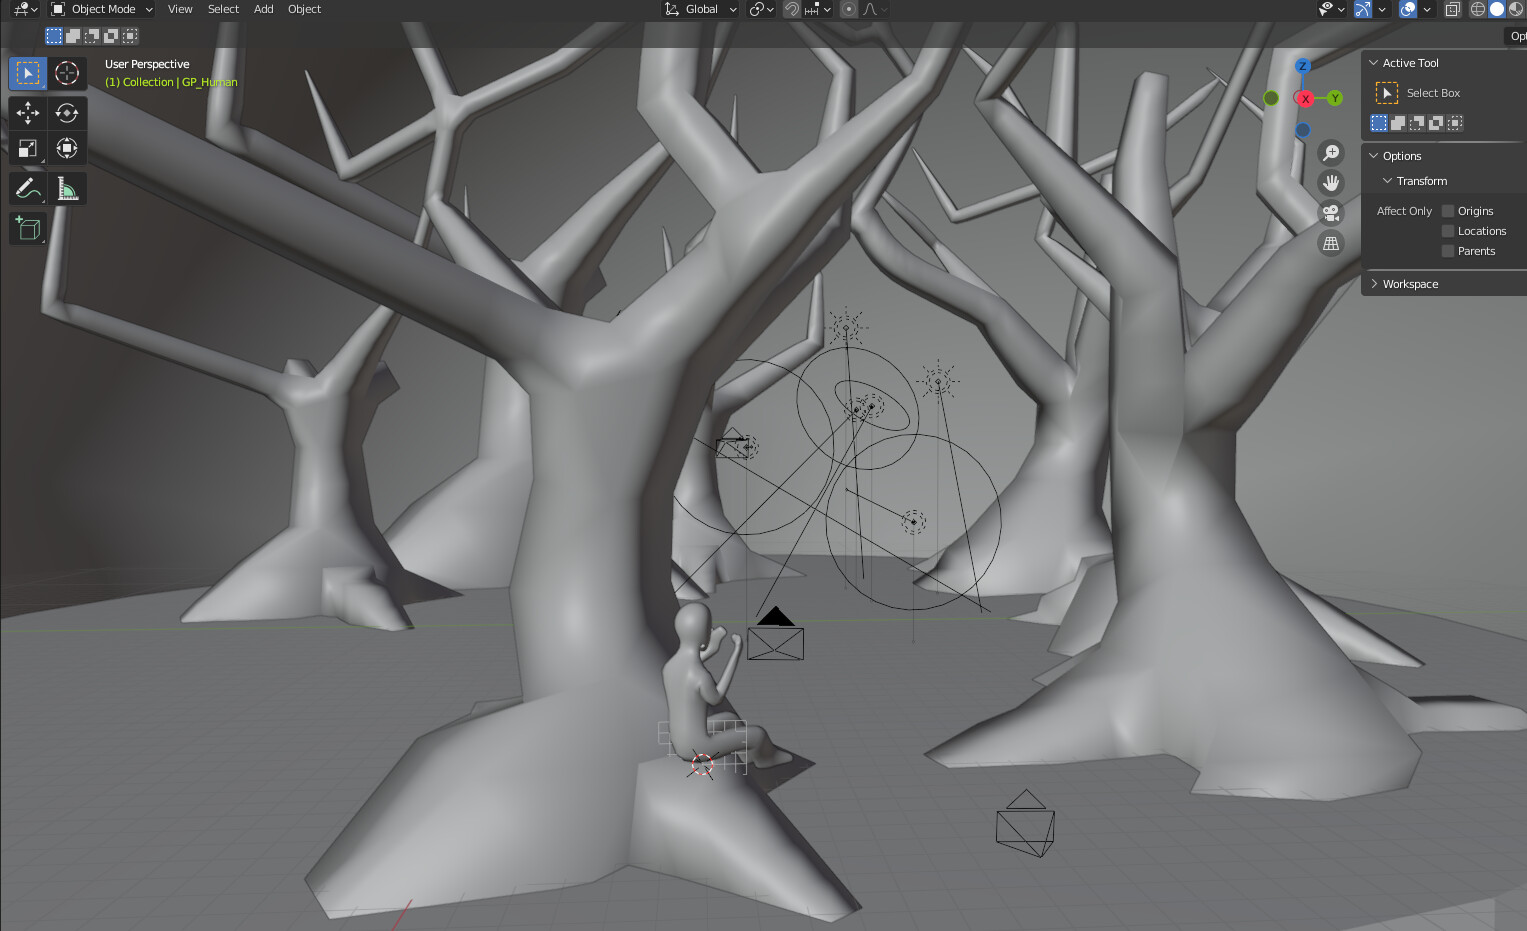
Once that was done I got to posing the super basic human model I made into a position. I tried several poses and different camera angles until I found the one I was satisfied with.
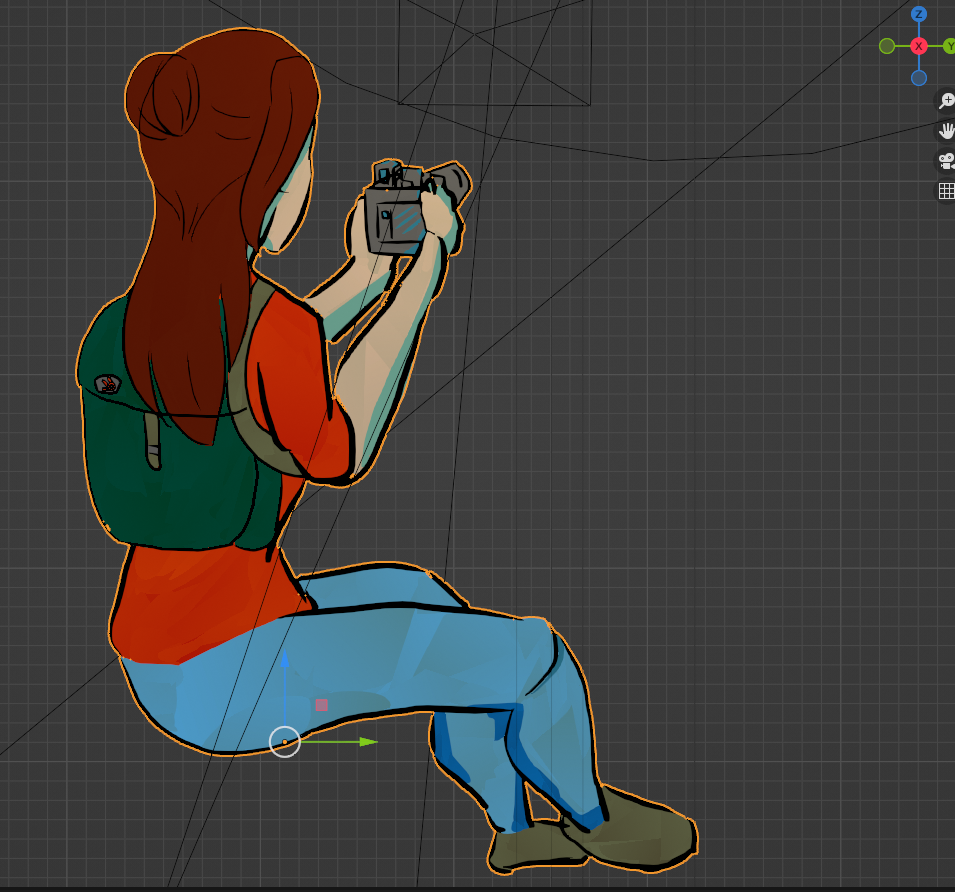
Using the model and the girl from blender splash screen 2.91 made by Robin Tran as inspiration I drew a flat grease pencil object of the photographer.
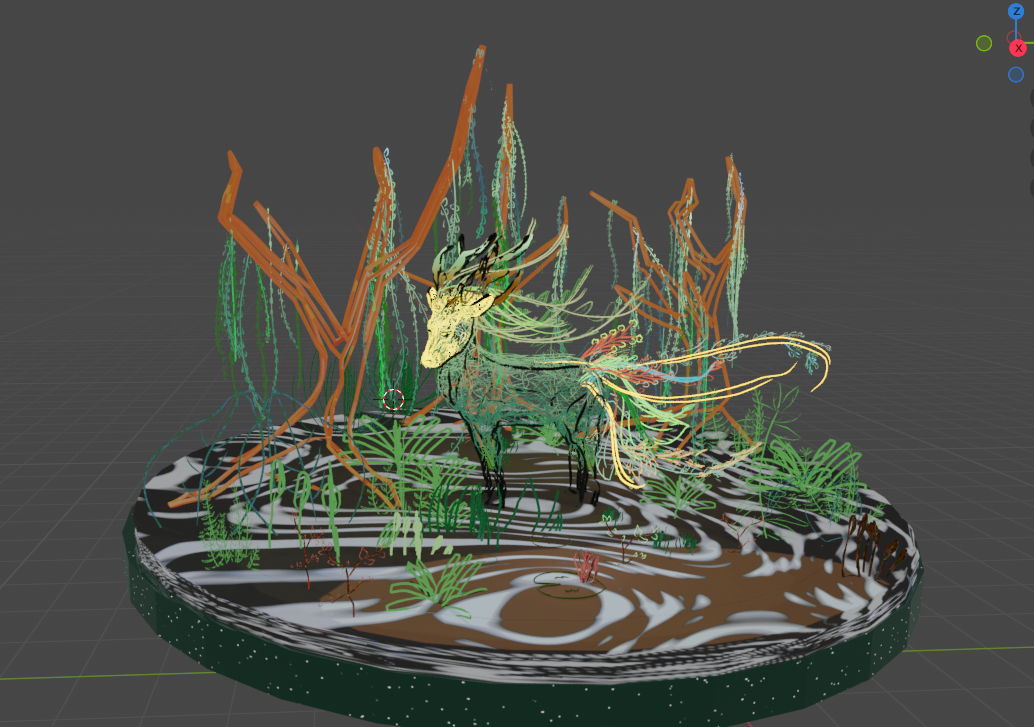
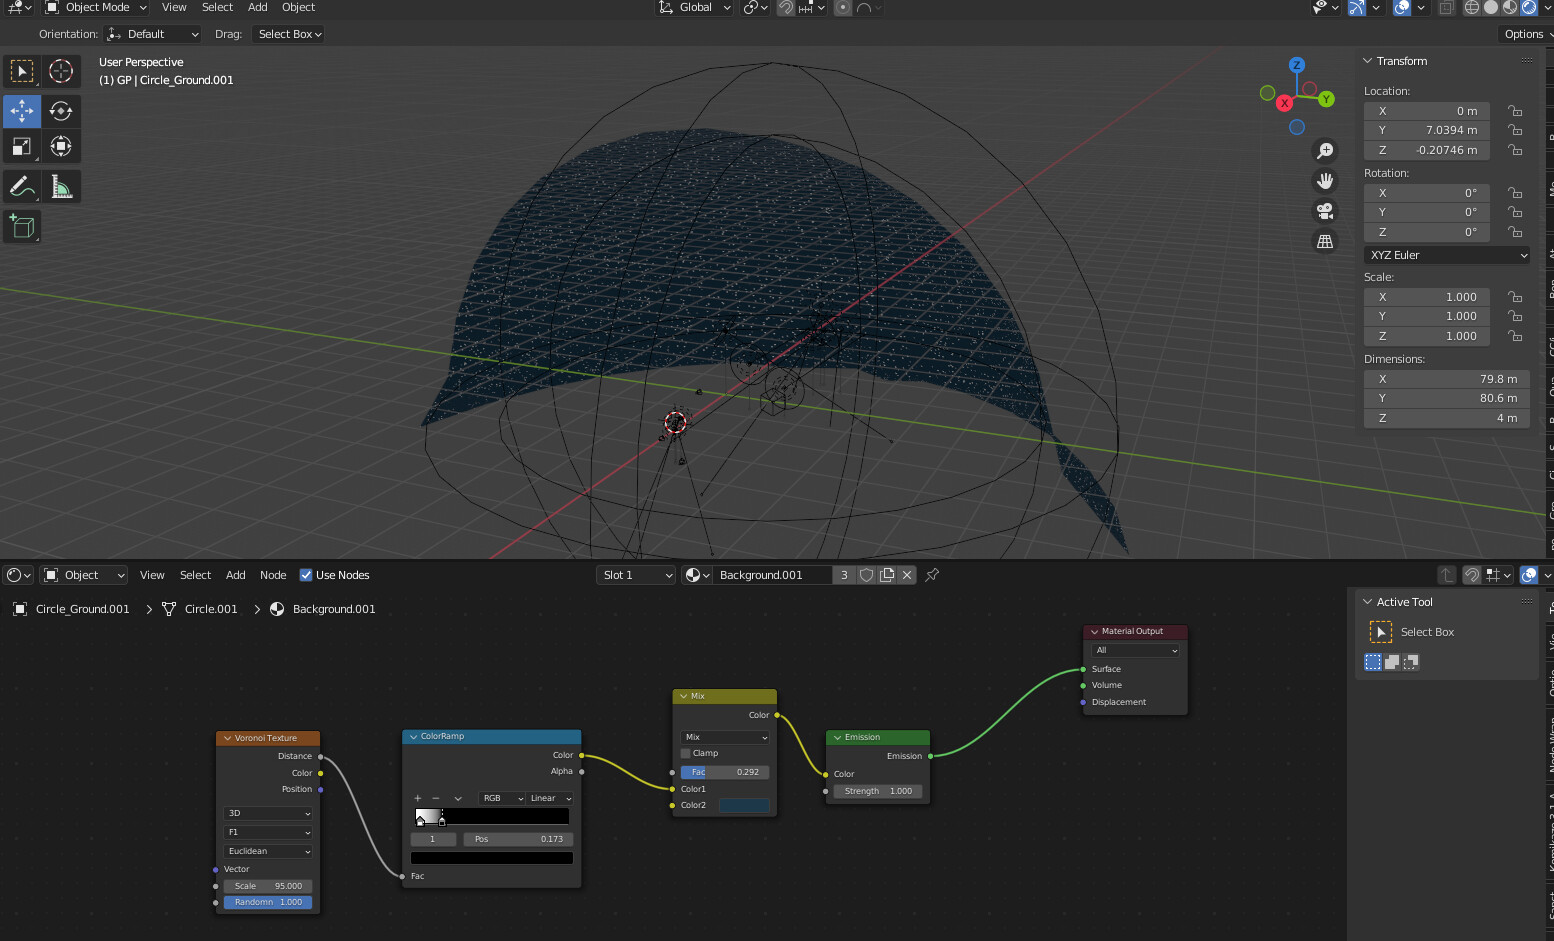
After that I added in the background starry night sky, mainly using a voronoi texture to get the effect instead of using an external texture. I also did the same for the ground but used a musgrave to give me the illusion of ripples.

Def skimmed over some stuff but this was the general gist of my progress with it. Again I hope I can find a way to get this uploaded, but if nothing else, this was a good learning experience of what grease pencil can and can’t do. I’m looking forward to how blender continues to develop the tool moving forward.
Sorry for the long post, but thank you to those who stuck through my ramblings until the end.