This is actually in the free tutorial section at thegnomonworkshop.com, but I thought I would spread the word about this excellent tutorial. It’s for Maya and Mental Ray, but many of the concepts and techniques can be brought over to Blender.
WARNING: NOT DIAL-UP FRIENDLY AT ALL! And you may have to wait in a download line, but it’s worth it. Creating Believable Eyes: By Alex Alvarez. It’s the third one down the page and is in 4 parts, all Quicktime format. Unfortunately you have to register with the site to download. Please don’t be discouraged by that, I believe this resource is worth it! Close to 4 hours of instruction is given.
Personally, I can’t view the tutorial because I’m at work and not allowed to view video while I’m here and I don’t have an internet connection at home currently.
However, I’ve looked at Maya tutorials before and while the result is usually rather impressive, it’s also rather alien. Can someone translate and publish this tutorial for Blender?
I just worked my way through part 1. The modeling of the eye is done, and it has basic shaders and transparency mapping. No refraction on the cornea yet, that’s part 2 (as well as getting rid of the specular highlight on the edge of the pupil.)
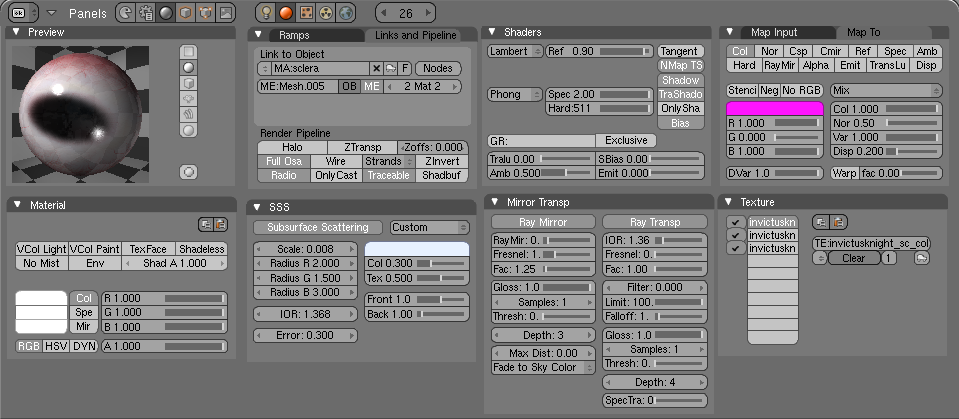
Sorry there’s no shadows, apparently hemis don’t cast shadows in Yafray and I couldn’t get a regular lamp to be shadows only for some reason… ‘No diffuse’ and ‘No specular’ buttons didn’t work. Model is 4,001 polies (exactly 4,000 if you don’t count the black shadeless plane for the pupil.:D)
No problem. Here. Quick note, though, with the SSS, aws357’s mesh is kind of small, so I had to artificially shrink the scale. Just set tinker until it looks right.
Also, the sclera’s SSS colour looks like white, but it’s tinted slightly blue. D2DCFB
Can someone think of a way to be able to use IWarp to make the iris image match the UV map? Or maybe there’s another free image editor that can do the job. I know paint.net doesn’t have a suitable liquify replacement either… Smudge tool blurs pixels as mentioned in the tut, I just want to move them around. I’m going to have a hard time translating until I can figure out how to do that. (Unless you modify the UVs to fit the image, not ideal.:()
Well, I’m on dial up, so it’ll have to wait until Monday. I gotta admit, though, my first reaction was “four freaking hours to do eyeballs! I’m glad I use Blender…” @BlackBoe, they do look good, so I guess it’s worth it.
I’m not sure what you guys are trying to do, but blender has a sort of warp tool. In the edit buttons, there is a field labelled ‘texmesh’, and if you type the name of another mesh ( not the object name but the mesh name ) in that field, your currently selected object will derive its texture coordinates from that mesh. to try it out, add two grids, add a material to one, with an image texture ( or whatever kind of texture you prefer ) then type the name of the other mesh into the texmesh field. then, go into edit mode with the other mesh ( the one you are using for coordinates ) turn on proportional editing, and twist and stretch it around a bit. then when you render the first object, the image will be distorted according to what you did to the other object. also, dogwaffle has some good warp tools, and pixia has a sort of warp / smudge tool that is pretty good.
 Please don’t be discouraged by that, I believe this resource is worth it! Close to 4 hours of instruction is given.
 Model is 4,001 polies (exactly 4,000 if you don’t count the black shadeless plane for the pupil.:D)