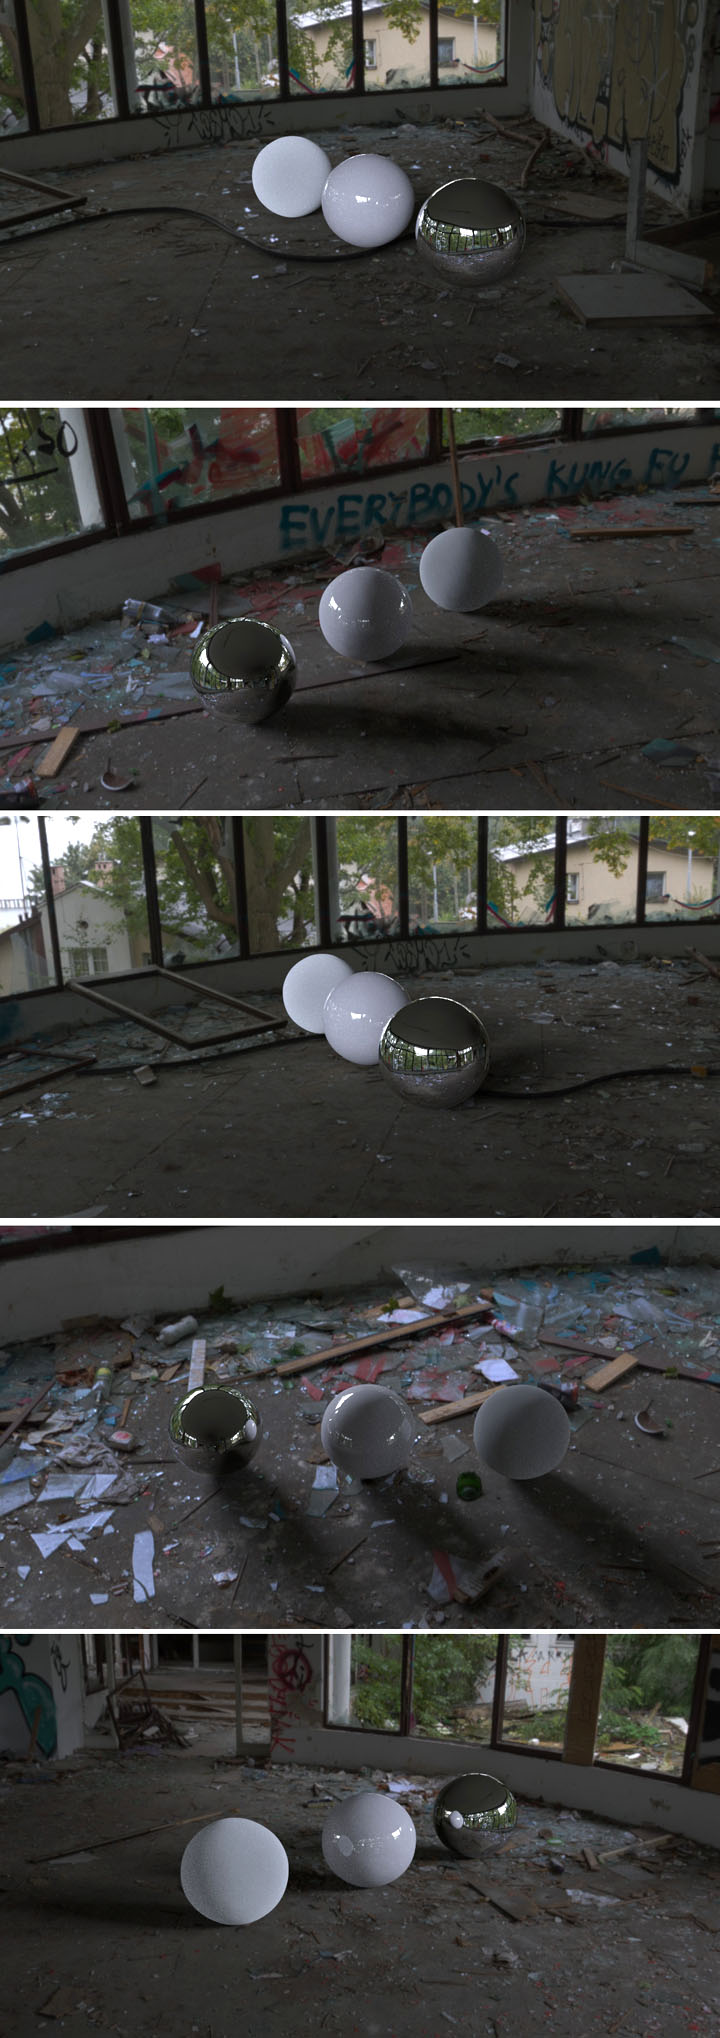
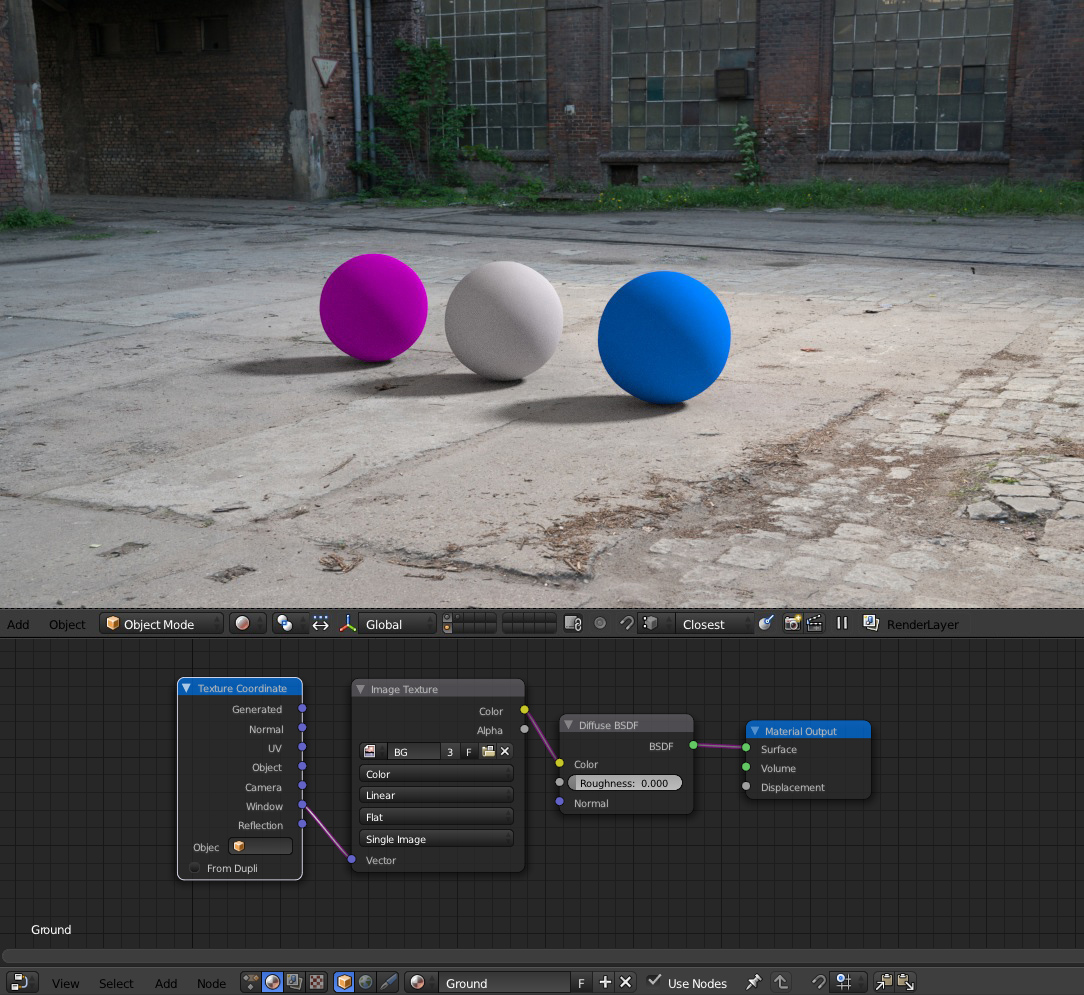
Simple ground material for a scenes with environment texture.
Material catches shadows and lights, no needs to composit render layers.
Ground material use the same environment texture as world, but ground material use “Reflection” texture coordinates with negative scale value for Z axis (-1).
Good only for flat surface. More info at blender.stackexchange.com
Yeah, add some lights, lamps, and all the magic is gone. Sorry.
Only a shadeless material can work correctly on the plane. However, a shadeless material is not a shadow catcher.
@michalis: Lightning is done by HDRi texture, there is no reason for additional lights.
(Plus, if you want to present something like a lamp that lights a light onto a ground, it seems to me as a benefit that ground catch this light rays too.)
@Monsaki: To correct light condition check end part of video, there is Greegzaal’s setup for world texture that fix your problem.
Anyway, did anyone of you noticed a link (from the first post) for more details on blender.stackexchange.com? There seems to me a better place for it, instead of repeating info here.
For some reason Vimeo destroys video by their compression, hmmm
This material has its limits, but for many situations it’s very fast and easy way to get cg into photograph.
For outdoor scenes (what I tried) it worked just perfect (for flat surfaces of cource).
As I wrote on stackexchanger - there is an awesome OSL shader called QUIP, which could be the best if it would work under GPU. Under CPU it’s slow for me, and correct colors took me a lot of time.
With this material it’s fast as hell.
Or if someone of you knows how to project environmental texture from center, let me know …
With this interior texture I noticed one thing.
Ground plane was too dark (maybe because of dark ceiling).
When I tried to multiply light strength in world nodes, objects on plane become over brighted.
But at the end it was easy to fix it:
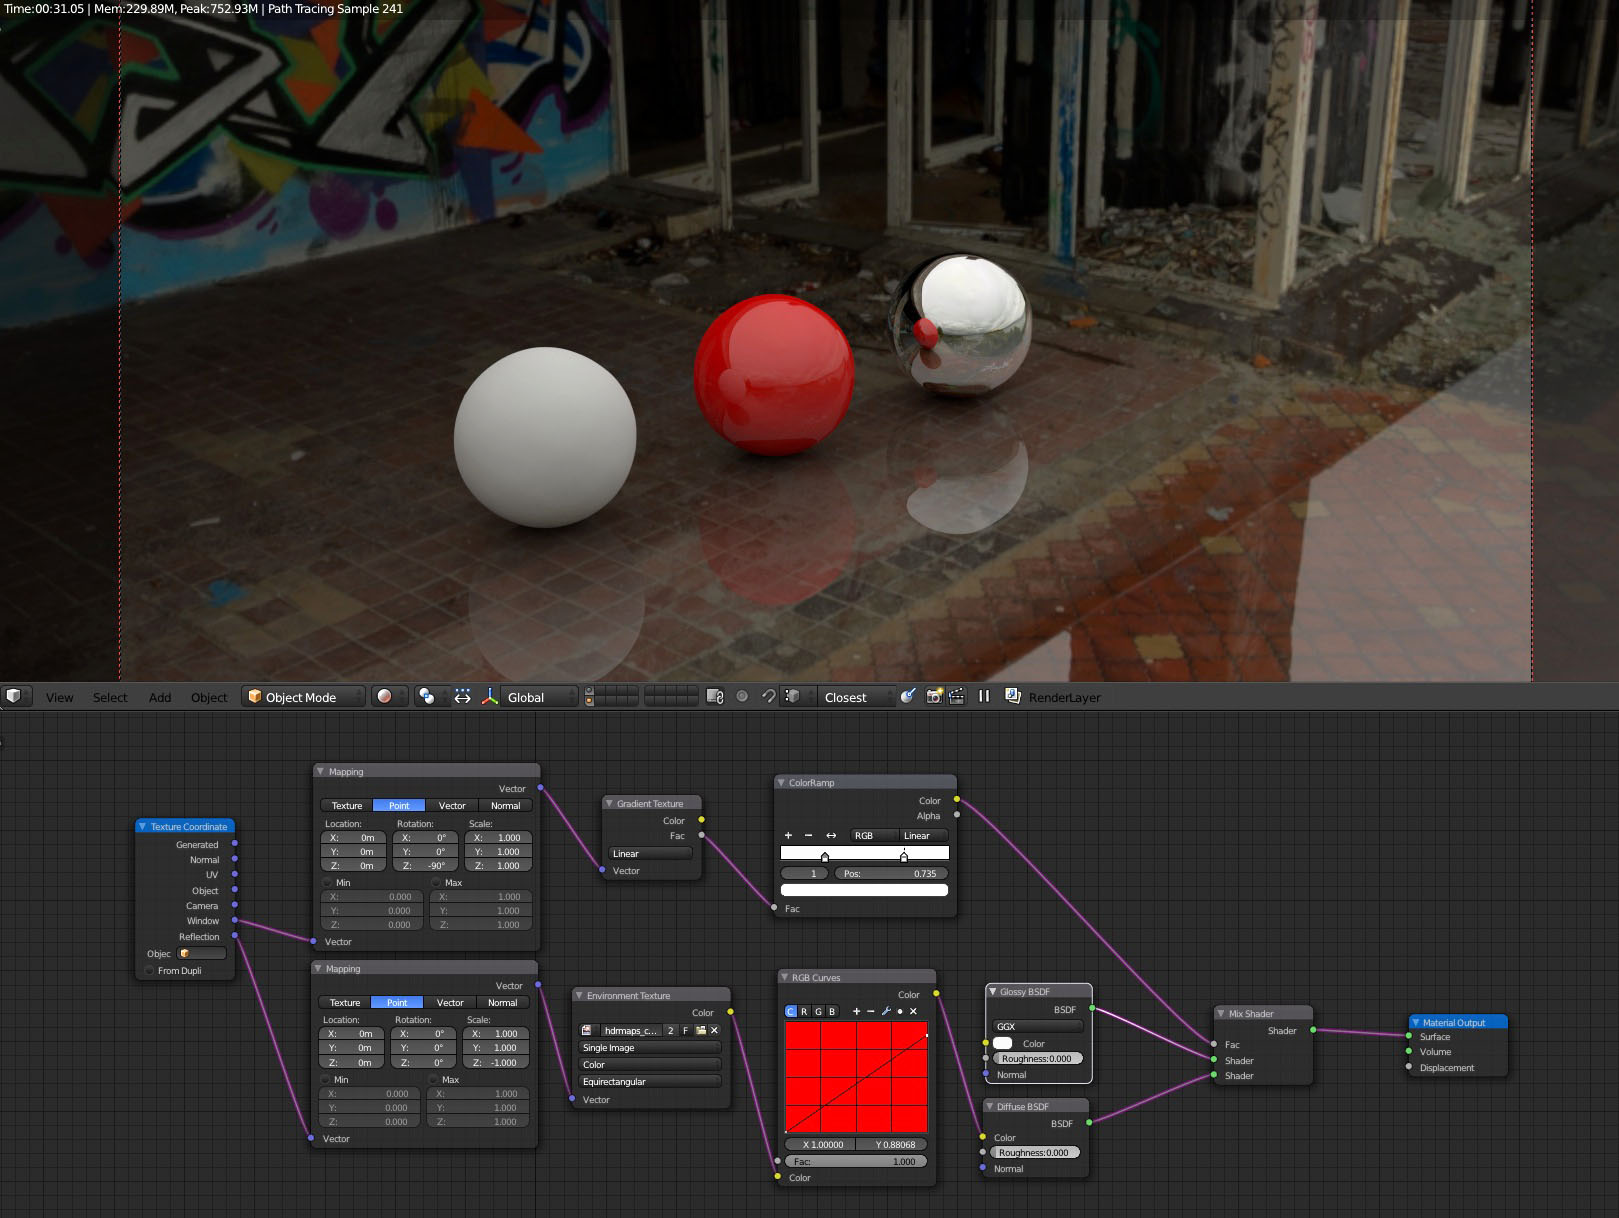
First hide ground plane and set strength of HDRi light for your cg like shown in video (Multiply node).
Than unhide (or add) ground plane that appeared for this texture still very dark, and bright ground texture. I added RGB Curve node on Environmental node output (see blend file).
@Secrop: thanks, maybe I discovered america few centuries later, but when I searched how to place cg into photo enviro, there were only references to BI “Only Shadows” or complicated passes via Render Layers for Cycles, so I’m enjoying it very much in these days
@michalis: If you spoke about placing cg into image, like background plate, there I can’t see a problem with light either.
In this scene is used one sun lamp and plane sized just take shadows.
In this case are coordinates of course Window type for World and plane. And there I didn’t use any additional color corrections.
Just increase strength of the sun since plane disappear on World BG. Soft/Sharp shadows easily setup by size as usual.
Since it’s only single image there is nothing to reflect correctly, only ground part that is projected on the ground is reflected correctly in this case.
Also for this Window type texture coordinates (that is actually projection from view) it’s not a problem to reconstruct environment to let objects cast shadows on any surface in photograph.
But this example has nothing to do with ambitions to “realistically” light scene or merge cg into photograph.
Yeah, I understand.
In your above example, the use of a color mixer in the plane material set up, as multiply may be more helpful. Avoiding to adjust the light energy.
However, you can’t use a spot or lamp or any emitter. Not constant lighting won’t work well.
OK, you used an emitter in one of the examples. However, it lightens a small area of the ground plane only. In this case, it works.
In any case, many thanks for the idea, I’ll probably use it soon.
Hmm, no matter what I do, I always end up with the catcher / reflection object sticking out in the scene. It is either too dark, or there seems to be an obvious edge to it. Will pack up a blend file for y’all to look at to see what I’m not doing / doing wrong.
@colkai: texture doesn’t “sits” properly in both of your blends, because you have set different rotations for world and plane material.
(Rotations of x/y axis doesn’t make sense in this case anyway, usually you need to rotate just z axis).
Blend with darker plane … your HDR image doesn’t light scene properly.
you can increase exposure of “sun” in your HDRi
(see paragraph almost at the bottom of blender.stackexchange.com)
or use gregzaal’s world node setup what you already use in the second blend
(as I wrote before - it’s good to correct world lightning strength without plane first, only with your spheres, and than correct colors of plane material if needed.)
Lightning by HDRi wasn’t goal of this thread, it’s quite self-category, but since these two things goes together, I will try to write few notes to the first post.
One more note to your HDR image – when you have background with ground like half shadow / half sunlight, it’s good to check if the camera was capturing enviro from shade or was standing on sun …and place your CG to the same lights. I never got a good result with CG object on sunny ground when camera was shooting environment from a shade (and opposite).
Thank you, will take a look at these issue. I can get nice HDRI using SiBL Gui on my Win7 laptop, but my old 32-bit PC doesn’t use it so was trying to replicate the HDRI lighting / shadow catcher here.
")


