I’m trying to create a spoof of the 20th Century Fox intro scene, and in the original there are these moving halo spot lamps, and as you should know the source of the light, and it starts as a circle shape, and basically stays width-the-part, only getting slightly wider, much like a cylinder (NOT a cone). In my Blender version, I can’t seem to get this effect, and instead the lights start from a very fine point.
Is there anyway in which I can get the source of the light to start much thicker?
You might be able to beat it with a cylinder with some texturing work (Think ray transparency with Fresnel effect and a blend texture for the fall-off and some emitter set on.)
A spot is infinitely small so it will spread out like a cone always. Have you tried dupliverting your halo spot around a circular mesh? You will probably have to play with the settings to get it looking right. This would also likely render more slowly than faking the cylinder with a tube mesh.
two ways I can think of. 1) make the spot radius very thin and place the spot way BELOW the model. shine the light up, but move it in a CIRCLE, tracking to the model. It will appear to be in the model shining up, and youwill have some distance between it for the spot to have widened.
2) Model or Composite a white semi-alpha tube wobbling around on top of the model scene, matching move to the model (sharing the same IPO curve).
Thanks for all the ideas guys! I like the sound of the cylinder one, and I’ll have to give that a go when I’ve got some time spare.
However, when I tried asking somewhere else, Ton suggested something to do with the settings of Spot Lamps, however, it didn’t appear to work for me. He then said I should just post here. So does anyone know if it’s possible to do it just with settings?
PapaSmurf: I originally did attempt to place the spot way below the light, however unfortunately, the models from which the light should be cast, you can see underneath them.
put a plane in front of them to hide them beneath the castle thing
you can also do the spot thing but put them much closer to the camera so they appear bigger, but it depends on how close to the original you want to get. In the original they are just shaded tubes composited on top of the model background.
cuby - im sure this would definately be possible with composite nodes and render layers!
it would be kinda like the cylinder meathod described above except the cylinder would be on a seperate layer in order for render layers to be used in the node editor im guessing that the blur node and the color ramp would be most useful for this
u can ask me on #smc if u want more help
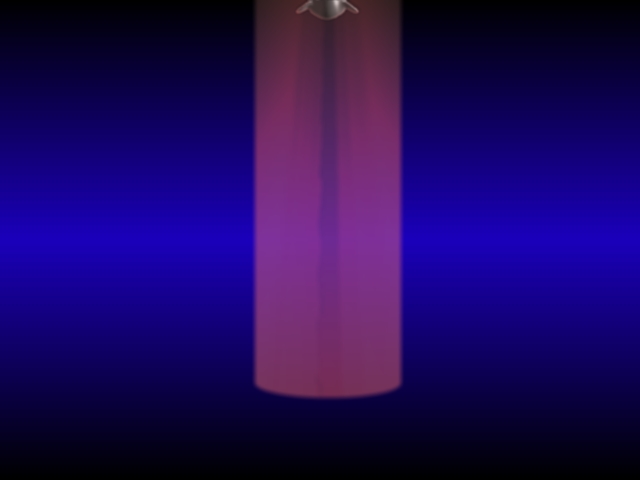
Are you looking for something like this? You can’t do it with settings. Spot lights are “Point” lights. That’s what CD38 was refering to. I did tjis with shape keys on a tube and a multiple render layer, multiple scene setup in order to keep from having to render seperate image sequences and recombining those in the nodes. It’s just easier this way cuz you end up with less clutter on your hard drive in the end. Perhaps someone will be kind enough to explain this to you cuz I don’t have the time right now. I will when I get back though. It’s just a run of the mill masking technique.
1 Render Layer; tube with shape key to be used as mask for “Halo” render layer.
Sky; Sky only in case it is to be animated in post.
Halo; Halo spot lamp in scene.002 (second scene). This renderlayer can “See” the monkey head but it can not render it because the layer is set to only render halos via the render layer tab, therefore only the volumetric light and the shadow from the head are rendered.
Monkey; Monkey head only. Render layer is set to only render solid objects.
Node setup:
Sky has it’s own set alpha node in case the background is to be faded out.
Nodes in order from left to right:
The halo render layer is plugged into a set alpha node and gets set to the alpha from Tube render layer. This is how the light gets masked. There are other ways to do this which are sometimes necessary but this is the easiest and most straight forward.
Mix node set to multiply lets us change the color of the light without having to re-render the layer.
Mix node set to add allows us to brighten things up a bit without having to play with material(alpha) settings for the tube in the scene. This is much faster than continually re-rendering to dial things in.
Blur node. This is our special little friend for dealing with problem alpha channel artifacts. Disconect the Mix node from it’s input socket and plug it into the alpha over node that the blur node is plugged into. That’s hideous isn’t it? Now reconnect things back the way you found them, then turn off the Bokeh button on the blur node. The resulting halo doesn’t really look bad in this case but it does look Wrong. Massive amounts of highlights appear in the shadows, exactly where they should not be. Bokeh doesn’t remove this entirely but it does smooth it to within acceptable limits. Notice also that there is actually a blur value of zero applied in both the x and y directions. I’m not sure why or how this works other than the bokeh filter is circular and as long as the size value is set to a number greater than zero then it works. I use it religiously.
Alpha over node applies the halo setup over the monkey head. This is not totally accurate but I promise that your viewers will never notice the difference.
Second alpha over node places the sky behind the halo/monkey setup. Now switch the order of the "Convert buttons on these two alpha over nodes. Bam! There it is. Sometimes you just gotta play with stuff until something works or keep playing after it’s working just to see what will happen. Sometimes you just get licky like I did here. I had no idea that would completely remove the halo untill I tried it just to see what the result would be.
RamboBaby: wow! That looks very good! Thanks very much for the .blend, and also for the really detailed explanation! I appreciate that. I’ll give that a go shortly, once I get some spare time on my hands to really give it a good go!
It would be nice to actually have cylindrical spots though - other apps do. Try making sun streaming through a window with spot lights, and watch as the beams of light and shadows which should be parallel, diverge wildly…
Well, ray shadows in volumetric lighting would be a neat trick but I doubt that you’ll see it anytime soon because halos are invisible to ray tracing and for good reason; they contain no depth. There are only two way I can think of that this could be implemented. 1, code other lamp types to allow them to render buffer shadows, or 2, code voxels into Blender. I’m not aware of anyone who’s even interested in coding voxels but there is a great deal of interest in the wiki feature requests section for other, better lamp types such as a “Real” sun which is sort of a hybrid between our current sun and area lamps which would render accurate shadows without all of the work involved in trying to adjust area lamps to get the job done. I don’t see voxels happening for a long, long time but, when developers (Broken; shameless call to action) are interested in other lamp types you might well see them in the very near future. Hopefully if we do get cylindrical spots they will have an adjustable size on both ends rather than being mere tubes.
I’m no coder and I barely understand what’s going on under the hood of Blender but it seems to me that since Buffer shadows are essentially created from an image “rendered” from the spot lamp’s POV, that if this image was “rendered” in ortho instead of perspective, it would result in parallel rays.
Wouldn’t it?
If so, should be easy to code - shouldn’t it? Or maybe it could be done with nodes by using an ortho camera to generate an image which can be composited into the true image as shadows? I don’t know about this either since I’ve barely played with nodes.
If you mean ortho from the spot’s point of view I’m not sure that’s possible because the spots rays are generated across a radius that begins with the point from which the spot originates. That’s why the rays diverge. If you mean ortho as in camera, the halos are invisible to an ortho camera. Cylindrical spots would essentially do exactly what you mentioned though because there would be no radius if they weren’t generated from a point.
You can come close to this by moving the spot into the distance and tightening up the cone to get the rays “more parallel” but then you have to increase the sample rate even more. Don’t go too far and with too many samples though unless you want to crash Blender. You may be better off scaling down the entire scene than trying to move the spots too far away.
Well, obviously cylindrical spots would have a radius, the radius of the cylinder. It’s just projected ortho rather than perspective. It’s definitely possible and is in many other apps, it’s just a matter of someone coding it (like everything else ;).
Anyway, the tight-angled-spot technique works and I use it, but the issue is convenience. That method is a bit hackish and a pain, especially in my scene, with light coming in through 5 windows, with that setup it’s quite annoying to tweak and navigate around. Scaling down the scene doesn’t really come into it - shadow buffers have a fixed resolution that’s not dependent on scene scale. If the spot cone is tight, and you’ve set the clip start and end close together so they’re just encapsulating your objects, resolution or samples aren’t a problem.
For some reason I just never think to do this and proceed as a jack-ass. This is the second time someone has mentioned setting the clip values to stay out of sticky situations. I’m going to have to remember to use it. I do it a lot with the camera so you’s think I would have to thought to do this with lamps. Must be from too much head trauma.
 im guessing that the blur node and the color ramp would be most useful for this