A: it is possible to bake the normal map of the asset plus decals as Object/World space?
DECALmachine does not bake the normals of an asset, it only bakes a flat decal normal map.
You are suppossed to combine the flat decal normals with the asset normal map on your own. This can easily be done in a substance product are even in Photoshop.
Baking them in object space could be done but I see no benefit in doing sot.
B: There is any issue if you use decals on assets which use material with a normal map already included?
Not that I’m aware of.
One nice trick for a normal map without skew and waviness is baking as Object/World, then convert it as a Tangent, sadly the Blender baker can’t do that conversion but Xnormal and Substance Designer can do it. So I wonder if there are some room to use that trick (baking as Object/World through DecalMachine, OR baking the decals normal map inside another normal map you’r using as a material) along with DecalMachine without encountering crappy bake result. https://www.artstation.com/artwork/ba3Qav 2
Baking in object space does not magically get rid of skewing. Baking in object space is an old technique used in cases the baker’s tangent base does not match the target engine’s.
These days, everyone uses MikkT I think.
To get rid of skewing in your high to lowpoly bakes, you can paint it out in tools like marmoset or substance designer(painter?).
In the DECAmachine workflow, the decals would sit on the lowpoly object, not the highpoly. Maybe, after you’ve baked your main normals from high to low. Since the decals then follow the lowpoly object perfectly, there won’t be any skewing, when you bake the decal normals.
You’d then have two normal maps, that you can combine.
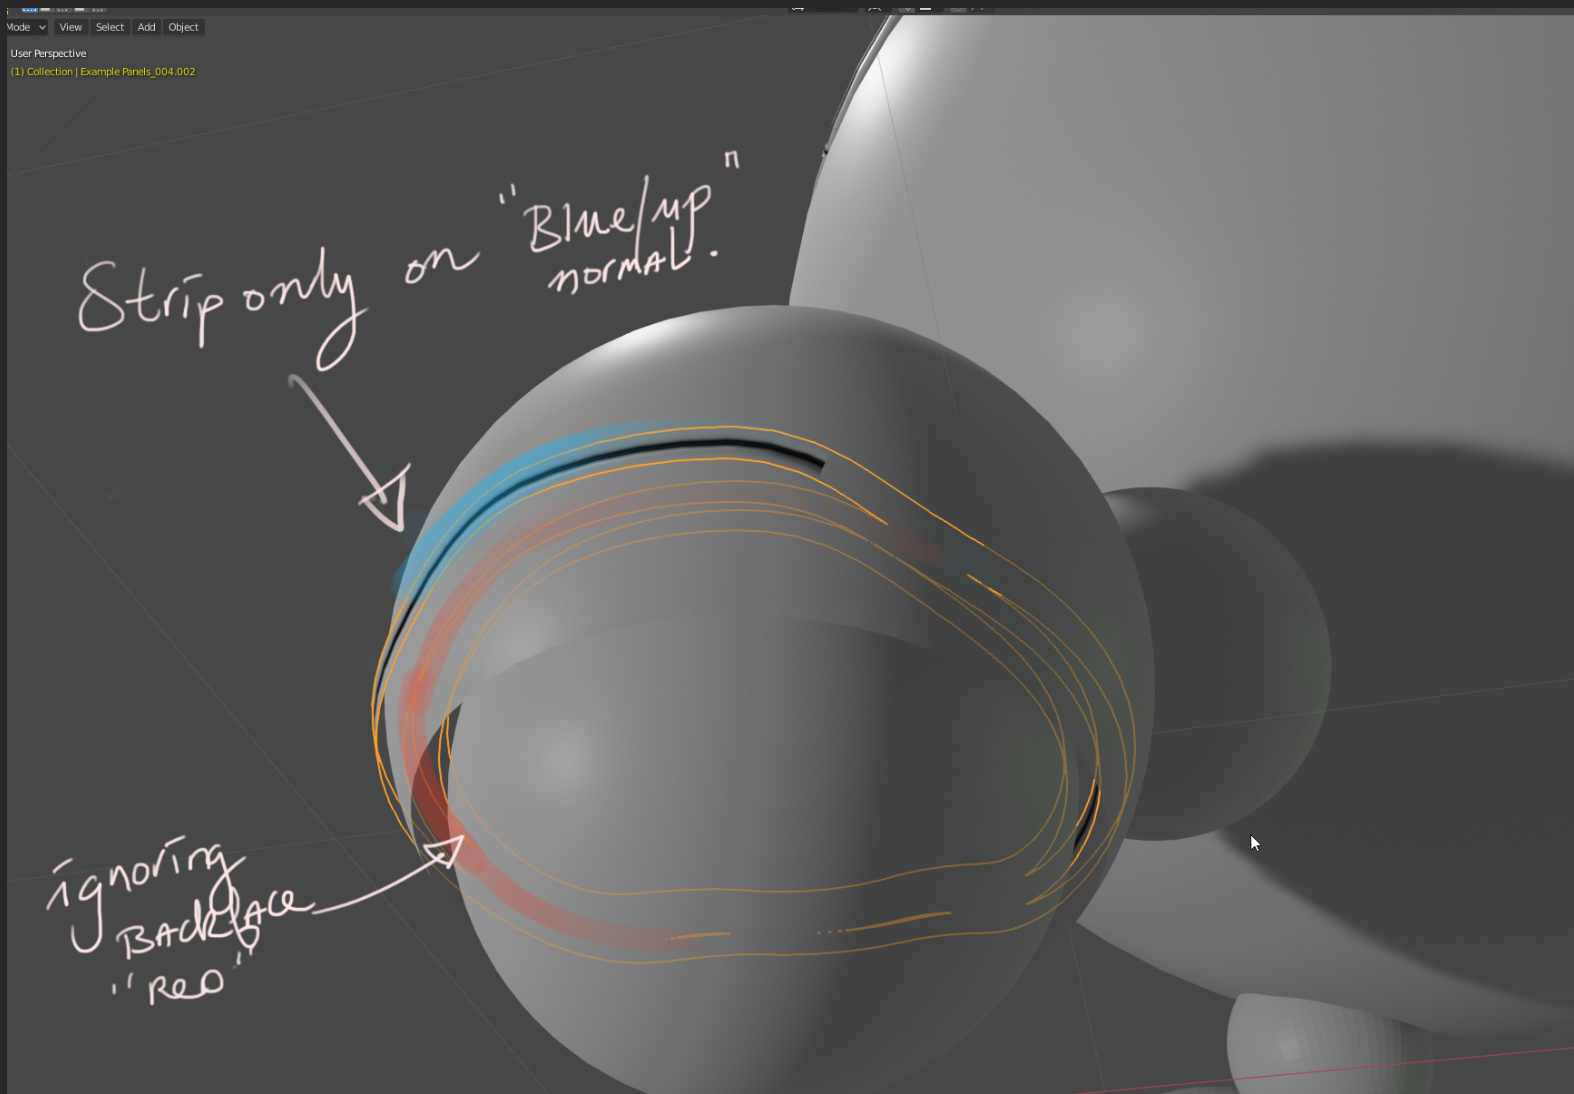
It’s a bit hard to see what is going on there. Slice creates panel decals on all surfaces the cutter intersects. There is no such thing as a back face in that context. And I can’t decide for you, what you conider a back face. Don’t intersect the faces you don’t want to create a panel decal on, or if that’s not easily done, remove them manually afterwards.
The Project tool on the other hand, does prevent back face projections, but that’s easily done because projecting is directional, slicing is not.
Decals are parented to the object they sit on top of. This happens when a decal is inserted on top of an object, and if a decal is re-applied. It’s also happening when projecting, slicing, e-paneling and g-paneling.
DECALmachine tries to enforce, that decals always have a parent object. So they will always follow an object, by default.
Compared to plain decals(flat, not projected or sliced), that are parented but can be moved freely, projected, sliced, e-paneled and g-paneled decals will get their transforms locked. This is done intentionally. They still move with the parent object though. They can be moved/edited in edit mode, if necessary.
Projected and Sliced decals should never be moved around in object mode after they have been projected or sliced, because
a) they may share the parent’s topology (project, topo slice) and the form in general, so moving them doens’t make any sense
b) they share the parent origin, which is important for the normal transfer, the backup tool and for matching of textures.
If the decals in your image don’t follow the parent object, it’s means they are parented to the wrong object. This can happen if you have decals on an object, that gets split or booleaned into multiple pieces. You need the then re-apply the decals, probably with the new parent object selected at the end.
If you have to move a projected, sliced etc decal, maybe becasue your want to duplicate and/or move it. You should retrieve the backup and re-project or re-slice that.
EPanel uses a different, more robust approach for panel decal creation, the same one GPanel and Slice (not topo slice) use.
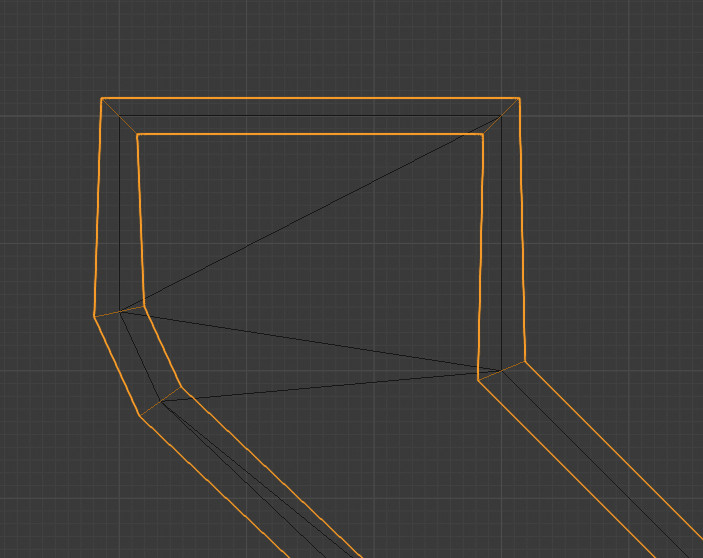
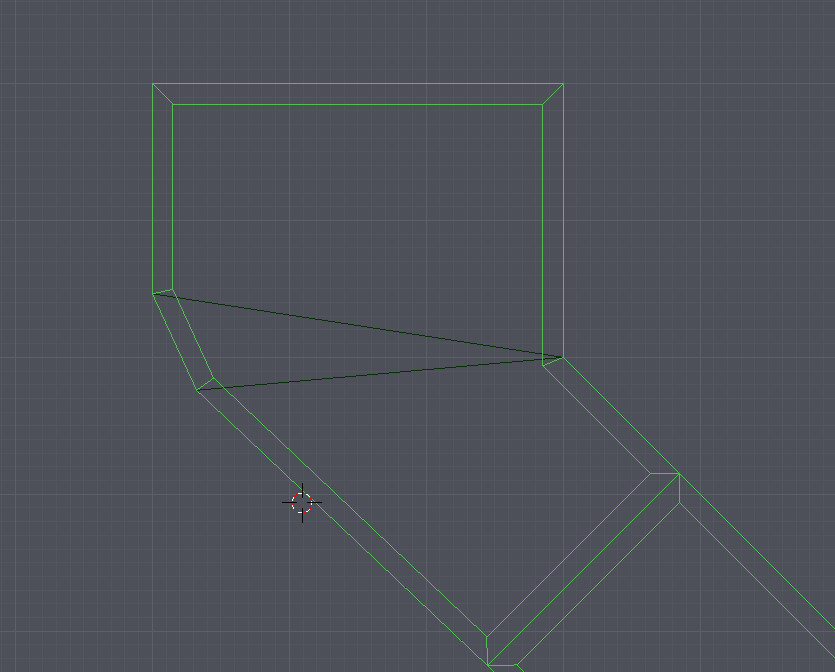
I think Panelize must have simply used inset on the face selection, to create the poly strip, that’s why it can deal with the harsh corners so well. But that’s also the only advantage of it tbh.
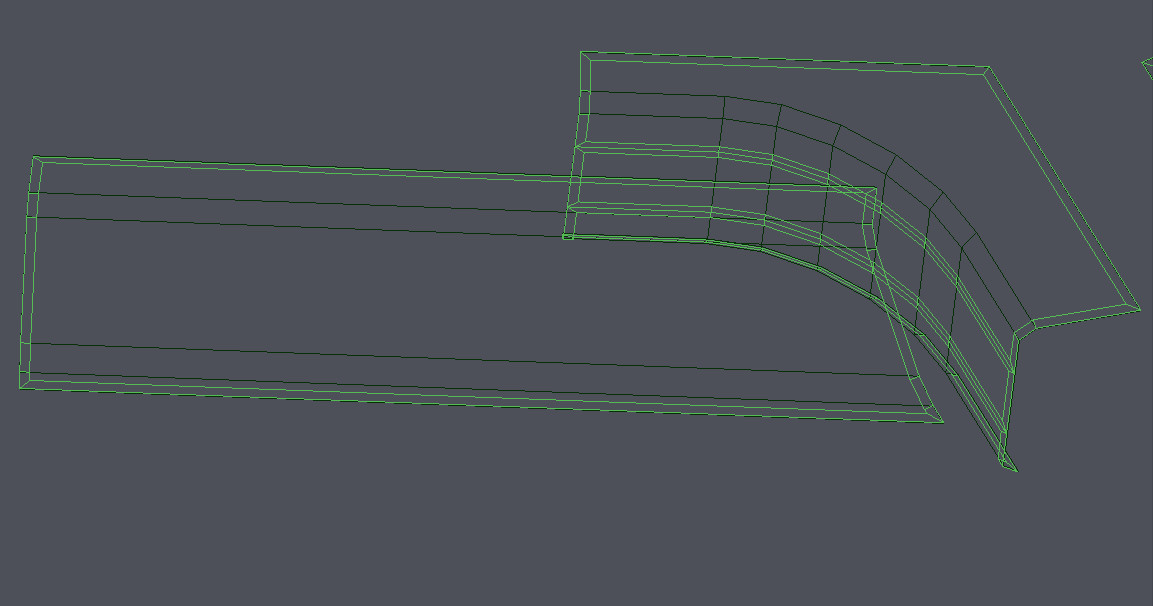
With the new approach used in Epanel/GPanel/Slice, all sweep edges are guaranteed to be the same length. For harsh corners, they need to be longer to maintain the same panel width however. This is a very non-trivial problem to solve in 3d space unfotunately. I’ll see what I can do about it but Its not a priority for me.
Try to avoid situations where you have harsh angles, and add radii before runnning EPanel.
No, mulitple subset material’s would exponentially increase the already complex decal node trees, and related tools like the match tool. Textured decals, may do what you want, but they aren’t available yet.
Each decal material has at least one node group and an associated node tree. Normal mapped decals tend to have 3, due to the parallax.
Even though DECALmachine actively de-duplicates them, the node trees quickly accumulate and clutter the group list view in the shader editor.
Like for Materials and Textures before, DECALmachine 2.0 can just hide those node trees.
Decal thumbnails will get emission indicators, if they have a non-black emissive map.
If the emission multiplier is > 0, it will be yellow (and the decal will emit of course).
You can also easily toggle emissive state or adjust the emission strength with the Adjust tool.
Info decals can emit even with a black emission map, by setting the emission color.
Also, it’s easy to retrofit existing decals, and make them emissive. I’m also exposing a ‘Re-Render Decal Thumbnails’ tool, to update thumbnails, when changes to a saved decal.blend or its textures were made.
Hi, I didn’t read all reply so maybe the has already been rised, Is there any plan to save source Geometry when adding decals into library ? (by temporary storing select meshes on decal creation then save it into the decal folder as a .blend if/when added to library) It can allow to load decal source and recreate decal with another resolution or make a variation of a previous made decal.
I finally used Baking in 1.9.1 and man that’s cool! Literally a single button to awesomeness!
Well, a few, if you want to change resolution, of course. This is absolutely bonkers that you can go to overdrive and use decals for the actual displacement, a complete game changer.