Initial trim sheet feature set is complete, working on atlasing, then documentation. If people would stop asking for release dates, I’d be faster with releasing 
Hello Machin3 and DM users -
Three things I have been wondering after using DM on a few practical projects over the last year :
1 - Is there a way to set things up so that no new collections/sub-collections get created on decal creation ? I understand their intended purpose but when working with a specific/strict scene structure this behavior can get really annoying and even straight up counter-productive in my case. I personally end up having to constantly move decals and trims out of these collections, deleting the collections as they arise, and so on. This costs time therefore I’d naturally love to avoid that.
2 - Similarly, is there a way to disable the auto parenting and automatic locking of transforms on decals and panel trims ? This too really gets in the way of a fluid workflow(or at the very least it does in my workflow - I just need these bits to not have any custom settings so that I can freely manipulate them).
3 - Lastly, I’d personally would greatly benefit from a global option forcing depth/displacement to be either 0 or 1 on creation, as well as two actions or buttons to set the depth value respectively to 1 (or more) and 0 on the selected decals or panel trims later (as opposed to having to dig through the nested rollouts in the materials panel). I always need to juggle with that stuff before baking (as having depth on details negatively affects normalmap bakes) so any QOL improvement in that area would help.
Thanks ! Looking forward to the next excellent-looking update.
There are options for parenting and collection sort in the N panel. Can’t verify right now where exactly though
See https://machin3.io/DECALmachine/docs/adjust_defaults
Projected decals or panel decals are not supposed to be moved on the object level. They closely follow the object’s surface and topology and so moving them on object level doesn’t make sense.
See https://machin3.io/DECALmachine/docs/project/ and https://machin3.io/DECALmachine/docs/slice/
In the past people would take already projected decals move them elsewhere and wonder why they can’t be projected anymore, or take panel decals, move them somewhere and try to project those. So I prevent this now and make it very clear they shouldn’t be moved.
Why do you need to move projected/sliced decals?
Similarly parenting is also done automatically because a decal is always associated with a parent object and should move with it, when the parent is moved/animated.
Parenting, although not exclusively, is also used internally by various tools to figure out which decal is sitting on which object.
Why do you need decals to not be parented?
I don’t follow. Nested rollouts in the materials panel? To do what?
Collection settings are right there, parenting is not optional.
There isn’t. Maybe in 2.1.
Just became a happy customer of Decalmachine  Does anyone else use it along with boxcutter and hops? If so, what keys did you remap for Decalmachine as by default they use the same D and ctrl + D. Would love to copy someone else’s good keys
You don’t need to remap keys. Boxcutter uses its shortcuts only when the Boxcutter tool is active. So you can just select any other tool and DECALmachine’s shortcuts will work.
Hi there @MACHIN3, thank you so much for the quick follow-up as usual. And thanks @Darknoodles too for the suggestion.
Before diving further I thought I might as well explain the context in which I am using DM as it will clarify some of my workflow needs. I am using DM extensively for two purposes … both of which somewhat different from what the tool was originally designed for.
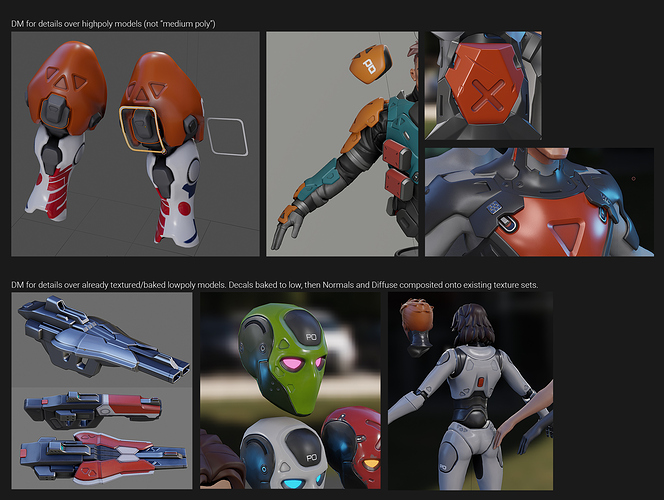
• The first use is that of a detailling aid for regular highpoly models and sculpts (as opposed to the intended target of mid-poly props and/or game assets with floating decals). I basically leverage DM as one would use Meshmachine plugs, or kitbash pieces in general. It’s a fantastic way to save time as it allows me to skip the modeling of any tertiary detail (top half of the collage).
• The second use is at the end of a regular highpoly>retopo>bake pipeline (not decal-centric in the intended DM sense and not trim-centric either). Basically either reusing the decals from the earlier described use (collecting them from the surface of the highpoly), or applying new ones from scratch if the design needs more details for whatever reason. In this case I am “breaking the rule of intended use” again, as the tool obviously cannot retrieve the color/roughness/metalness of the object I am applying the decals too, since these are not sporting a simple Principled shader with values, but rather a whole set of game/baked textures (diffuse, normal, and so on). Meaning that DM cannot pick up the colors under the decals for matching - but that’s okay as it is trivial to do by hand (bottom half of the collage - you can see the lowpoly edges of the objects the decals are applied to).
In both cases the objects underneath the decals are bound to change at any time during the modeling process ; and even the density (very dense and very low respectively) is outside the intended DM use. Meaning that I am constantly manipulating decals directly at the polygon level, merging them, sometimes removing their materials and applying another one, editing their UVs to adjust the scale of things, and so on. So in my case … both their place in the timeline and their end usage are somewhat different from intended.
This is why as far as I am concerned both the collections and the parenting are a bother, because they are pretty much irrelevant to my use ![]() I treat decals as just like any other shape/element, bound to be moved and edited. That said I’d love to know which feature depend directly on the collections and parenting, just to avoid any accident in the future.
I treat decals as just like any other shape/element, bound to be moved and edited. That said I’d love to know which feature depend directly on the collections and parenting, just to avoid any accident in the future.
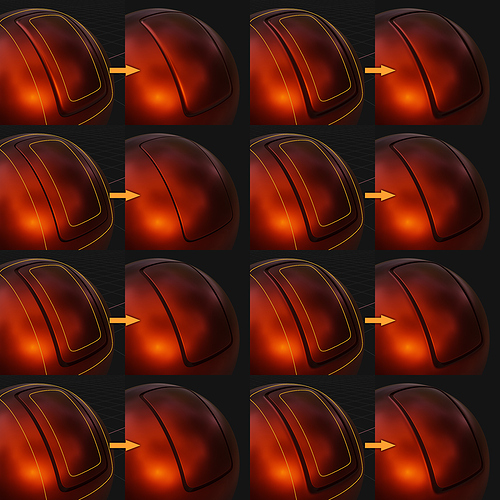
As for the parallax value : what I mean is that in some cases, the on-screen depth control in the regular Decal editing pie doesn’t go high enough for a given decal, therefore I end up having to set it past 1 in the material itself (in the panel, or in the shader editor). Furthermore, for QOL I’d love to have the option to automatically go through all the decals in a scene and setting all depth values to 0 - because if I miss a single one, then my normalmap bake needs to be redone as decals with depth bake slanted … It seems like there is an option to set them all at 0 at the time of creation so might help indeed, thanks. But still I’d love to be able to set them all to 0 at any time.
I hope this all makes sense somehow ! Hopefully the examples will help. Of course I understand that important parameters are indeed tied to the parent object (for normals sourcing, most obviously), but as an experienced user I’d really benefit from being able to bypass all these safeguards (locked transforms, parenting, and collections) as I spend quite a bit of time getting rid of them manually each time ![]()
Oh lastly, another thing about collections : I work with some specific scene collection organization ; as a matter of fact I am using an addon recreating the little dot matrix of collections from 2.79. Meaning that any tool creating its own collections constantly wrecks havoc into my setup hehe ![]()
That’s about it !
Thanks for the elaborate response, will look into it and consider. Very busy with other things right now though.
Hi there M3 ! Of course, no worries. None of the above is any dealbreaker or blocker anyways - just providing some perspective really.
Best of luck with everything you have going on !
Hi MACHIN3, your work on this addon is simply amazing.
I think one area where the panel decals are really useful is creating raised or lowered patches on a surface. The standard decals already do this, of course, but they are somewhat limited by the texture resolution to area ratio.
So I’ve made some panel decals that do this. Basically I used a plane where one half is flat at 0, and the other half is raised and then I played with some profiles. Then I added a gradient to the edges of the normal map, to give them a seamless transition into the surface.
It’s not a prefect system, for example you can’t overlay one of these panels over the edge of another, since it’s hollow in the center, but it’s still useful if used with its limitations in mind. There are solutions to the issue described, like shrinkwrapping a grid to mask out a portion of the edge, of course.
I’d like to share these here, if that’s okay. Maybe others will find them useful as well. And feel free to include them in future versions, if you like. That is, of course, if you’re not already working on a similar system, and probably a far more robust one than what I tried ![]()
Thanks for all your work!
Edit:
MACHIN3 suggested that I pack these as a zip, that way you can install them directly from the addon’s preferences. So I’m attaching the zipped panels instead and removing the old archive, to avoid confusion.
Just go into the addon’s preferences and choose to import the zip. Don’t forget to tick the “slice” option.
Hi just wanted to report, crash on start if enabling Decal Machine plugin
- alpha 2.83 latest build March 14, 01:26:32
- Decal Machine 1.9.2
I’m doing a late winter sale, kind of. 30% off for a limited time.
Thanks.I finally found time to look into the faq today. But there is no crash anymore.
If you see an errror, always open the system console and be prepared to show it to me, all of it.
Hello may I know how can I add this decals?
Preview of Atlasing in DECALmachine 2.0
There’s also a tweak mode allowing for free positioning and non-uniform scaling, giving you full control over the result.


