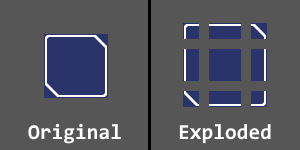
Pre-Packing panel decals, means they are packed before everything else, and stretched across the entire canvas.
This closes the loop and means an Atlas created from solo decals in DECALmachine, can in turn be used as a Trim Sheet in DECALmachine. Both are now the same thing.
Hi Emrebel, sorry for the late reply.
You just extract the archive inside the DECALMachine addon folder. The rest of the folder hierarchy is already set-up inside the archive.
If you provide a zip instead, people can import it directly from the DECALmachine prefs too,
as long as you zip only the actual decal library, that is.
Didn’t realize that, thanks for the info. I usually install/set up addons manually, so these things sometimes slip past my observation
Thanks for the info!
Hello Machine !
I was wondering if you had a public roadmap concerning your addons ?
Using MeshMachine too, i find that the hook, array plugs etc are really useful, and i was wondering whether a such feature was planned for DecalMachine (or a 9-patches system ?)
Here is how to use one or multiple atlases, either the supplied ones, or your own ones (see previous videos how an atlas is created), to get ready for export.
If you have the same decals in multiple atlases, the first atlas in the list is prioritized, hence the option to sort them.
This process is fully reversible and supports decals you may have joined.
9-patch system is used for UI element such as frames and basically stuff that can have modulable size.
The in-between pars could be stretch or repeated.
Of course, taking exemple on this image is not really convincing, but we could have a complex and different part on each corner as well as the straight parts and the middle.
This is in my opinion not an absolutely must-have feature, but if some day you feel bored… Though i’m pretty sure it will not happen that fast with MeshMachine on the road and stuff
Anyway, all those videos just make helps keeping me sane
Batch Insert allows for bringing in entire decal libraries at once.
This is especially useful in context of atlas creation, to be able to add one or multiple decal libraries to an atlas.
I need to ask a question, so I’ll do it here at risk of getting my head bitten off:
I’ve got a military aircraft model with a uv’d mesh and a camo texture painted on it, and I tried using strips to create aircraft panel edges all over the fuselage (with bolts running along them). I figured out how to make a custom strip material and how to switch materials from the built in strip ones, but I couldn’t get the albedo in my custom material to match the (uv’d) texture in the underlying material.
This last example using a UVed texture works by having a data transfer mod, transfer UVs to a second uv channel from the parent to the decal.
Automating “texture matching” like I have done for parameter based material matching, presents considerably challenges - especially when attempting to support arbitrary node trees - which I haven’t tackled yet.
[quote=“Ruuuuuumeng, post:870, topic:688181, full:true”]
please help me! When I bake, pressing the bake button will give an error.
It says
:Traceback (most recent call last):
File “C:\Users\Administrator\AppData\Roaming\Blender Foundation\Blender\2.81\scripts\addons\DECALmachine\operators\bake.py”, line 133, in execute
target_mask = bake_target_mask(bakescene, bakebasepath, target.name, ‘mask’, bakeimg, bakemat, margin=0, ray_distance=ray_distance)
File “C:\Users\Administrator\AppData\Roaming\Blender Foundation\Blender\2.81\scripts\addons\DECALmachine\utils\bake.py”, line 161, in bake_target_mask
tree.links.new(emit.outputs[‘Emission’], output.inputs[‘Surface’])
AttributeError: ‘NoneType’ object has no attribute ‘inputs’

")
