I noticed that, too.
It would be really useful to not have this behavior because it can be really useful in larger projects to have one dedicated decal bake scene for baking a quick decal without cluttering the real scenes.
That’s default Blender behavior when you delete a scene, which is what DM does when when it’s finished with decal creation or baking.
I’ll make it return to the actual scene your started in for 2.4.
Great! Thanks!
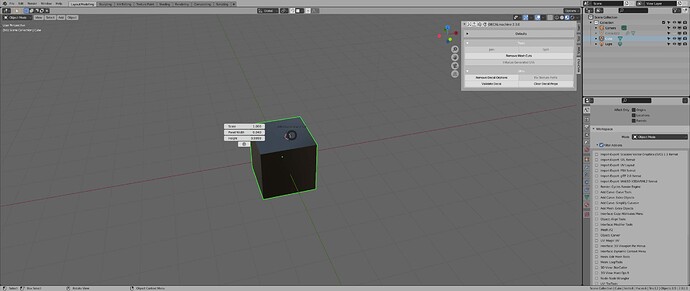
Hi. Tell me why is asset loaders doesent work? If I create a new file and try to add a decal Pie menu is OK, but after a while it doesnt load libraries, like this:
What can I do with this issue?
When createing Subset Decals is there a way to influence which object gets which material?
I understand that the active object gets one material and all other object get the second material.
But often I want to have several objects to have one material an other objects the other materal.
Of course it is possible to join the objects but that is often not desirable, for example when relying on modifiers and/or vertex groups.
It works just via object selection. But you can also ways directly edit the masks map if you want.
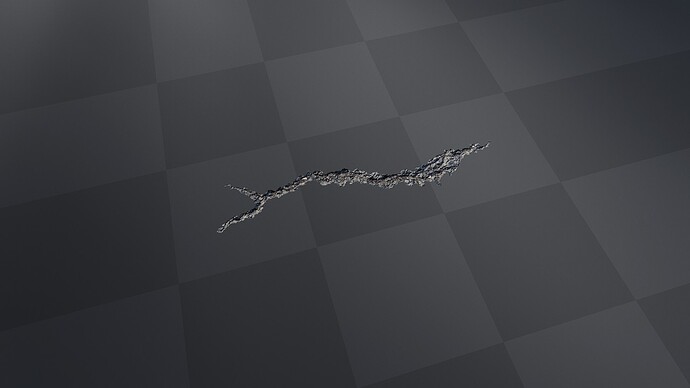
Hi @MACHIN3, I’m looking to add some Road Cracks decal from Quixel Bridge. They load into Blender as a single plane poly with PBR material textures with an alpha mask.
tjnmffbo_8K_Albedo.jpg
tjnmffbo_8K_AO.jpg
tjnmffbo_8K_Roughness.jpg
tjnmffbo_8K_Normal.jpg
tjnmffbo_8K_Opacity.jpg
I’m trying to figure out how to add this to Decal machine properly. I’m looking at the documentation for Info Decal, but it seems to only load in color textures only, but not a PBR texture set. Simple/Subset seems to work on actually geometry. Maybe a singular trim sheet? Any help would be appreciated. Thanks.
The focus of DECALmachine has always been hard surface detailing, either for concept, or game art with the aim of bringing decals into deferred rendering pipeline such as Unity HDRP or UE4.
As such (normal mapped) decals in DECALmachine don’t have color, roughness or metalness textures.
In Blender decal materials fetch these color, roughness and metallic properties from their parent objects through a process called material matching.
The focus here is simple parameter based materials, not textured ones, and certainly not heavily weathered materials. Decals in Blender are opaque objects after all, and a generalized, automatic approach, that can match opaque decals to arbitrary user created node setups creating complex weathered materials is just not feasible and beyond the scope of what DECALmachine intends to do. If decals had color, roughness, or metalness maps, then they couldn’t be material matched, and they would stand out instead of visually integrate.
Furthermore, in deferred rendering such as Unity HDRP or UE4, decal material properties for color, roughness and metalness are simply taken from the parent object’s material - textured or not - simply through the nature of how decal shaders in deferred rendering work. And so again, textures for color, roughness and metalness are not needed.
This lack of support for color, roughness and metalness textures in normal mapped decals, makes using DECALmachine decals for damage and weathering effects impractical, unless a new decal type is introduced specifically for this purpose.
Trimsheets won’t help you, unless you want to add these cracks on the mesh/uv level as trims. Decals created from Trimsheets (Trim Decals), will strip any color, roughness or metalness information that the trim sheet has, so they too can be used for material matching.
Since you are using these on roads, is there anything stopping you from using the Quixel decals as they are?
Thanks for the explanation. I mainly want to start decorating a street scene with stuff like graffiti and text labels with the added benefit of DECALmachine placement/projection tools, which works well with the Info Decals. For the road, I’ve been importing the decal material/texture set from Quixel Bridge and applying it to a flat polygon. Things like Potholes, cracks, and even rusty drain gutters are applied on top of the road in this fashion. Of course, I use similar decals with materials that would be close to the applied surface to work. So in this case, material matching is not needed (it would be nice if I can use the Adjust Tool to change the hue/saturation/brightness slightly). However, without DECALmachine to applied these quixel decals, I find it slow and cumbersome. I was hoping I could use DECAL Machine’s placement, projection, and adjust tools to speed up the process.
Perhaps I can make a feature request to expand Info Decal creation tool to support additional texture inputs such as Roughness, Metalness, Normals, and Opacity/Mask. For Info Decal batch creation, we can setup name suffixes to detect name convention from other softwares? Thanks for hearing me out.
Sure, for the future this is planed. But DM is not my focus right now and is basically in a maintenance and bugfix mode.
Completely understand and I’m willing to wait. BTW, the Quixel Decals also provide height maps, so I think the parallex benefit can also be added 
Thanks, I’ll make sure to take a good look at Quixel decals when I add the ‘textured decal’ type.
MACHIN3, Are u think about creating korean bevel decals based on marks edges or selected(like Epanel)? Or its to hard to do this?
Hey great Addon!
Unfortunately after i placed a decal, i cant see the regular PIE Menu again.
In the tutorial videos, it is not shown. Hope you can help.
If it’s not a secret, how does the UnWrap to Empty Trim work? I wonder if I can get a similar UV Unwrap with standard Blender tools.


