It resets the UVs and moves them to the empty trim. In CTRL mode it unwraps instead of resetting them.
See https://machin3.io/DECALmachine/docs/unwrap_to_empty_trim/
1 Like
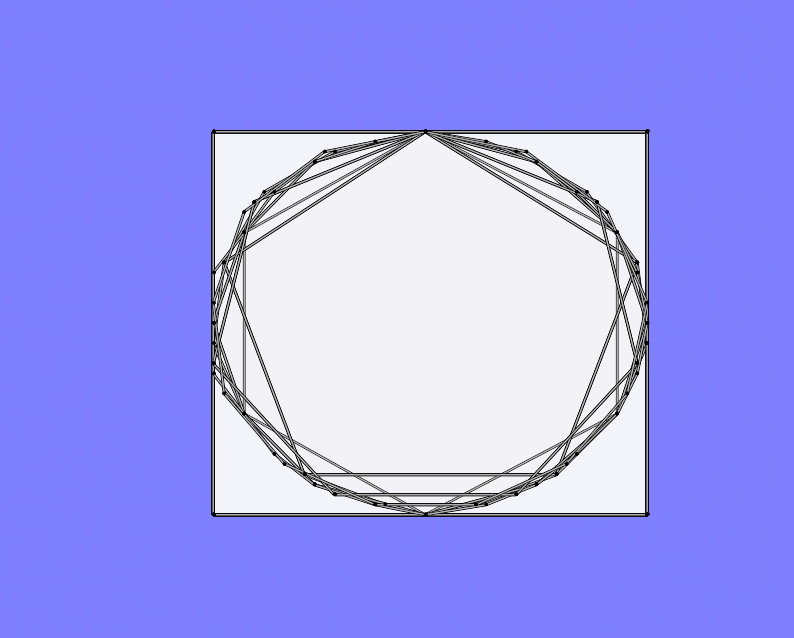
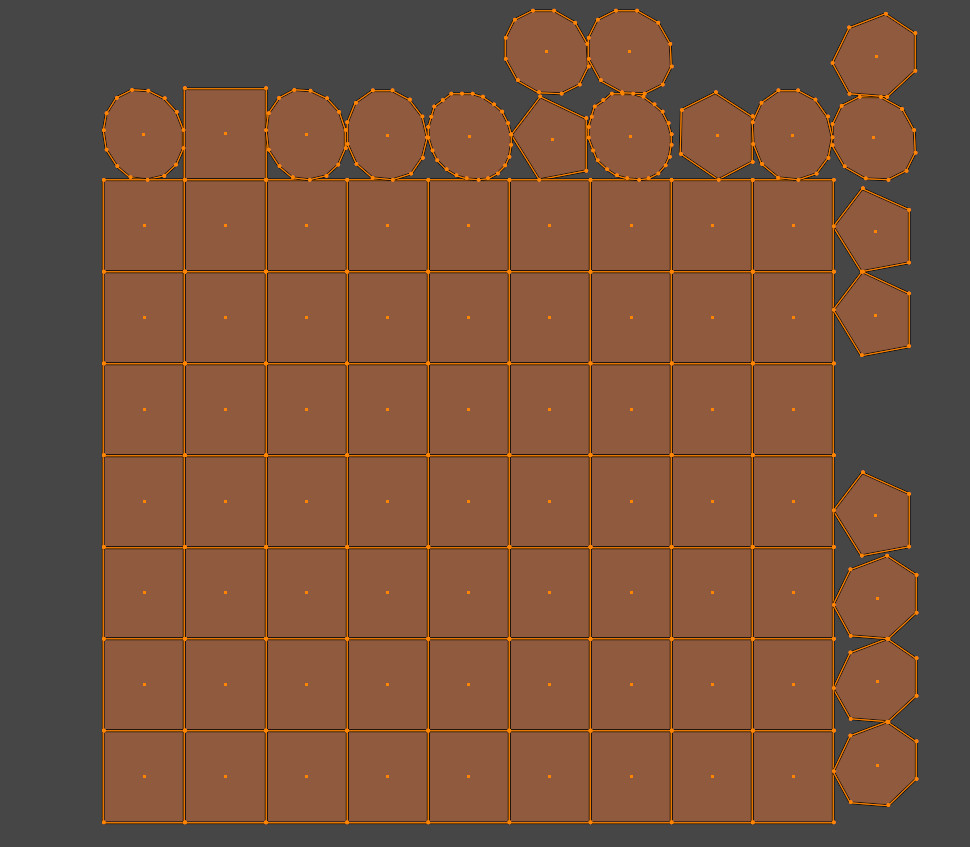
Oh, it seems I did not quite rightly formulated the question. I am interested in the technique of UV sweep. It’s just curious how about identical squares and circles are obtained from different UV islands. If there are some ideas with squares, then the circles put me in a dead end. To create them was used as a self-written method?
Thanks for the answer! I thought it was something complicated, but it turned out that everything is very simple.
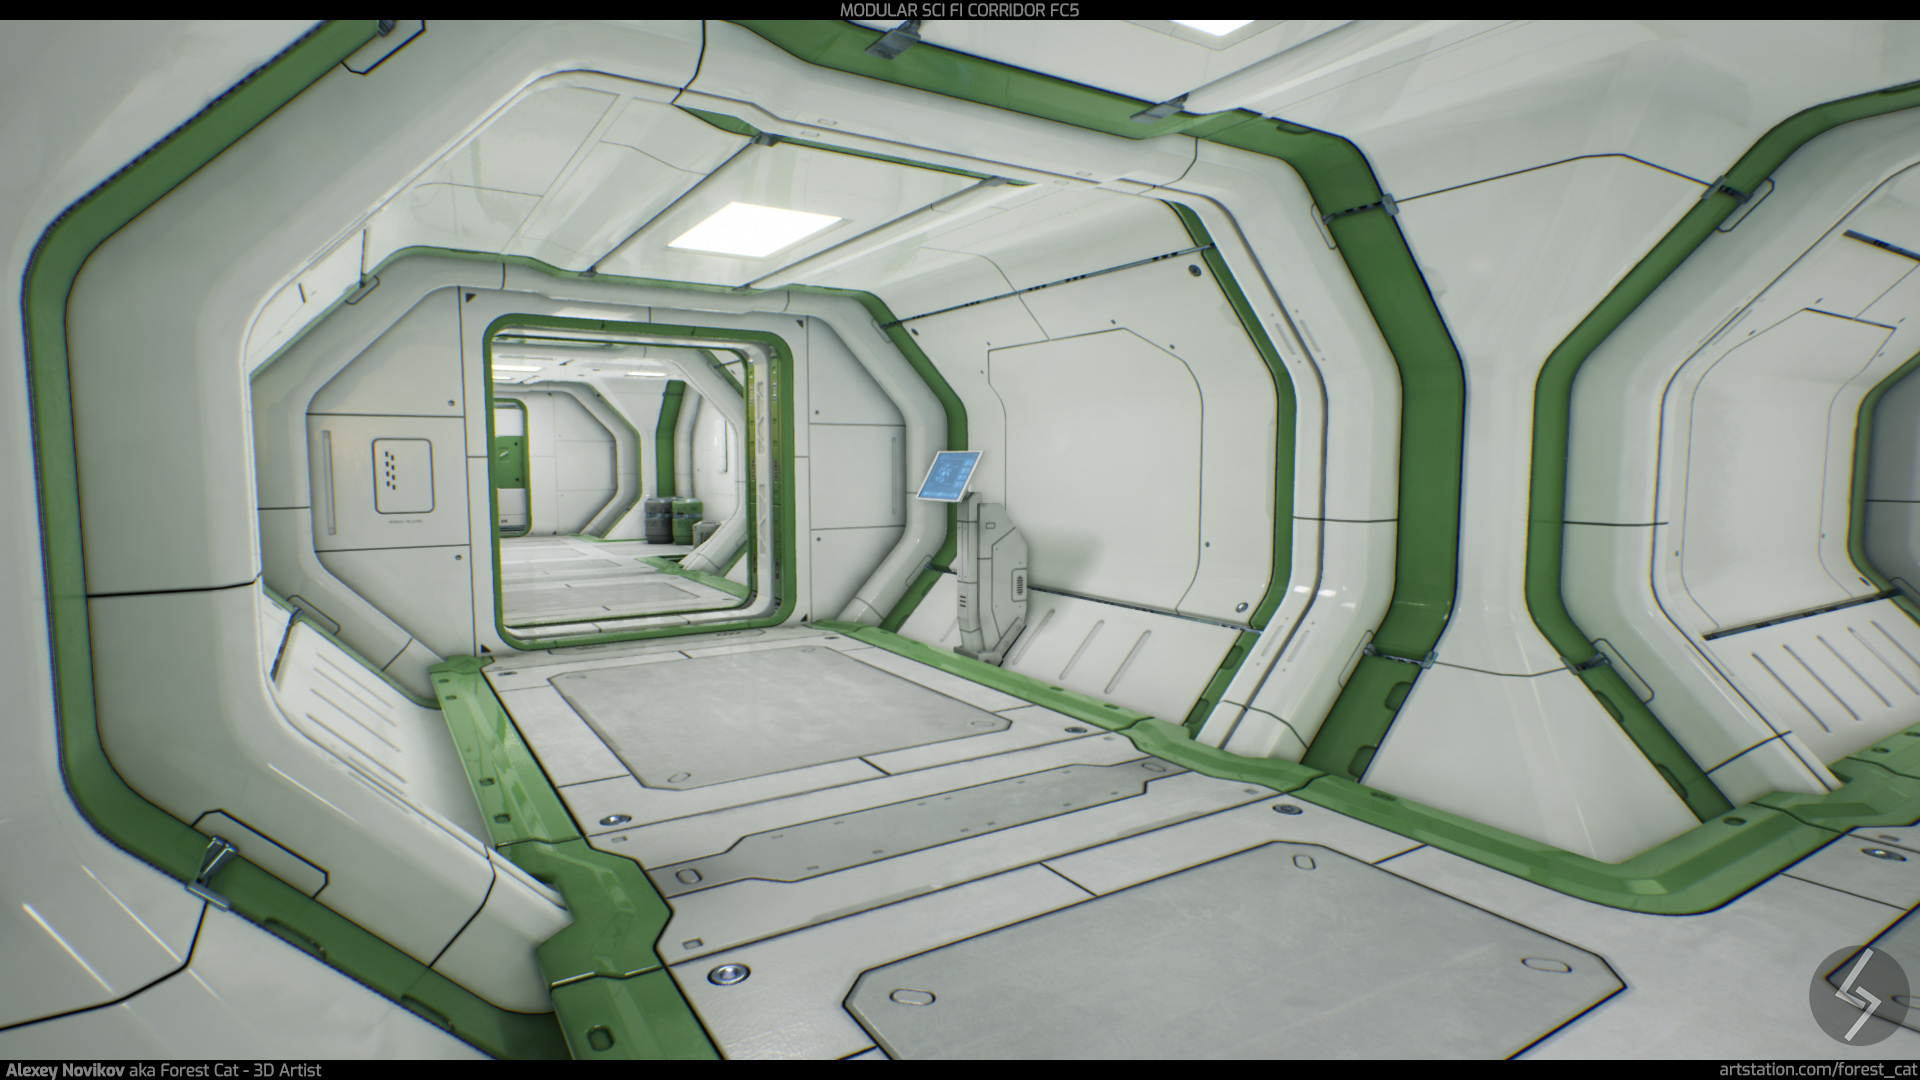
Made another environment using Trim Decal workflow.
Link to WIP: https://blenderartists.org/t/wip-ue4-modular-sci-fi-corridor-fc5


7 Likes
I noticed the outer material (sorry, new, so can’t remember the terminology you use yet) matches the color, but doesn’t add the bump map. So if you add something like a counter-sunk screw head, the bevel on top is suddenly smooth. It would be cool, if possible, to add the bump map of the neighboring material as well.
And I’m not sure at All if this is possible, but it would be awesome to be able to select a portion of the decal to keep from deforming. So if you put a row of screws along an edge or something like that, then the plane and transition shape would deform to both flat surfaces, but the screw would stay looking planar. Obviously, you wouldn’t want the top of a screw head to wrap around to both of the larger surfaces.
And yes, just like the parallax effect, it’s going to break pretty quickly. You would still not want to put a giant screw on the edge, for the same reason you wouldn’t want to have a bump out be visible at a glancing angle for noticeably long (or at all).
I put together a basic sample that shows the issue a little:

In this example, the top face should remain flat. This is just a 7 degree angle and it’s noticeable. Something like a 45 gets to be pretty gnarly.
So realistically, the whole screw head wouldn’t move at all. But if I could define just the top surface, on into the center hex area to not deform, that would be killer. Or maybe it could just deform a lot less than the rest? I’m not sure if you could drive that or not. Maybe it would be map driven, either created by the decal creator, or created from vertex group or weight paint. No idea. I looked at your parallax shader network and decided it was so impressive that I couldn’t try and figure out what was going on because it was hurting my brain. So well done there. But that also means I have no idea what magic is happening. It looked like some magical blending of different normal…stuff.
So if you could add a map that kept some of the normal blending with the surface behind it down, then awesome. And if it’s not possible, that’s cool too. I just wanted to mention that, because it would be useful if it were possible.
If not, it would probably be cool to blend some things together like mixing some tools from box cutter and or hard ops in there so that it actualy trims a base shape out first with simple geometry, then adds something like the screw as an image plane just how you have it, all in one step. I guess then it becomes slightly more like Kit Ops, but lighter weight.
Regarding application of materials to decals, this might help:

It does look like someone figured some things out, but only if I purchase another addon.
InstaMat is cool. I should probably get that one. Smugr is really awesome too, but is too expensive for me to just keep casually buying these addons without having time to actually learn one of them in depth.
And I already had the material behind the screw in this example (also they wouldn’t be this big, I just left them that size to accentuate the curving flat surface) so it would be nice to have a similar button to take on the bump that’s already there without having to use smugr specific maps.
See https://machin3.io/DECALmachine/docs/init_generated_uvs/ and https://machin3.io/DECALmachine/docs/match_material/
Also https://machin3.io/DECALmachine/docs/faq/#can-i-create-decals-for-damage-and-weathering-effects-such-as-those-from-quixel for some more context.
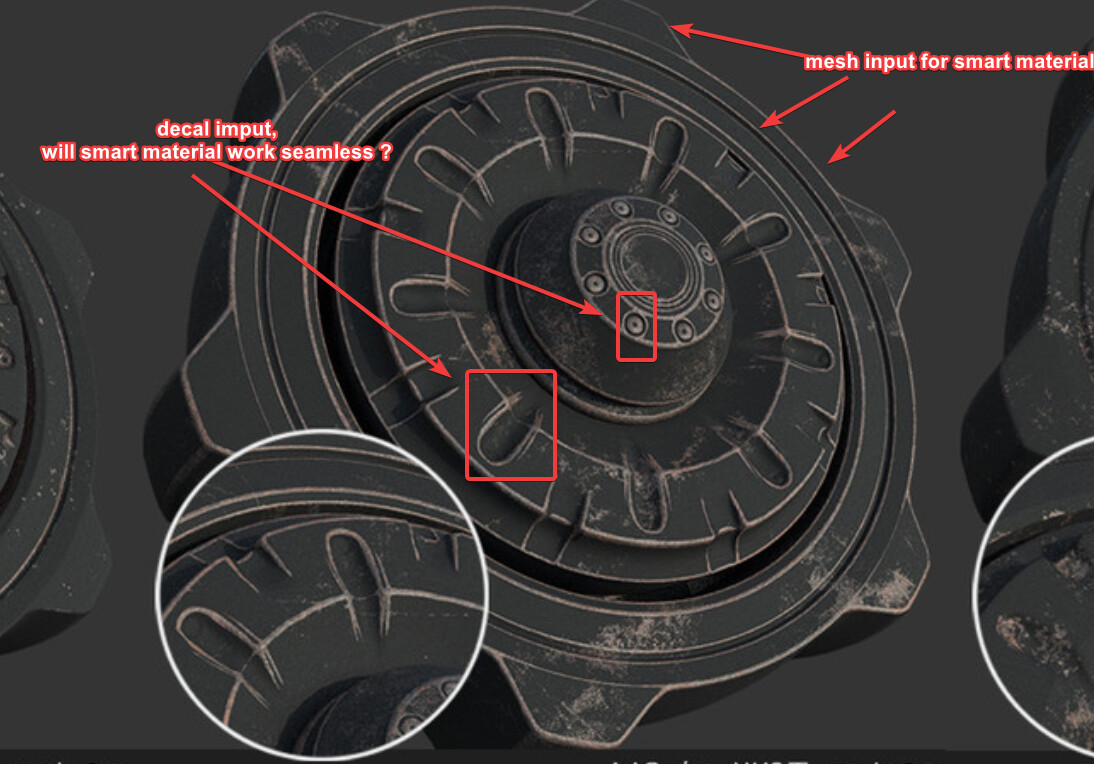
Hi, I would like to know if decal machine could work fine with substance or quixel smart material to add grunge in concave region, as decals are just flat images, should I only work with mesh or there is a workflow I can use with decal machine ?
When I asked about grunge, it’s not adding every grunge with decal machine, but instead use decal to add details objects like screw hole, but add smart material to the entire mesh after it :
It depends how you apply the decals. Do you keep it as decal atlas or do you bake it to the UV Layout of the mesh?
I don’t do any of that, last time i used the addon, uv atlas wasn’t finished (it was during a refactory of the addon), and since then i rarely do hard surface job or i keep everything with default material.
Thank you very much for pointing those out. this helps.
The material I tried using it on top of was a mix of several materials with a complex network (I didn’t make it) so that made the effect even worse.
But that clears up why some cases wouldn’t work, and how to fix them. I’m guessing I could still fix the other one by finding all the nodes that make up the different bump/normals/color, etc. But I think I’ll go back and make a new material that isn’t as complicated. I was going for a powder coated material with a small amount of metal fleck in it (not like bass boat or anything, but something that just adds a little sparkle) and it looks good, but I’m also getting problems with placing image decals over it as well. It looks great in eevee, but cycles is causing some sampling issues behind the images and I can’t figure it out.
Here the image on the left is one I made before I purchased decal machine, the one on the right is using decal machine. You can see sampling issues behind the bounding box of both images.
I haven’t solved that yet, but it is Much less apparent with a more simple material behind it.

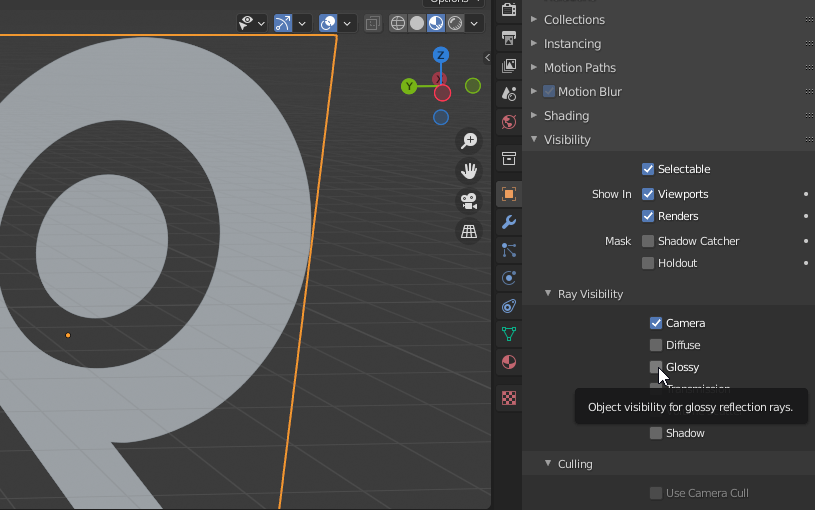
uncheck glossy in the visibility setting of the decal object and see if it helps, it works for me.
(just remember that by doing so the decal will not show up in reflections)
You can do that using the Adjust tool and also globally for all decals in the sidebar’s Decal Defaults.
However, I don’t think that’s the issue here. Maybe playing with the decal height helps? Cycles can introduce z-fighting or clipping if decals are too close to a surface, see https://machin3.io/DECALmachine/docs/decals/#clipping
If that still doesn’t help, then it may also be the alpha map not being perfectly transparent.
1 Like
Thanks, I didn’t know. maybe I should read the manual. ![]()
1 Like
Yeah, that’s what I thought. And I was eliminating one thing at a time just to be sure, and figure out what was going on. I’m curious if it’s just My install of blender or My machine?
I started from a blank scene to make a test here: test material.blend download link
The render looks like this:
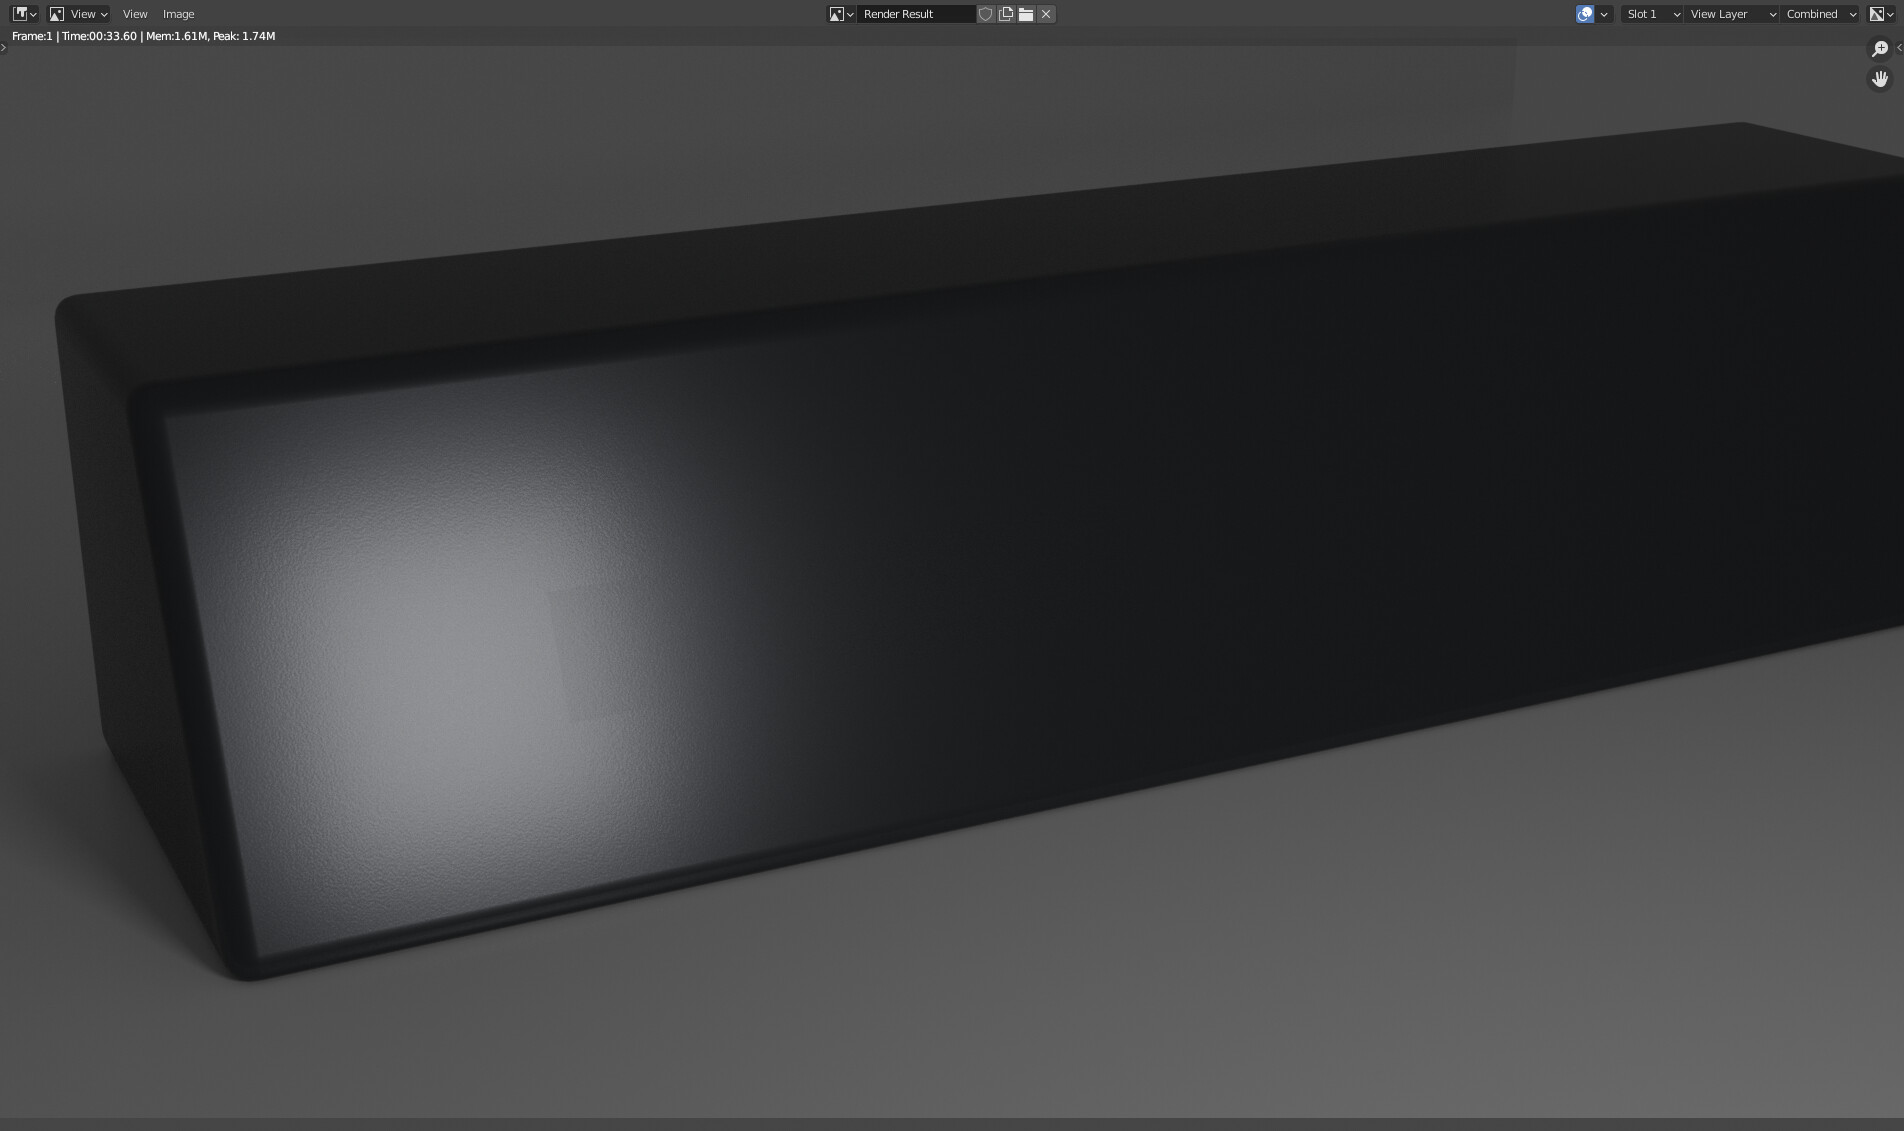
The plane you see there is currently 15mm above the surface using shrinkwrap (not even decal machine for the test)
I checked face orientation, turned off ray visibility to everything but camera, and the material is just a straight transparent bsdf.
The material behind it is somewhat complicated, but you can get the same sort of results if you create a somewhat darker grey material, somewhat rough and reflective, and turn the color management look to high contrast. It’s pretty easily seen in a highlight if you switch to false color as well.
Aaaaand, I just narrowed it down to clearcoat.
That file I shared doesn’t have a basic Principled material in it. I thought I’d start from scratch and see when it shows up. If you have a highlight from a light going through the plane is when it really shows up, which includes image decals from decal machine.
But it wasn’t from a bump map. Once I added clearcoat, it showed up again.
So from what I can tell, clearcoat is “seeing” the completely transparent object somehow? And that’s still with the plane being 15mm offset from the 50cm tall object. So there Should be no clipping issues at that point right? I usually don’t get clipping issues until I’m down toward .005mm close to the surface, or somewhere between .01 and .001 anyway.
Am I doing something dumb, or is this an unintended shading artifact having to do with clearcoat?(doing my best not to call it a bug there)
Please report any issue you have via email, see https://machin3.io/DECALmachine/docs/faq/#get-support