Thought I’d start a W.I.P. thread as somwhere to put my 3D progress, 3D doodles and experiments (not everything I do reaches completion). I’ve renamed my 2D thread (mostly Krita and murals) to Dinoreplicas 2D Doodles.
I’m not starting any serious art projects for a while as my landlord is renovating my accommodation. I’ll be able to use my laptop when I’m round my daughter’s place so I’ll occasionally post some old stuff until I’m operational again.
Might as well start with this, it must have been the first dinosaur skeleton I ever attempted in Blender.
I’m guessing I made this around 2011/12 with the Blender 2.5/2.6 series, It’s heavily influenced by paleo-art skeletal drawings which is something I wouldn’t do now as I prefer to reference academic published material, anyway my knowledge of dino bone structure has improved a lot since I did this. Also it’s very out of date as new specimens show that Steggy had a longer neck, shorter body and lower posture without such a pronounced curve in the spine.
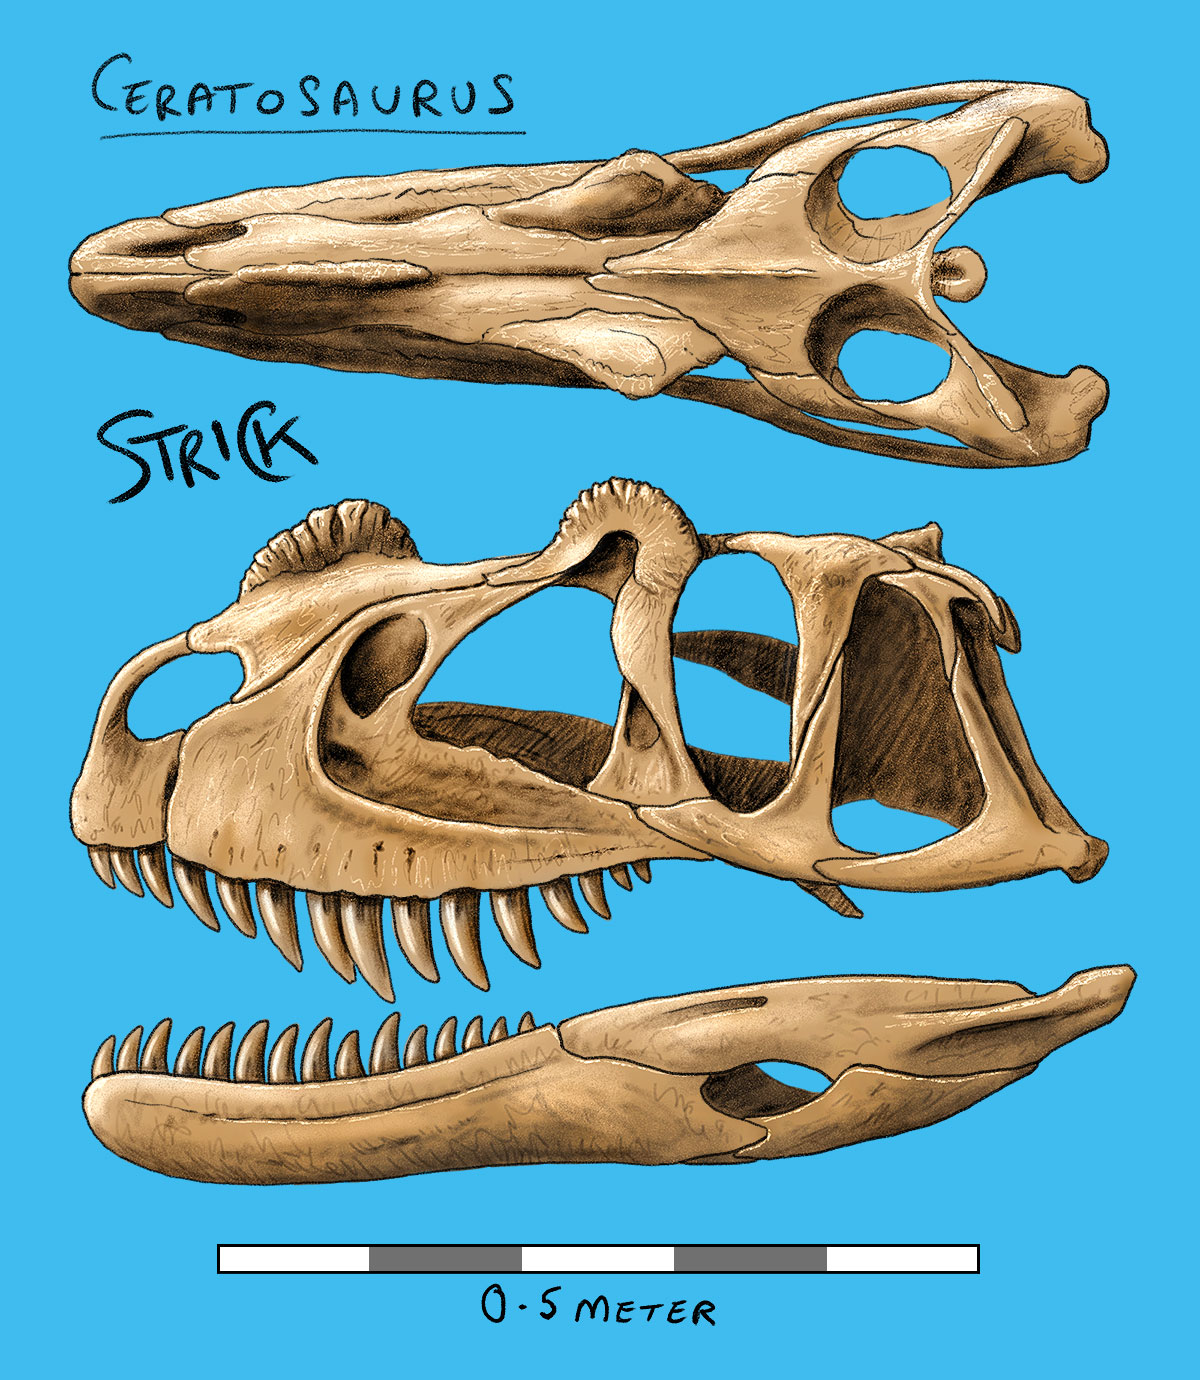
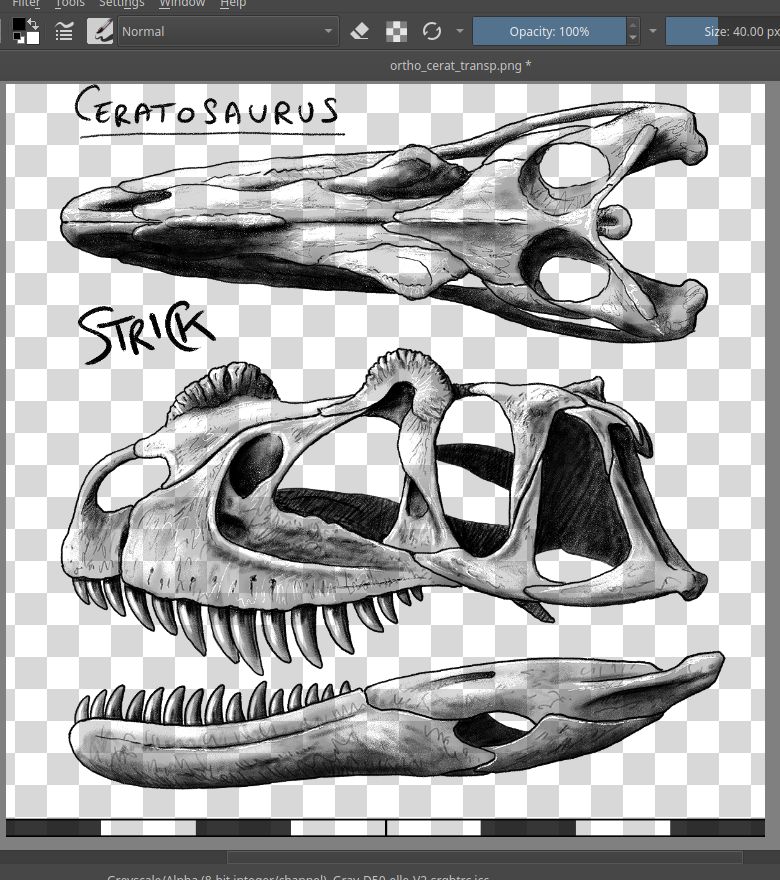
Decided to make another skull for 3D print. Mostly based on specimen MWC 1 with parts adapted from other Ceratosaurus fossils. I normally create these orthographic views traditionally with pencil and tracing paper, this time I drew it entirely digitally in Krita, traced over digitally assembled reference.
In the next few weeks I’m hoping to put a new PC together so I can have a go at the Blender 2.8/2.9 series. With my current hardware I’m still mostly bound to v2.79 but that will be fine for making this model.
This one’s been brooding in the background for too long, time to get started on the 3D model.
I’ll put a few process pics up but not too many 'cause it slows me down. If anyone’s interested in my methods there’s a few threads here on the Dinotoy Forum.
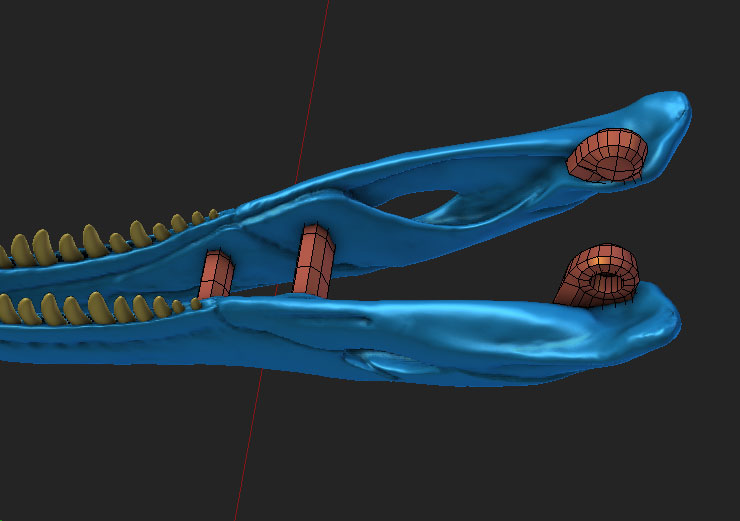
To make the skull I’m going to employ the same 3-step process I used for the Mosasaurus and the Styracosaurus, it’s a bit of an odd approach but I like it.
freeform a ‘scaffold sculpt’ to form the basic shape
construct a low poly mesh over the scaffold
subdivide the low poly mesh and add details
The original orthographic drawing had a 0.5 meter scalebar but I’ve changed it to 0.8 meter so it encloses the length of the skull. This makes it easy to set up the template images in Blender which lets you set the width of the image numerically.
Starting the scaffold by approximating the form with subdivision surfaces, this eliminates a lot of messing about push/pulling a cube or sphere into shape.
This is the process the building a poly cage. I like to work out the polygon flow by painting lines on the scaffold model. I start by defining the major edges, then fill in a traverse lines to make ladders of irregular, mostly 4-sided areas. It’s a bit of trial and error and takes sometimes takes a few redos. Then with face snapping on I can just add polygons over the painted guides.
I’ve got a bit further since I made this GIF but I’m done for today, I’ll check it over tomorrow and probably post some updates over the weekend.
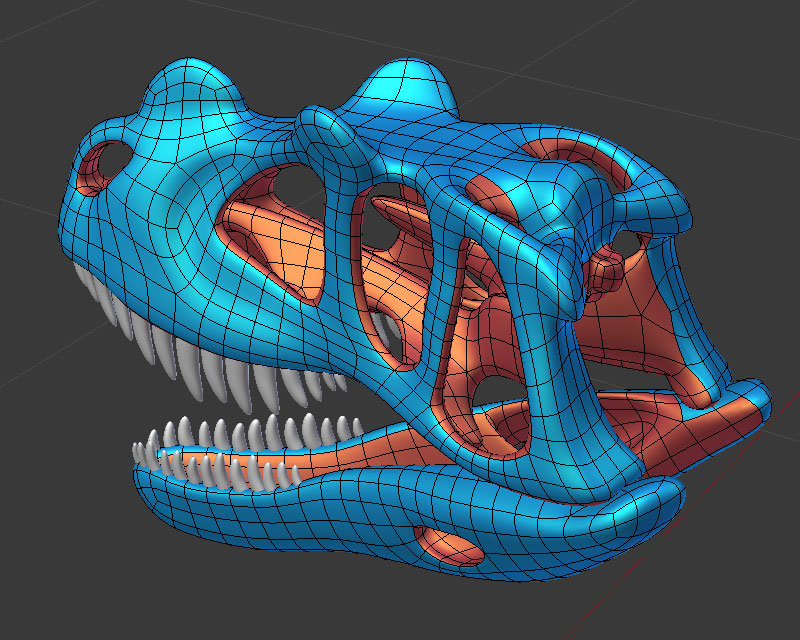
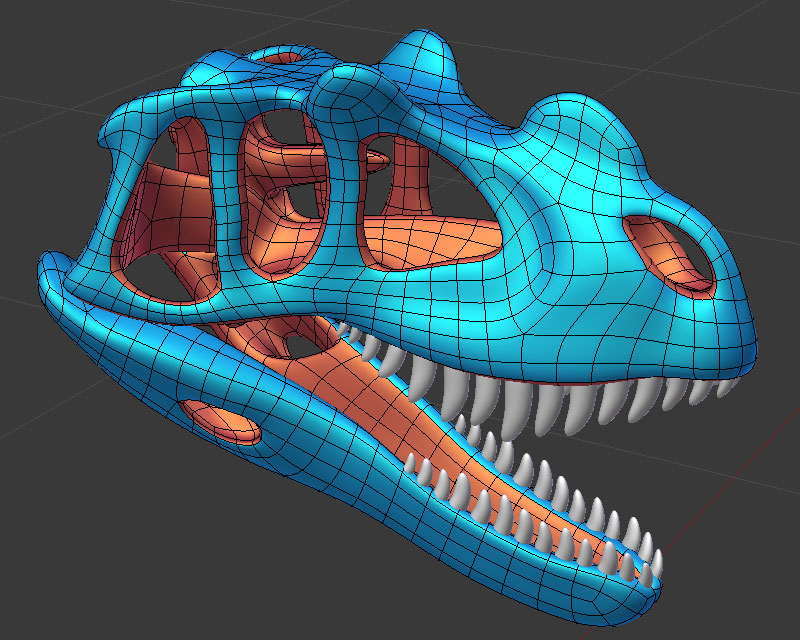
Might as well keep pushing this forward while I’m in the mood. Theropod teeth in Blender, a relaxing break from making the cranium. Apart from the profile shape the main thing is to make sure they are narrow.
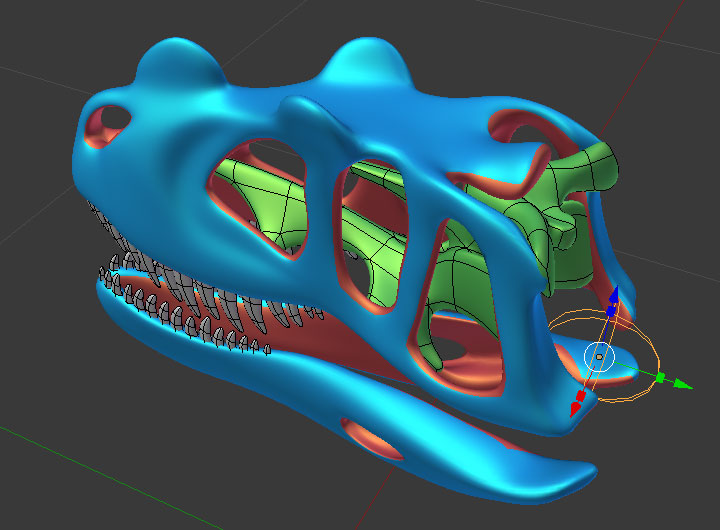
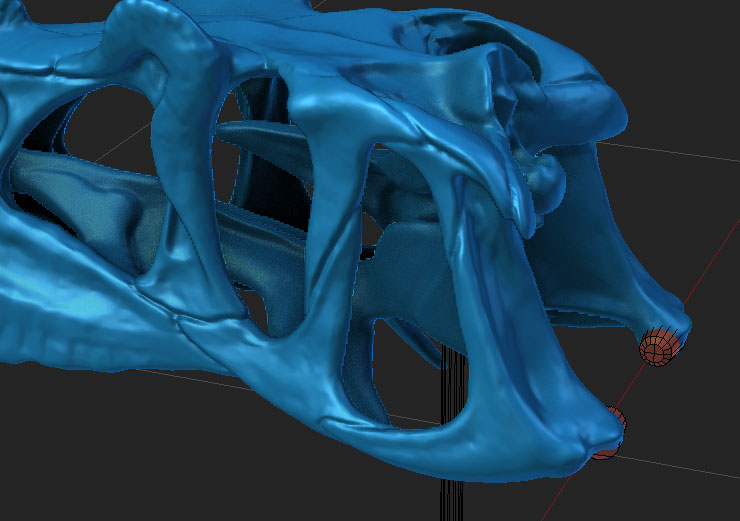
The solidify modifier is my quick and easy way to add thickness to the polygon surface. Once it’s applied I’ll need to make a few adjustments with respect to inner structures. Also form a cranium roof.
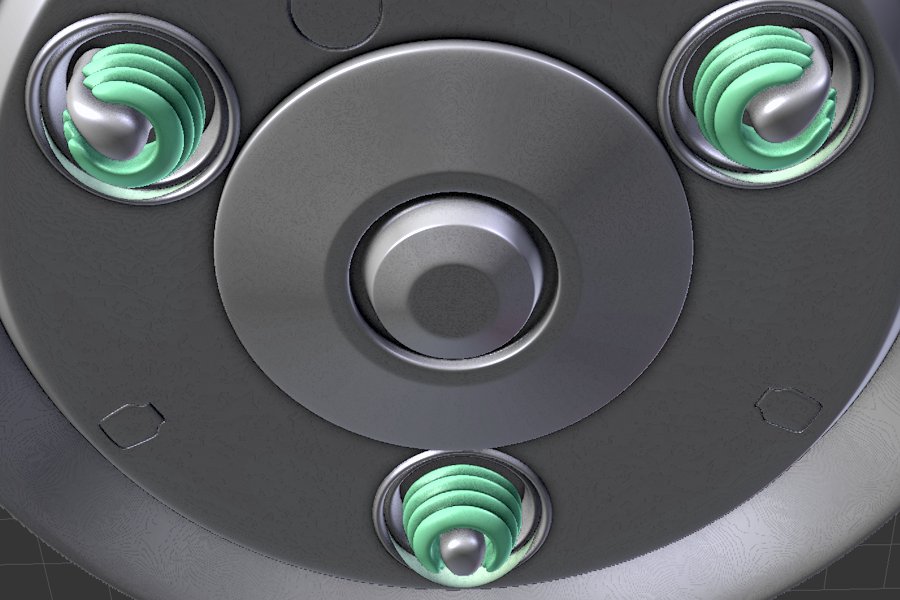
Viewed separately, the palette and brain-case section (green) looks like some kind of alien slug. Just need to get it joined to the cranium to complete the base mesh.
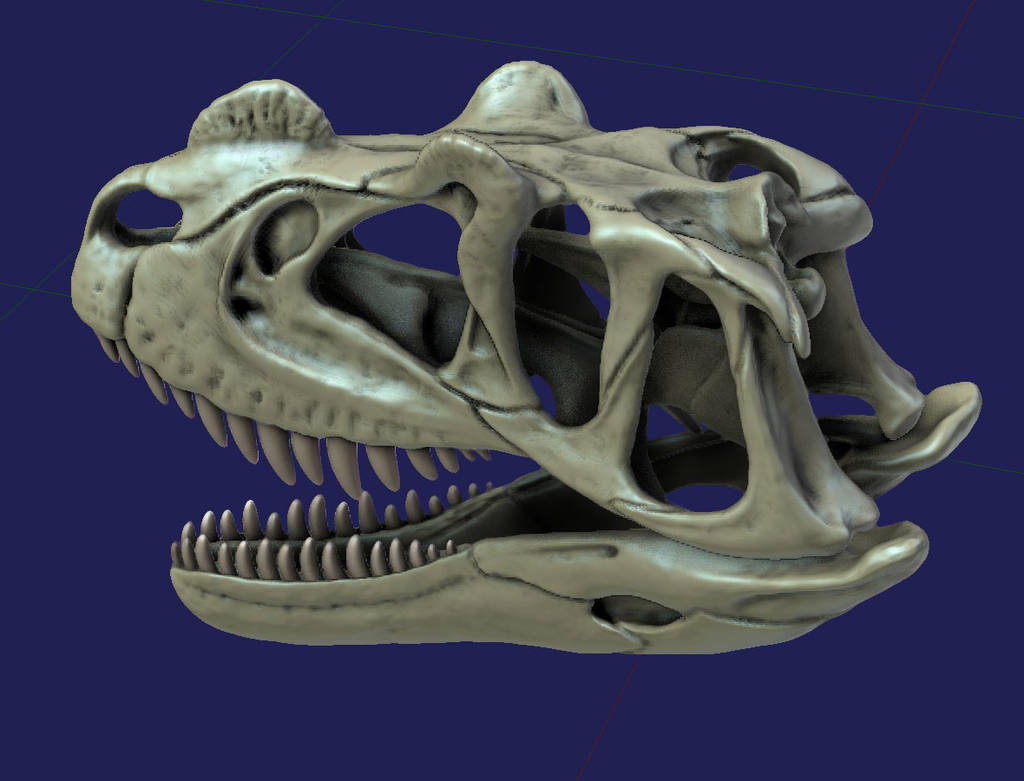
Blender’s decimate modifier can get a couple of million polys down to a few hundred thousand without mangling the details. I don’t go too fine with details anyway as they disappear in the print.
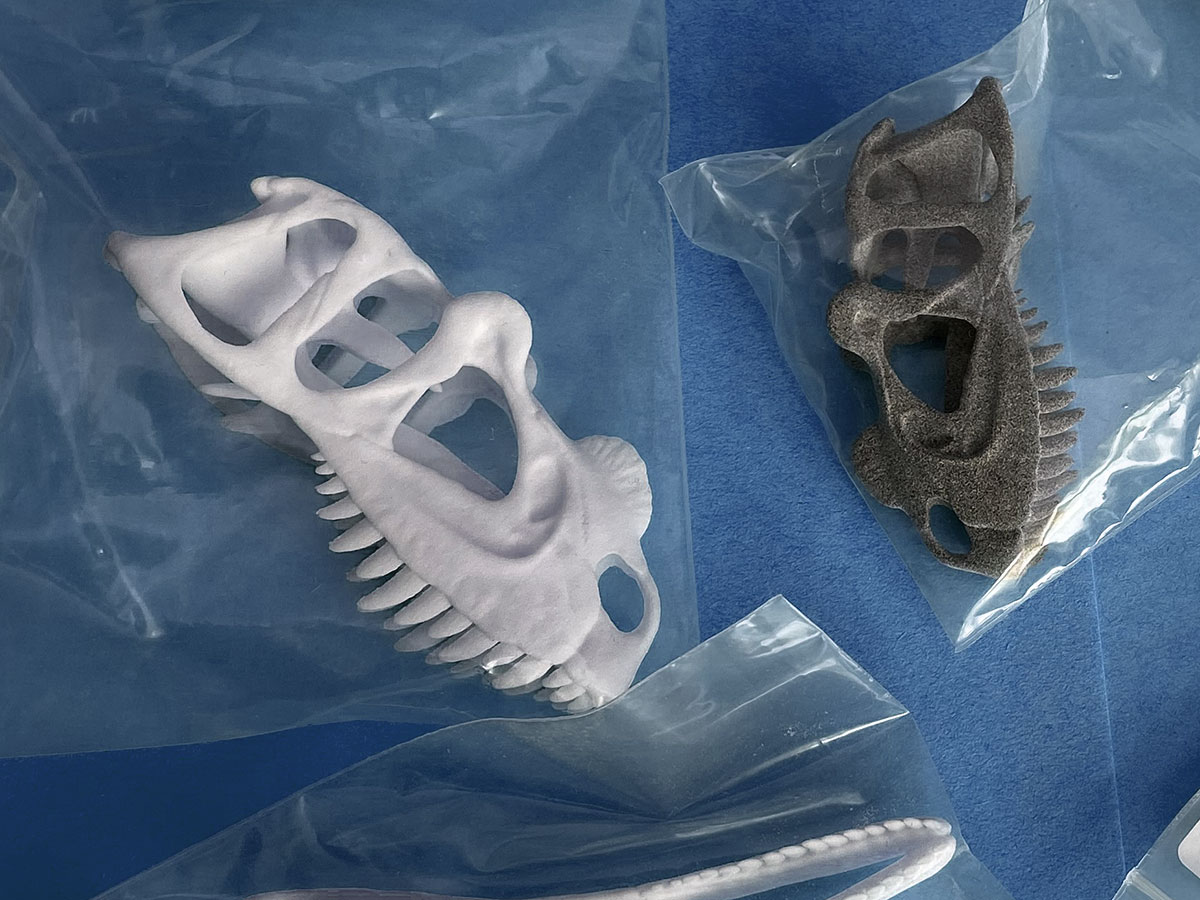
Made the parts for the print version. This is just about ready now, going to try it at these scales- 1:8, 1:10, 1:12 and 1:16.
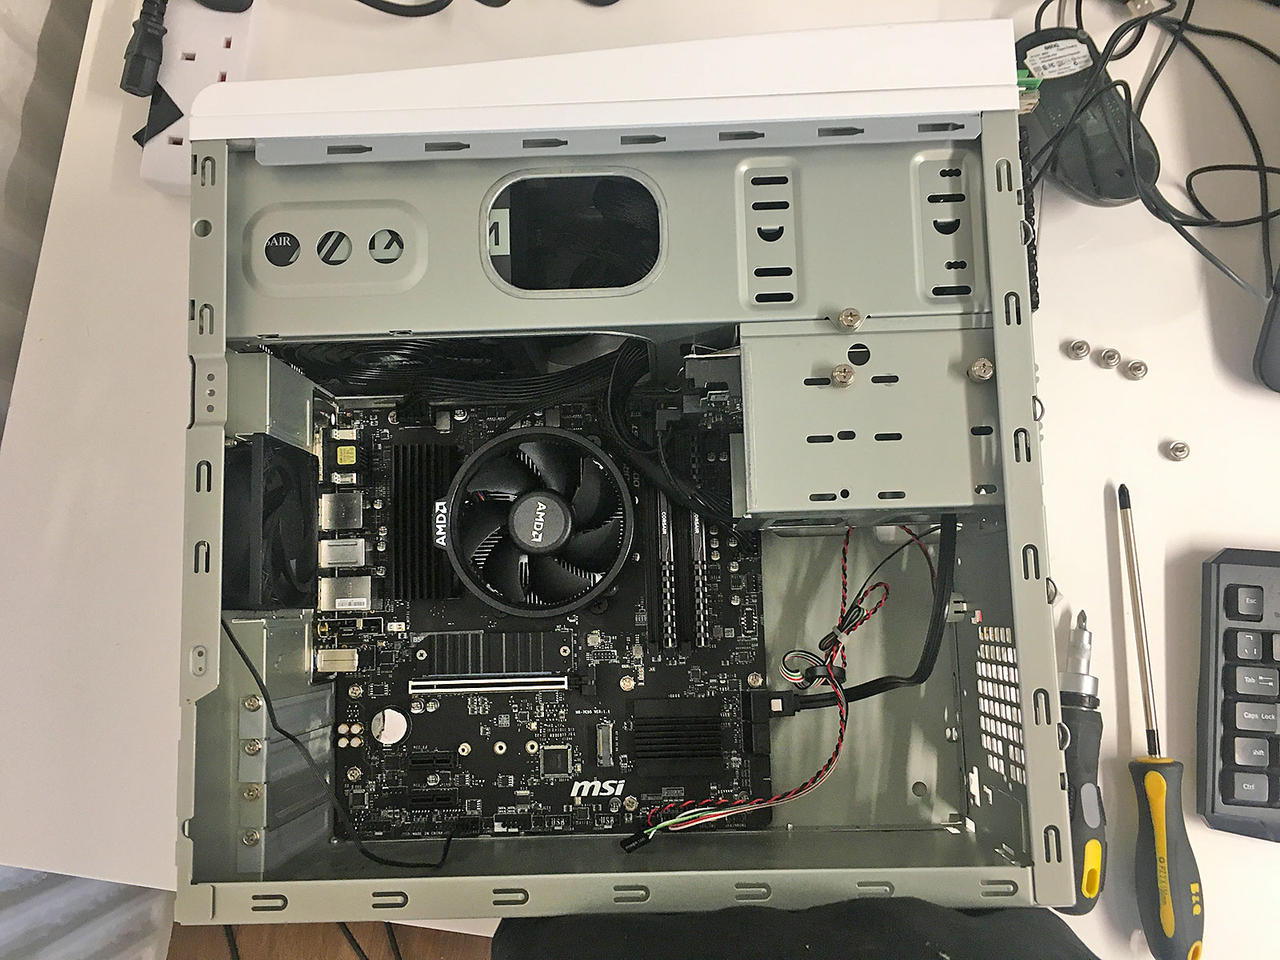
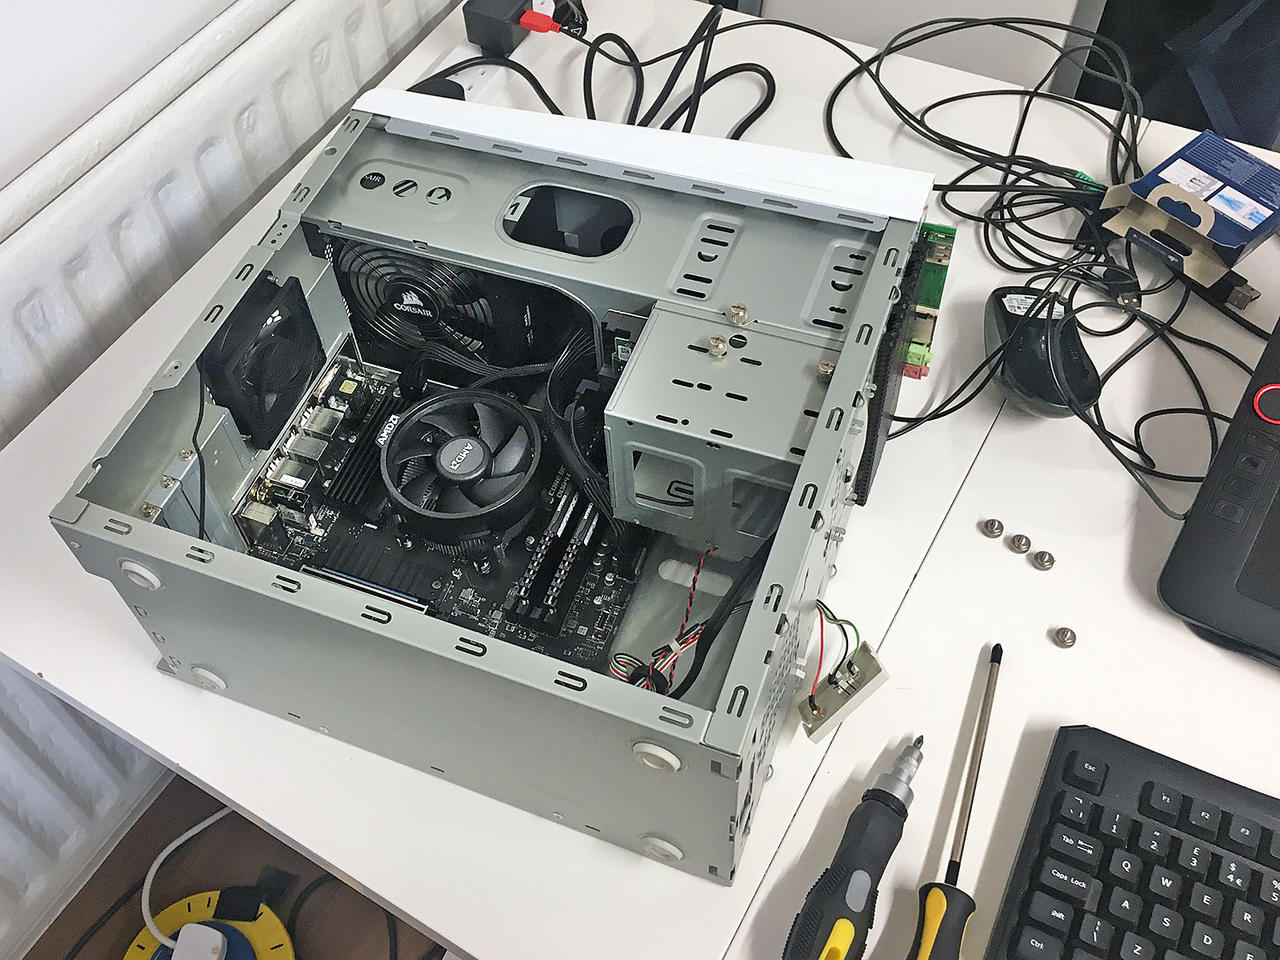
Also got started on my new PC build. It’s a fairlymodest spec, a 6 core AMD Ryzen 5 APU with 16Gb Ram.
The old mechanical hard drive is temporary, got an M2 drive coming this weekend but I want to test this now.
It should mean I can finally move on from Blender 2.79 and onto the newer versions. Might add a proper GPU later.
The case was donated by a friend. I had to replace my previous desk and my old Antec 300 case is too tall for the new one. Might keep the case if the cooling is adequate.
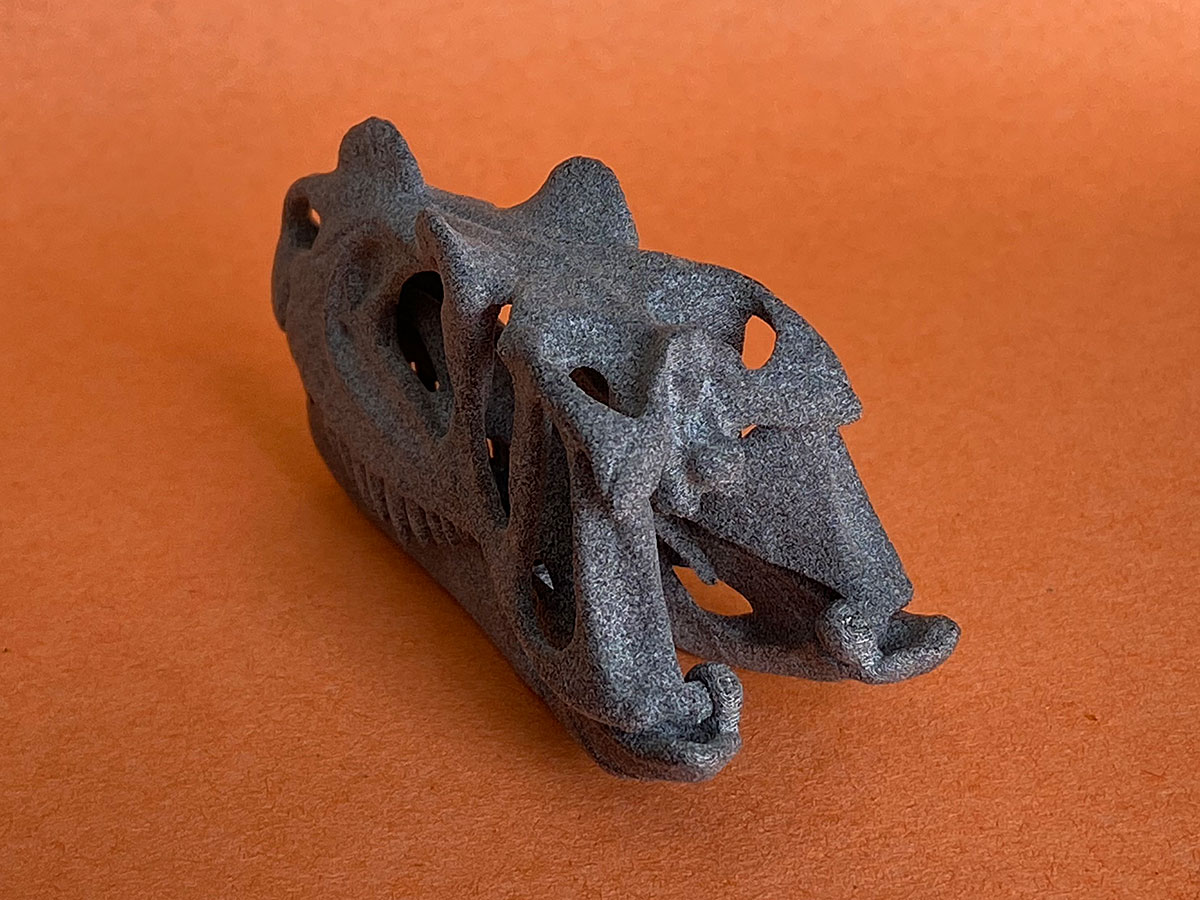
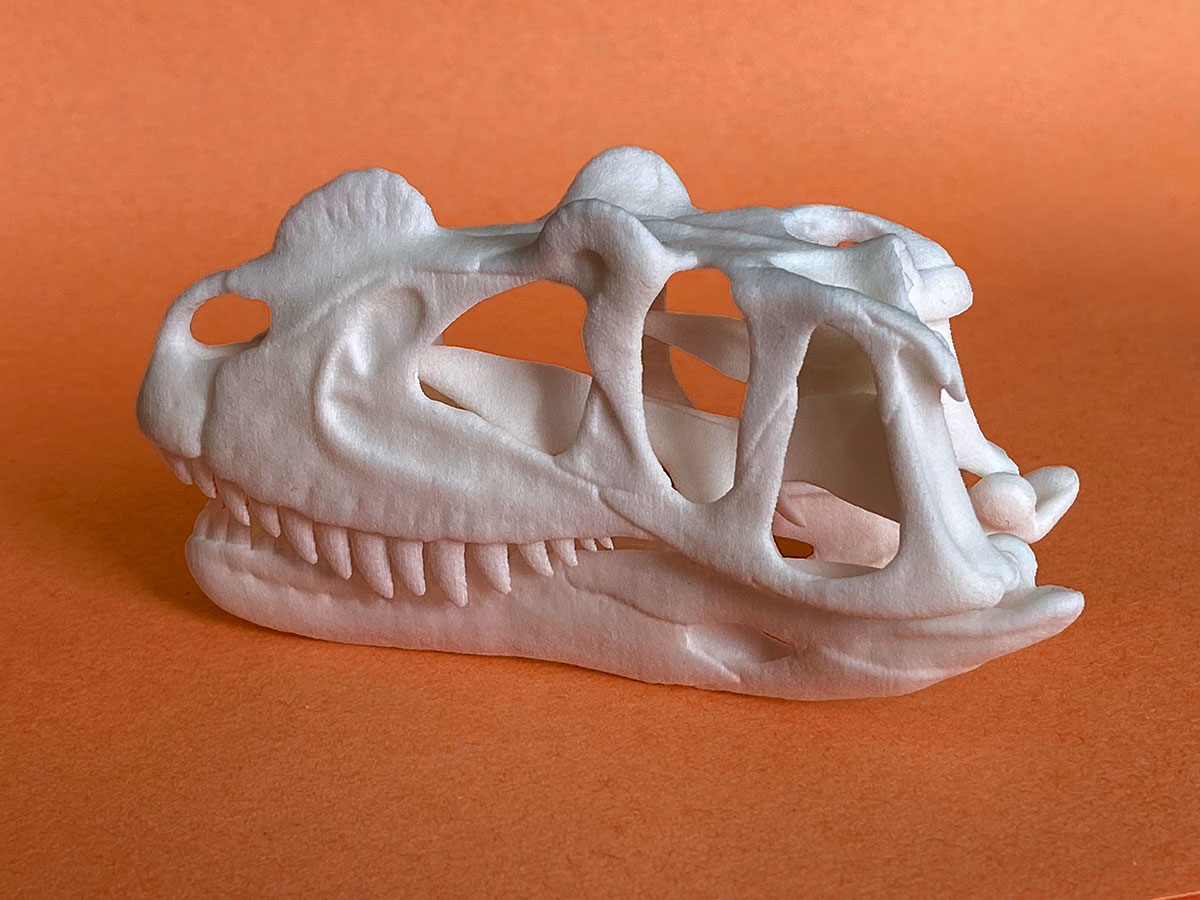
A few more photos before I paint these, jaw articulation seems to work well. Both prints are nylon material, the white one is Selective laser sintering process and The grey is multi jet fusion.
Painted the Ceratosaurus skulls yesterday, still need to make a stand for the big one. Now I’m rushing to finish the photos, wouldn’t mind putting the model on Shapeways tomorrow. The hot pink background paper worked OK, going to add a bluish vignette round the edges.
You must really like dinosaurs, because these seem to have a lot of work and passion put into them, the detail is great and the structure is too! You did great work here
Thanks to the new PC I’m finally able to move on from Blender 2.79 and have a play with newer versions, in this case Blender 3.2.
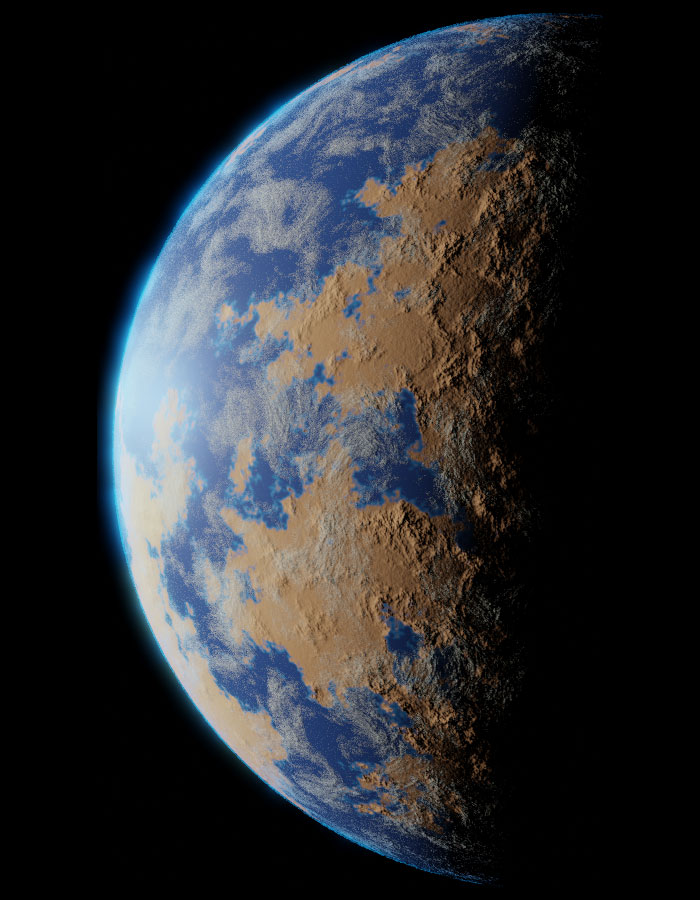
Thought I might have to buy a GPU but for the moment the Eevee renderer seems to work OK on my CPUs built-in graphics, these screen-grabs were done with Eevee but the results are similar with Cycles. The first thing I wanted to try to make was planets!
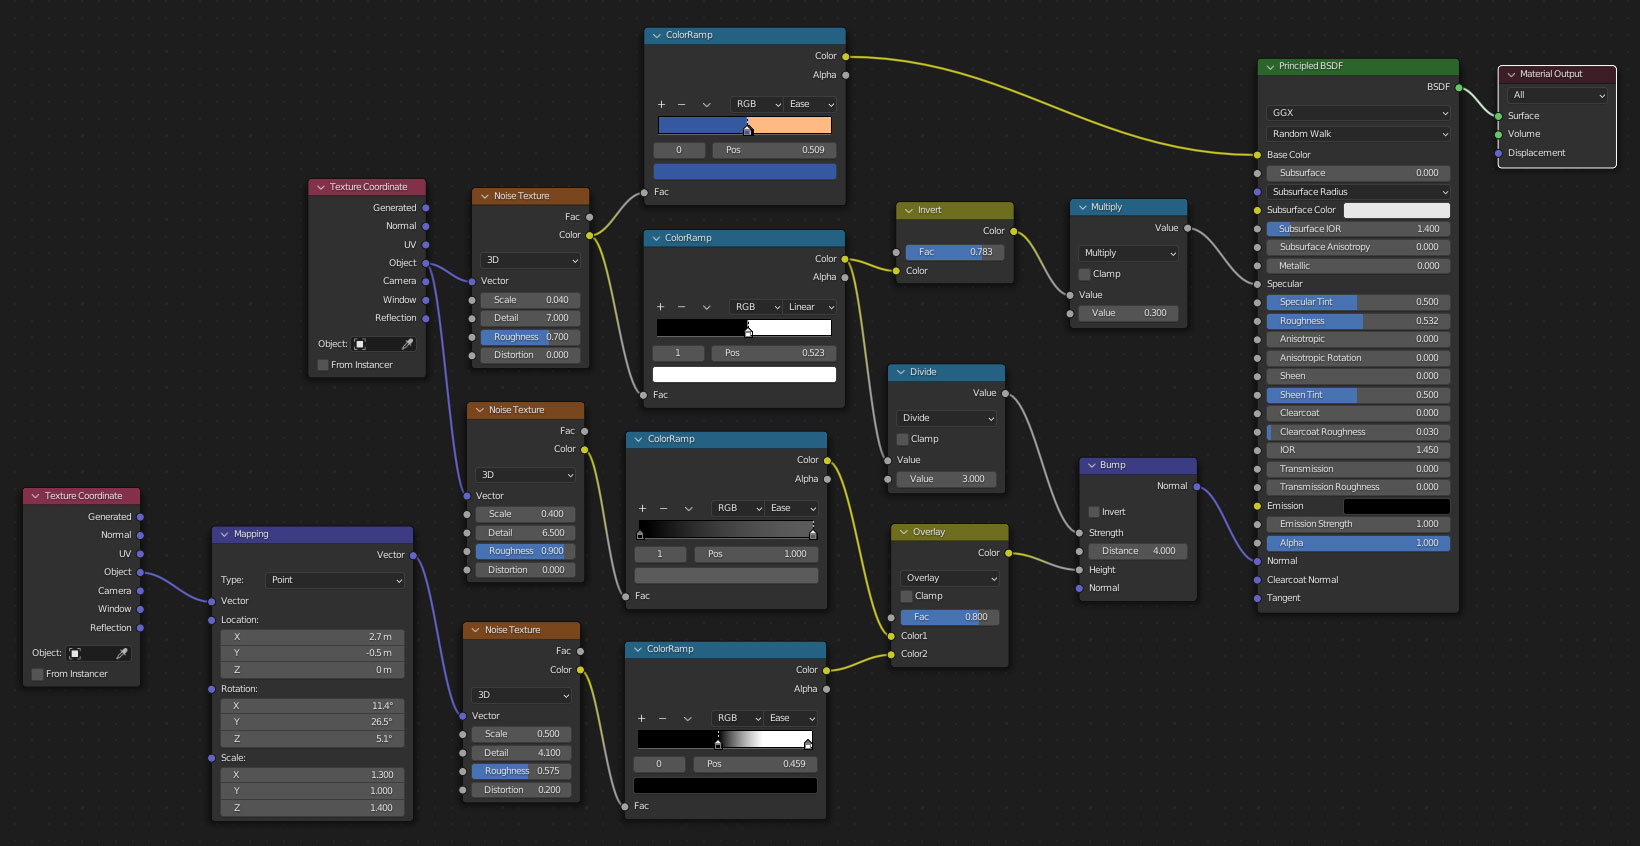
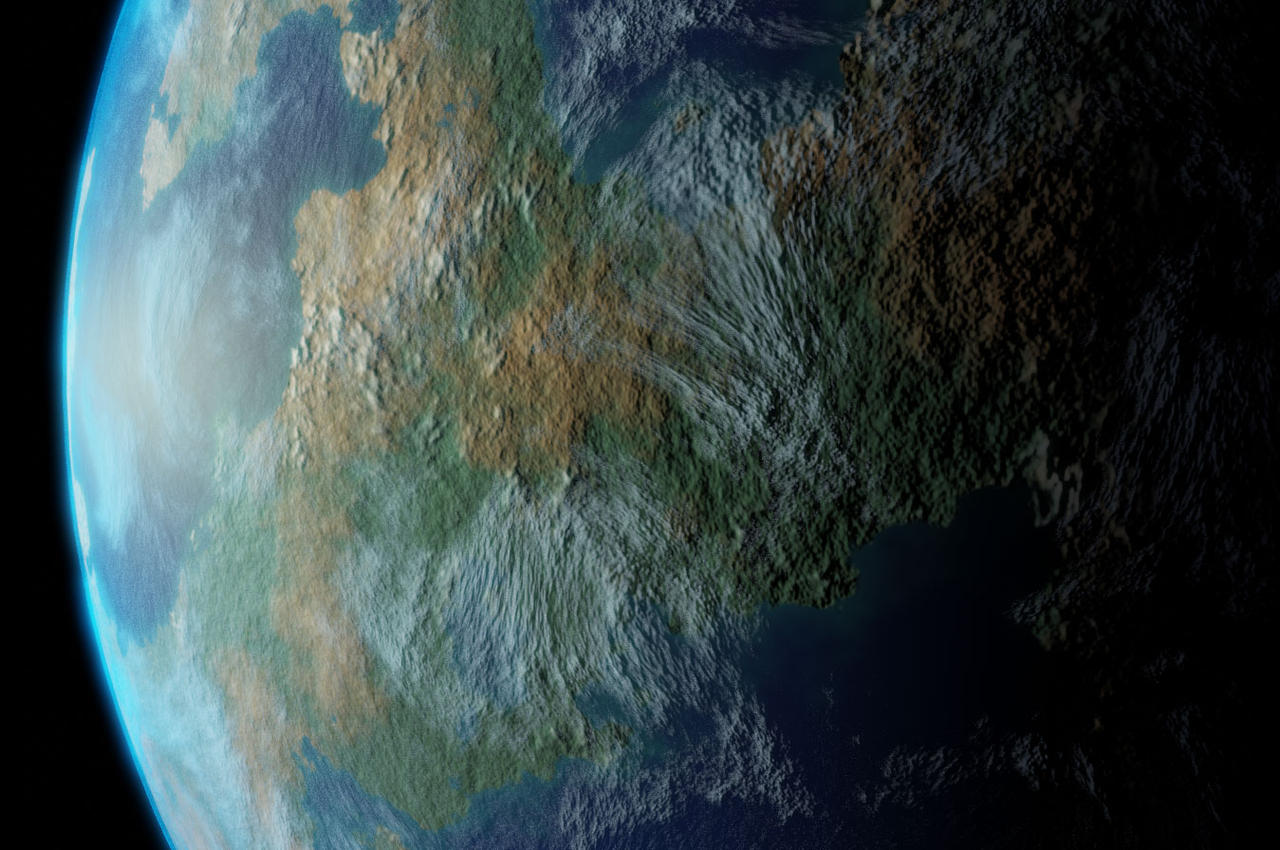
This was the first attempt at a rocky planet material I’ve tried to put everything into one BDSF shader. The atmosphere is a separate sphere containing clouds and cyan rim glow.
The node graph for this is pretty simple (it’s my first go). You can see I’m using procedural noise to drive a bunch of colour ramps. I’m using a clamped B&W ramp to make the continent mask. There’s a second component to the land part that adds the mountain ranges.
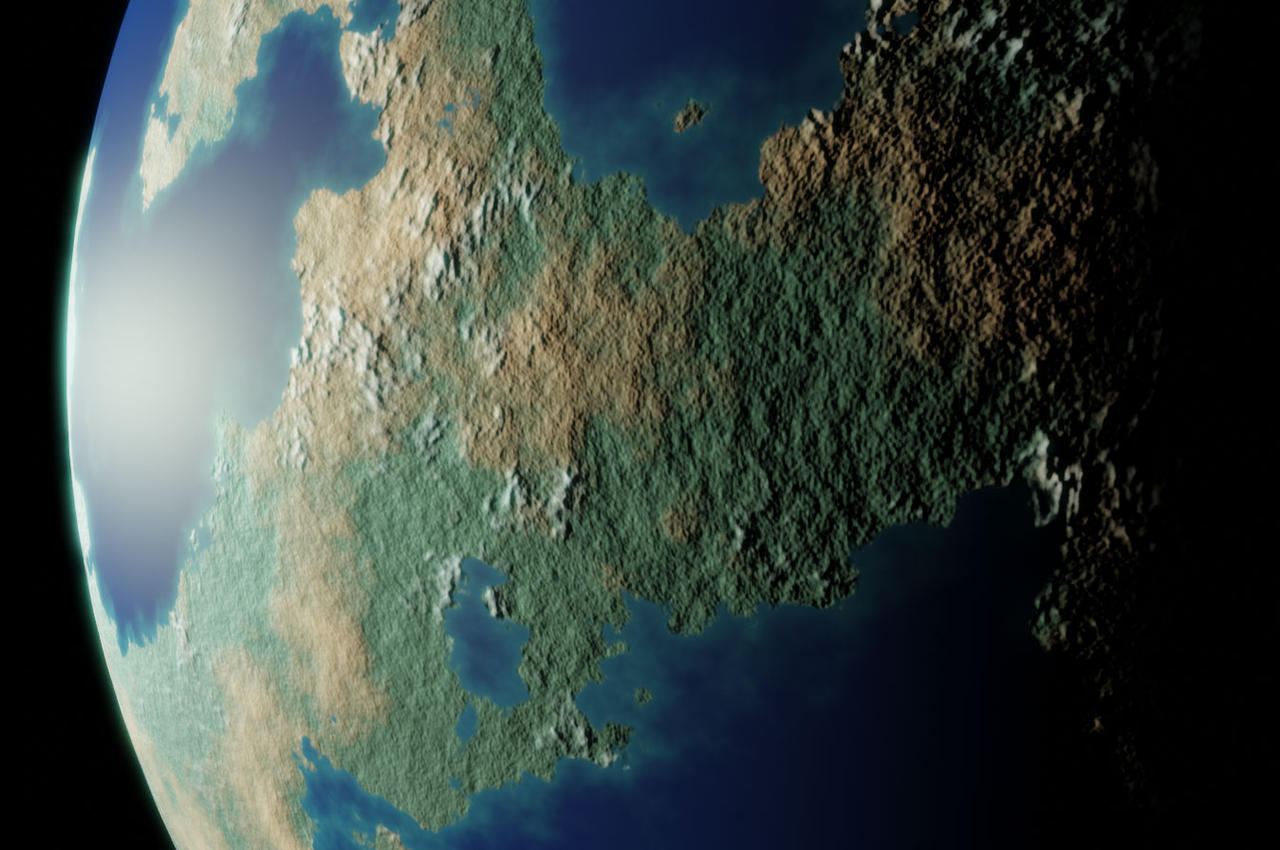
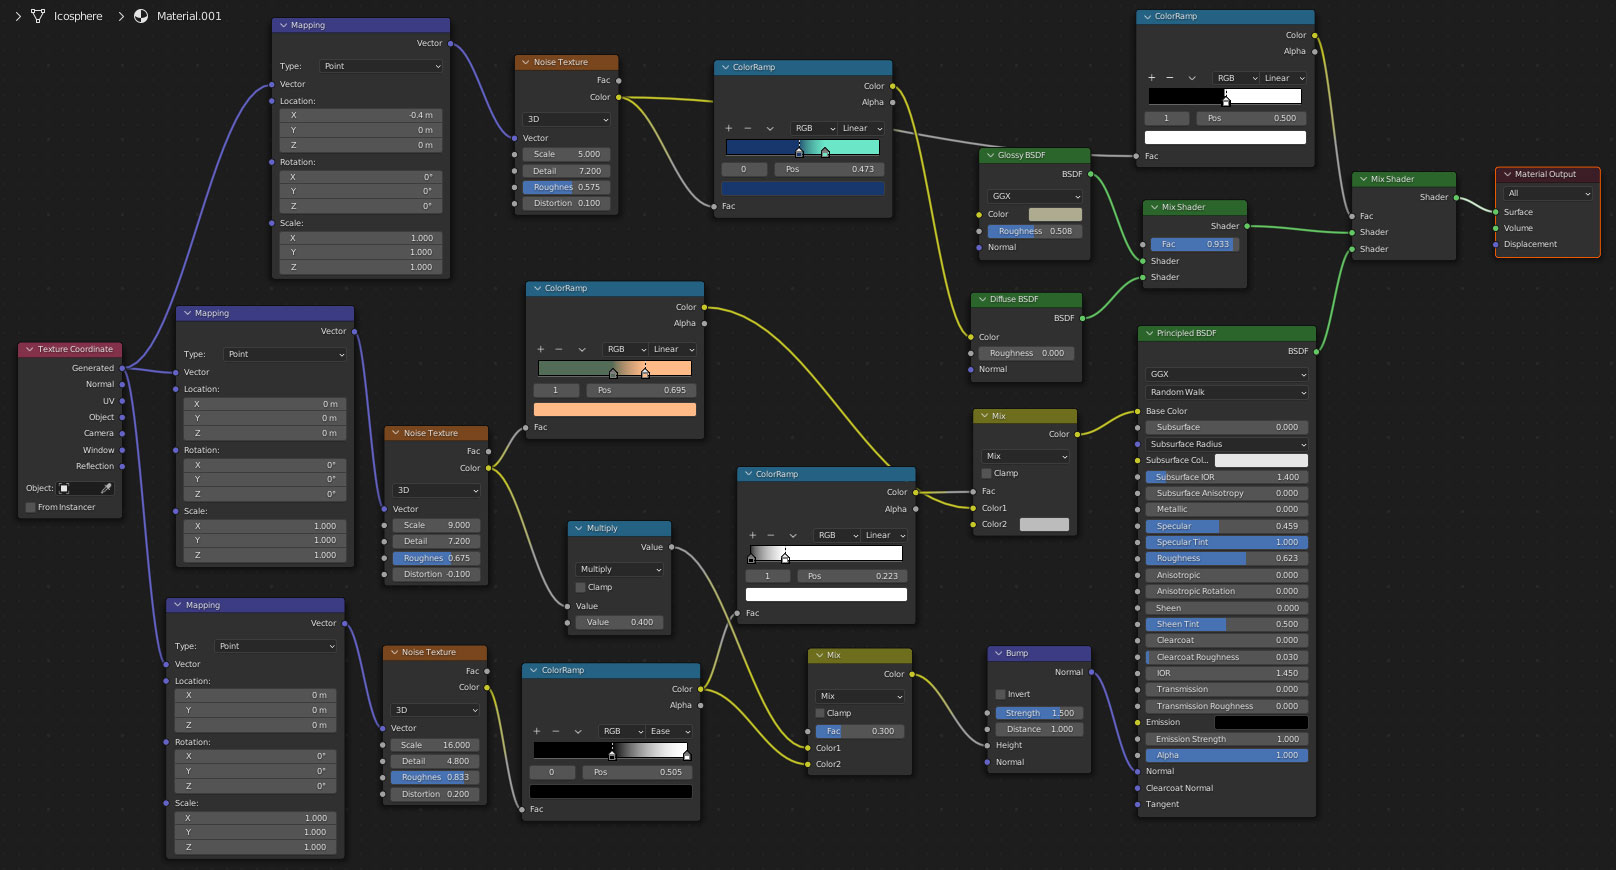
It was hard to get a good transition between land and water, more so when zoomed in. The second attempt uses 3 materials in one shader (5 if you count the mixers), a BDSF for the land and a simple diffuse/glossy mix for the water. This time the mask is separating shaders which gives a better specular transition. The land bump is too pronounced but it’s less noticeable when the clouds are present. The clouds are a bit stretched, I was trying to get a wind-blown look.
The nodes are a bit more convoluted for this one. I’d still prefer to have everything within one shader in the material. probably baking to image textures is the way to go for surface details but I’d still need to use angle based effects for things like atmosphere glow and dark-side city lights.