For close-ups of the windows, I can make some actual room settings to give it a better effect. Nothing too elaborate though. That’s sort of what I have planned for the above room cells.
Excellent, the parallax of real models will help a lot!
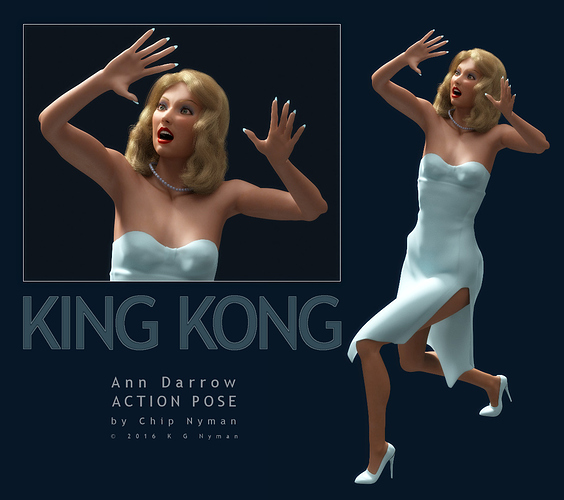
So, Ann looks good in her wardrobe, but, can she act?
Ayup!
A dynamic test of both the model & clothing, and both performed quite well. I can see a few places to tweak but all-in-all ready for an animation test.
A few window test shots…


I need to get the outside lighting to penetrate the glass enough to cast some light on the objects near the window, while the inside lighting still shows off enough of the colors of the background objects to make the scene look more realistic.
More window settings and background props will be made once I get this lighting issues dealt with on these. I’m open to any tips or suggestions.
If we stick to the script(s) from the two version, the climb will be at night, so external lighting would be from whatever spots you use for the exterior of the building. You can fake a low-level of ambient light for the items near the windows with mesh emitters set to not show on camera. Also, practical lights (as they call them in the movie FX biz) like desk lamps, lamps mounted on the wall, maybe even an illuminated clock, can help give the eye something to key on easily.
Be sure to check on BlendSwap for these kinds of accessories, it’s a great resource, excellent timesaver.
Night shots will make this a LOT easier, but i still want to get the effect of sun shadow on some of the windows I make. I’ll try to figure out how to set up mesh emitters. I’ll also go check out BlendSwap.
Thanks!
Mesh emitters (aka mesh lights) are a Cycles thing, regular meshes set to emit light using the Emission shader node. In Cycles you can also set an object to be invisible to the camera but still react to or emit light, very handy for faking various lighting solutions.
Be sure to check out the many Cycles materials files to be found on BlendSwap as well as the models. If you are new to Cycles, such collections can be invaluable both as right-now resources and as learning tools.
I don’t think I’ll be able to use Cycles much… It’s very slow rendering on my poor old computer.
I feel your pain, I had to give up rendering any new stuff for a time until I could afford a new machine, and of course, I’m straining it, too, lol. But I think Cycles really is the way to go. You may not be able to render full scenes, but materials tests, lighting tests, etc. should be OK. Just avoid hair! Hair in Cycles really puts major demands on my comp, so of course, I specialize in human figures, 'specially women. 
Doing even a simple test render takes a long time in Cylces. Add up all the test renders to put together one scene and I’m looking at many days of time where I can’t use my computer at all. It isn’t worth it to me.
EDIT: I tried downloading one asset from BlendSwap, (an office chair), and it was 1.5 million verts! It took me 45 minutes to load it and then remove it.
Oh, man, you got the luck today, all of the bad sort :(. BlendSwap isn’t usually that mean, maybe avoid files that are rather too large for their subject?
I no longer use BI for my figures, don’t even have a skin shader for it, let alone hair, eyeballs, etc. I’d be willing to convert your BI stuff to Cycles (with approval renderings of course) for the final push, if you think that’s a good option. Same with lighting.
You can apply your magical touch to whatever I model. I’m totally open to that. I haven’t textured anything though, except the windows and the street-level entrance.
No probs. You do the UV Mapping since you’re familiar with the topologies, and I can do the Cycles mats. I have a decent library already but there are a lot of Cycles packages on BlendSwap, including one of mine.
Let me know when you want the UV maps and I’ll see if I can unwrap this thing.
I spent all yesterday trying to figure out why the white of my window shades won’t show up in the window. I even removed the faces of the window that were transparent so the light could penetrate, but they still come out dark grey, like you see on the left. They should be white like you see on the right. Any ideas?
Looks like the window glass could be casting a shadow on the shades – use Transparent Shadows (or similar, I don’t recall the exact nomenclature in BI) for the glass material, or mark them to not cast shadows at all (again not sure the exact means in BI). Sorry I can’t be more specific, it’s been years since I worked in BI, and I think in Cycles now lol.
Modeling of the interiors looks good, simple enough to carry the idea and not cluttered.
I found the problem… I had THREE copies of the window all stacked on top of each other! Yeesh! What a moron I am sometimes!
Now I can get back to having fun making these things… :eyebrowlift2:
Ah, yes, the ol’ three-window-panes problem, yes, been there m’self. ![]()
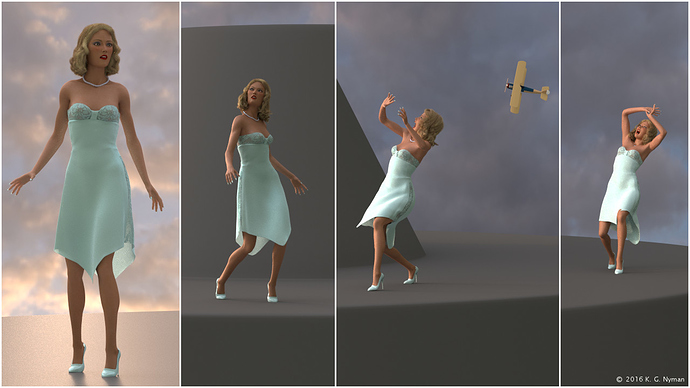
Ann has been very Lively lately (major points to whomever spots that trivia ref), with my first animation test of the model:
Stills:
Besides the animation this also tested Ann’s gown & hair simulations, which required dozens of test bakes to pin down the best parameters. Now I need to start finalizing the shaders and materials. I thnk the lighting is appropriate for the story, as the bi-planes attack in early morning. The BG imagery is just a placeholder for now (a view of the city & its surrounds would be best) but does lend a lot of drama to the scene I think. Imagine the planes circling among the clouds…
My windows didn’t turn out very well, so I’m sticking with the ones I was already using. They look pretty good anyway.
I started adding a ballroom/dining room to the observation deck level. I’ll post some images later.
Cool work, AF! Stuff for Kong to kick around!  I have a Wrought Iron shader for Cycles that will play well with that filigreed railing.
With Anthony’s model work on the ESB and the biplane in hand I’ve expanded my setting for Ann’s reaction to the air attack, but haven’t yet done any but rudimentary Cycles shaders for them, no materials or detailing yet. The exception is Ann’s gown, which I redesigned and finalized the fabric look: satin and lace, a little more conservative cut, but still showing off her lovely legs. Hair style is improved (closer to Fay Wray’s 1933 styling) and works with Hair Dynamics better now, but still needs a little polishing, it’s not quite casual enough.
Along with the 4 frames from Ann’s animation, I did a few insert and cutaway shots, blocking out camera angles. The biplane needs some remodeling into a two-seater fighter (needs a gun!), the Curtiss Hellcat, and its current shaders are mere placeholders, but they work well for setting up shot plans. Same for the ESB tower model – I discovered in researching the topmost floors that the wider “ledge” Ann is acting on is a fairly recent development (for the workers on the zillions of antennae mounted there now), so I’ll be thinning that down considerably as well as adding detail to the 102nd & 103rd floor exteriors.
In case you’re wondering, the big open space in the final image above is patiently awaiting the Big Ape :D.
Lots of work done on the Curtiss Hellcat model, though color scheme and shaders are not final, and I need to make its guns & flyers.
If anyone with mad aircraft material skilz would care to dress this fine fighter plane as it richly deserves, please speak up! I’d greatly appreciate both the help and the chance to learn how it’s done right 


