
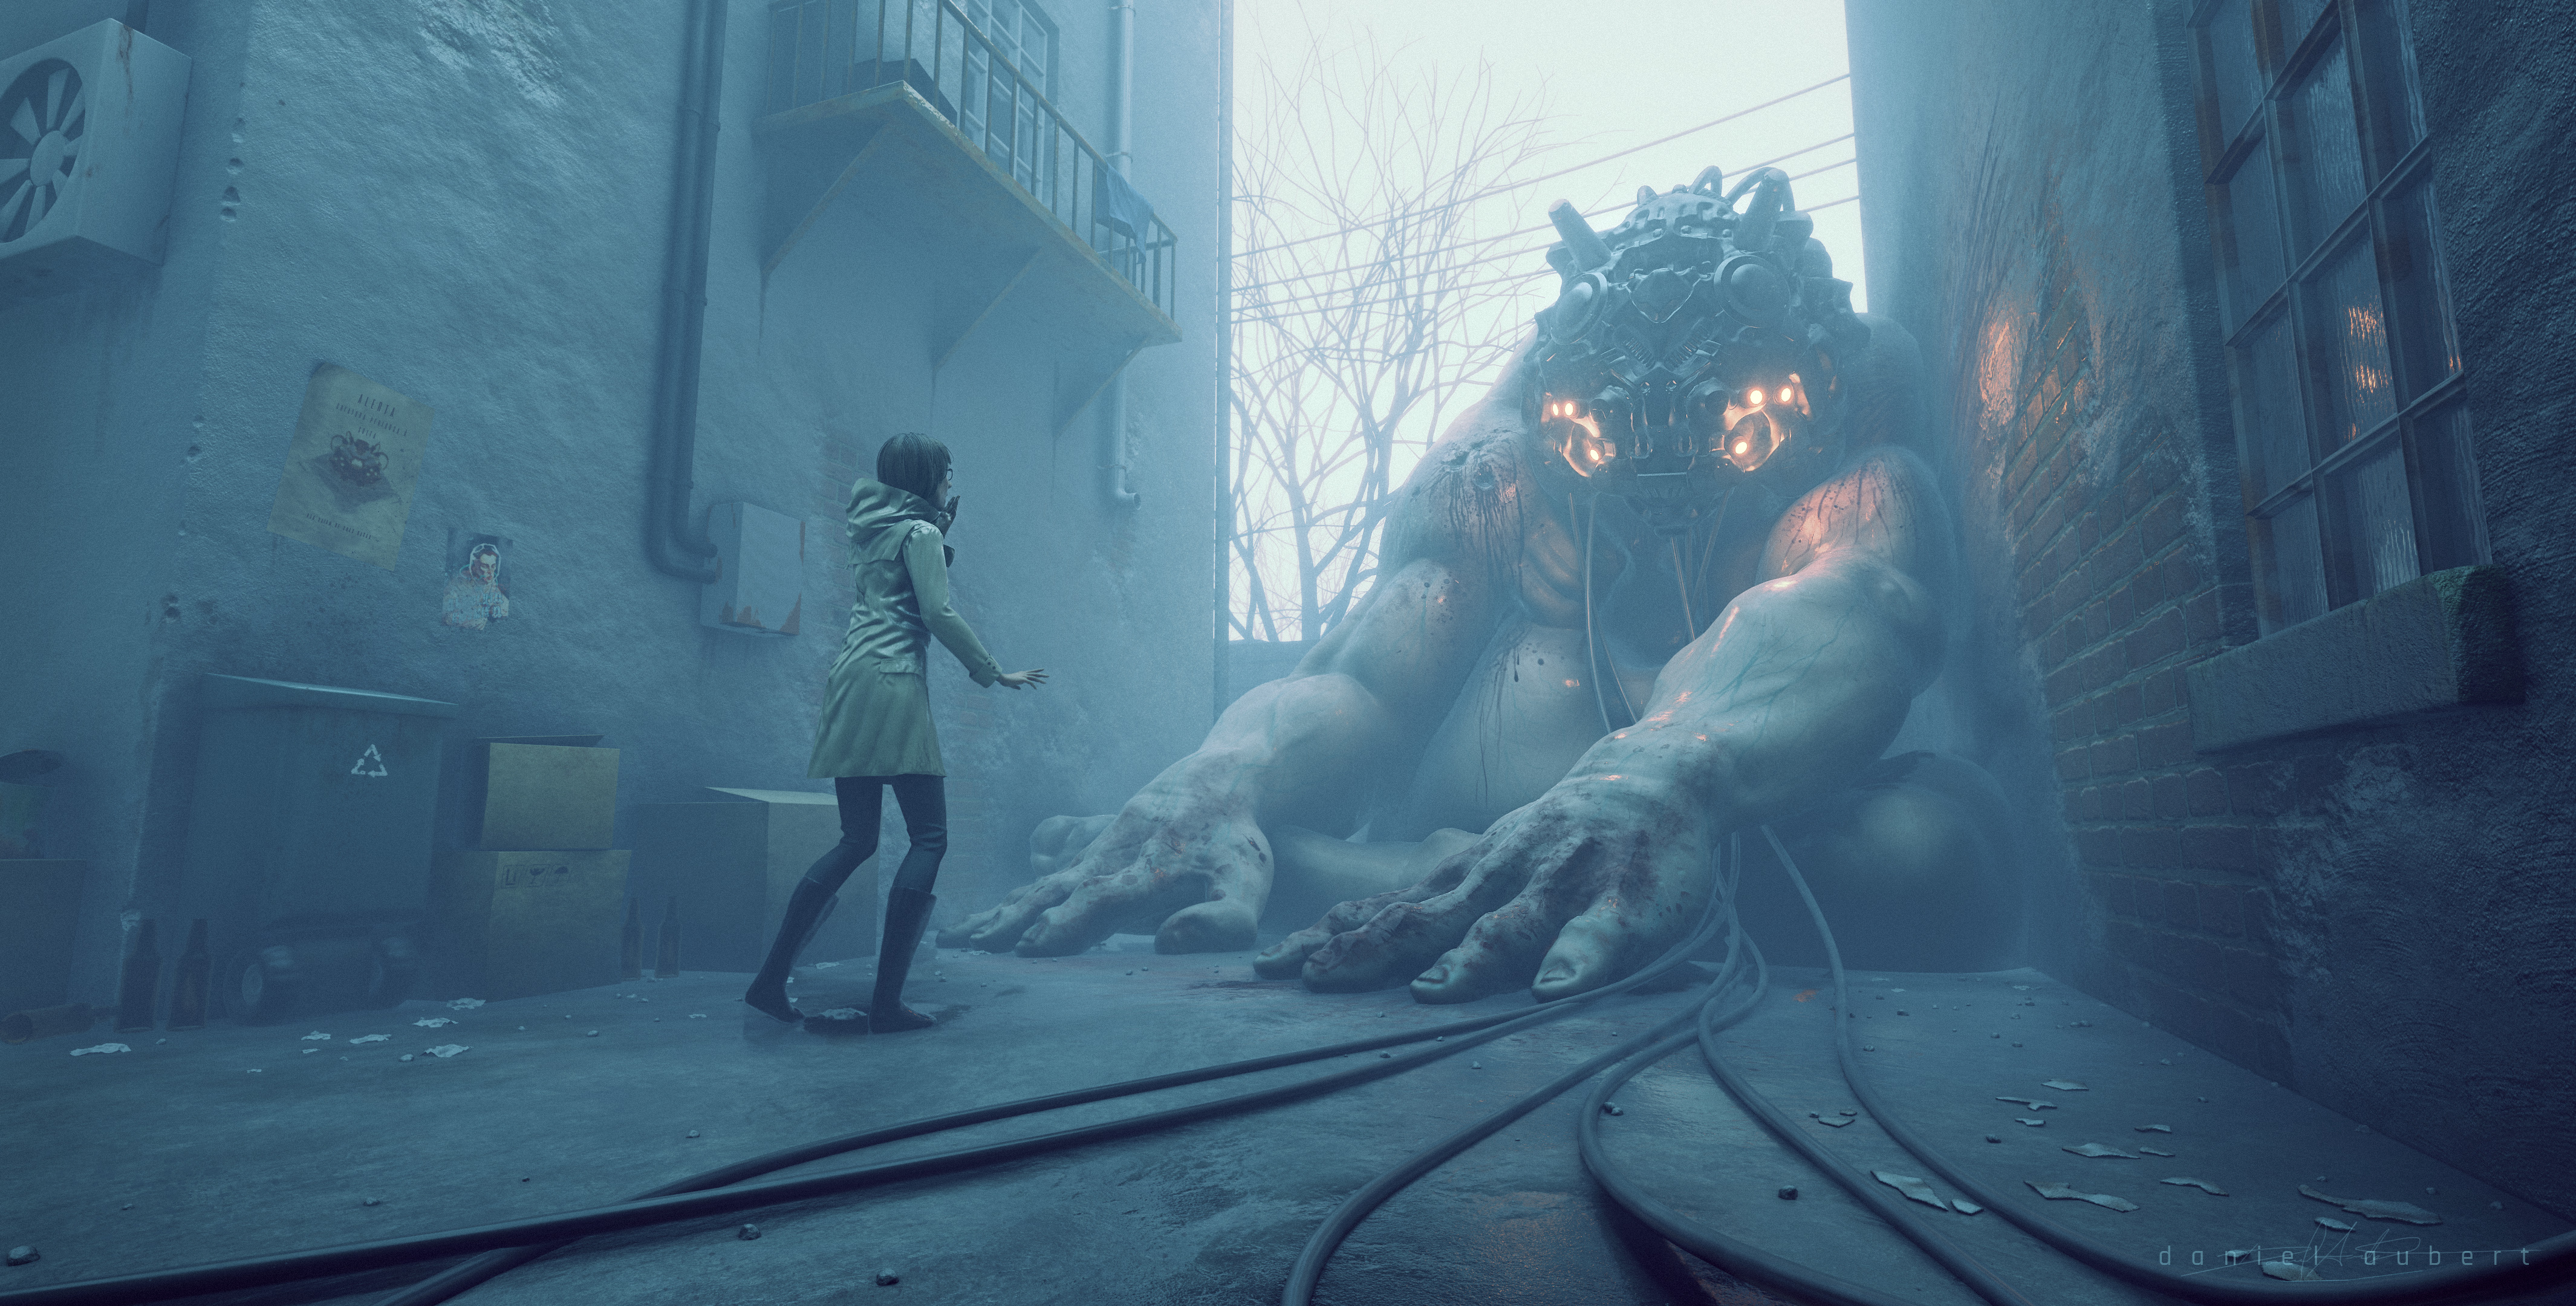
Have been working on this scene for some time now. I still wanted to add more details, but I guess at some point you need to let it go and experiment more in the next piece.
Rendered with Eevee.
.
Blender 2.8 for the most part (texturing, modelling, rendering…)
.
Zbrush core to sculpt details on characters
.
3d coat for sculpting the mech head (I think it is a great software for hardsurface)
.
Photoshop for a bit of post processing
.
Textures from Textures Haven https://texturehaven.com/textures/ and Wild Textures https://www.wildtextures.com/


130 Likes
wow amazing work
2 Likes
That is very nice. I love the lighting especially.
1 Like
Amazing work. Very high level 
Maybe the thick wires and the rubble on the floor could do with more interesting details on them…
1 Like
Agree! Cables could have little drops of water. Thanks for the feedback!
1 Like
Fantastic work. Very impressive atmosphere. I like it very much. Congratulations.
1 Like
Thanks, mate!
Hey there. I really like the general composition of your image and the sculpts … but I’d also improve upon some aspects:
- The general box modeling and texturing: Most of the assets seem artificial and kind of throw me off … sometimes I am under the impresssion, that your normals are kind of bended sometimes, because you seem to only use bevels and no supporting edges, wich leads to weird shading artefacts because your vertex normals of the straight faces aren’t at a 90 degree angle to the face.
Also I’m kinf od missing a details in the mesh and textures. Especially, since grunges in your texture sometimes seem very random and not on palces where you’d actually expect grunge.
So if you want to focus on making great sculpts, then just go ahead and use asset libaries, if you want to make compelling assets on your own just pick something in your flat, try to spend a day to really get each and every detail, repeat that a few times and then you’re golden.
Or mabye just go for a more stilized look. This is artistically more challenging but requires less detail work to look great.
Also I’d consider using displacement on brick walls, that are this close to the camera. - Cyrllic signs … just don’t write english word wih cyrillic letters, that kind of look like latin ones. You just wrote “Dlejat” and this looks just sooo cheasy.
If you want to write “Be alerted” use the words “быть начеку!” or just “начеку” (buitz natscheku or natscheku), but most russian danger signs will probably use “Опасно”, wich means “dangerously” and pronounced “opocno”. It takes 5 minutes of googeling and makes your scene more believable and less cringy/insensitive. - post processing … I think you kind of overdid the blue tint and bloom when you ask me.
- Values: You almost have thew same value in your whole image, wich kind of makes it visually less intresting and less readable. So I’d kind of work with more variation in values.
- Colors Nitpicky, but it’d have the orange of your creature in one more area somewhere else on the opposing side of your image and either choose a less saturated color for your human character or make the yellow way more pronounced.

Please don’t take this as some sort of utter destruction of your work, but I see so many great sculpt work and a really cool general image composition and also good storytelling, but there’s just so many aspects, that also kind of spoil the image for me.
So yeah … I hope this can help you find some aspects to improve upon.
9 Likes


Thanks for the feedback, mate! Definitely gonna take in consideration for the next piece.
Cheers!
Hey this is amazing feedback. Thanks a lot Betalars! I think I didn’t know how important supporting edges were. Gonna use this more often.
I actually started this piece thinking of making an overpaint. I just wanted to set the main shapes, lighting and composition and then paint it over with Krita or Photoshop. But then I got carried way haha. But it was very good for me to learn a bit more about texturing in Blender. Specially using procedural textures. I learned a lot, and now a bit more with you comment, so thanks a lot!
About the levels and bloom, that is actually what I was aimming for. I wanted a foggy overcast day that you could not see exactly the details in the creature. Kinda like a Silent Hill atmosphere. And I also wanted the color pallete like this teal and orange look.
Really glad you took your time, mate! haha! Cheers!
Ohhhhh … it’s fog. Okay that didn’t come across. I’d use the actual volumetrics of eevee to sell that and might even add some sort of light source in the eyes, that can cast a cone of light into the mist.
I used eevee volumetrics and there is a light source, a point lamp. I did not want to use the spot light, it would look like a car lamp of something like that. I wanted something subtle.
I totally get your point and this absolutely sounds like a decision, I’d have made potentially. But it’s kind of difficult to read. But yeah … conveying a vision and having good readability sometimes tend to get in the way of eachother. 
1 Like
Sorry if it was offensive to you. Not my intention at all. Changed it to my own language.
Offensive was also probably a too strong word choice (also it’s not my native language)
Let’s just call it cringy/insensitive
I featured you on BlenderNation, have a great weekend!
2 Likes
Thanks, Bart!
1 Like
Man, a great sense of atmosphere here - something that is usually somewhat lacking. I really like the sense of presence / mass of the “monster” and the body language of the girl.
A few things that kind of popped out at me:
I agree with the comment posted above about the contrast/uniform value. Some playing around with Levels would help with this.
The lack of high-frequency detail doesn’t bother me as much since the whole image has a stylized feel to it.
I think that you might either want to reduce the saturation on the lights, or, push up the overall blue saturation to kind of balance it out. Right now, to my eye, the saturation of the lights seems out of place / out of palette.
There is a weird tangent off of the girl’s left heel - not sure what that is (shadow? reflection?), but my eye keeps going back to it - but I’m probably just weird - lol
There is also an odd pattern to the folds on the girl’s coat in the “skirt” section - the part that is closest to the viewer - there are three almost symmetrical, parallel folds that don’t look natural.
I love that helmet design, but the way it’s sitting on the character is too XYZ perfect. Given the “busted up” nature of the monster, I think having the helmet sitting with more of a tilt forward and a bit to one side would add to the mood - right now, it seems like it’s just to “squared up” to look natural or match with the beat-up “condition” of the monster.
The curvatures of the cabling is a bit too smooth and they seem kind of clean. Maybe consider adding some more “squiggly-ness” to the cables and making them dirtier.
It’s always a bit hard to stomach criticisms on something when you’ve spent a lot of time on it, so, I only offer these critiques in the spirit of improving the work as opposed to trying to “bash” it somehow. As it sits, I think it’s a great image, and my criticisms are my opinions - and should be taken as such.
2 Likes
Thanks a lot Joe!
No worries! Getting feedback is very good, so we can learn more with each other. You have good eyes! Those 3 folds really look too parallel. And yeah maybe I should rotate his helmet a bit more. It is not straight, but it definitely could be more “natural”.
Thanks a lot, man. Gonna keep these in mind for the next one!
Cheers!