¡Hi, there!
Since beggining of 2022 I have been stucked on this issue, trying lots of different solutions and tutorials, to no avail… Until today that is.
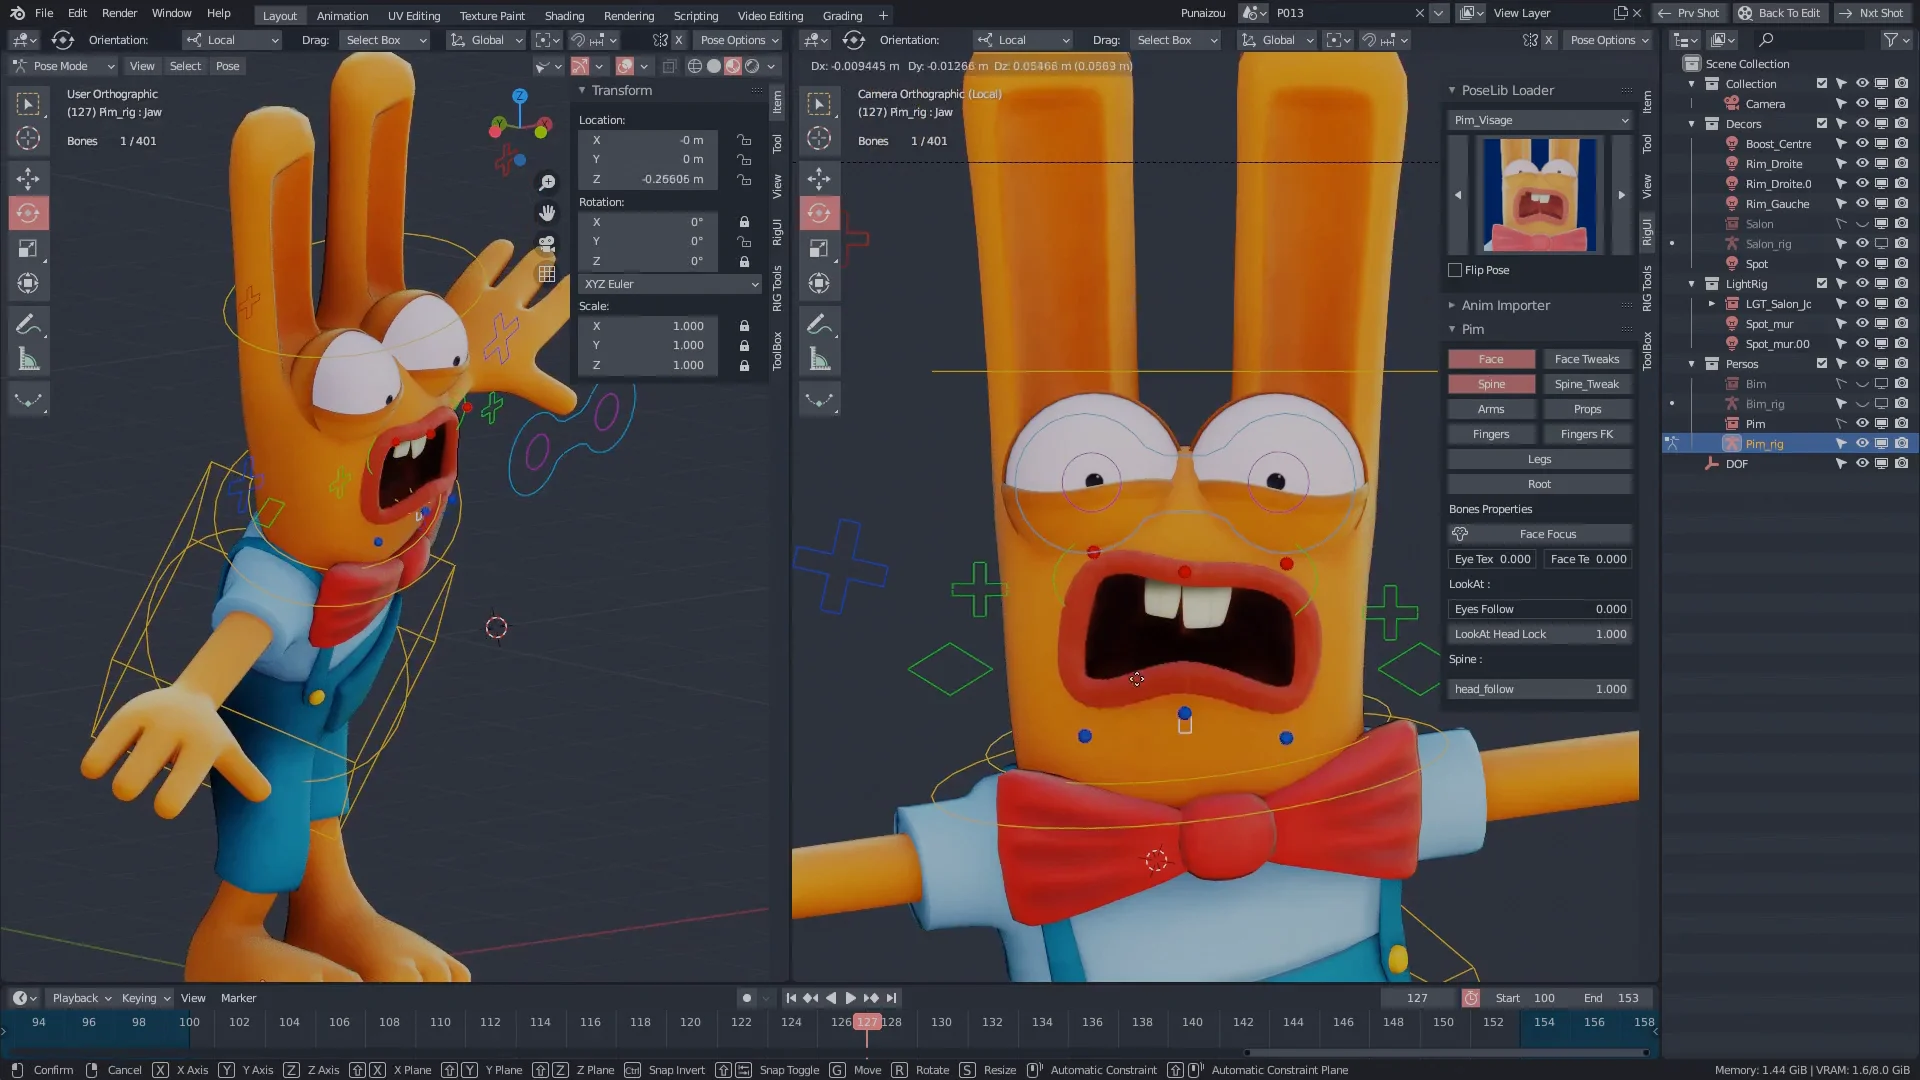
In the short video below, I show the correct result on my artwork, achievable through this “Non-Linear” Shape Key setup.
As we can see, the eyes are largely stylized, making any basic A to B Linear animation very inadequate; it needs some sort of “Breakown” frames, which, unfortunately, Shape Keys seem to be lacking. At least in my particular case, I couldn’t find any reliable approach which combined Shape Key and Drivers and using the Graph Editor; only one solution did show a certain mediocre result, meaning it only worked partially, while being incredibly complicated and sluggish to work with. Instead, I’ve eventually found this other way around…
The solution is actually pretty simple, although it involves a fine combination of tools.
Vertex Group: for the eyelids’ mesh —if it is inside the head/face mesh Object, which is usually the case.
Solidify Modifier: it will create the thickness of the eyelids’ faces (the eyelids must have no thickness otherwise).
SHAPE KEYS:
Basis (fully open eyelids): make sure to use “Snap: To Face” when positioning the eyelids vertexes exactly onto the surface of the Eye Object —because of the Solidify Modifier, we can immediatly see the eyelids modified thickness covering the eye while editing.
Key 1 (fully closed eyelids): same as before, use “Snap: To Face”
Note: Of course, if we test our Shape Key now, there should still be terrible interpenetrations between the meshes of the eyelids and the eye, since this is still but a Linear Shape Key transformation.
Shrinkwrap Modifier: Now comes the magic. Create this modifier (AND NEVER APPLY IT) and configure it to affect (also, as the Solidify Modifier) only the Vertex Group of the eyelids’ mesh. Also, the order of the Modifiers is fundamental here: the Shrinkwrap Modifier should come first (be above) the Solidify Modifier; if not, even the modified thickness of the eyelids will be “shrinkwrapped” onto the eye Object’s surface.
Finally, for some of the configurations on the Modifiers
Solidify:
Mode: Simple
Thickness: 0.025 m
Offset: 0.0000
Rim: Fill (check)
Shrinkwrap:
Wrap method: Nearest Surface Point
Snap mode: Outside Surface
Offset: 0.01 m
Essencially, we are compelling the eyelids mesh (which has only but illusory thickness, from the Solidify Modifier) to conform to the eye Object’s curved surface, on a “frame by frame” constancy while changing the Value of the Shape Key. The eyelids’ mesh (with each of its individual vertexes) cannot help but follow the generic orders from the eyeblink Shape Key, but having to strictly respect the flow over the tridimensionality of a curved surface such as of the eye Object. Thus, making this whole setup a possibility of achieving clear Non-Linear animations in Shape Key.
Shrinkwrap Modifier can oblige mesh elements to “flow” over another arbitrary surface. It is working here as an automatic “Face Path” or “Multi-Path” generator for the Linear Shape Key; it’s not operating on a single Path or for isolated vertexes or edges, but for an entire 3-dimensional, correctly deforming sheet —the eyelid mesh.
I’m really glad to have finally solved this issue which took me so long; I’m also very glad to share it. I’m sorry I couldn’t make any better presentation nor tutorial; I hope this is clear enough for now and may be useful.
So… ¡Happy Blending!
PS: Oh, don’t mind the extra Shape Keys that weren’t active at the Properties Editor (in the video) —they were from a recent and previous attempt. Here, we only require 2 Shape Keys: Basis+Key 1.
 I still don’t know if it would have worked, as I’ve never used Action Editor before —although I’m an animator, yes.
 So it’s a nice advise. Only more recently I’ve become a bit less unconfortable with the idea of having IK without exact constraints for angle rotation limits for each joint of the armarture; similar with Bones with Weight Paint for freeform transformations on the facial expressions. So, all this absolute control is perhaps not of great relevance as it might first look like. I’m still struggling a bit with this 3D Rigging concept, because it feels ‘wrong’ or somehow unintuitive; on the other hand, I’m starting to understand a bit more why this approach might even become artistically advantageous (on some cases, as you have suggested); not just economically advantageous.

 By the way, ¿do you showcase the characters you rig and/or model somehwere? ¡Cheers!


