This is my most recent (finished) project, which has helped me learn a lot. However, I’d like to review how efficient the process really was.
In this post I will give a thorough explanation of the process I followed in the making of my first game ready (is it?) creature model in hopes to get feedback on both the process and the outcome.
It is also important to let you know this post will be divided into two parts:
A (model) & B (rig + animation).
A will follow the sculpting and texturing stages, which include:
- Block-Out
- Scuplting (Basic)
- Retopology
- Sculpting Details
- Texture baking (HP to LP)
- Texture Painting
B will follow the rigging and animatong stages, which include:
- Armature
- Rigify (parenting)
- Making the Rig Game Ready
- Baking Animations
- Export
.
.
.
.
.
Alright, let’s get to it:
Part A of the process I learned thanks to Grant Abbitt’s GameDev.tv “Introduction To 3D Sculpting In Blender - Model A Dragon From Scratch!” course (this course: https://www.youtube.com/watch?v=g2Ntu94Uh3E).
The whole block-out process was very simple, just objects coming together using Subdivision Surface, Solidify and Mirror modifiers.
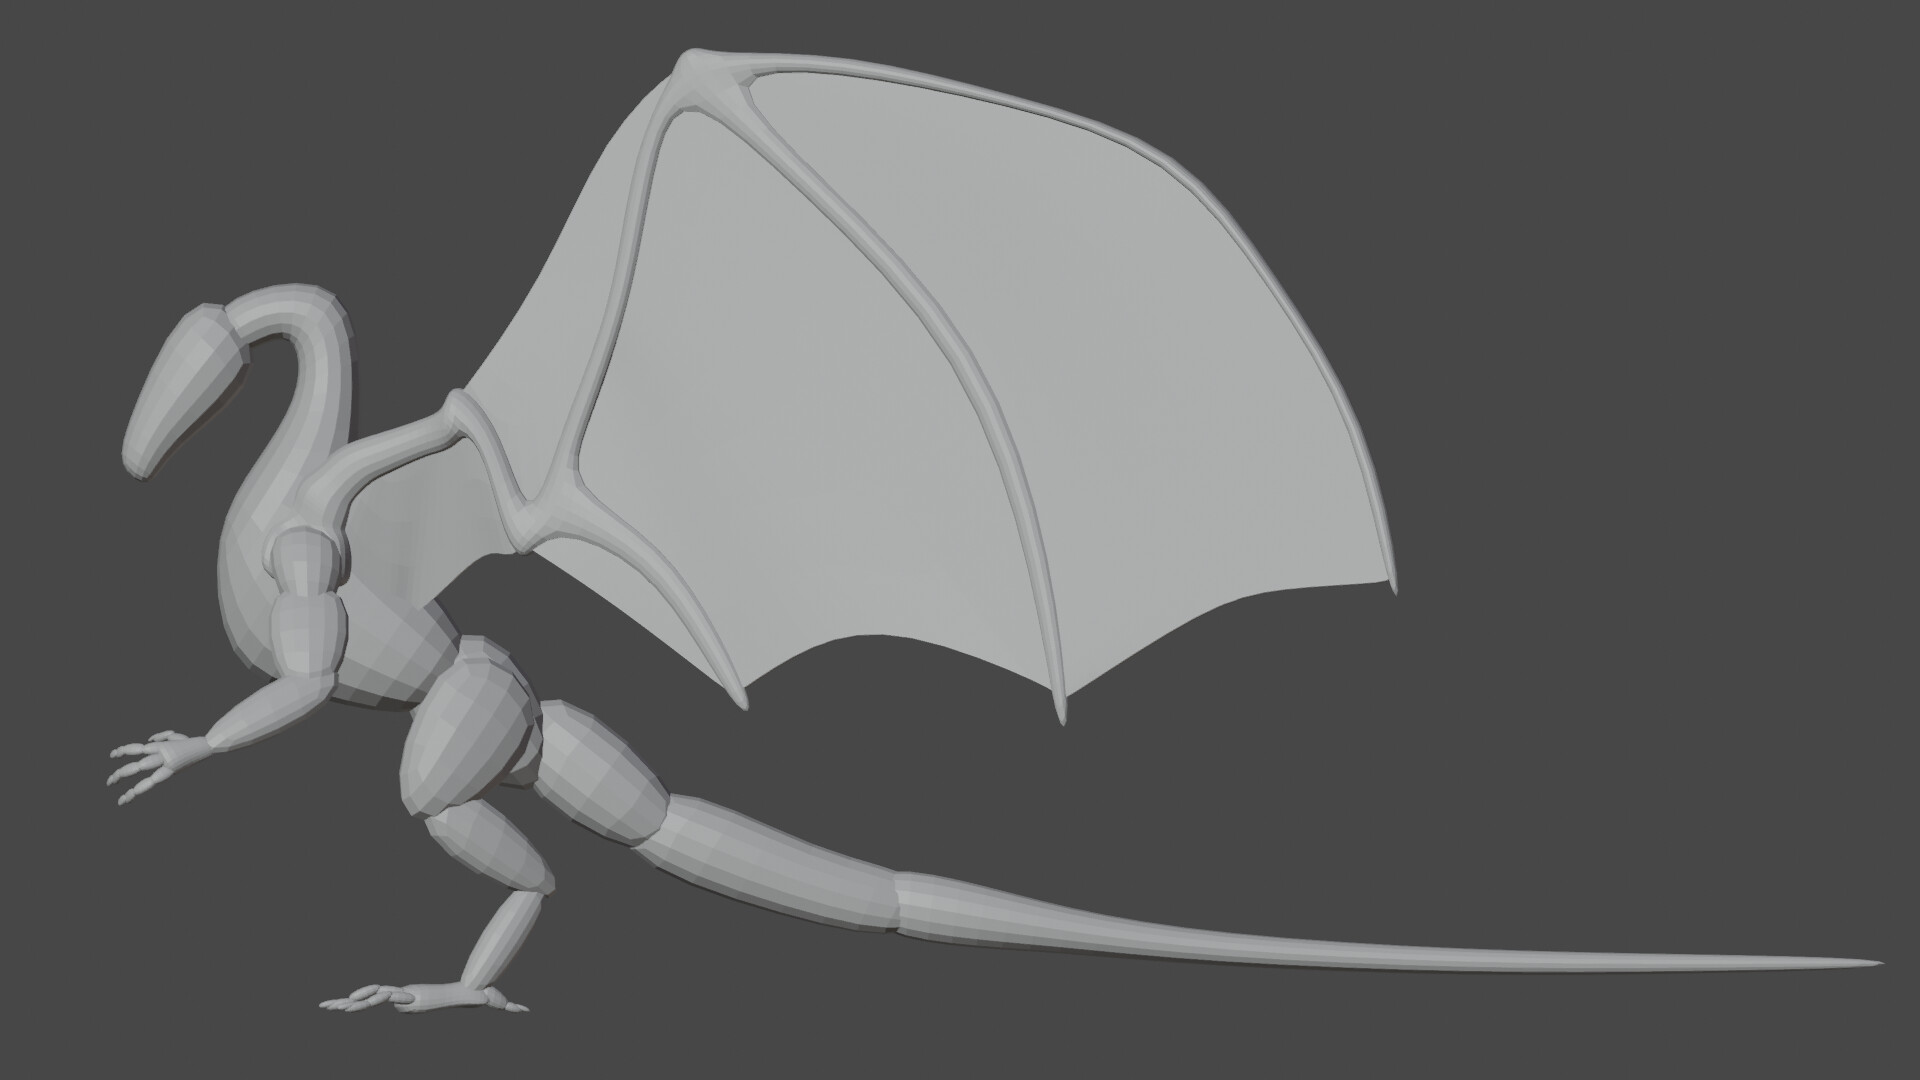
This objects I joined (Ctrl+J), and going into Sculpt Mode I remeshed the whole thing (thus making it really one mesh, eliminating any overlapping meshes.
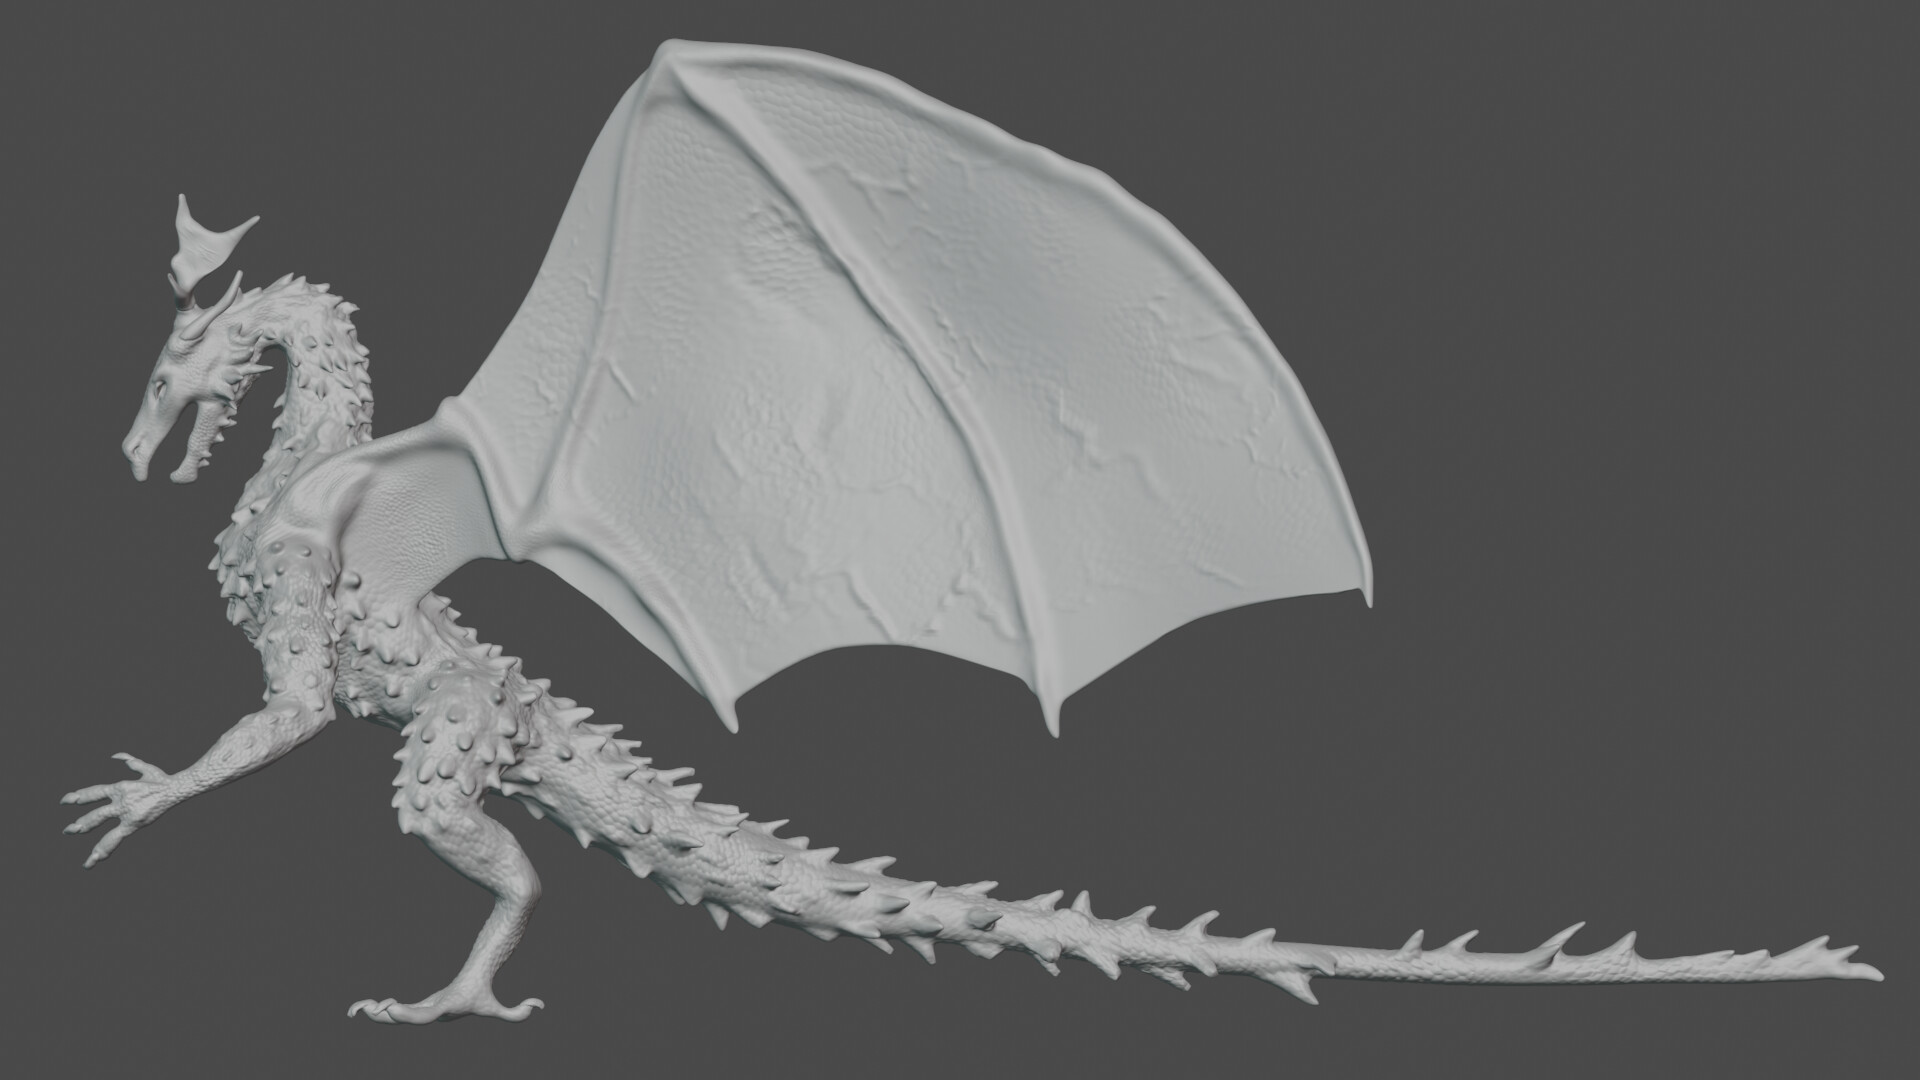
It was the steps that came after which I found to be a little confusing; you see, after the block-out some sculpting happened (I later came to learn this sculpting was supposed to be very very simple, kinda like a slightly more detailed block-out) BUT I didn’t realize at the time, so I sculpted some details, like spikes.
My mistake. This is the sculpt:
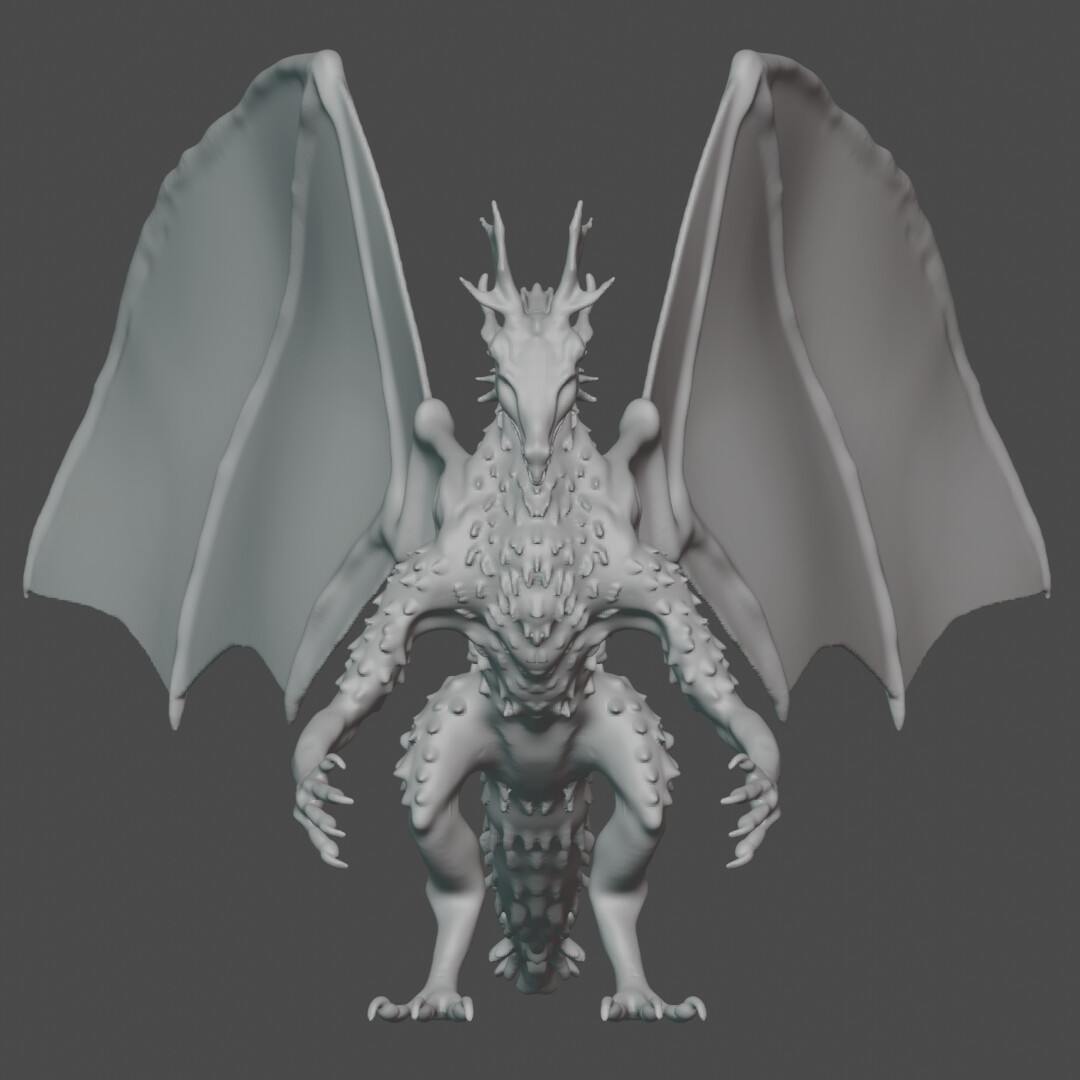

However, after this first sculpt came the retopology, which I did using the Quad Remesher addon (this one https://exoside.com/quadremesher/).
I don’t really understand how it works, all I know is I lost most of the details I had sculpted, notice how the spikes are gone:
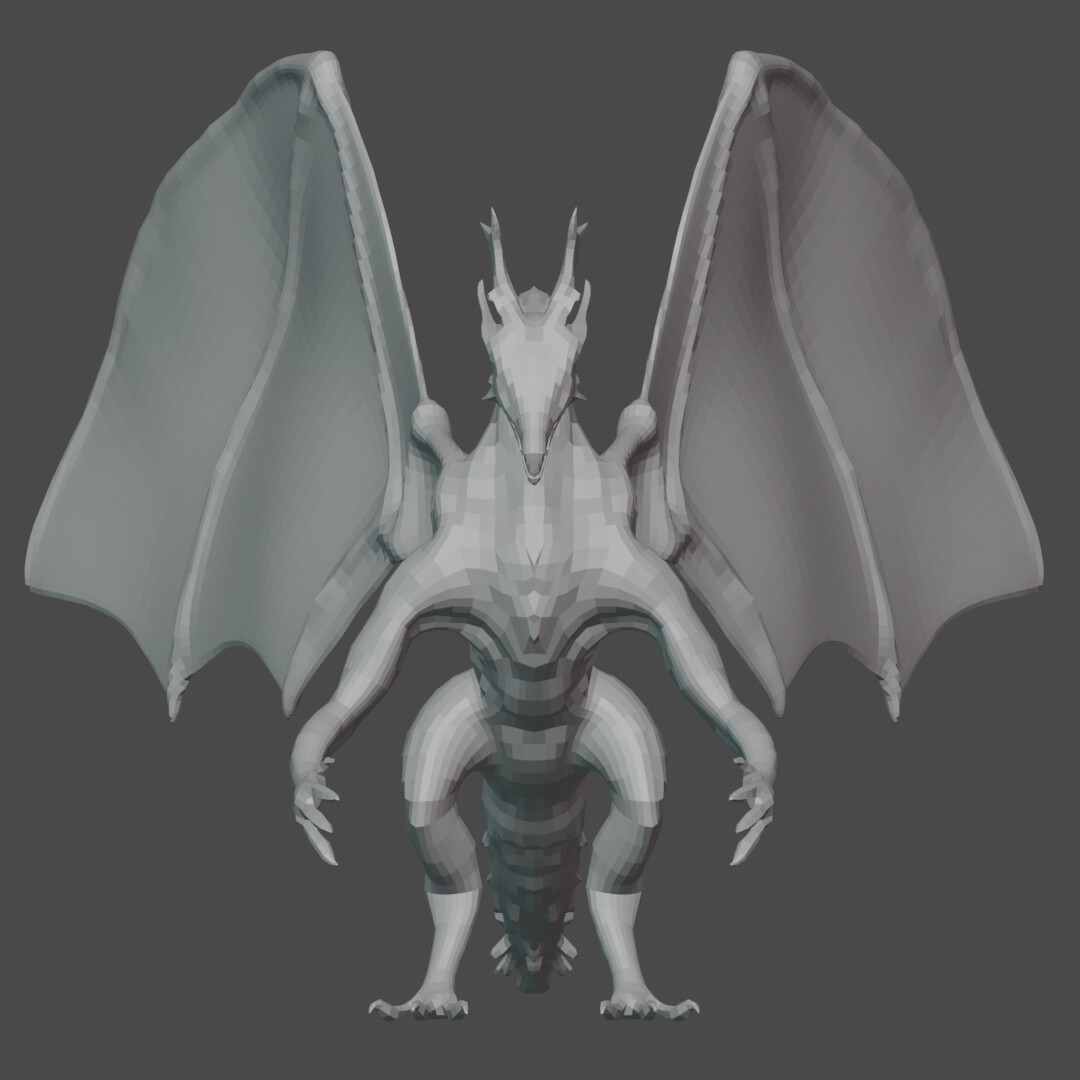

Now, to this new remeshed (retopologized?) model I added a Multiresolution modifier and then a Shrinkwrap modifier to try and recover as much detail as possible.
Using about 4 subdivisions, I then proceeded to Sculpt Mode to, again, add more detail.
This time, however, with the mesh retopologized, I added the finer details.

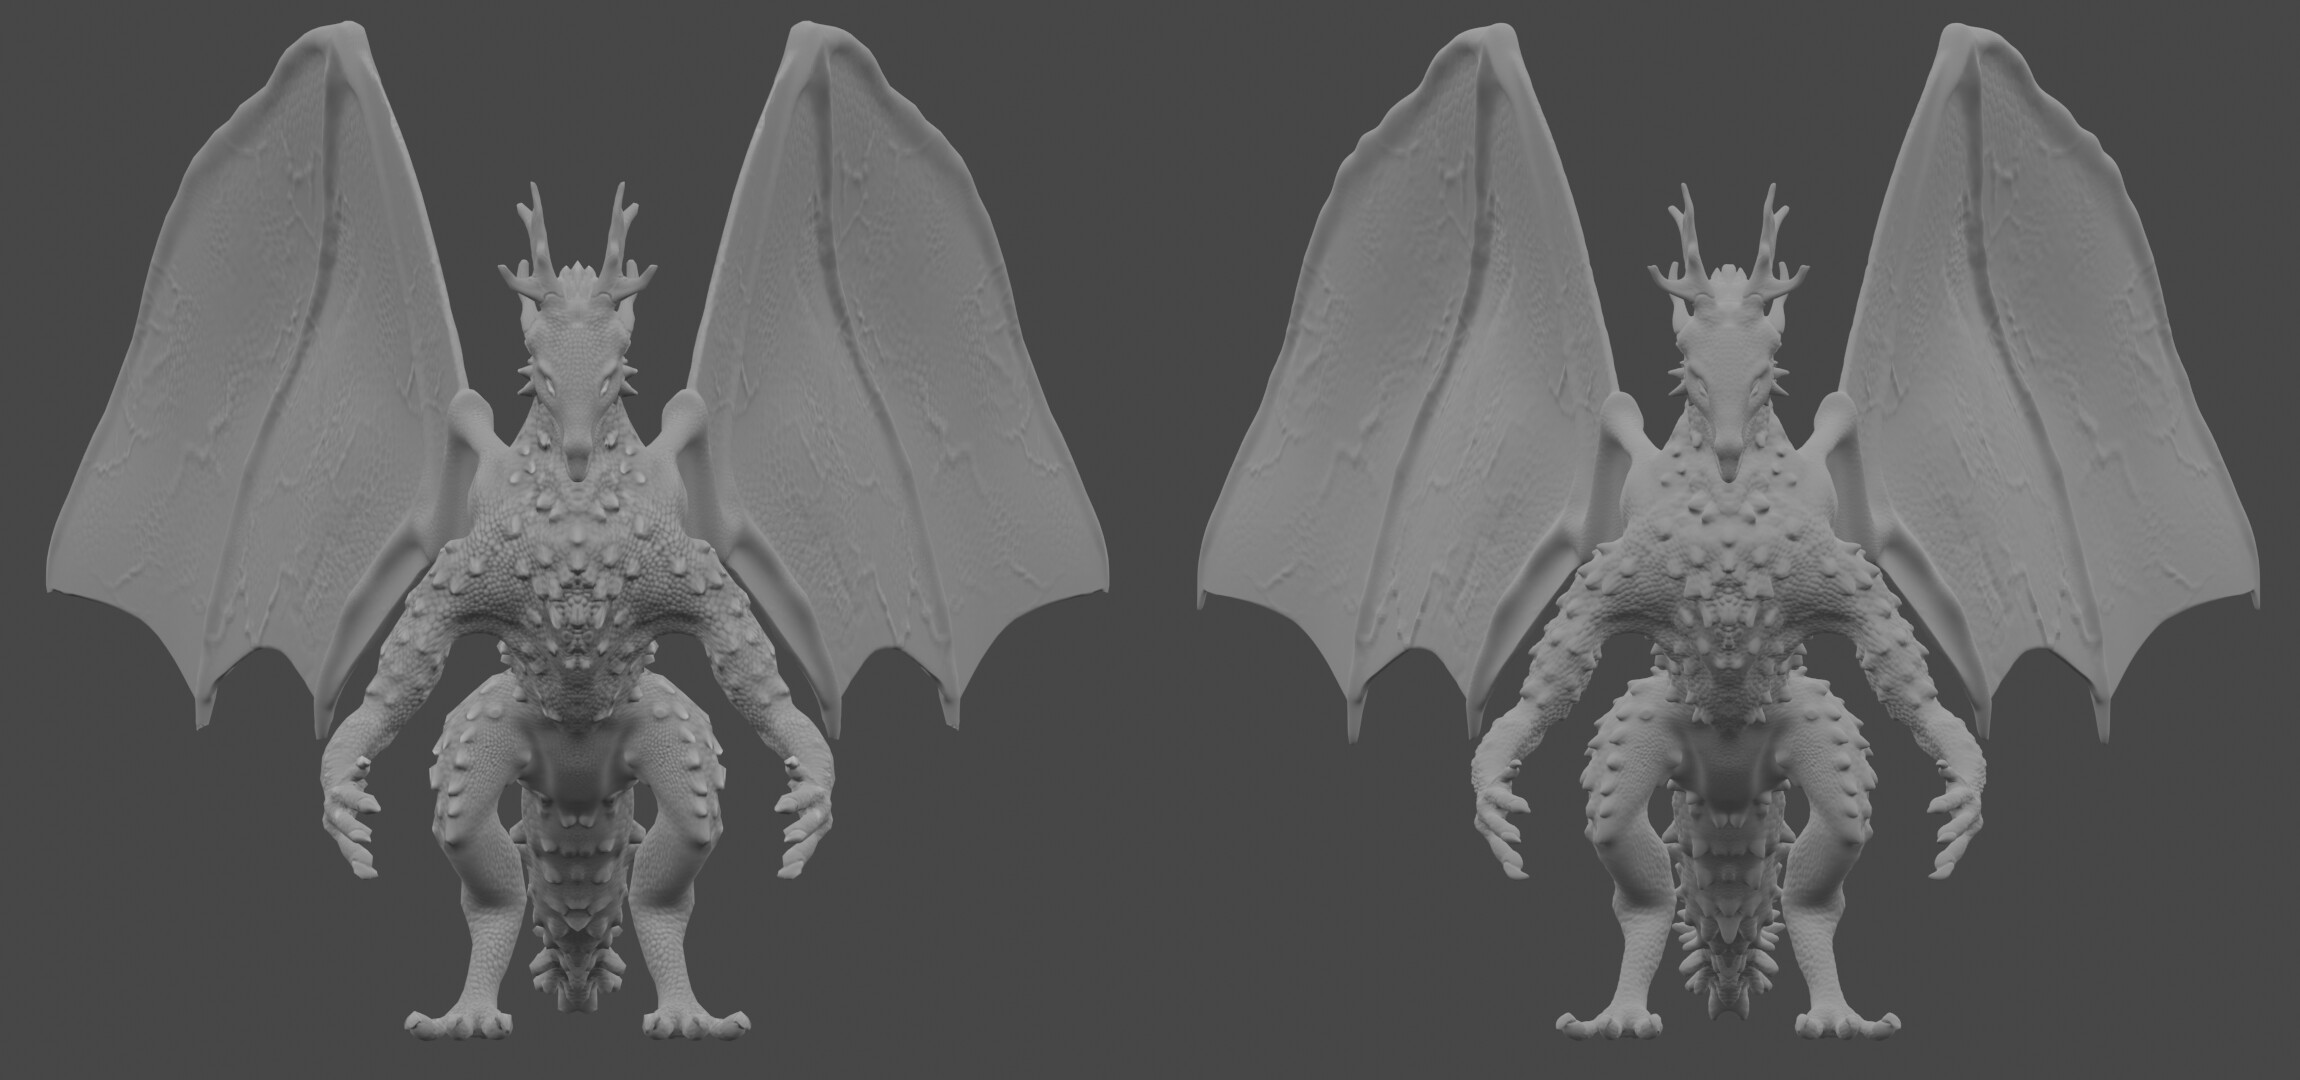
Satisfied with the sculpt, I baked the High Poly (4 subdivisions copy) into the Low Poly (0 subdivisions copy), baking the Cavity, Normals, Roughness and Base Colour.
Here’s how the LP model looks like with the baked textures (left) and the HP (right):
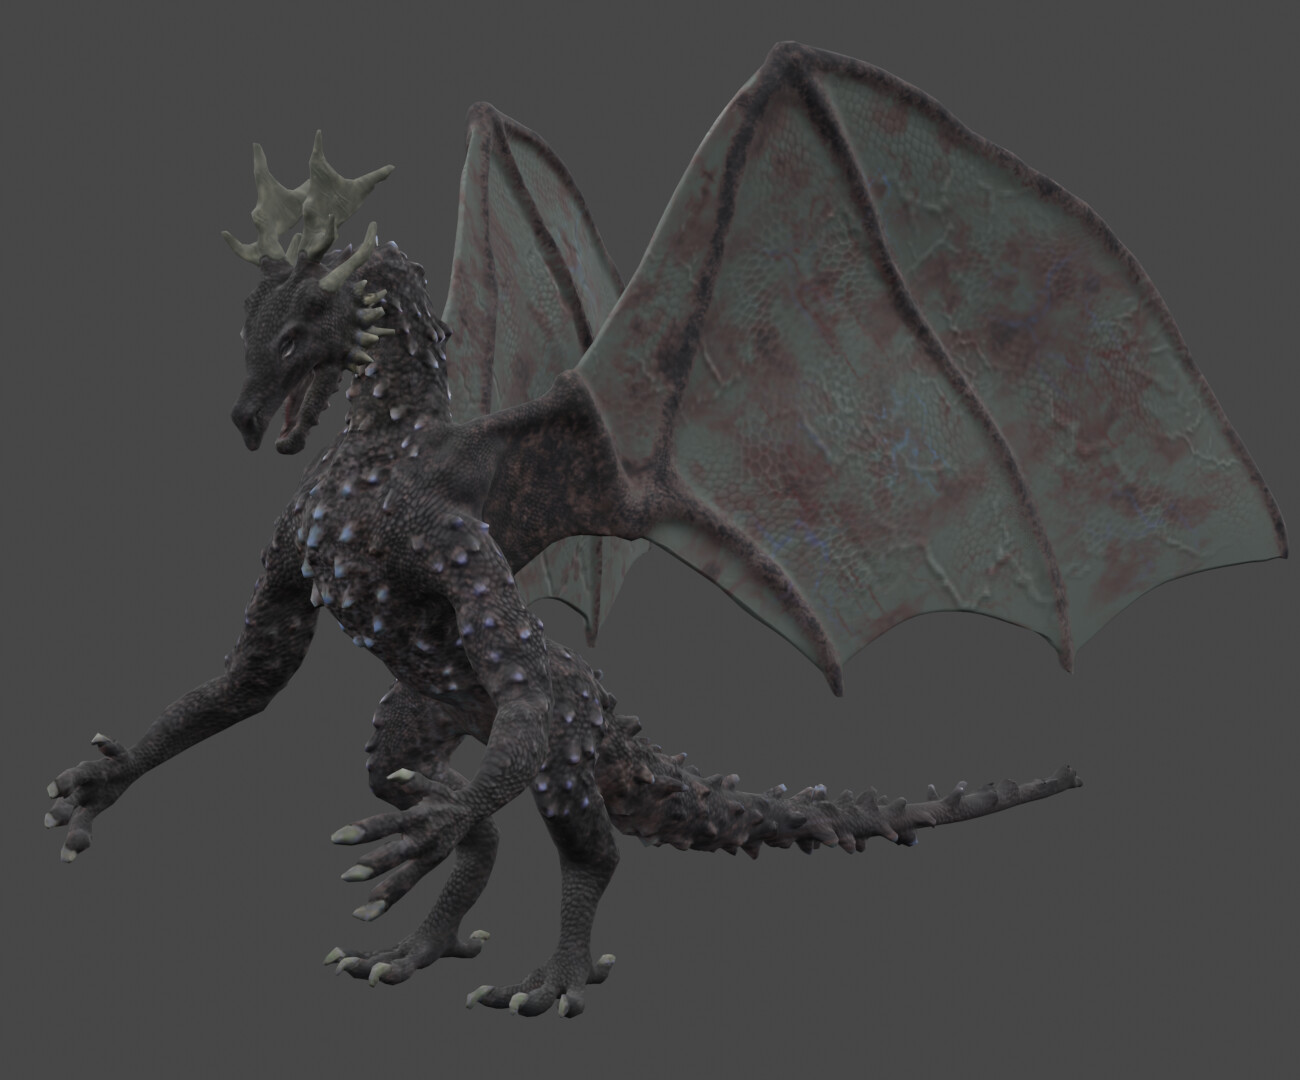
Then, on Texture Paint Mode, I painted the textures (this is also my first time hand-painting textures! what do you think? How did I do?).
This is the result:
.
.
.
.
Now, Grant Abbitt’s course is very good, I think, though some things were not quite clear- I want to clarify that Abbit’s course is by no means a game ready character course, since it’s main objective is to only teach the principles of sculpting, and it does a good job -take the pose of the model, for example Upon further research I came to learn that, depending on the type of creature or character, certain poses are a better starting point than others for Rigging and Posing / Animating (like the A or T pose for human characters, as an example).
However, by the time I learned as much, the model was I was working on was ready-ish, and going back to fix it would have meant doing the whole from scratch again, so for the purpose of learning I believed the model I had created so far would still work. Without further ado, I tried Rigging and Animating my model, which takes to part B of this post.
Part B of the process I learned thanks to CGDive’s YouTube “Rig Anything with Riggify” and “Blender to Game Engines- Bridging the Gap” tutorial series (both can be found here: https://www.youtube.com/c/CGDive/playlists).
Now, breaking down the entire process would take forever, so I’ll describe as efficently as possible the (and as best I can remember) the steps I followed.
- For the Armature:
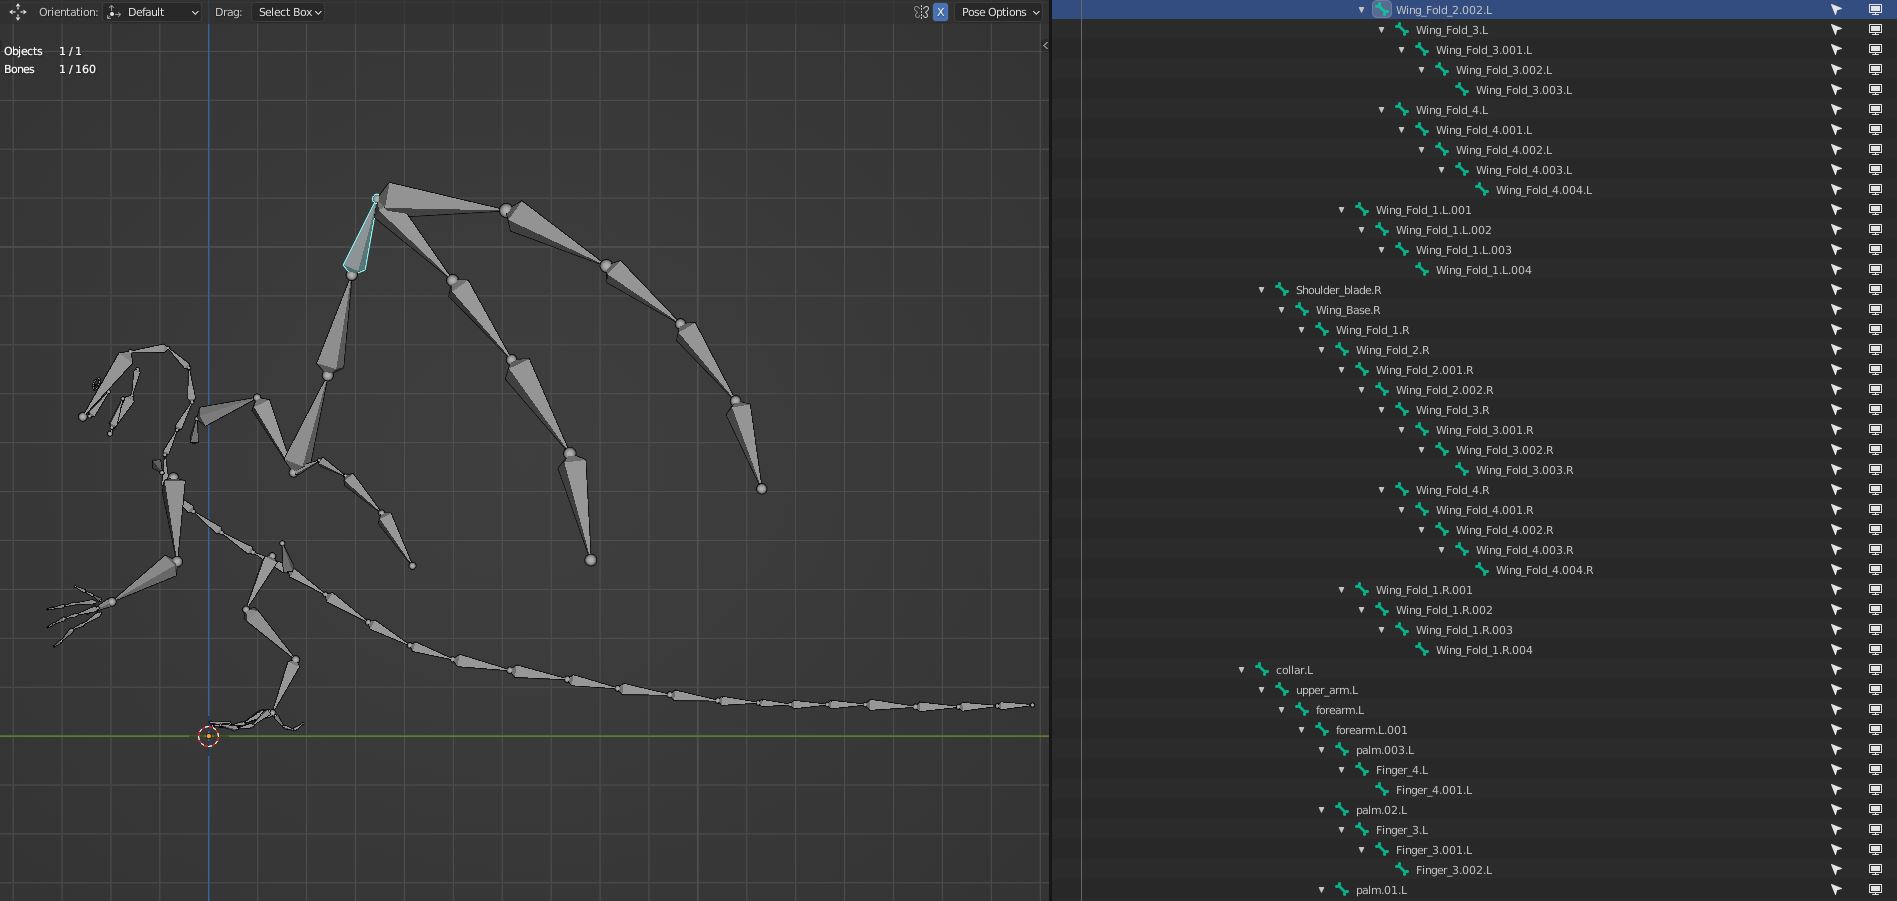
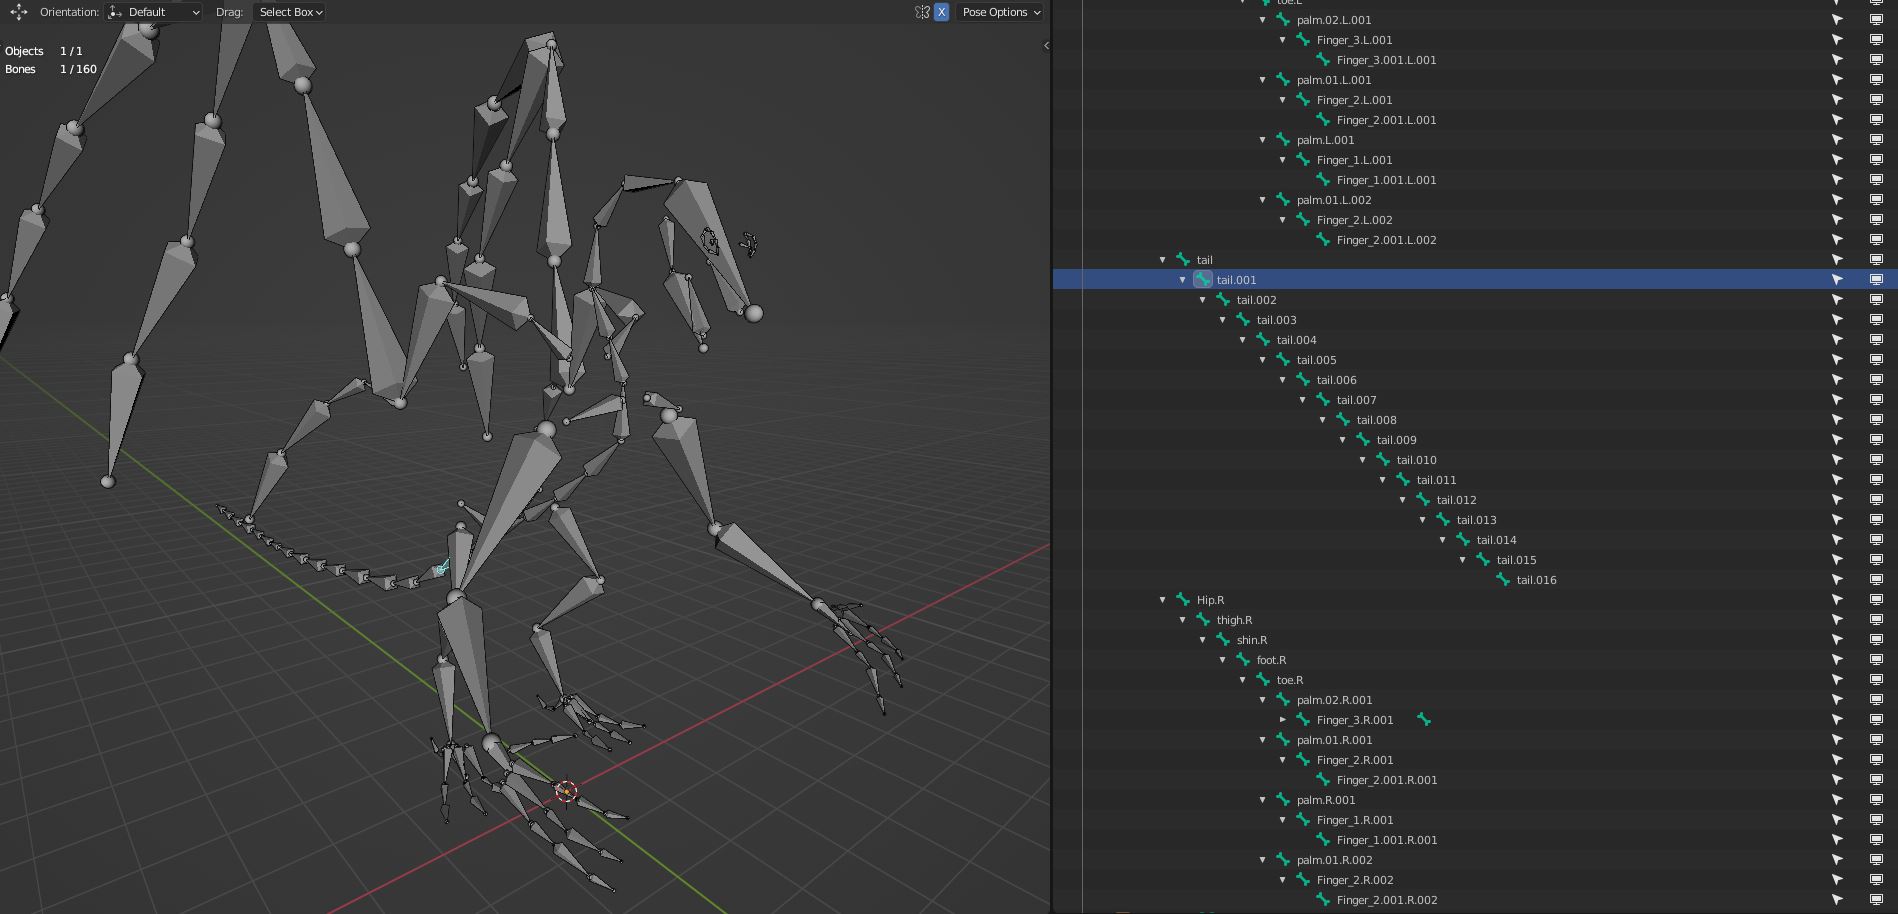
In Edit Mode, in the Properties panel I entered the Object Data tab (the one that looks like a running stickman), and then opened the Rigify tab. Within this tab I then opened the Samples tab (too many tabs, I know).
Now, the Samples tab allowed me to add (please forgive the constant repetition of terms) samples of specific bone structures (such as tentacles, super copies, copy chains, spine, arms, paws, tail, whatever I needed).
Once I had added all the needed bones for the model to move properly, I parented each in a logical functional hierarchy- fingers to palms, palms to forearms, forearms to upper arms, upper arms to collar bones… and so on.
Here are some screenshots detailing the hierarchy:


- For the Rigify:
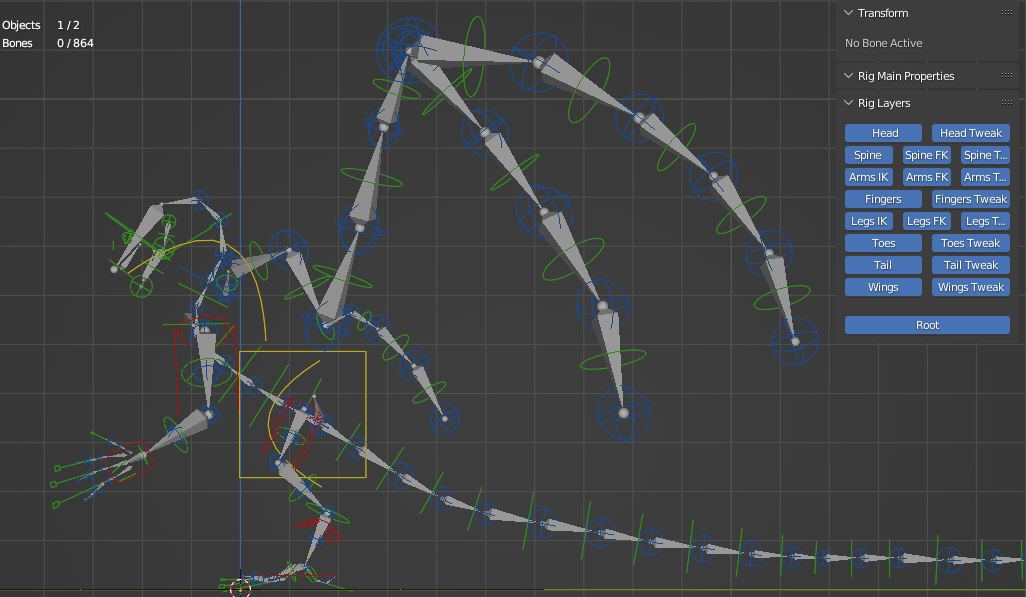
Afterwards, within the Skeleton tab I placed the bones (also taking into account the Tweak and FKs) on different layers, depending on which part of the dragon’s body they belonged to:

The following photo best describes how I placed them:

Then, in the Bone Groups tab I added the Standard bone groups, allowing me to name, in the Layer Names tab below, each group. This way, the generated Rigify controls would be much easier to identify and use:

Once satisfied with the Rigify outcome, I parented the Dragon mesh to the generated Rig With Automatic Weights. The behavior of the Rig was as expected, it worked fine to me. Now, the Rig was pretty much finished.
However, it still needed to be made into a Gamre-Ready Rig, which is was the trickiest part.
- Making it Game Ready:
In order to do so, I first duplicated the Rig (the one generated by rigify). This copy became the Game Rig, and the original became the Control Rig (as explained by CGDive).
In the Game Rig I cleared the animation data, deleted all deforming bones in layer 29, and removed all constraints and custom properties (rig_id).
Also I fixed the hierarchy of the bones (still in the same order as I explained before, if I’m not mistaken).
In the Control Rig I made sure all bones were non-deforming, and removed the squash and stretch by setting the IK Stretch to 0 in all IK controls; for all the bones in the Spine I disabled the Stretch To constraint.
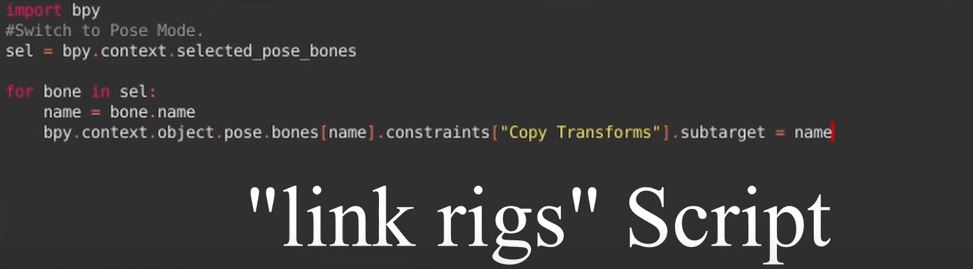
Then I constrained the Game Rig to the Control Rig by using CGDive’s “semi-scripted workflow”.
This is why it is important for the Game Rig to be an exact copy of the Control Rig, since the script uses the exact same names of the bones to constrain them.
This is done by adding a Copy Transforms (the target being the Control Rig) to all bones and then, in the Text Editor, adding and running the following code / script (by CGDive):
Once properly constrained, I parented (Armature Deform) the Dragon mesh to the Game Rig.
- For the Aanimations
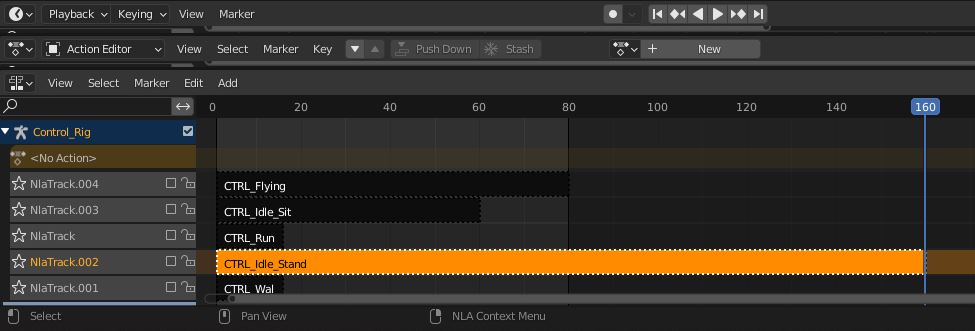
Now, with the Control Rig selected, I opened the Timeline, Dope Sheet-Action Editor and Nonlinear Animation (NLA) windows.
Just like in any other animation, I positioned the model in the desired poses and added keyframes for it to make the desired movements.
I tried to pay attention as to create looped movements: the quickest lasts 16 frames, and the longest 160 frames.
Once the animation loop looked the way I wanted it, I named it and Pushed it Down to the NLA.
In order to bake these animations into the Game Rig I selected it, entered Pose Mode, selected all bones, and (while still selected) I allowed the NLA to display other objects’ animations, thus letting me see the NLA tracks for the Control Rig.
With these visible, all I needed to do was star (select) the desired track (which would activate the starred animation on the Game Rig), go into the Pose menu, enter the Animation tab, and select “Bake Action”.
Inside the Bake Action menu, all I had to do was set the number of frames to be baked, enable “Only Selected Bones” (with all bones selected) and “Visual Keying” and click OK.
A new action would be created, which in turn I would, just like with the Control Rig, name and then Push Down into the NLA (of the Game Rig). Now, for the NLA tracks to work, I had to select all bones and desable their Copy Location constraints.
Finally, for exporting the Game Ready model I first checked all the boxes (toggle channel muting) as to select them all to be included in the export.
Then exported two FBX files with both the Mesh and the Game Armature (in rest position) selected at the same time: one containing the Skeleton and the Mesh (without animations), and the second containing the animations.
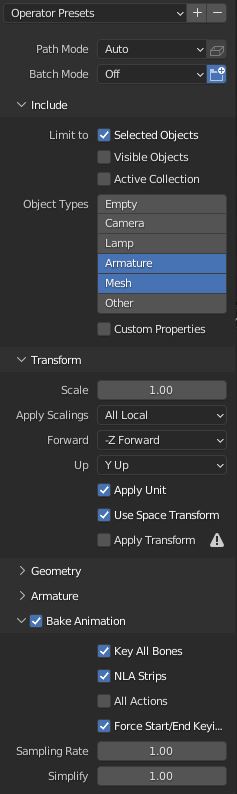
To do so, I used the following settings:
(I disabled “add leafbones” within the Armature tab, btw)
Skeleton + Mesh (left)
Animations (right)

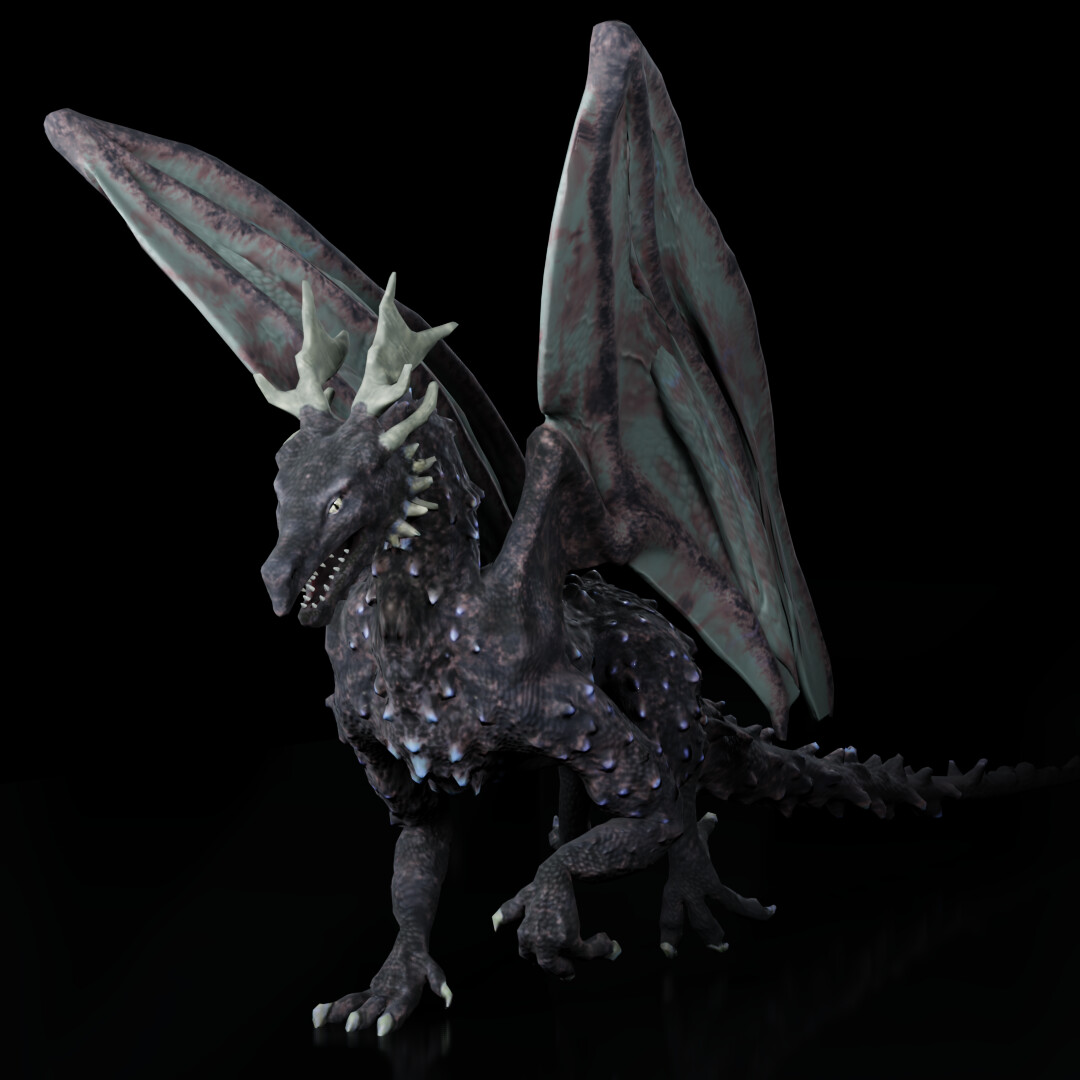
Here is the end result:
The model is free for download under the CC Attribution license.
All animations can be viewed through Sketchfab.
(I know the walk animation turned out… awful)
All feedback regarding anything (may it be the entire workflow, a specific part of the process, observations on the final model itself, etc) is very very welcome, I would really like to hear what people more experienced and/or knowledgeable than me may have to say.