Coming soon to a desktop near you 
2 Likes
Nice wood effect, I’ll look forward to seeing this one grow.
Thank you! Hoping to finish it today or tomorrow ![]()
Neck _ inlays (skulls .abr brushes from seraphshaw: http://browse.deviantart.com/art/Skull-and-Crossbones-Brush-Set-86156252, dropped them in GIMP and made a PNG file to add with empties to the fretboard).

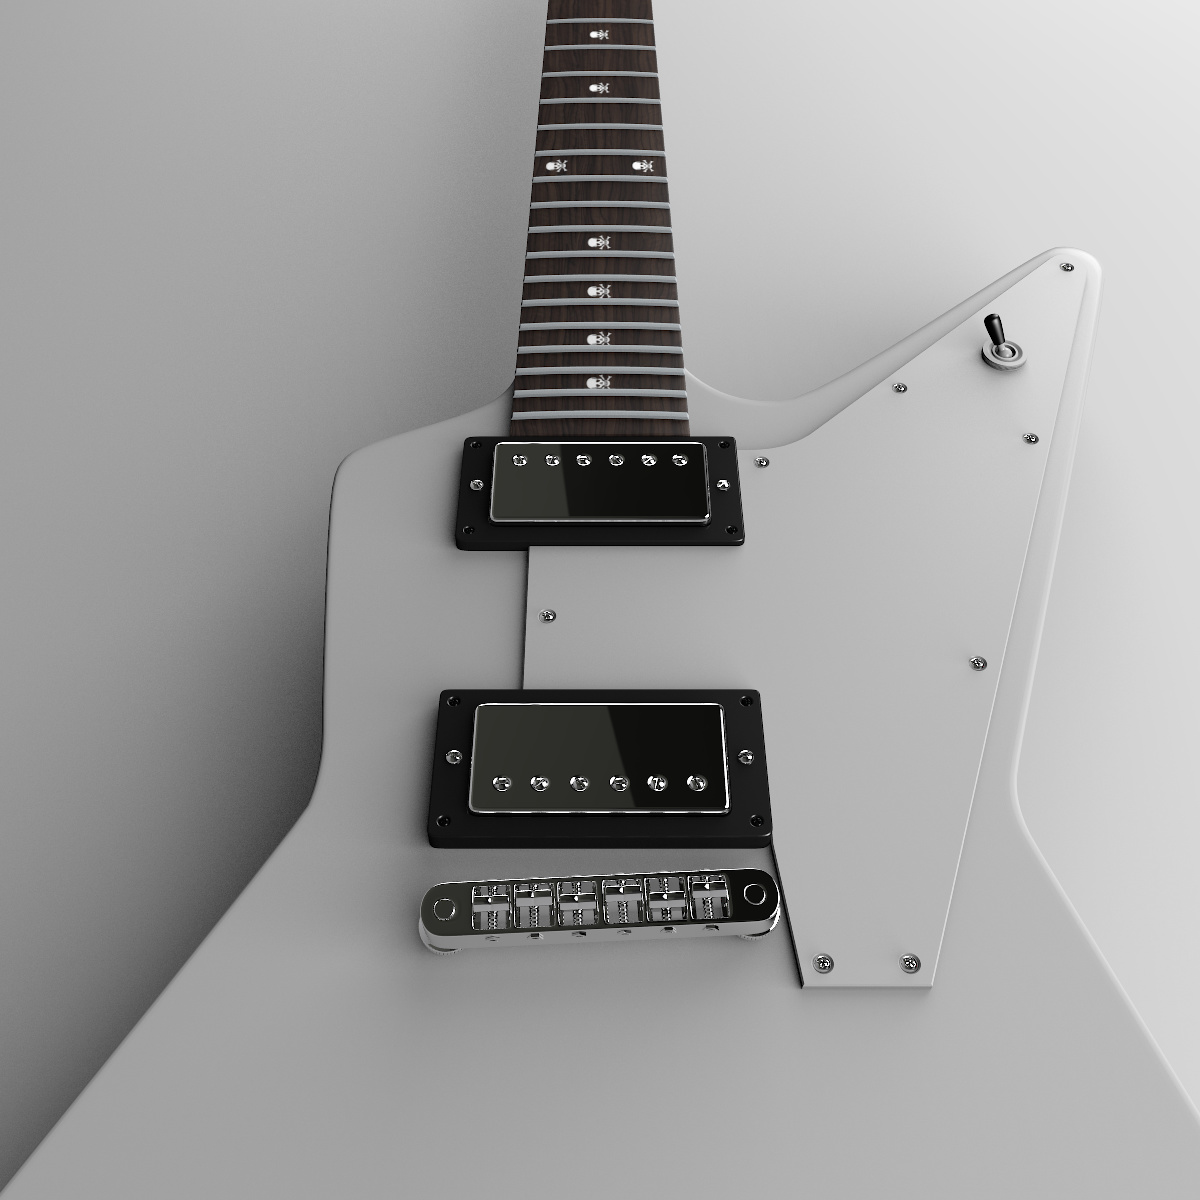
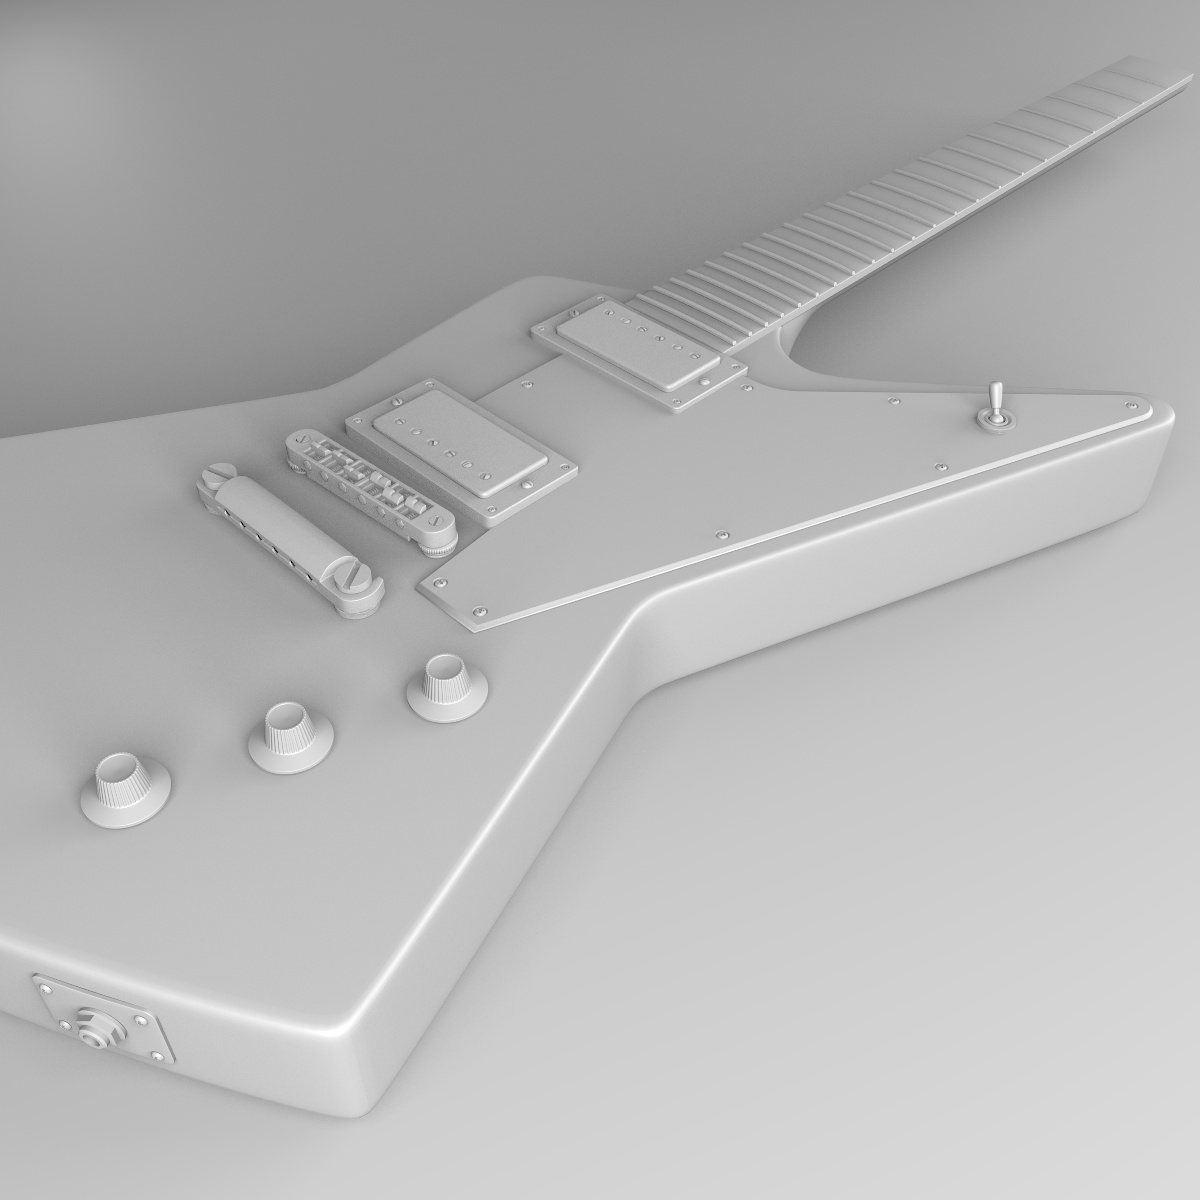
Pickups close-up:

Back to work…
Thats an interesting idea using empties for the frets, when i did my guitar i used UV layers to place the dots. How exactly did you do it?
@MonkMonk: I used the “decals with empties” technique merely to make some of the skulls larger towards the head if I wish. as I have seen on some guitars. Beats making a whole new texture if I wanted to resize or spin them around. Here I added the ebony wood texture, then underneath I added ten more, simply duplicating the one that came before and assigning them each to their own empties by using Object instead of Generated. Sounds complicated but it only took about two minutes to do them all.
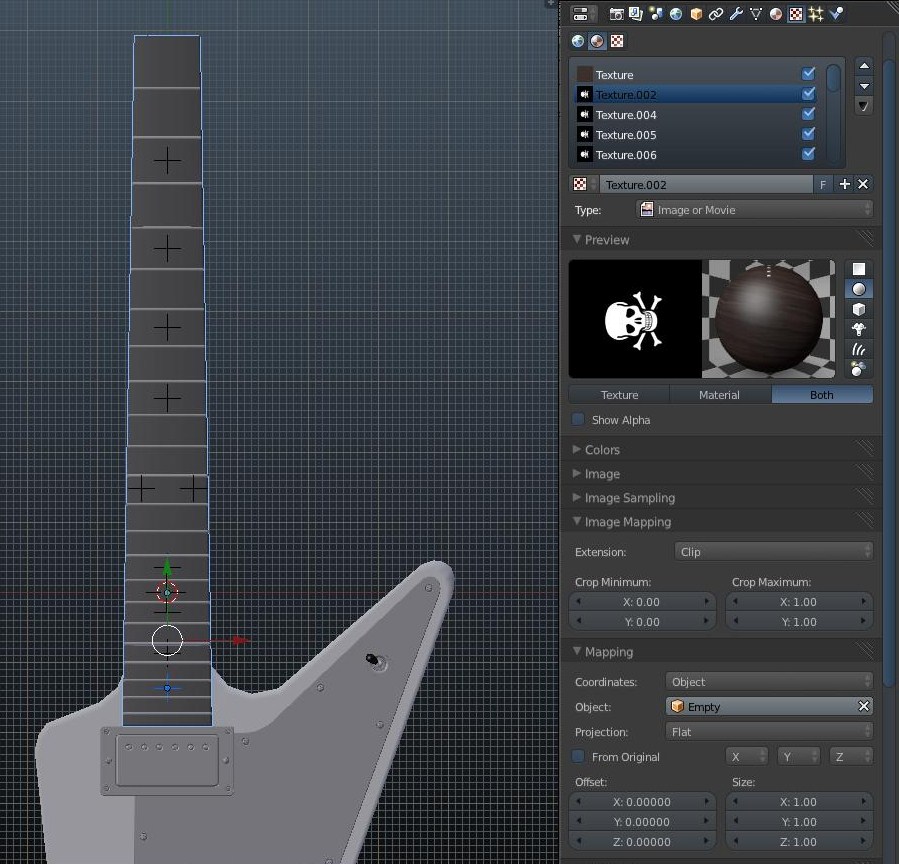
EDIT: The technique is more simple than what I did, just to clarify. You just add a texture (transparent png is usually what I use this technique for), choose Premultiply, then change it from Repeat to Clip, then change from Generated to Object, and in the Object box, locate the empty in the list and throw it in there. The empty will be facing up, so if you want it on a side or something, just spin the empty. Also, a drawback to doing this is it shows up on the back of the mesh too, but in my case here with a neck behind it, you’ll never see that. Just clearing that up for someone who may not know how it is done.
Looking great! Explorer is my fav shape.
Guess I go and continue with my Blender guitar…thanks for the inspiration!
Damn…this is starting to look sweeeeeet!
@IconW: Thank you very much! Looking forward to yours! 
@harleynut97: Thank you! Almost finished with the tailpiece, then moving on to the headstock. Should be ready for prime time tomorrow :yes: Loving your One Arm Bandit by the way!
Looking better with every update! Cheers for the info on empties. I seem to remember playing with that once but have since forgotten about it (so much to do in blender its hard to remember everything).
@MonkMonk: You are welcome, and thank you! It’s quite a useful technique, especially for something like this or the headstock. I’m not going to unwrap the headstock just to add the ‘Gibson’ logo Transparent Gibson logo, add new texture, change to object/empty…DONE  I have since finished the tailpiece, test rendering now. It’ll be up shortly Headstock and tuning hardware next
sorry, i dont follow 
r there any advantages of using empties over UVs?
btw, this guitar is totally humbling almost intimidating
it’s amazing!
@khalibloo: Thank you so much! I would say there is many advantages in the right situations. This is one of the last pieces I have to make: http://lghttp.20874.nexcesscdn.net/809E10/magento/media/catalog/product/cache/1/image/1200x1200/9df78eab33525d08d6e5fb8d27136e95/1/9/1983_gibson_explorer_pearl_white_electric_guitar_90024__-6.jpg The empty/texture way works perfect for that logo…no unwrapping, etc. Only thing is, it will show through the other side, but you can simply just turn off the texture if you are doing a shot of the back. Basically anything that has to do with transparent decals or something similar, I use empties every time. Like I said to MonkMonk, I can now spin them around, make certain ones larger than others, delete some, etc. It all depends on what you need to do
i highly doubt i’ll ever need to use it. but it’s a good technique to know thanks
It comes in handy quite a bit ![]()
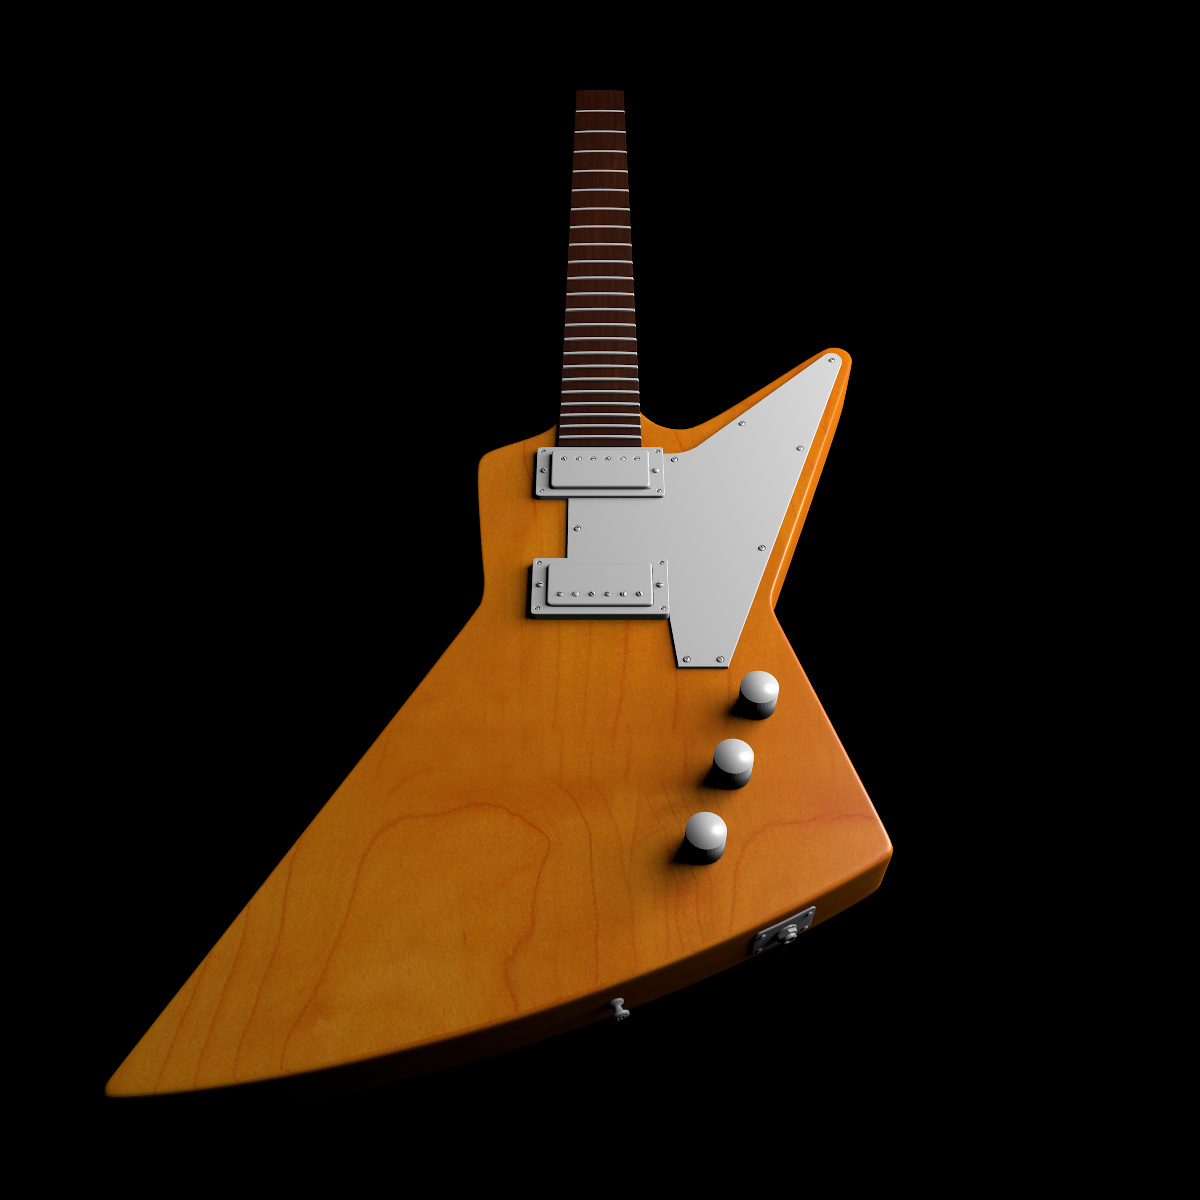
UPDATE: Converted pickguard to mesh as to flatten out the bottom, leaving room for the black/white/black stripes on the side. Also added “witch hat” volume/tone knobs
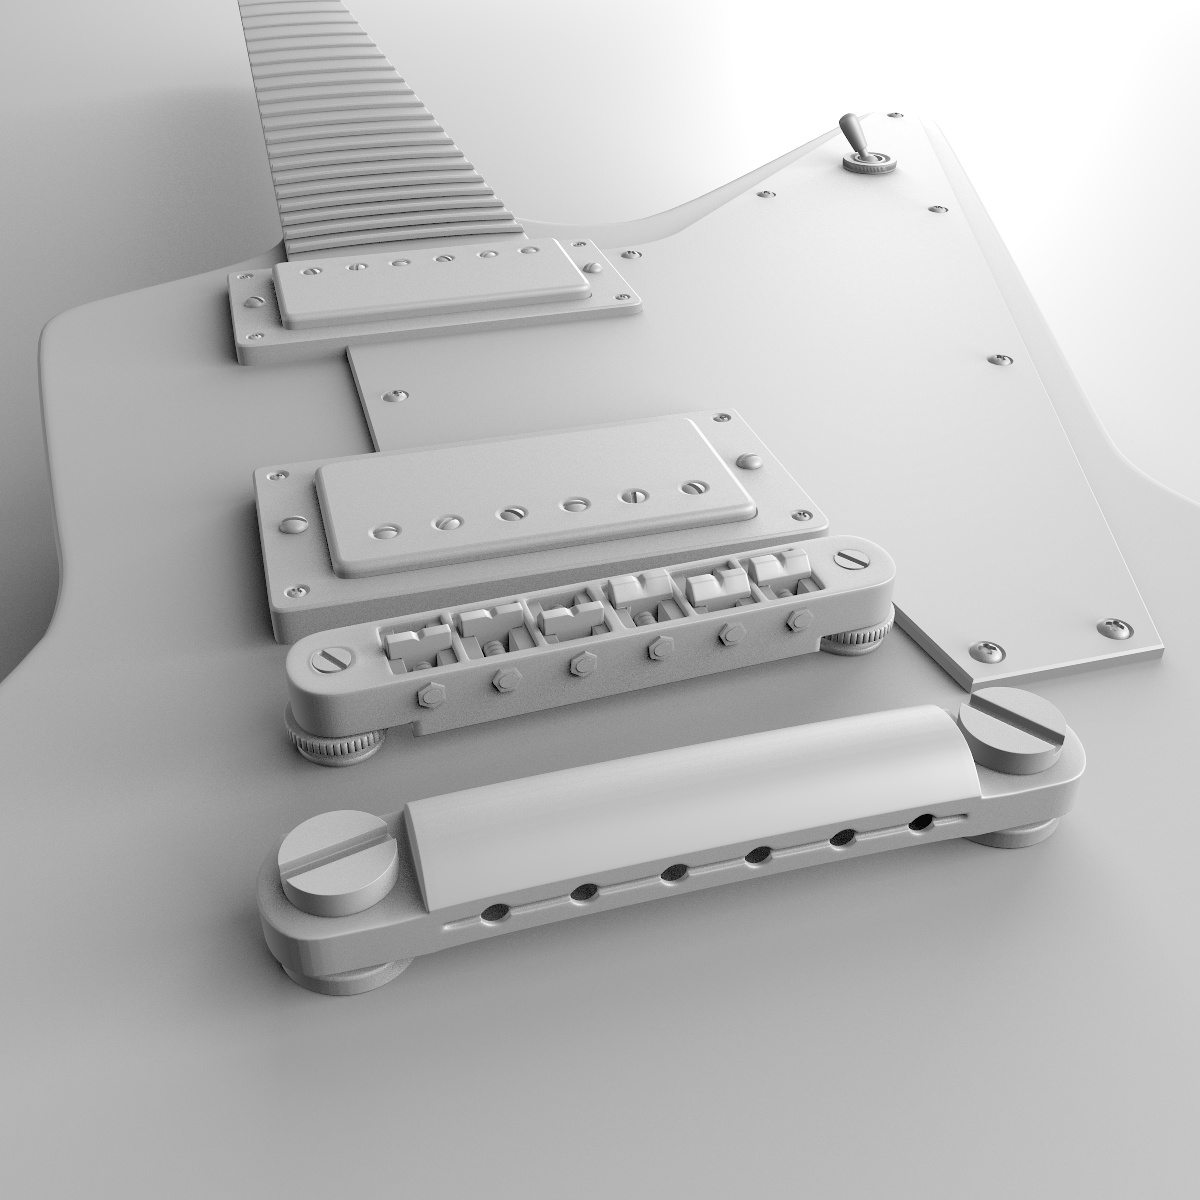
Really love the detail you put into the bridge… this whole thing is really coming along beautiful. I’ll have to look up a reference pic of this guitar…
@harleynut97: Thank you! I’m more or less going off of this model, I think it’s a '76: http://www.guitarvillage.co.uk/admin/pages/upload/GibsonVarious/76explorer.jpg I’m using Gibson PAF pickups though, and witch hat volume/tone knobs, but they did come on the guitar at various points in it’s life as well The only modern thing I have done to this is added an ebony fretboard, which is what the newer models come with, I just like the darker color better than rosewood
Thanks for posting the reference pic… if you ever find your way over to Nashville TN, an absolute must for any Gibson Guitar enthusiast is to go and check out their manufacturing facility / showroom. It’s actually in some mall near opreyland. At this place they manufacture mandolins and dobros… but they have a showroom that will blow you away. As I was walking around I demo’d a few guitars (acoustics), there wasn’t one of them that were less than $ 7,000 usd. You could literly just pick them up and start strumming away right there in the showroom.