I have a metalic knob with a red glowing ring around it.
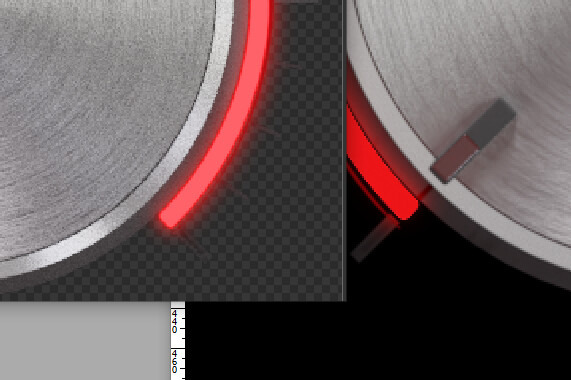
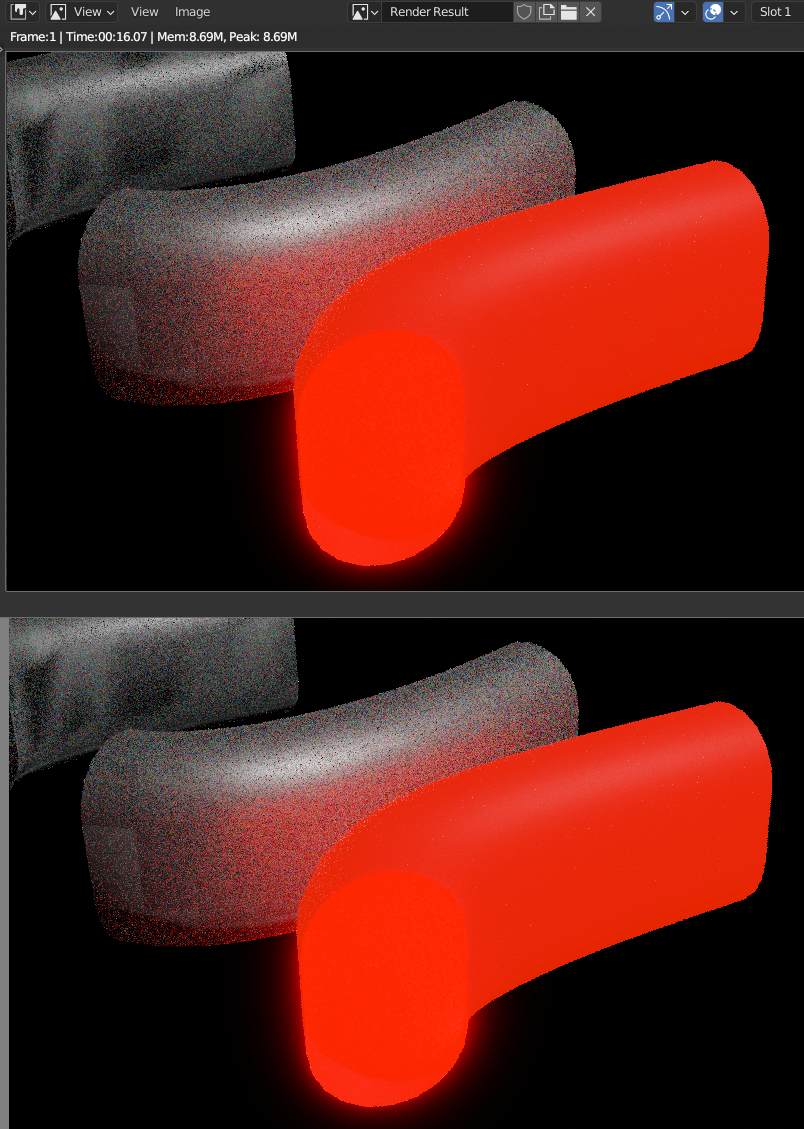
I want to export this as .PNG and maintain the outer glare. Despite my node set up and the correct (I think) rendering options, the glare is lost. Left image, glare intact in the Render window, right image, the glare gone in Photoshop.
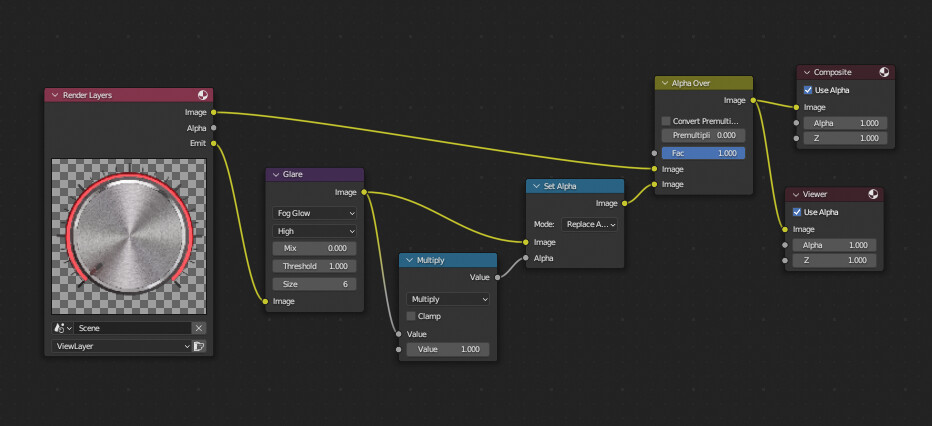
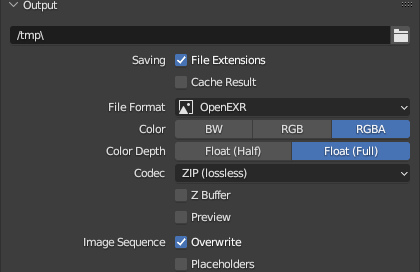
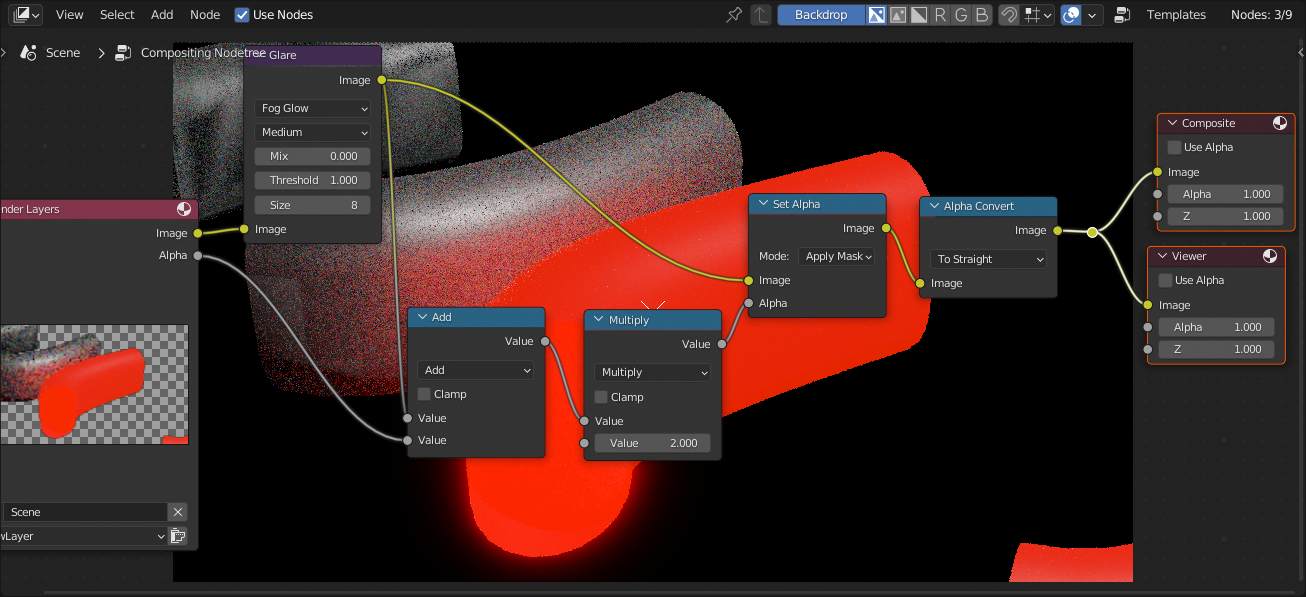
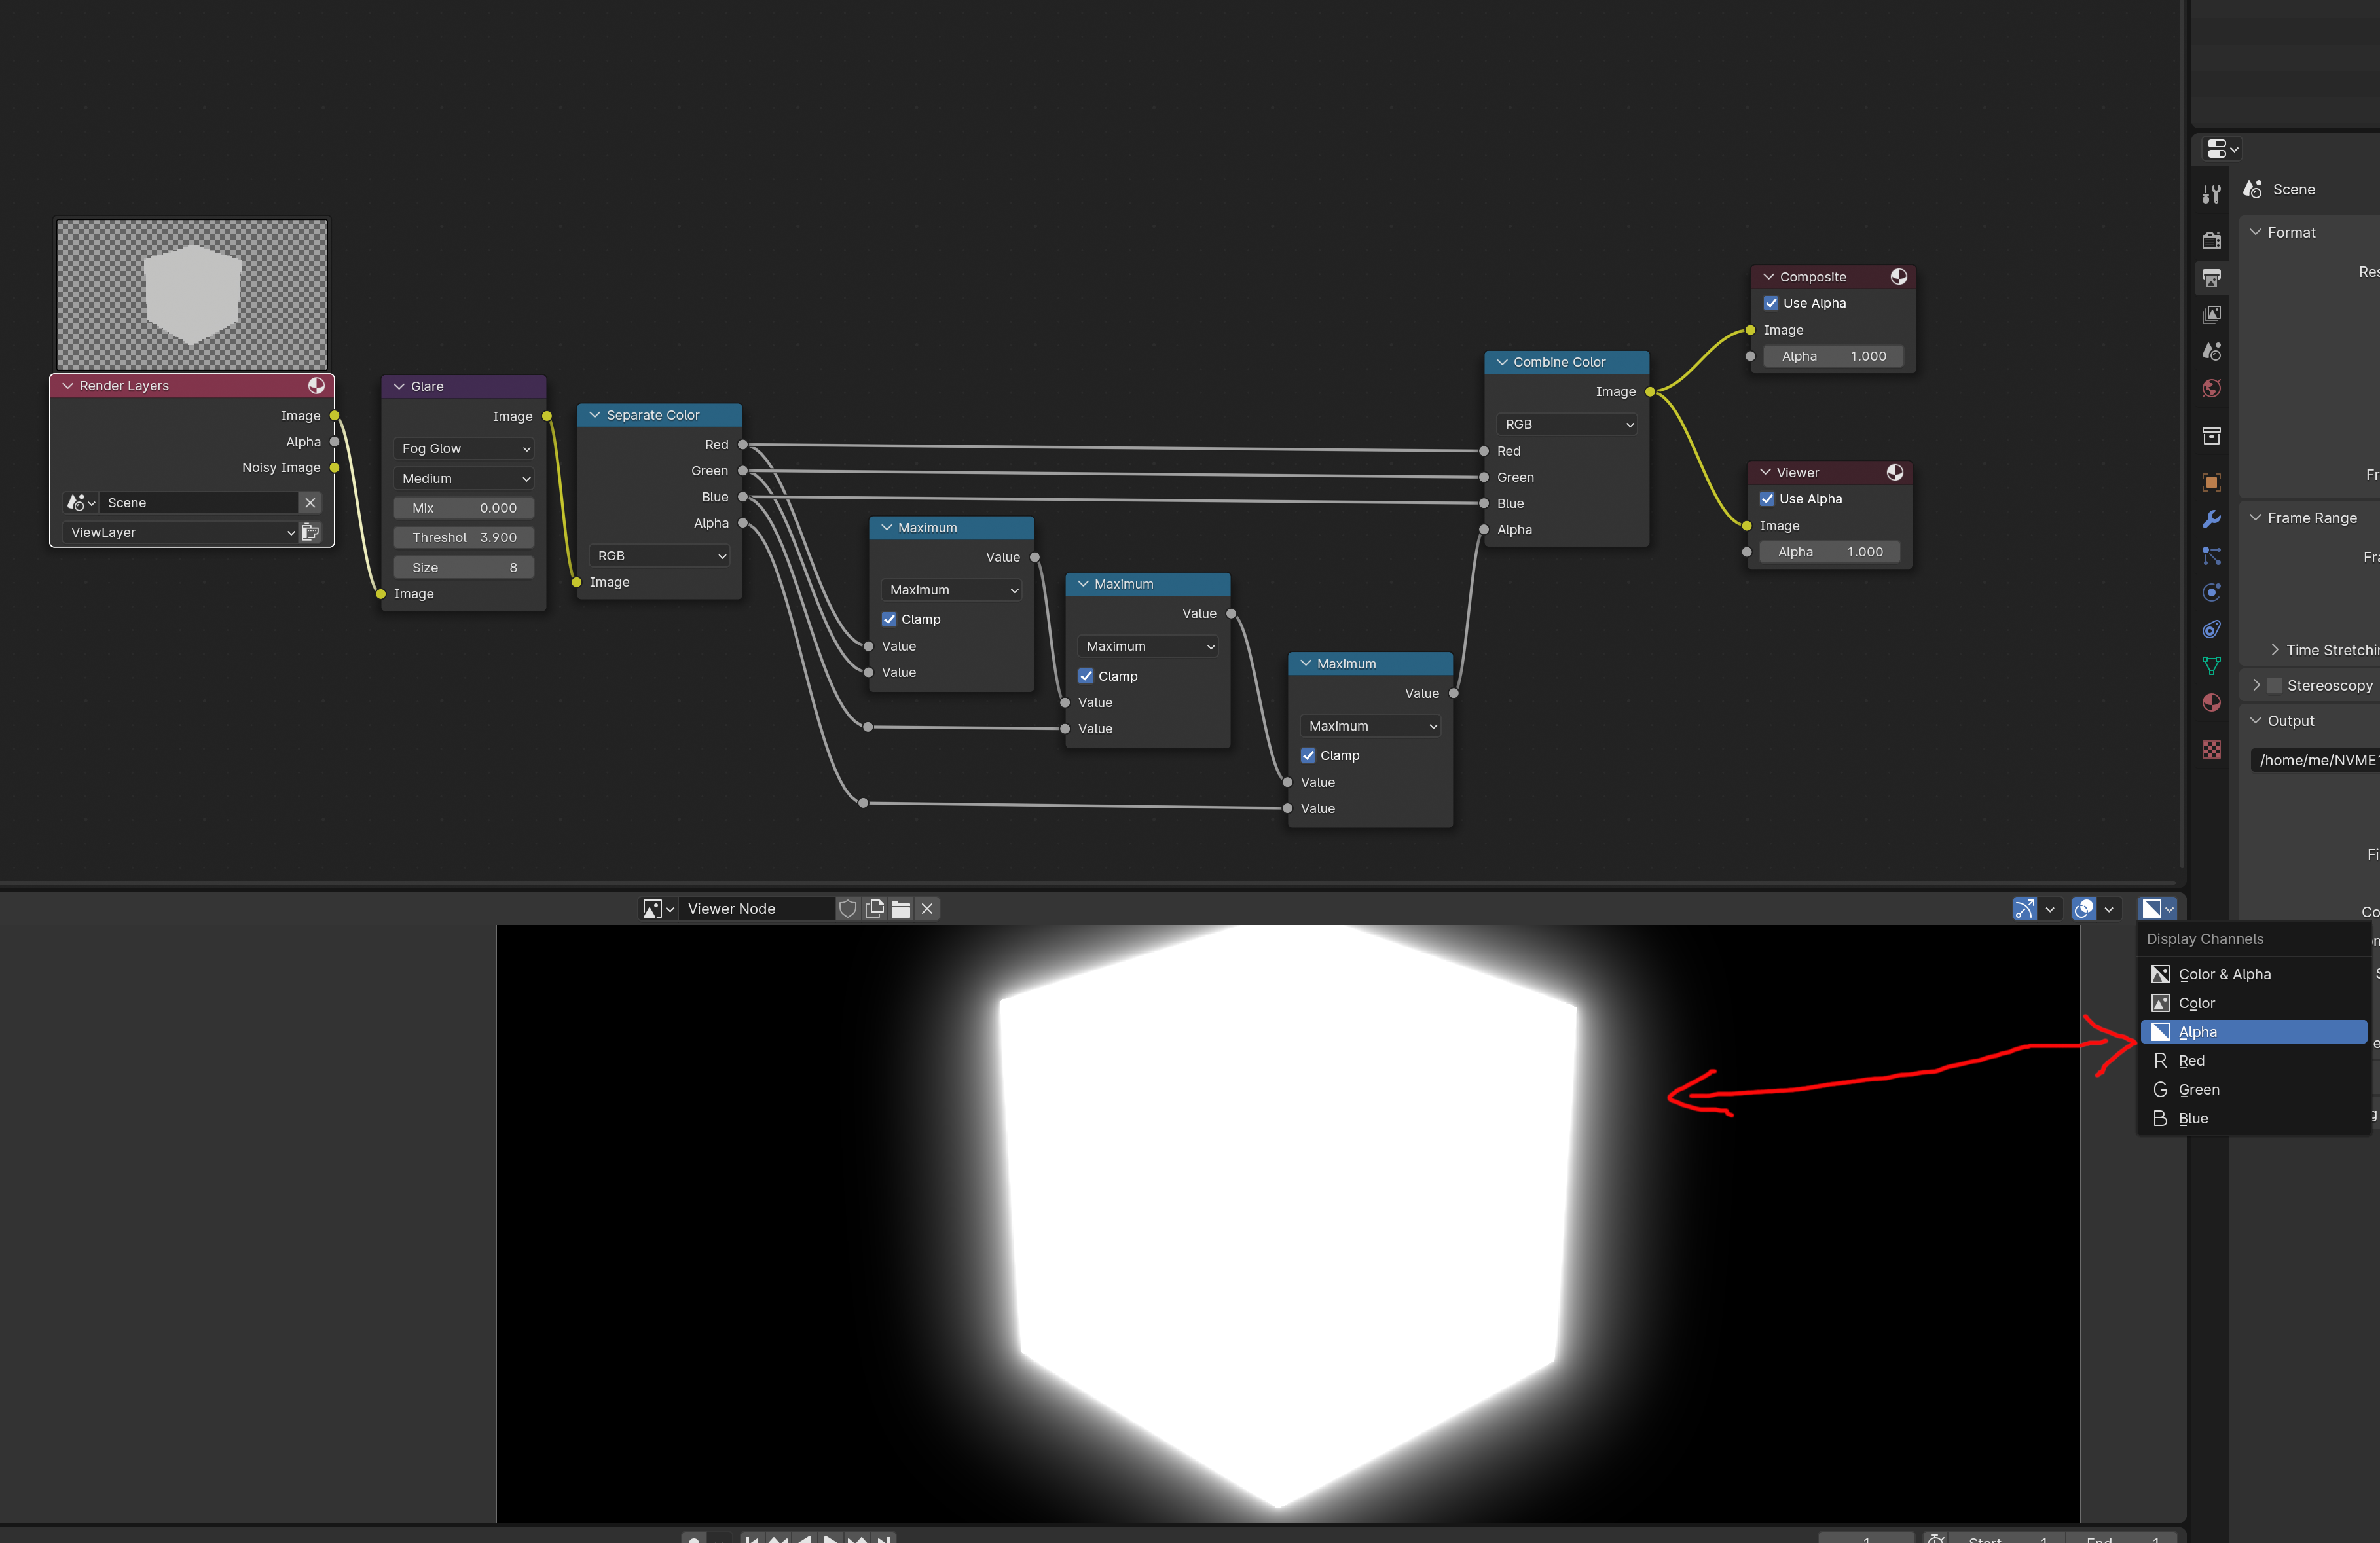
Here is my composite node setup. I am exporting PNG, RGBA.
This is a limitation of the PNG format, you’ll need to export to EXR (or render on a black background, then in Photoshop, take your image and set its blend type to “Add” instead of Normal)
The first image is the result of the render without the glare, with a transparent background. The second image is just the glare alone on a black background, without transparency (you can get it with the “mix” setting on the glare node).
You can then use the glare image in add mode over the base render and re-create the result you have in Blender.
Hmmm, as I feared. The knob is an animation of 127 frames. So I guess in Photoshop I have to combine 127 Png’s of the knob and 127 Png’s of the outer glow and then re-export them as one file.
Maybe I could craft a Photoshop script to automate all that.
If you are going to render an animation with a transparent background, I am assuming you are going to composite that animation on some other footage, right?
If yes, couldn’t you import both layers of the animation into the other program and just use them there without joining them first?
Hmm … heard this before… and i know about straight and premultiplied alpha… but… for example… using this (no additional emmision pass; just added the alpha with the image; even doubled it… maybe not needed):
On black, sure—but what you’ve got there isn’t really a glow anymore! On plenty of other backgrounds, you’ll see an ugly “blob” of alpha underneath the glow. You don’t usually want glows to darken the pixels behind them!
What kind of file are you planning on exporting? Combining them into a PNG will just repeat the same problem again, since PNGs still can’t hold emissive pixels*, and if you’re going to write to an EXR (which can), why not just write that out of Blender in the first place?
(Also, Photoshop isn’t good with emissive pixels, either—I’d be fairly confident saying the problem repeating itself when you used EXRs was its fault, not Blender’s.)
*Emissive pixel: a pixel with RGB values but no alpha—a pixel that emits light into the scene without blocking light from behind it
Oh yes… while testing this out i somehow totally oversaw that the background was getting black again instead o transparent… and i was back on the initial problem…
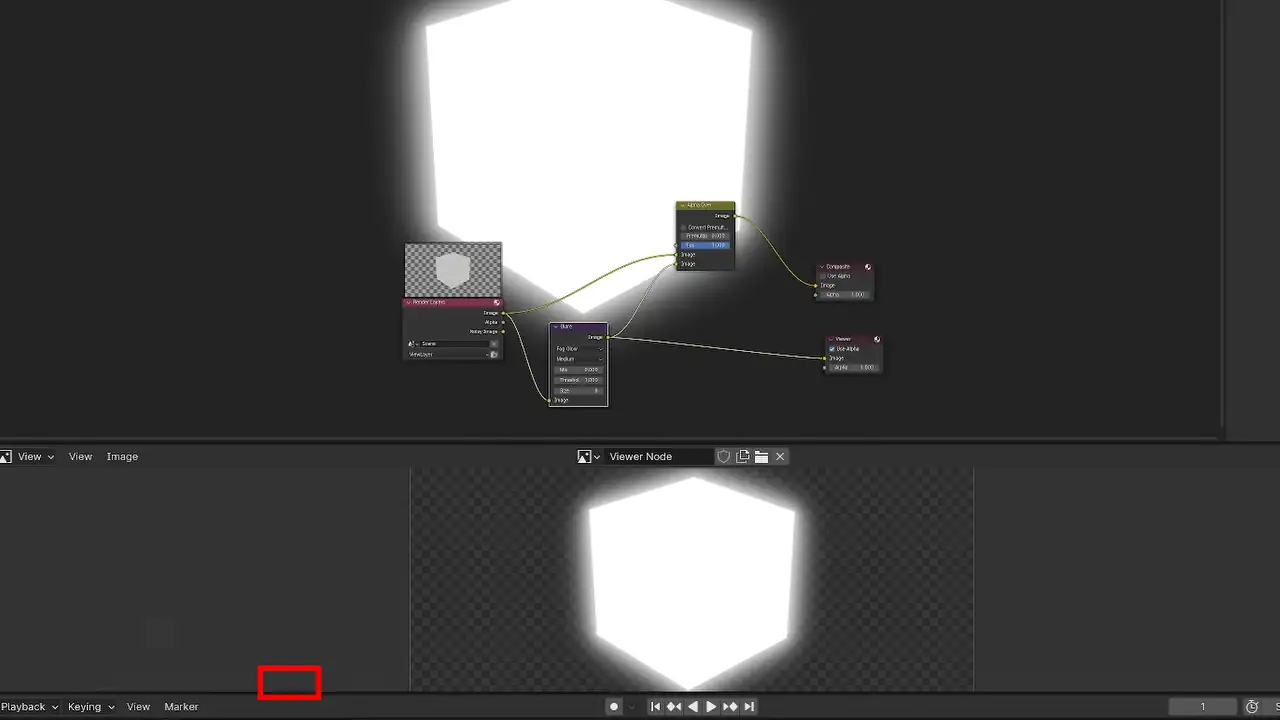
A promising ping closely before my endresult was this (with alpha simply put into the alpha input at the Composite node and maybe shown not so good embedded here… maybe i have to put it into a zip… no it seems to works):
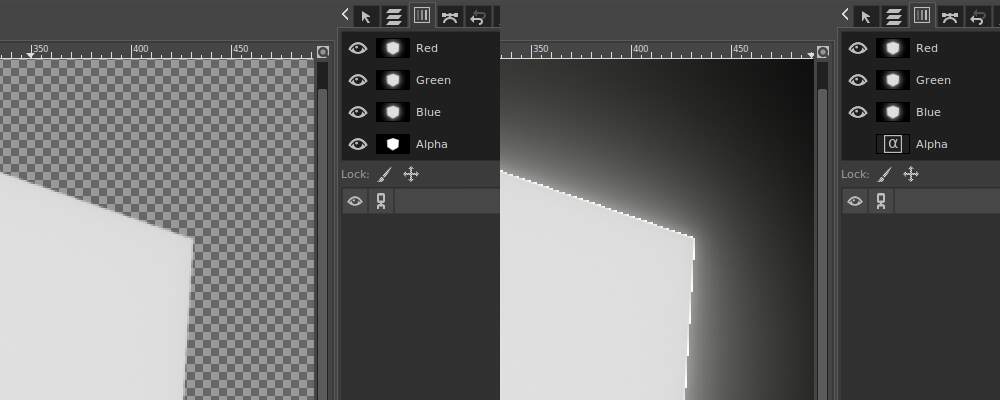
Anyway what do i see here exactly at the frst and the second image except that it is named correct/incorrect ?? Which is from what?
My Blender shows only a light/middle grey checker in the compoite RenderLayers-node but a middle/dark grey checker in the Image Editor showing the Render Result…
I think it will work if I export the glare separate onto a black backgound, then combine that with an Add blend mode in Photoshop.
I found this guys video helpful:
I’m not a fan of that video, personally—much too long and self-congratulatory for what is ultimately just presenting the existing workaround (use two layers) as though it’s new and revolutionary, and really weirdly dismissive of all the people in those threads patiently trying to explain the issue and how it’s more complicated than that, including showing correct answers on screen several times while claiming “no one has figured it out!”
Not to mention spreading some glaringly incorrect information (EXRs can absolutely store bloom, the problem is the software they took it into failing to support associated alpha, not the image format itself)—if you’re going to be that arrogant about it, at least don’t be wrong, you know?
That aside, though, yeah, the two-layer technique is a totally valid workaround, and probably the best strategy if you don’t have access to software that can handle EXRs properly, or don’t want to start wrangling with scene-referred data and Filmic! Totally do that if that’s what’s going to work best for you.
Again, though, that’ll only work at the moment of compositing—if you try to export that double-layered image anywhere else, you’re back to the same problem!
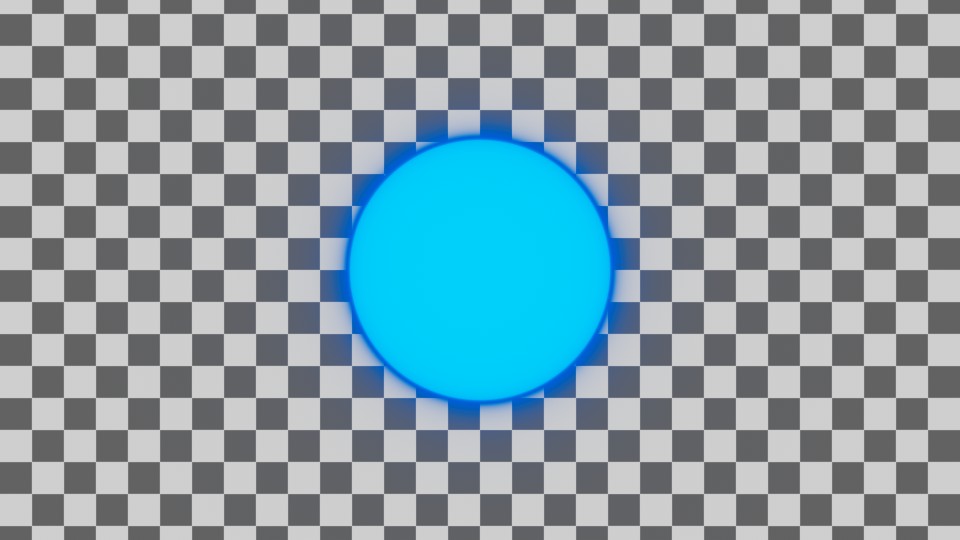
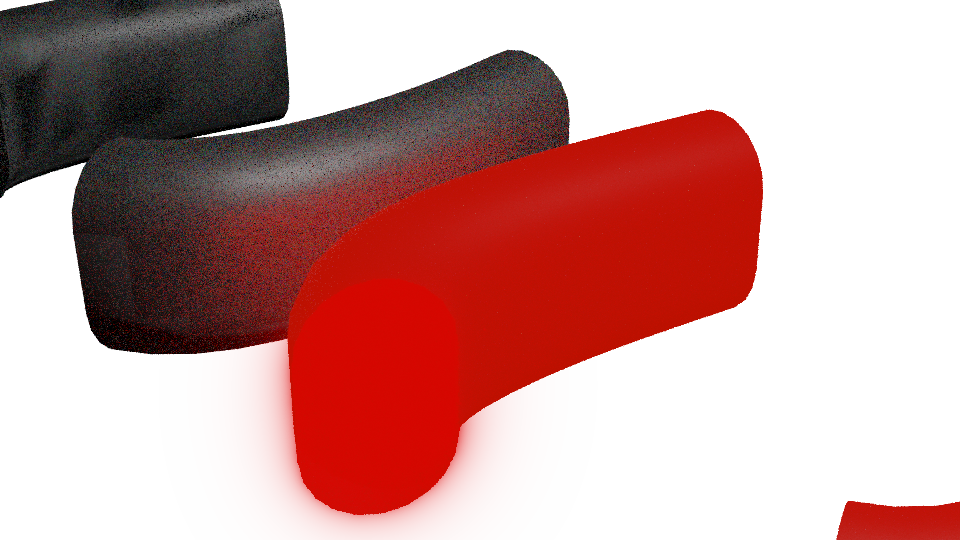
@Okidoki , those two images are a glowing object composited over a background with normal additive glow (the object has alpha, the glow does not) versus the same object with the glow mixed into the alpha (like your example node setup), creating a chunky dark blob.
this kinda works since the glare node is the guilty here and not affecting the alpha of it’s output:
the output of the combine color can be used in alpha over or exported as png with transparency and keeping the glare
@CarlG i think that’s the reason the glare node don’t have the alpha in it’s output . and that’s the reason why i said “this KINDA works”, hard to come up with a perfect solution for this for every case.
Blockquote
sum/3
Blockquote
just picture that you have a perfect blue glow. so you end up with a value in blue and 0 in red and green, average will end up reducing the glare (less alpha cause of the average with zeros where there was a lot of blue glare).
color weighted? how the weight are gonna be/come from?
so my thinking was that the glare will be a values from the object itself fading out around it, and taking the max that value gave as an alpha so the intensity given at a certain color will not be killed/reduced by the alpha.
please don’t take it as a perfect solution (rendering a separate pass on black and adding it will always be the safest) sorry for the confusion.
i was intrigued by the node tree suggested by the guy who started this thread and i thought that’s smart move how can i make it this work. for a simple cases at least.
i had case before where i needed this on a paid project on deadlines and this solution could have helped me (simple hologram logo spinning that will be very transparent on top of a video) and cause i didn’t have this solution i rendered the emission on separate pass and blurred it and added it after which was not worth for the scale of the project and the importance of the that logo in the project (or expport the glare node separately from blender comp). when i saw his try i was like hmmm maybe his up to something and added to it (so i just changed pluging the RGB output of the glow into the alpha of a set alpha node)
Alpha storage can be “associated” (“premultiplied”) or “unassociated”, but PNG standardized on “unassociated” (“non-premultiplied”) alpha, which means that imagery is not alpha encoded; the emissions represented in RGB are not the emissions at the pixel level. This means that the over operation will multiply the RGB emissions by the alpha, and cannot represent emission and occlusion properly.
So you can try ( like most people ) “playing around” with “fixes”… and spend a lot of time with this… ( which do not solve the initial problem ) …or just use EXR (as many suggestion show: just works correctly…)
But then also some argue about “bad” colormanagement
…but then: EXR just stores all the rendered data… (and so also “the bloom” ) …and if you know your color management…
But then again: some people alos argue about the best color management… while other say it’s just a visual stimulus ( and refer to visual color illussions…)…
So i guess you have choose for your own workflow…
( See ?? I also learnt something since my last post in this thread )
@Okidoki i learned a lot from you since my last post on this thread
but i don’t think it’s a PNG issue at all. even in blender image viewer itself something weird is happening. just add the glare node with a transparent film render and look up the image viewer place your cursor on the glare and you will see the alpha value on the image viewer status bar to 0 while blender itself is showing some transparency there which is in my opinion odd. (image below)
if the same result goes into an EXR file. exr will not save you. EXR is my go to render files btw and had issues like this with EXR in fusion while using blender files as my OCIO transform. alpha is alpha and alpha breaks!!! ( just a reference to Jerry rigs everything here).
that’s a good thing to know thanks. but have an opaque black background
still goes back to what we’ve been saying " use your own workflow". usualy since it’s 2d effect and not physically accurate anyway i prefer the emission pass on my exr and bloom where i do my final comp. if i don’t like it (too low or too much) no need to go back to blender (plus i like the choices in fusion)
the case i had once is i used such glow effects on a video once promoting a conference. the client reach out later saying we like the effect you did and we want it for the conference design it will a huge print the size of the wall can we have that exact thing the max size you can in a transparent PNG for our graphic designer to lay on top of our artwork!
so i had to reach out the graphic designer and explain: hey that’s a glowing light and light is additive so i will send in black and use add/screen/softlight whatever you like in what ever software you’re using. after begging blender can’t you use what ever values you showing the transference on your window in the alpha channel.
i understand why kinda, if the bloom is a certain color. the background a certain color and you relay on that alpha to do simple OVER, the edge of the bloom will look ugly (im sure the dev of those nodes aren’t stupid) it’s meant to be a light and light is additive by nature.
thanks for the nice tips tho
the tomatoes no big deal as long as they delicious. what bugs me is why separate is one word but “one word” is separate!!!