my biggest problem is with the mapping

another doubt:
it is possible to bake a material, associated with several different objects, with the grungit applied with: object info: random in some channels that consider the variations of: object info?
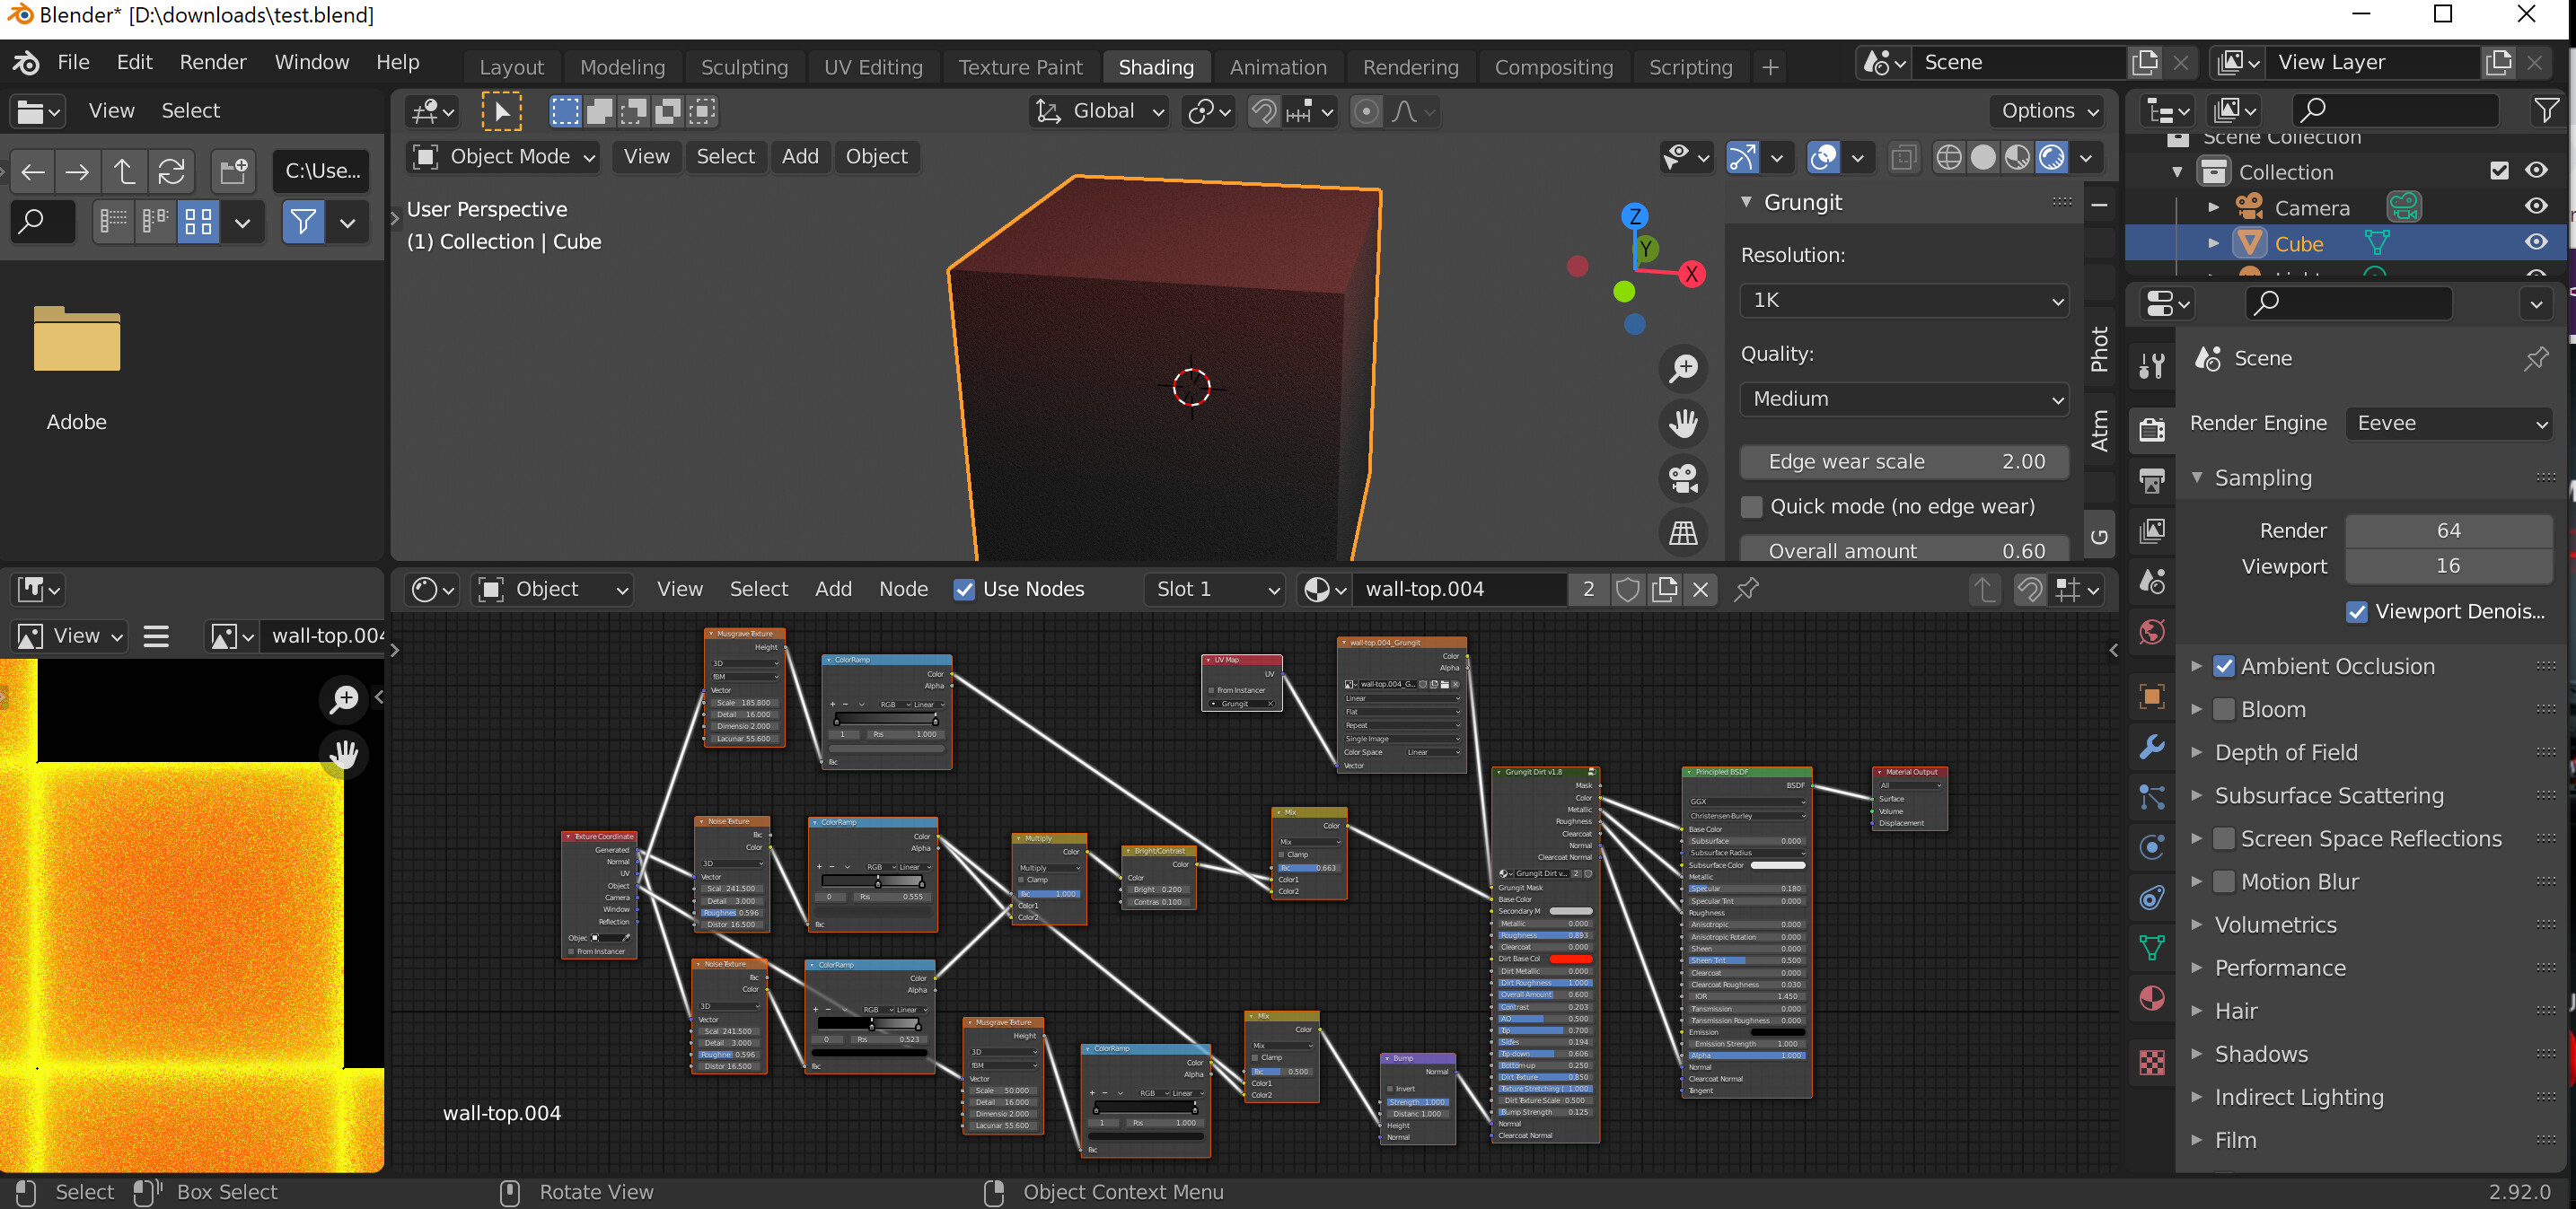
Here is the node tree. Only connect what you need to vary, and set the min and max values as you wish to use. (You can do the same with all inputs)

Do your objects have the same materials? Otherwise you either need to duplicate the materials or manually adjust UVs so there is no overlapping between the objects’ UVs.
I recommend checking tutorials about UV’s and Baking to better understand the workflow and the problems that arise
wow really nice . thanks
1 Like
what do i do when the dirt orientation is reversed?
above is below and below is above?
how do I redo the guidance?
does the object have to be closed for the gungit to work well?
can I scale the object after applying the grungit?
and change the shape?
You need to apply the object’s rotation for that to work correctly
No it’s not necessary
You can scale and change the shape, as long as it’s not something that alters the UV’s. So you can move vertices, scale, rotate…etc, but you can’t add new geometry, extrude, remesh…etc. also if you change the shape too much the result might get weird and you will need to apply it again
what if the object is different above it from below to apply rotation?
Sorry, I am not sure I understood your question, can you explain it in a different way?
if the dirt is inverted: underneath it is above and above is underneath:
if the object has a shape that is above one way and below another, like a human body, how can i invert it for the grungit to work properly?
Can you share an example ?

That looks like AO dirt, not top/bottom dirt.
Try applying again with “advanced mode” enabled
and reduce AO

you did not understand
the human below has the : top-down on the Y axis
and so the : top-down dirty the back
How do I fix it?
some objects are like the inverse top-down on the Z axis

have you tried applying rotation ? (CTRL+A > rotation )
worked, thank you
what does this command do exactly?
basically each object has its own “internal” rotation for the geometry inside, and when you rotate it it’s an “additional” object rotation. So when you rotate the object it’s “internal” rotation doesn’t change.
In your case the internal Z axis was pointing from the front to the back, instead of from the bottom to the top, and that’s why the shader gave the incorrect result. Applying rotation will modify the geometry and align the internal axis and undo any additional object rotation, so the Z axis will be pointing up again
Why can’t I see the dirt texture in this example?
I have a file of 50 objects that looks like this.
How do I fix it?
could it be because I deleted the grungit nodes several times and applied it again?
if yes , how do i solve it ?
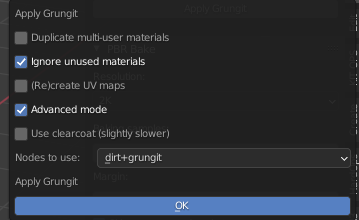
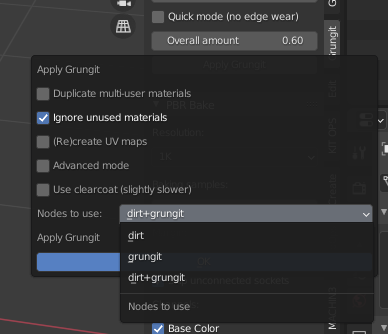
You need to choose “dirt + grungit”, when you click “apply grungit”. Just apply it again and it should be fixed.
it still doesn’t work 100% correct
textures are not working correctly
texture stretching and the dirt texture scale does not work
is there anything else i can do?
do you have a detailed node dirt manual?
Do you have scale and rotation applied ? have you tried to enable “(re)create UV maps” ?