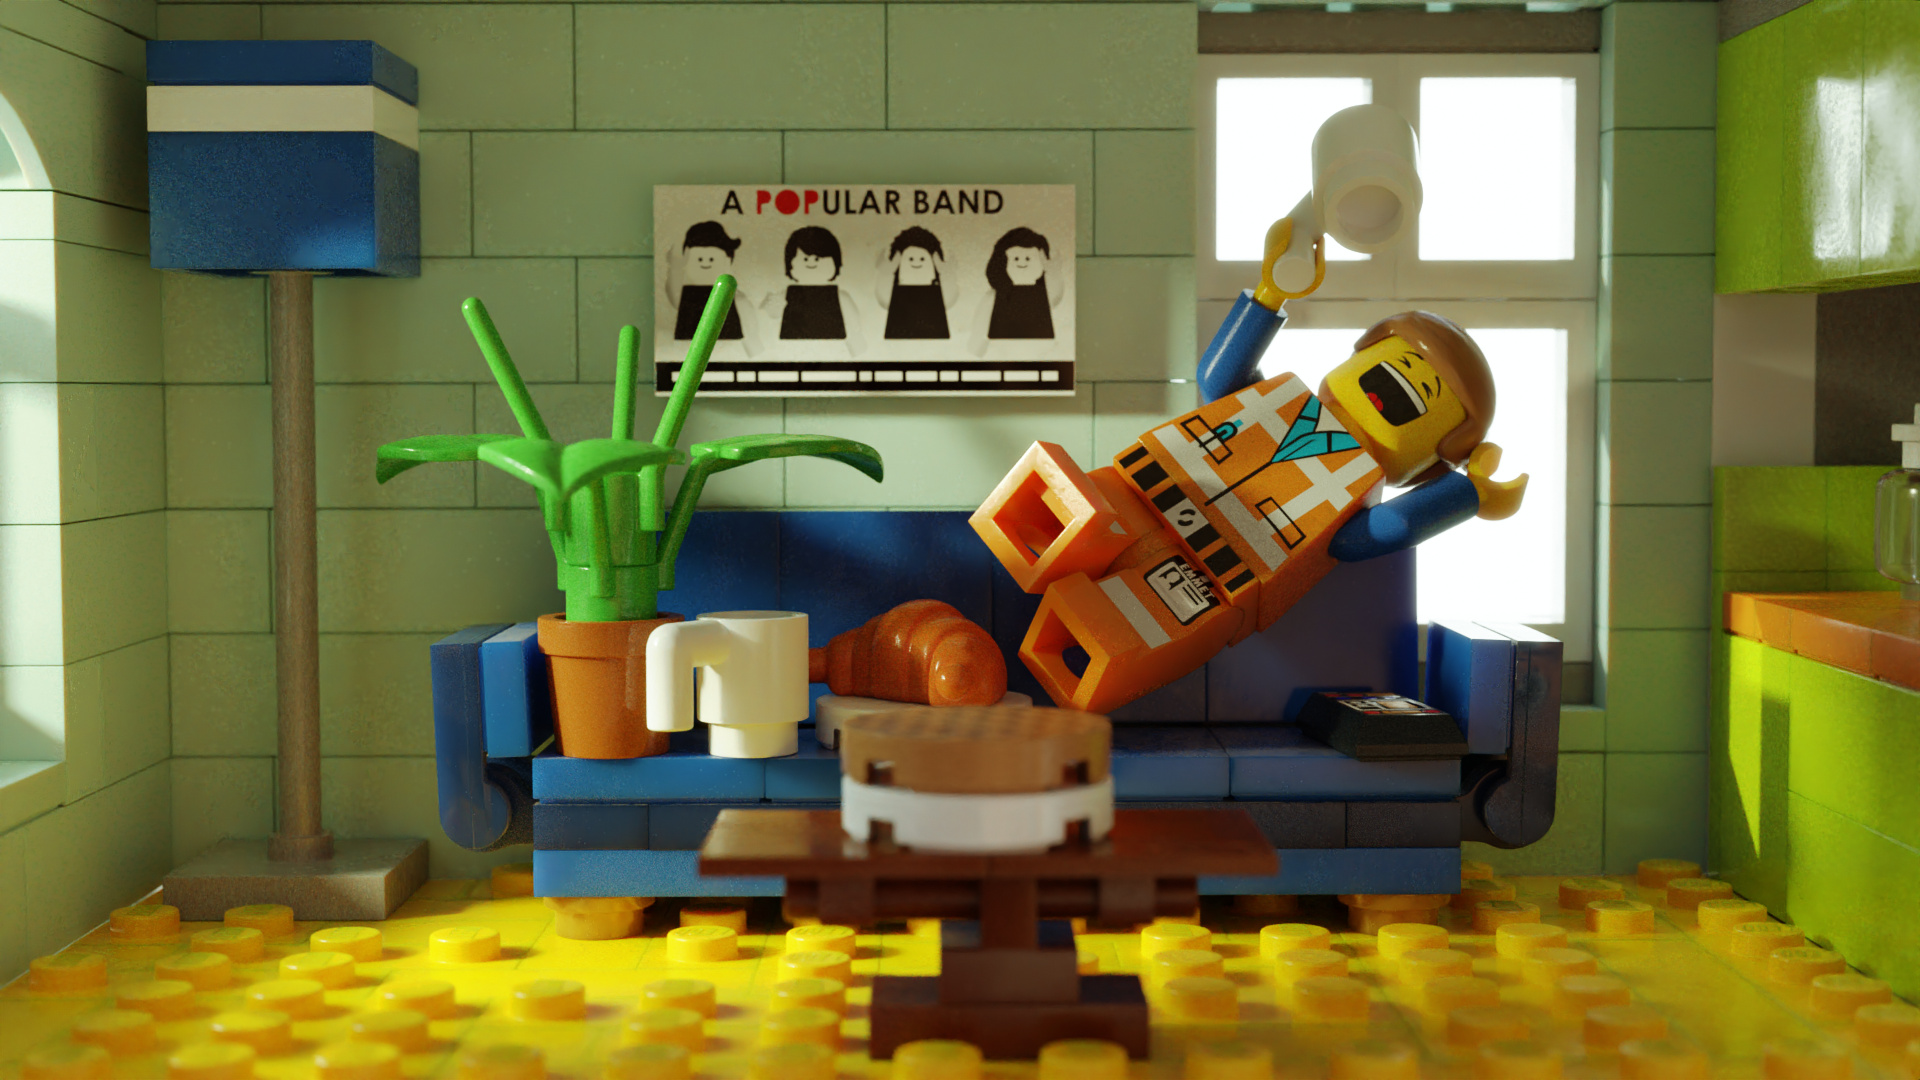
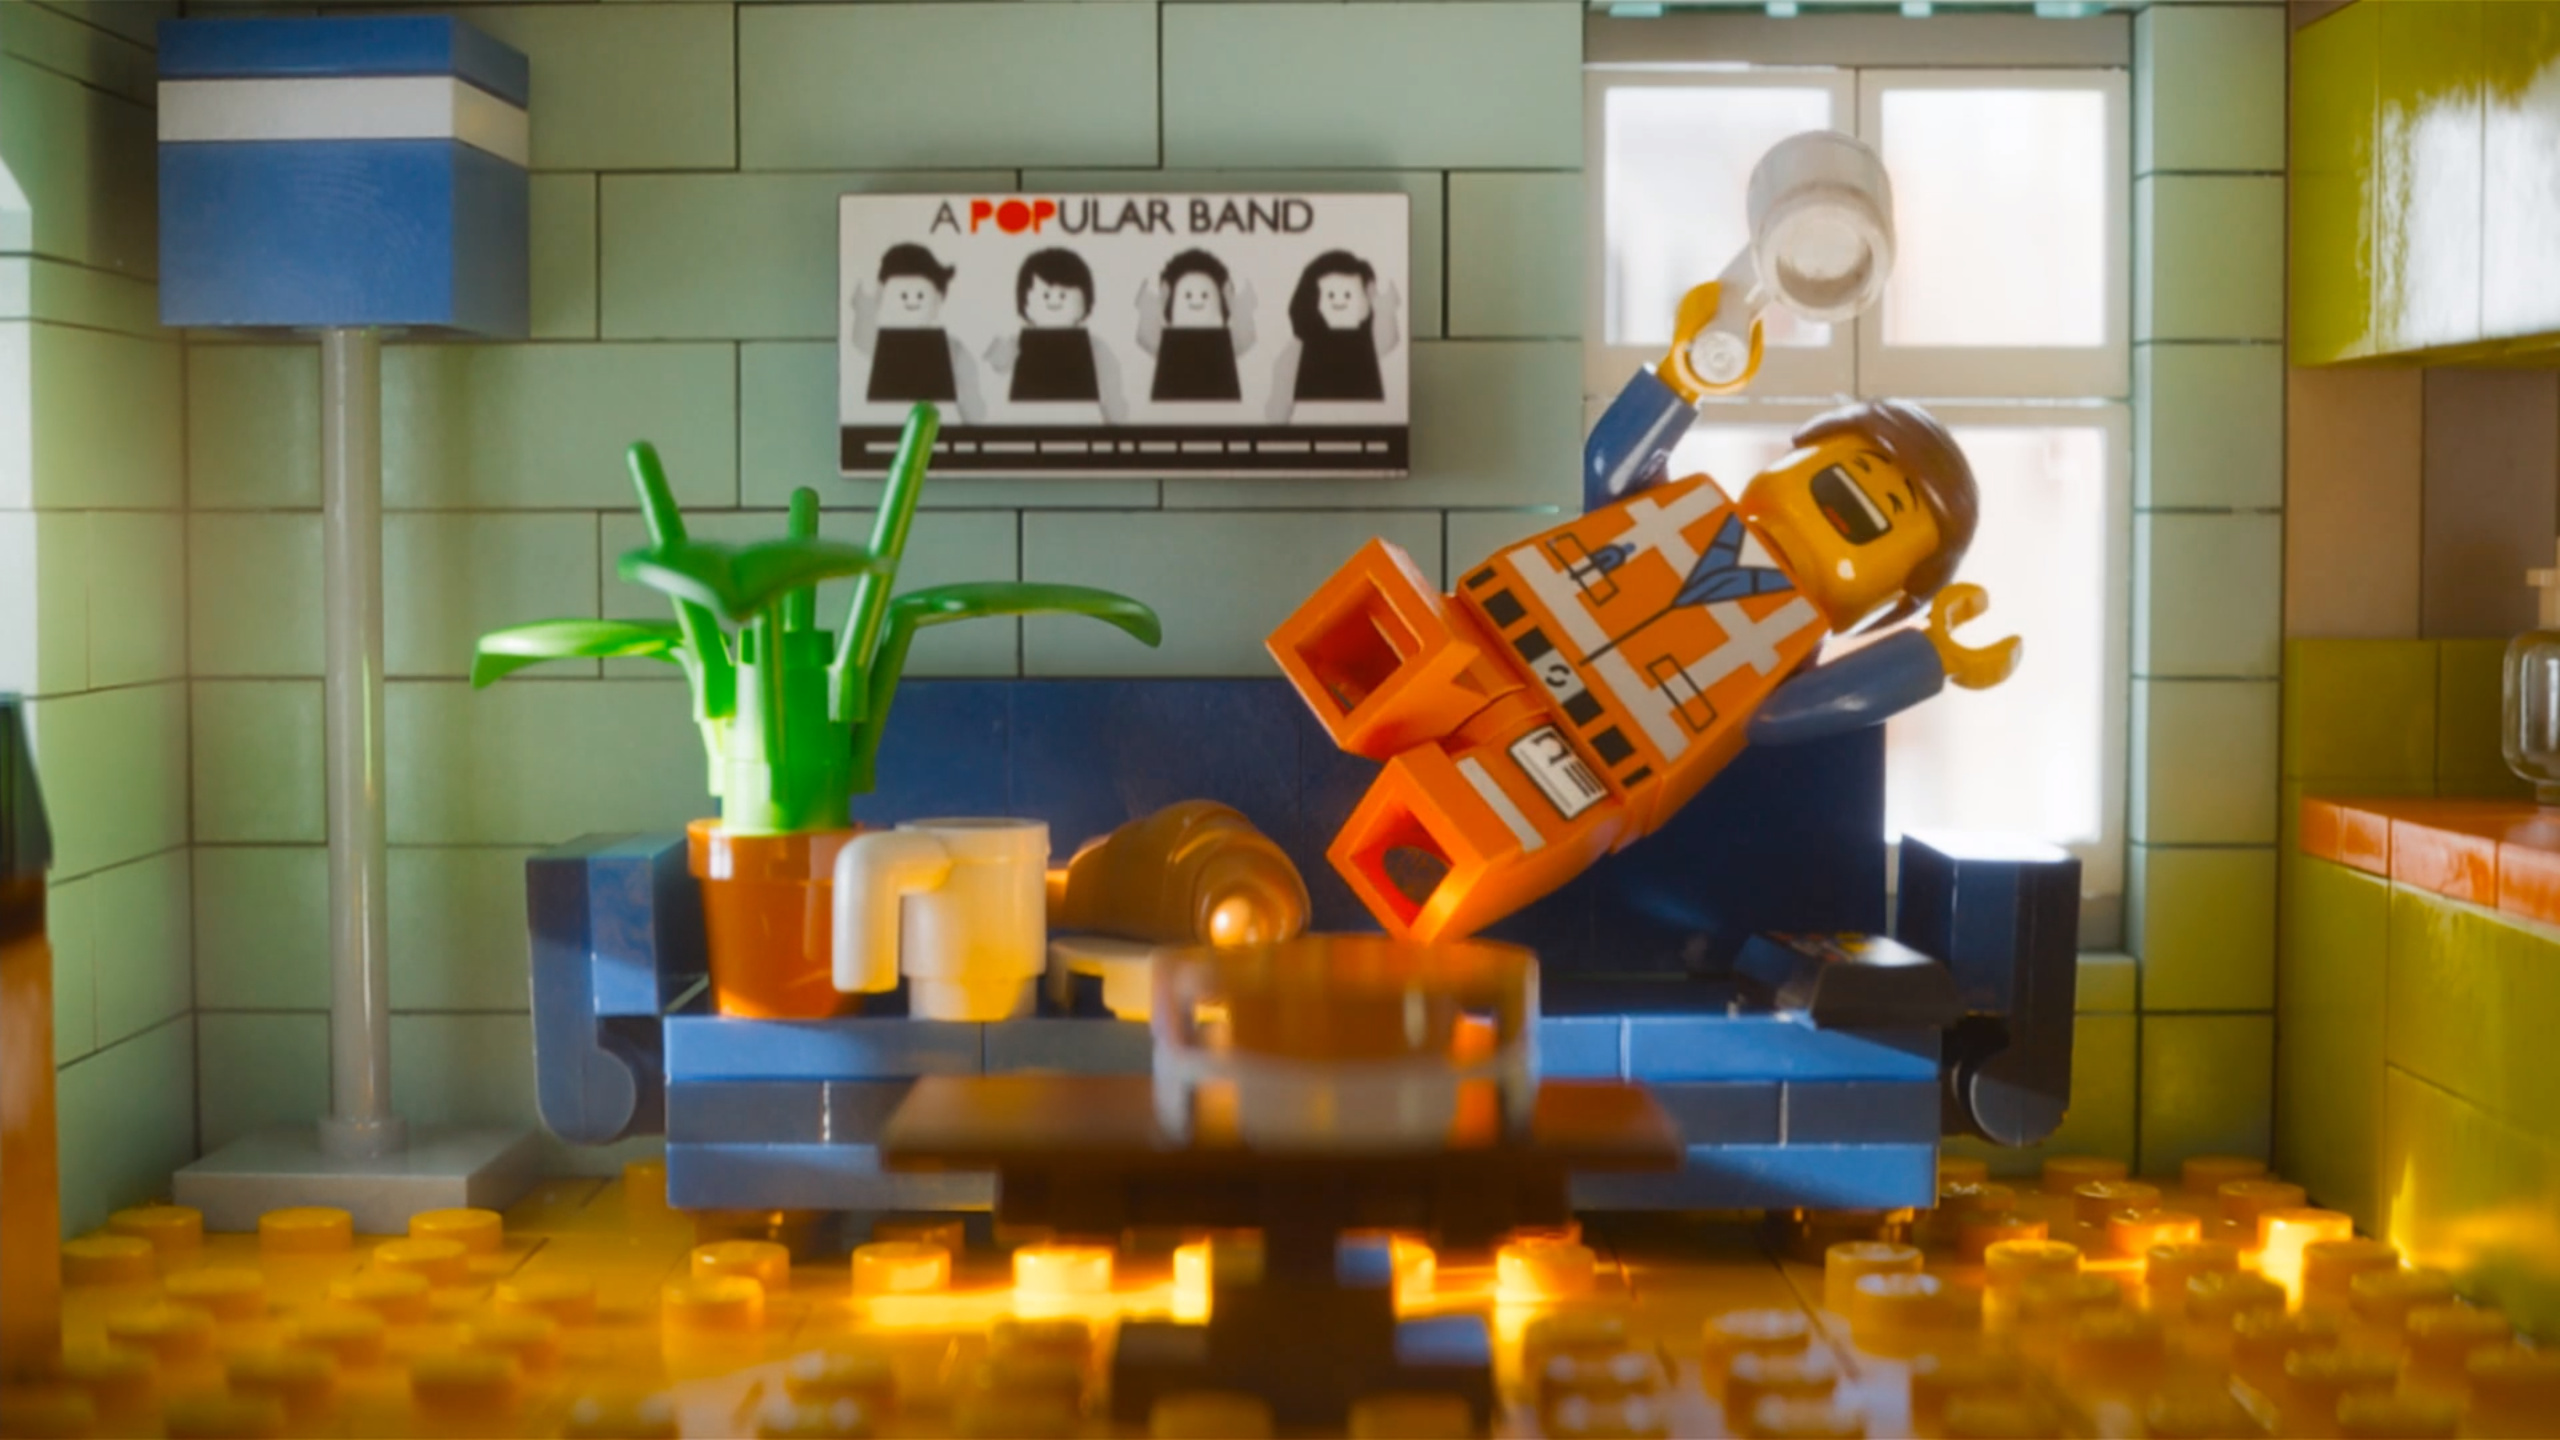
I’ve been working on this scene for a while, trying to get close to photorealistic Lego. As a way to gauge the photorealism, I directly recreated a scene from the Lego Movie. I have a pretty good texture and shader setup, but I can’t really display it well because I am downright awful at lighting (as you’ll see if the render). I would like to match the lighting from the scene, but I’ve given it my best shot and I still can’t get it. If someone could shed a little light on the subject of effective lighting, I’d be very appreciative.
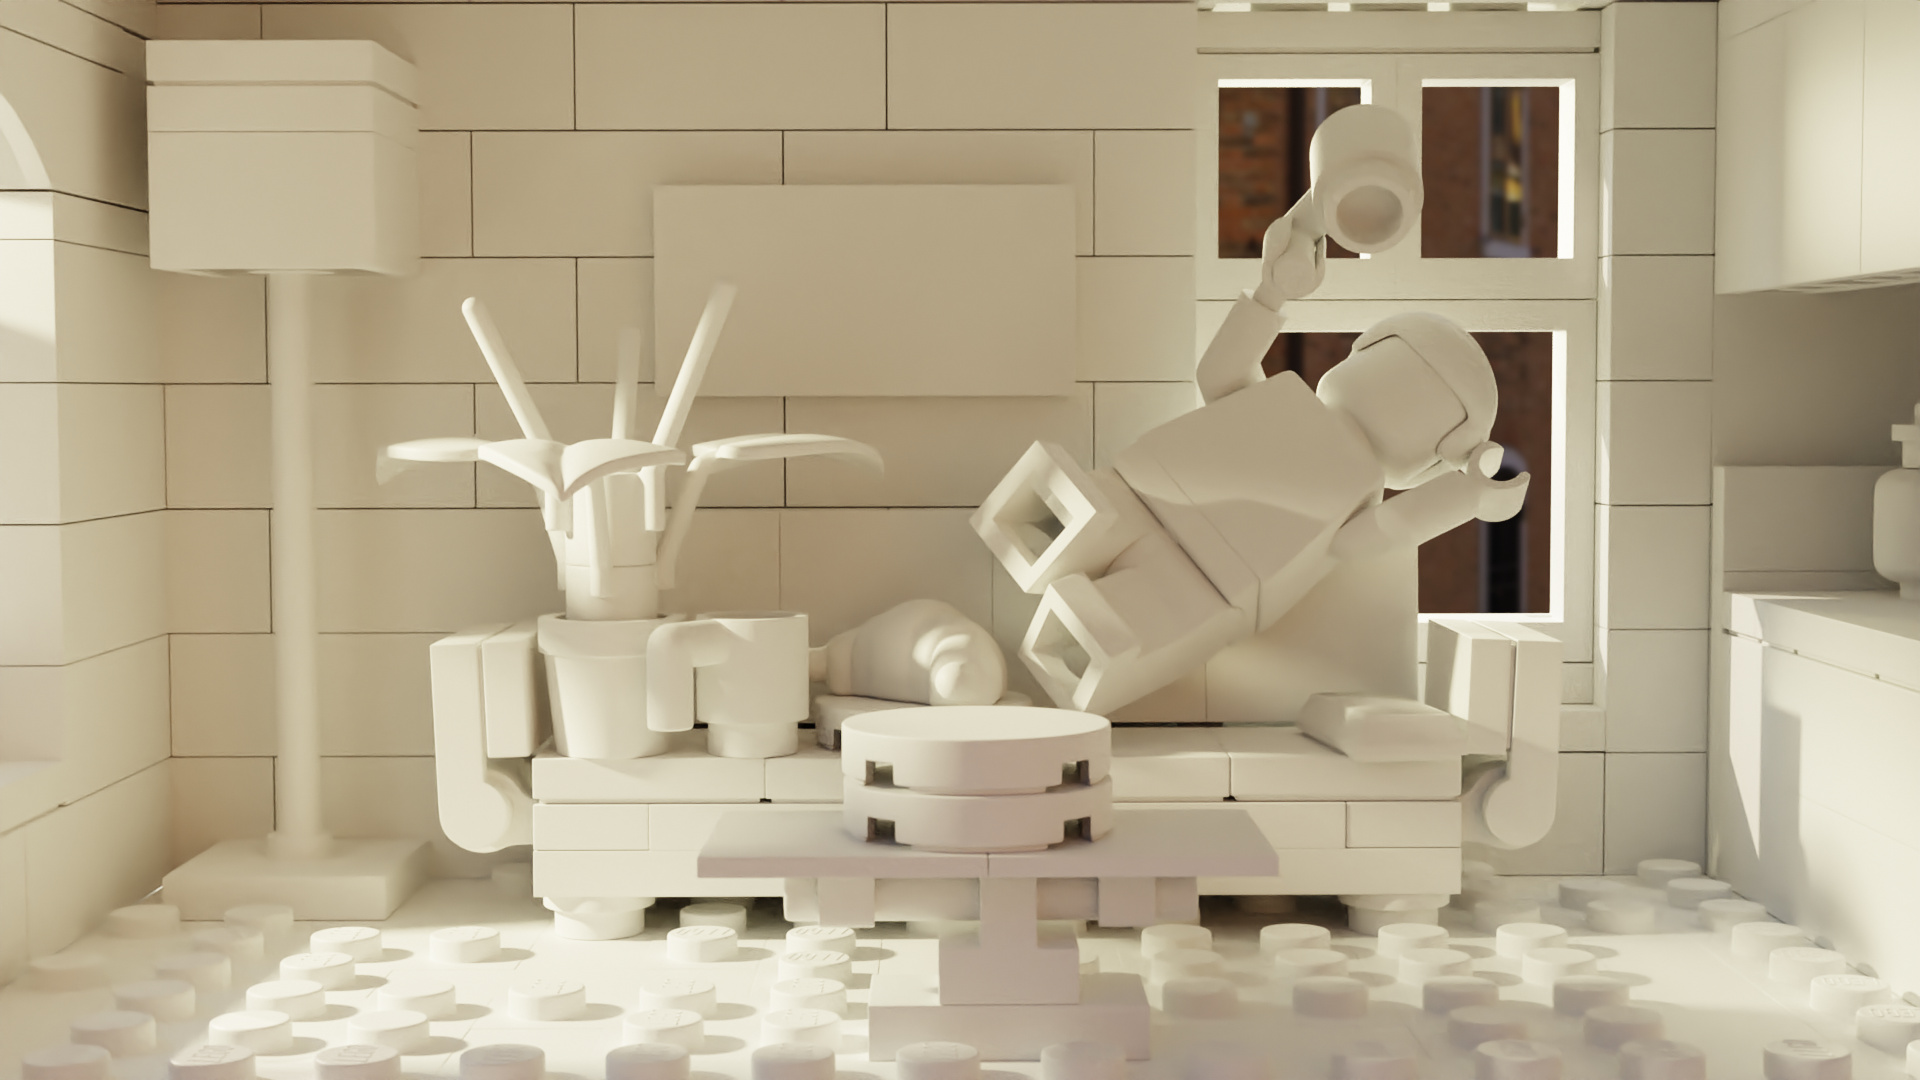
Here is my attempt so far:
Your scene is already great . To get closer to the original scene I would brighten up the window. Which engine do you use to render? Cycles or Eevee? For Cycles I would use a textured plane with a strong emission shader right behind the window. For Eevee I would do it similar and add some Bloom intensity in the render settings. The second change would be Depth of Field. You can find it in the camera Settings. Play around with the distance and F-stop. As you can see in my portfolio I’m very new to blender but still I hope I can help somehow.
Oh and a last thing. I think they used less roughness for the plastic. The lamp, the floor and the kitchen looks more specular.
I’d say, lighting could be slightly more intense, and so could the spec value of the plastic.
I also suspect there is a little bit of SSS which I think is missing from your scene. Plastic generally lets a little bit of light pass through it, so it might be worth testing that out. I also agree that a little compositing of some bloom and other bits will help sell it.
Adding onto what others have said, I also see that the lighting from the left is too high up compared to the reference. It is also too sharp. The reference has much softer lighting as can be easily seen on the floor studs, and on objects on the right.
Also, there is some depth of field and slightly visible shaft of light you would want to add to get the scene to match the reference more closely.
Cool! Thanks the advice! I’m using Cycles. I usually use planes in Cycles, but this time I went with area lamps. Is there an advantage to using a plane with emission over an area lamp?
Oh, I didn’t even notice. I had DOF on, but must’ve turned it off at some point before rendering. Thanks for reminding me!
After rendering this, I changed the spec and gloss because I noticed the same thing. It should look better on the next render.
Thanks for the reply! I’ve updated the specularity in my shaders, so I’ll see if that helps. As far as SSS goes, I already have it on, but maybe it needs to be more intense? I also think it may not show up too well because of the lighting.
Bloom is great idea. I’ll definitely add that.
These are all smart suggestions, you may also want to consider tilting that light down more. In your render it is hitting his upper left foot, but in the reference lower right foot is where the light lands. So just scoot the sun up a little and rotate it down towards ground more, id it hasn’t been suggested all ready
As other’s have said, your scene is really faithful to the original, Great Job!
Conveniently for you, Alex Fry gave a talk about the color space rendering pipeline for ‘The Lego Movie’. Look at the range of light they were able to use, don’t be afraid to go higher and use the Look, Exposure, and Gamma mapping in the Color Management settings in the Render Properties tab. (Note: I haven’t looked at your file so I don’t know what settings you have used there.)
Now I am not suggesting that you should try to follow it exactly by setting up ACES for Blender using OCIO, but the information is there if you want it. @troy_s has pointed out and detailed the issues that ACES has here and in other posts, so it might lead to more headaches than it would solve. I can’t say for certain.
I have a few questions though after giving it another go. I still haven’t been able to get the lighting right, especially on the light coming from the left side. Any insight on that? I just am not able to figure out the correct position on it.
Also, for the color management, is there a way to achieve something similar to ACES without using it? I’ve never messed around with the color management settings before, so I’m not sure where to begin. Lastly, to match the frame from the movie, how would I get that light blowout on the plant? I’ve turned up my light to high values, but it doesn’t give me that bright spot, it just brightens the rest of the scene.
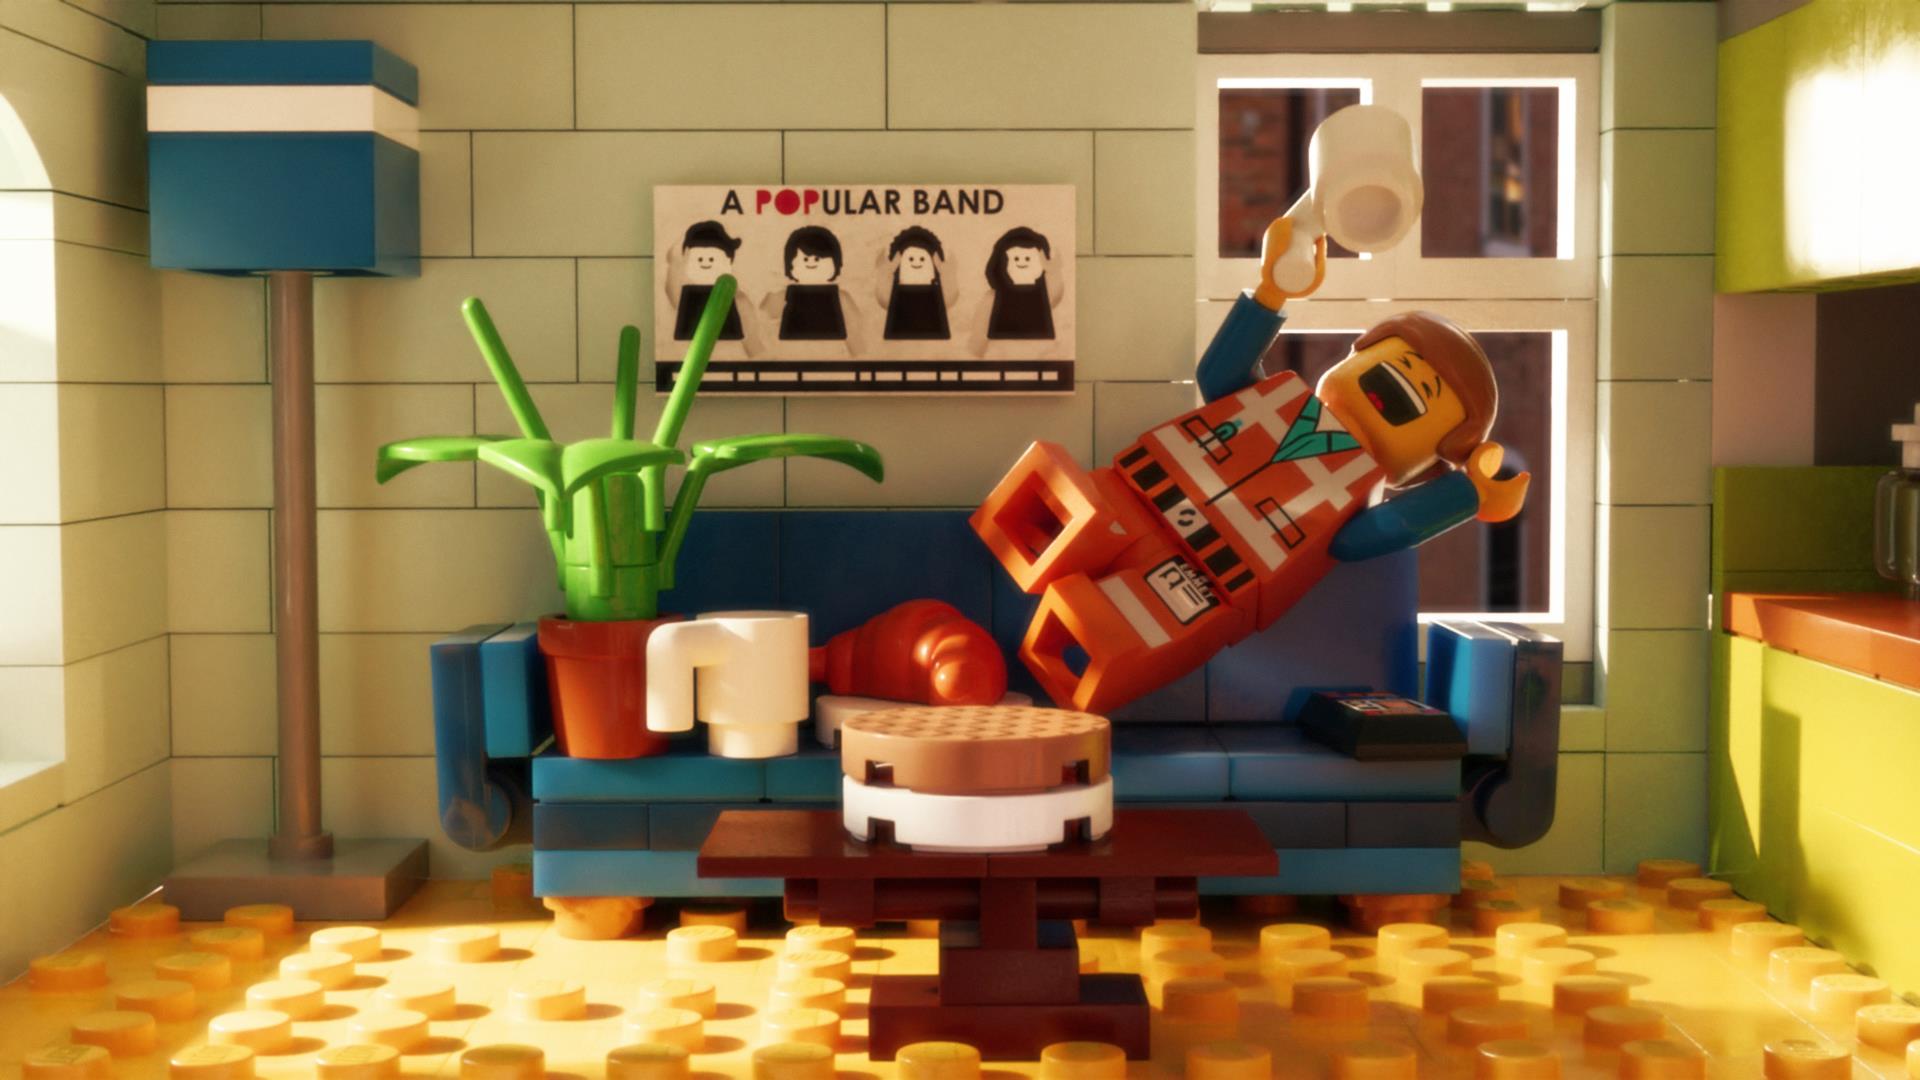
I couldn’t get the textures of your scene to work in blender. I tried it in Eevee instead, as the result are faster and any change in lighting is almost realtime. Had to simplify the shaders. No fanchy mixing of colors or roughness maps. Baked irrriadiance cache. Bloom. AO. Also the soften look is important. Overexpose the lights. So on.
I didn’t even think of using Eevee for setting up the light! That’s makes sense.
I’ll definitely work on all of that. As you can tell, I’m much more experienced with texturing and modeling, while lacking in all the other departments.
This looks great! You’re definitely right about the smoothing, exposure and glow. I’ll get to work on it.
I’m on a AMD card so I have no choice to use it as it is butchered in blender for now but the result is about 80% of cycles render. Also it’s fast. The best thing is in the shader nodes you can set what nodes should render with eevee and what should render with cycles. Then when you switch you don’t have to worry of compatibility of the shaders.
I don’t have any feedback (I’m a noob), but to my untrained eye it looks pretty good. Do you mind if I study your lighting setup and render settings for my own learning (not copying, just learning)? Feel free to say no.
ACES does not gamut map beyond the brute force approach of a 3x3 matrix. That means that the floor will do all sorts of crazy skewing in terms of colour. The folks at Animal Logic, in particular Alex, apparently went to some great lengths to get the hot splashes on saturated Lego bricks to work more gracefully, as ACES flails miserably here.
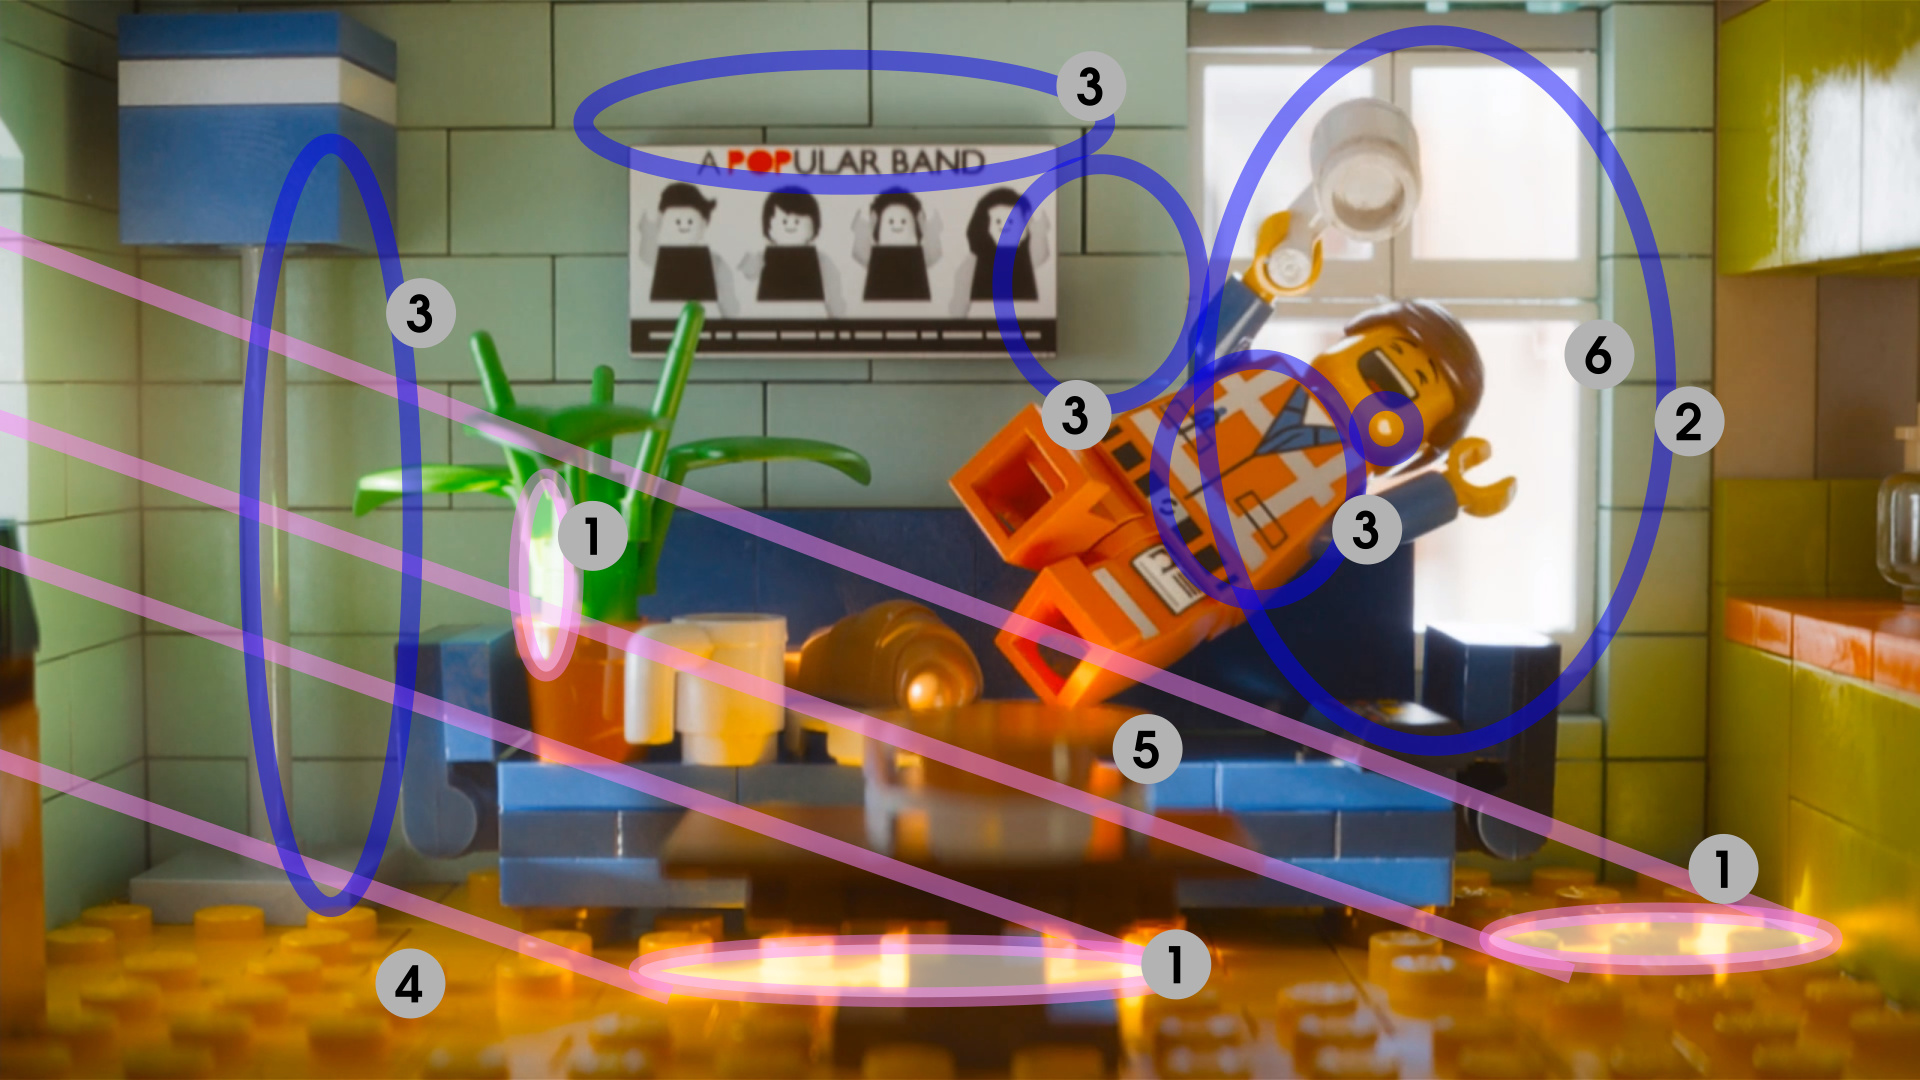
If you want to see just how badly it fails, you can get a taste of it on his foot from the splashed light. Note how the intensity appears to be increasing and the colours are skewing from the orange of his Lego colour to pure yellow? That’s a problem directly attributed to a lack of gamut mapping.
You won’t be matching the result without matching the exact transform chain, and part of that transform chain is hidden away at Animal Logic and Alex’s work. It will be noticeable in the floor, where the colour is skewing quite wildly but Alex’s work is keeping it somewhat under control.
With that said, you can clearly see some entry points to start at. In no particular order:
Your primary left window light is not cut the same way it is in the shot. Note the shape of the gobo on the window light. There’s something casting a slash along the couch, while the light hits the plant and the floor. Given how intense that light is, and the impact on the indirect illumination, small changes in that primary source will have a dramatic impact on your resulting shot. Place gobos to constrict and shape the light just outside the window, and increase the intensity of that light. Pay close attention to the shape of the resulting light to estimate the gobo / light position.
Same for the rear window. Note how it doesn’t appear that there is any direct light entering the room, and instead it seems as though it is either diffused direct or more likely a bounced light off of an object outside the window. The nature of this light will have a large impact on the room. Increase the intensity and try a bounced wall as a source.
Cheated fill. It seems there may be a cheated fill light used to illuminate the tealy-green wall behind the couch. Notice the uplighting shadow above the “A Popular Band” picture, and how it appears to be a middling diffuse source. It’s also not the orange splashed indirect off of the floor, as it feels more achromatic relative to the scene’s illumination. Another giveaway is that the floor splash and rear window are all illuminating from below or behind, and yet his chest shows some fill light. The giveaway as to one of the secret fills are the shadows from the pole and picture, as well as the clear reflection of the fill light on his chin. The one on the pole and the residue by the right side of the picture is likely a larger fill light outside the window projecting in, close to the building itself. The one on his chin is camera right and projecting back onto the diagonal below portion of the picture. See that subtle darkening there? That’s likely his fill. If I were betting, I’d say there’s a third somewhere close to the couch seat, likely invisible to camera, to fill upwards. Why? Because the window fill wouldn’t dig up that high, and we would expect a three quarter shadow around the picture; up, right, and diagonal. Yet there are only two distinct shadows, with the up light having a clean edge. Note that the pot iof the green plant is actually likely showing both the direct hit from the window light and the glint is probably that fill outside the window. It would be impossible for the direct light to hit the pot given the angle, and even if it did, it would be a very small reflection on the convex surface. Hence it’s likely a large bounce light, as we can tell from the smooth shadow on the pole and wall given the distance.
Your floor Lego is the wrong albedo mixture. It looks as though it is closer to an orange mixture of reflectance albedo. This will also impact the overall mixture of light and tonality in the room.
Camera depth of field. It’s a minor detail, but one where if the goal is verisimilitude to the source image, you’d do well to match it.
Post effects. There’s a subtle post glow applied. The intensity outside the rear window will keep the glow constrained to only the highest values, so you should be able to apply the glow threshold sufficiently high to not have it appearing on anything beyond the hottest scene values.
Wear, abrasions, and grime. Note the thumbprint on the upper left object, and the knicked and duffed edges on the couch etc. to bring that uniquely “played with” subtlety to the shot.
 . To get closer to the original scene I would brighten up the window. Which engine do you use to render? Cycles or Eevee? For Cycles I would use a textured plane with a strong emission shader right behind the window. For Eevee I would do it similar and add some Bloom intensity in the render settings. The second change would be Depth of Field. You can find it in the camera Settings. Play around with the distance and F-stop. As you can see in my portfolio I’m very new to blender but still I hope I can help somehow.
 Look at the range of light they were able to use, don’t be afraid to go higher and use the Look, Exposure, and Gamma mapping in the Color Management settings in the Render Properties tab. (Note: I haven’t looked at your file so I don’t know what settings you have used there.)