Hi, I need help with baking texture. I convert marvelous designer models to another game through blender and everything works fine. I can convert them easily. The problem is when it comes to making to making textures. I was never satisfied with the result.
The texture looks fine in blender but when I bake it the result is too dark. I tried to cycle baking but it didn’t give me the best result either.
In render mode the texture looks fine but in cycle mode or whatever it’s called it’s so grainy. It didn’t even allow me to bake anything until I opened the object alone without the avatar. It kept saying the there is no image found for the material.
I decided to try baking something for the object alone and it worked. I just didn’t like the result.
I need a method of baking that gives you the exact same result that you see in the view port. I tried many settings and I couldn’t get it. Any help would be appreciated. I’m new to this so I might be asking really stupid questions.
@Snoopyohhh Not sure what is going on but there is a bit of an odd method to baking textures in cycles. This video may help you with the process. The video is explaining the normal map baking but same process applies when baking other textures as well. As far as blurry or grainy results that could be simply the quality of the texture file you are using for the bake, which is explained in the video as well. And try to save the bakes as png or tiff files as others tend to be quite noisy and lossy in the final output. But here is the video that explains the process.
That’s my problem. I don’t understand the different types of baking and that’s why I can’t search for the exact thing that I want. For example, what is material baking? Is it what’s shown in the render view port or the material view port? And how can I decide which lightening to keep when baking?
You can bake with blender internal for grainy free images.
Change to Blender Render
Make sure model is unwraped
Make sure model has image applied to the UVs
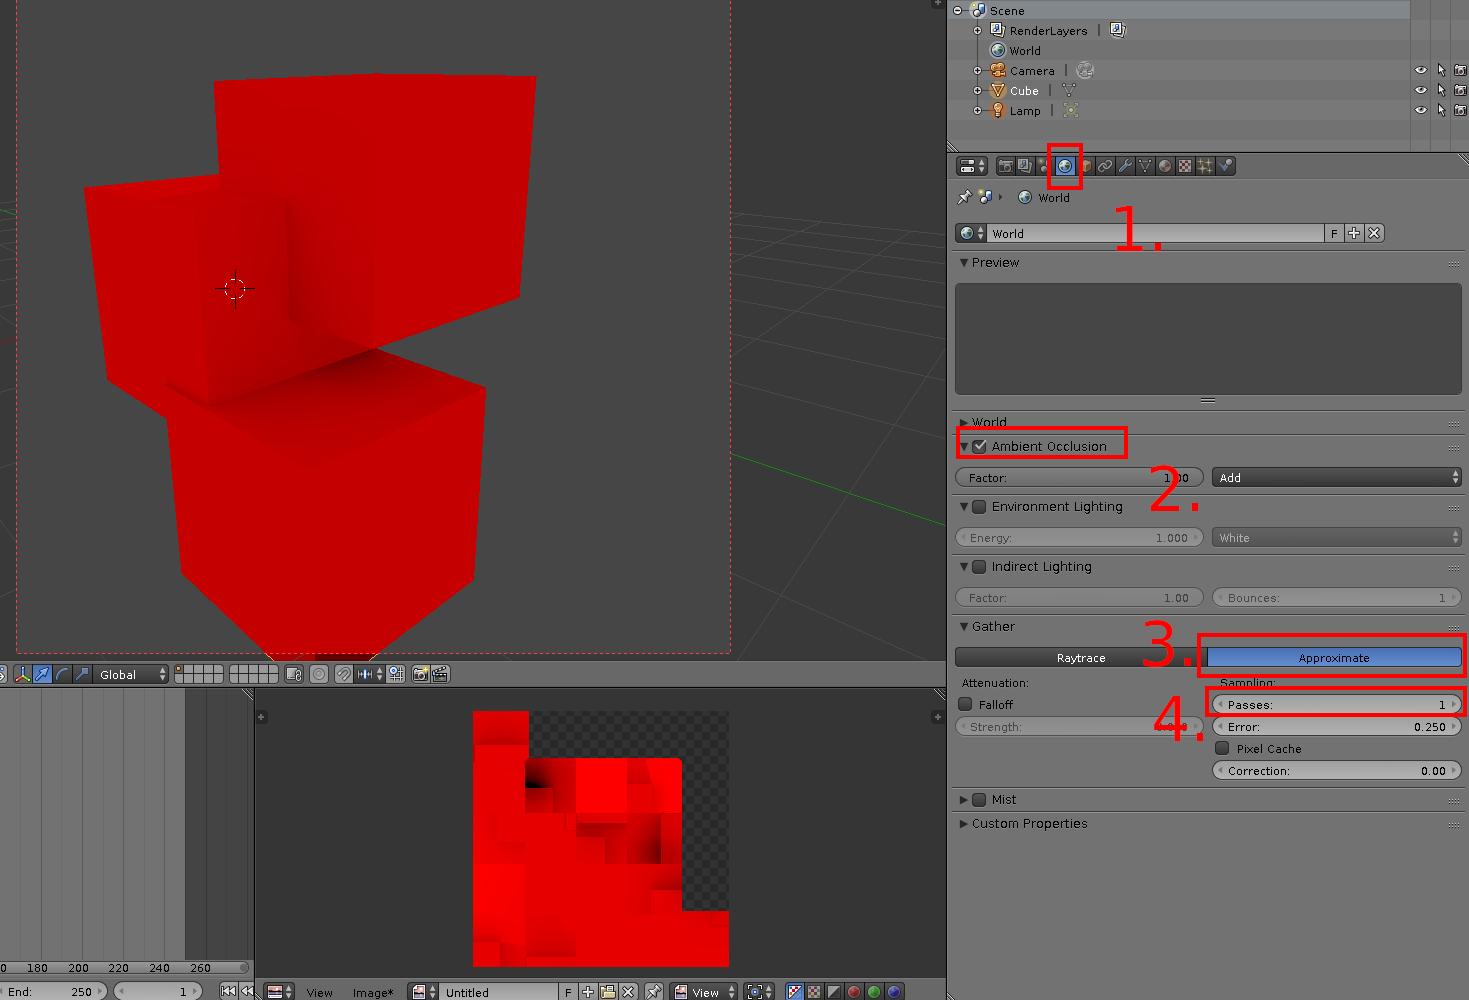
Switch to render panel
You can change bake mode to Texture and in that case only model material color will be baked so no shadow will show. For example I have only red material in this scene on cube and if i hit bake only red color will show. Since i selected Full render everything is included AO, Shadows, Emmision, Reflection etc.
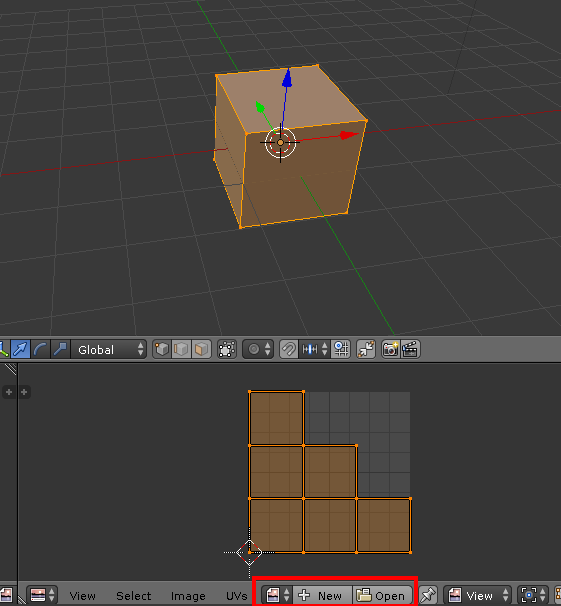
That is error that you avoid if you have image applied. So in UV editor(lower window on my image) there will be buttons that say “New” and “Open” you can click New and enter desired resolution and click OK. After that you can bake on that new image. Don’t forget to save it by clicking Image/Save as Image from that same window(UV Editor) or by pressing F3. Optionally you can open image from your computer. Save save way after baking.
Note that you can use “Raytrace” method too. Results will be much more realistic but grainy. Its similar issue as with Cycles baking. You can crank up number of passes for Aproximate method or number of samples for Raytrace method. Play with those settings. Using Raytrace with 32 or even 64 samples could get near perfect results but run forever. Meanwhile using Aproximate with only one sample could get you finishing work in no time. Its mater of finding what works best for your scenario.
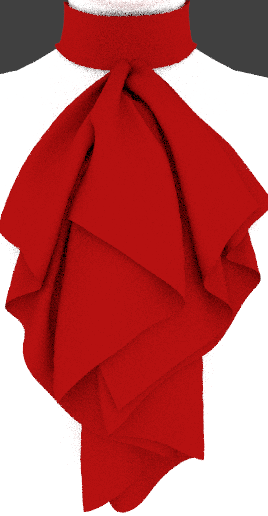
Well, The shading changes in the results but it’s still… not smooth? I’m not sure how to describe it. The folds in the first picture are smooth but the second one looks distorted.
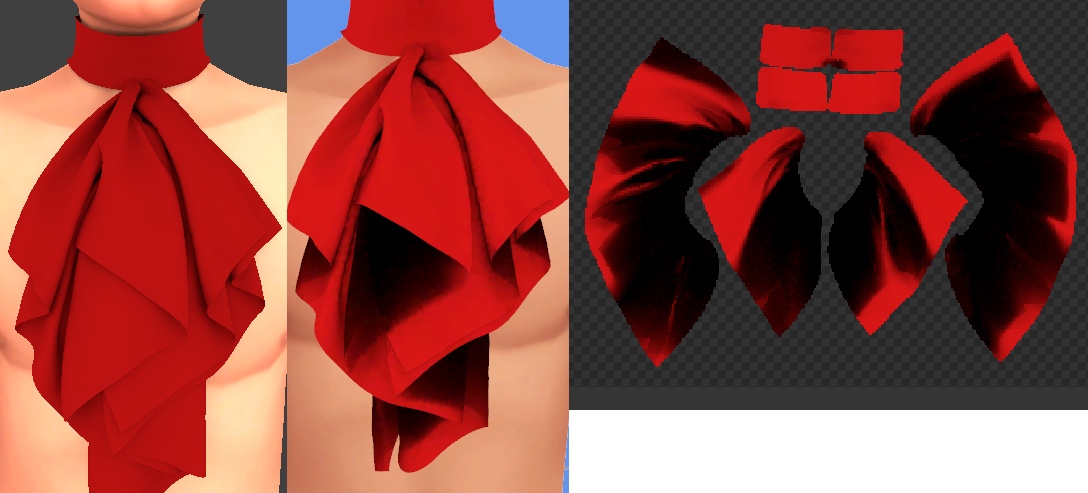
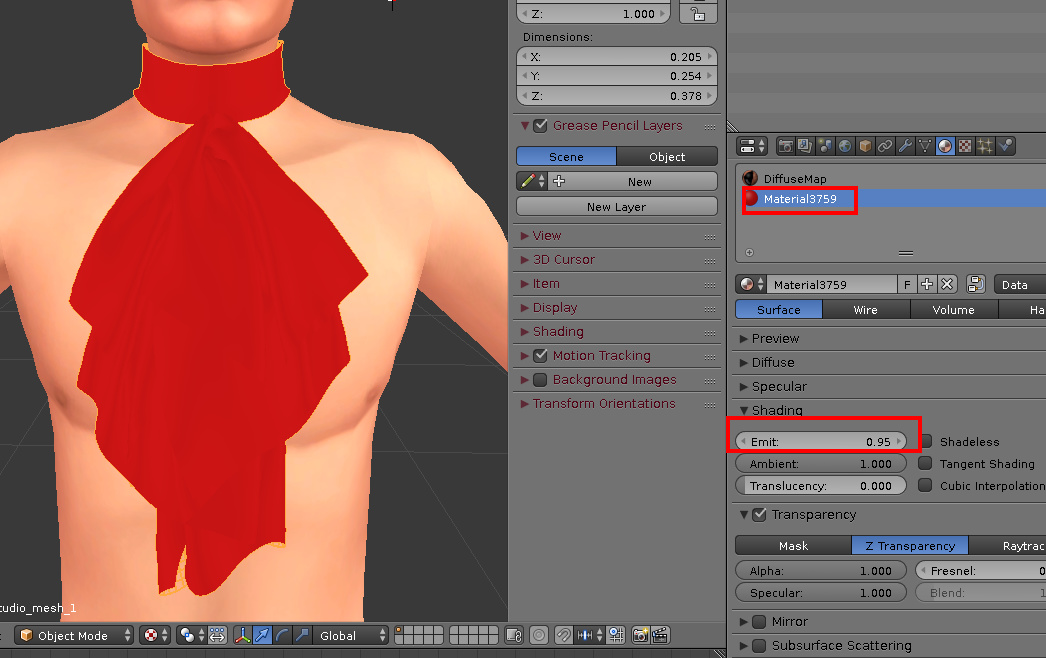
This particular cloth mesh has only one side. For this particular case you only can have workaround. Theres reason why you see those blacks. Cloth is wraping around and in some places you see it from front side and on other places its wraped and you see back side. Since back side is not rendered you see trough it. and behind it theres cloth that has shadow and therefore black. Workaround is that in material settings under shading you add emit value which will give you less shadowy cloth.
Do you see what I mean by front and back faces. Looking from this side you just see front faces. all back faces are turning away from you and you cant see them really. If you rotate around you would see only back faces and not front faces. Theres nothing with baking method whichever you use since issue is with model. You could apply solidify modifier to this mesh and it will give it front faces but then you need to unwrap it and model will have twice the geometry.
For example, when I export it from Marvelous designer I have different settings for the texture and the uv. Will changing the object from there change anything?
If not, I’ll try the solidify method and see if it’s worth it.