Hello, I am looking for some assistance with an architectural project to render my 3D model in a point cloud. I have both files (3d model and point cloud) but am having difficulty with the 3d model and applying materials/textures to make it look how I envision. I also want to adjust the scene to have environmental conditions (fog, rain, etc). Willing to share files and more info on the project! Any help is appreciated!
Any more info and specifics? screenshots of what it looks like now and what you would like it to look like?
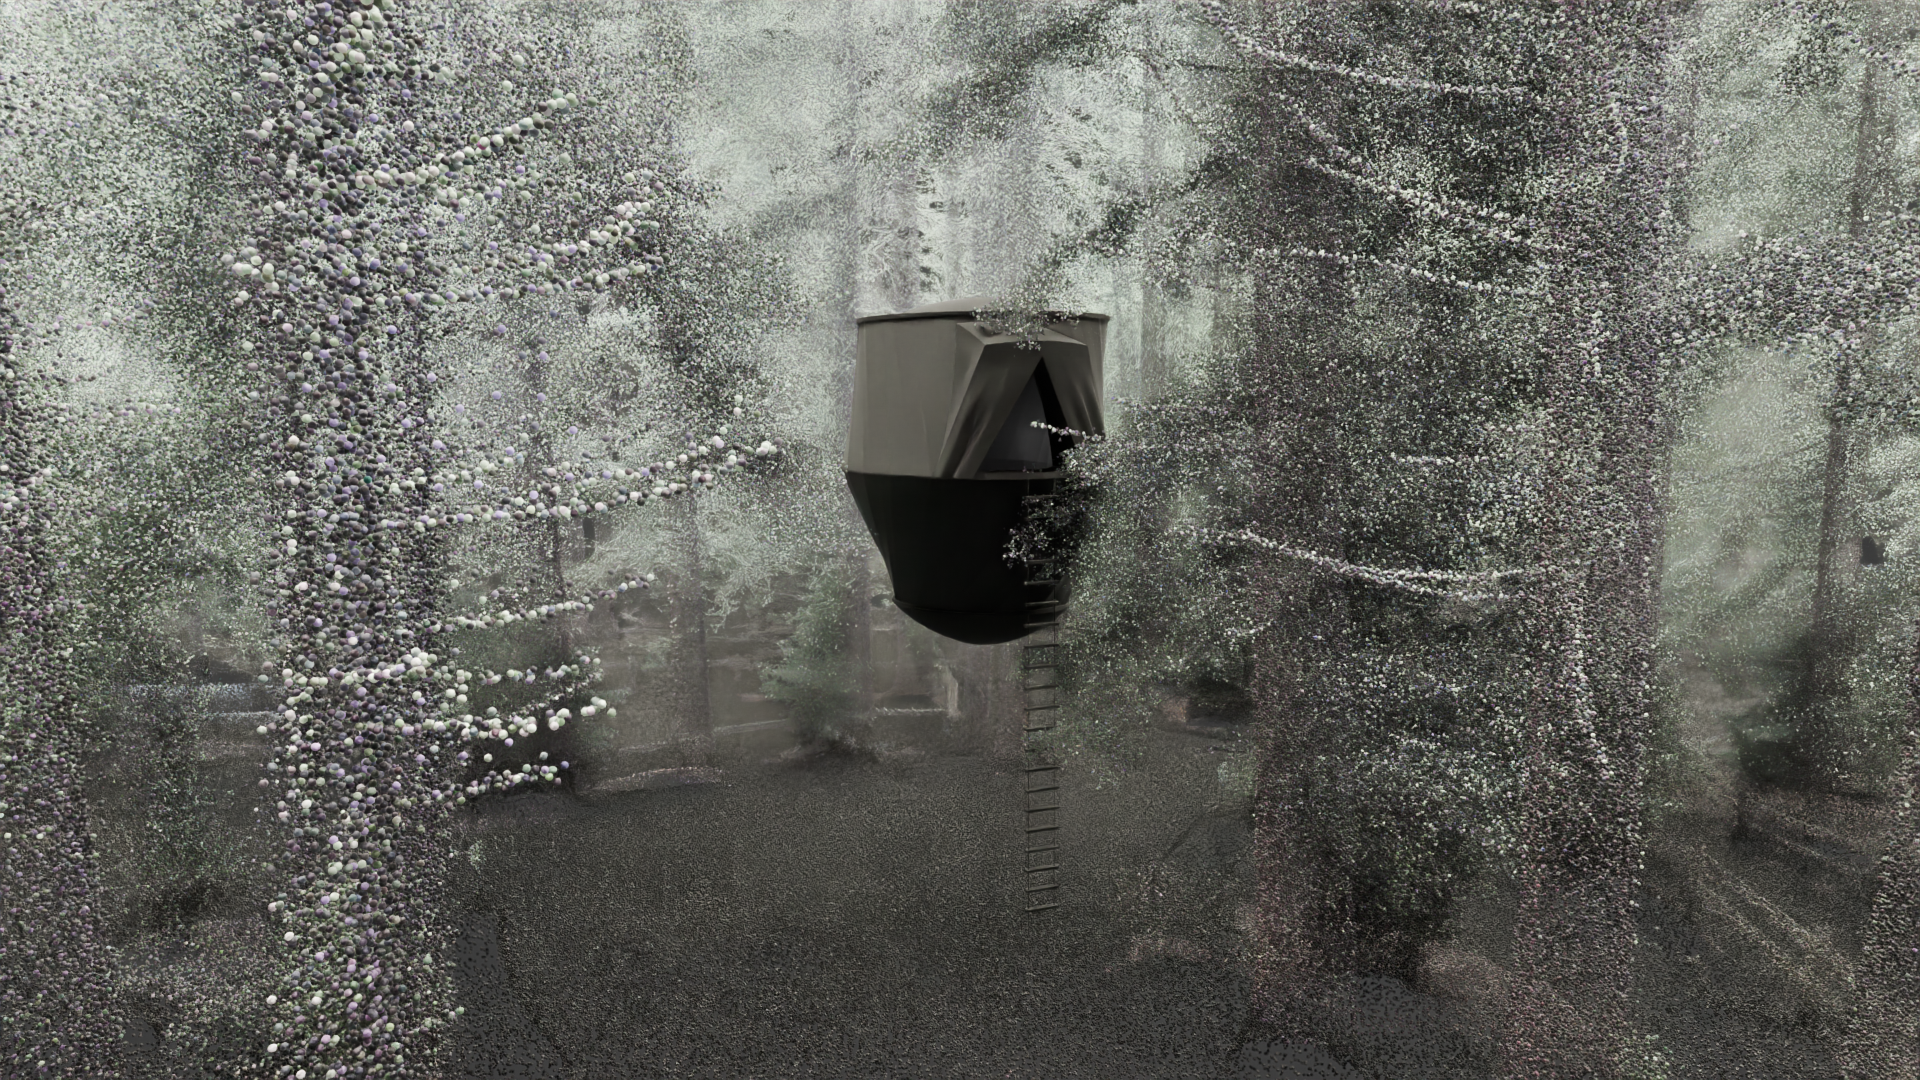
Certainly! I attached a screenshot of what the rendered version looks like now. I also attached the blender file in case that would help. The idea is that this form is hanging from the trees and is an instrument of the forest. So it collects fog (outside netting) and rainwater (from the roof), and stores it in the bladder which is fixed on the bottom of the form. In times of drought, the form will produce fog/mist from the water reserves.
Deliverables:
- Renders with full 3d model (2 dusk / 1 daylighting)
- Render with section cut 3d model (one view with daylighting)
- Animation of fog/rain collection with form sagging down
- Animation of fog production with form rising back up
- Animation of glowing form at night bobbing in response to the trees swaying
Current Issues:
-
The OBJ file that I imported is only showing as one material. Ideally there are different layers of fabric with three structural rings. I would like to add texture/material to each fabric layer. There are material layers that imported from the OBJ material file but they are material layers rather than object layers (and I think that is the issue?)
-
Lighting in the scene will need to be adjusted. Would like to have a light in the model lighting from the inside and the outside lighting to be dusk-like.
-
I currently have a cube with a noise texture that is giving the fog effect but I also think that is interacting with the lighting.
-
3d form style not aligned enough with point cloud. Point cloud and form are too distinct materiality/textural wise.
-
I am a novice with blender (just downloaded it a week or two ago) and am having trouble with picking everything up.
-
Timeline for completion is quickly upon us. Trying to have all this done by May 1st.
Inspiration:
Hmm, those aren’t unsolvable issues, but navigating the lack of blender experience / tight deadline combo is going to be tough.
You see to understand some general 3d fundamentals, so I would look for specific tutorials for your issues regarding separating objects by materials / applying multiple materials, and lighting in a foggy environment.
Tight timelines and inexperience are a rough combination. I’d love to help more, but your needs are pretty vague right now, and it seems like a you don’t know what you don’t know situation. Please feel free to ask any more specific questions and I’ll do my best to respond.
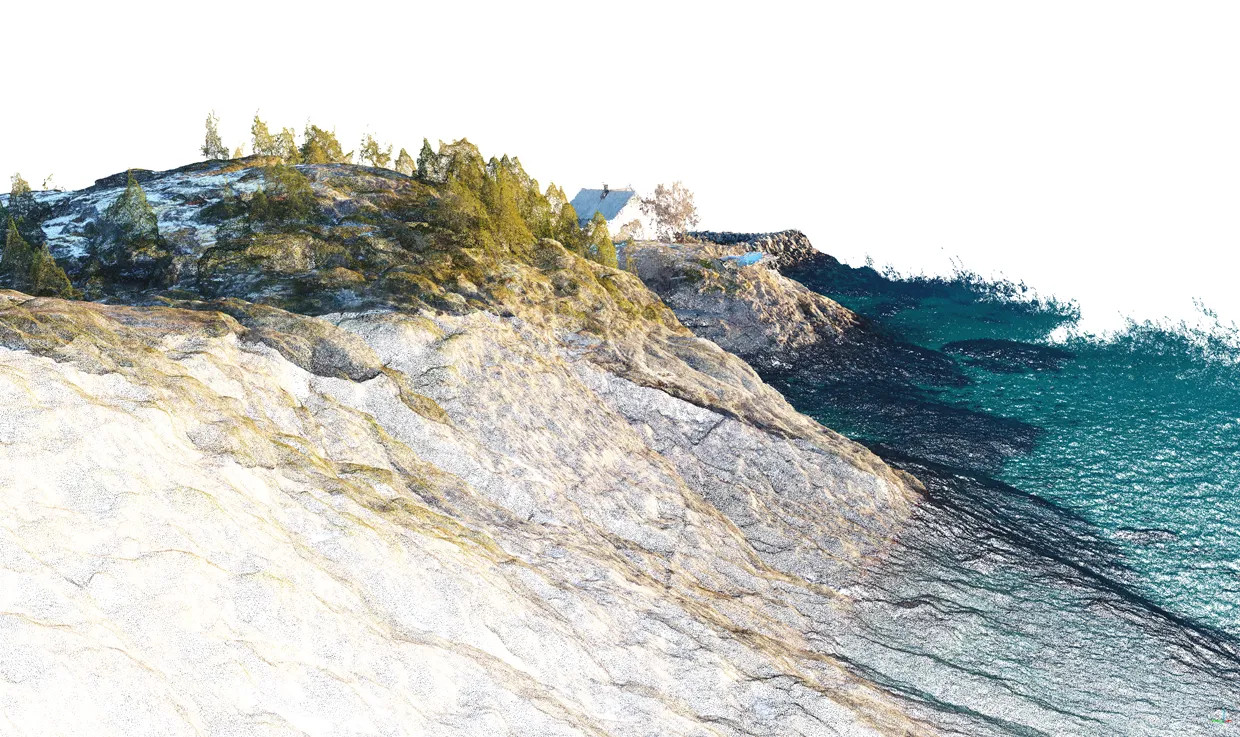
This thread might help you with the point cloud.
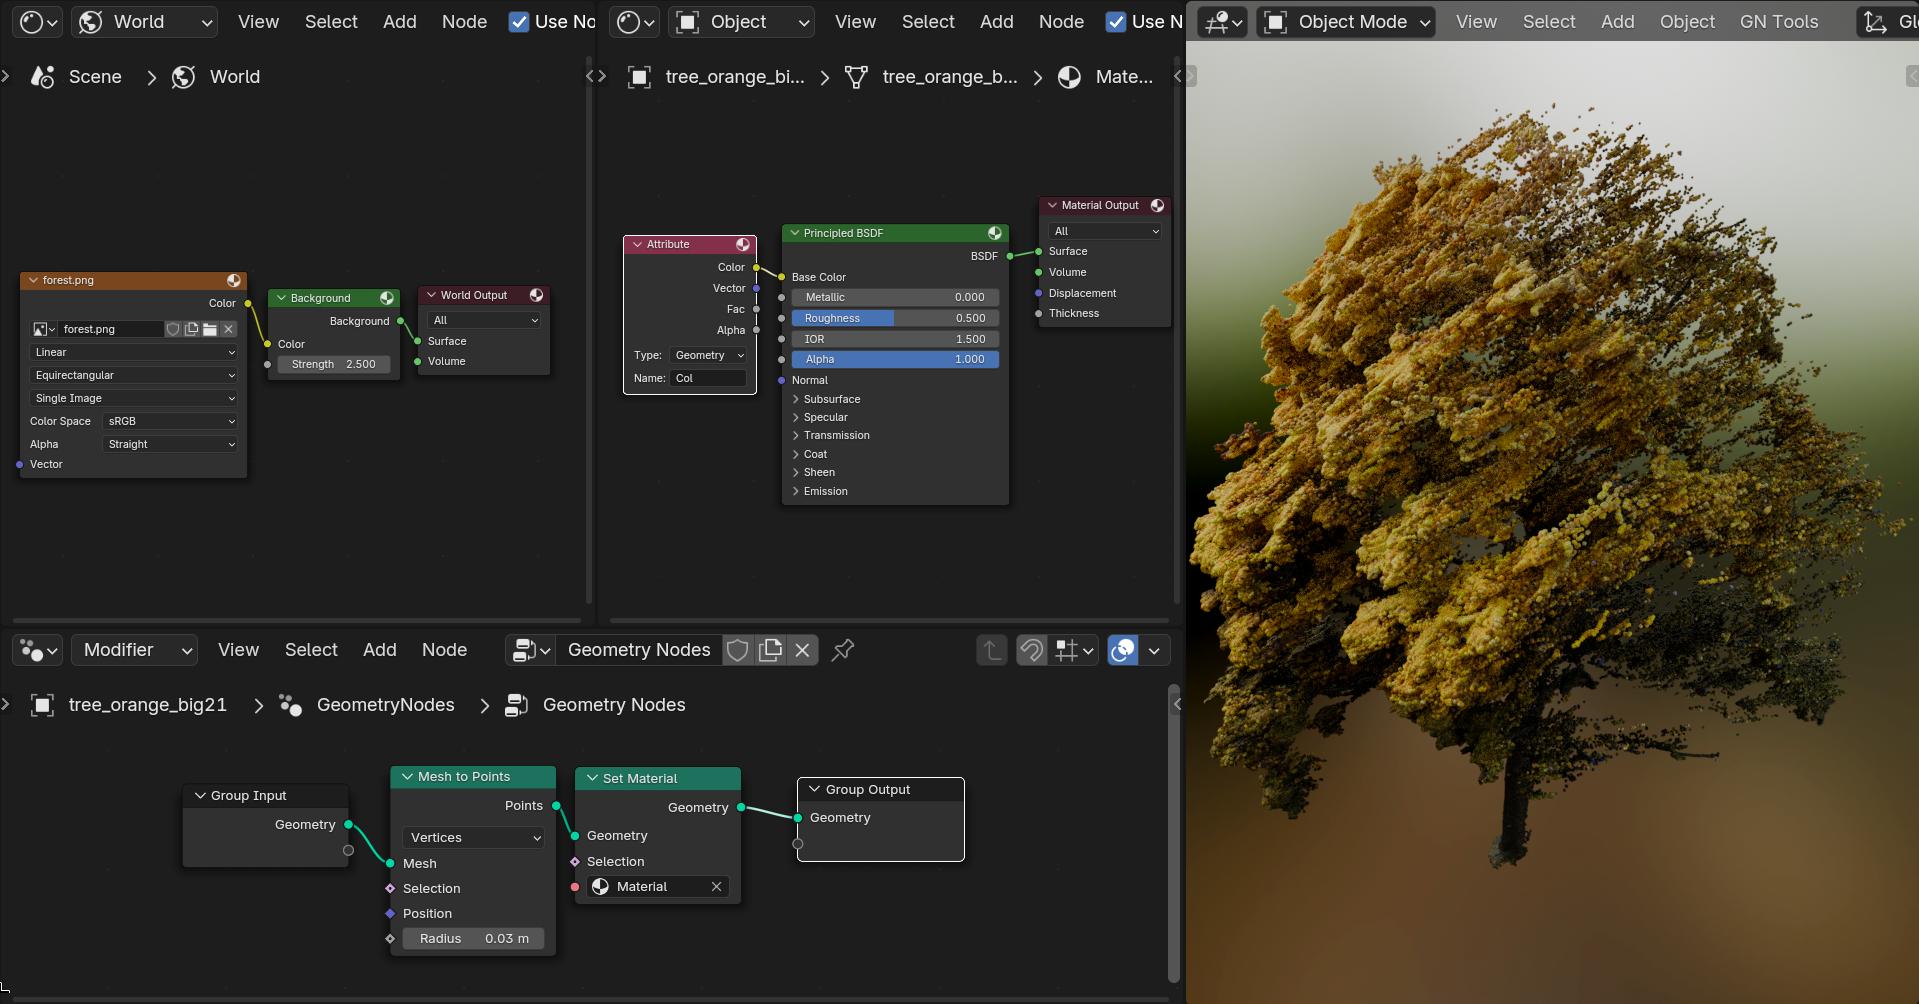
It was a ply file imported and we used geometry nodes to convert the mesh to points. You can set the point radius in Geometry nodes. In this case the PLY file came with vertex colours built in (yours probably does too). The iported file is just a bunch of unconnected verts so you need to convert to points in geometry nodes to render properly.
In that thread we used an emisive material but you can use a principled shader instead to light the points and also get shadows.
Like this;
You can also adjust the colour attribute with a colour ramp and/or hue saturation value node.
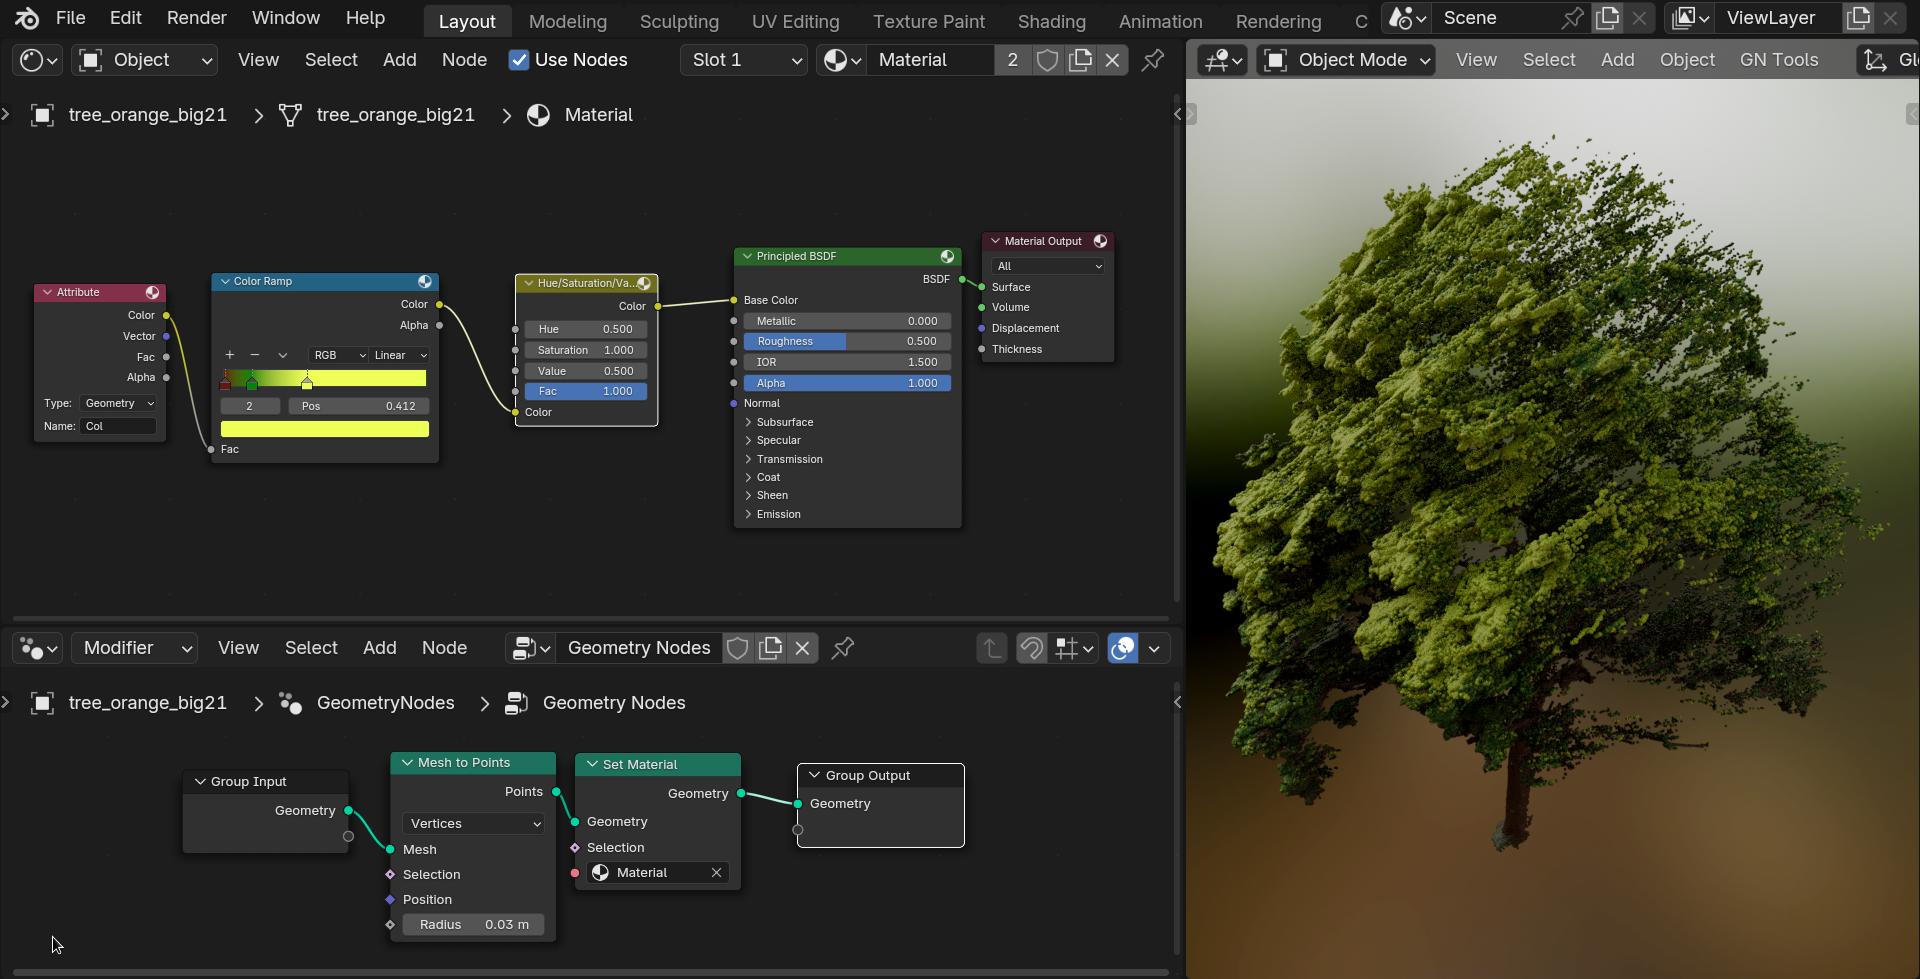
To clarify the top left window is the shader editor and the bottom left the geometry node editor. You need to give the point cloud the geometry node set up, assign the material to the object and set the material in the geometry node setup aswell.
1 Like
Thank you for all the help! When I run into issues, which I’m sure I will, I will try to find a post or add on to this thread.
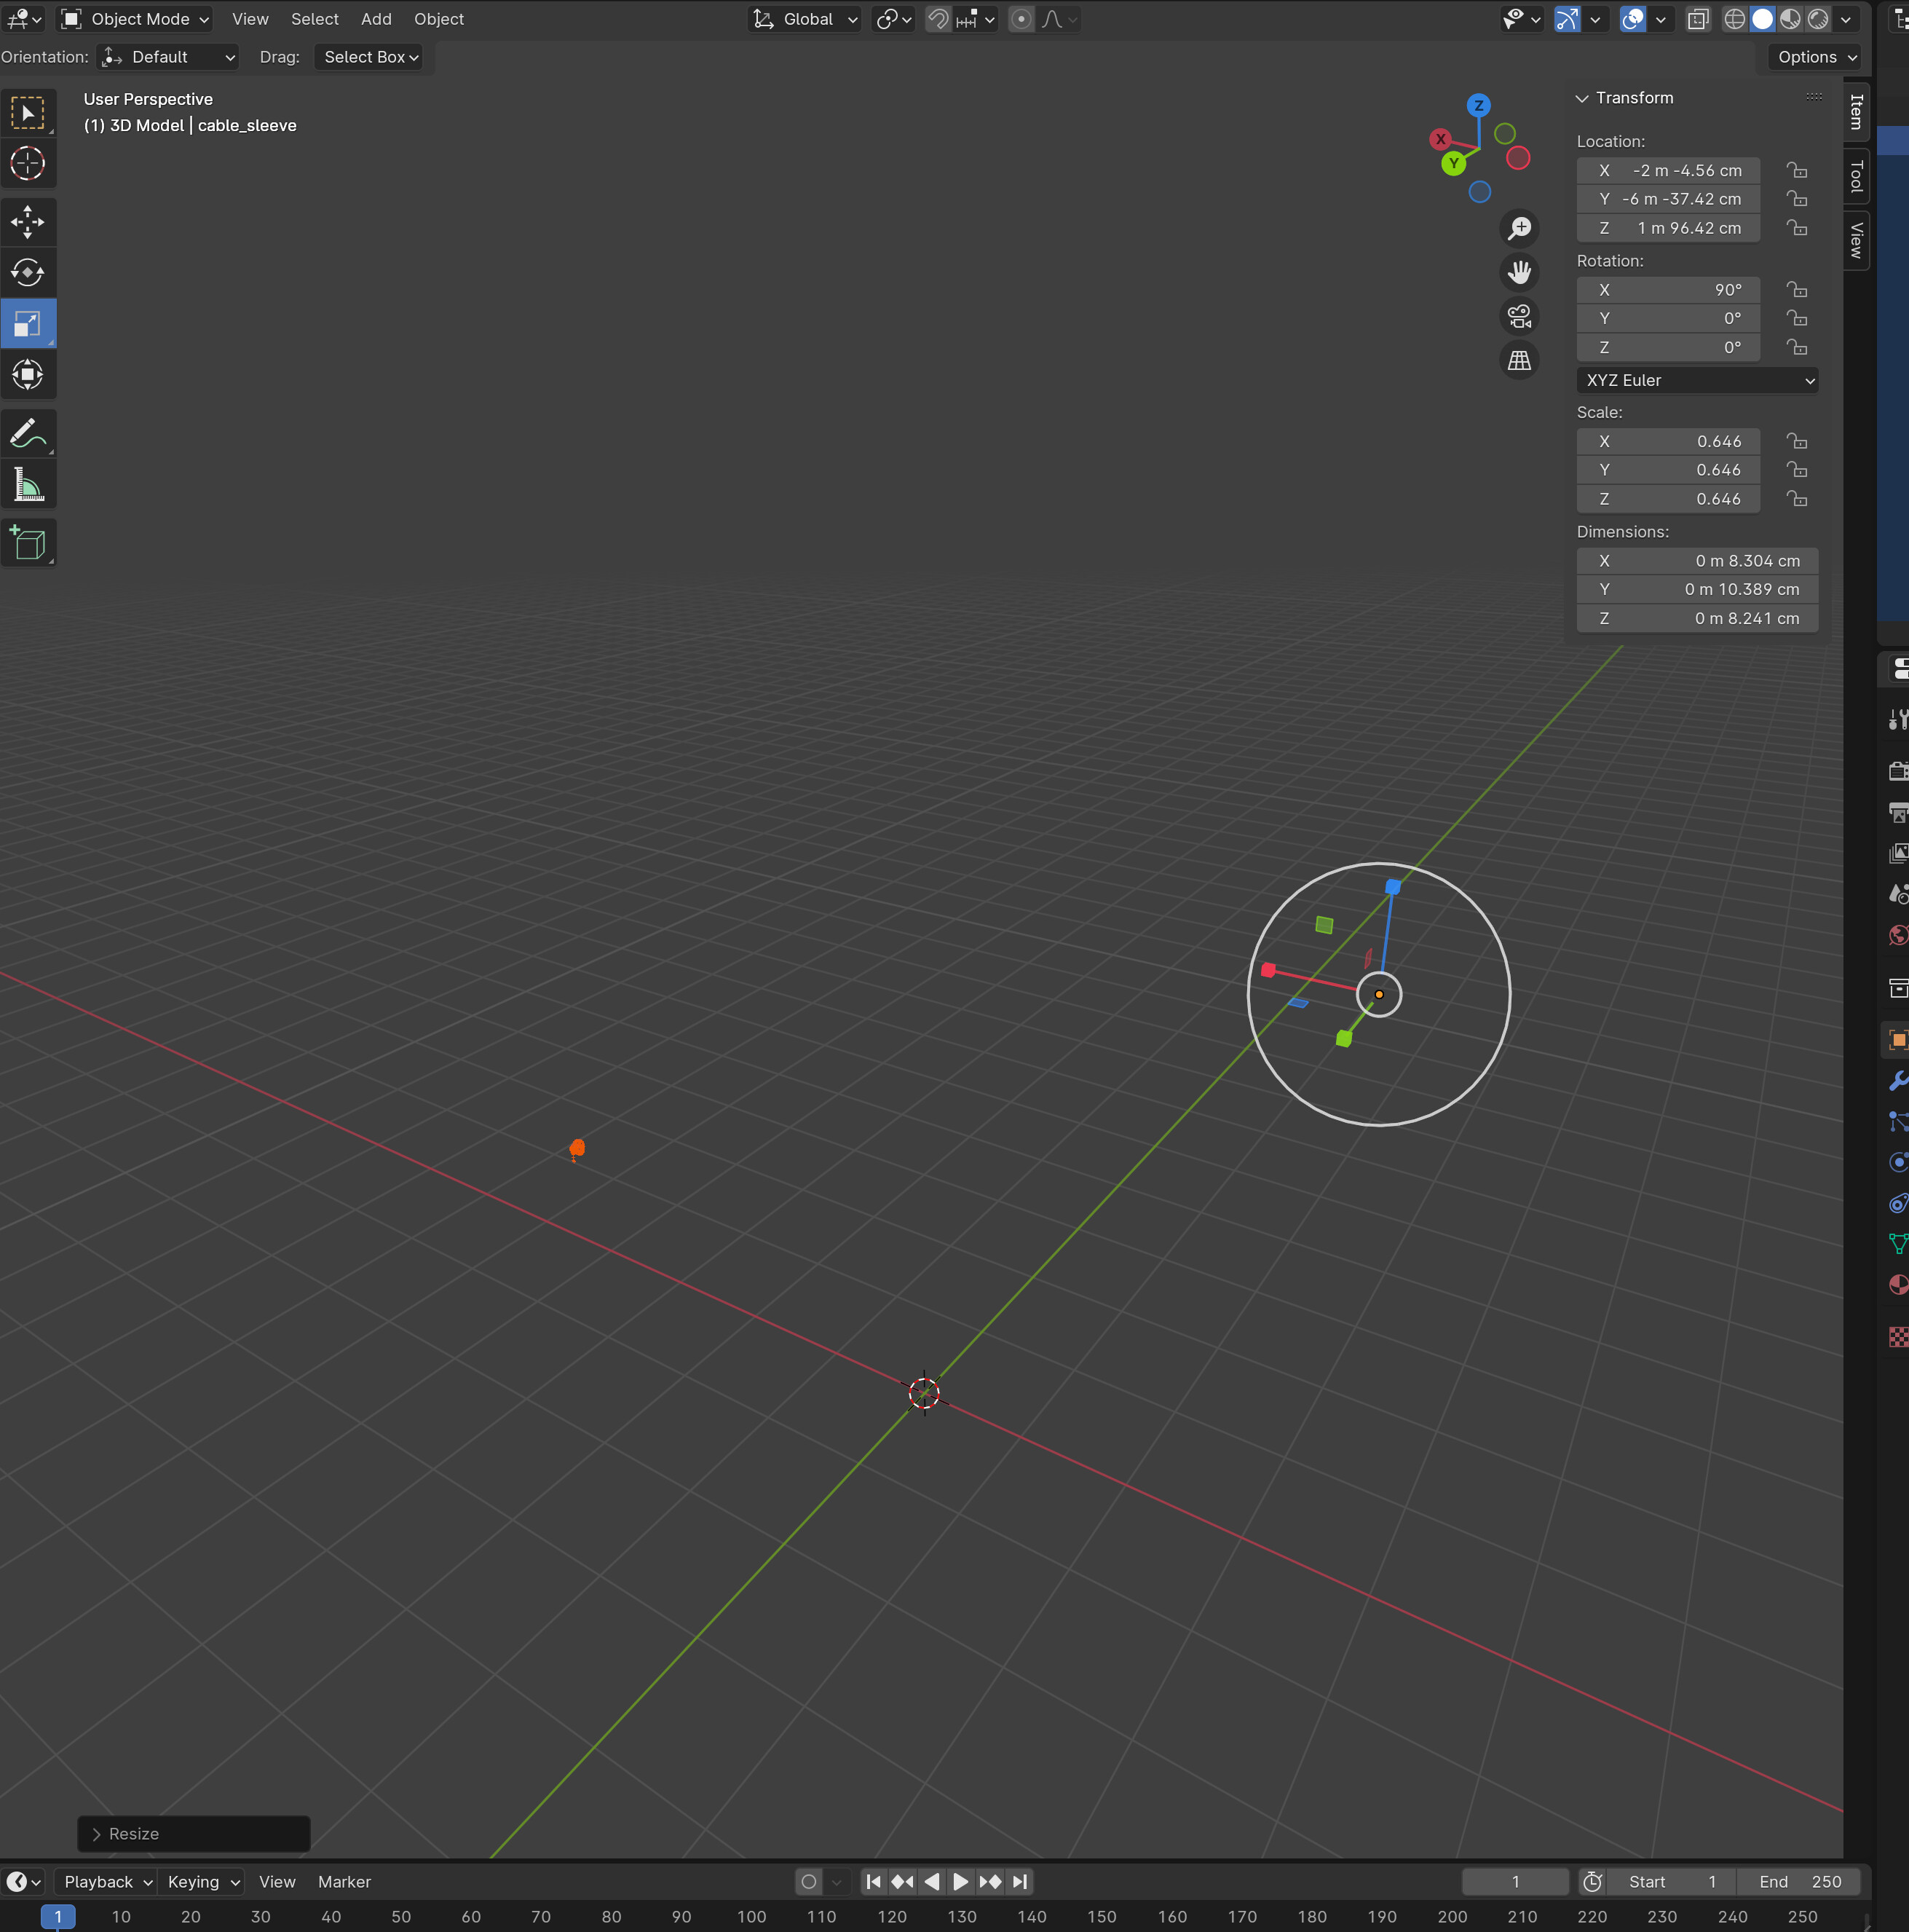
I was able to fix my OBJ file and now the layers are objects and added under one collection. I do have an issue with the origin of the OBJ. It doesn’t seem to be at 0,0,0 but it seems as if Blender is thinking it is. Is there a way to get the actual model at the origin? See screenshot. It makes it difficult trying to move or scale the object.
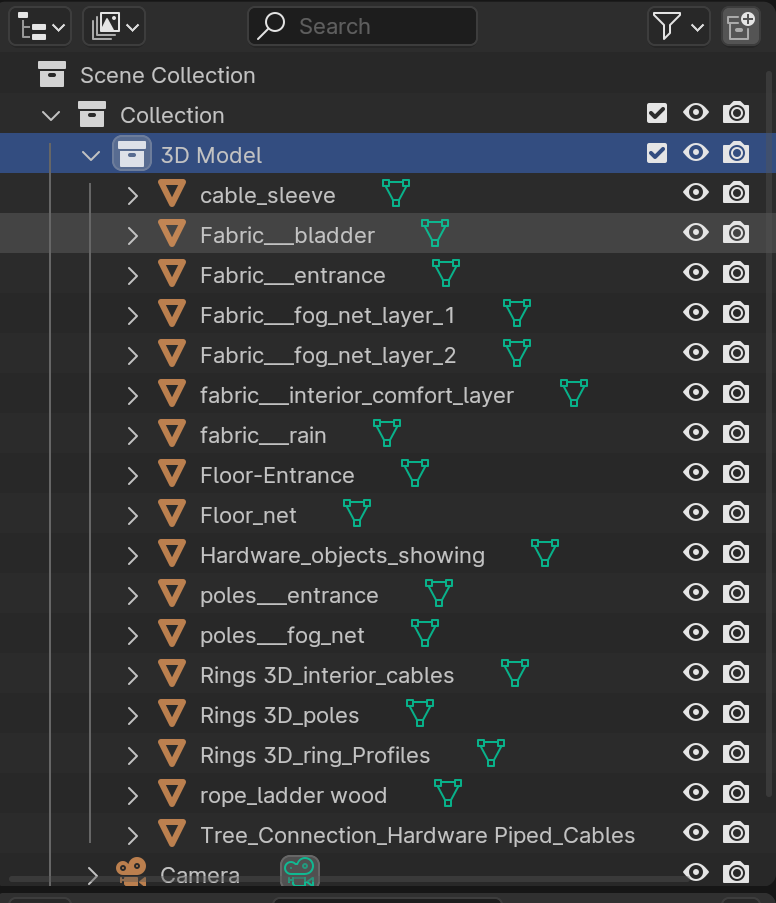
Is there a way to turn the “3D Model” collection into an object? So when I click on the “3D Model” (like pictured) it highlights every sub-object?
As of right now, when I click on 3D model it doesn’t highlight the model or give me option to move, scale, etc.
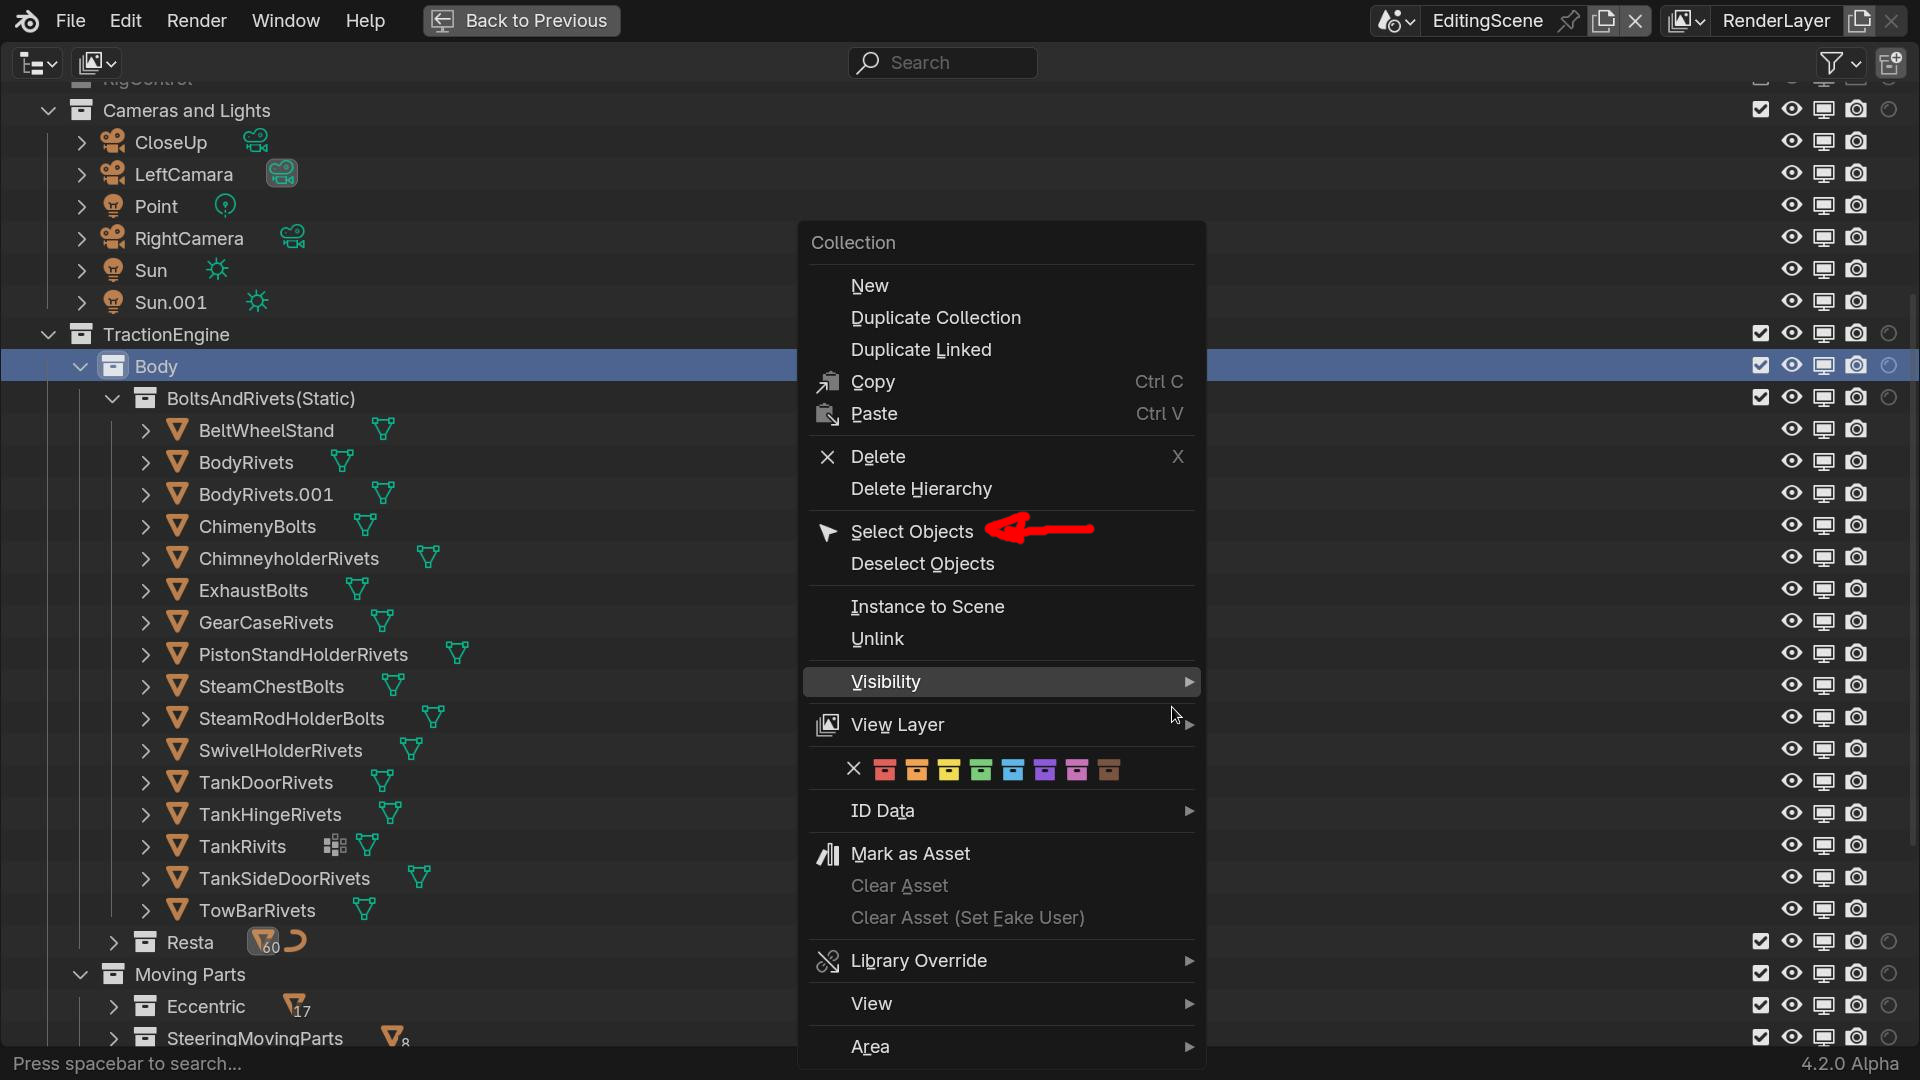
Right click the collection (3D Model) and a menu pops up, choose select objects. that will select all the objects in the collection and you cans scale (S key) move (G) etc
@DNorman I was more asking if there is a way to turn the 3D Model collection into a mesh. Reason being, so I don’t have to repeat modifiers or geometry nodes for each object in the collection.
Yes you could join all the objects, select first one, (so that it is the active object) then right click the collection and select objects as I said, then Ctrl J to join.
That makes one big object out all all the pieces, so you would no longer have individual objects. It is considered a destructive way of doing it.
A better non destructive method, If you want to maintain the original objects separate, would be to use geometry nodes to instance the collection and hide the original collection. You can then move rotate scale and add modifiers to the instanced collection (as long as you realize the collection instance.
Here I hid the original collection, added a plane, gave the plane a geometry node group that instances the collection and realizes the instances and then added a simple deform modifier to bend the collection.
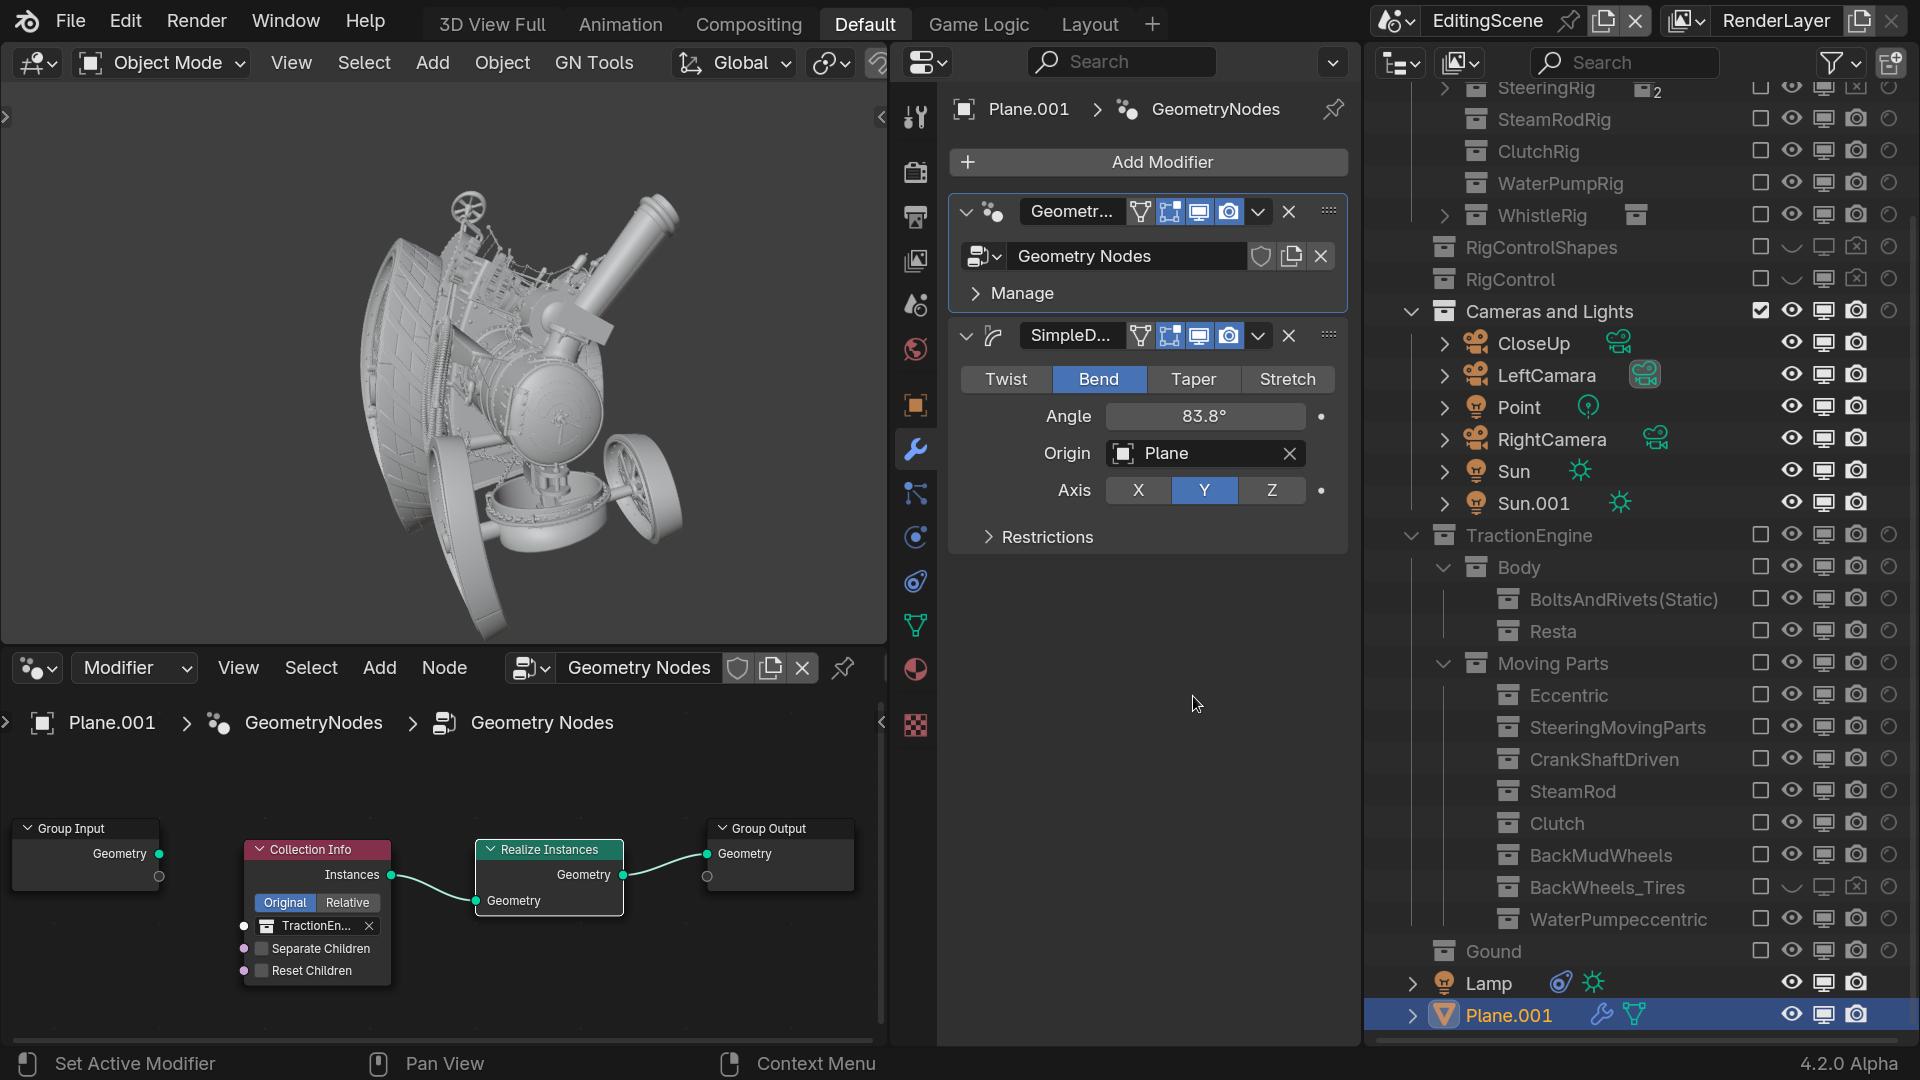
This is deforming the instanced collection, the original collection stays as it was.