In recent years most of renders are done with low light strength, even when i make materials darker examples walls to absorb more light then reflecting my archviz interior looks more realistic. On other hand when i make interior with more light strength my interior doesnt look as realistic as lower light strength. In some cases strong light can make details less noticeable due to high reflection.
I dont know if high bouncing light flattens anything of the scene.
As you can see in this photo the lighting is very strong even though this is real photo. How is it possible to achieve this kind of result. Is it possible to mimic this in blender cycles with high lighting and to make barely noticeable with real life photo
The lighting is subtle, but the exposure value is high, so I think it was taken with a bright image.
Basically, information related to photography will be helpful.
And look at the blender’s Color Management.
High rendering sample values also have an impact.
That should just resolve the noise quality, not the light bounces needed.
That should be total maximum amount of bounces in light path, and mostly max bounces in diffuse, glossy in the light path options.
Otherwise, lighting it with emission materials for windows, or area lights, portal etc, setting up proper strength for sunlight as well.
Then there is the actual surfacing as well to consider if the other “simpler” settings are failing.
True that color management is a place to start with as well, you do have exposure and gamma controls you kno
this sentence don’t sounds right for me, or I am missing somthing!!!
do you mean clipping? where everything is too bright that gets washed out in a white surface. (you can show us examples)
you need to approach this like real life photography. it’s not about just how bright? it about how many light what white balance, what light color, and where are they placed.
use the false colors in your color management exactly like we do in Professional cameras and see where are u clipping and where are you too dark?
if something lost it’s details cause it’s clipped but yo don’t want to darken your scene. darken that objects that are clipping materials. move the light away from them. reduce the light close to that object and increase others. render in linear and do color grading! even our eyes clip if you go from dark to bright on the sudden!
if your issue is clipping definitely avoid standard mode in blender color management.
i don’t think the bounces cause details loss i think it’s the opposite.
you can even cheat sometimes using negative power lights in some area to reduce the light btw (like when they use black blanket in photography to darken a side of the subject)
would love to see one of your scenes. that looks ok dark, and you loose details when bright. we will be able to help you more looking at it
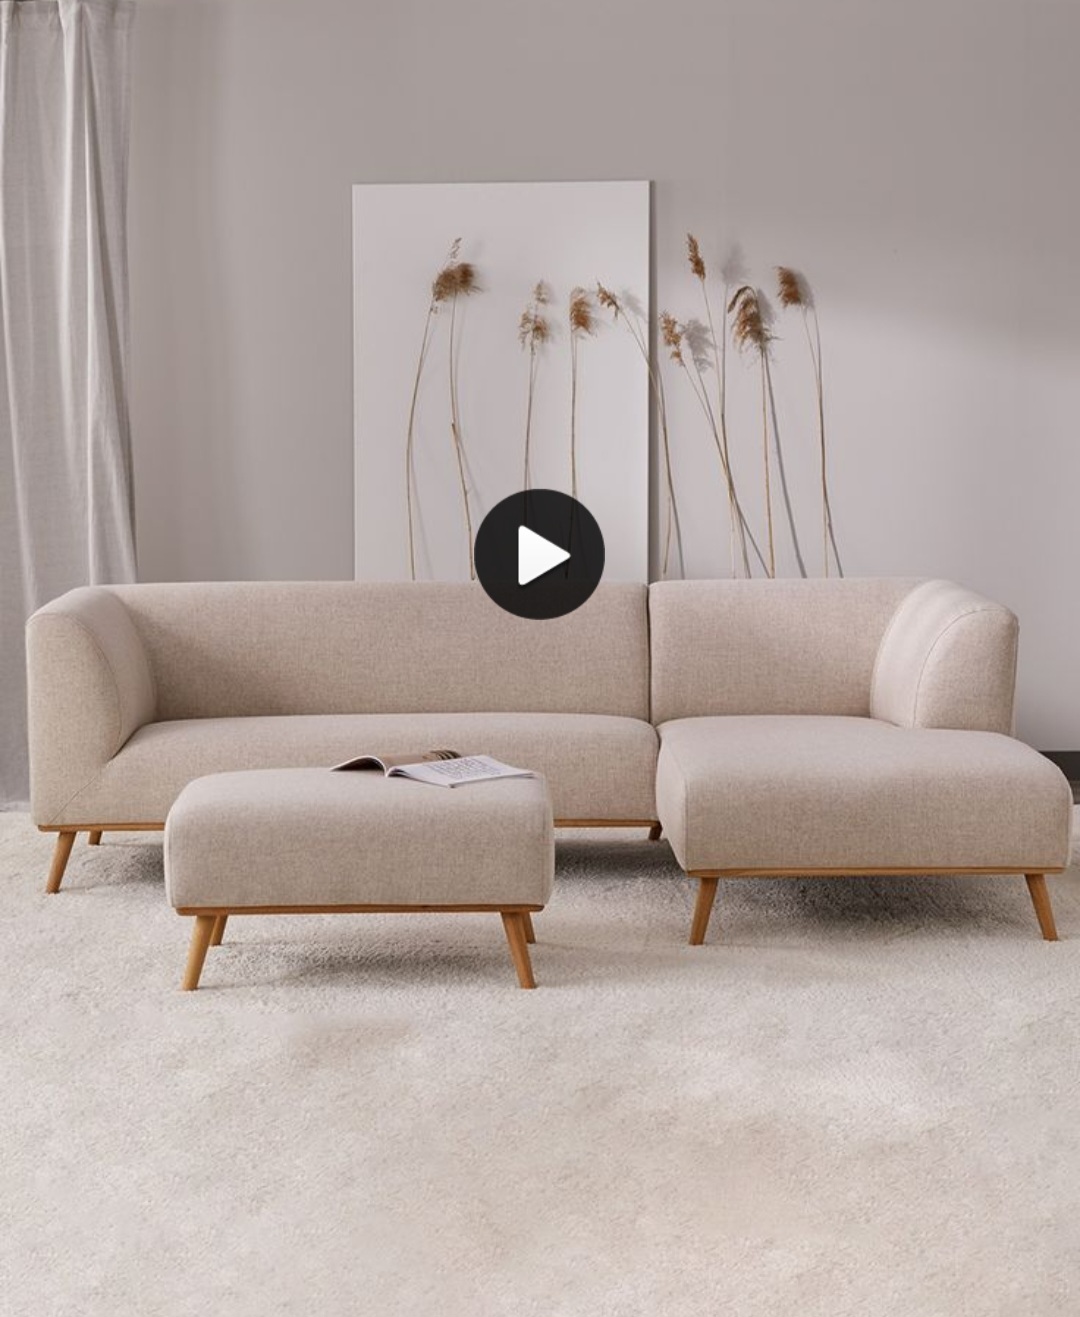
Yes, it is clipping that any material gets washed out in a white surface, Recently i have did one scene and changed my material of my sofa.
Fabric materials seems very hard to play with since it has very small details and rendering at a distance with denoiser on it causes a destruction which gives you unrealistic look. I am the one who seeks perfection of my render.
This is my scene that i did recently
It is one sided lighting from left i really dont like using any hdr or any other lighting because i dont want any other color.reflection i just use pure white global illumination i only add emission node
As you can see on left side there is a clipping light which gives very realism i am happy with that i used white ceiling to make more light bounce.
I think if it is possible to use only one white source and to try playing with light bounces. on other side.to.add a white wall for more light bouncing. I will be trying to make a new one to see what can i do next
I suspected you ment that, and that was what I ellaborated on, the light path increasement is needed, what you wrote however, could be interpreted wrongly still though.
The photo you refered to is a studio shot, not just any at home single light source from the windows, so treat it as that, which means exposure,white balance, and maybe even reflectors, dimmers, and additional studio lights.
hdrs not necessary and probably not suitable for a shot like this.
If you use just one window emission source, or portal light, it´s not gonna get that brightness overall.
Look at “professional studio photography” books where they talk about “color” and what are called “gels.” These are “sometimes very-lightly(!) tinted pieces of plastic” that you can put in front of your lights and strobes – usually using different ones at different light-angles within the same scene.
Of course, the books that you might now read on this subject also had to consider “the color profile characteristics of various kinds of ‘actual film,’” but the fundamental idea is the same. In the real world, “light” is never of a consistent color, and it is never “white.”
now that you confirmed what you mean and it’s clipping. needs to be fixed with the same approach real life photography specially that you want realistic renders.
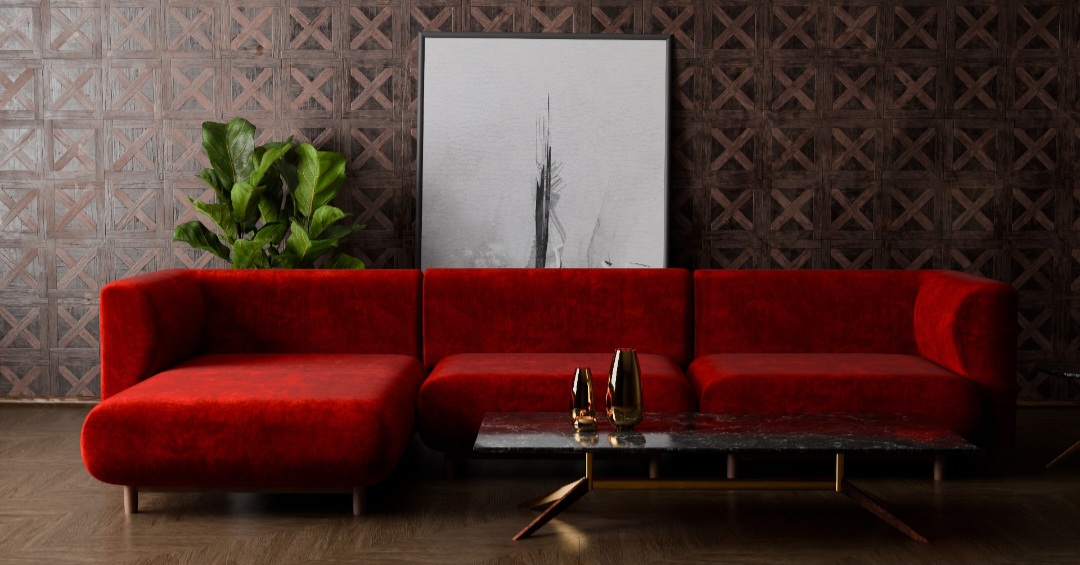
if you meant clipping at the left side where i put A. it’s still not clipping for me as is (nice reflections). but if you want to make the scene brighter and have more light in B with the same light that will quickly clip yes
that’s the reflection of the light. if a photographer in real life was there he will maybe move that light in A “the key light” so it doesn’t reflect toward the camera. or i don’t want this material/wall it’s too reflective
Or which is best in my opinion in this case add a “fill light” in the B area, a white not so bright area light or emission shader on a large plane like reflector
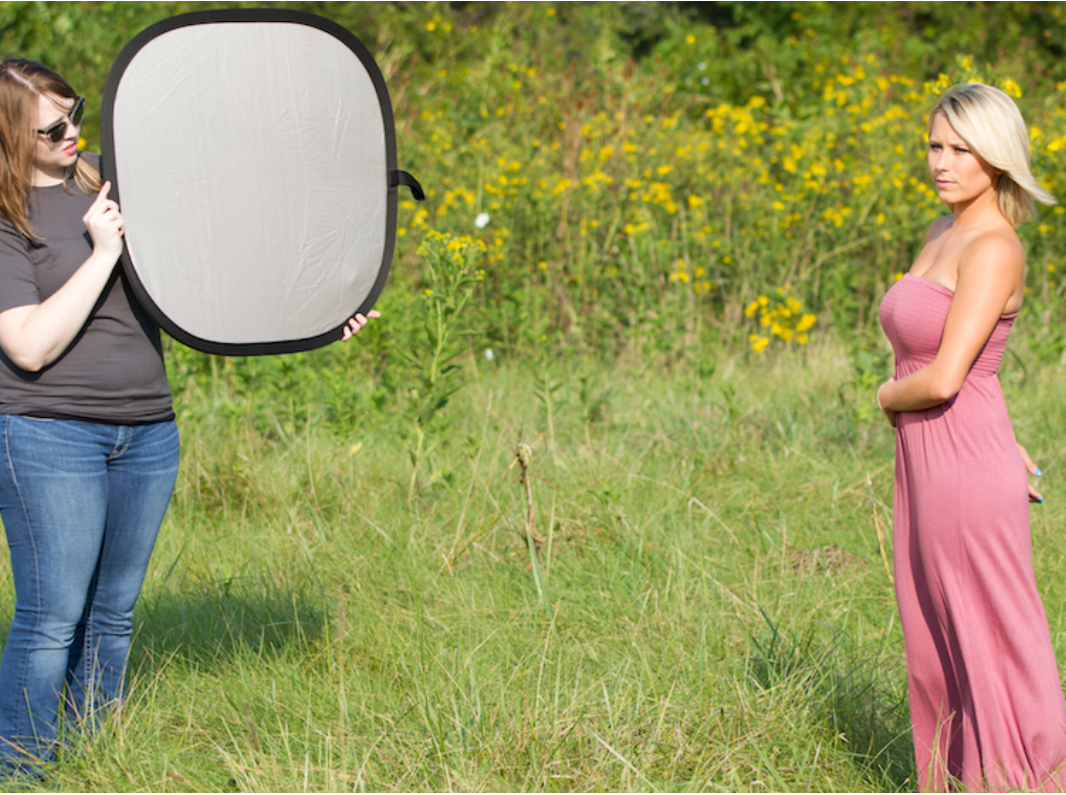
like here if they want more light on the dark side and by increasing exposure the bright side will clip so you compensate with a reflector and eve will give nice smooth depth to the shadows
Last night i have watched a tutorial of Gleb Alexandrov about cinematic lighting.
It was really good tutorial and one of the main thing that i have learned was 3 point lighting which was awesome. Archviz and cinematic lighting it might differ at some point but i think combining these elements can give me a good results example making a windows a key light adding additional lamps on side as a fill light or any white wall for light bouncing like you told me will work great i think.
@Brand_Serie photography is the art of capturing light.
in the example above i talked about key light and fill light only based on the scene (the wall is part of the scene)
if a small subject in the middle (human/ product) you add the third: rim light to create separation with the background.
and the combinations are endless.
here is another tip in 3D you can add a negative power light that can darken a certain area in case you need that.
good luck
Three point lighting is the basis, the foundation of a simple render, unless you can use HDR, or really strong GI with a lot of bounces Only, depending on walls and reflectors, you should try to at least use a fill light, rimlight also good to seperate, highlight a figure from background, but not Always necessary, depends on the surface of the figure, and the background reflection and colors and how much GI bouncing it provides.
@Brand_Serie im back it took me a while to find this thread again lol
you might take a look at this thread by @Firdavs :
the renders are amazing and if you look below the trick used in the shaders for world and lights might help you too with this exact issue where you can use the ray depth test if it’s greater than 1 which means it’s a bounced ray and give it more intensity. which will give a brighter environment without increasing the direct light intensity.
note that the light path have a depth for diffuse and for glossy (since you complained about too much reflection when you increase the light) so you might use that.
there is even a nice tutorial there too
anyway i hope this will help too