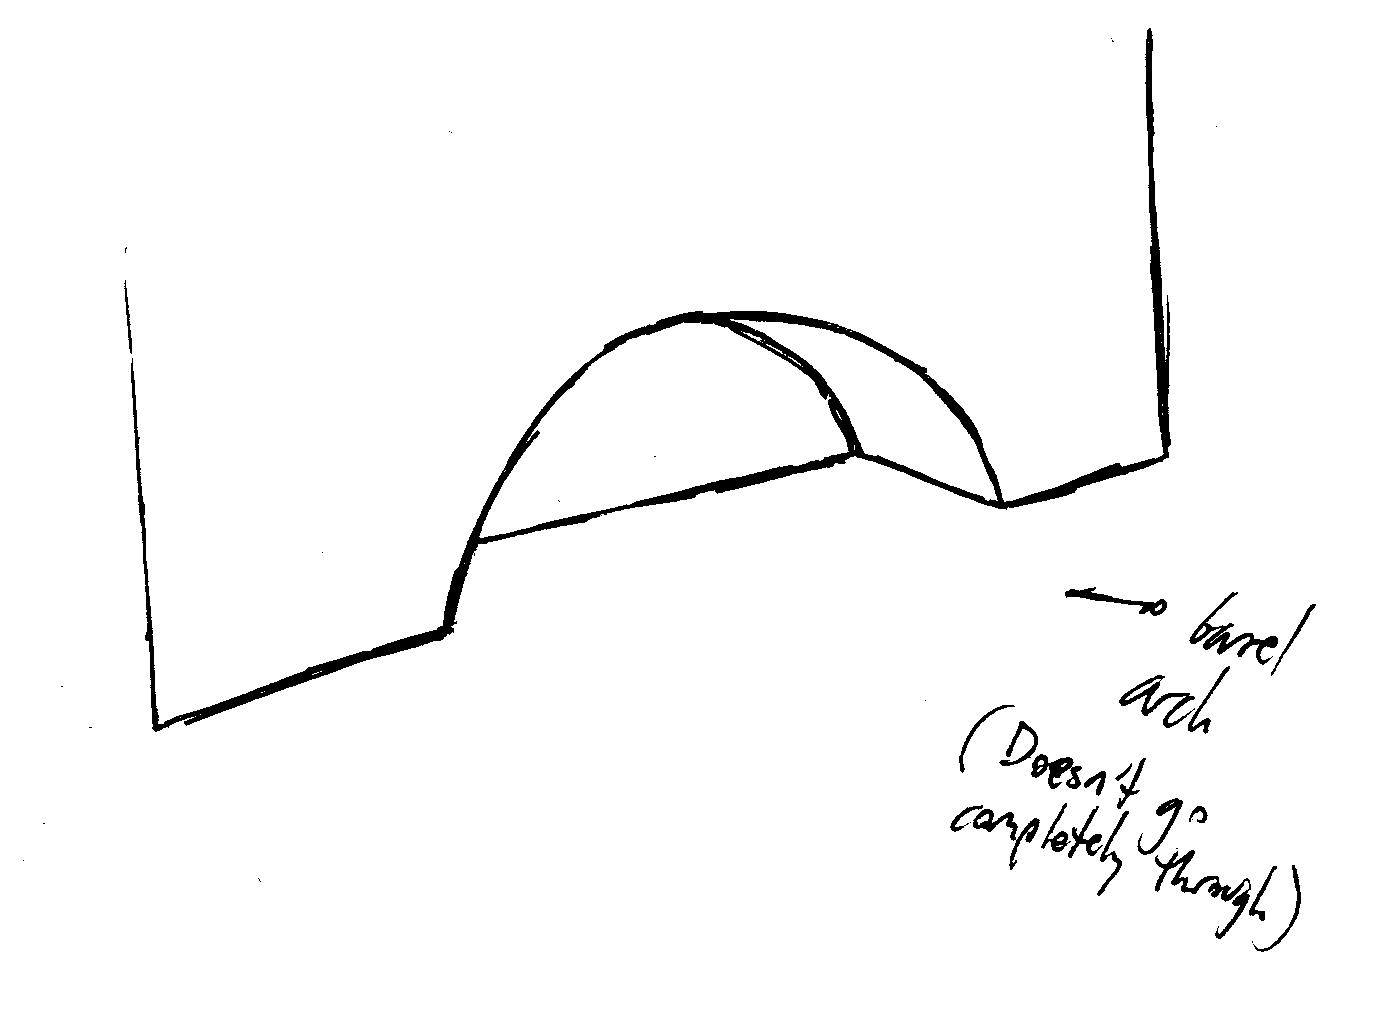
Attached is a rough sketch of a wall I’m trying to model. It needs a barrel-vault arch in it, but not all the way through (flat wall in the back). I’ve managed to make a very rough arch by subdividing the base of the wall and extruding sections, but the results are crude and when I try to remove the “skin” of the wall where the arch is I lose other pieces. Does anyone have a good technique for doing this? I’m finding nothing about an “arc tool,” which seems like it would be a useful basic tool…
Take a cylinder with a closed end and boolean it out (it’s a modifier).
Boolean modifier would be my first suggestion.
http://wiki.blender.org/index.php/Doc:2.6/Manual/Modifiers/Generate/Booleans
- Add a box, add a cylinder where you want to “cut” or subtract out the arch.
- Add a boolean modifier to the box, set the cylinder as the object, and difference as the method.
[edit] Ninja’d! tommmywright beats me to the post button! 
I suggest using a semi circle and a plane to get cleaner geometry.
I immediately thought:
A) boolean, but it creates an odd geometry. So I tried:
B) Circle plus rectange, filled and extruded, again odd geometry. So I tried:
C) Circle plus rectangle, filled manually quad by quad. This allows loop cuts that “morph” between the circle and square shapes, and the shading seems correct. Extra verts were added to the corners of the square so that subsurf wouldn’t bevel them too much (see image).
Please let me know if there is some trick I could be using on the boolean or filled (a or b) techniques to avoid these results. Because they are definitely faster. And if RDP wants the blend to mess with let me know.
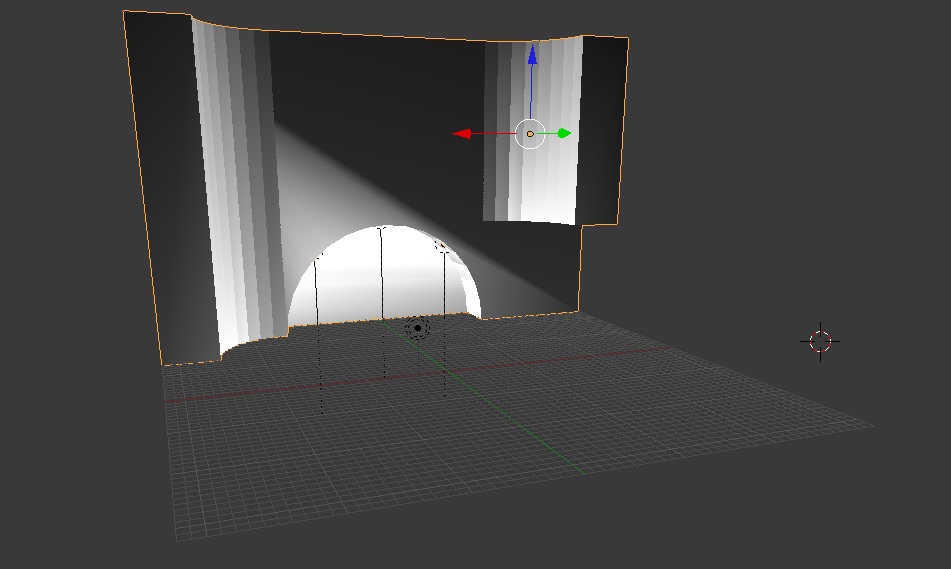
p.s. I always like it when someone submits a 3-d sketch to describe their shape! Anyway the screencaps show what I’m seeing a little better than words.

Bollean and inset must works really well with a subsurf too!
Or if you require clean topology, method I would use:
http://estructor.biz/testje/semicircle/semicircle.htm
(quick wink tutorial, flash based)
Result:

Fast and low poly. You could also apply horizontal geometry instead. Topology also makes it easier to add more features.
Btw, at the end I applied a 3 level sub-d - I forgot to mention that 
Subsurf loves clean topology. It’s the only way to make it works finally.:yes:
What is a boolean modifer? How do I find it and add it? Learning as I go here. Thanks for your patience.
PS
Where is the Properties Editor?
Herbert and Damien are right, the estructor topology is the cleanest topology for this, use that and not the boolean or my bastardized circle/square topology. Any panel in the blender gui can be changed. The properties looks like this.

Basically with boolean you create two objects and move them so they overlap in some way you want. then select one of the objects and add a boolean modifier to it. in the modifier you select the other object and the type (difference, union or intersection) after you apply it, on a difference for example, you need to hide the 2nd object in order too see the effect. It can result in some weird topology though and is somewhat fussy and unpredictable.
Thanks! I managed to make my arch today, and made a number of margin notes in the book so I can locate the properties/modifier buttons (they were off-screen). I then applied the same basic principle to make the curves in the wall and cut little tubes in the arch for the lights.
just an FYI… don’t forget you can always use and apply a planar decimate modifier or even a remesh modifier to clean up the Boolean-ed geometry afterwards, though you may loose edge loops along the way. But imo its often worth doing for basic static meshes (meshes with no animated deformation) as it will make the mesh nice and tidy as it makes UV unwrapping much easier so texturing wont cause issues later.