I need some help with modeling. It’s about a seat bench which should be modeled with different patterns and seam variations. The most complicated pattern in this case is a kind of honeycomb. An example is attached. Unfortunately, I have not spent enough time modeling during my short Blender career.
I am primarily interested in creating such a pattern on an existing object. I want to make the indentations and elevations of the pattern visible.
As far as the seam is concerned, I have been able to find out as much as there is a possible step (array along path, curve modifier etc.). I have searched in vain for videos of the pattern, but so far I have only found solutions using normal Diamond Shapes (Cloth Filter?), not with this particular shape. So I thought it would be easier if I could recreate the special shapes as a mesh or path and then apply them to the object (bench) without having to work on the object extensively myself? I’m thinking of the Knife Tool, but not manually?
I saw another post nearly what i want exept of the special shape, which I think I can´t create with the methods that were shown:
I would like to apologize for my probably confused sounding statements and hope that someone can give me a few tips on the subject.
Best regards
You mau have to use some array modifer to get the perfect position so that the you can merge the result and also place some proper subdivisons and “emboss” this manually like so:
Patterns do not have to be whole.
You just have to make the smallest minimum piece.
There are three ways to model this.
Make it look like a real picture (modeling)
processing photographs into materials
To mix 1 and 2
The object in the picture is a material with little height.
In this case, it can be processed using PBR materials without modeling themselves.
Combining modeling here can give you a more realistic feel.
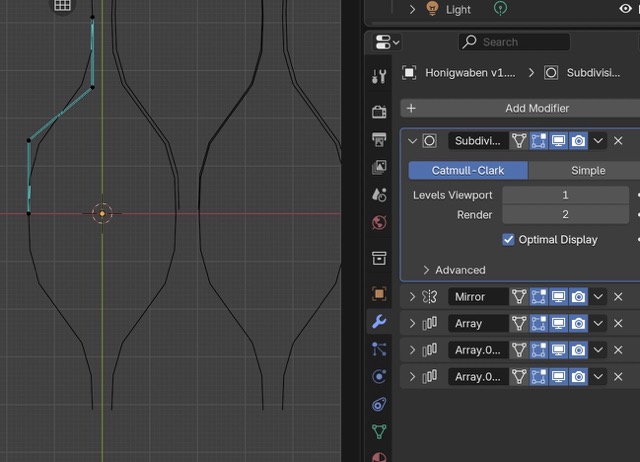
Thanks for the quick response and your efforts. However, I still can’t quite get it right. array and mirror modifier are clear, but how do I get a subdivision on it? as soon as I try to apply one, it distorts the entire object. even with mark as sharp edges somehow doesn’t work. How can I apply a subdivision correctly and then raise the middle area of the honeycomb so that it looks evenly round?
Sorry, i’m just too inexperienced in this area and still have a lot to learn.
Use a knife tool to cut the edges
A. After cutting, move Vertex to create volume.
B. It looks more realistic to make the volume of the object slightly different.
Replicate the object and place it on the other side.
Adjust to the same size after placement.
Adjust the Vertex position to prepare to connect the two objects.
After adjusting, connect the Vertex to create a Face.
Once you have completed one pattern, use Mirror and Array to replicate the pattern.
Use the Subdivision modifier depending on the purpose.