Okay after the long hall with people bugging me to do this bl2 competition, I decided why the hell not,what do I have to lose…a few polygons ha ha:D
Best of luck to mwa.:spin:
I know life is unfair but I’m trying to play fair.
In this thread you’ll get to know my enemy’s and how good people can critique your work & How hard I’ve tried this character to be better, but have only gone backwards and forwards repeating things and repeating myself, let this be a lesson to those, taking on huge amounts of criticism and trying to learn not to take it to heart and learning to ignore crude, rude, disrespectful, harsh, snarky and un-needed entity’s as I wouldn’t call them human.
ENJOY.
Thanks Patrox, yeah i don’t know much about painting or textured and need help with finding good techniques with U.V unwrapping its always hard to paint really well, does anyone have a good suggestion !thank you.
I know he is wearing a lot of make up lmao, like eye shadow too anyway it was just an example its really hard even when you watch the tutorials.It may be a lot less work if I had reference photos for this guy or something similar but guess what this guy doesn’t exist …no one has his jaw lmao
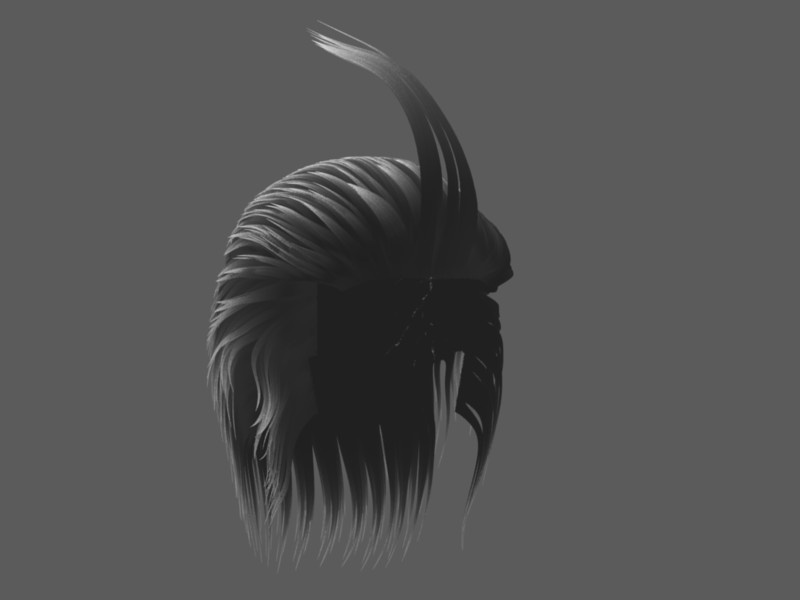
OMG okay no luck with hair someone needs to help me fix this …when the hair which I have uploaded is on my model it has a major problem! :o
It is a separate mesh so making it cover the bald areas is hard for me, also what I want to do is have
the hair on the same mesh as the head model …
:rolleyes:
…but right now there two different meshes so I need :spin:
help setting up the material for hair so it doesn’t render all the head… omg its confusing stuff.
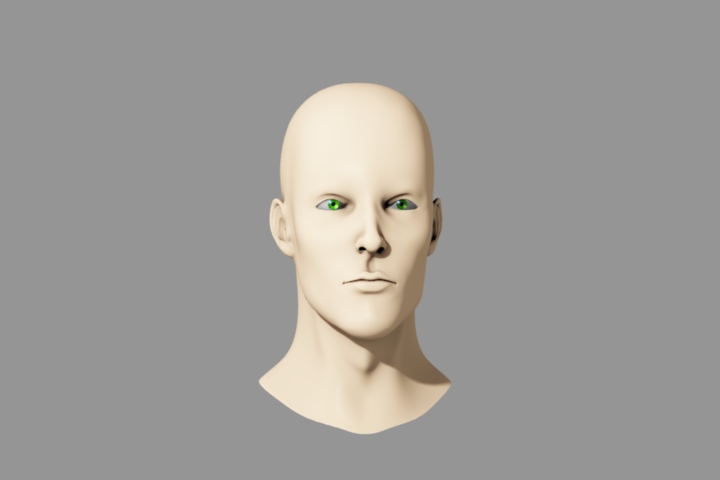
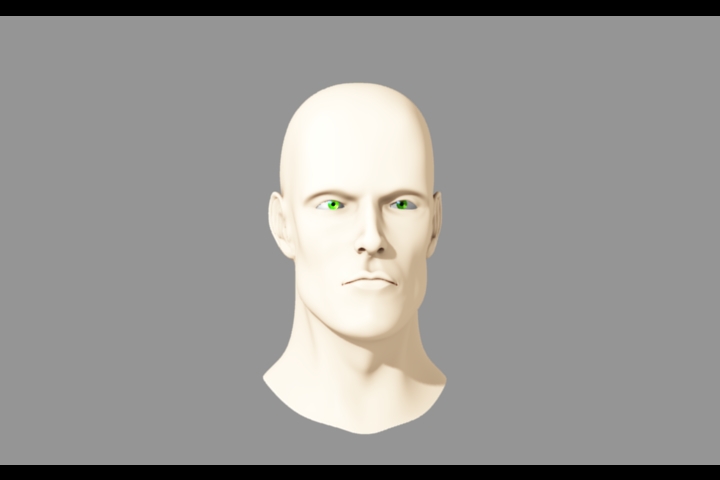
Also I’ve changed my mind and have removed the textured from this model and added eye’s.
:evilgrin:, I think this SSS is not good I’m going to edited it all and delete a few things.
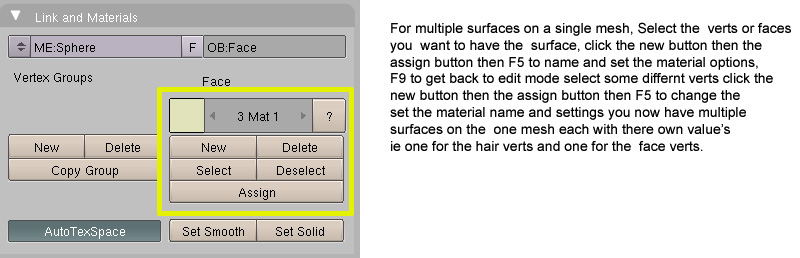
the eyes and hair look great havent had anything to do with those fancy skin sharders yet :spin: here’s a file i put together for you hopefully its of some help, you might already know this stuff so apologies if you do, for lighting you should post a thread in the Texturing & Lighting support section, bound to be heaps of lighting guru’s there. but a three point light setup is always a good start 1 key light 1 difuse light and 1 Rim light.
Sudai
ps: forgot to mention Crtl + J to join meshes, select you hair first then the head mesh
[quote=Sudai;1548440]Hi frank
Hey Sudai thank you for replying to my urgency yeah that is all set up but do you think my A.O is too bright Hmm, A diffuse lamp which one is that I got a rim and Key lamp…!The Skin shaders are so bad still and basic-deleting somethings and editing every little thing i can too change it.
I made a thread in Material / Lighting, cheers for that lol.:eek:
Yeah looks over saturated with light, set the lights to zero one at a time to find where the cause is, I done some AO test a while back here’s the link
scroll down and you will see the pic with various settings I used, The diffuse Light is a light you use to help lighten up any dark areas that the key light is not saturating enough ie the shadows, but if youre using AO you probably wont need it when I try and light a scence I start with just defualt grey on everything so as to focus on just the lighting then progress from there everyone has their own way of dong things that just what works best for me.
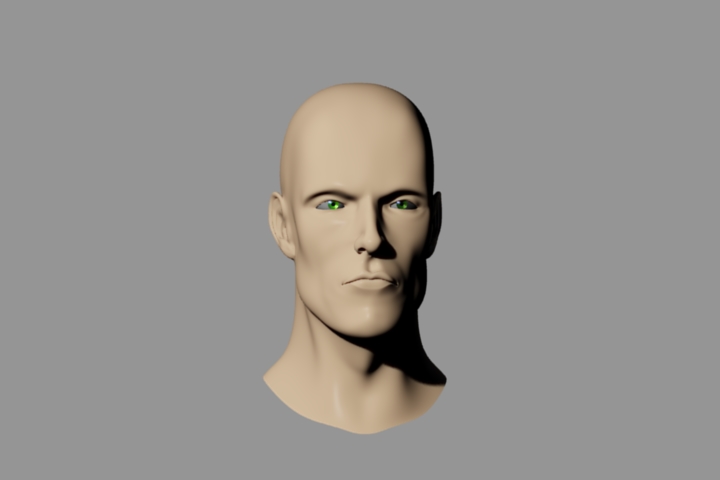
Some crits on the model.
His brow is really hard, maybe smooth it out a bit.
Cheeks look sunken.
You could square his forehead a bit.
And the tatoo design looks good.
Good look texturing
[quote=cire792;1548537]Yeah his brow is strong and yes his check bones are sunken in ha ha, Ill soften that brow square up the forehead>How do you mean??
Im no longer using those first images I uploaded the s .s.s, is more useful then u.v mapping crapy sss and textures right now ha ha, cheers Cire.
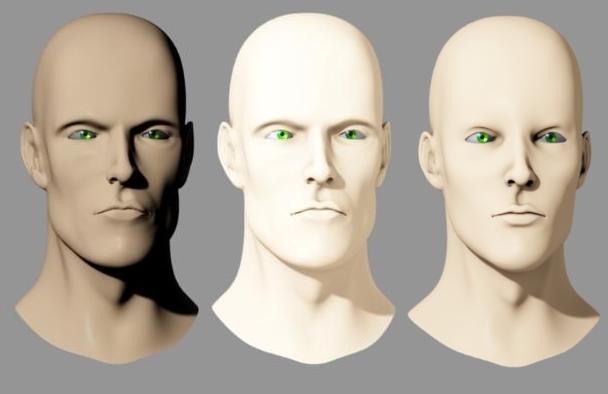
With high levels of A.O Approximate, this took away a lot of that white eddect, but if I take it off the model looks less pure" as I would say so, also:spin: I will upload another image of my human head with a few tweaks to the check bones and eye brow area,:eyebrowlift: thanks Cire for pointing that out, okay well best of blending to you’ll.
I’ve edited what I could, what do you think so far …I need more idea’s what to change …Diffuse made the eyes an ultra blue which looked ridiculous, so I didn’t use a diffuse lamp.
I can see the shadows on the new model is a bit too “burnt” compared to the others.
I want to use ray trace with noise will that create a more realistic lighting or do I need to start to texture?
don’t know how a diffuse light can turn your green eye’s blue seeing as its only a light unless you changed it to blue? I like the lighting on the first one the shadow needs a fiil or diffuse light (both the same thing to me anyway ) to take some of the darkness away the other two are still to saturated with light, have you got any seperate texture layers like in that tutorial yet? skin still looks flat even a subtle bump map for skin pores etc would help, texture mapping is hard but you will be impressed with what they can accomplish .
Thanks Sudai, also yeah I had pressed ray trace on the eyes causing the whole effect of the cornea to #(&#%) it up, thank you, I’ll do that lighting now, I found your lamp set up blend file,unusable when i rendered it to see …Back to blender.


 With high levels of A.O Approximate, this took away a lot of that white eddect, but if I take it off the model looks less pure" as I would say so, also:spin: I will upload another image of my human head with a few tweaks to the check bones and eye brow area,:eyebrowlift: thanks Cire for pointing that out, okay well best of blending to you’ll.