How to make blender hair look right?

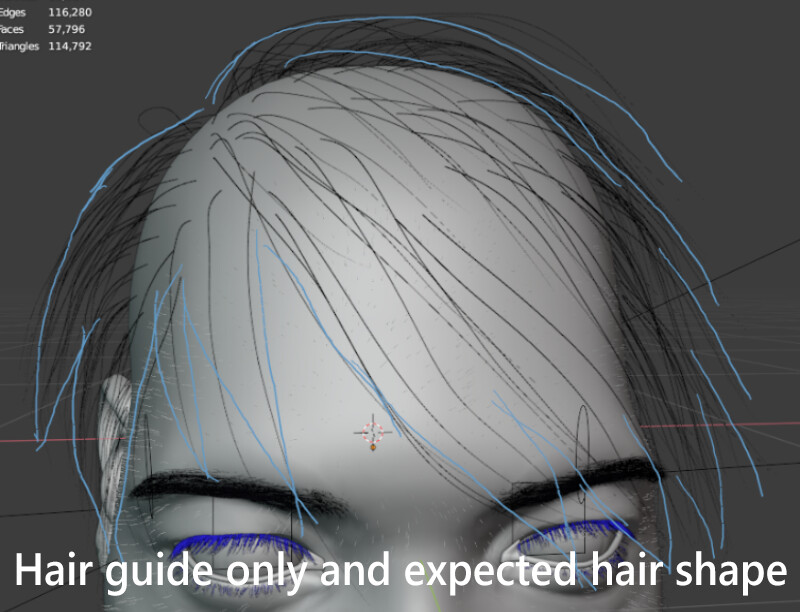
Hi, I currently doing some likeness sculpt to learn more about character, but I give a lot of try still can not make the blender hair look right.

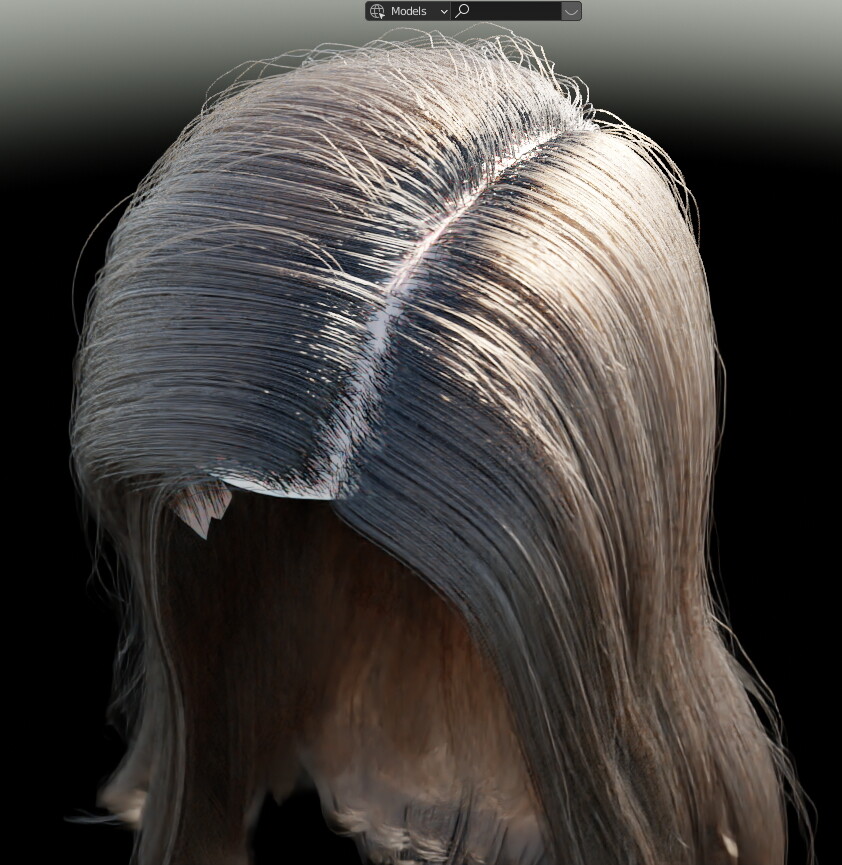
I think using simple children give me better control, but the hair looks like a lot of separate clumps and the transition between different layer is too hard.

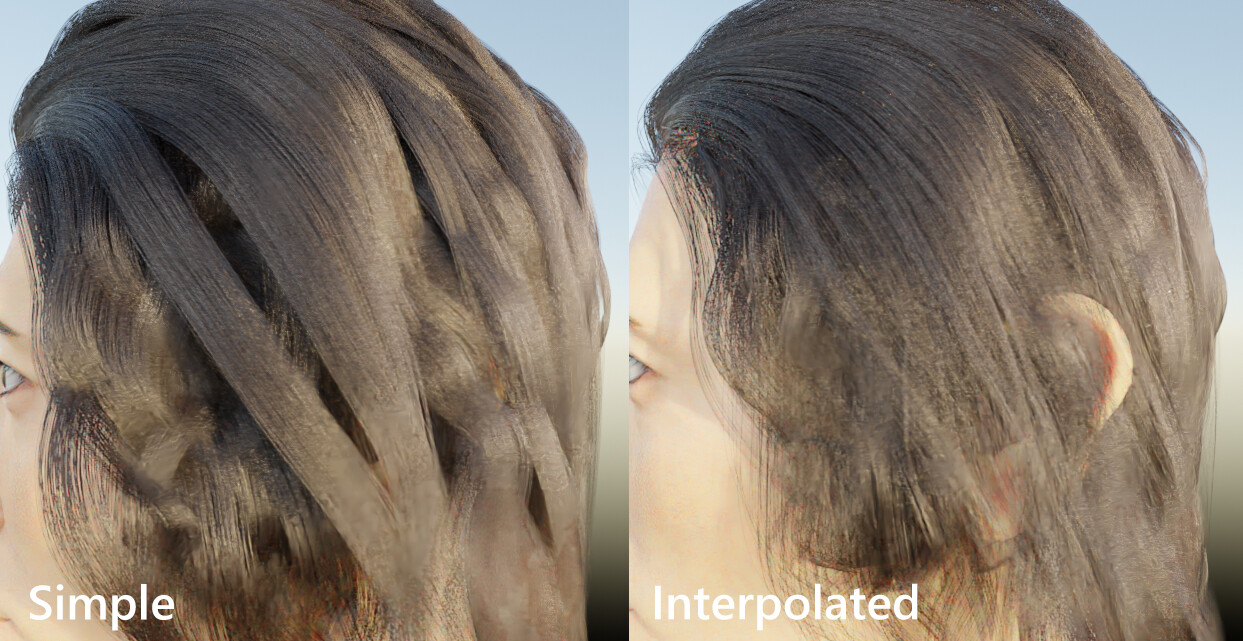
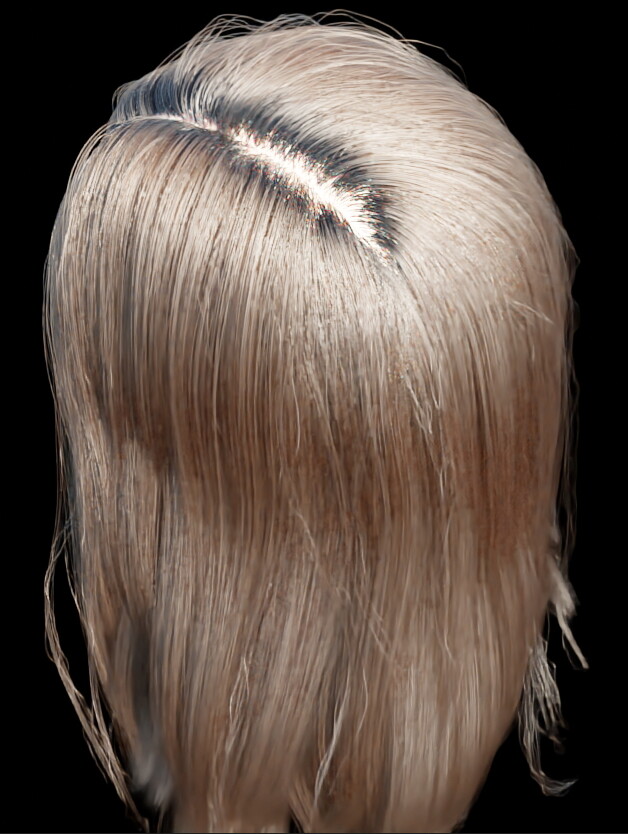
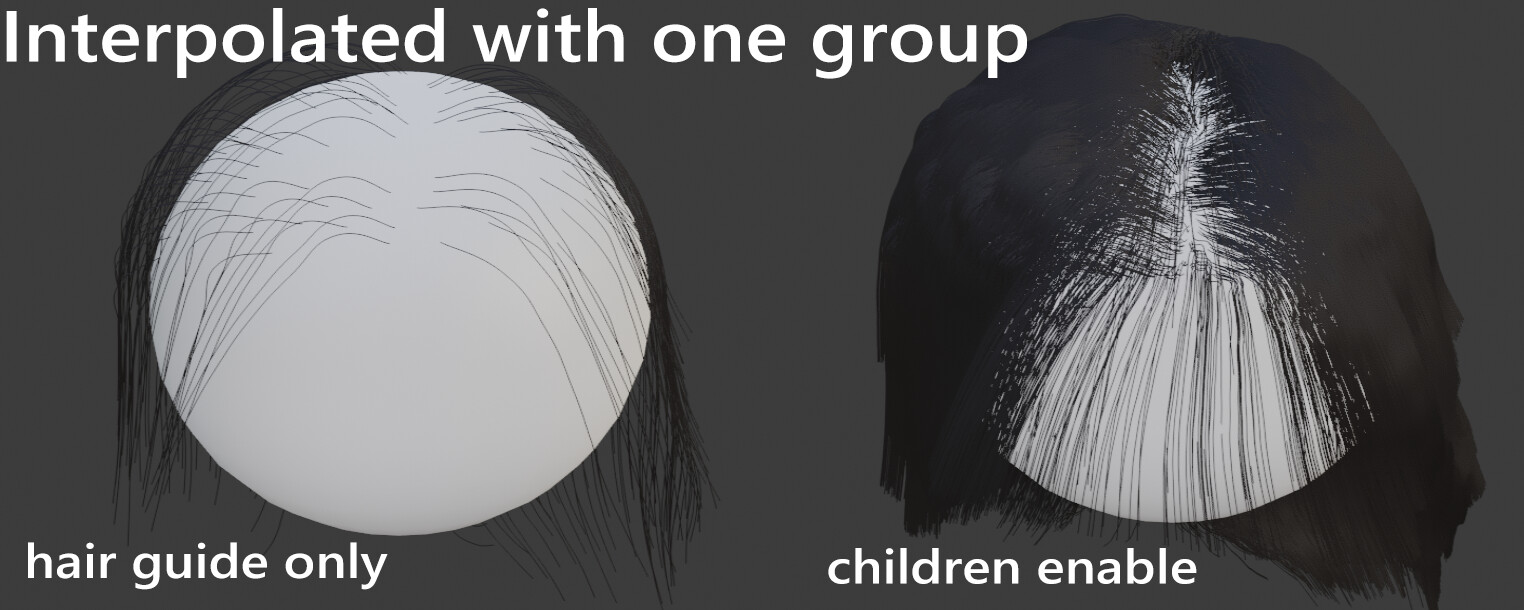
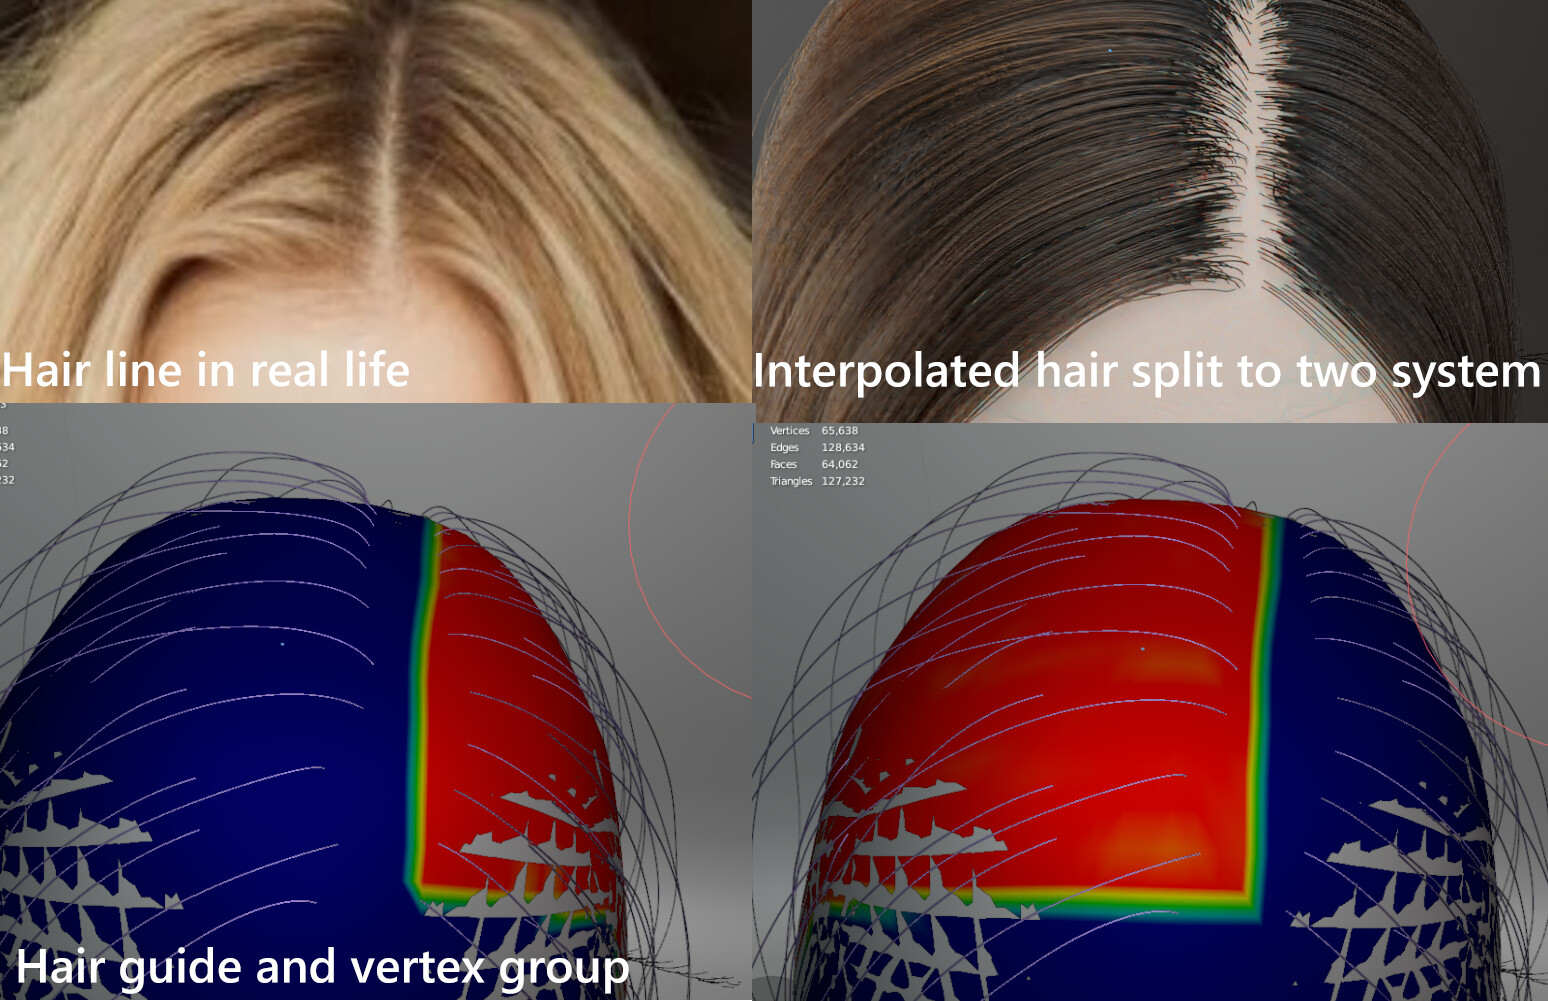
interpolated children have smooth results, more look like hair but always have some unexpected interpolate result between different direction and not very good create layering effect for hair. They can improve a bit by increase the parting value, add more guides or split hair into two particle systems, but high parting value also makes the hair look like a separate clump or strip-like simple children.


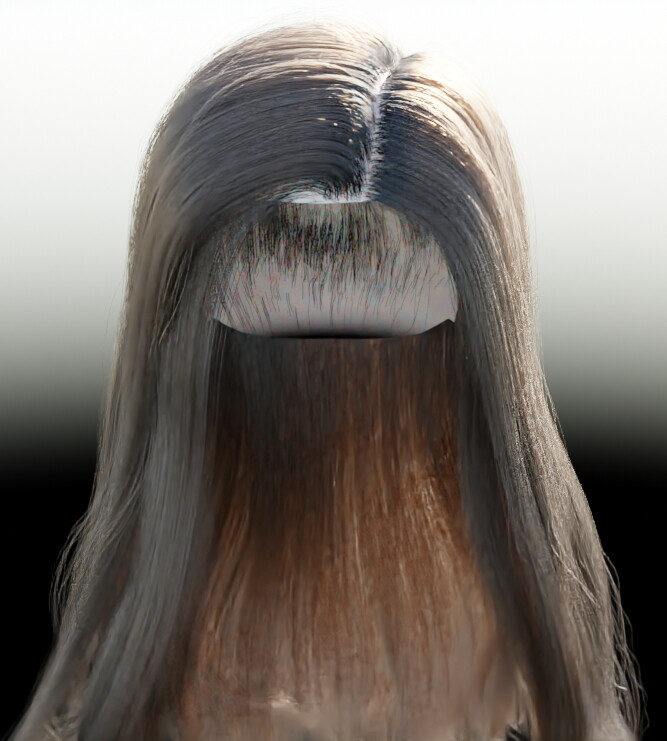
The interpolate problem can also fix by split the hair to different particle systems control by vertex group, but the hair in the edge still not look right.


I see some people split the hair to a lot of different particle systems, but I think it’s very difficult to adjust the hair especially for complex hair.

Moreover, I watch some youtube video about how they make hair in Maya, look like the Maya workflow don’t need a lot of hair guides, just for maintain the main flow for hair and add some modifier to control how the hair looks like. Can blender hair system have a similar workflow like this?

5 Likes

Two hair system is imho the best way to go.

2 Likes

Lots of different particle systems is the way to go. It can be a little tedious, but it’s not too difficult to manage and change/tweak if needed.

A few things you can do which will help:

Add chaos - even nicely combed hair will have chaos. Split ends, scraggle, fly aways. This is where multiple systems come into play. Adding a separate layer which is a little less neat, doesn’t just make it look more natural, but it also blends everything together.

Layers - Just like with a scraggle layer, build the hair up in layers, and tweak the settings a little for each layer. You can mix up the use of simple or interpolated children to, tweak clumping, noise, etc…

Ditch the weight paint - For some things, weights are good, but with my experience with particle hair, I much prefer making a separate mesh. Set the hair count to 0 and use the Add brush in combing mode to add your control hairs. This does limit you more to the simple constraint rather than interpolated though - so personal preference I think. If you do want to use weights, be a little less harsh with your blend lines. Your example above has a very hard line of where you will allow hair to go. Soften the edges, and allow a little more of a bleed. This will also help it look more natural.

Another thing I often see people do is to forget to add any volume at the root of the hair. if you look at the example you have above, the hair line looks quite flat. Make sure the hairs roots are inside the mesh a little and pointing downwards. That should just give a more natural lift around the root. On that example aswell, adding another layer or two on top of that main layer would help blend the parting and make it look a lot more natural.

If you do go for a layered approach, make sure you change the amount of hair each layer has. Generally I’d say have a couple of main fill layers, and then build on top with layers with less hair and children, and blend everything together.

Blenders hair system is a little lacking, but it can be tamed a little with some experimentation and finer control.

3 Likes

I posted some tips in this thread. Frustrated with Blender hair and considering crossing over to xgen, unless

1 Like

Thanks for the tips! Never think split the mesh into two part can replace the weight paint, it’s really have better control. I just did a long hair testing use the split mesh method with two groups of interpolated hair to handle the top layer, one more interpolated hair to fill the area under the top layer, and one more simple hair for fly away. it looks a bit closer. But not sure the short hair for display parting result and other hairstyles with more complex flow will have good result in this method or not.


1 Like

Thanks! I already watch this youtube tutorial but don’t know the twitter post, its very cool and look like not only me have trouble in blender hair lol… Unfortunately, the new hair system for blender look like still in the early development…

I found roughness to be an important feature to make the hair look more natural and add a little chaos. This was helpful to get started with it: https://www.artstation.com/godstepson/blog/0ga4/006-hair-in-blender-part-2-procedural-grooming-tools-2

Apart from that I made it a habit to always UV map the hair mesh/hair cap and instead of weight painting I do the masks for density, length, etc as greyscale textures. You can add subtle irregularities that way and rebake/reuse those masks with different heads. And of course split into different hair systems for any detailed work, it’s just not really manageable without.

Looking forward to the proposed new hair system though. This one here is clearly showing its limitations (and I haven’t even dealt with dynamics/animation at all - no clue how it holds up).

2 Likes

New hair system is still a bit away. The dev that should work on it is busy with mantaflow bugs but the proposal from an expert is finished so the way and most questions should be solved and the implementation can go faster…

1 Like