Here we have some of my main developments from the past year piled into one render (plus a little tribute to the original Lightwave version ![]() ).
).
")
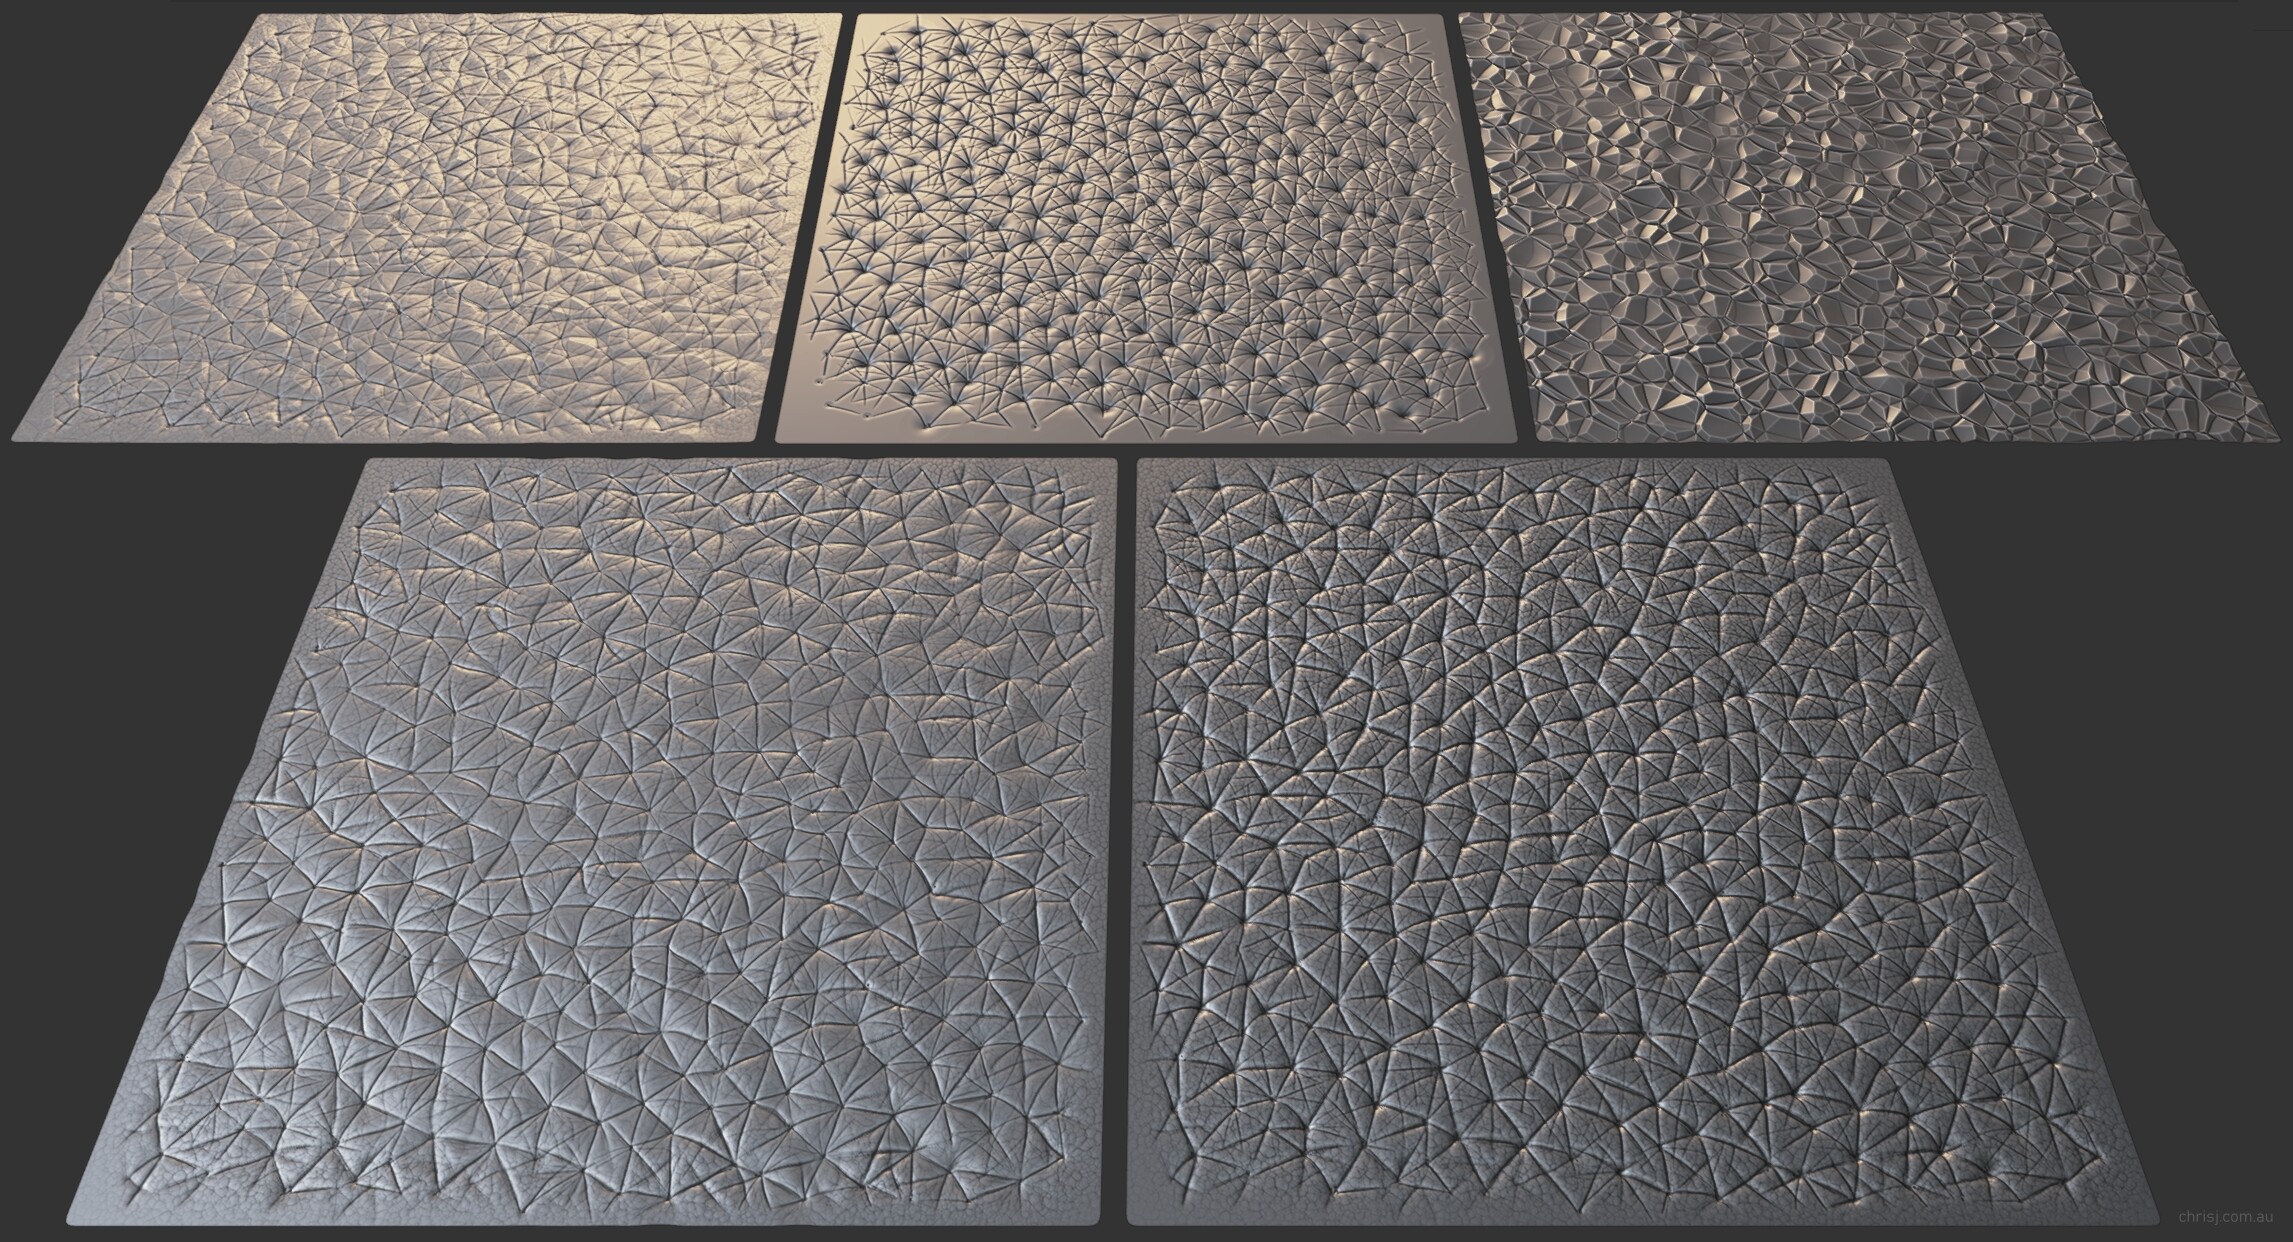
Textures were painted from scratch with the help of some newly sculpted skin, which I baked to displacement images for use as tiles/stamps in Krita. After laying down a base texture I drew in finer wrinkles to help direct the pore flow, in something of a repeat of my handprints painting marathon, but for the rest of the hand and arm. Deeper wrinkles and veins were sculpted and added to the layers in Krita for further editing.

And at long last, I have managed to implement proper procedural tension maps. ![]() This turned out to be a bit of an anticlimax though, since they’re harder to control than the mask setup I was already using, so I’ll be sticking to masks for the face and using this new version for less critical areas. Not that I have much choice anyway, due to the aforementioned mask limitation. The other downside is it requires a duplicate of the base mesh, which I had been trying to avoid.
This turned out to be a bit of an anticlimax though, since they’re harder to control than the mask setup I was already using, so I’ll be sticking to masks for the face and using this new version for less critical areas. Not that I have much choice anyway, due to the aforementioned mask limitation. The other downside is it requires a duplicate of the base mesh, which I had been trying to avoid.
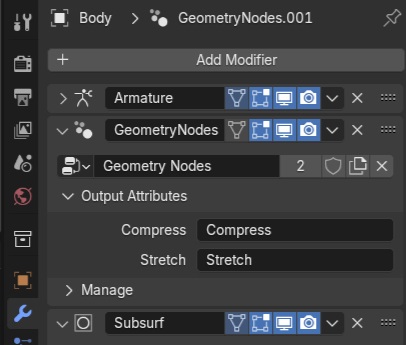
It uses geo nodes, and I can’t claim to fully understand how they work, nor to remember where I found the instructions on how to put them together… but after some modifications they look like this:
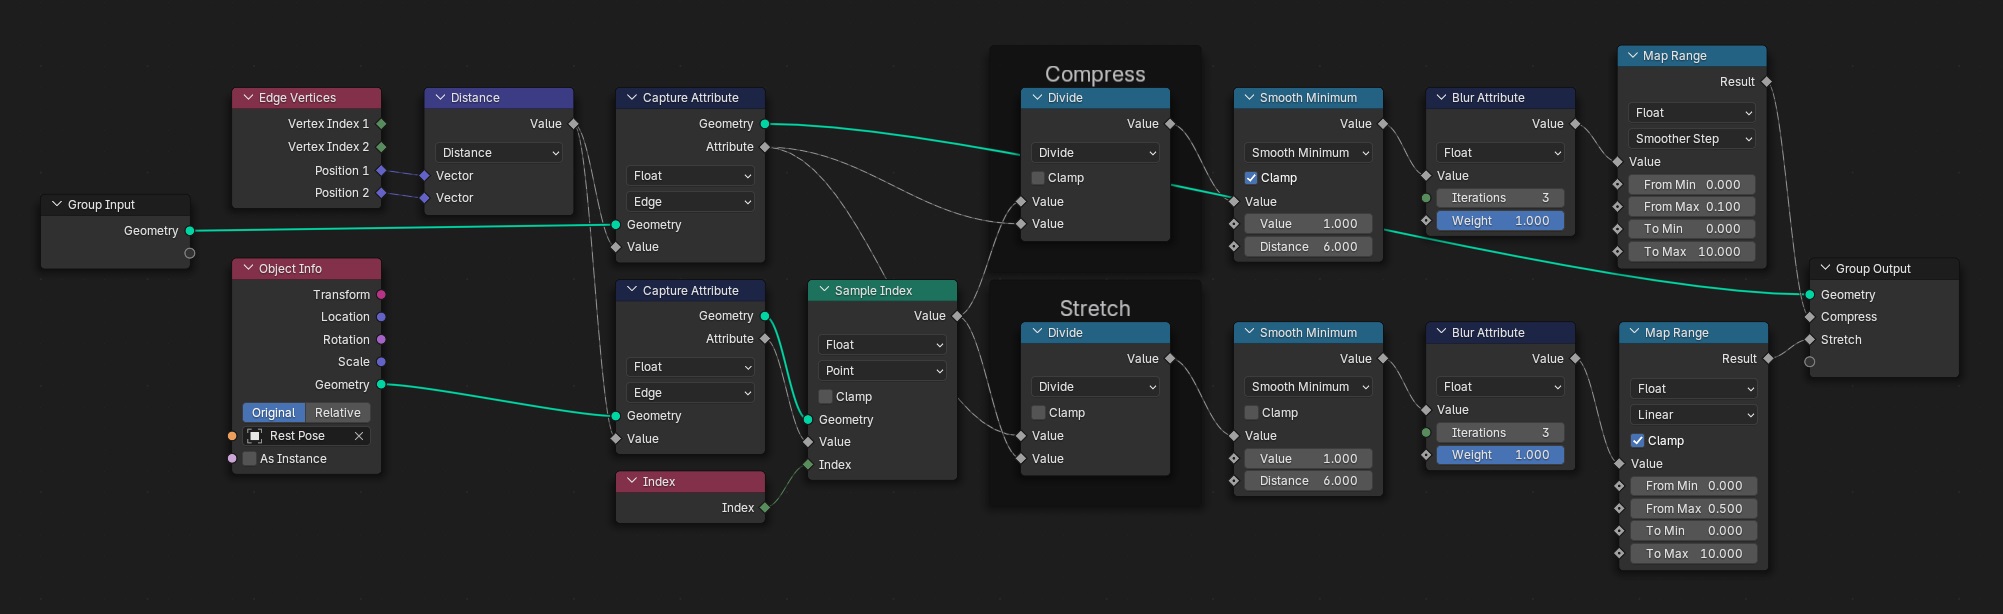
It was a while ago that I set it up so I’m a bit hazy on the whole thing now, but I’ll try to explain: there is a duplicate of the main object, and that object has all its modifiers removed. This object acts as a neutral reference, and should be selected in the Object Info node (in the above screenshot it’s called Rest Pose). The Geometry Nodes modifier on the main object is positioned after the Armature and before Subsurf. There are two output attributes: Compress and Stretch. I forget how those came to be there…
Attribute nodes can then be added to the main object’s material, and Stretch or Compress entered into the node’s Name field. Then they can be fed into the other nodes to control the displacement/colour/whatever.
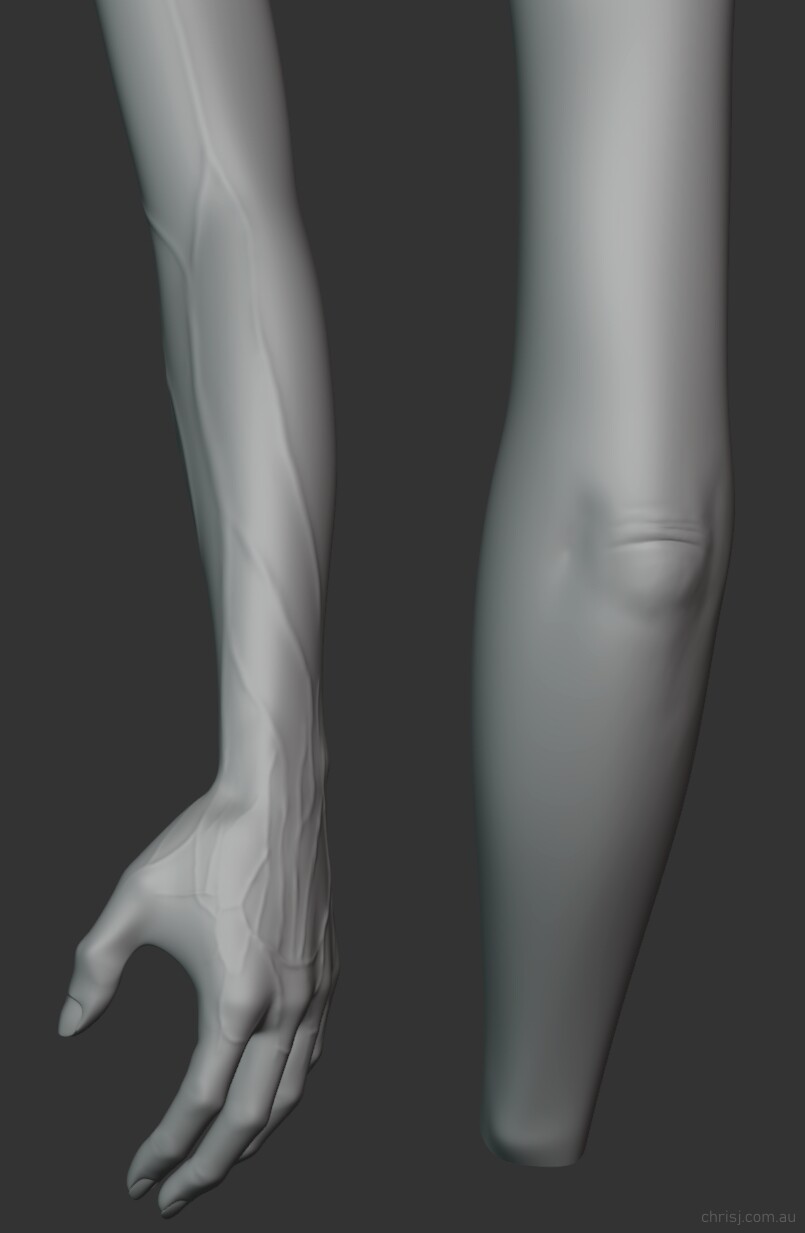
I sculpted the wrinkles while the hand was in various poses, baked them and then refined/added more in Krita.
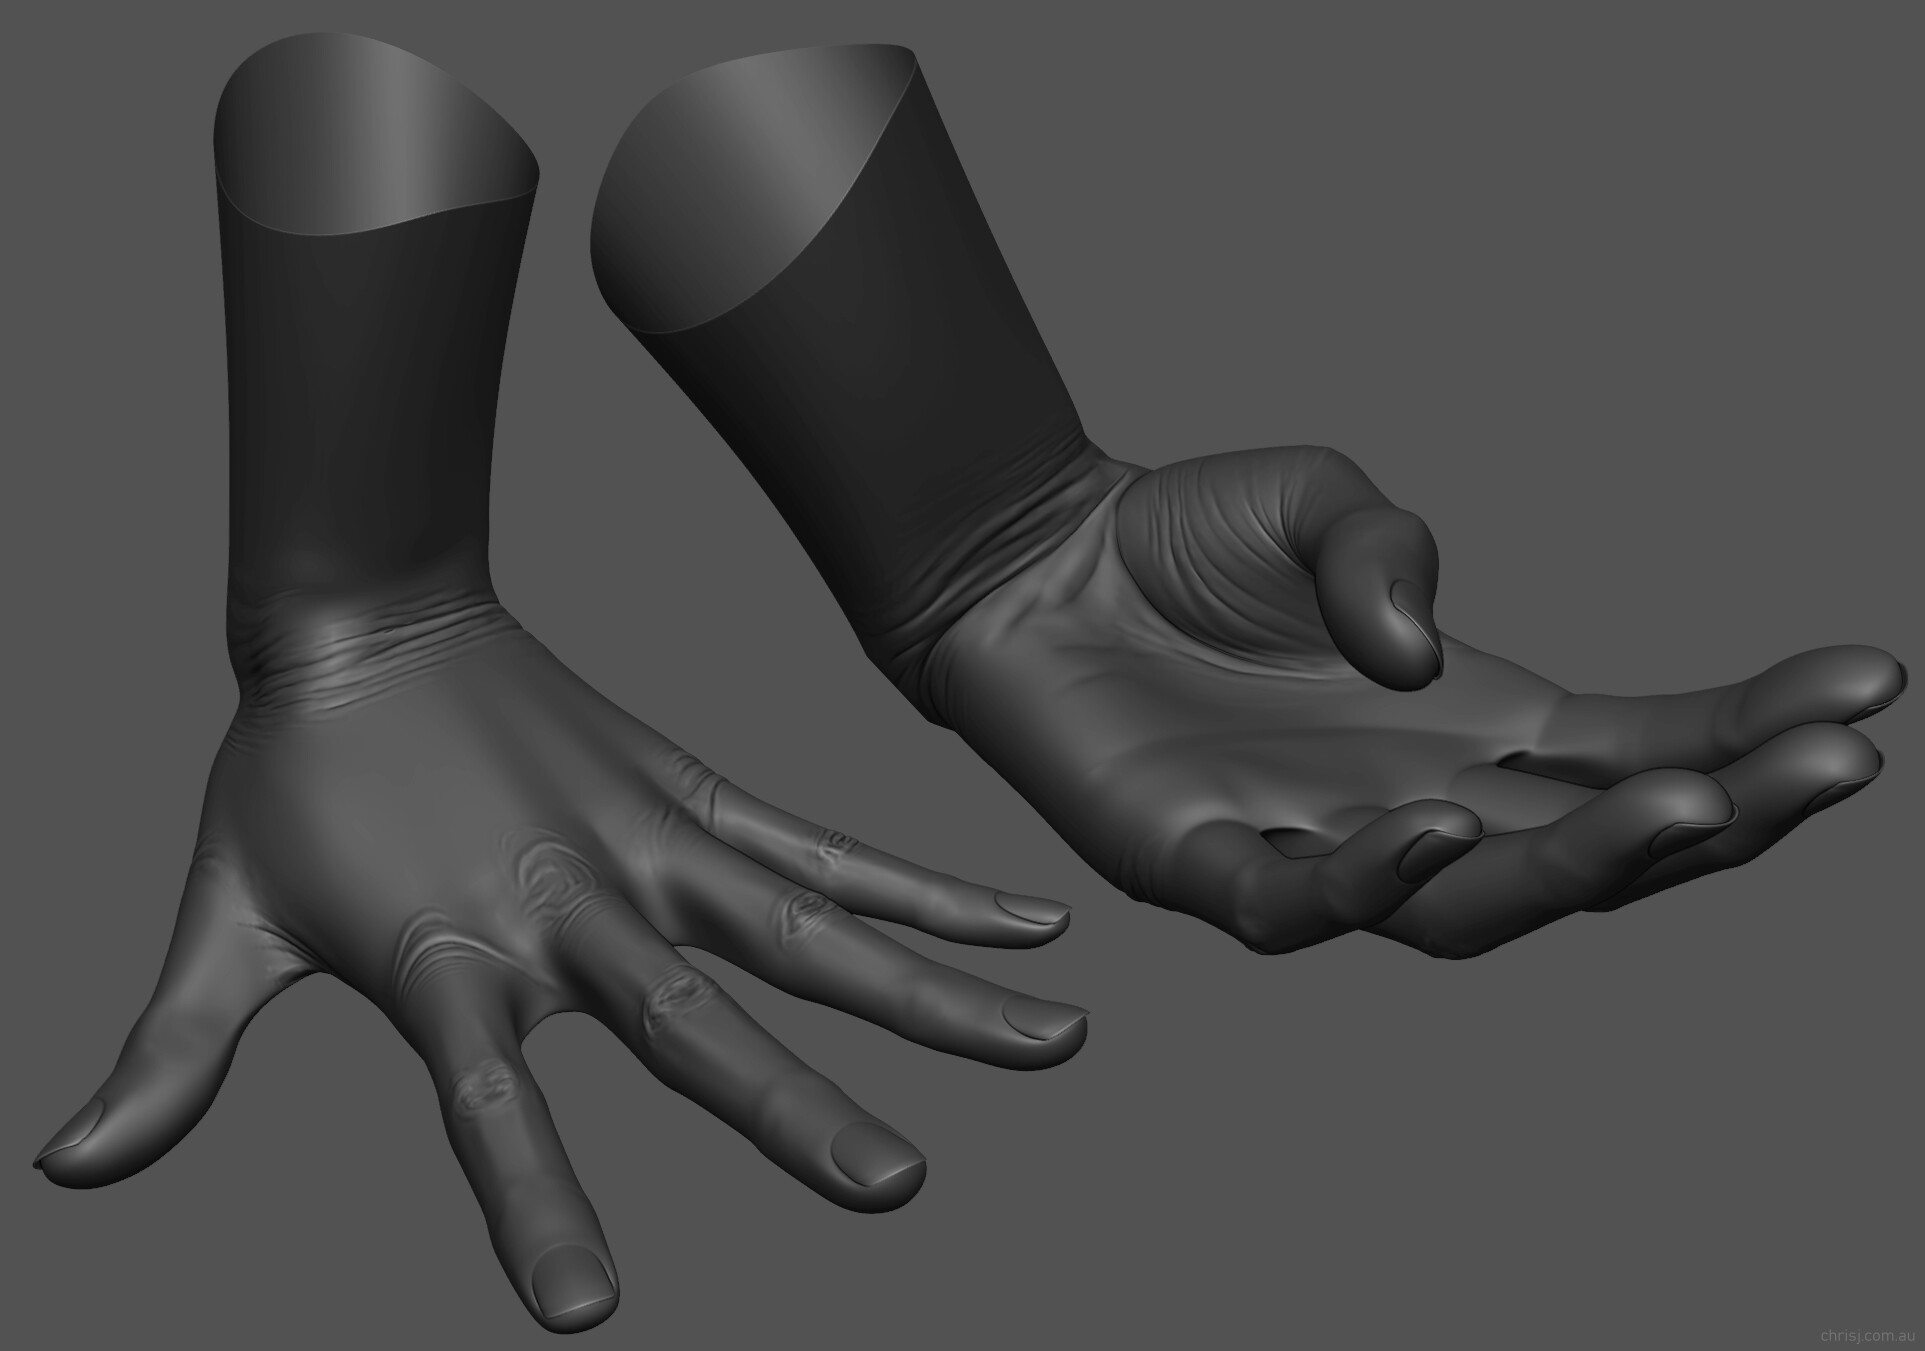
As well as the wrinkles, I leveraged tension for blood flow (e.g. to lighten the knuckles in a clenched fist) and roughness and general displacement height to make the skin smoother/shinier when stretched and more rough/matte when compressed.
I’ve also reworked the proportions of the hand rig and mesh, which prompted several reworks of the tendons as well, which I have somewhat expanded upon since their initial incarnation. Since they rely on Shrinkwap, each muscle, tendon and bone has to maintain close proximity to the skin at all times while articulating and conforming to all the corrective shapes, male and female variants (plus another variant of which I’ll speak later) and proportional changes without breaking through the surface and causing a crater, or disappearing beneath it. So moving the arm mesh a couple of cm can have serious knock on effects.
To cap it all off, there were boatloads of obstacles to navigate around just to get this thing rendered, such as a weird error that would stop it rendering after a few frames unless I added or subtracted a pixel to the width or height (which mysteriously went away at some point); figuring out how to add motion blur without the render times blowing out to 30+ hours per frame instead of 2-3 minutes, or having to resort to Blender’s subpar vector blur (Davinci Resolve’s superior vector motion blur saved the day); and countering the background banding caused by YouTube’s compression, the most tolerable compromise of which was to render a background noise pass with static or slowly undulating noise, and blend it in with just enough opacity (0.04) for YouTube’s encoder to register it.
[EDIT] I no longer endorse optimising your video for encoders on various platforms - see the addendum here.