As a silent stalker of this threat, what you have been doing is insane.
I saw this article today. https://80.lv/articles/chris-jones-casually-unveils-the-most-lifelike-blender-made-facial-animation/
4 Likes
hahaha us ![]()
![]()
![]()
I thought the same, but apparently is not an easy thing to fix, as explained by Sergey in that bug report:
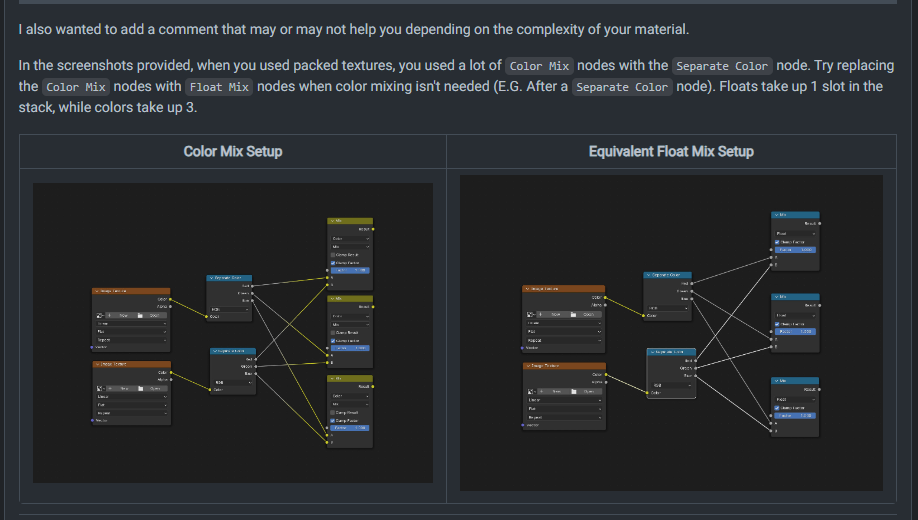
Further down on that thread someone else commented this about mix nodes, might be of help too
5 Likes
It’s a shame the eyelashes kill it a little bit. The moment they are in focus and especially when the eyes blink, the eyelashes do tend to stand out a bit as CG, compared to everything else.
@julperado Yeah I saw that, but don’t have separated RGB anywhere. I’ll have to see if there are any other mix nodes that I can substitute.
@thetony20 They looked a bit better as geo nodes, but the glitching was more of an eyesore. It bothers me, but I couldn’t keep waiting indefinitely for a fix. ![]()
Awesome work Chris!
2 Likes
Incredible work.
1 Like
Hello, @ChrisJones. Amazing work! However, I am curious about the anatomy of the mouth. How did you model the inside of the mouth? Are there uvula and tonsils there?
The mouth interior is just a featureless void, apart from the teeth.
1 Like
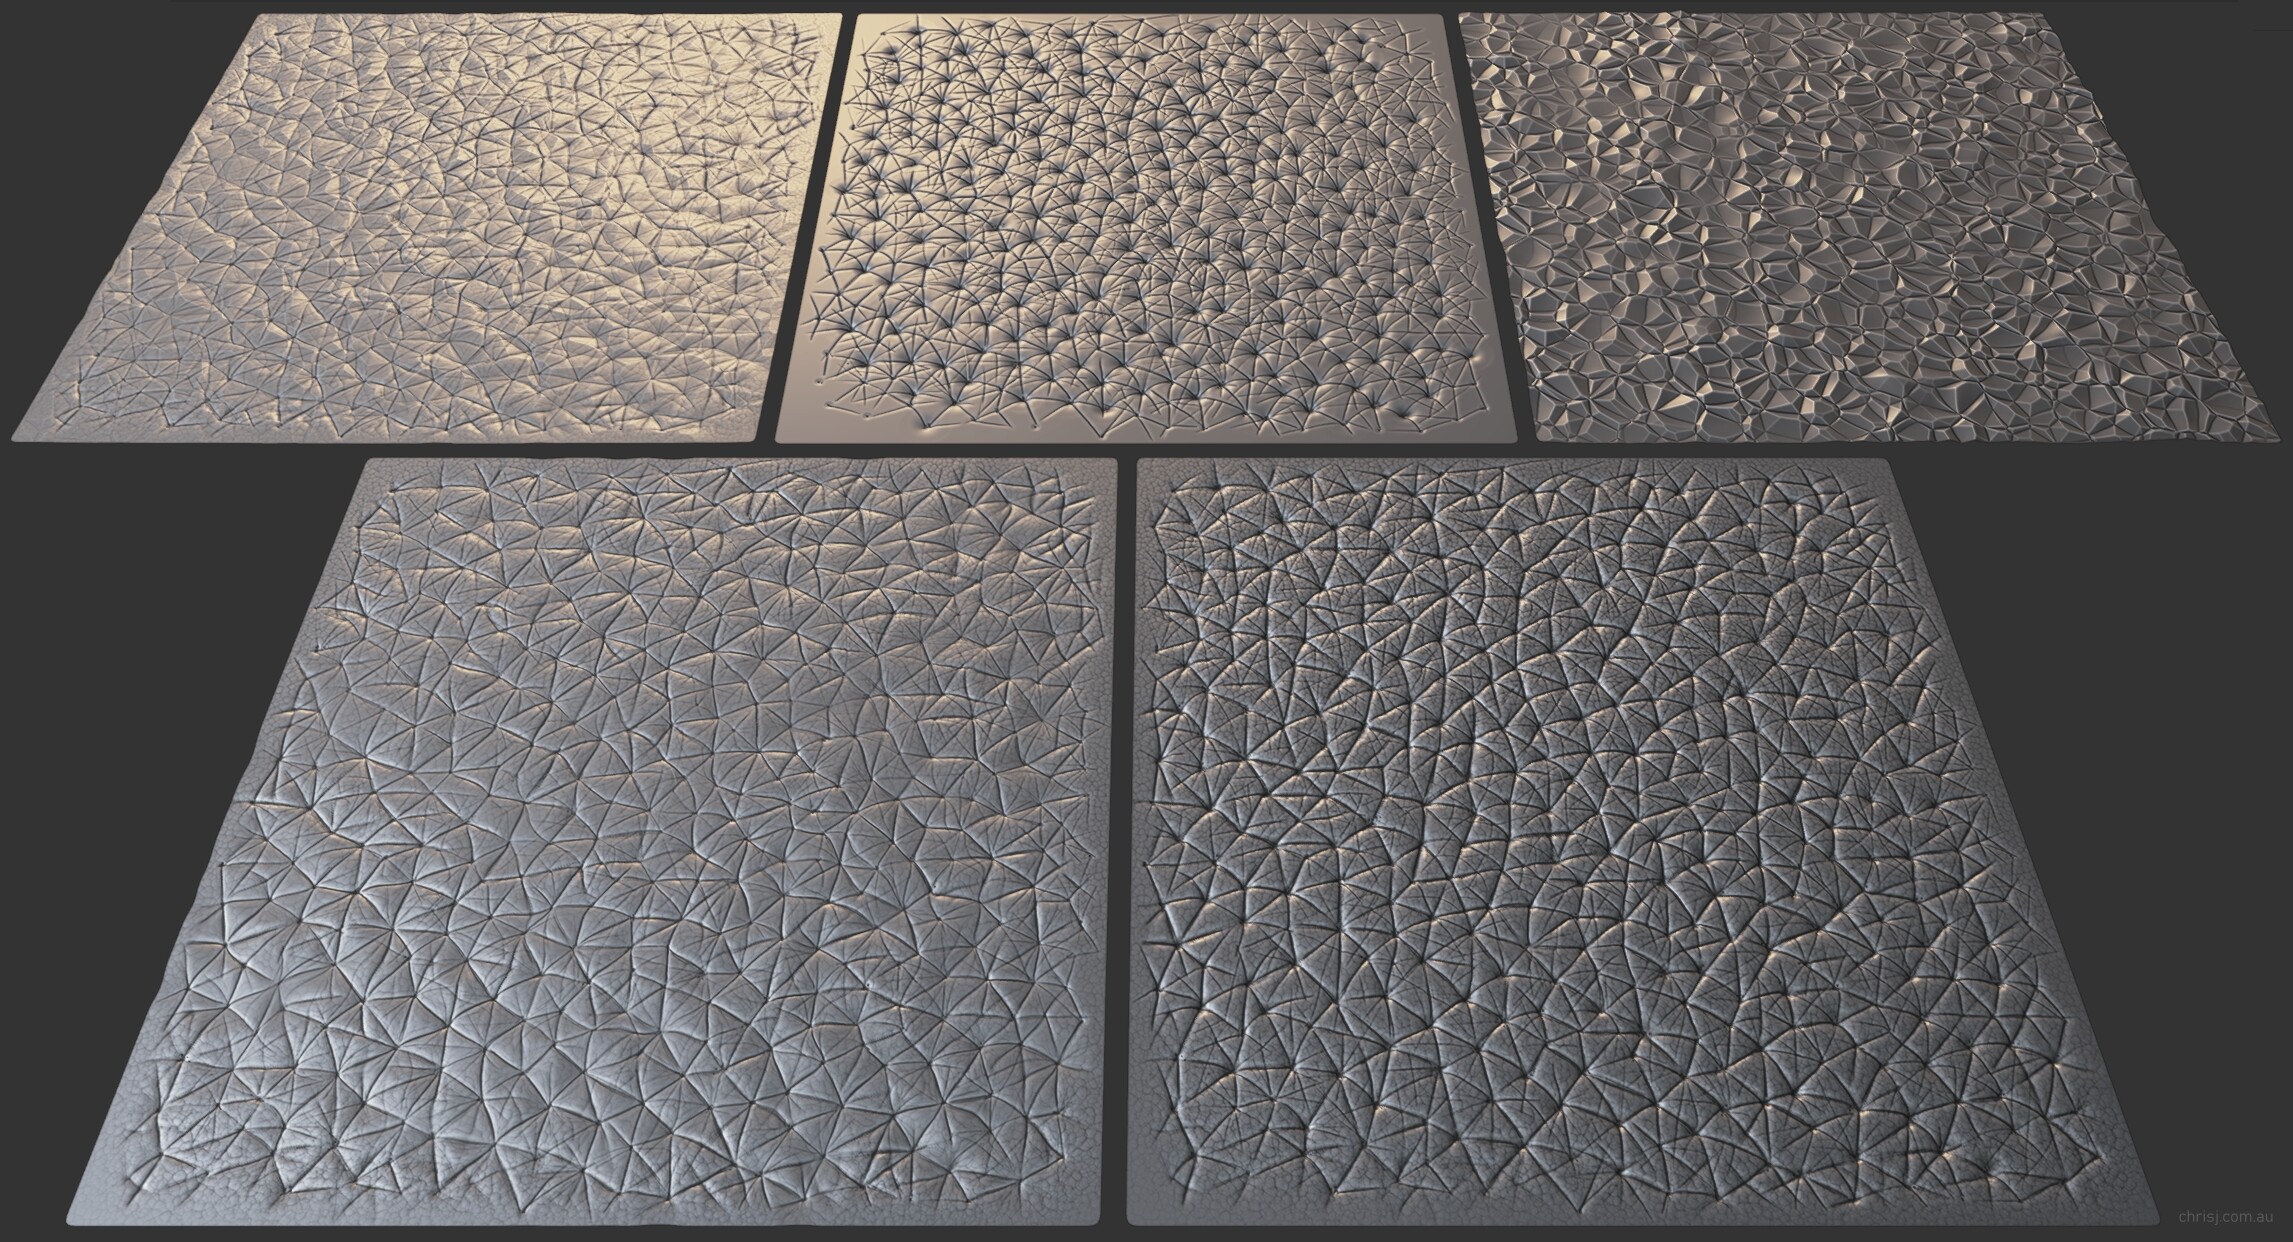
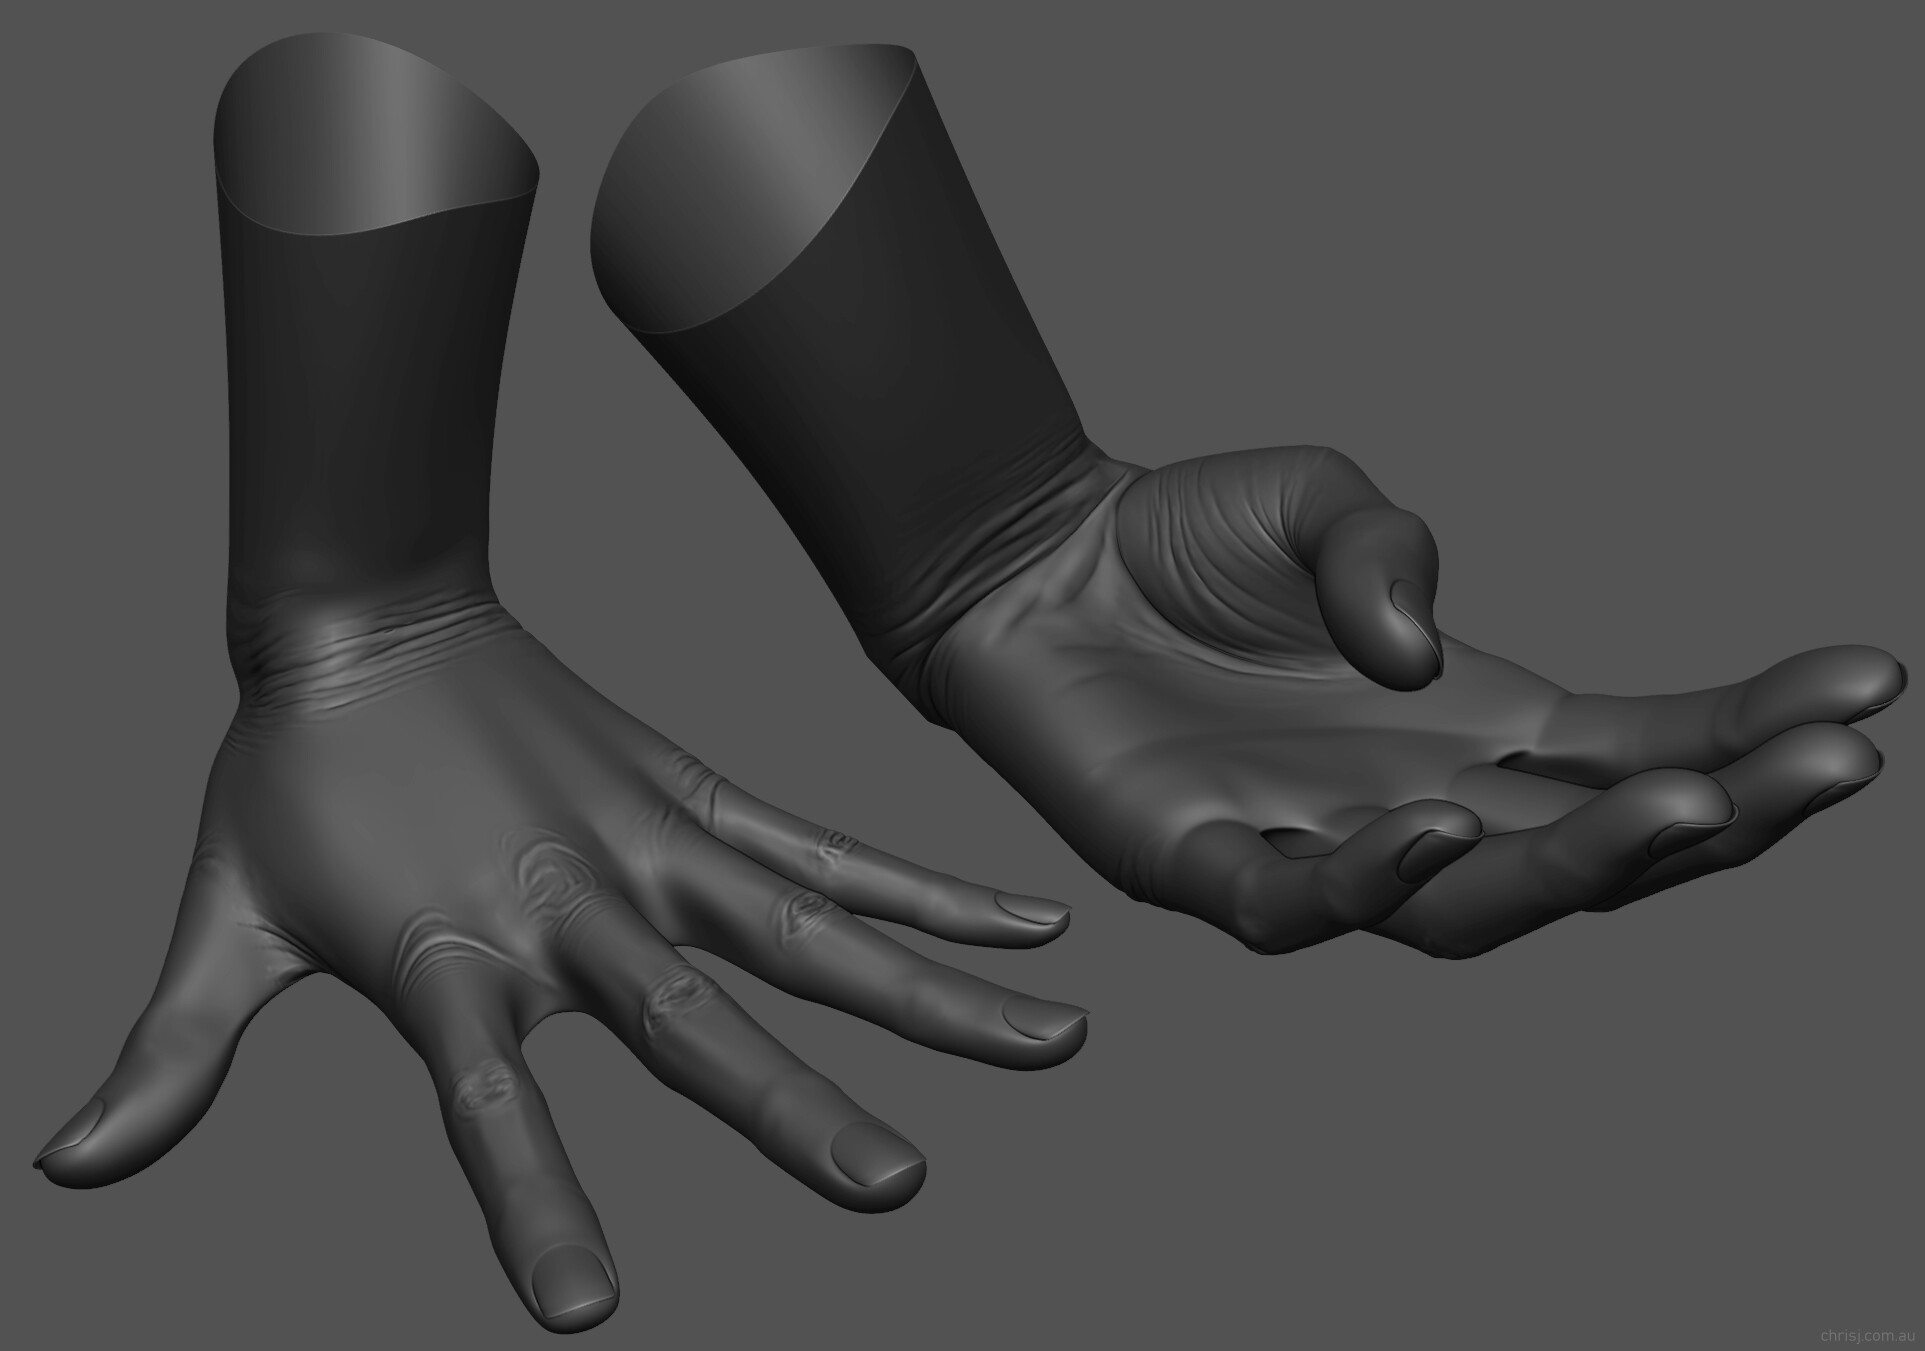
Here we have some of my main developments from the past year piled into one render (plus a little tribute to the original Lightwave version ![]() ).
).
")
Textures were painted from scratch with the help of some newly sculpted skin, which I baked to displacement images for use as tiles/stamps in Krita. After laying down a base texture I drew in finer wrinkles to help direct the pore flow, in something of a repeat of my handprints painting marathon, but for the rest of the hand and arm. Deeper wrinkles and veins were sculpted and added to the layers in Krita for further editing.

And at long last, I have managed to implement proper procedural tension maps. ![]() This turned out to be a bit of an anticlimax though, since they’re harder to control than the mask setup I was already using, so I’ll be sticking to masks for the face and using this new version for less critical areas. Not that I have much choice anyway, due to the aforementioned mask limitation. The other downside is it requires a duplicate of the base mesh, which I had been trying to avoid.
This turned out to be a bit of an anticlimax though, since they’re harder to control than the mask setup I was already using, so I’ll be sticking to masks for the face and using this new version for less critical areas. Not that I have much choice anyway, due to the aforementioned mask limitation. The other downside is it requires a duplicate of the base mesh, which I had been trying to avoid.
It uses geo nodes, and I can’t claim to fully understand how they work, nor to remember where I found the instructions on how to put them together… but after some modifications they look like this:
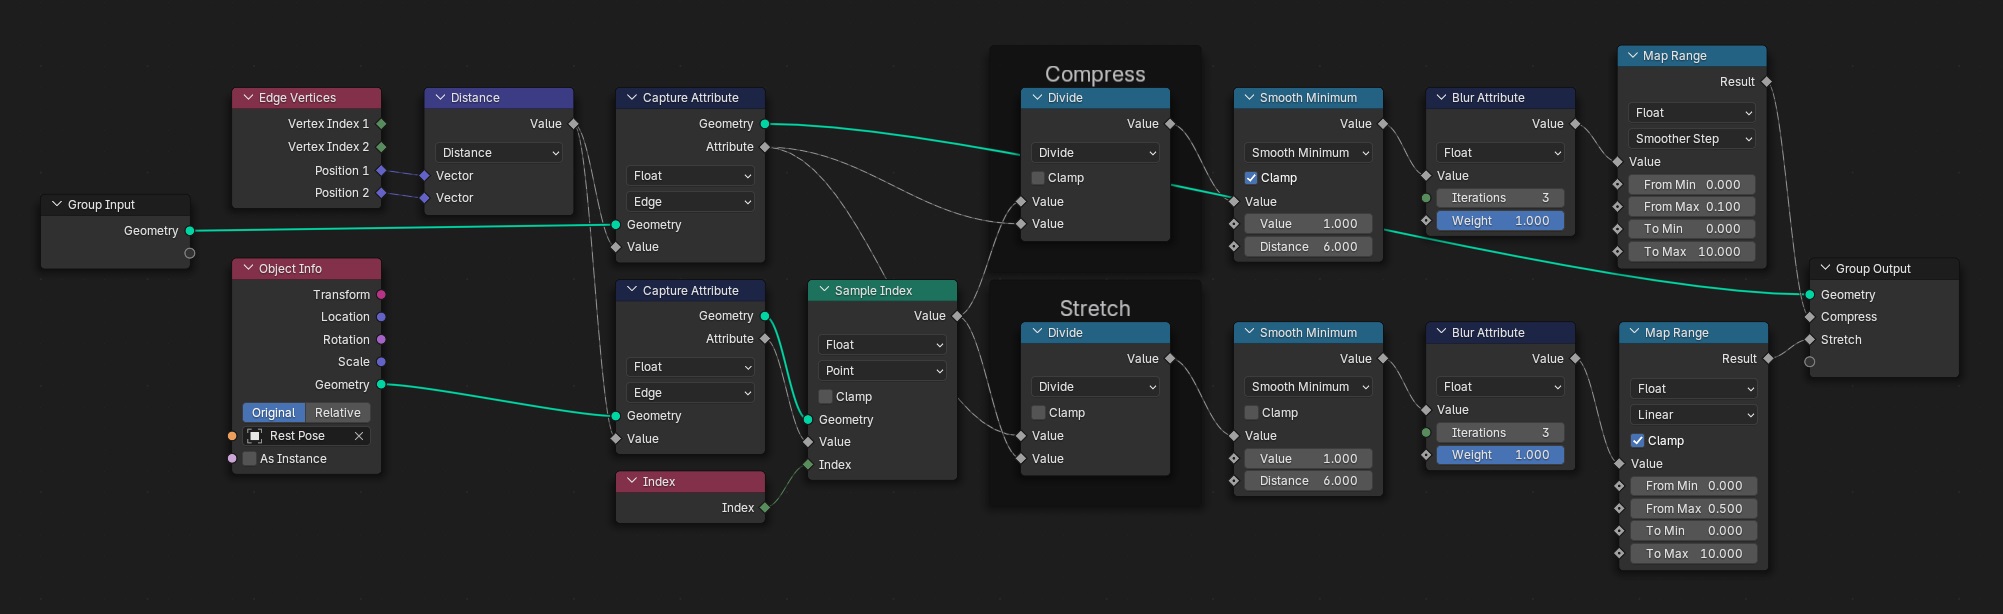
It was a while ago that I set it up so I’m a bit hazy on the whole thing now, but I’ll try to explain: there is a duplicate of the main object, and that object has all its modifiers removed. This object acts as a neutral reference, and should be selected in the Object Info node (in the above screenshot it’s called Rest Pose). The Geometry Nodes modifier on the main object is positioned after the Armature and before Subsurf. There are two output attributes: Compress and Stretch. I forget how those came to be there…
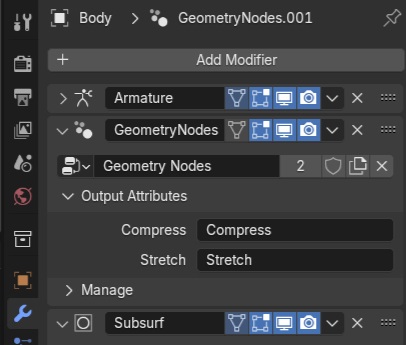
Attribute nodes can then be added to the main object’s material, and Stretch or Compress entered into the node’s Name field. Then they can be fed into the other nodes to control the displacement/colour/whatever.
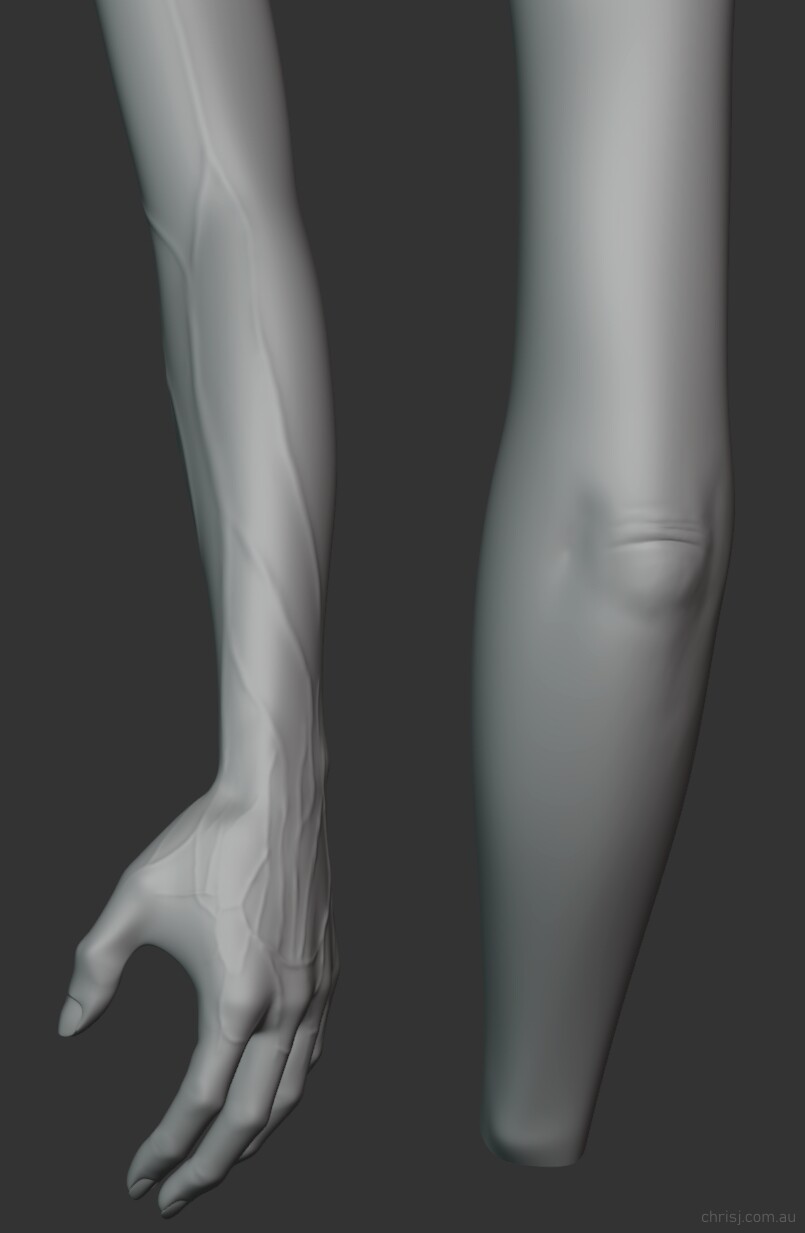
I sculpted the wrinkles while the hand was in various poses, baked them and then refined/added more in Krita.
As well as the wrinkles, I leveraged tension for blood flow (e.g. to lighten the knuckles in a clenched fist) and roughness and general displacement height to make the skin smoother/shinier when stretched and more rough/matte when compressed.
I’ve also reworked the proportions of the hand rig and mesh, which prompted several reworks of the tendons as well, which I have somewhat expanded upon since their initial incarnation. Since they rely on Shrinkwap, each muscle, tendon and bone has to maintain close proximity to the skin at all times while articulating and conforming to all the corrective shapes, male and female variants (plus another variant of which I’ll speak later) and proportional changes without breaking through the surface and causing a crater, or disappearing beneath it. So moving the arm mesh a couple of cm can have serious knock on effects.
To cap it all off, there were boatloads of obstacles to navigate around just to get this thing rendered, such as a weird error that would stop it rendering after a few frames unless I added or subtracted a pixel to the width or height (which mysteriously went away at some point); figuring out how to add motion blur without the render times blowing out to 30+ hours per frame instead of 2-3 minutes, or having to resort to Blender’s subpar vector blur (Davinci Resolve’s superior vector motion blur saved the day); and countering the background banding caused by YouTube’s compression, the most tolerable compromise of which was to render a background noise pass with static or slowly undulating noise, and blend it in with just enough opacity (0.04) for YouTube’s encoder to register it.
[EDIT] I no longer endorse optimising your video for encoders on various platforms - see the addendum here.
37 Likes
Nice to see something “new”… ![]() ( image- or animation-wise )…
( image- or animation-wise )…
…not so nice that i now know that i have to spent at least 10 years to get as far as your old bw-renders… ![]()
![]()
2 Likes
Your work never ceases to amaze me, the detail, deformation and wrinkles look incredible!
I’m curious about this, you always seem to encounter the oddest issues/bugs ![]()
Can I ask, how many samples are you using for render and how was the motion blur setup? I know it does add to the render time but in my experience it’s never more than a couple of extra seconds per frame. Though I usually don’t render such detailed and complex geometry, for work it’s mainly cartoony stuff for a kids youtube channel.
Still it seems odd that just enabling motion blur would have such a huge impact on render times, it doesn’t make sense…
2 Likes
This is fantastic! The tendon work is so good.
I think I could contribute a little bit. Instead of inputting a rest pose object, you could use a separate geometry nodes setup before the armature and any other modifier to store the information into a named attribute. Changes nothing, and honestly could be done without, but saves on using an external object. Here’s my setup:

Since its no longer dependent on other objects, it helps for keeping assets using your technique more mobile between scenes.
Hopefully this knowledge is somewhat useful! ![]()
10 Likes
Hi Chris, I’m the owner of a motion capture studio, and I’ve been racking my brain for 2 weeks now on how to transfer mock body data to your model. By the way, I have greatly improved your system of wrinkles, and now it is fully automated to capture the movement of human facial expressions, please tell me, could I clarify some important points with you?
1 Like
2048 samples, Motion Blur checkbox checked with default settings. The previous Glitter render was something like 10 minutes per frame, while motion blur was estimated at 70 hours per frame. In reality the ETA reduces exponentially over time due to having Noise Threshold enabled, but it’s still so slow as to be completely useless for anything to do with this project. Maybe it’s the SSS?
Interesting, I’ll definitely have to look into that. Much appreciated!
I usually suggest binding my rig to a separate mocap-ready rig, although I can’t confirm how successful this would be as I’ve never attempted it myself. That’s the first place I’d start though.
Sure.
1 Like
Hmm that doesn’t sound right… I don’t think it’s just the existence of SSS either, on the cartoony project I mentioned before we use a lot of SSS to give a more plasticky-warm look to the buildings and motion blur doesn’t blow up render times like that. What can increase render times a lot in our case is using a high number of transparency or volume bounces.
Maybe the shaders are too complex? I remember you mentioned having reached the limit of nodes available on a single shader before.
Would you mind sharing a screenshot of your render settings? I’m really curious about what could be causing that and want to do some tests here
My feeling is it’s something to do with the shaders, but here are the settings anyway. Any collapsed panels are left at default.

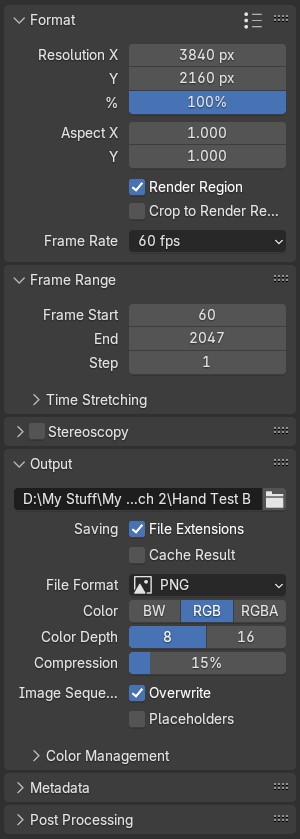
Definitely nothing out of the ordinary with the settings… It must have something to do with the shaders then.
Though I still find that issue very odd… ![]()
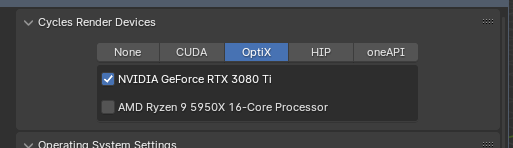
Just one more thing, how’s your configuration in Render Devices? Optix is faster for RTX cards and the CPU should be disabled if you’re not using Tiling for the render
1 Like
I have it set to CUDA, can’t remember why (might have been to do with having to wait for render kernels to load all the time while doing test renders). CPU is disabled though.
I just tested Optix with motion blur, and it brings the estimated time down to a few hours per frame, which is a lot better - but still not very practical. Then I deleted the hair, and it dropped back down to a few minutes… at which point I remembered that I had discovered this already. ![]() I even made a note of it (there are too many notes!), along with another note about trying to fix it by replacing geo nodes hair with hair particles - which I abandoned for reasons unknown, because my notes trailed off at that point.
I even made a note of it (there are too many notes!), along with another note about trying to fix it by replacing geo nodes hair with hair particles - which I abandoned for reasons unknown, because my notes trailed off at that point.
I also found a note about vector passes making geo nodes hair go haywire, which I circumvented by rendering a hairless vector pass and using that to blur the hair. So that’s another one to add to the list of oddities.
1 Like
Meanwhile, YouTube has gone and changed the video codec, further degrading the quality of the Hand Test II video and undoing all the work I put into reducing the banding. ![]() Since they retain the original uploads for re-encoding when better codecs come along, this means all I’ve done is permanently degrade the original myself by adding copious amounts of noise to it.
Since they retain the original uploads for re-encoding when better codecs come along, this means all I’ve done is permanently degrade the original myself by adding copious amounts of noise to it.
Twitter completely butchered the one I uploaded there (and I couldn’t preview it before posting, since they’ve removed that functionality ![]() ), so instead of trying to tailor videos to encoders on specific platforms and sabotaging them in the process, I now recommend uploading in the highest quality possible and let them take care of the sabotaging for you.
), so instead of trying to tailor videos to encoders on specific platforms and sabotaging them in the process, I now recommend uploading in the highest quality possible and let them take care of the sabotaging for you.
7 Likes