This project was made for a contest and as usual I wanted to overdo it trying to make something too demanding for the time available ![]()
I used Blender to create this scene and I worked on different Render Layers so that I could manage the lights of each level separately. In the end I composed everything with Blender Compositing, actually making everything with Blender without the help of other external software.
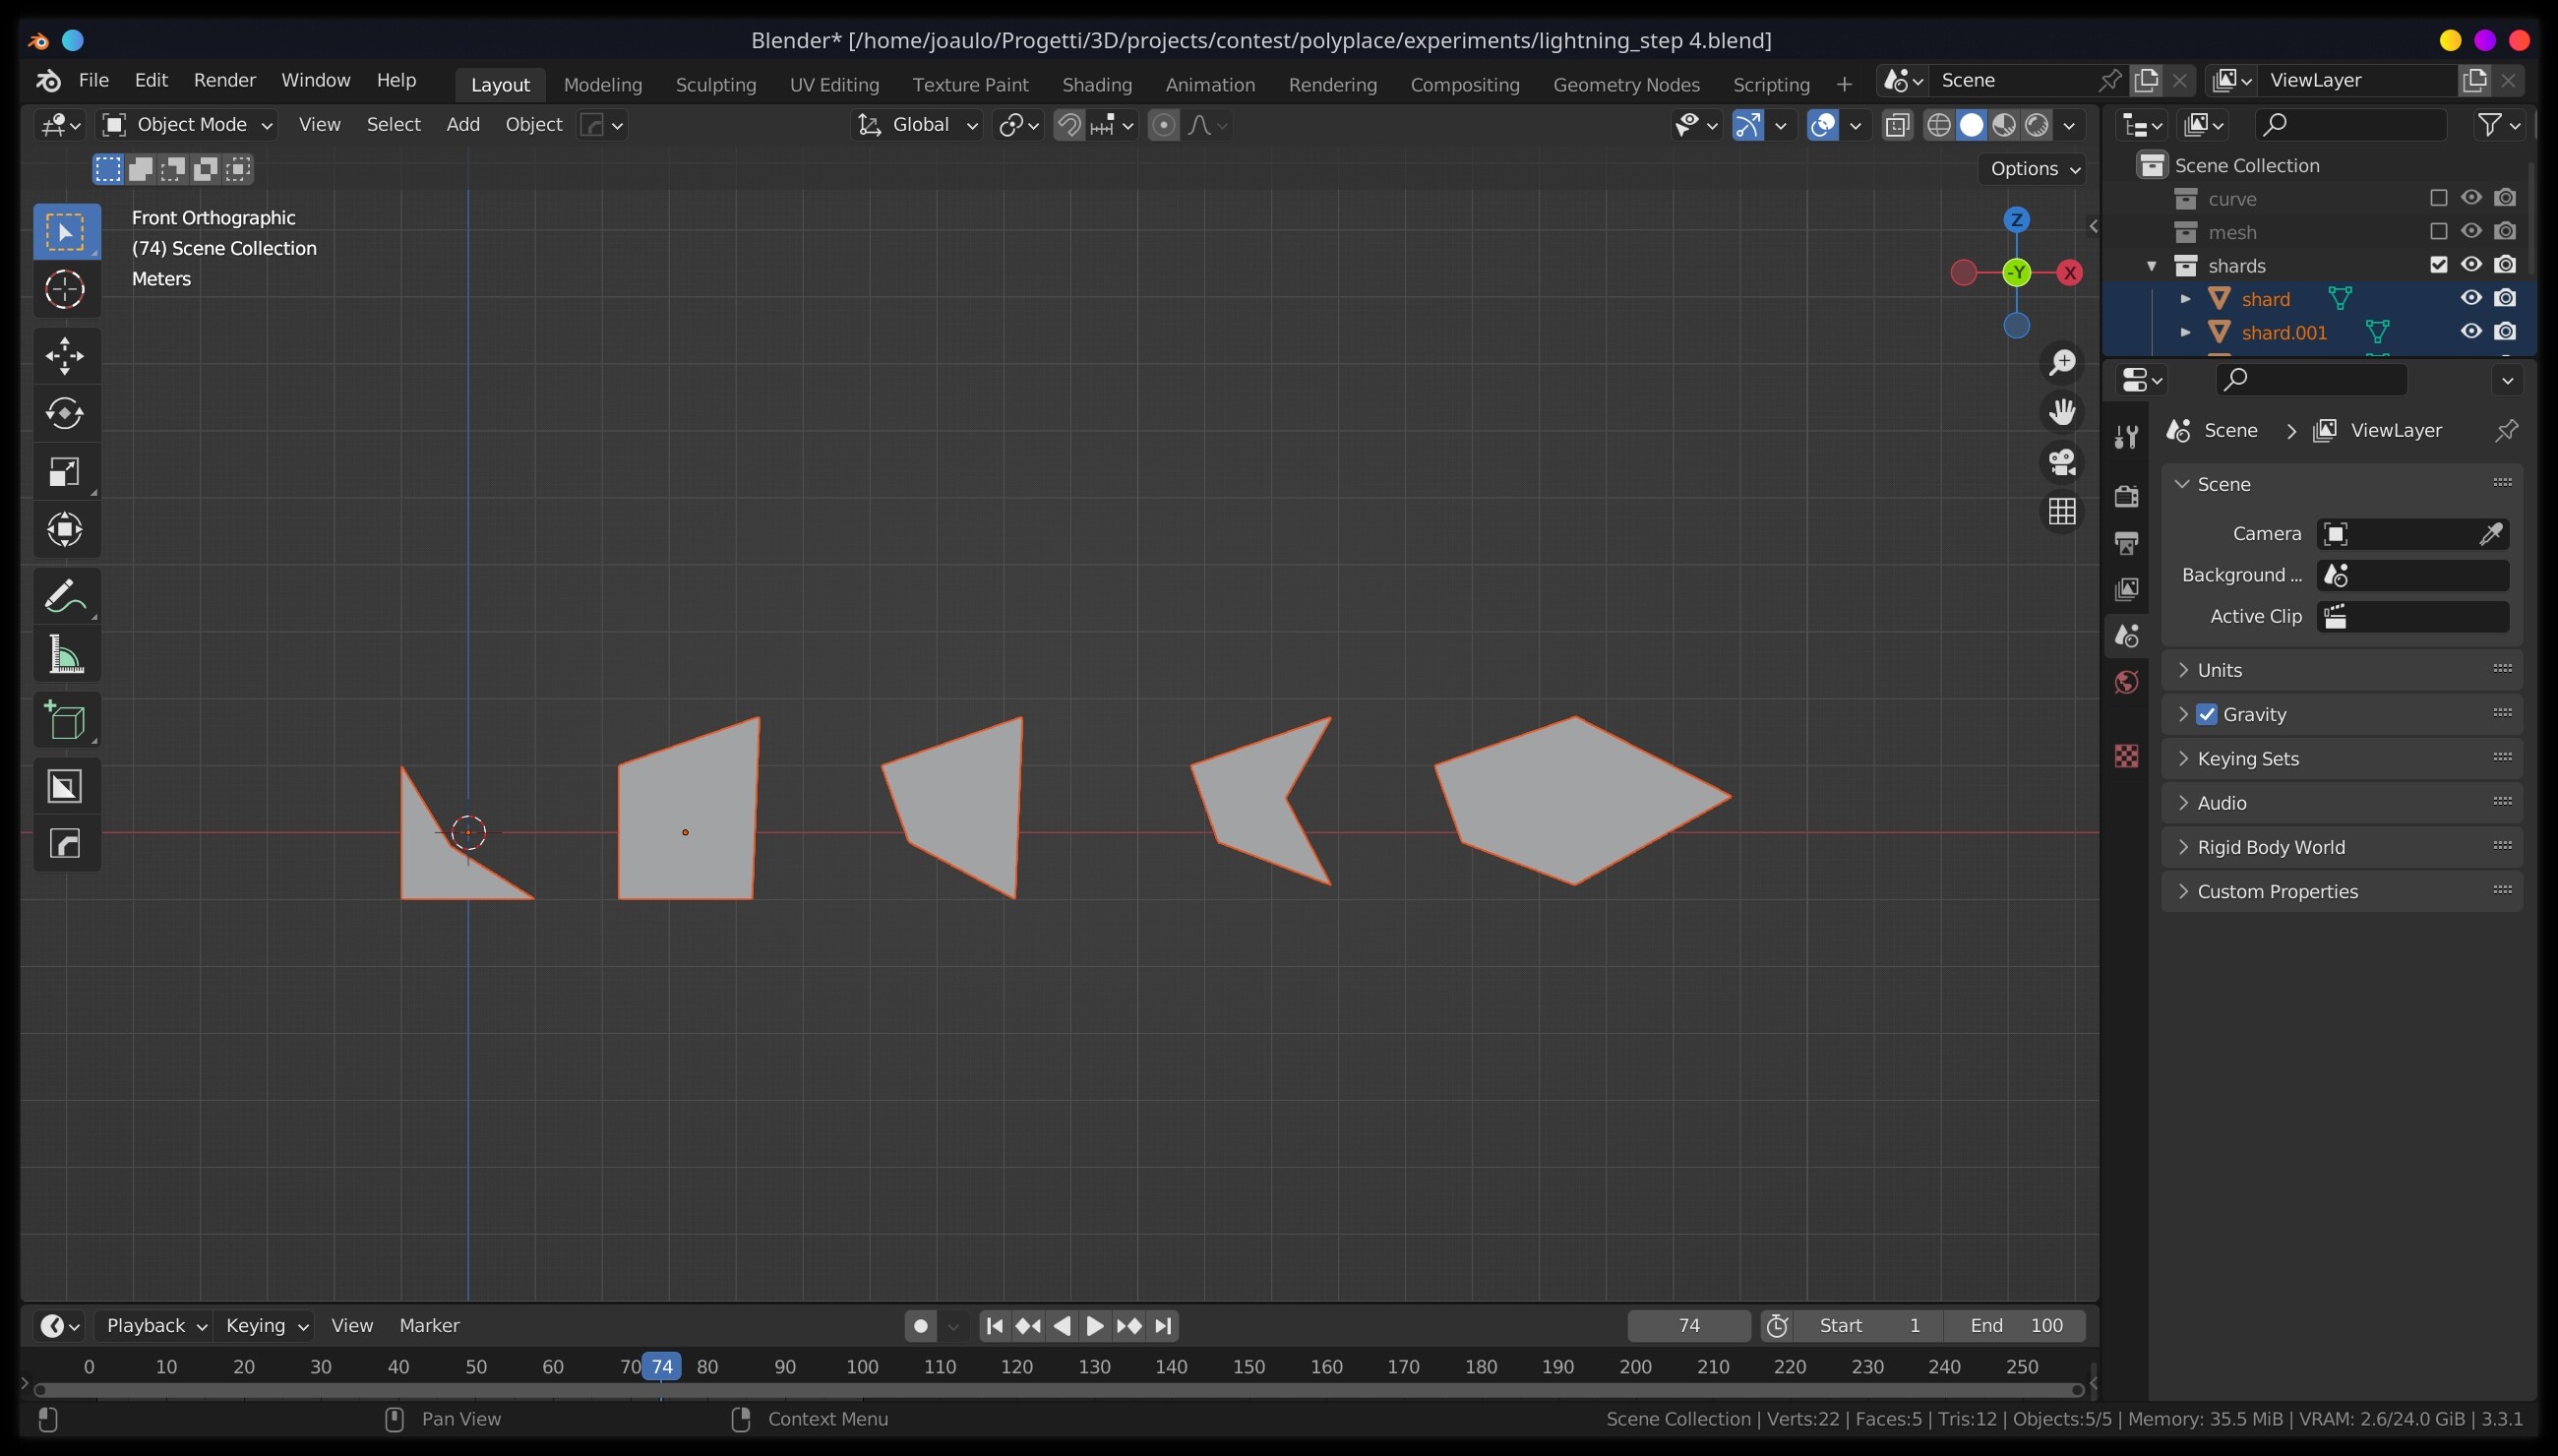
First of all I tried to make a rough composition of the scene by volumes, after the blockout I divided the groups of elements that would have required separate treatments into collections.
First Layer: the sky of Eternia
The first layer (the most distant) is made up of the sky, obtained through a plane with an Ocean Modifier applied (seen from below!) To which a thickness and a volumetric material have been given.
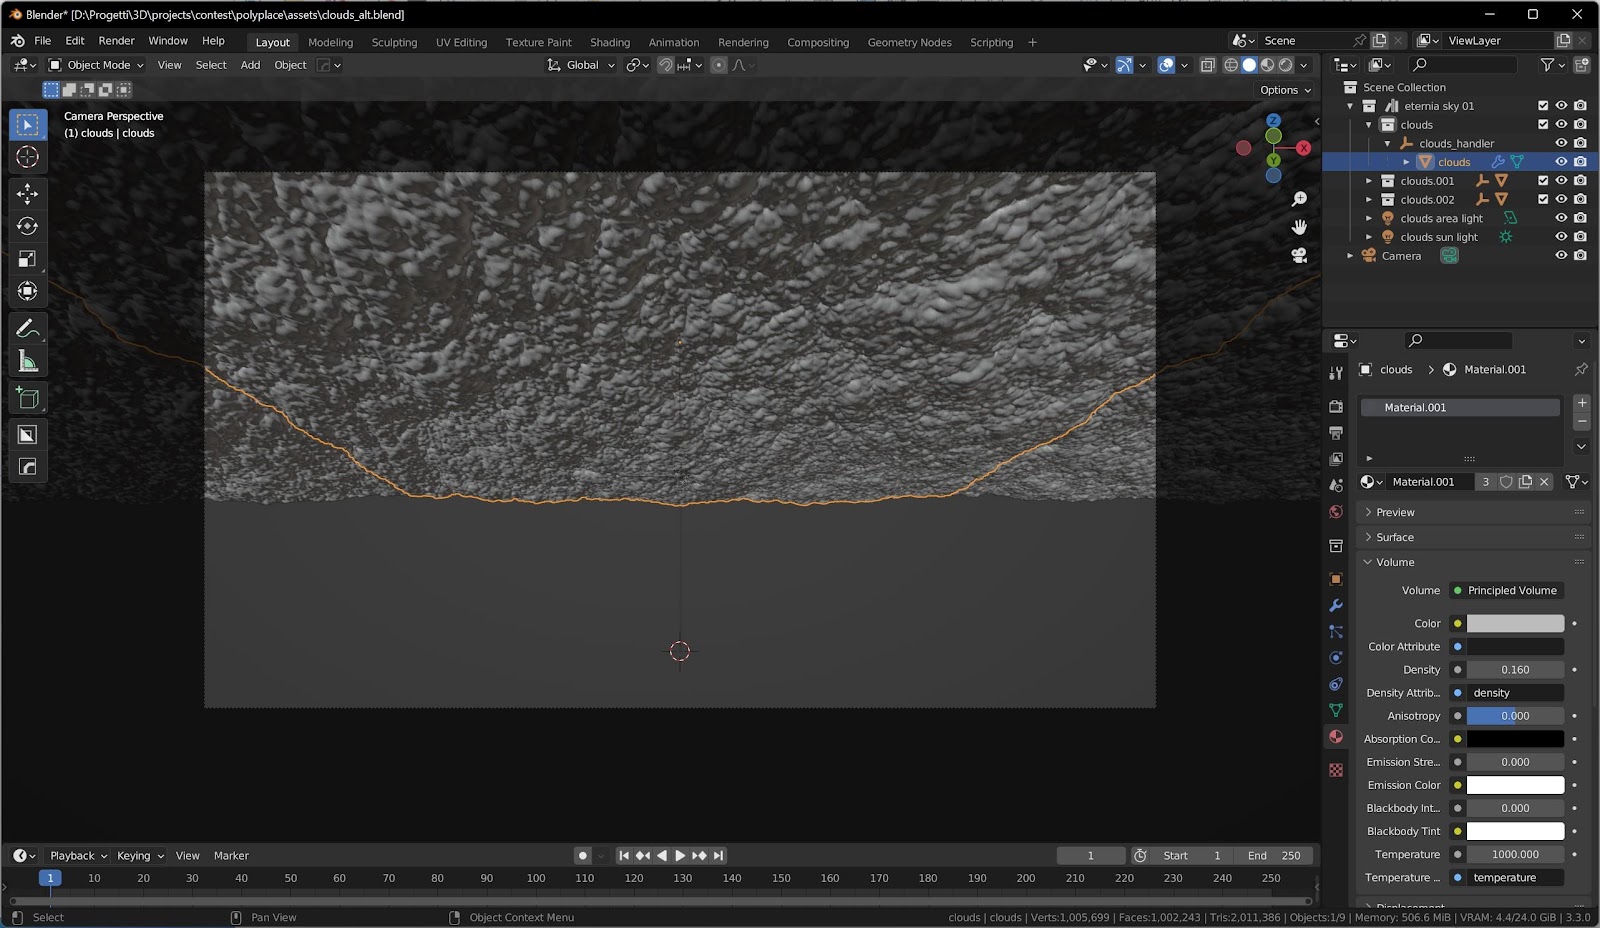
To achieve the desired color effect, I added an Area Light above the “clouds” and a Sun Light below the clouds with almost grazing rays.
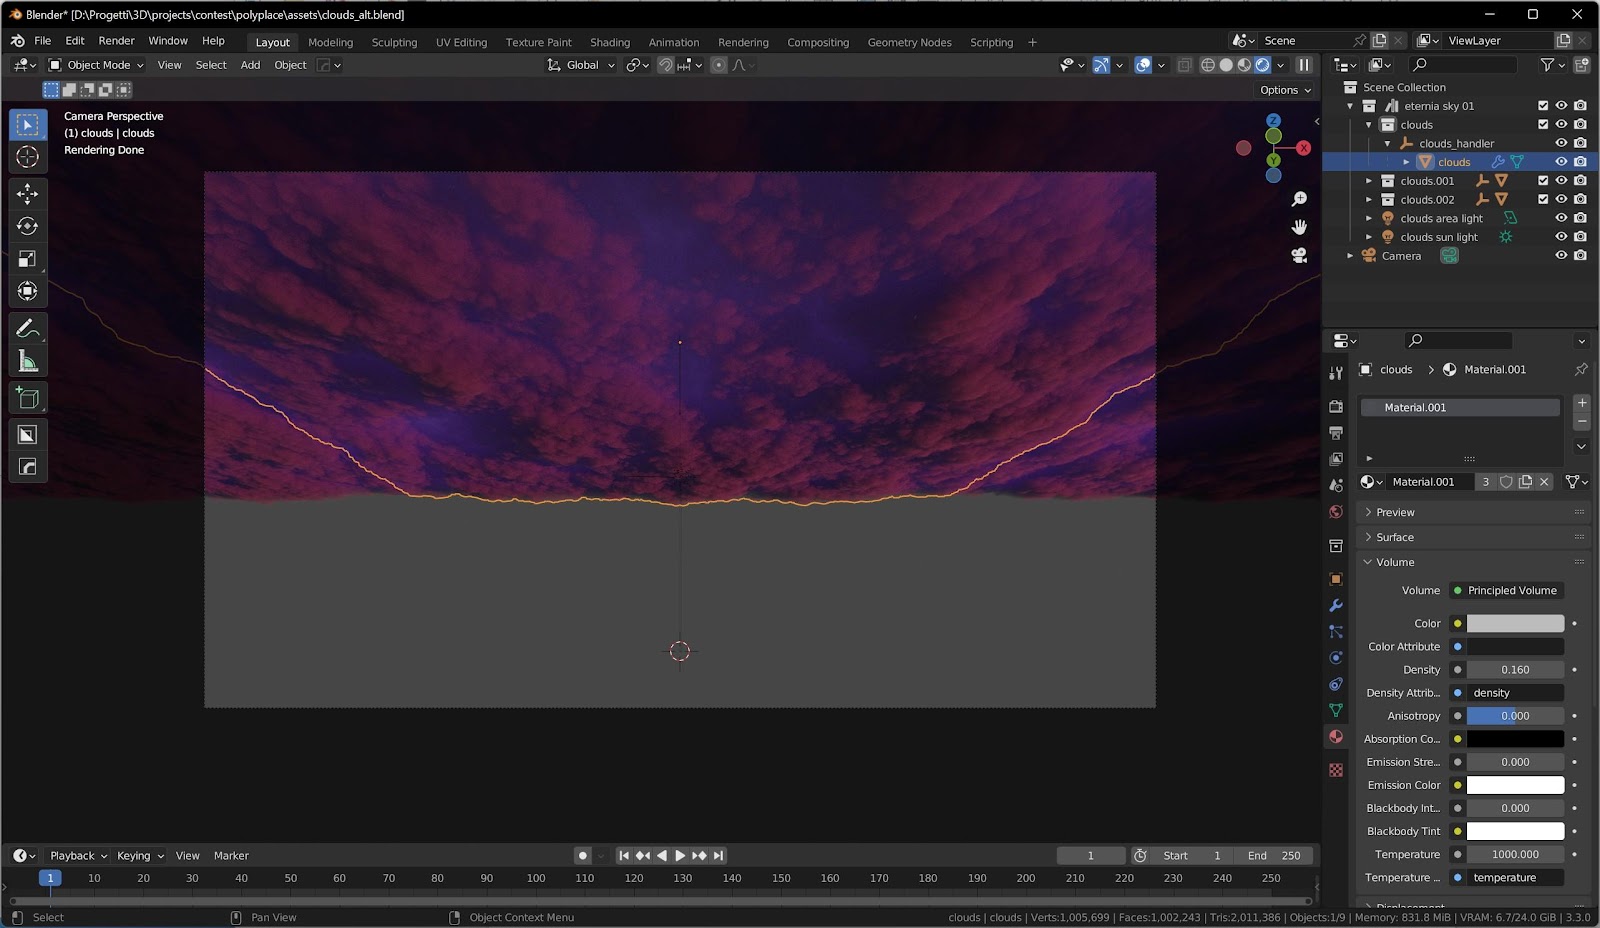
I am very satisfied with the result, I think it is a good realistic transposition of the original sky in the cartoon of the 80s.
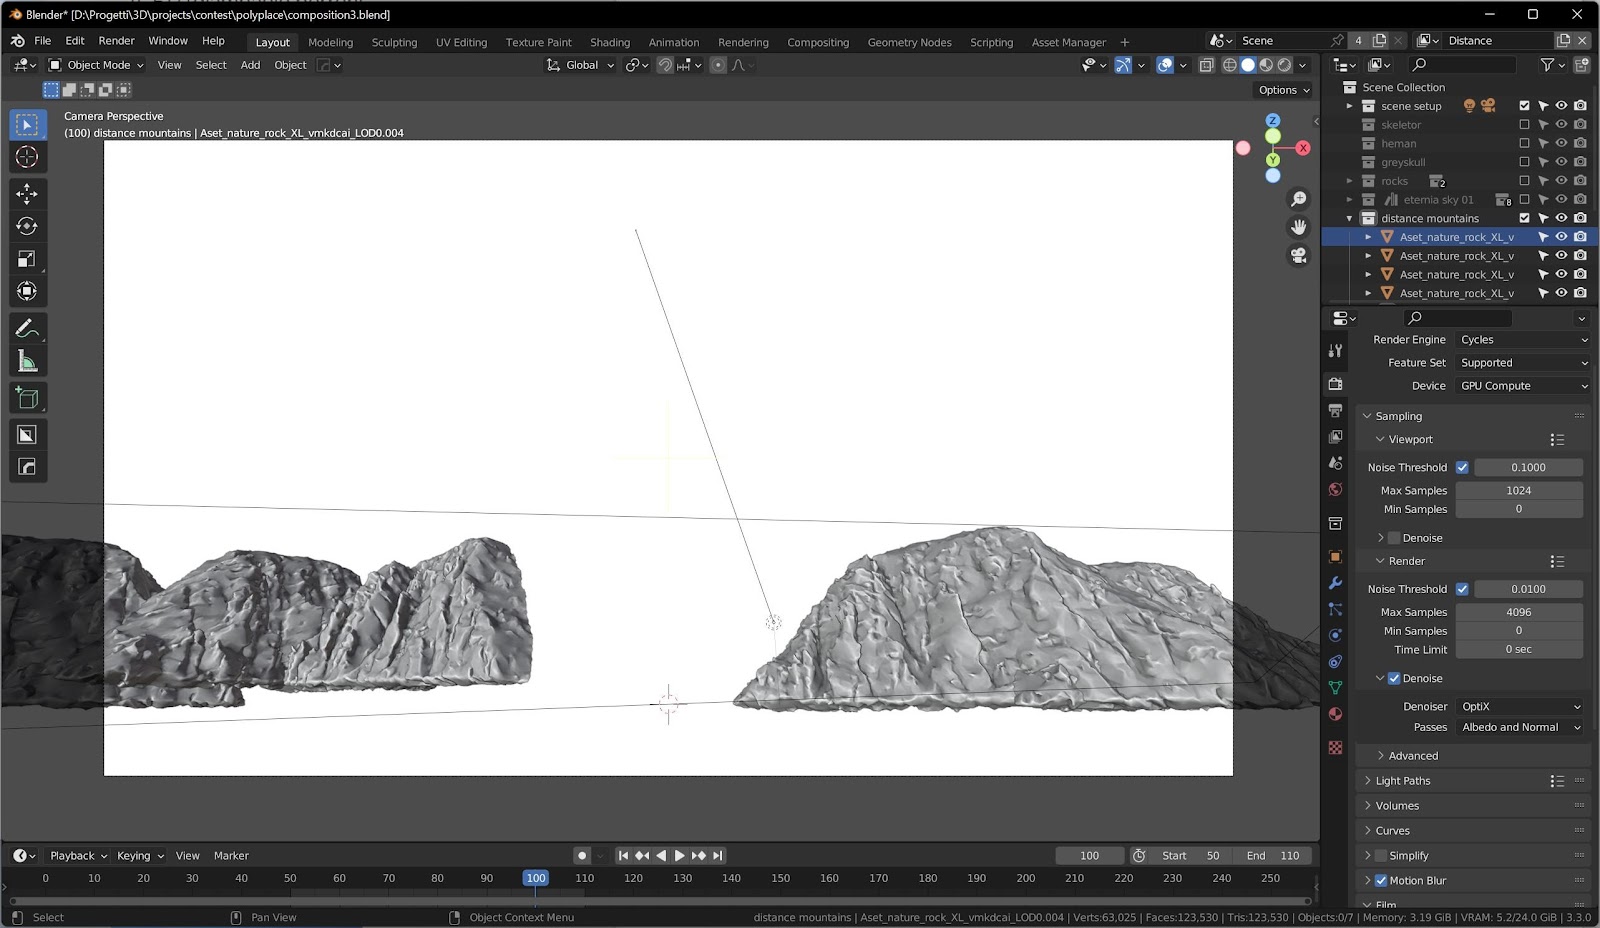
Second Layer: Mountains
Contains almost everything that is very distant.
I used Quixel Bridge assets appropriately scaled and moved away from the camera.
I had to modify the original textures by working with a Hue/Saturation/Value node to obtain a color tone more suited to the context.
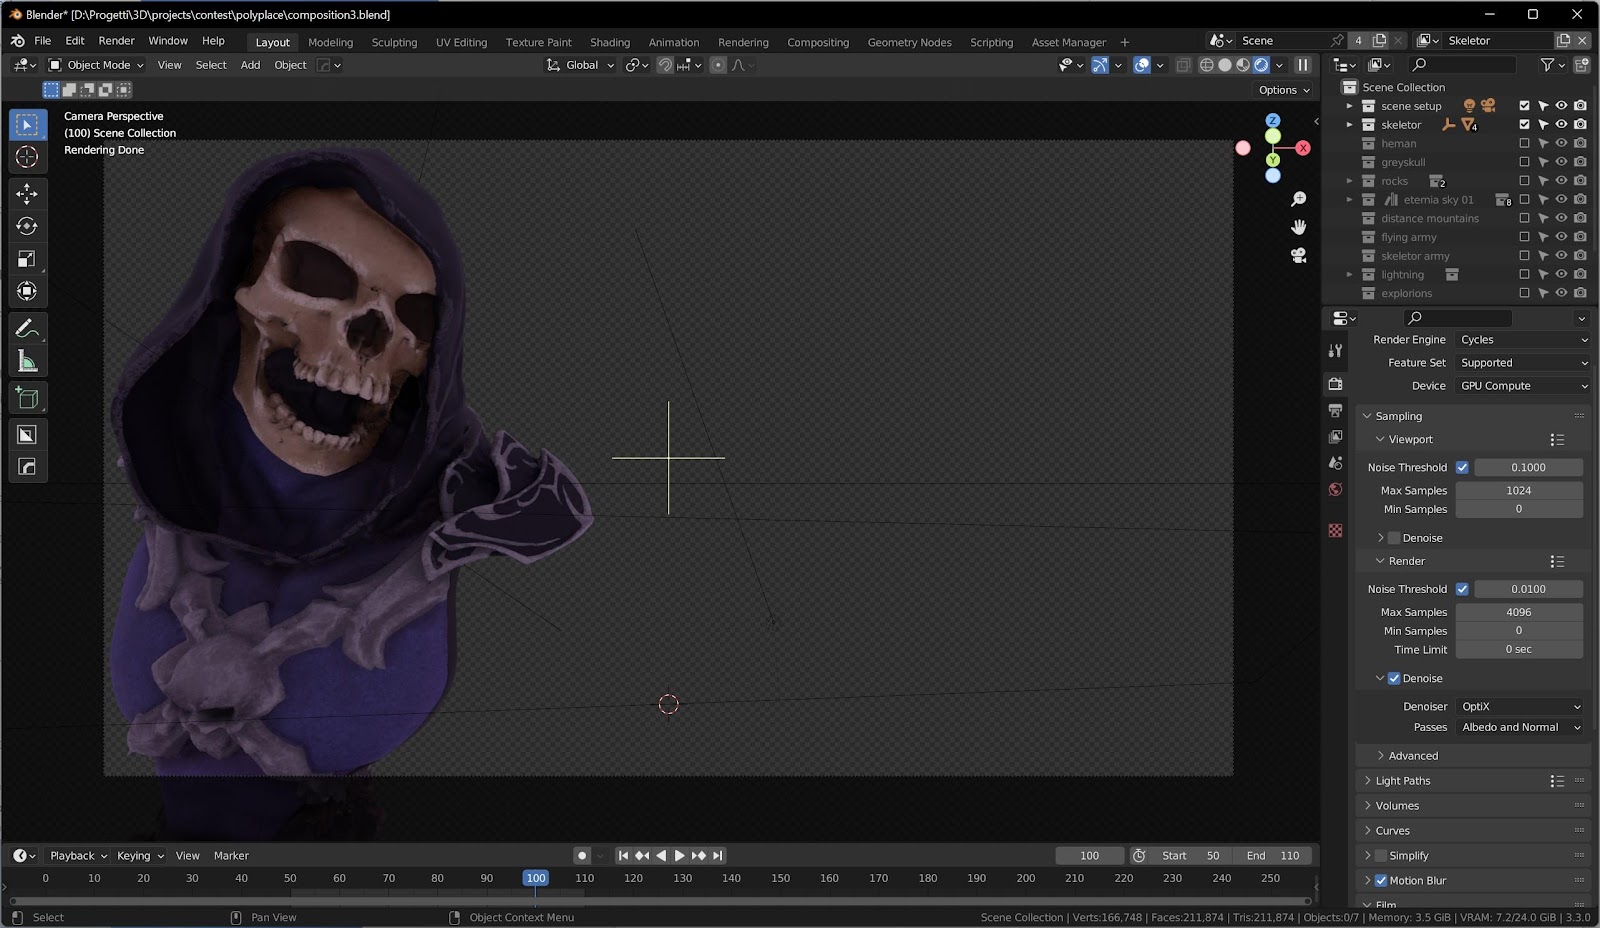
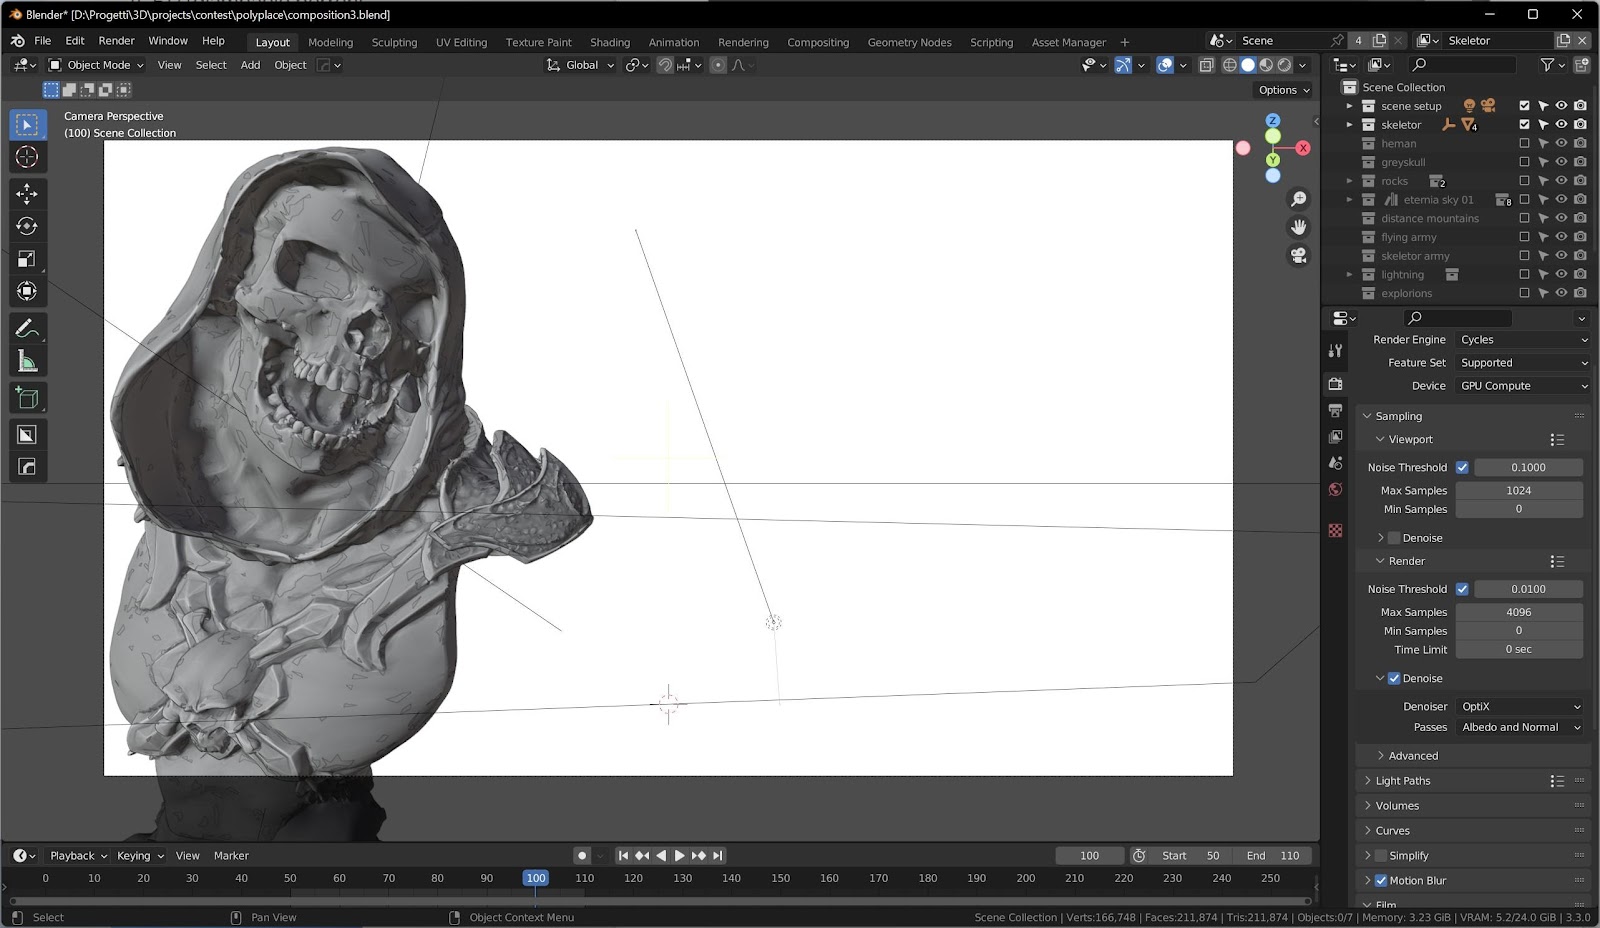
Third Layer: Skeletor
I was lucky, I found a model already made and ready to use, I just had to place it in the scene. But I felt guilty for not having time to build it from scratch, so I tried to use it as a side element in the background.
In any case it is a beautiful model, thanks and my compliments to the author, you can find it here:
https://www.cgtrader.com/free-3d-models/character/fantasy-character/masters-of-the-universe-skeletor
Fourth Layer: the delirium
Here I indulged myself. The initial idea was to do everything as hyper-realistic as possible, but I realized very quickly that I wouldn’t have the time.
After a bit of reference study, I opted for a more “plasticky” look, reminiscent of the Mattel toys of the 1980s.
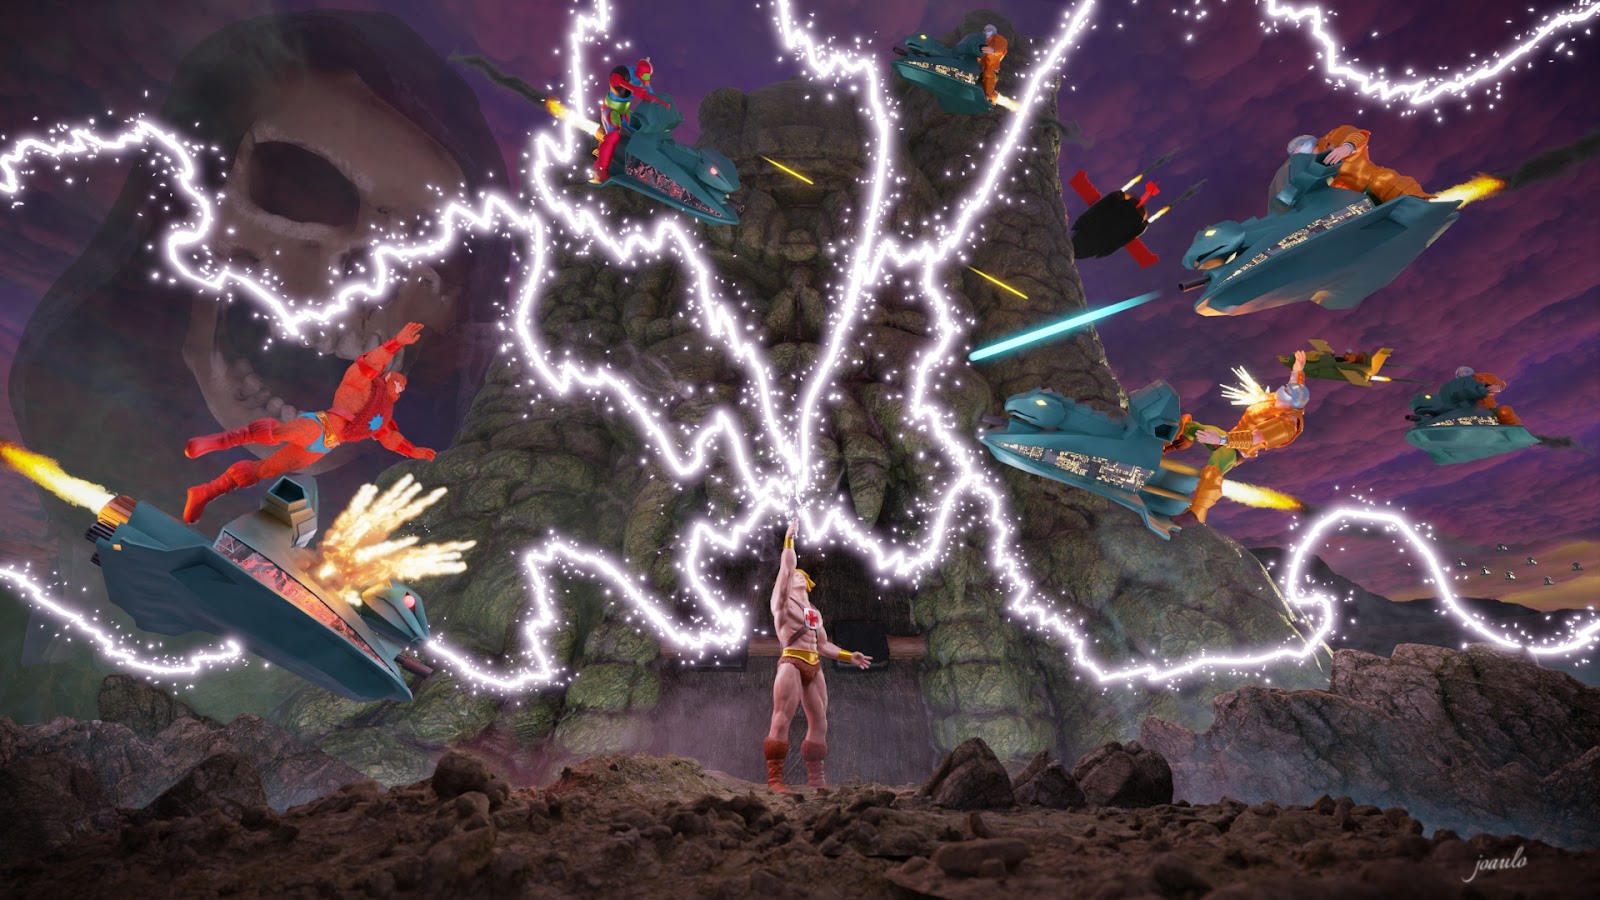
In short, the scene I had in mind was revolutionized and turned into a sort of diorama. However, I wanted to somehow convey the idea of action, movement, dynamism… I wanted to create a fight scene frozen in time.
Characters
I started working on the characters and to be able to meet the deadlines I had to start from ready-made bases, so I looked for a generic muscular human model and luckily I found a perfect one ![]() , you can see it here:
, you can see it here:
Obviously this model required various adaptations in order to be used (polygon count reduction, vertex group, materials…) and became the basis on which to build the armor and the characteristic features of the various characters.
I started with the generic soldier of the royal guard, simplifying all the details of the armor where possible and interpreting the references (a mixture of cartoon and toy) in my own way.
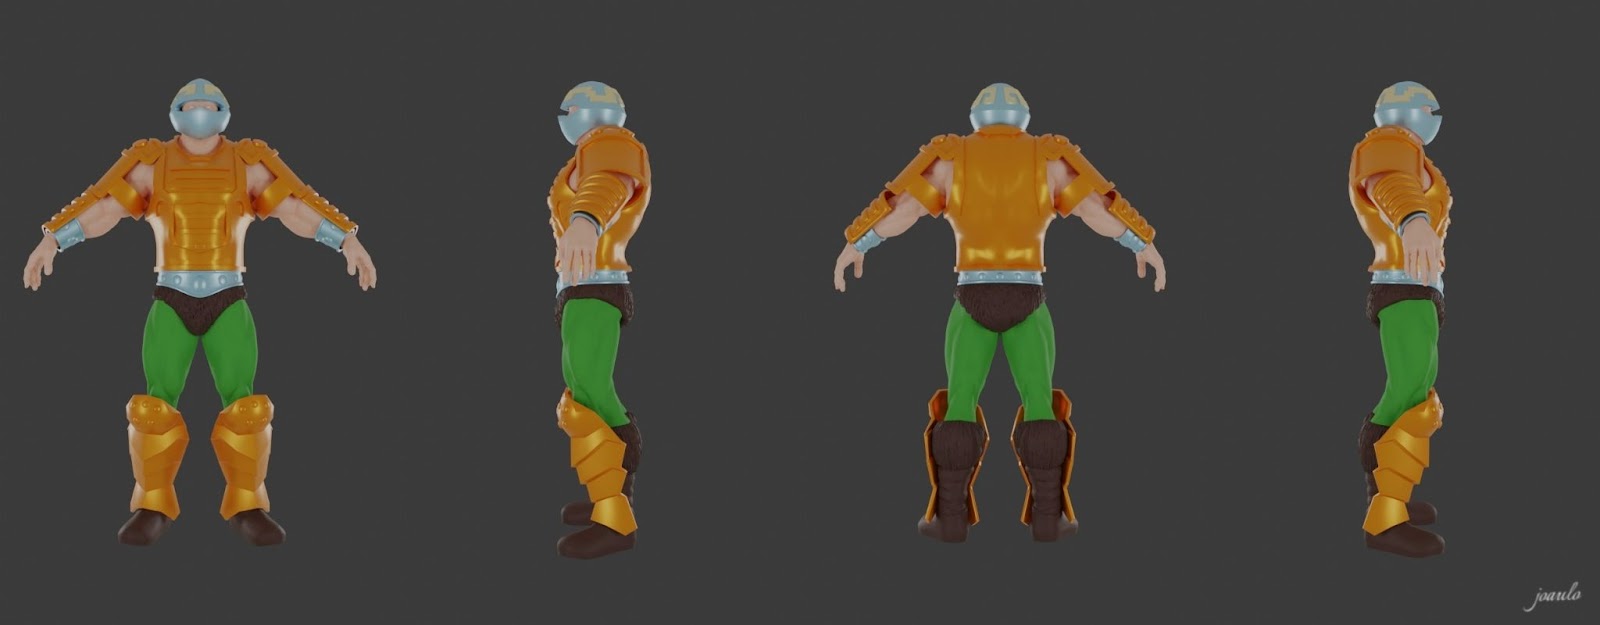
Side note: as often happened in the cartoons of that period, there was not much consistency in the drawings and the models could also be heavily modified between one episode and another… so I don’t feel guilty for having “interpreted” myself. the details in favor of short delivery times ![]()
Later I switched to Skeletor’s army with Trap-Jaw:

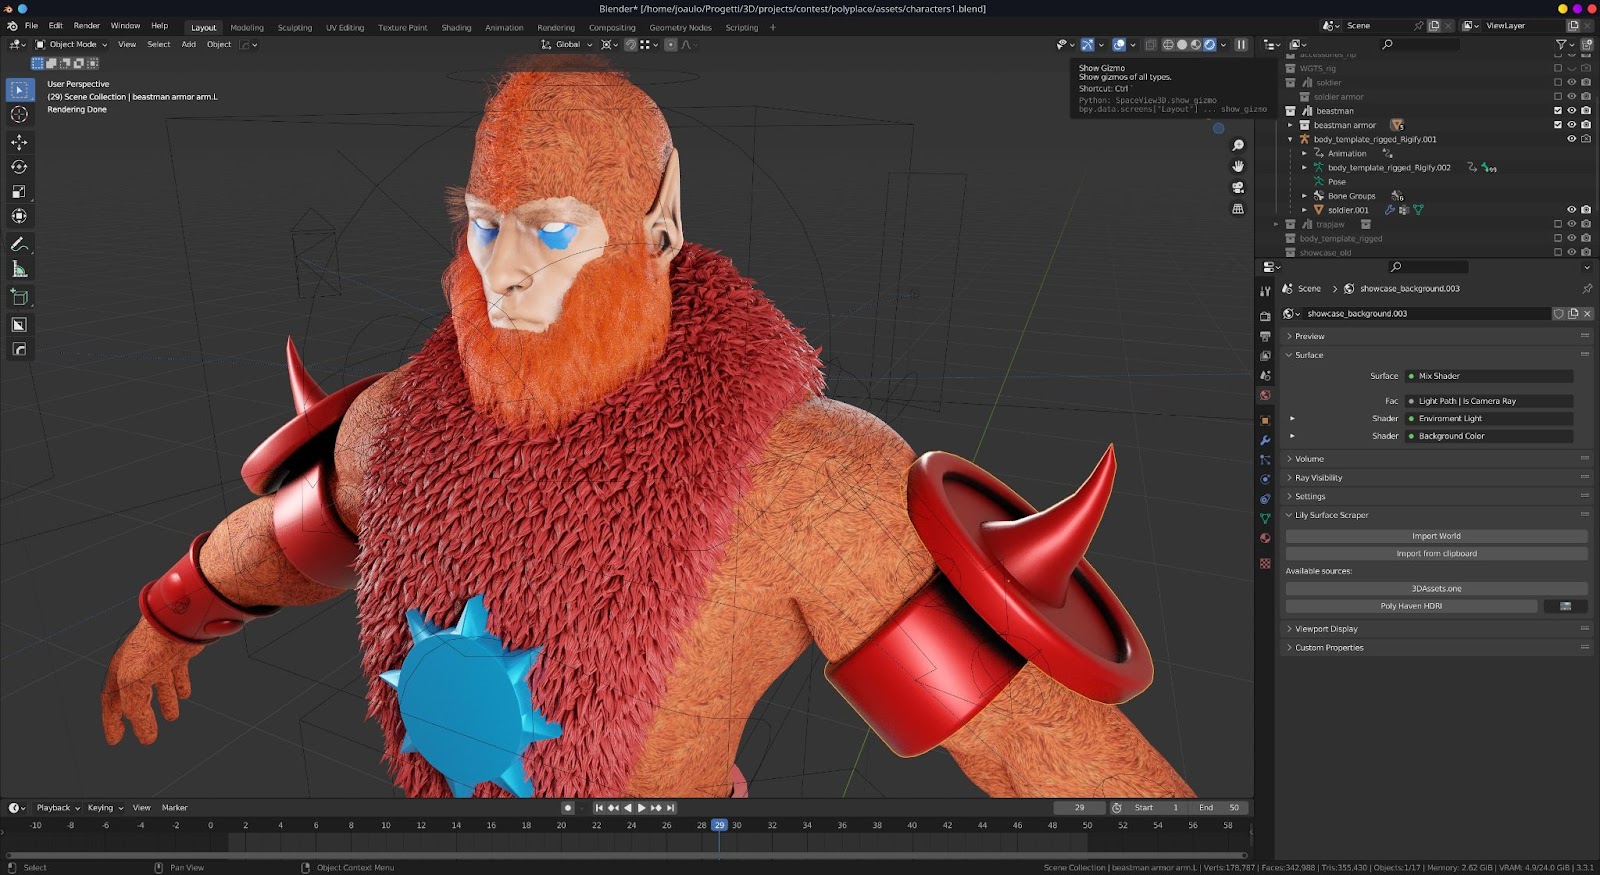
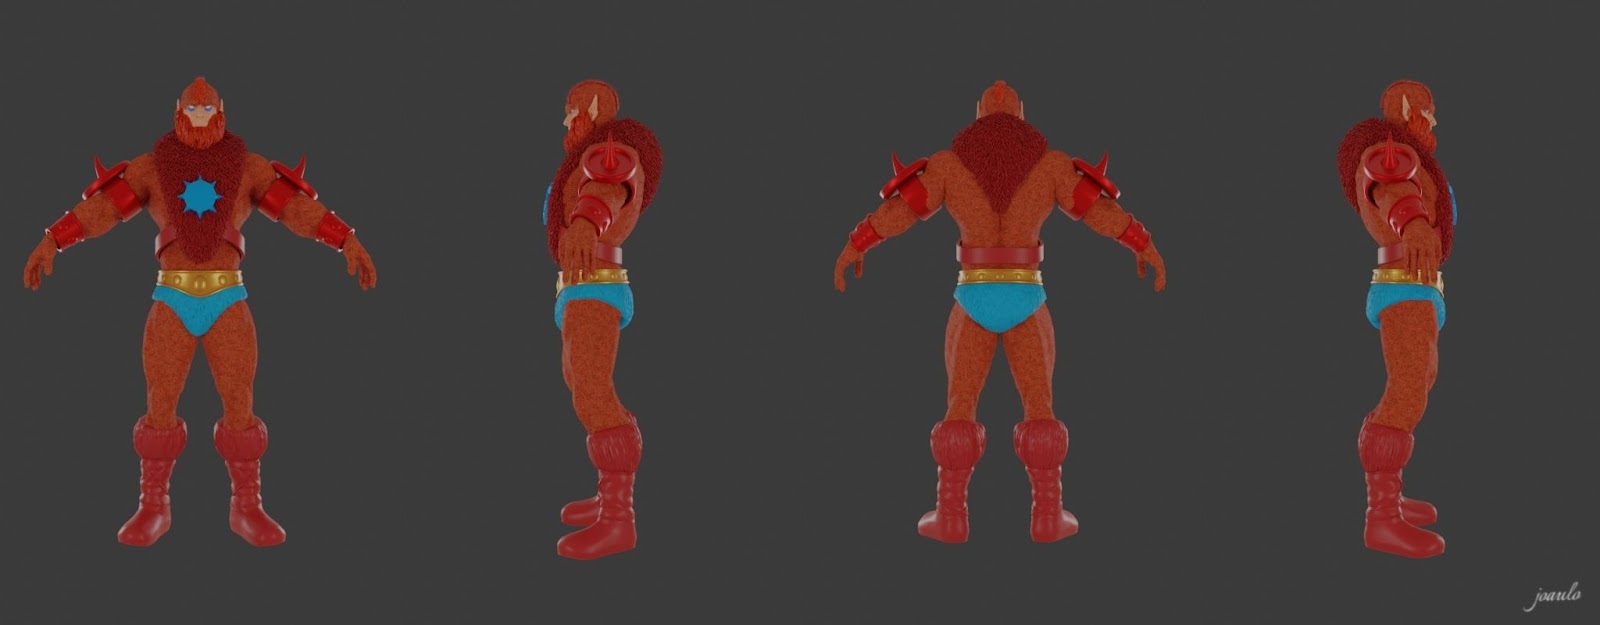
And finally Beast-Man on which I enjoyed a lot (and I lost a lot of time) playing with the various types of hair/fur ![]()
I would have liked to add Mer-Man and Evil-Lyn too… and also some prominent characters for the good guys, surely Battle-Cat, I would have liked to have Stratos darted in the sky but… it will be for next time.
Once I made the first basic character I used AccuRig (free software you can find here: https://actorcore.reallusion.com/auto-rig) to generate the bones/armor to pose the characters. Initially I tried to do it directly in Blender but I had problems, probably because of the unpolished mesh.
Once I re-imported the bones/armor model into Blender, I generated the Rigify controls and was able to pose all the characters.
Fortunately(or unfortunately) I found a ready-made He-Man model here:
and even if it’s not exactly what I wanted (more muscular, dimple on the chin…) given the tight deadline I am more than grateful to the author of the model for having kindly made it available. The model was without materials and with a stratospheric polygon count so it required some manpower to be used and integrated into the scene.

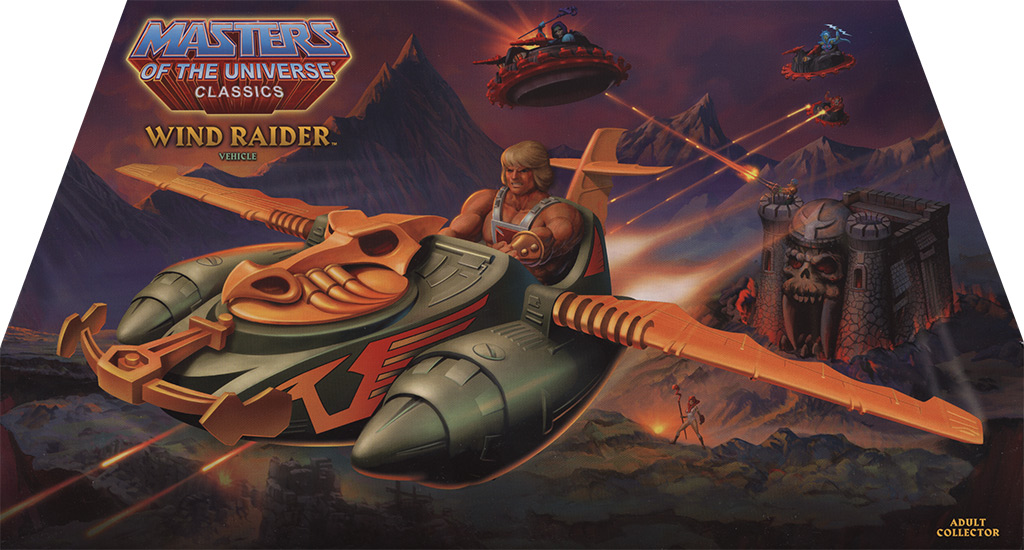
The vehicles
For the vehicles, I relied largely on the references from the cartoon, partly on the graphics of the toy packaging, and it took me a bit of my own to blend it all together.
I have created two vehicles per faction, the first is the Wind Raider and luckily in the 2 versions it differs only in color.
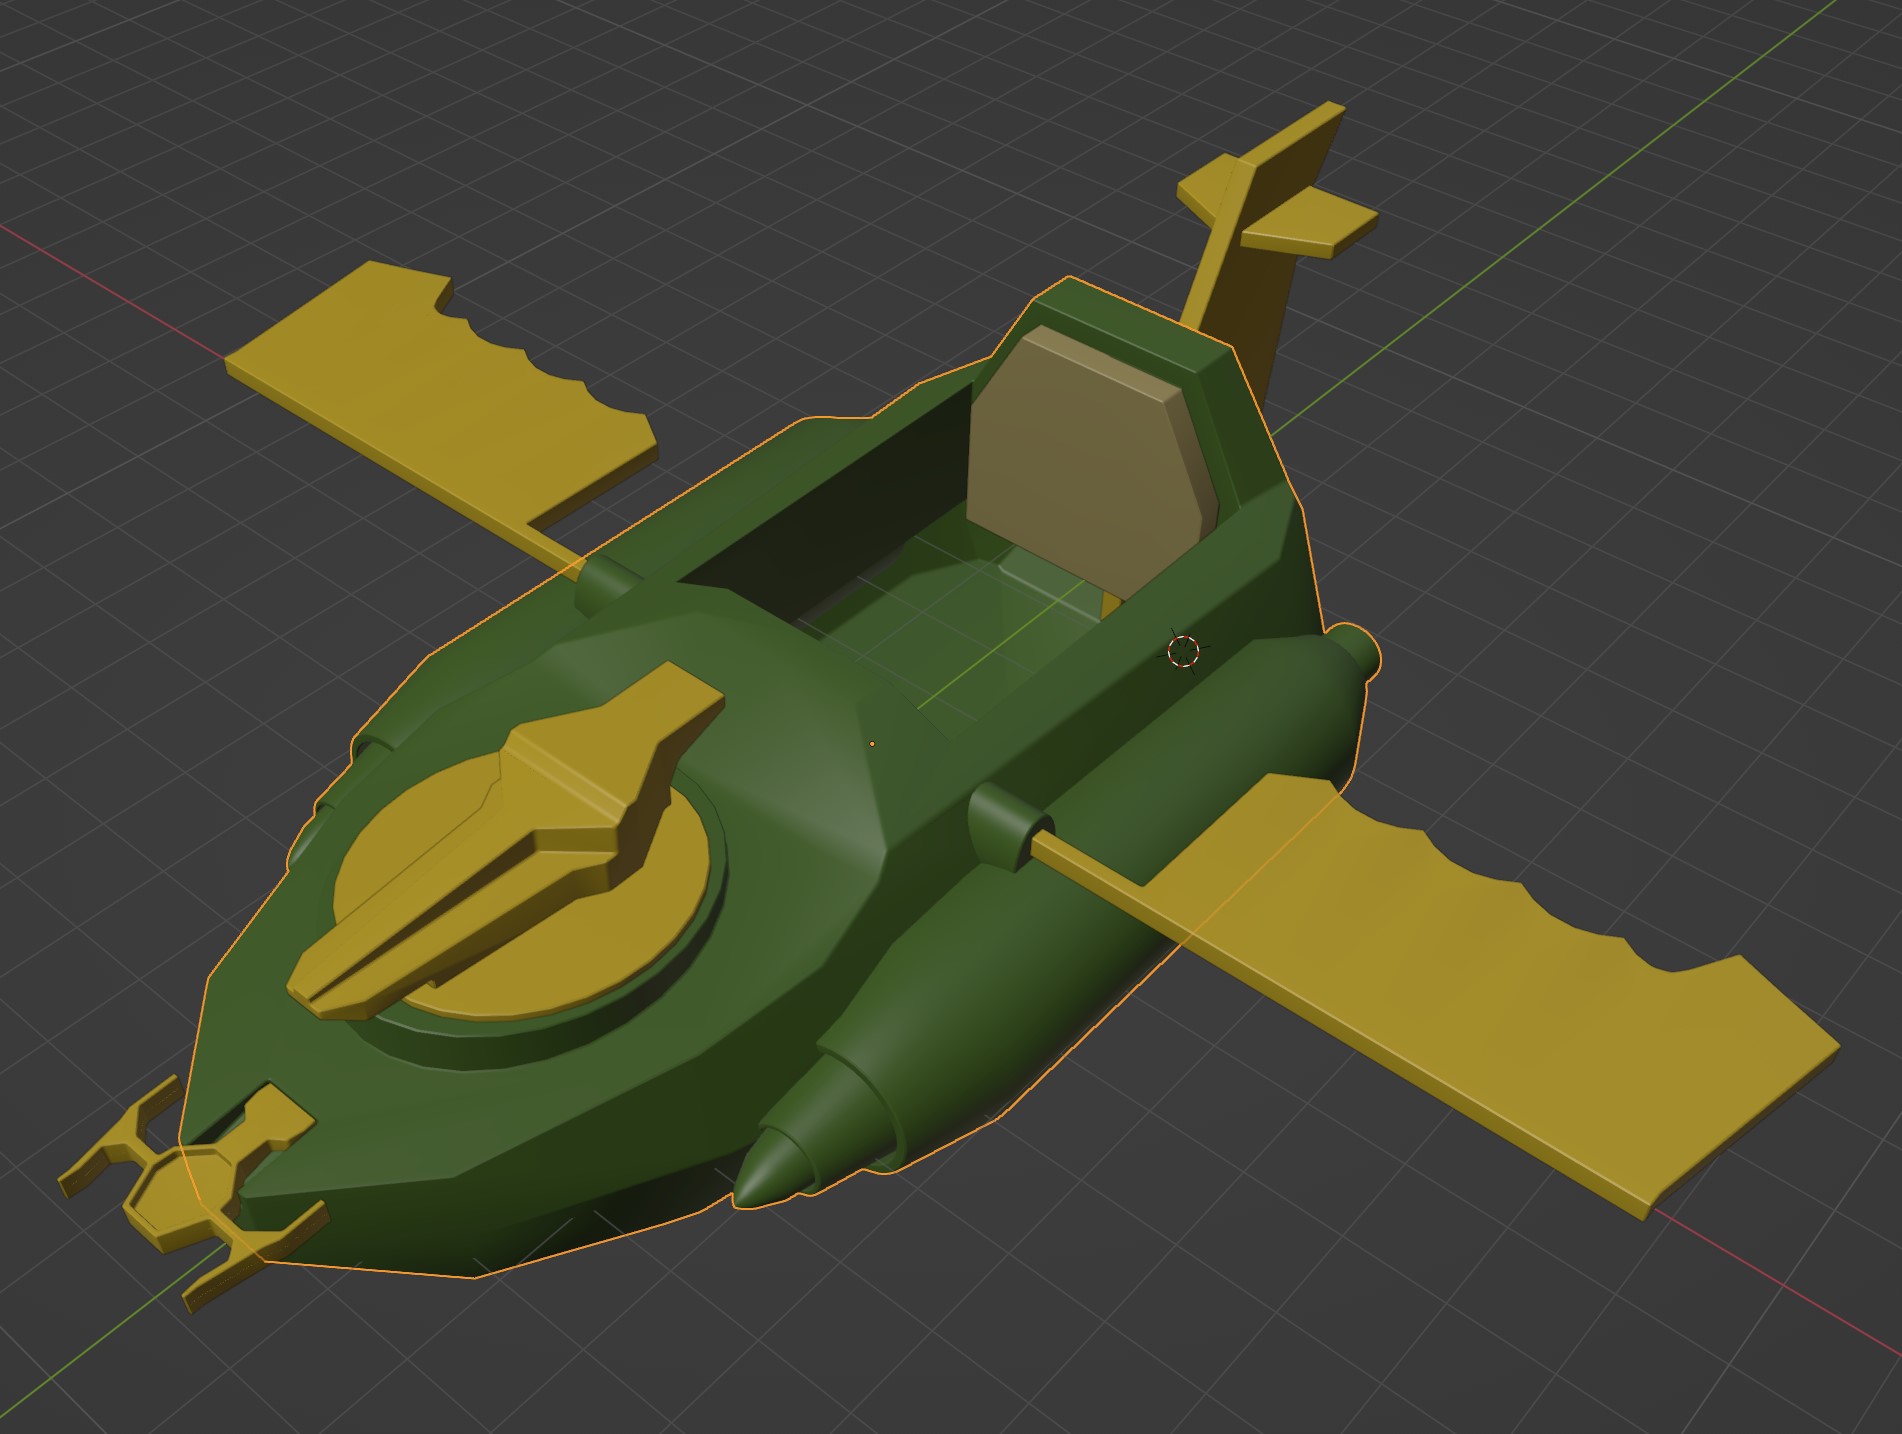
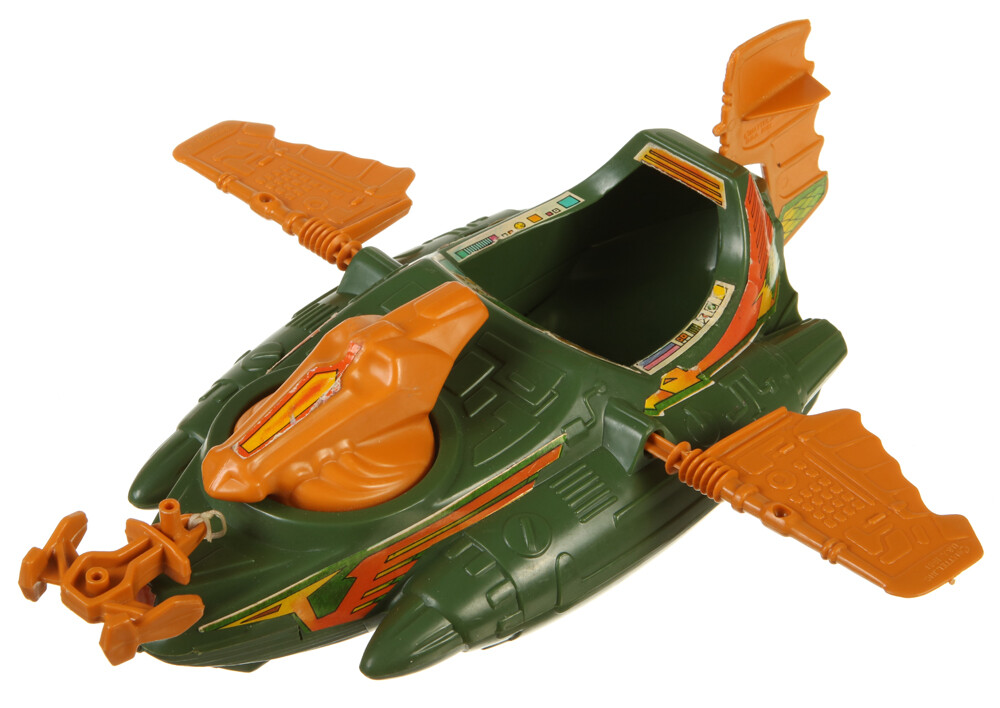
The second vehicle was the Battleram, specifically the flying module. In this case, only the animal head that protrudes from the front of the hull varies between the two factions and I have added a minimum of panels and lights.


Grayskull Castle
Grayskull Castle is a model downloaded from here:
presumably meant for printing, I created the shader from scratch by mixing 3 different types of distributed rock based on the curvature of the surface and mixed with a little bit of noise to reduce the tiling effect.
I couldn’t find the right composition between camera focal length-Heman distance-castle distance to obtain the same “bottom-up” view effect as the references, so I deformed the castle with a Lattice to adapt it to the needs of the scene ![]()

VFX
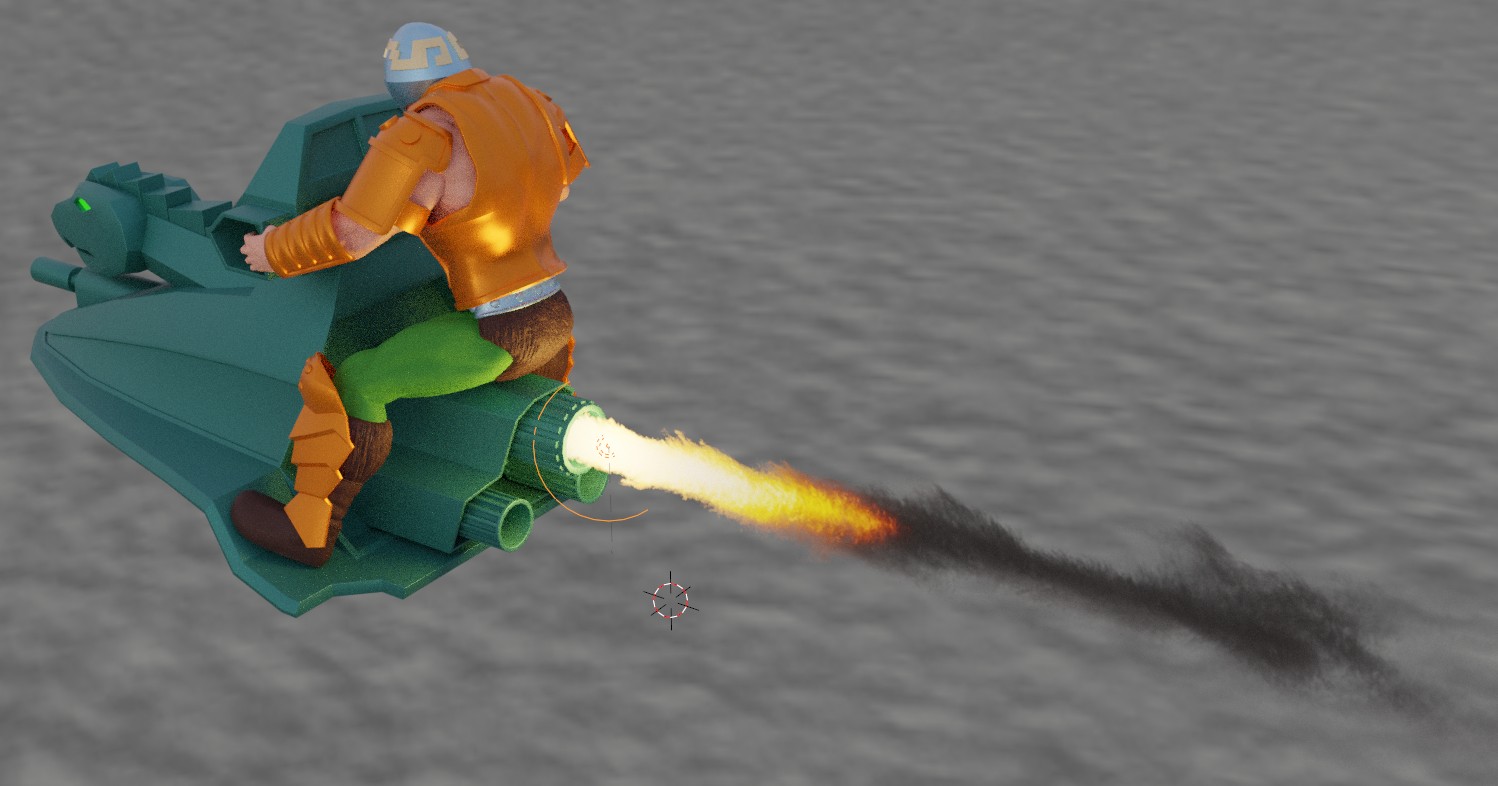
For the propulsion of the vehicles, based mainly on the graphics of the toys, I wanted to make a flaming exhaust with a trail of smoke and to make it I used the Smoke Simulation in Blender.
To obtain the desired shape, color and detail I had to go a little “further” and the result, however satisfactory, was also too heavy to be imported into the scene, so I rendered several frames from different points of view to be imported later in the scene. scene as pictures. I was afraid that this solution would be too obvious but I was wrong and the images integrated well into the scene (I tried to orient each image as best I could towards the camera). However, I could not use the light emitted by the flames to influence the scene too much because by raising the emission value too much I would have highlighted the semi-transparent outline of the smoke at the expense of integration into the scene. So I added Point Lights in correspondence with the flames to recreate their glow on nearby elements.
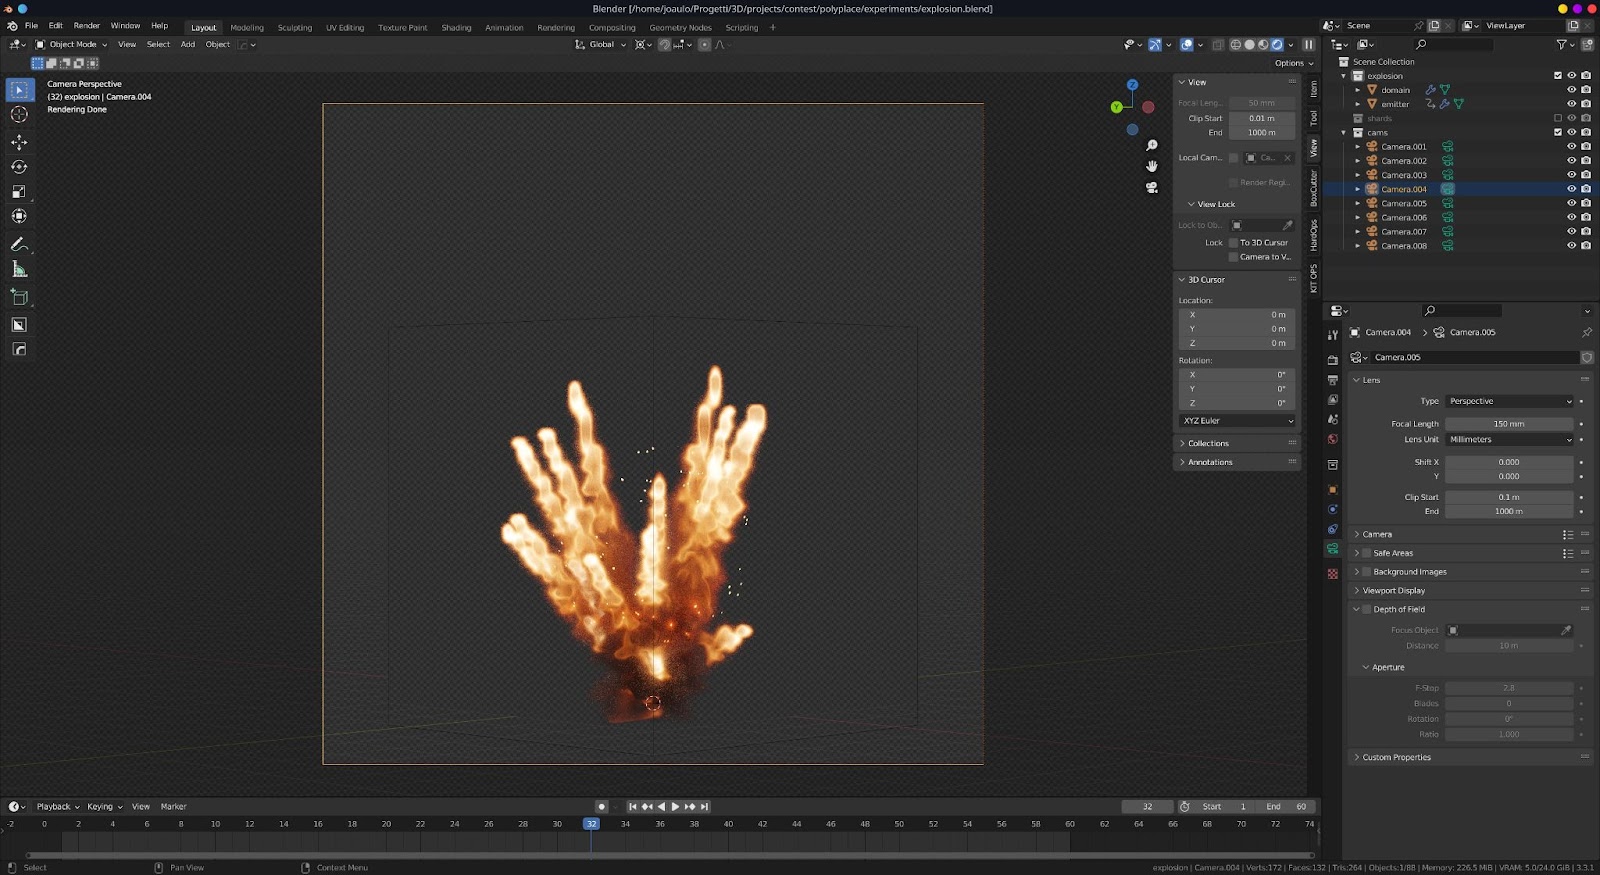
Same goes for the explosions, made in Blender through Smoke Simulation, this time with a compatible weight for integration into the scene but given the success of the first approach with the exhausts, I preferred to use the same technique, so I generated several frames from different angles then imported into the scene as planes.
In one of the first versions there was Motion Blur on moving vehicles but I had the impression that it ruined the “diorama effect” even if undoubtedly the dynamism would have gained. Eventually I took it off from the vehicles and left it for the lasers.
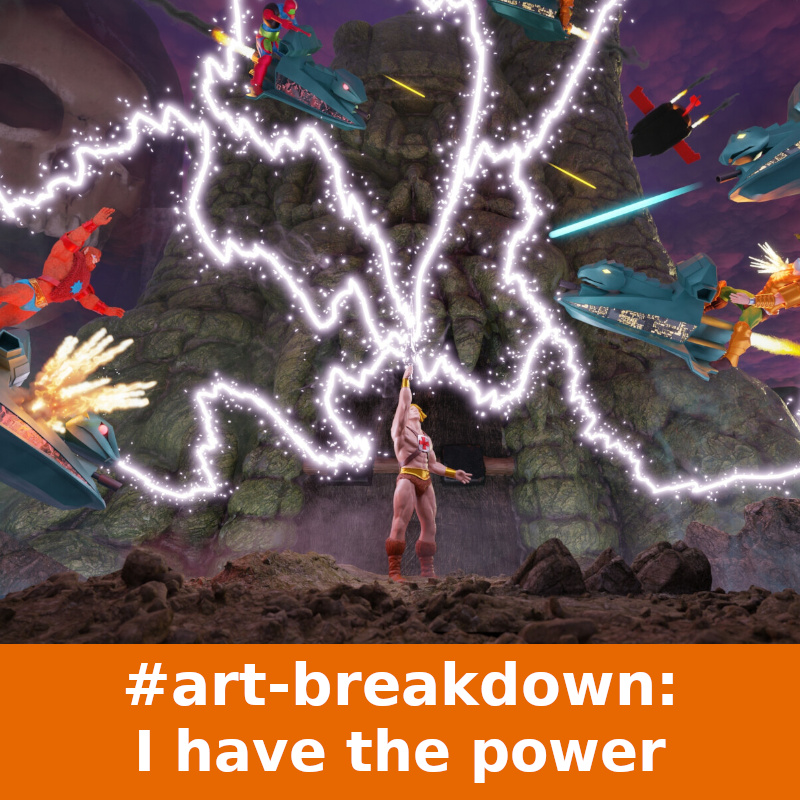
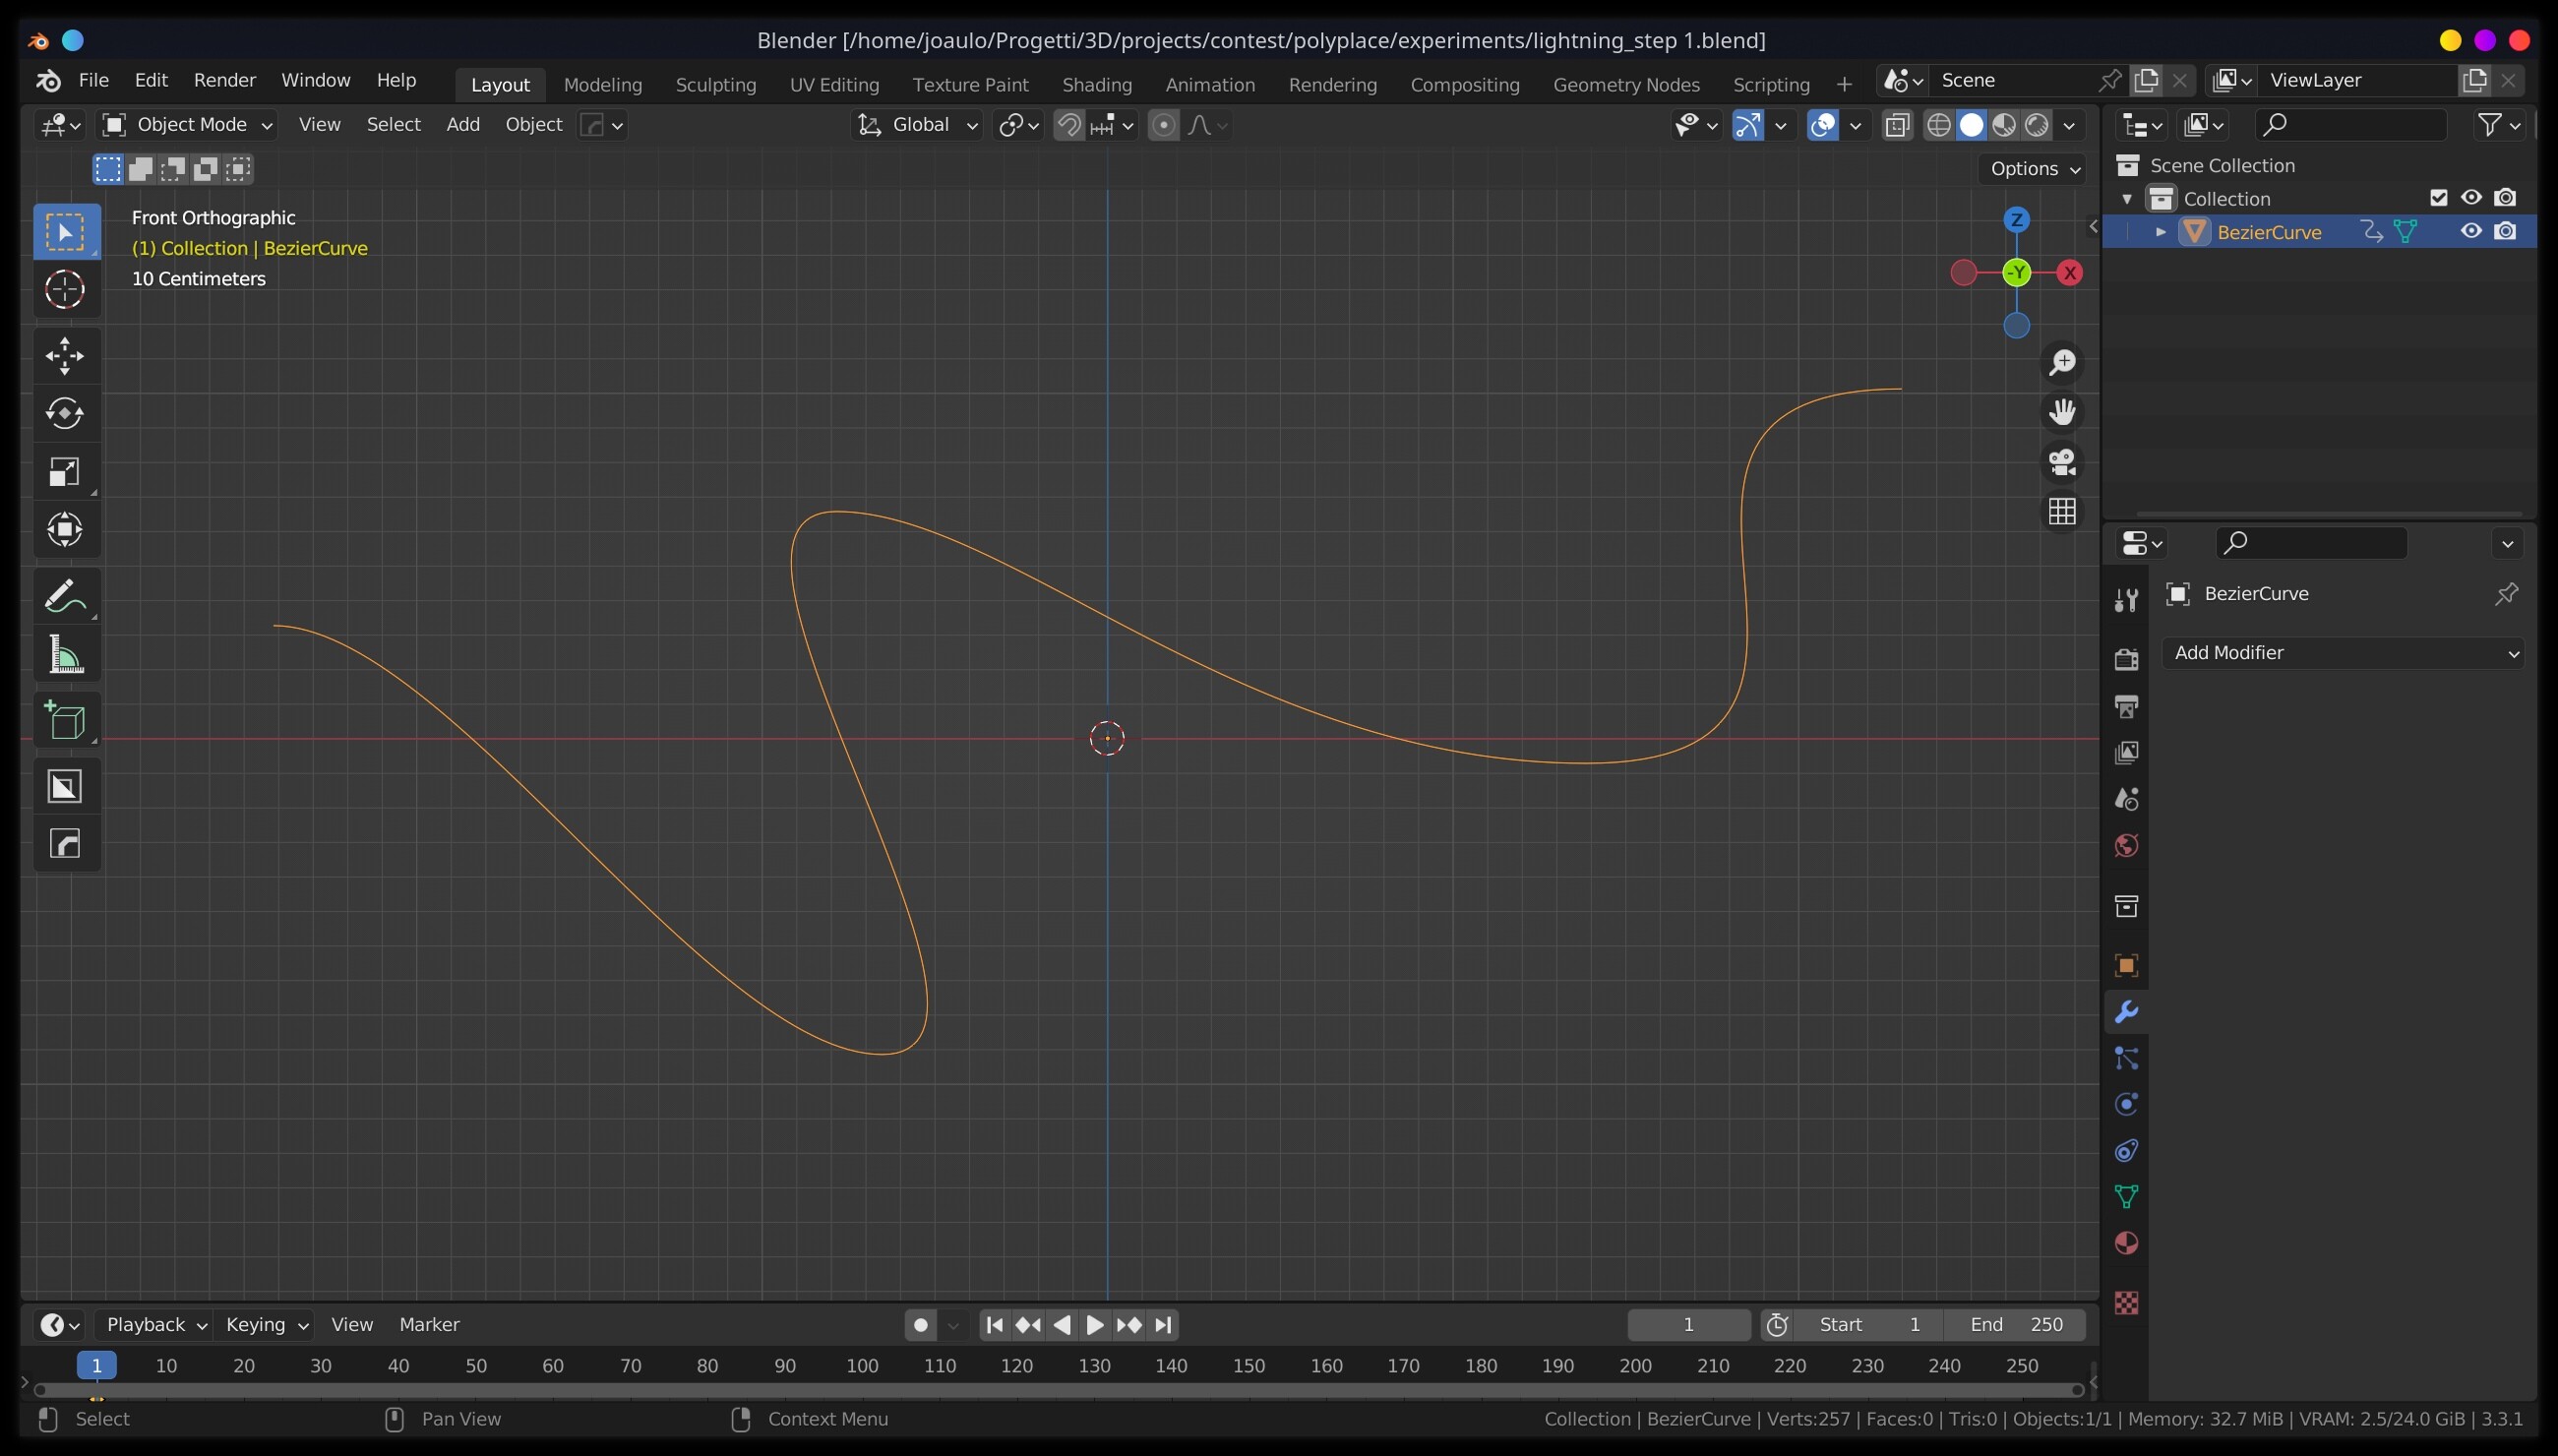
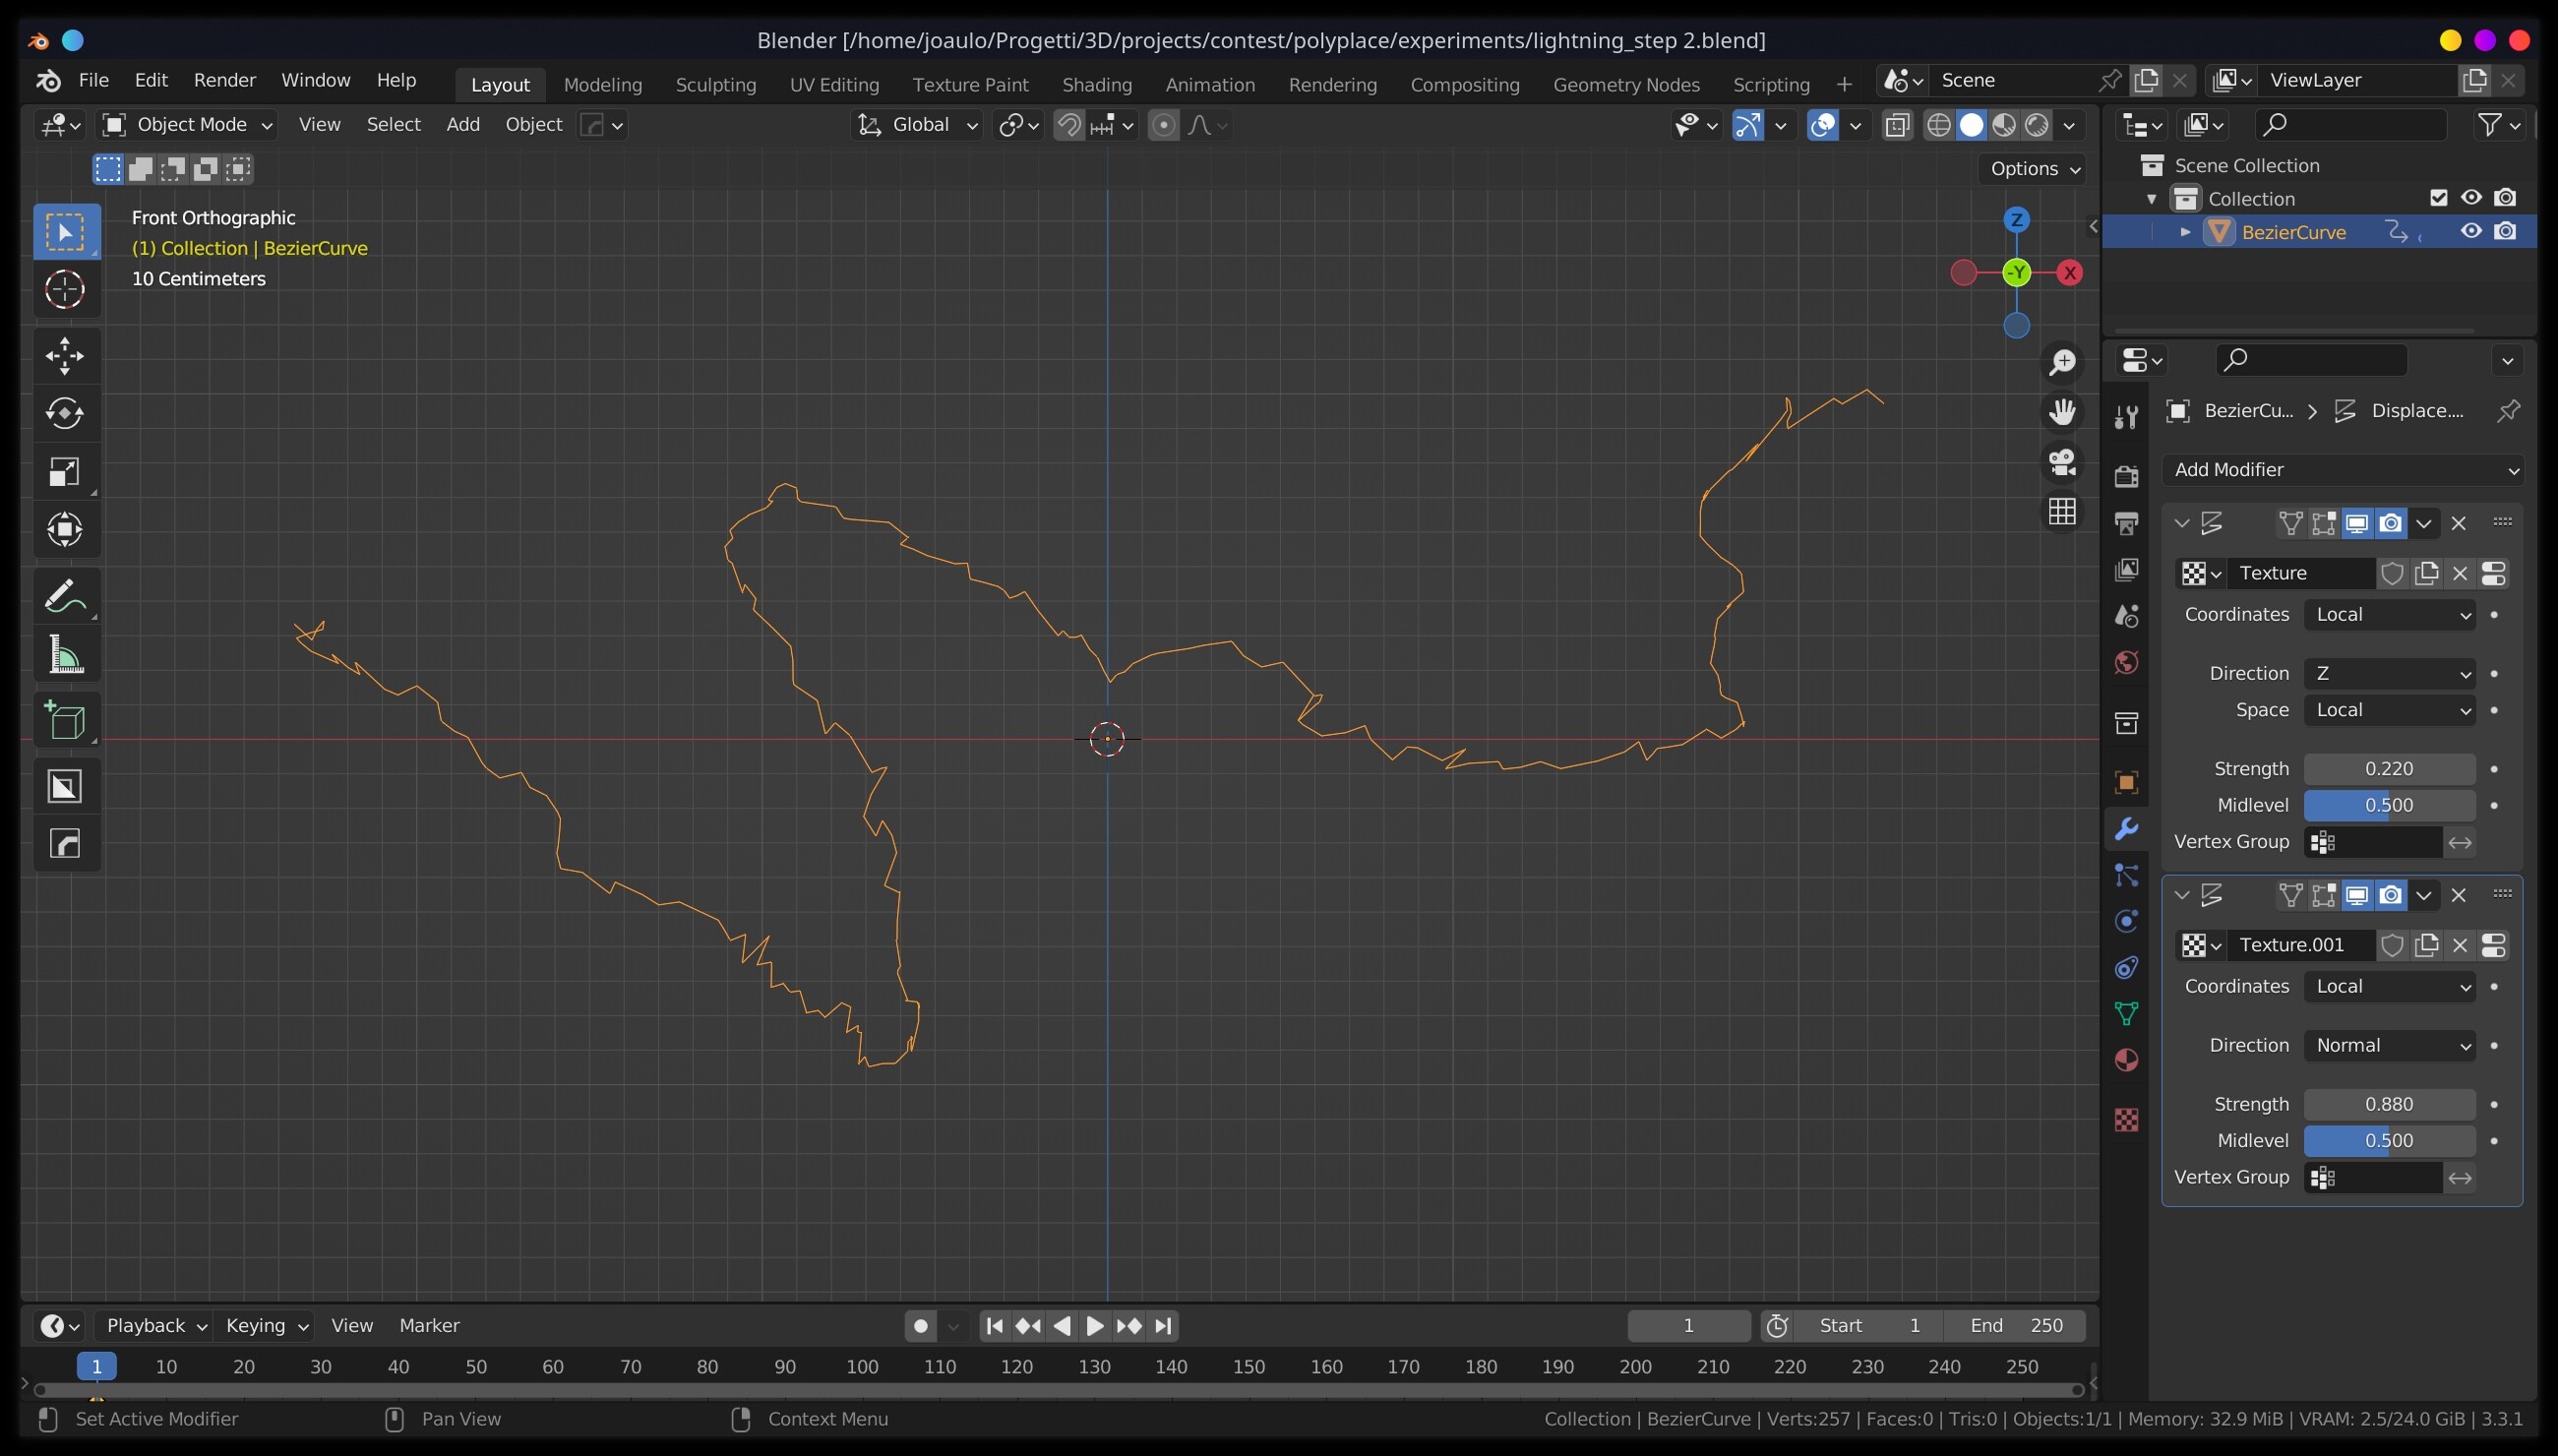
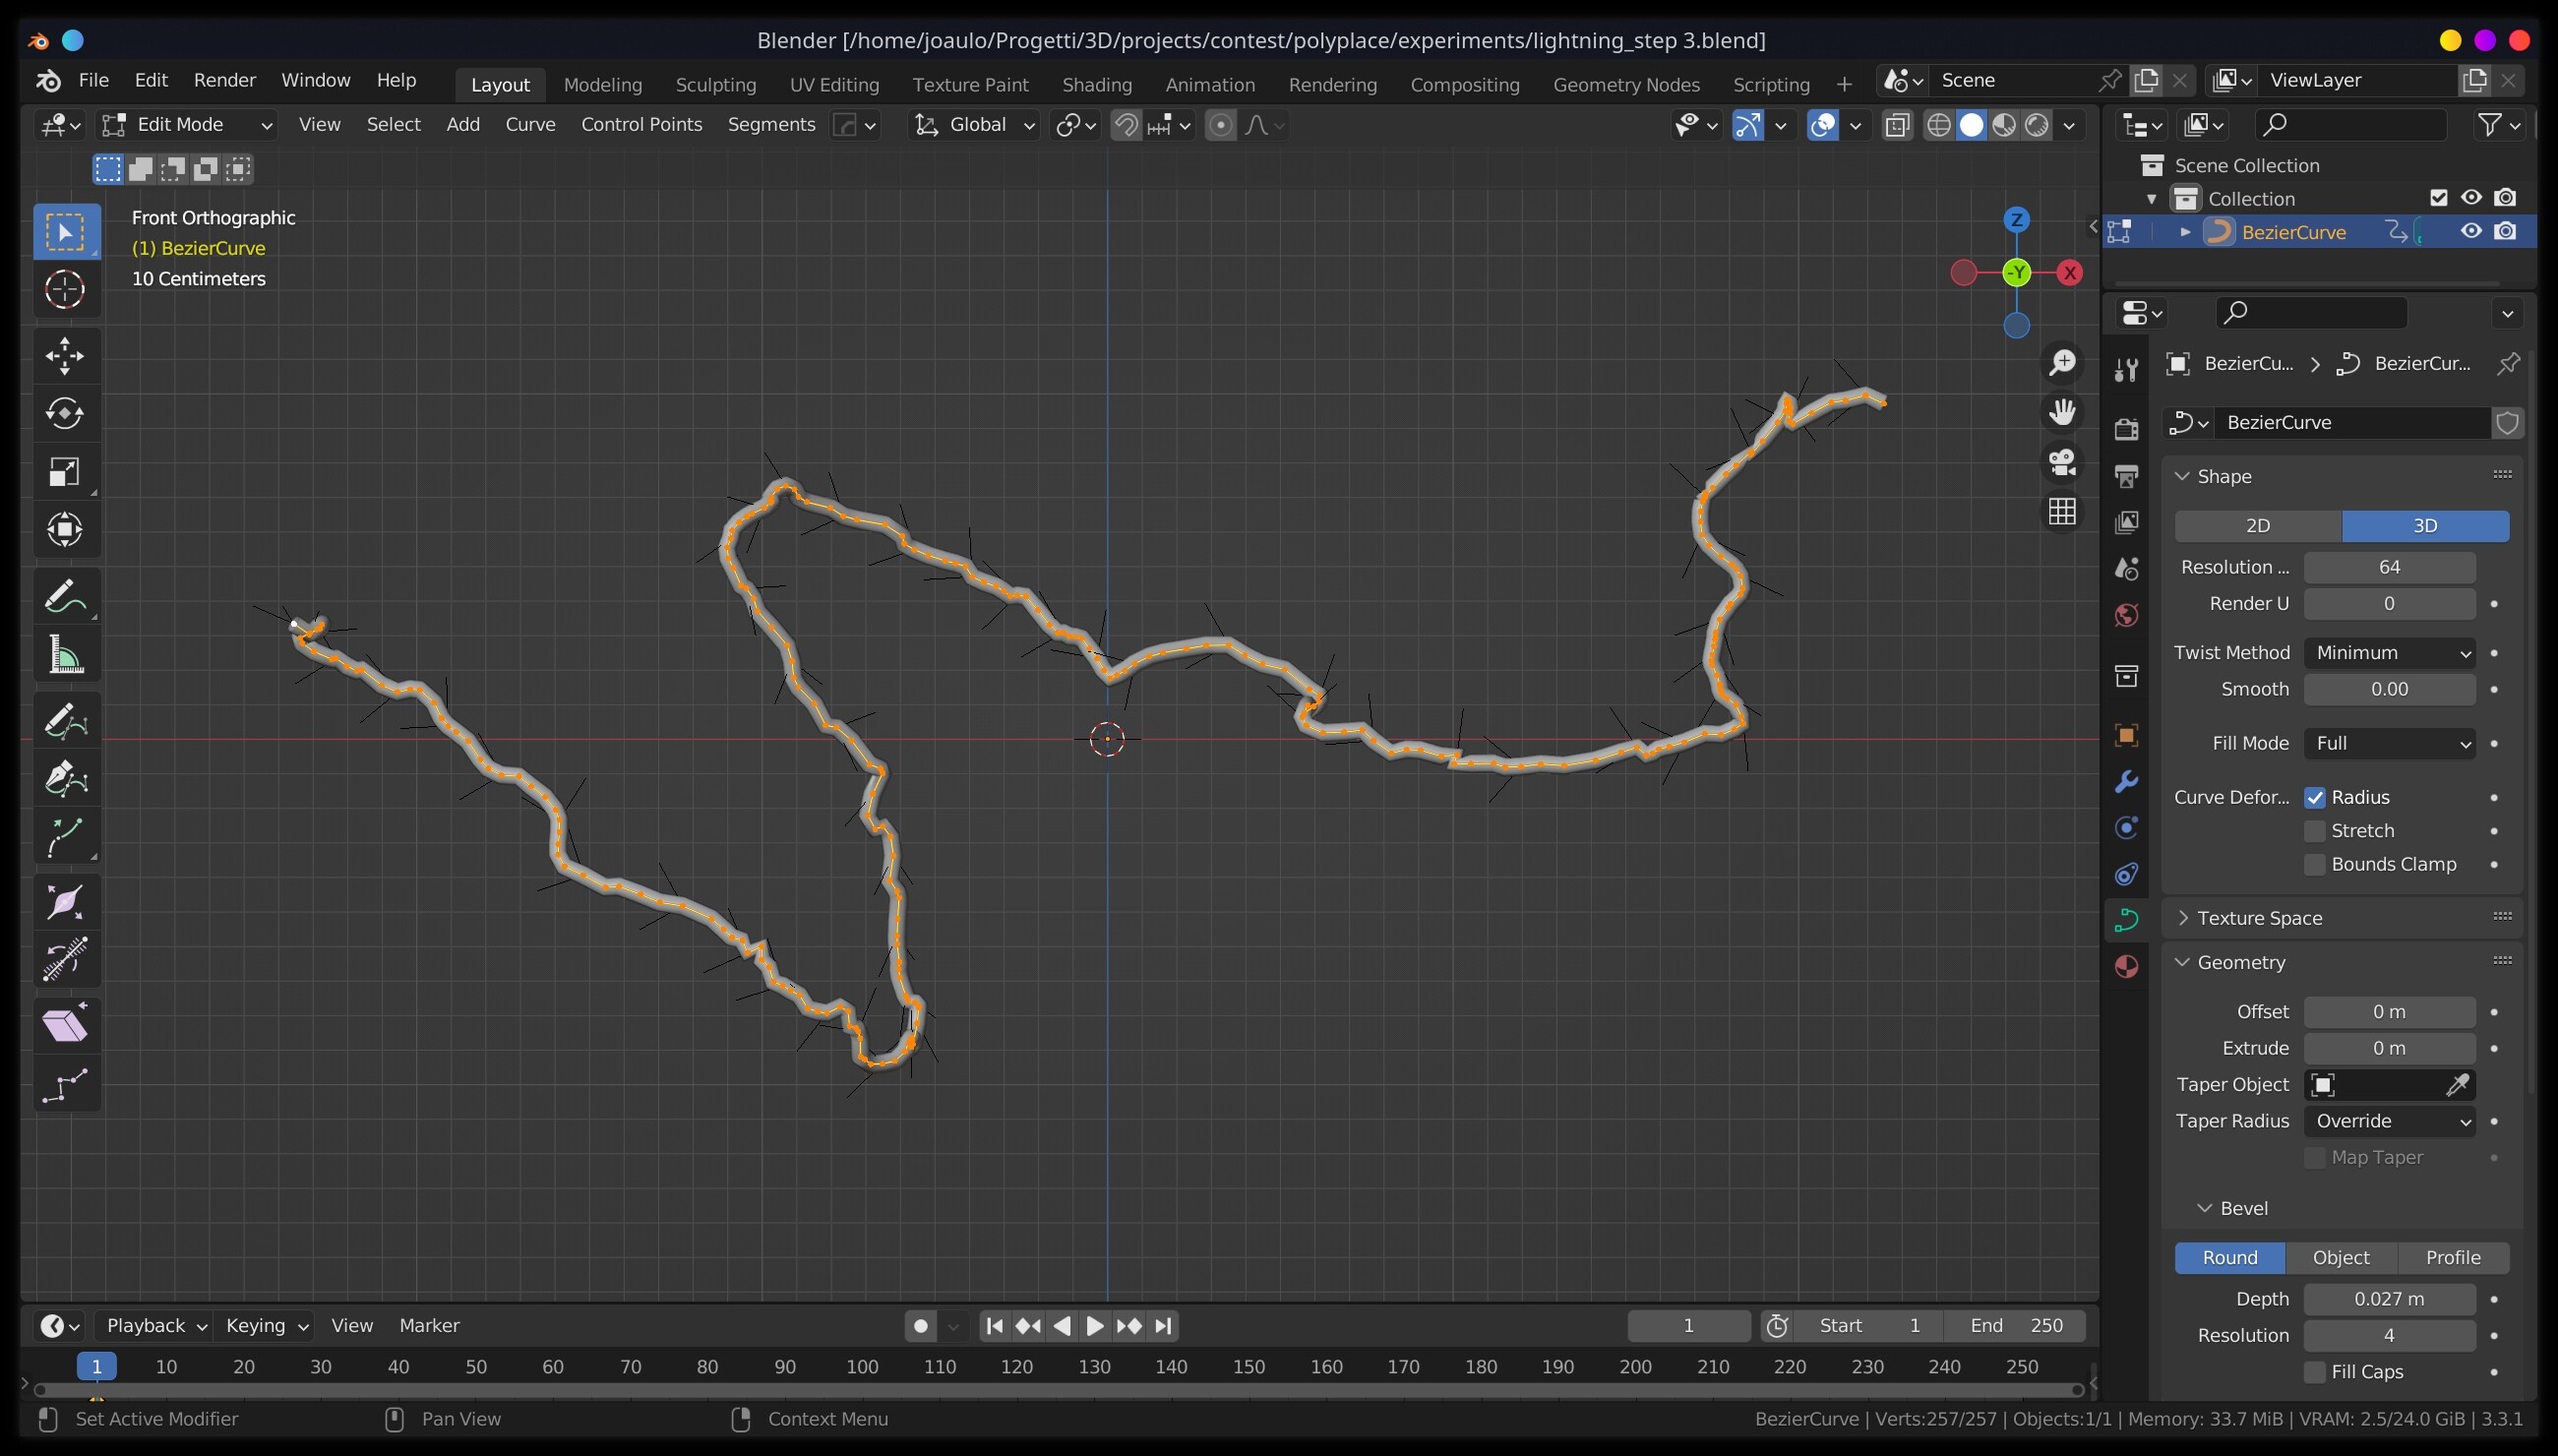
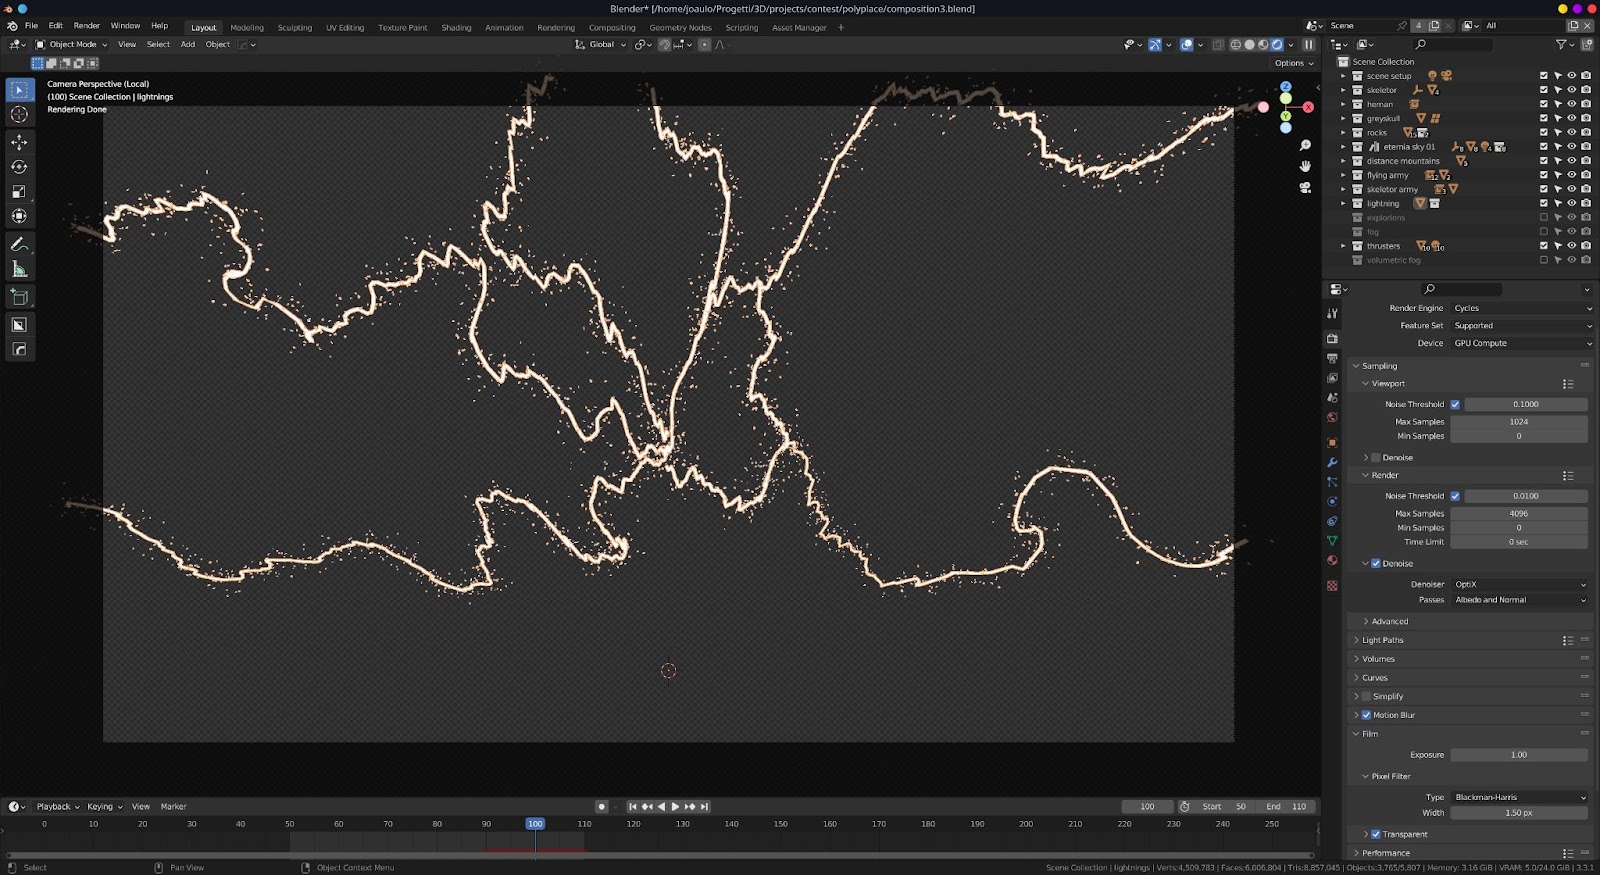
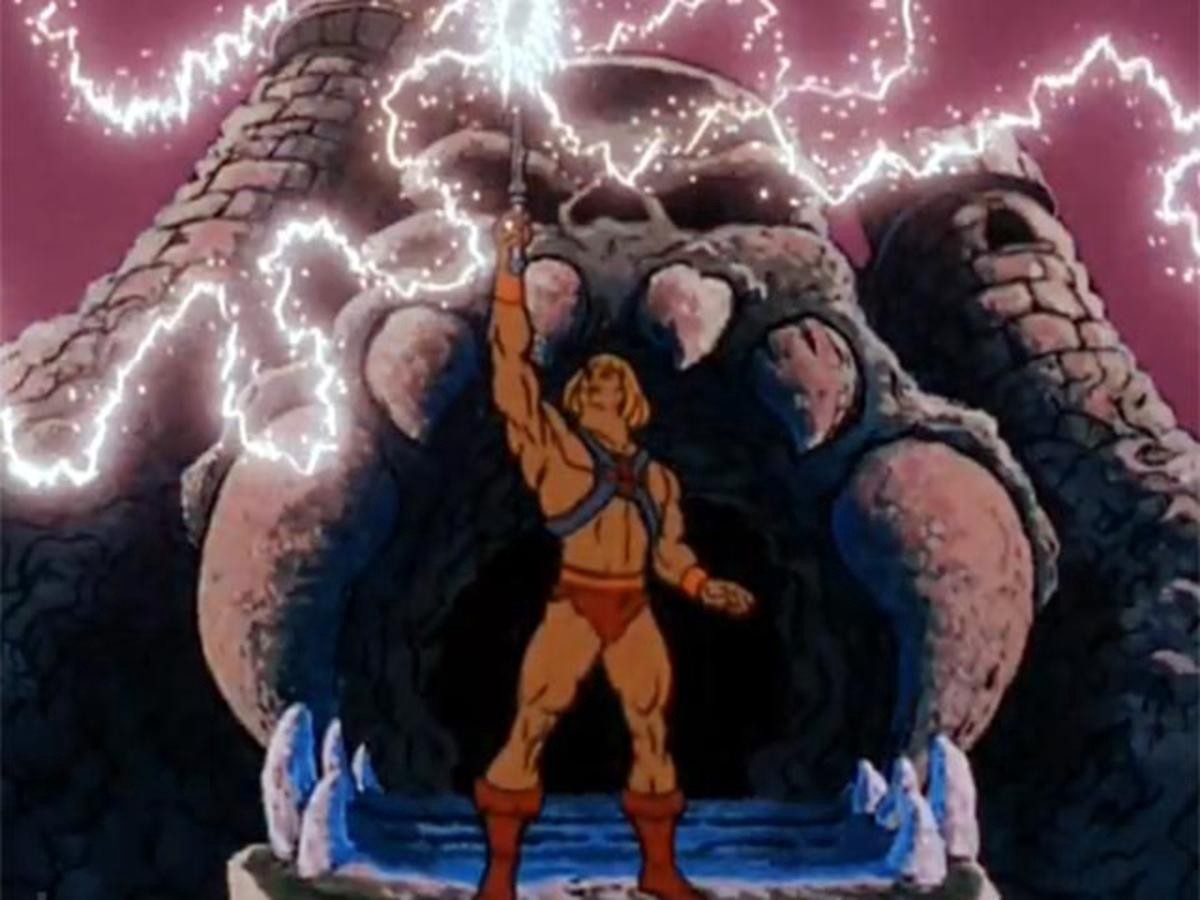
And finally it’s time for the “lightnings”. In spite of the project’s direction based on semi-realism, for the lightnings I absolutely wanted to recreate the same effect as the cartoon so I based a reference to the iconic image of He-Man raising his sword in front of the castle and tried to reproduce a broad lines the trend of the rays with Bezier curves. Then I used the displace modifier to add the jagged shape (actually 2 different noises with cloud textures, one for the higher frequencies and one for the lower ones). I created the geometry around the curves and converted everything to mesh, applied materials and particles… et voila!
To further stratify the scene I added layers with fog masks, at various depths and working with a slight color correction to better adapt them to the tones of the scene. For the fog masks I used the following resources:
Compositing
Finally, I placed the layers on top of each other in compositing, adding just a little Bloom and a slight vignette. I didn’t do a color correction because I was already happy with the final result, but looking back I could probably have worked on it a little bit.
And here is the final result in all its glory ![]()
Conclusion
I didn’t win the contest, but I had a great time and I had the excuse to work on this project that I had been keeping in the drawer for a long time.
I do not exclude that one day I will pick it up again to try to reach the level of detail and realism with which it was initially conceived.
Thanks to all the authors who have made their models available online, without them I would never have been able to go so far in such a short time!
And if you have read this far, a heartfelt thanks to you too for the time and attention you have dedicated to me and I hope I have passed on some passion for what I do.
See you soon ![]()
j