Image recreation, learning lighting, detailing, post processing

Hi,

I’m at least medium level in modelling and texturing, but my weaknesses are shown in the headline: lighting, detailing and post processing (color correction). Given enough time, I’m able to reproduce many things (or create my own), but I always fail to give my work the final touch and correct mood. After playing a while with AI image generation, I thought it’s a good idea to rebuild an image created by the AI in Blender. My primary goal is learning and get better.

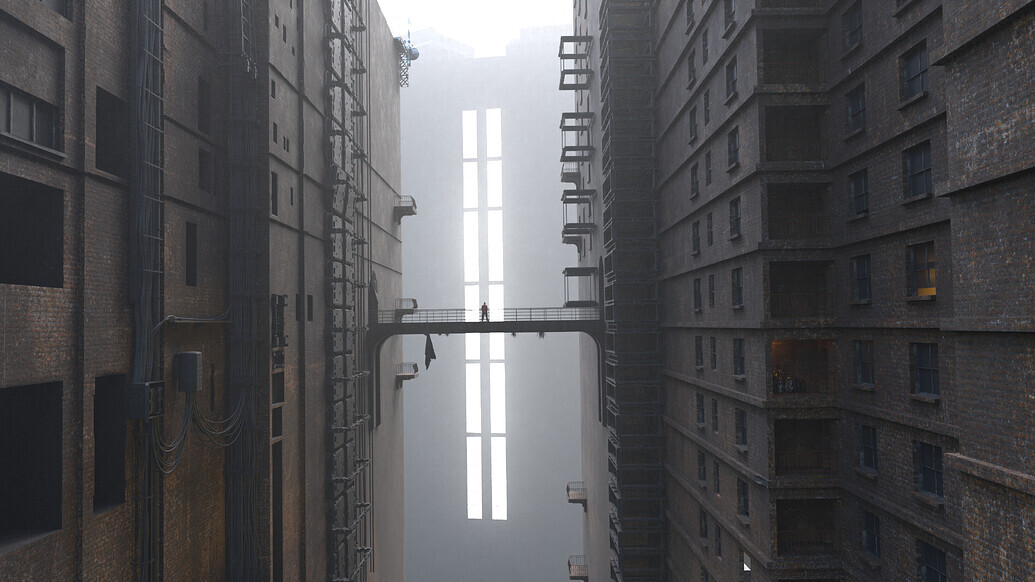
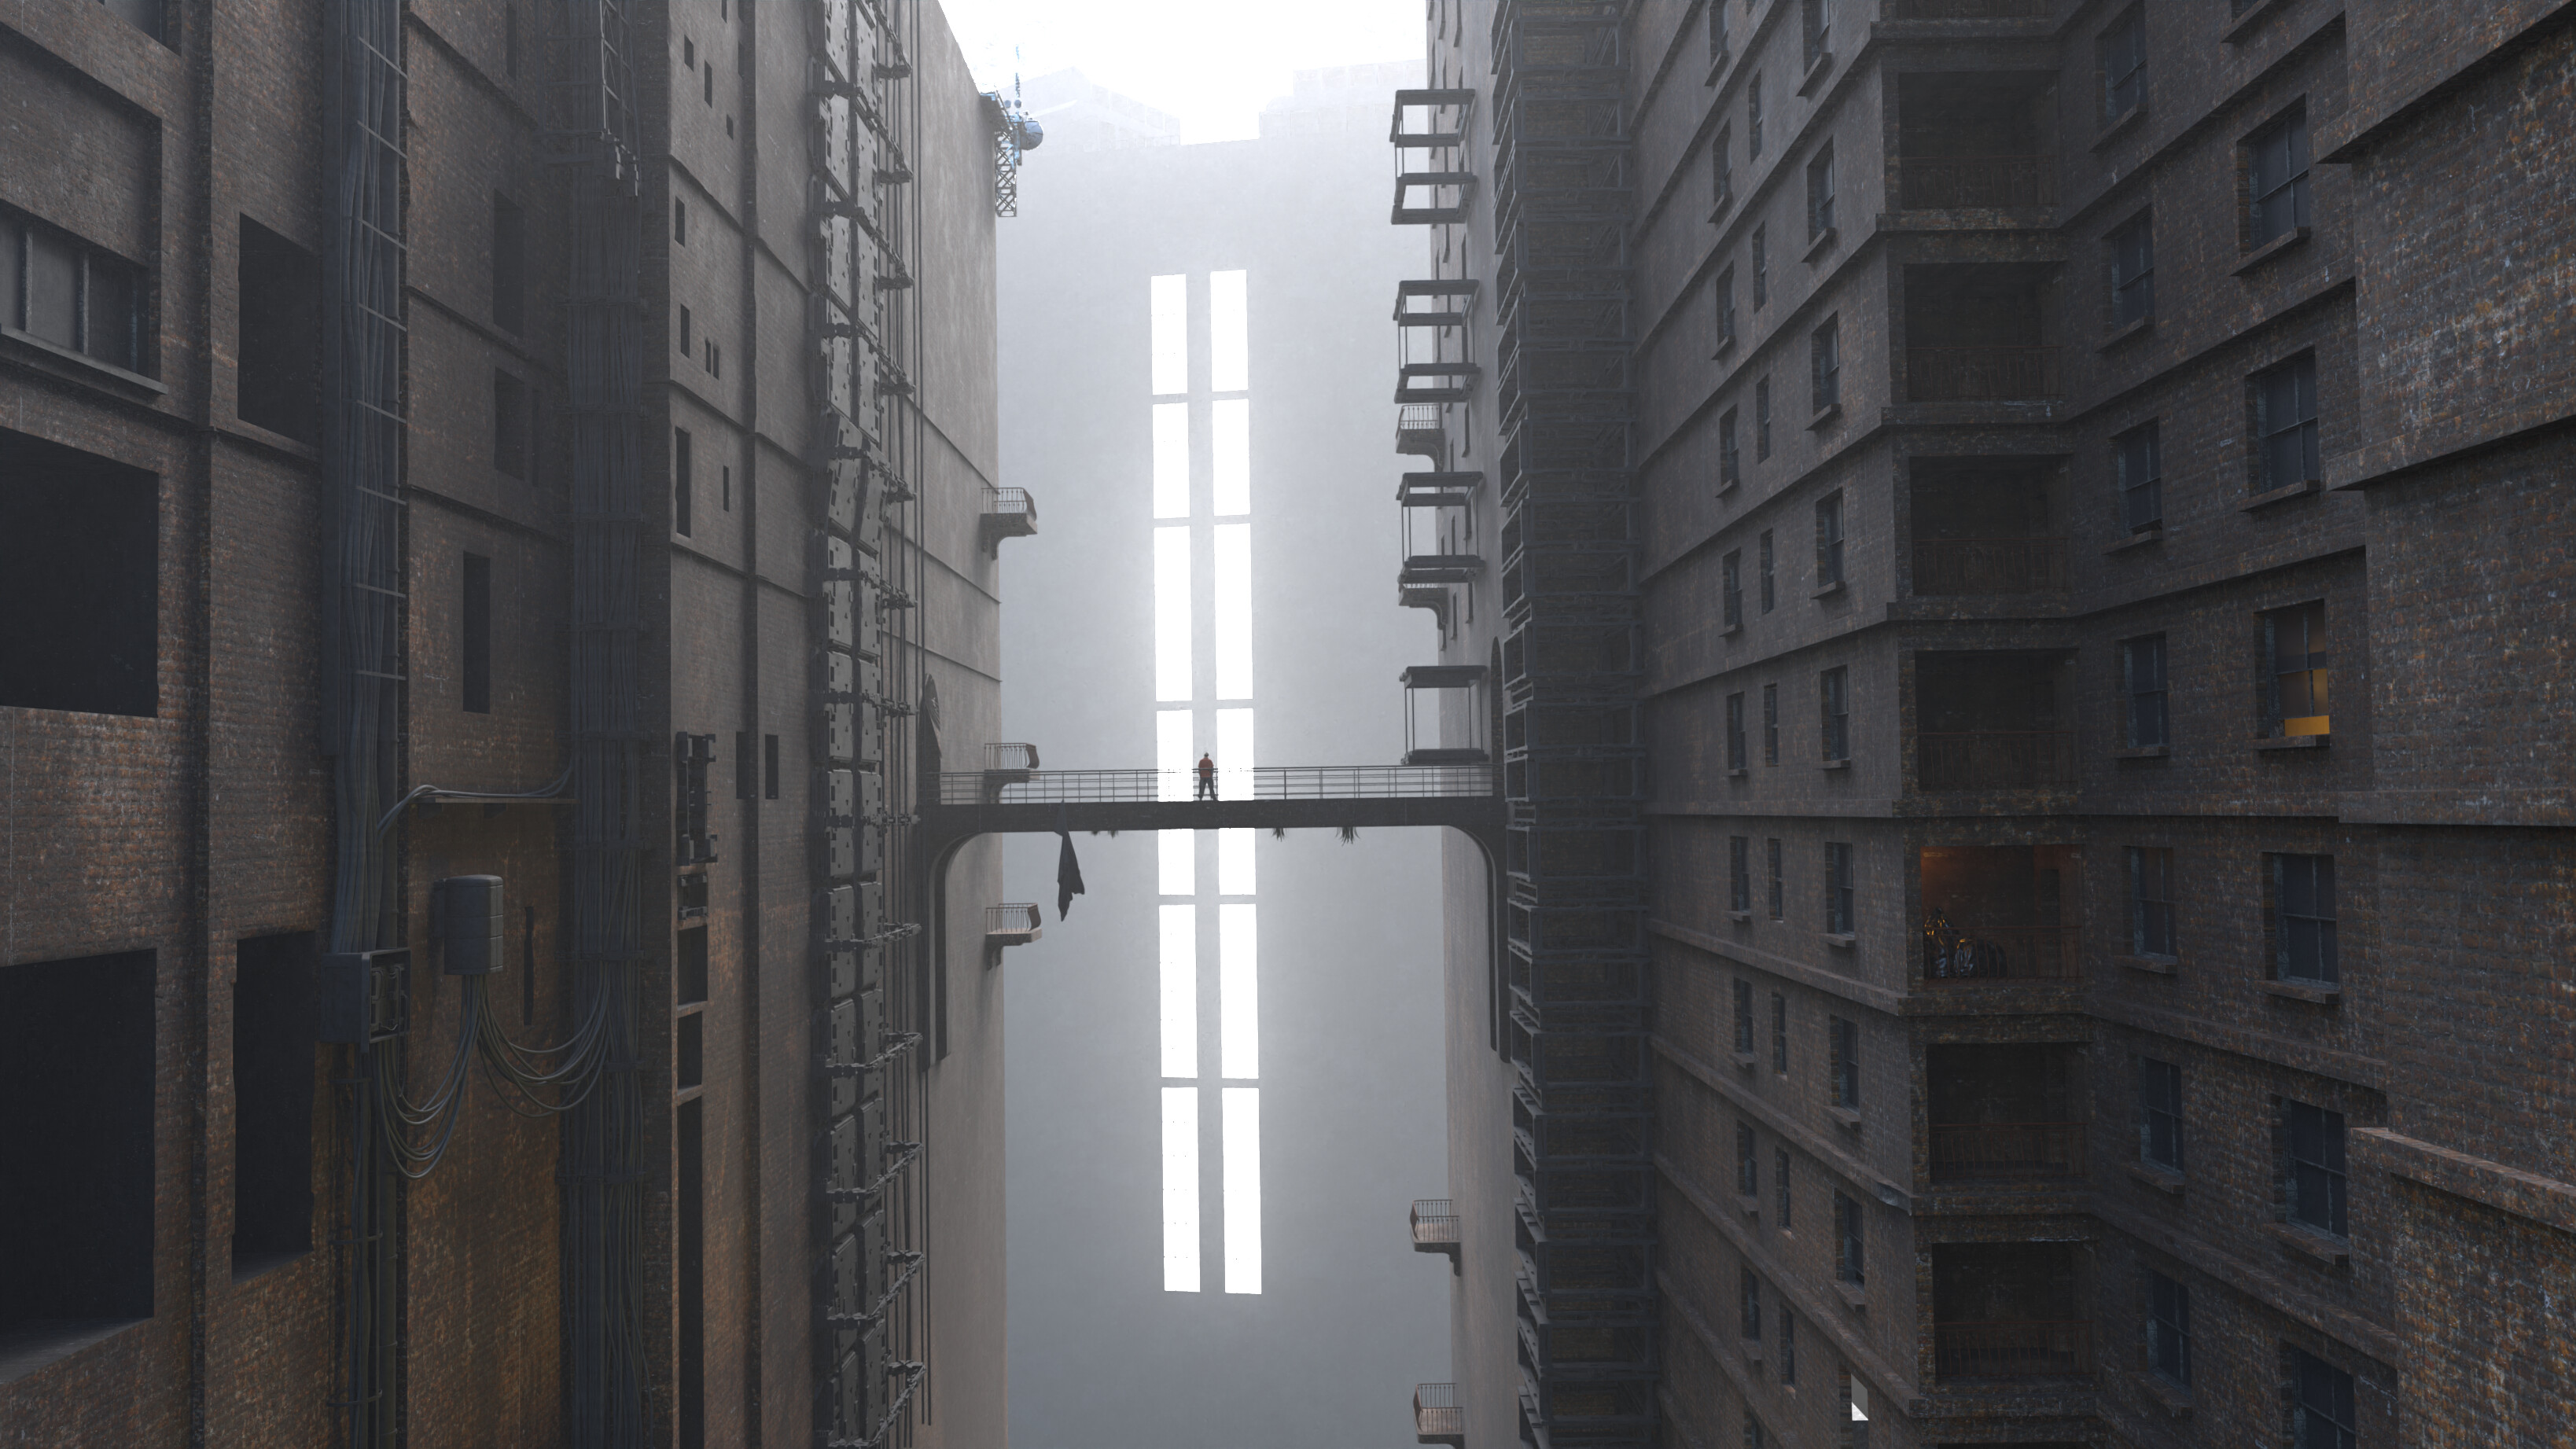
This first image is my current WIP. It still has some minor geometric issues, some placeholders and misses some elements. But even that: I miss the most important part → the correct mood, the ‘dystopian magic feeling’. Compared to the AI image below, it feels bland, technical and empty. I assume that fixing the above points does not change this in a higher grade.

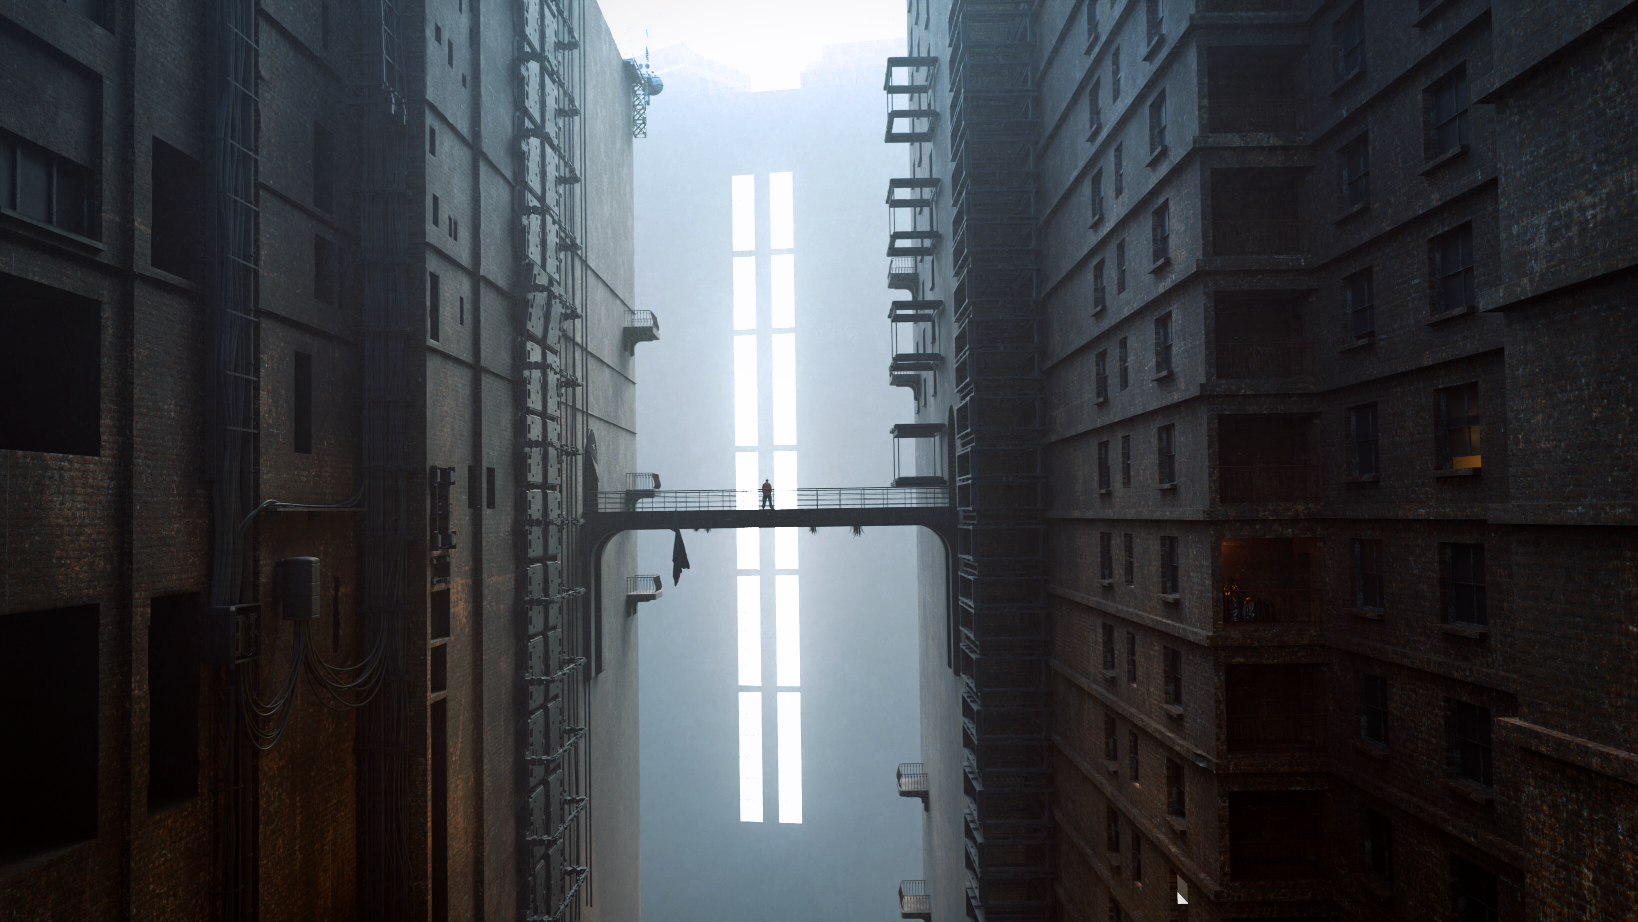
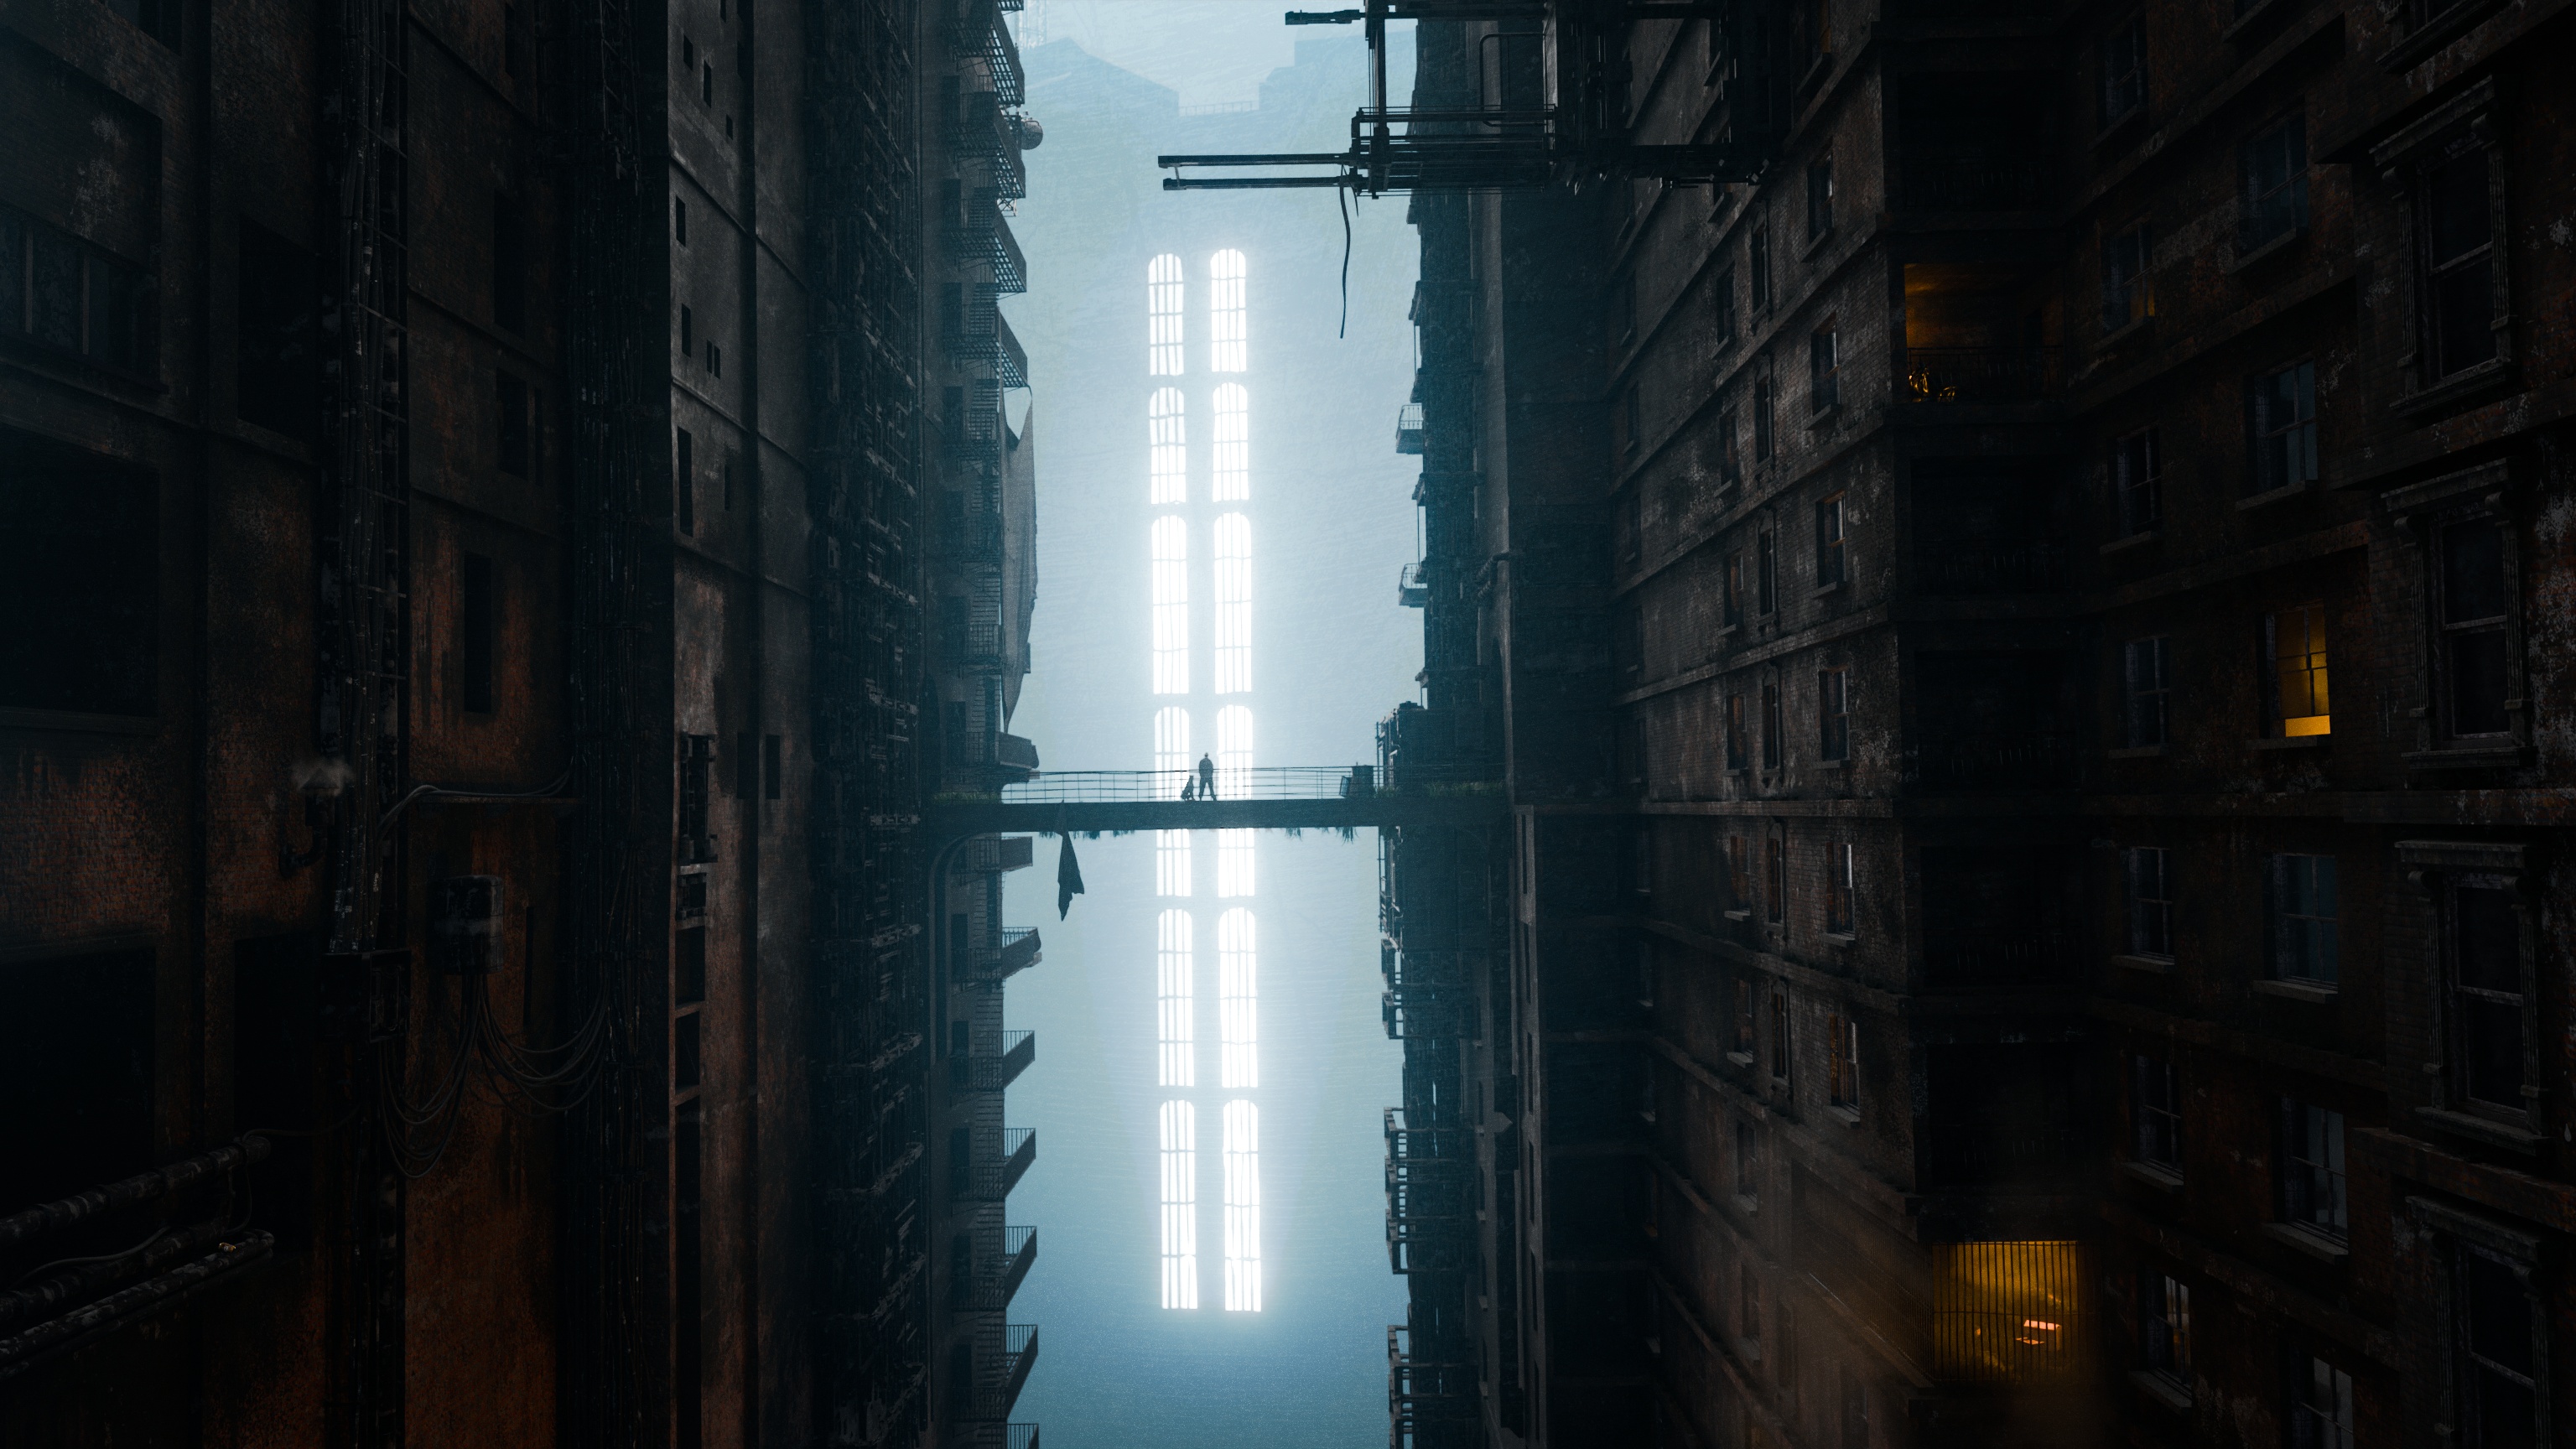
Here’s is what I try to replicate, generated with stable diffusion:

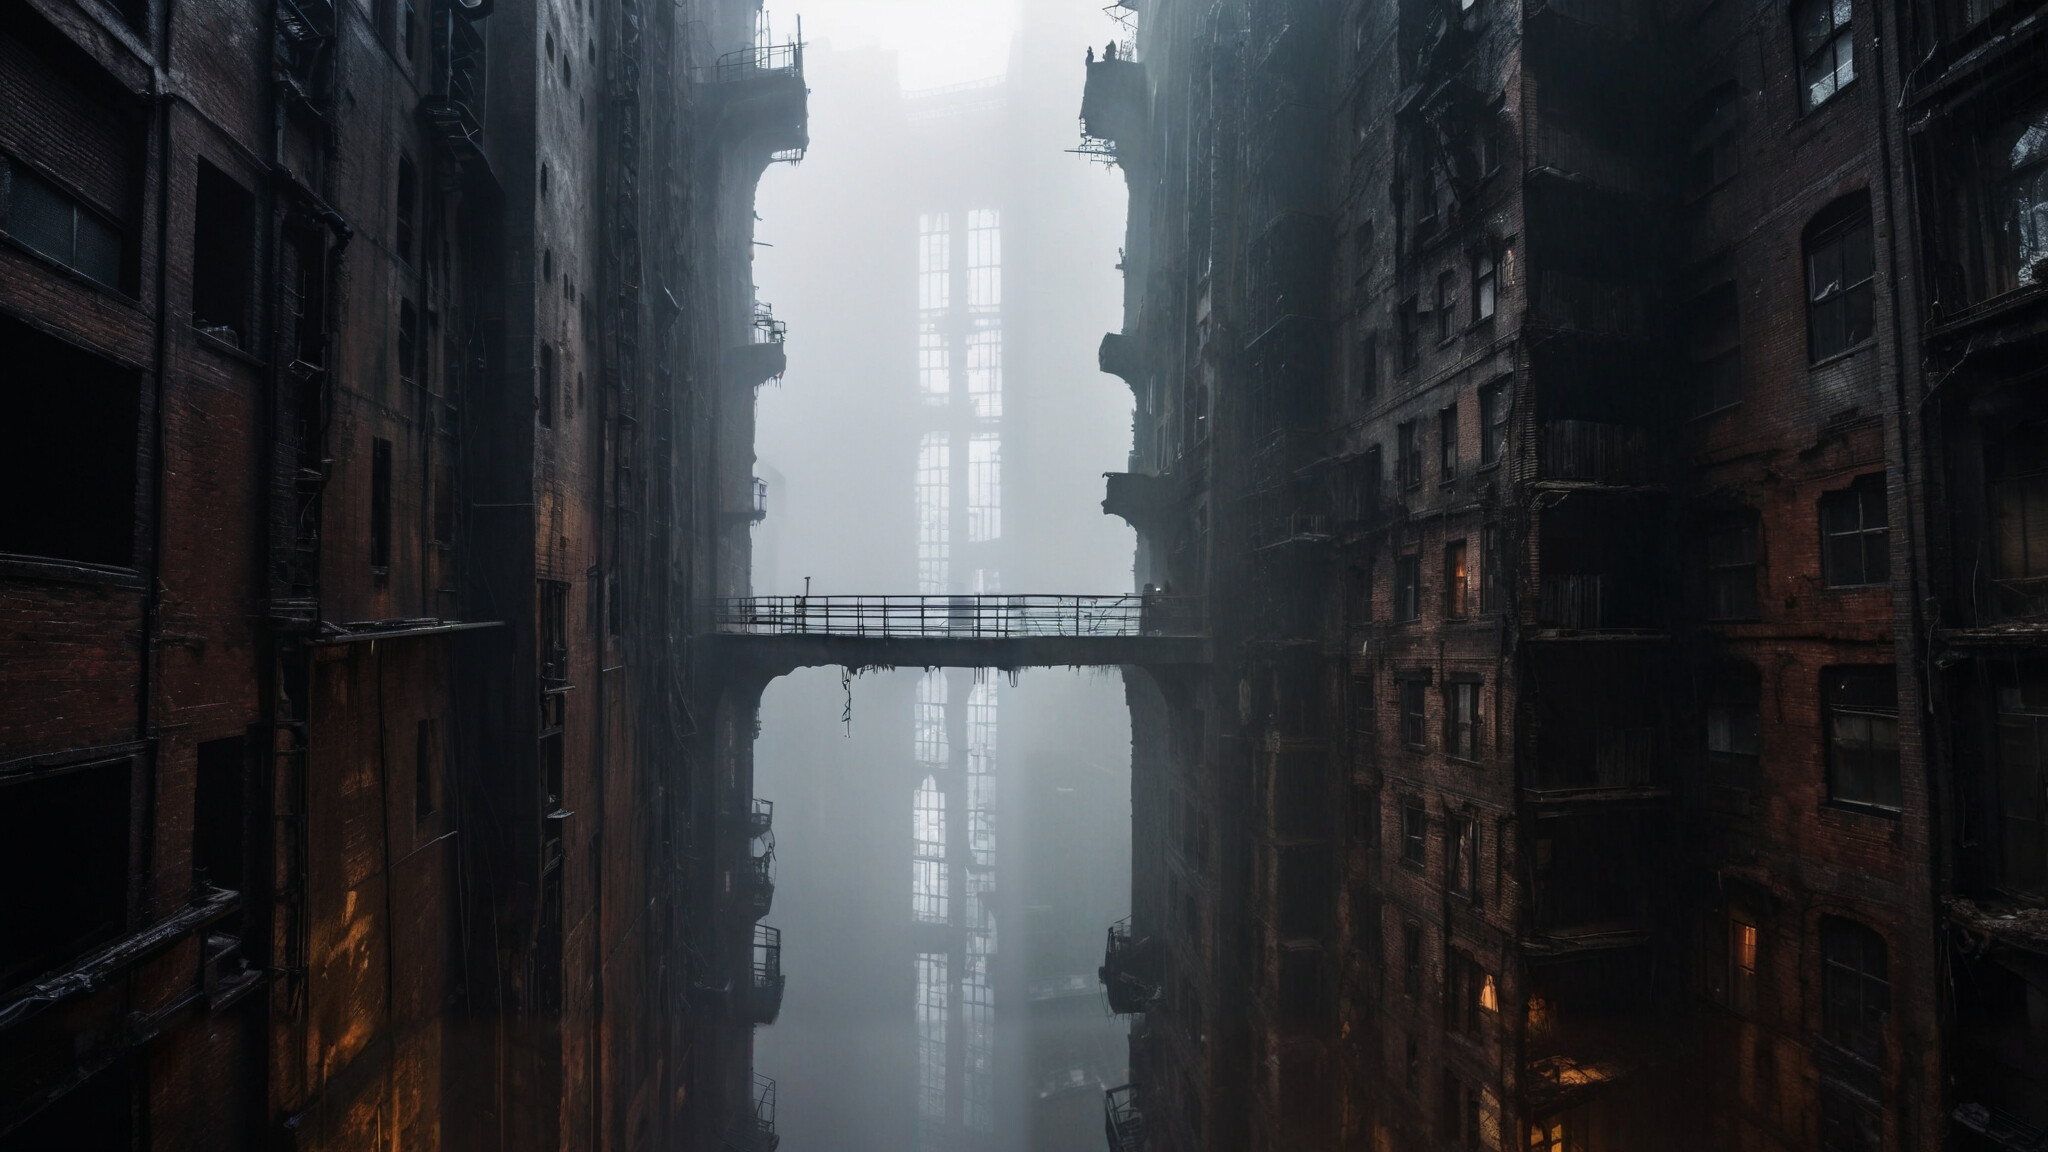
It’s really hard to replicate all those little details (mainly the imperfections), especially as some parts in the AI image contain hard to ‘read’ details/elements, it’s more like an artwork.

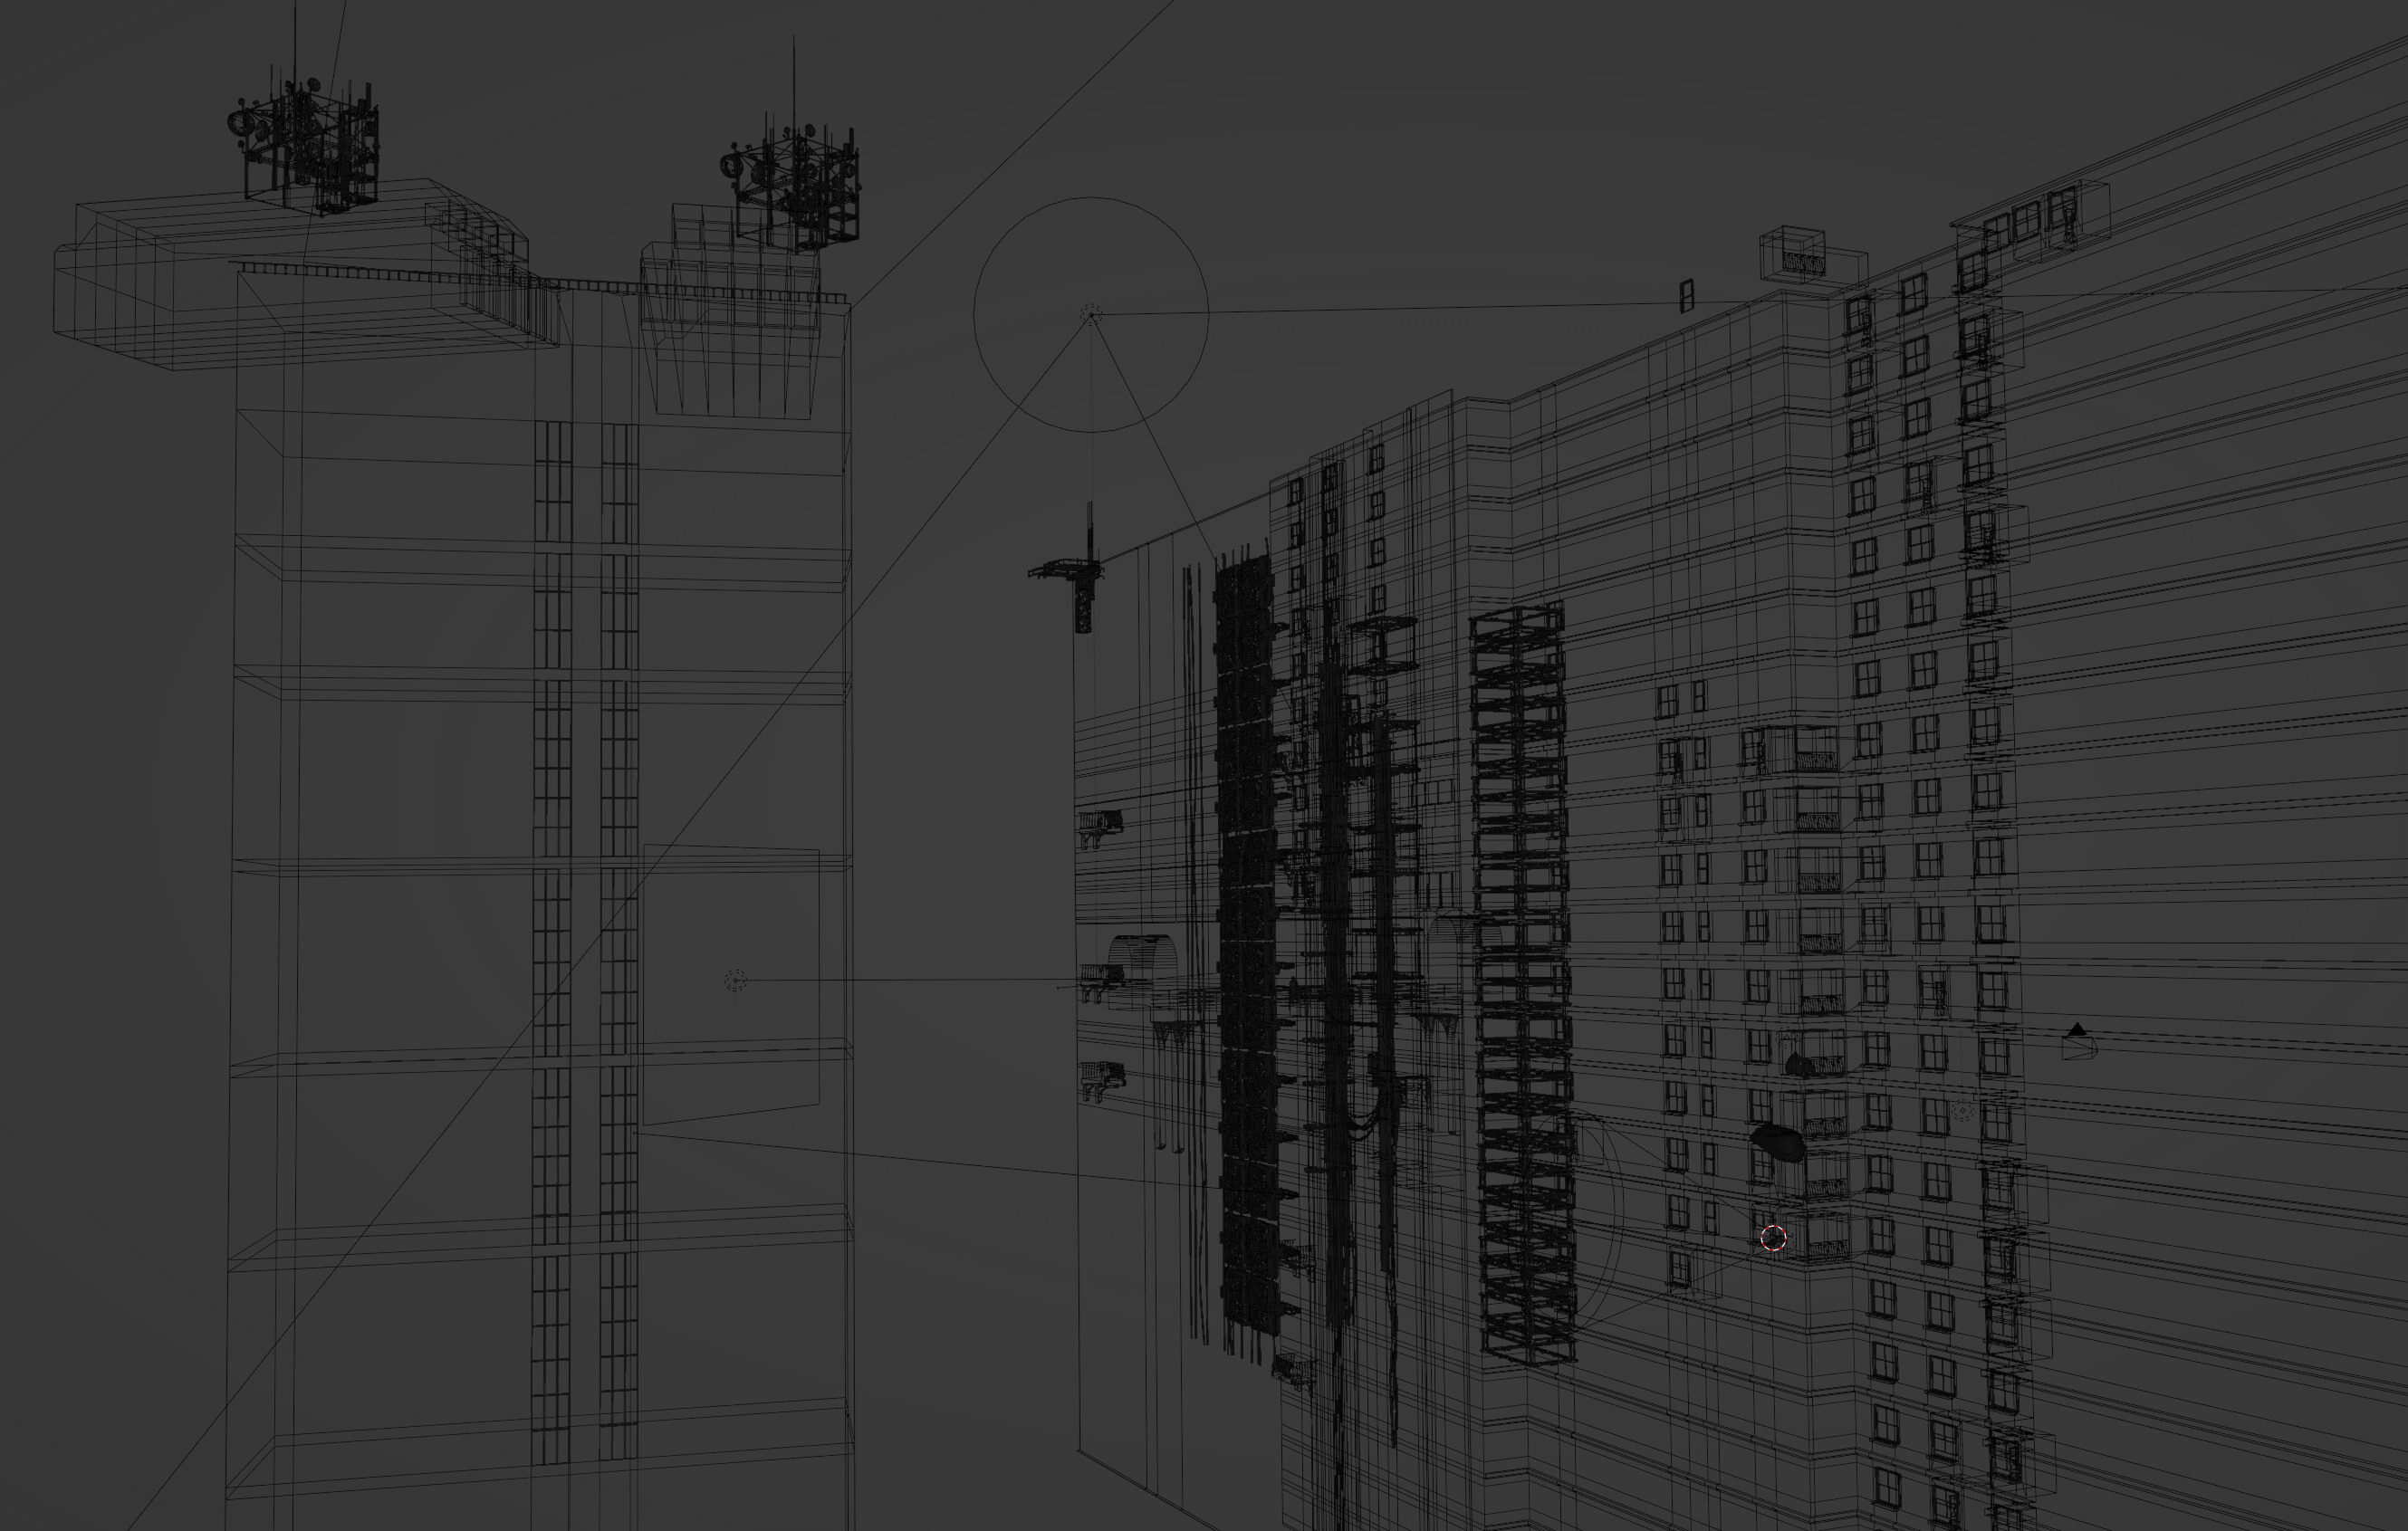
Here’s the wireframe view if of any use:

I spent a lot of time to create a non-repeatable brick material, as it is use in most surfaces. It contains many imperfections, so I assume this is not the (primary) problem:

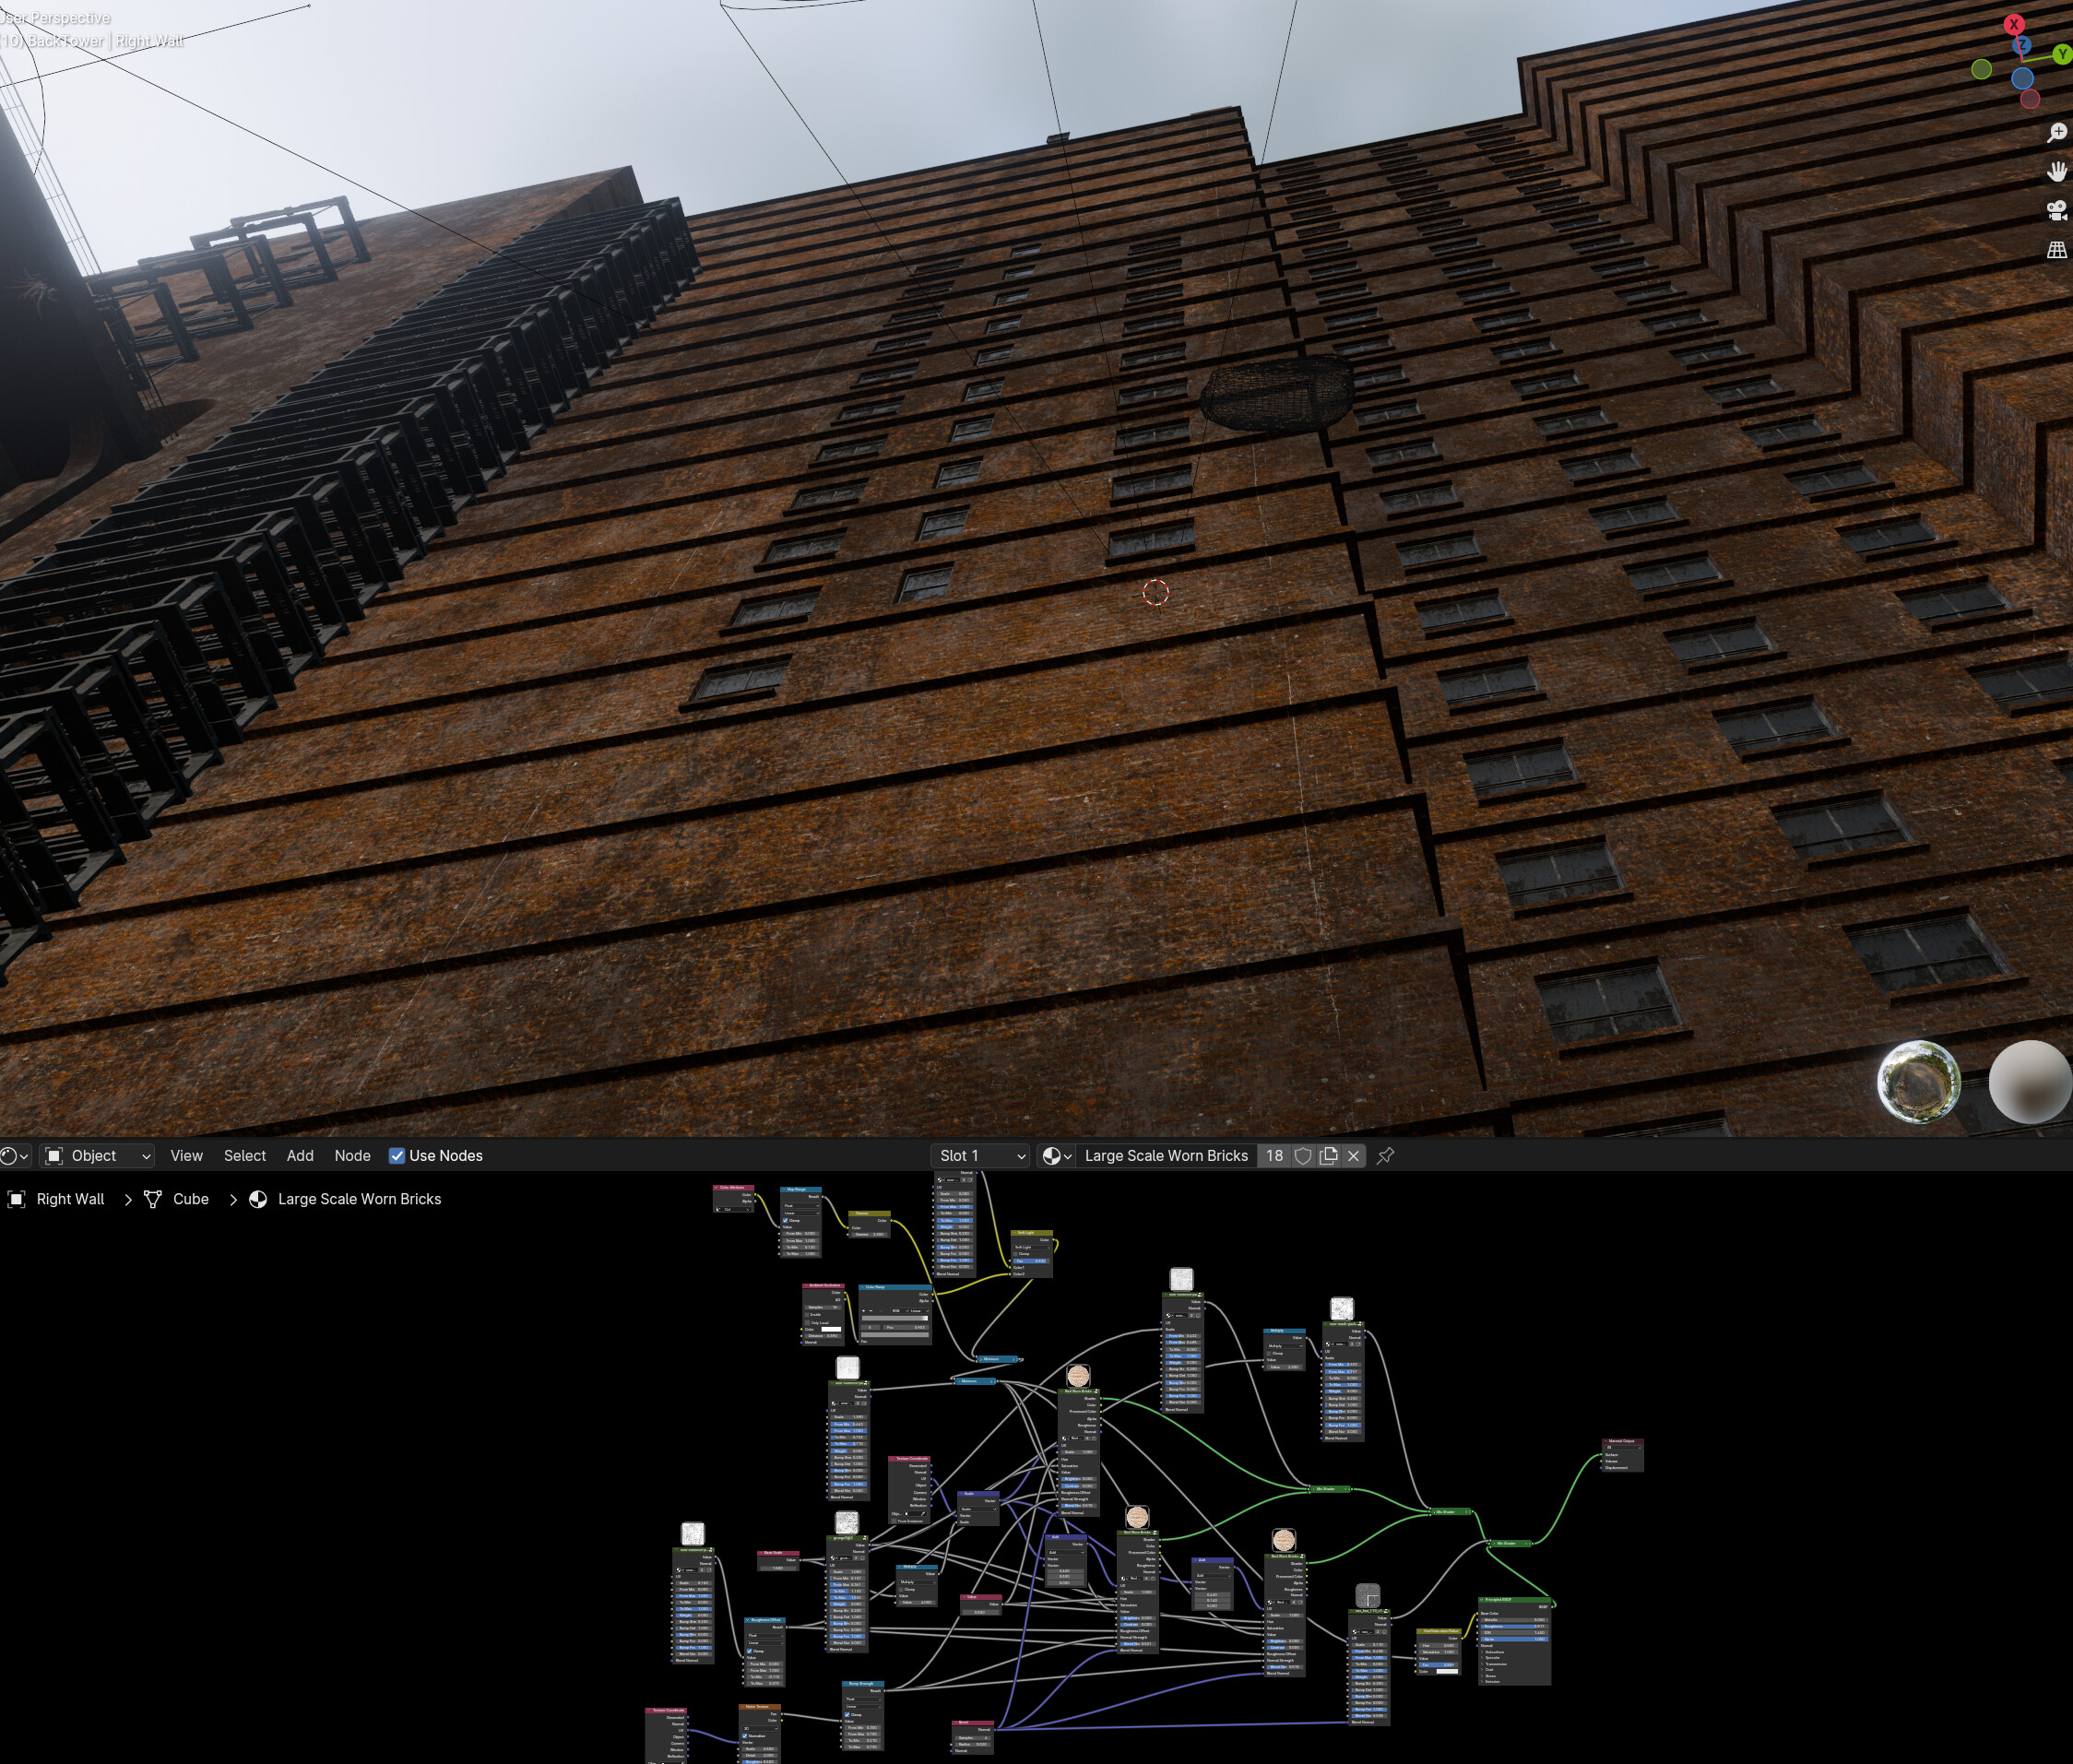
I’ve also experimented with displacing the walls with a noise texture, but this creates some artifacts and does not really increase believability.

Maybe final color correction, post processing or better lighting will move the result more to the original feeling. I can’t upload the scene, as it contains some bought stuff. But I may remove those components and upload if someone requires this to give me some tipps.

Any advise is highly requested.

Many thanks,
h0bb1t

5 Likes

Hi,

I’d just like to say first of all, your current version is already very good, I think it just needs a couple of extra things to push it over the line into being excellent!

Just from having a look at the stable diffusion output versus your version, the thing that really sticks out to me is the post-processing. The ai version looks a lot more punchy, so some effects that might help are:

  • Increase the contrast
  • Add a subtle teal/orange colour contrast
  • Add a slight vignette
  • Add some lense distortion/use a shorter focal length

Just as a small example, I took the image into Affinity Photo and applied some of those effects. I think it brings it a lot closer to the original, and makes it more visually striking:


I'm always surprised by how quickly a "meh" render can be turned into a great one just by applying some basic effects in the Blender compositor.

Aside from compositing, I think that the other thing the render could benefit from is just some more random stuff. You’ve done a really good job already adding in large scale details, but I think it needs a lot more small scale randomness e.g. pipes, small cables and wires, weeds, random bits of geometry. I would probably distribute these with geometry nodes or a particle system so I don’t have to add them all manually.

Just some other small tweaks I’d make to make it more similar:

  • Add larger random patches in the bricks with lower roughness, to better show some reflections and make it seem damp.
  • increase the glossiness of the windows for the same reason.
  • Add an orangey light underneath the buildings and tint the world slightly teal to get the colour contrast effect in camera.
  • I know you said that displacing the geometry didn’t work, but maybe just doing some large scale deformations could add to the feeling of rickety-ness, without messing up the geometry too much.

I think that one thing that Stable Diffusion has to its advantage is that none of what it creates has to actually make sense, it just has to look right, so embracing the randomness makes sense for a scene like this.

Sorry that’s quite a lot, feel free to disregard any of it :sweat_smile:

4 Likes

I like it, very nice.
@Strike_Digital has already given a lot of good advice, if I may add my two cents based on the scene you can show:

  • for small details I would add ruined edges/frames/balconies, pipes with some steam leaks, destroyed fire escapes, etc.
  • lighting/colour “variation”: in the original image the last buildings at the back appear much darker than those closest to the camera, giving a very dramatic effect.
    Hope it helps.
1 Like

Hi again,

@Strike_Digital and @BG_Division, many thanks for those valuable tipps! I will experiment with them and report back, which may take a little bit time. But your words motivate me :slight_smile:

@Strike_Digital Your Affinity Photo fixed version look already much better. I also bought and love this software.
Do you use the Personas to modify the image or do you use the layer effects and filters? I’ve tried this too, put the original image on the screen and played with contrast, levels, exposure and others, trying to match the original colors and look. But I always get lost adjusting the values and order. It seems my sense to ‘see’ what is different and needs to be set is very bad. I should try to find some tutorials that are more technical than artistic :wink:

@BG_Division You are right, the more far part of the close scene is close to black. I currently try to create this, but not sure if I either modify the material in this part or reach this with lighting changes. Still experimenting, but this seems to be very important for the final mood.

Again,
many thanks to you

Blockquote
@BG_Division You are right, the more far part of the close scene is close to black. I currently try to create this, but not sure if I either modify the material in this part or reach this with lighting changes. Still experimenting, but this seems to be very important for the final mood.

You can also try some simple light blocking plane or the new lights linking system. There are so many things to experiment on

i just want to say a little something, maybe it will help. it’s always difficult to use an ai generated image as a template. the details in these images (which aren’t really any) dazzle the viewer. the expectation of your own work is very high and it’s a long way to get there until you have an image with a similar level of detail. don’t let this blind you. work long enough on the texture and the details, and sometimes it can’t hurt to move away from the original a little in order to achieve your goal. additional light sources, or if the light were a little flatter, could also ensure that more detail could be assumed on the surfaces.

Hi @xeonow,

thanks for your tipps as well. Yes, the AI is very good at adding details which are impossible to interpret, but details are an important part of realism.
Thanks to your response I thought I should work on the image again (done another in the meantime) and this is my current iteration. I’m really happy with the current state and I think I’m close to release it here on blenderartists. But I’m always open for some final suggestions.

1 Like