this thread was really useful. look at what @RobertT does to get certain material effects. Go through a bunch of his examples, and some things just start “clicking”.
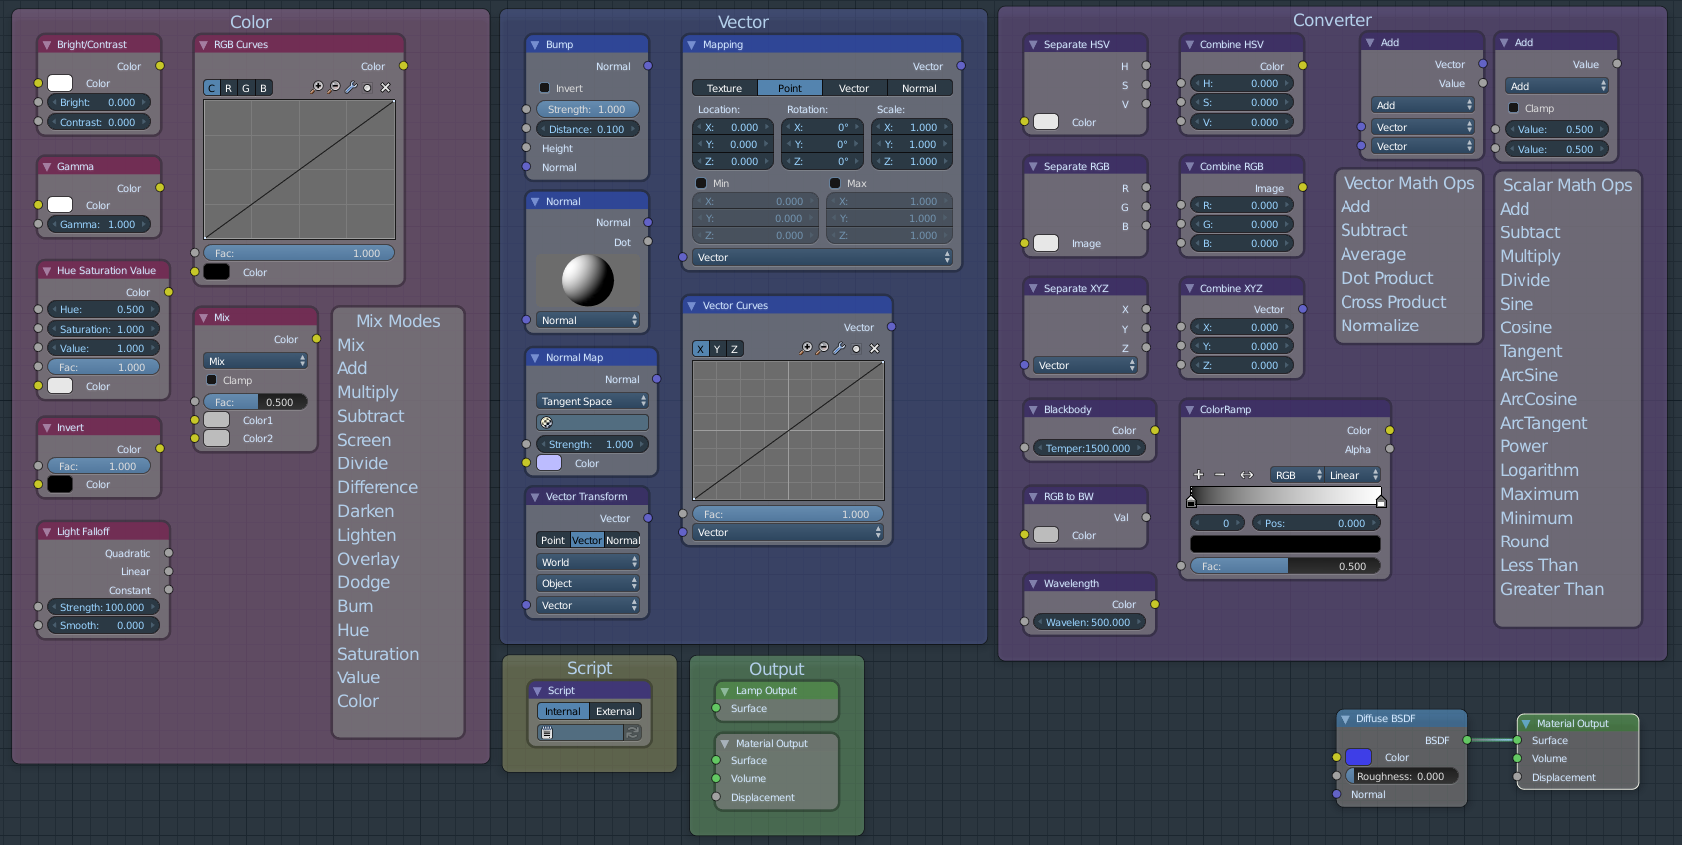
Another thing I do, when learning node systems is to make images of all of them. I’m a visual learner, so it’s easier to SEE & Remember, than to look through a bunch of menus and submenus of node-names (text).
These particular images are dated, so you might have to rebuild your own new ones:
To make these images, I just added one of each node in the material editor, pushed them around for compact grouping, put frames around the various groups, and then Screen-Captured to a still .PNG image.
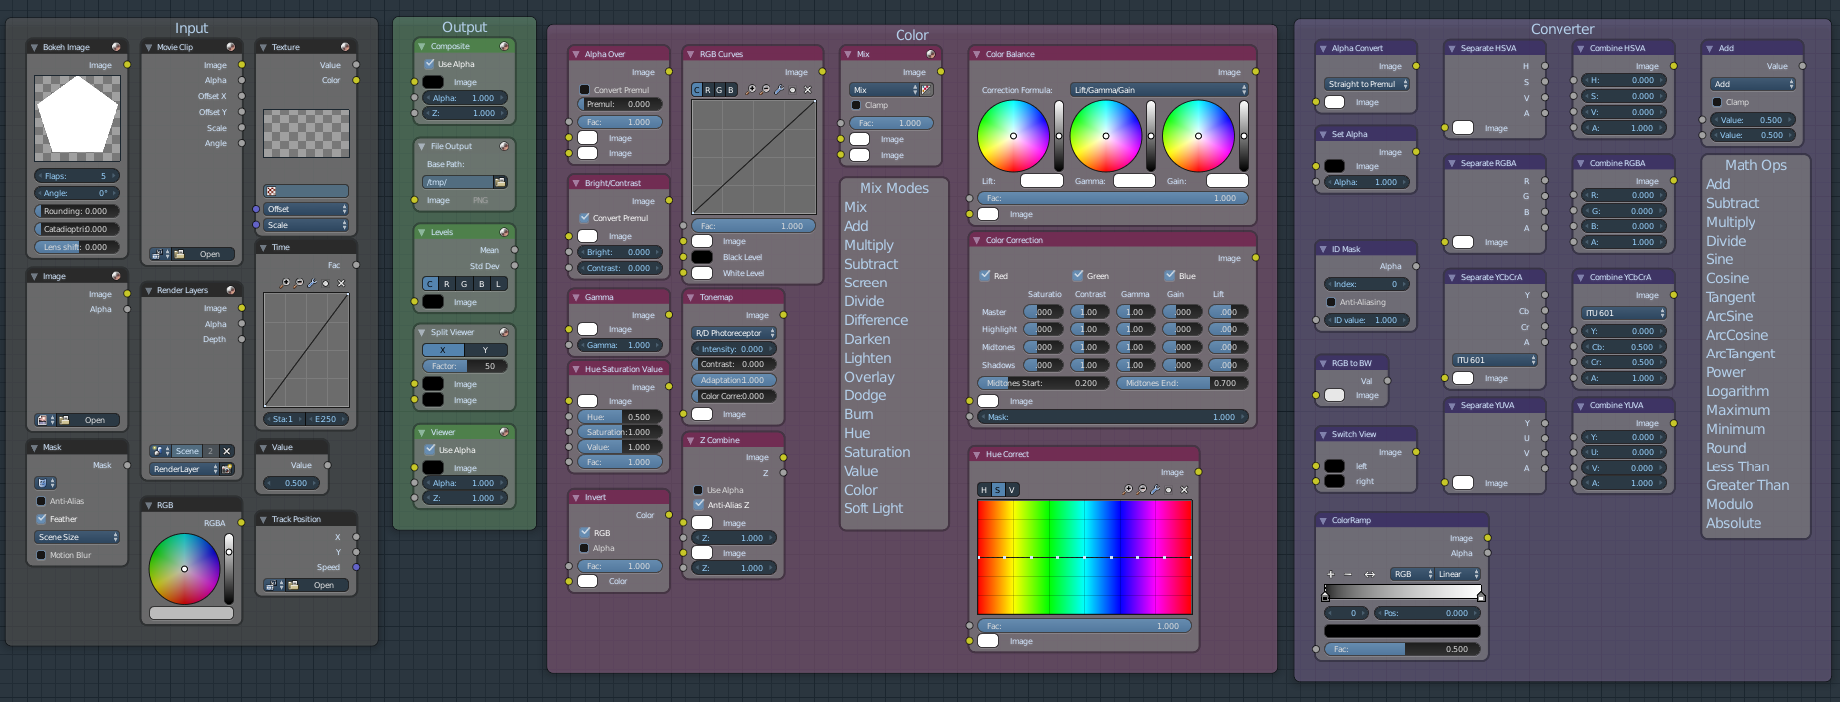
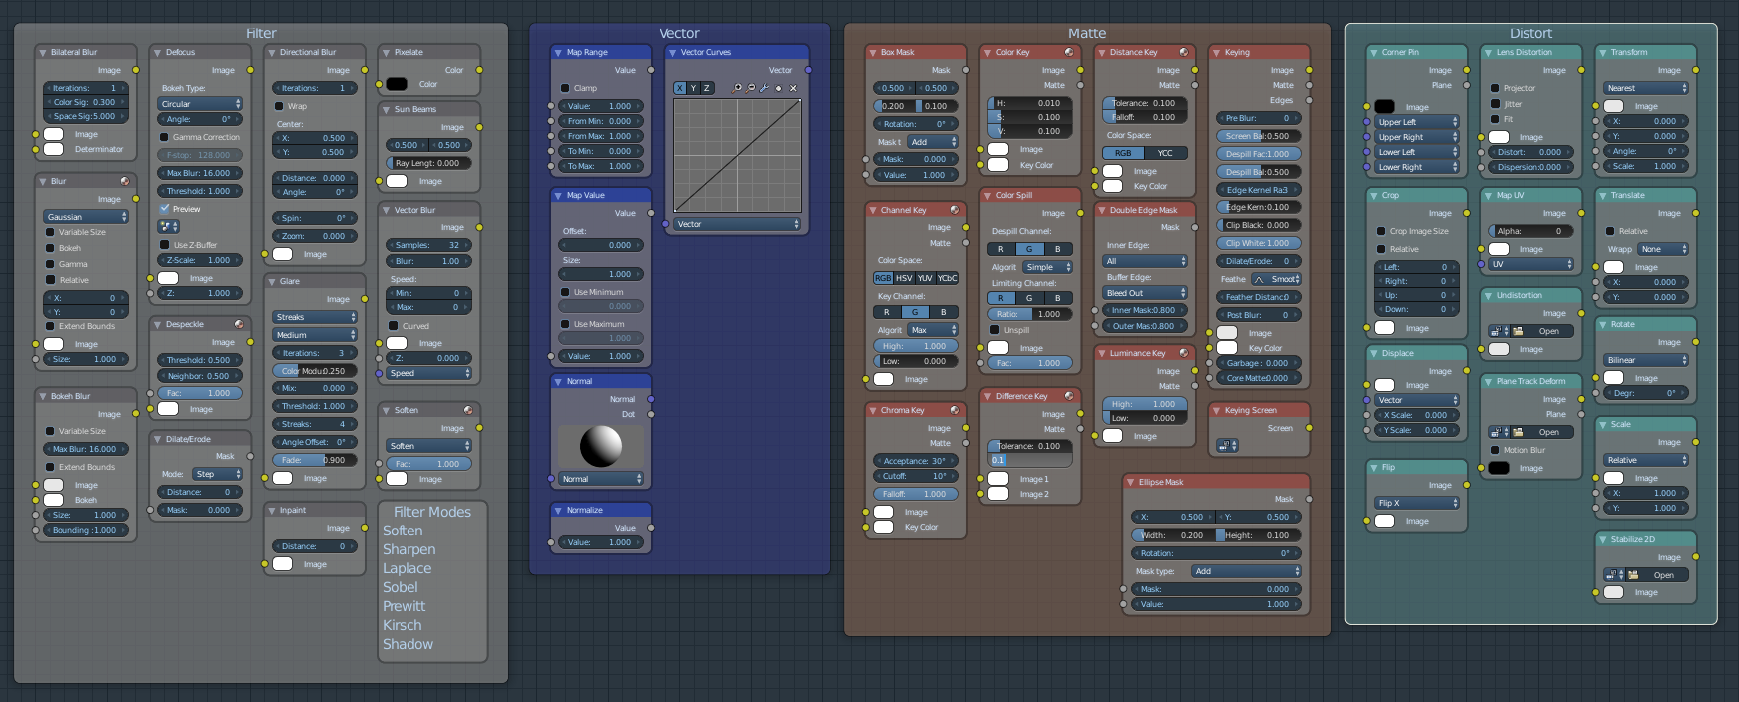
also dated images, but for completeness, here are the compositor nodes:
When using these, I just open an image viewer program, and thumb through the images to see what my options are, and/or to find a node that I remember the shape & features, but not necessarily the name.
(The “math” & “vector-math” nodes are particularly annoying, when reading someone else’s node-groups, because the apparent name of the node keeps changing…)
Learn against a specific project. That’s how it will click. So if you’re looking to create a shader-based canyon, try doing that, and if you struggle, then ask for assistance
there are two things to learn :
first you need to understand the PBR theory which is about shading, or how light will react when hitting a surface. Nowadays it’s mostly covered by the principled bsdf but still you need to understand what is doing what and how to set it up correctly.
This is pretty old but it explains pretty well the shading theory :
Then once you know how to make a proper surface, the second thing to learn/understand is more about texturing, which is about adding variations to the surface. Here there are different ways, you can use textures that you can find on polyheaven, or ambiantcg. You can make fully procedural materials, a mix of both…