Looking for constructive critique

Hi guys,

As the topic states I am looking for your critique. I believe this scene is enough structured to submit for your personal insight and critique. There are few things like cables to be wired , few things added here and there etc.

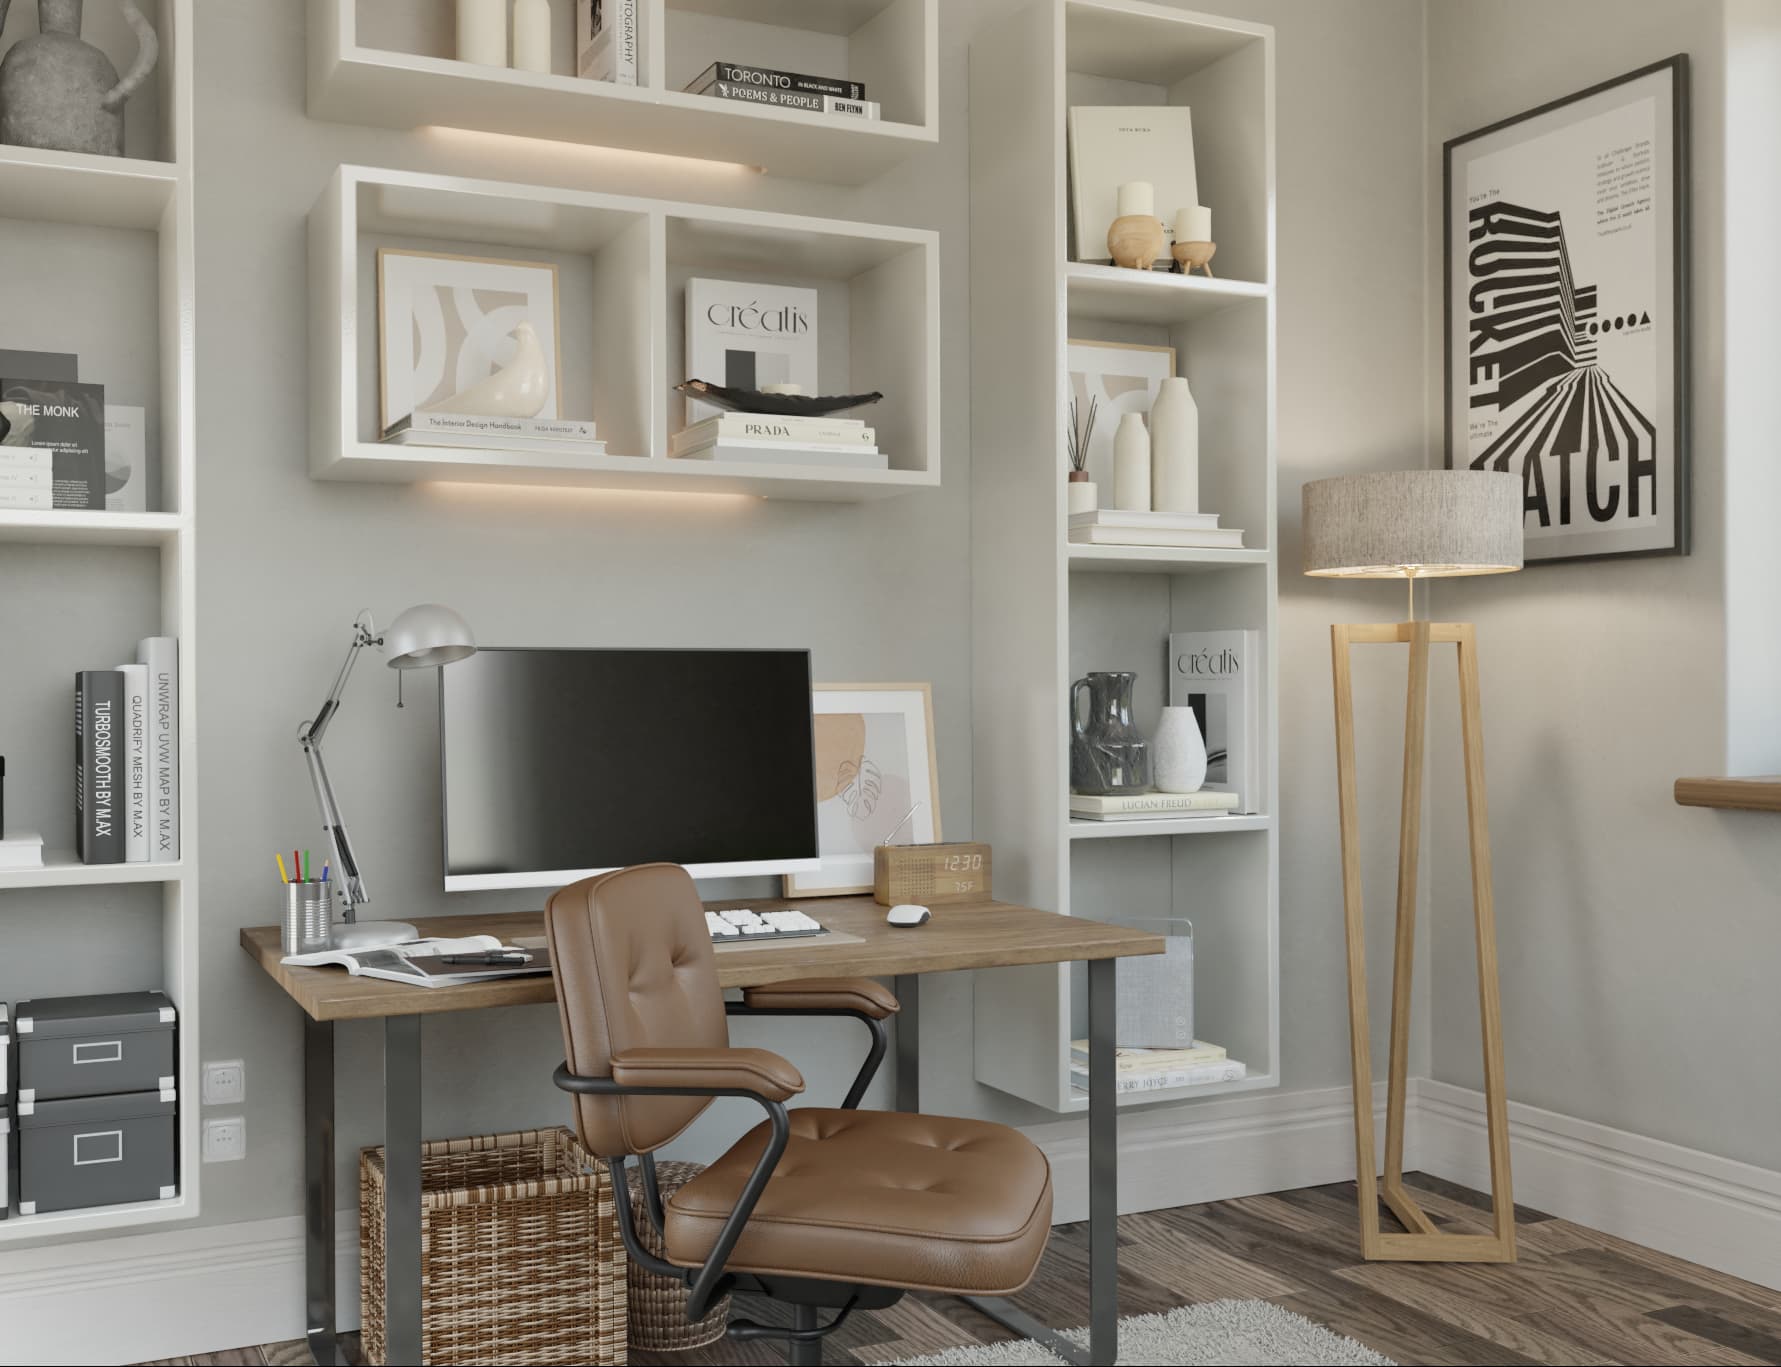
What I mostly not satisfied with, is light. To be more precise it feels somewhat flat to me. For the light purpose I used HDRI and couple area lights by the window and doors which you can be seen in the screenshot. I was aiming at the scene to have light feeling to it but it’s not entirely there. it lacks dimension to me.

I terms of materials and textures I’ve tried my best. Scale wise I suspect I am not off too much there for things should be more or less to life scale. Noise levels were kept under control in order not to smear/smudge the textures which came out fine in my opinion. It took me a while to find most efficient settings to achieve it.

What I am also frustrated with is the texturing and materials. For instance poliigon floor generator generates very fine floor. In Substance it looks fine, in Blender under Spot light it also looks fine until I introduce HDRi light wood effect changes dramatically which makes then go to node tree to fine tune it. Some other materials looks change too after the HDRi or Sky environment texture introduced. I am not entirely sure whether I do things right at this point. Any suggestions here ?

I was also wondering whether it’s down to CYCLES engine or lack of material and light understanding?

For render I used Blender E-CYCLES X and CYCLES 2.91 2.93. Results are pretty much similar apart from speed.
900 SAMPLES
1920 x 1080 resolution

Thanks,
T


10 Likes

If you look at other archviz renders, you’ll see that they just use a single HDRI for the lighting. Try that and convert the area lights into portals and also put them really close to the windows (just cover the openings) to reduce noise. Search for a user called ArchWiz for examples.

1 Like

Hey @neb
Mason here. I worked as an artist for Poliigon in the early launch days, and now I’m working as the manager/lead for the 3D scanned assets. So I’m very happy to see you using our flooring generator :slight_smile:

As you’ve mentioned, the flooring looks really nice in substance and in blender under more high contrast light scenarios. This is pretty standard for all materials. When you have a lot of flat or diffused lighting, the materials tend to look a little bit more soft and flat as well. That’s because the reflections are much more dispersed.

So I think what your scene is needing right now is more contrast to the lighting. The first thing I always recommend doing, is turning off any indoor lights. Standard practice for interior arch photography is to only have interior lights on at night or blue hour. So for an interior shot like this during the day, they should all be off. I would turn off the lamp and shelving lights.

Right now, it looks like you have some very large light sources in addition to your HDR. These will play a big roll in flattening your light. My first two tips for the light would be to remove any light objects you have in your scene, and rely only on the HDR to get you where you want. If you already have a Poliigon subscription, you can browse our HDRs, or you can go to polyhaven.com/hdris and browse the fantastic free HDRs they have.

For this scene, I would strongly recommend a clear day HDR, perhaps a clear sunrise/morning HDR.
One of my favourite HDRs for bright interiors like this is Hdr Sky Morning 003 from Poliigon.

I would use just the HDR, and use the Texture coordinate node along with the mapping node to adjust the rotation of the HDR to angle the light to come in through the window. This should bring a lot of sharp light into your scene, and through GI, it will fill the room with really nice, natural looking light.

I also recommend playing with the color space looks. By default, Blender has FIlmic enabled now. But the default look is medium contrast. SO I would change that to something like medium high or high. That will bring out a lot of the detail in the materials, and give the scene some subtle contrast. You can find that option in the color management menu within the properties pane.

Other than that, I think the scene is looking really good! your materials are nice, I think they just need some help from the lighting to really pop. Something that does go a long way with materials is imperfections. Using some grunge maps to affect the roughness channels on your materials can really help sell the surfaces. Use it sparingly though. It is easy to go overboard.

It’s also good to know that Substance now has an official plugin for Blender.
This is really helpful for designing your materials right within blender. You can load in the Poliigon SBSAR files and instead of using Substance Viewer, you can adjust the material in real time right within blender. This can help you get a lot of control over the look of the materials directly in your scene and specific lighting condition.

I hope that helped in any way!

4 Likes

Hey Neb!

Nice renders! I like the darker walls for sure. It’s my thought but I would suggest adding a texture to the drywall I think it would make the whole scene pop in a subtle way.

The only thing that my eye keeps getting caught on is the baseboard and how that would normally be cut at a 45-degree angle but the line does not match the wall. This is a minor one and I understand having the rug on a wood floor (all arch-vis has it), but it wouldn’t be the best to roll around on (a bit of the rug is coming through the desk feet/leg).

I digging the neutral colors with the splash of color with the pencils. Keep up the good work, I look forward to seeing more updates on this project and sharing what you have tried that worked and realized didn’t work.

Sincerely,

1 Like

It think what your render would help is some post process, just curve and camera raw

3 Likes

There’s also a way to check and adjust the lighting one by one.

It’s also good to analyze the lighting of the reference image.

If there is an externally installed light. HDRI can lead to bad results.

1 Like

I featured you on BlenderNation, have a great weekend!

2 Likes

Hi there,

Thanks for coming forward with some valuable information.

Eventually I got rid of the additional light sources and extra window in the room to make single light source provide so much missed punch to the scene. I still use SKY Nishita for now because I don’t have Poliigon subscription right now but will definitely try it when opt back. I hope that you guys have decent HDRi. While using some free HDRi from internet helps they are inconsistent with quality sometimes.

In fact I use high contrast option but as you said earlier too many light sources diffused scene a lot there for it helped little for my intended purpose.

I can’t wait to install substance plug-in which would make a ton difference in my workflow. Jumping between both programs is quiet inconvenient.

By the way I use 3D scanned plants from poliigon and they are great!

T

1 Like

Hi HelloDJ,

Thanks for jumping in. Followed your advice I looked for ways to improve wall texture. It’ is still in progress at the moment. The thing is I don’t know exactly how to do textured wall the way I want but working on it right now.

Nice spotting about baseboard and rug coming through :wink: . Didn’t notice it to be honest. Stay tuned updated version will follow soon.

T

1 Like

Haha, no problem. I’m locked on for updates!

1 Like

Just checking in to see, “How’s it going?” :grin::+1:

1 Like

Glad you showing interest ! Currently working on the other side of the room and other bits and pieces. It’s a learning process for me too which takes times as I go along :smile: Stay tuned !

Long due but finally done :slight_smile: Living Room/Office Space Visualisation. E-Cycles