I have two issues I’m trying to resolve with a procedural material for mahogany in cycles on Blender 2.8. Any help would be appreciated.
The material is correct on faces facing in certain directions but is distorted on other faces. I’ve read in similar questions that this can be resolved but it’s unclear how (something about having multiple orientations but how is that implemented)?
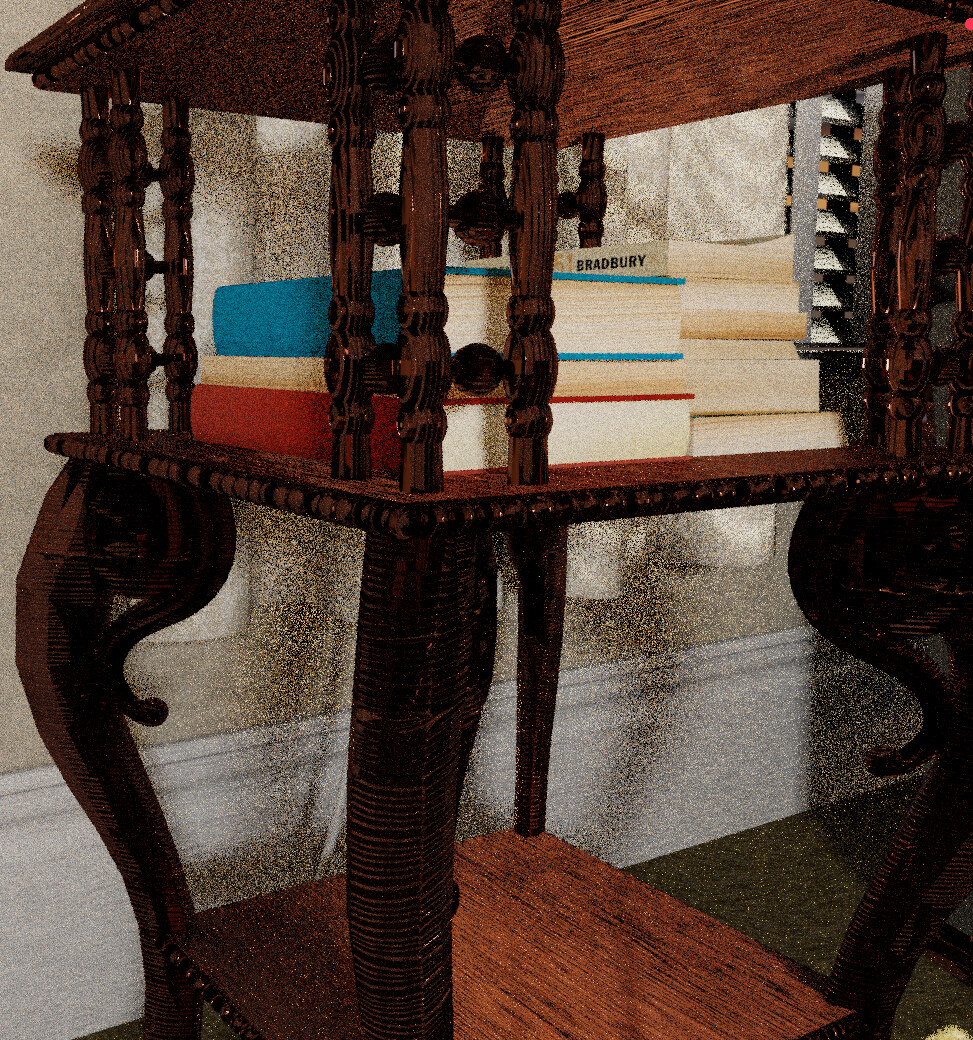
The wood is polished and should have some reflection. I’m using a Glossy node to achieve this but so far it’s ether not reflective enough and true to the colour of mahogany or reflective enough but off colour. How do you get that balance? No doubt I’m missing something in the nodes settings but what?
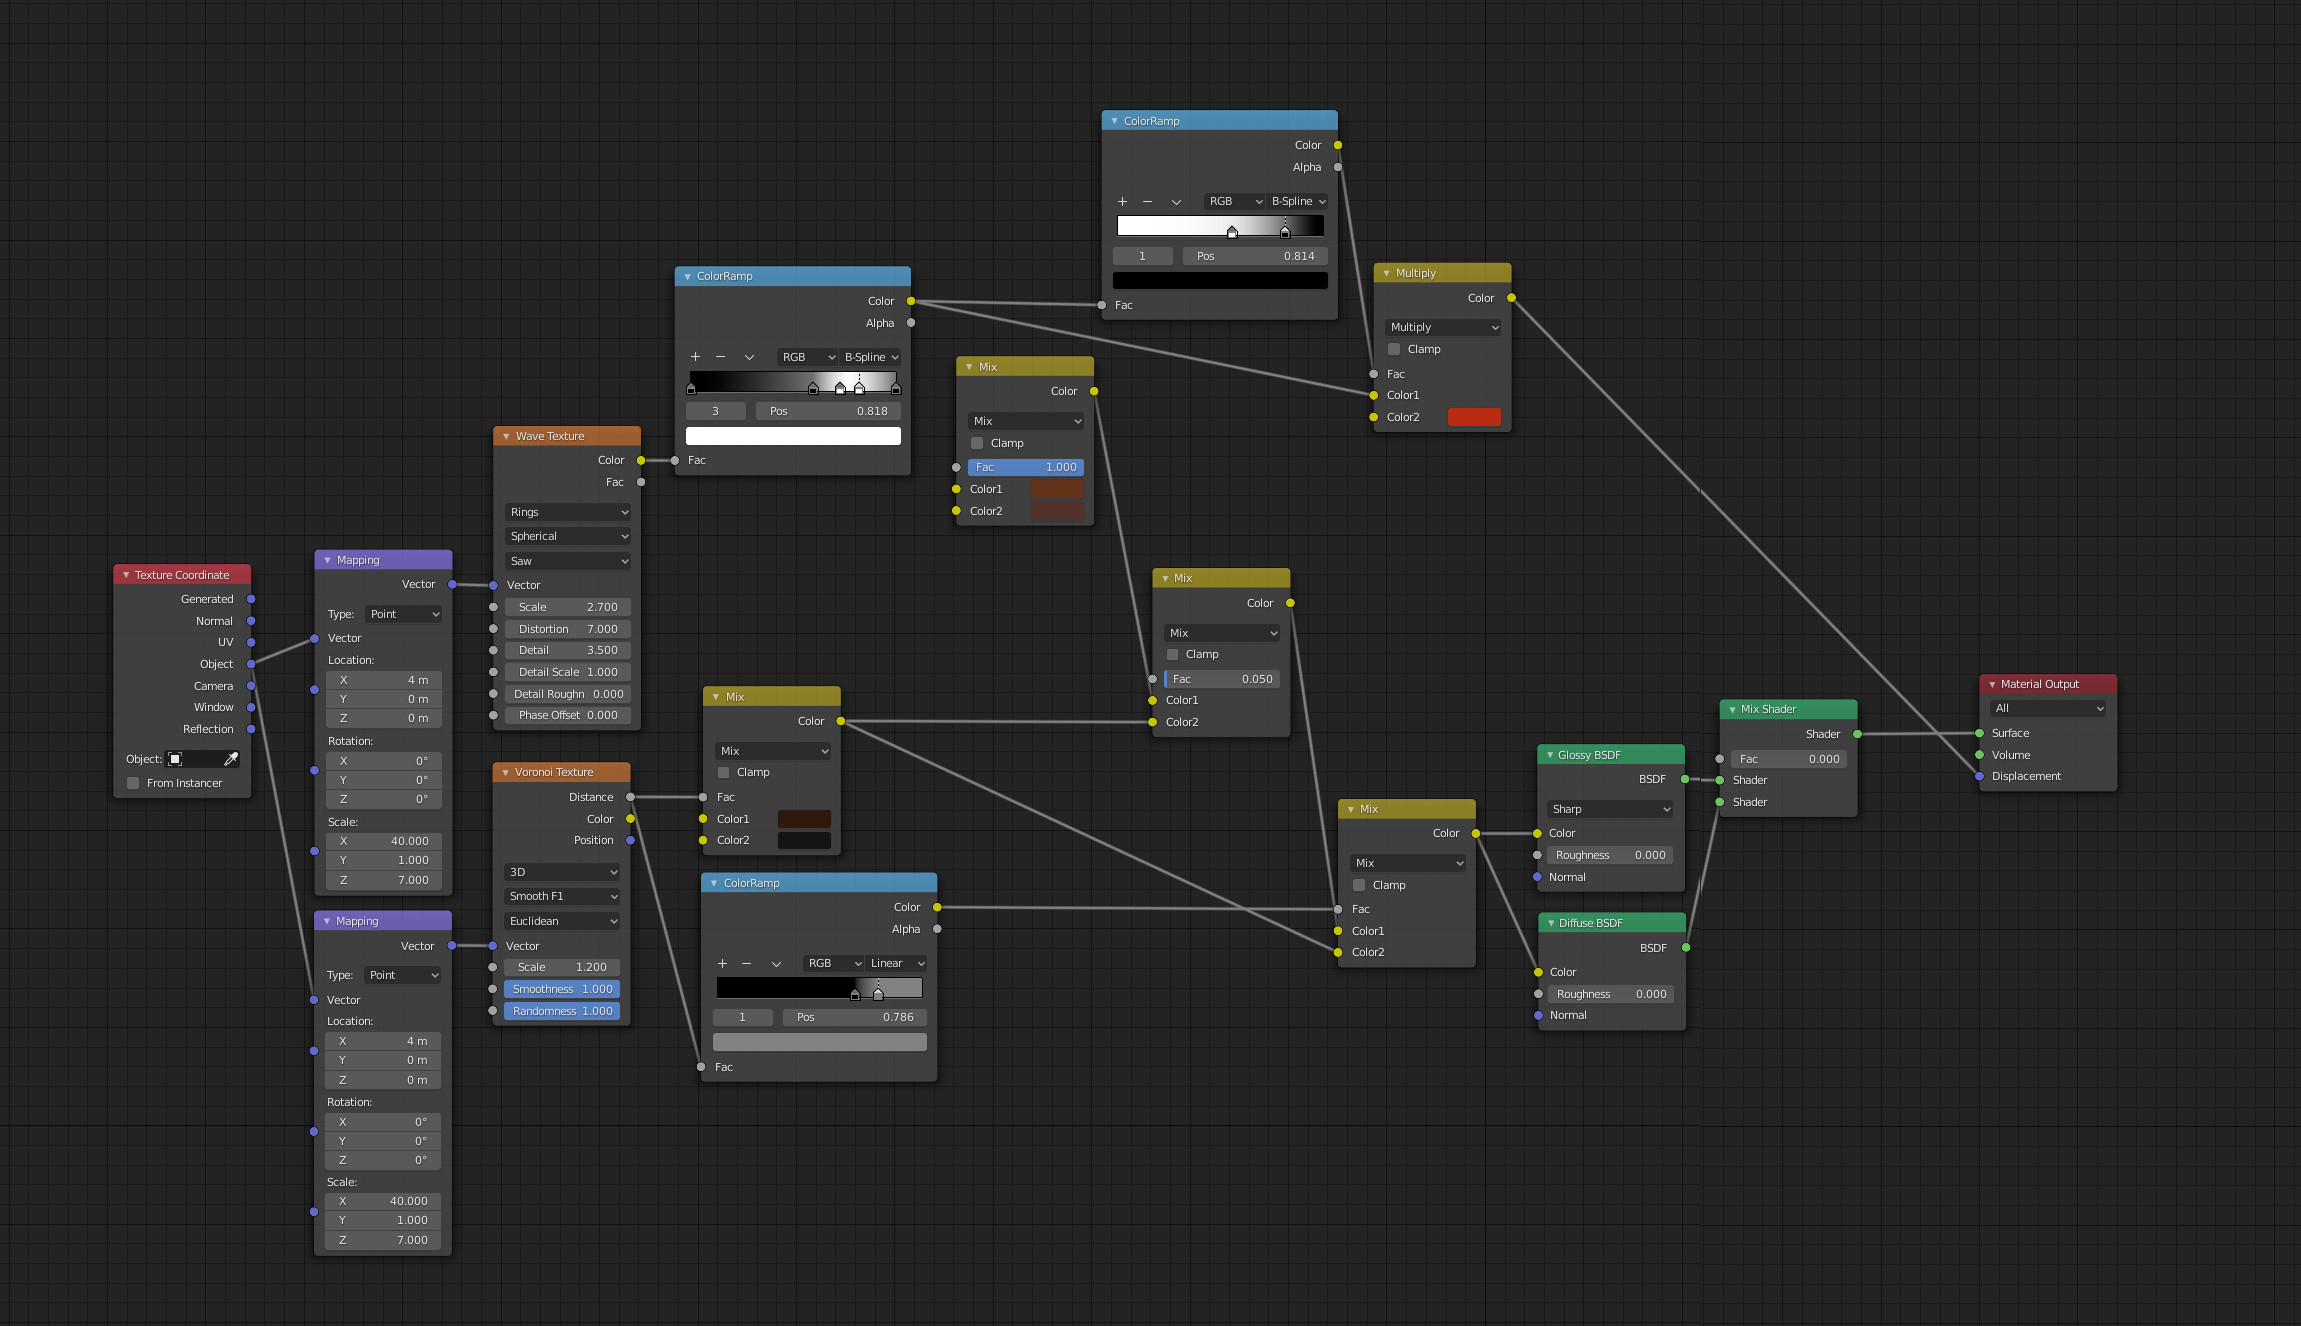
I’ve attached a screenshot of my material setup for reference.
At first, use a Fresnel node for the input of the mix shader between glossy and diffuse. It’s the standard approach to handle glossy layers.
Also the glossy might work better when not set to fully sharp, but give it at least a bit of roughness
Not sure what you mean by ‘off color’. To see it, maybe a higher res and less noisy render would help. In any case you likely can get closer to the look you aim for, by using a different color for glossy than for diffuse. Either place a hue/saturation node between the color mix and the glossy input, or duplicate the color mix, so you have two separate ones for glossy and diffuse.
About 1, you use a map node to stretch the texture (by using different scales for different directions). As the direction is fixed in object coordinates, it will always stretch in the same direction in objects space, no matter how the mesh is aligned.
To change the alignment, using the rotation input of the mapping node should work. To have different alignments for different pieces of your object, I see 3 options:
split the mesh into multiple objects, each one with a different rotation of its object space as needed
duplicate the material and rotate the mapping as mentioned for the copy(s) the assign different materials to different parts of the mesh
feed the rotation input from a vertex color node, then using vertex paint to mark which part of the mesh should have which alignment.
As you can see each face that points in a different direction has its own coordinates for the texture. The more faces that have different angles the more x,y,z center points, see what happened to the sphere.
Edti (again!) you could change to generated coodinats it will work better.
If you want your texture to look the same from all angles, the best thing would be to unwrap your object and change the «spherical» option to x, y or z.
Or you could use a force box mapping node setup like the one in this thread:
Edit: you could also check out this thread for triplaner mapping:
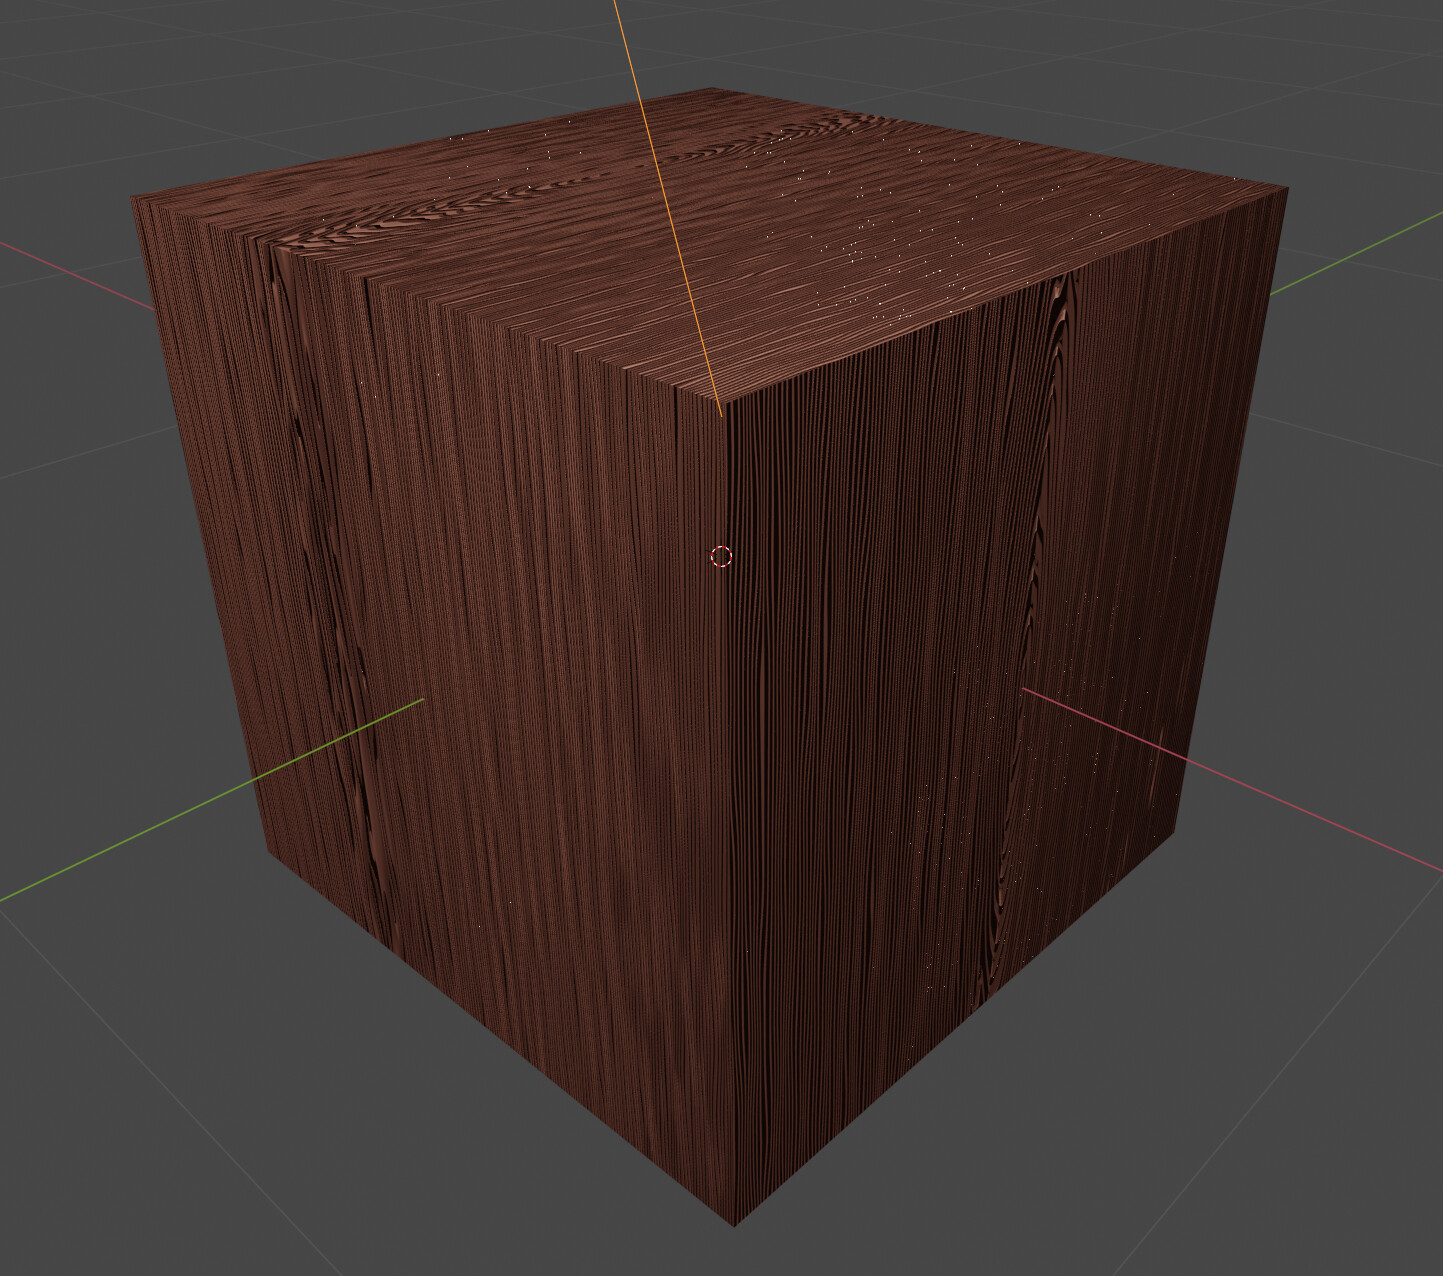
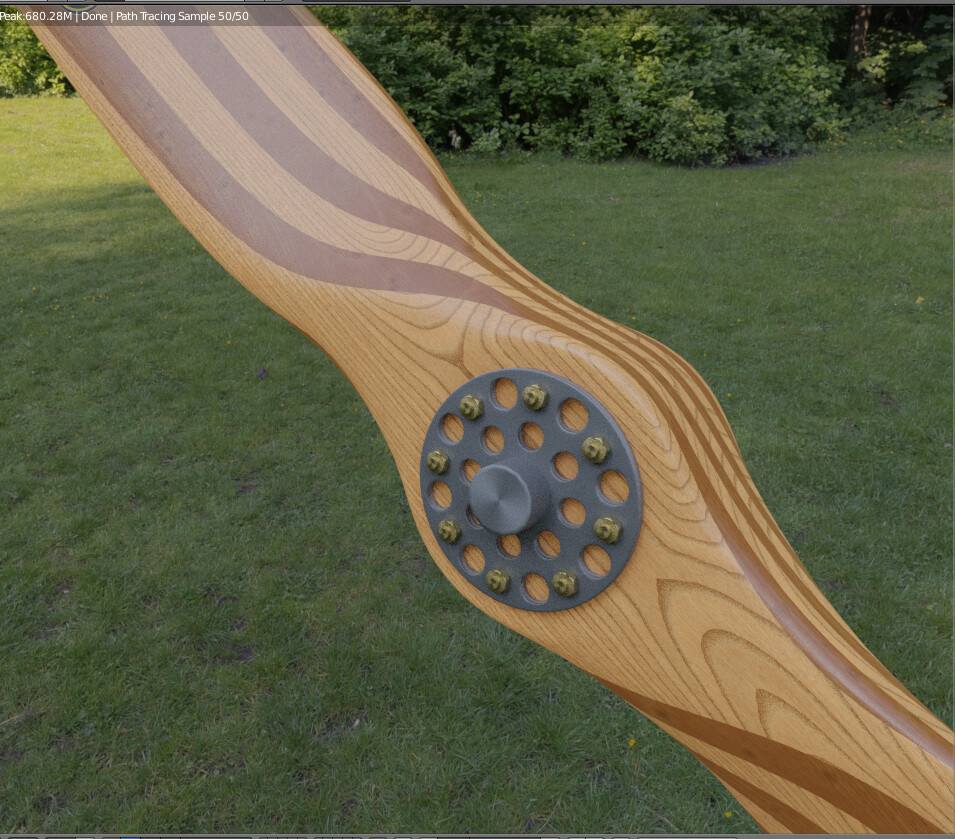
@omgold My mesh is already separate objects. Duplicating the material had already occurred to me and I wanted to avoid that - preferred to use one material as it’s less confusing when applying to the surfaces. I did try to use your third option (vertex colour / vertex paint) but didn’t really understand this so I opted for @DNorman’s solution of triplanar mapping. I think this was the solution I mentioned in my original question but didn’t know how to implement. The example given was clear (once I figured out I needed to use Mix Shader nodes instead of the Colour Add nodes). This is my end result:
Works well on a cube but needs finessing on other shapes.
-For 2
I added a Fresnel node as suggested and it helped a little. Tried using non-sharp settings on the glossy with some roughness and no significant difference. As I solved question 1 the reflection improved a little. I think perhaps the displacement might be an issue so am going to continue to play with those settings to see if it improves more.
I’m using two area lights and a HDRI. The area light named Sun doesn’t allow much light into the space (in the original there are blinds and curtains on the window so I have blocked the window out in this blend). The majority of the light comes from the area light named Flash light. I’ve added a Displacement node as you suggested.
Thanks. Unfortunately I don’t have any more time today.
What I found so far:
I don’t think you can combine displacements like this, with a color mix. You can color mix normals, if you use bump nodes instead of the displacement output, though. Also feed the texture into the height input of the displacement node, not the normal input.
doing that, reducing the displacment scale value and increasing the glossy roughness improves for me the situation so far as that shaders work as expected. might be tuning the displacement scale, the glossy roughness and the glossy brighness (via the HSV node) is enough to give you the look you want. would have to try.
reduced displacment scale and connected texture correctly
Fresnel mixing of glossy was reversed
tweaked glossy color and roughness a bit
It certainly isn’t yet the final result you want. Also the lighting I used is different, not having the image textures. But there is a sensibly working glossy now which you can gon on tweaking.
I don’t think you can combine displacements like this, with a color mix. You can color mix normals, if you use bump nodes instead of the displacement output, though
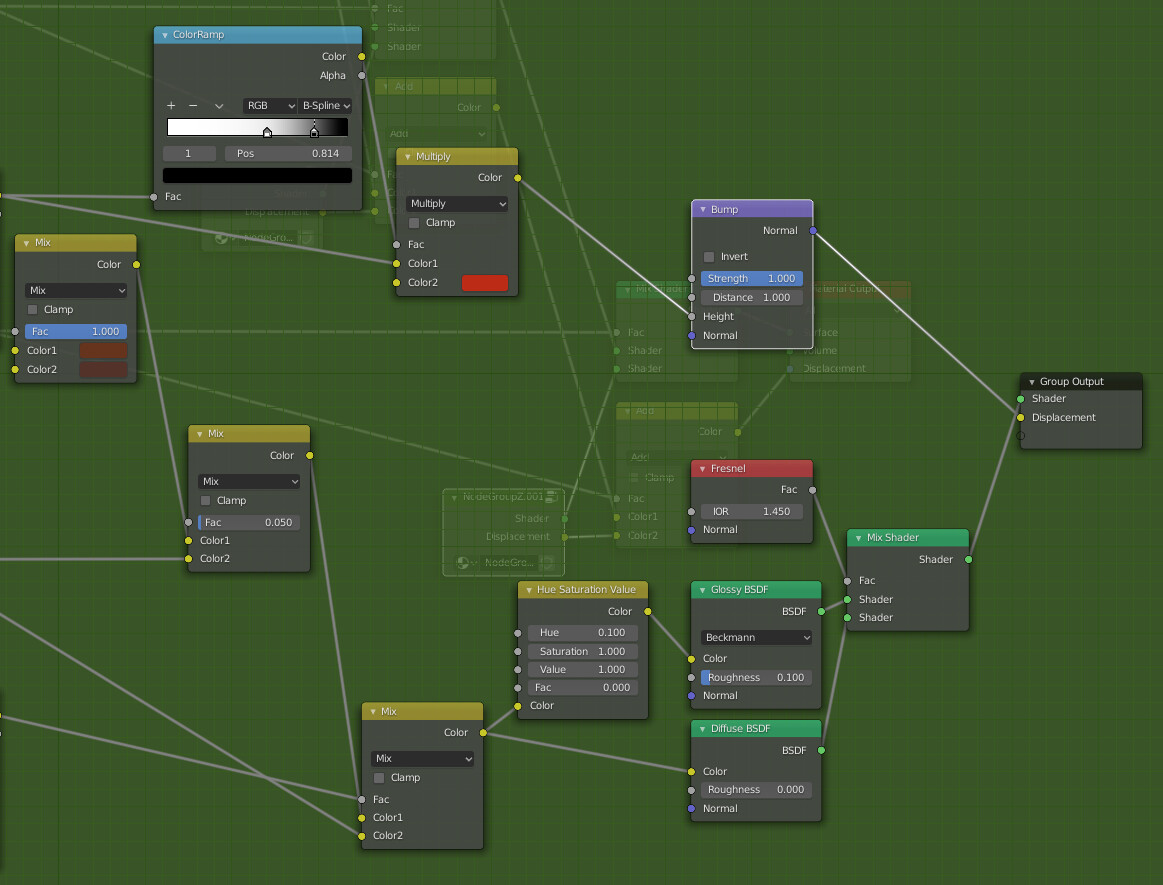
Am I understanding this correctly? Swap out the displacement with a bump (as in the image) or do I lose the Add nodes that are combining the displacements?
The bump node works differenty. You have to connect the output to the normal input of the shaders. But you can use color mix to combine multiple bump normals. It gives you only part of the bump strength of the individual inputs, though.
Alternatively (what works for both the displacement node and bump node) is the add the height input values. The behavior of that method is different, but that is another matter.
The way to fix your material with least effort is probably the second method while keeping the displacement node. Move the displacement node out of the node groups. Use just a single one right before the output. use the add nodes to combine the textures before feeding the result into the one and only displacement node.
Move the displacement node out of the node groups. Use just a single one right before the output. use the add nodes to combine the textures before feeding the result into the one and only displacement node.
Ok I understand. I’m starting to get a good gloss/shine/reflection now. Just need to play with the values a little more tomorrow. Many thanks for all your help.
The displacement node is used to actually modify geometry and move vertices. Using a displacement node to achieve bump gives an unnatural shadowing effect and does not «displace» anything.
For true geometry displacement with nodes you need loads of subdivisions or adaptive subdivisions to have enough geometry for it to look good.
For a polished wood texture you do not need that kind of displacement.
The logical way to go would be to use either a «bump» node or a «normal» node plugged into the normal input of a principled shader. If you do not have a proper normal map go for the bump node.
Wood normally has very subtle bump unless it is old and weathered. For polished furniture like this the bump should be very subtle.
I know most of your questions have been answered, but I just wanted to offer you to have a look at my blog. I really need to update it for 2.8, but in terms of general results it might be helpful to see how I’ve made procedural wood in the past:
I’ve used this method for various projects with good results:
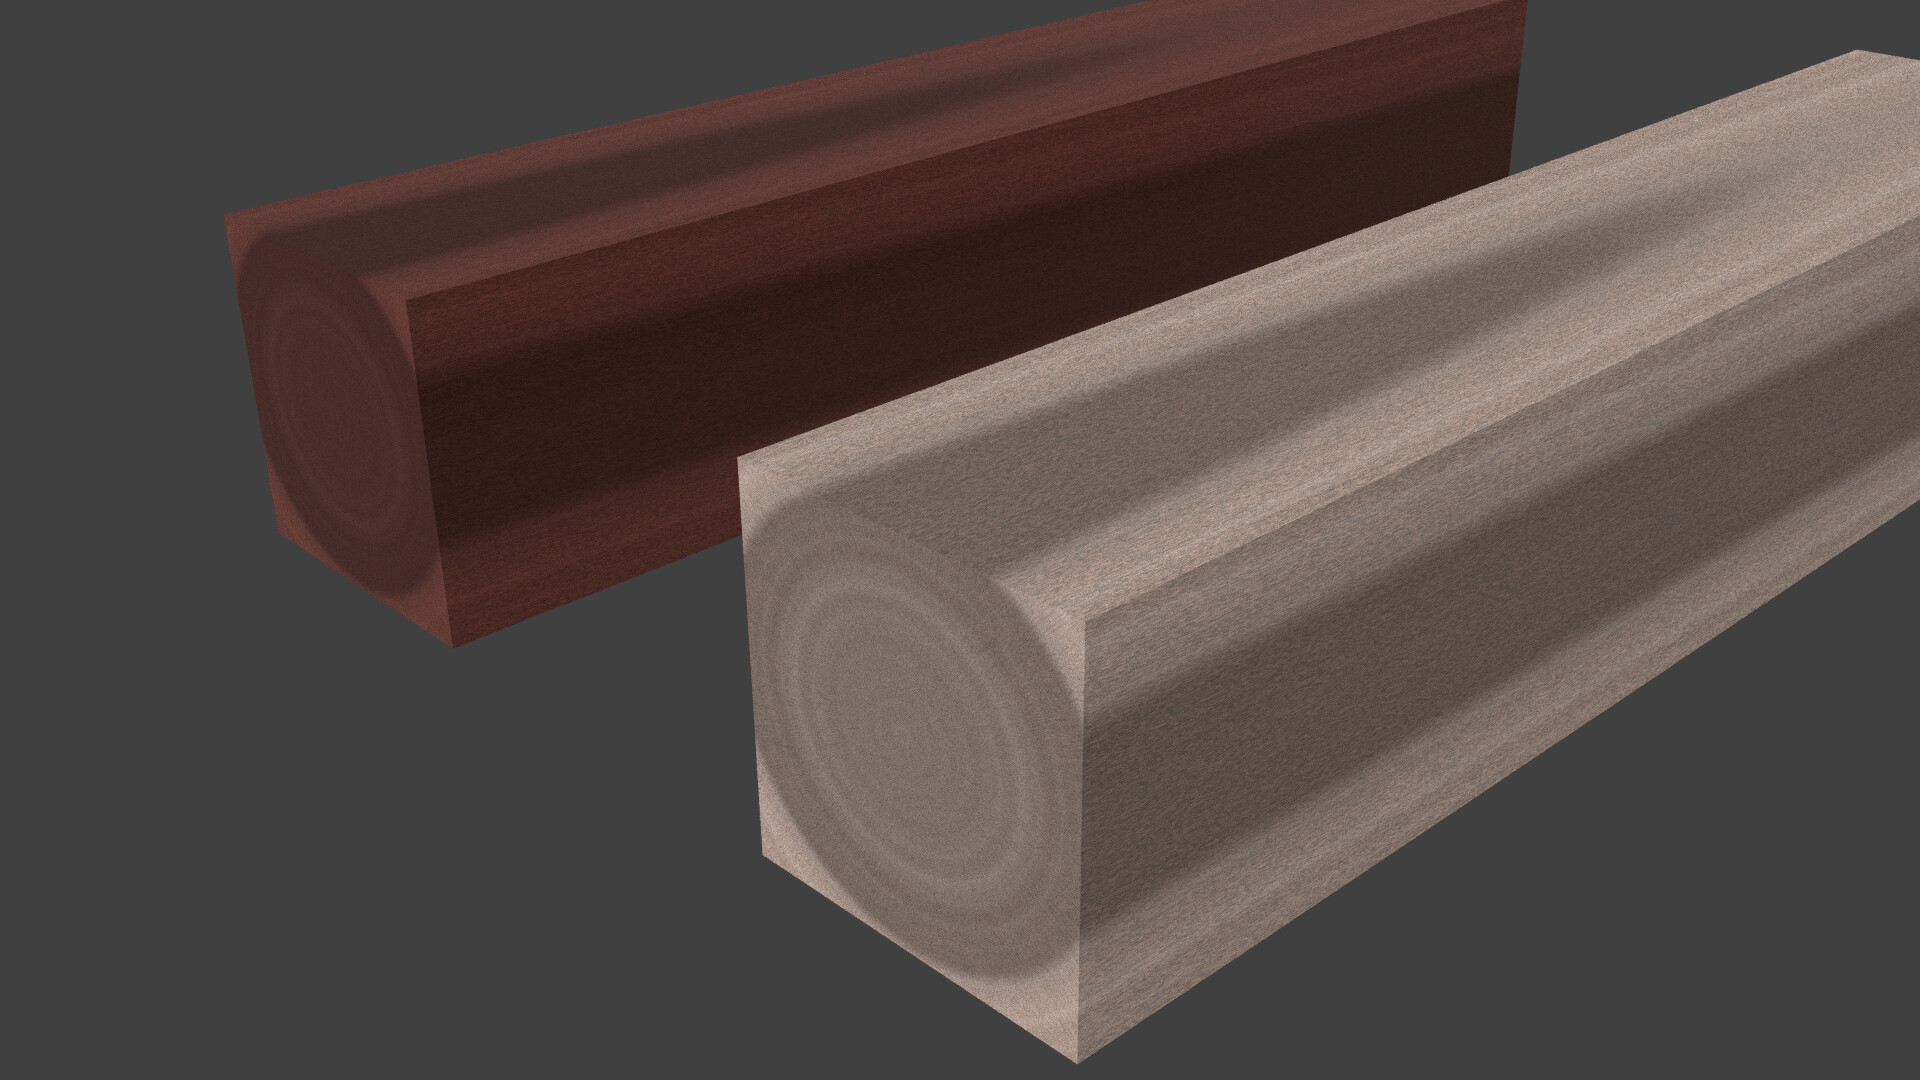
One thing a lot of people don’t realize is that when you use “Object” mapping mode, you can put any object in there. If you use an Empty, then you can move the Empty around until you get the grain you like. Also you can potentially use the same material for different parts of your object, because the Empty can make it look like different pieces of wood…these are the same 2 materials with Emptys in the “Object” slot:
Other than what’s already been said, swap the diffuse and glossy input nodes on the mix shader node. It’s supposed to be fresnel to mix between diffuse and glossy, not fresnel to mix between glossy and diffuse. Here the glossy roughness is quite low so it doesn’t matter too much, but if you don’t know how to setup roughness based fresnel and/or microroughness, use a Principled node instead. Generally speaking, you’ll want to use GGX for most things, and possibly Multiscatter GGX for rough glossy (I wouldn’t bother with that here though).