I’m struggling to get a good grasp of animation-friendly topology and I really need an advice especially from animators’ point of view. Below you can see my progress so far. The whole character I’m making should be pretty low res (about 8k tris) and I decided to start with the hardest parts, namely those meant to deform.
You can for sure, however, it would probably be better if you posted your questions to this thread so that other people with the same questions can find it and learn from it
I’m also not a retopology expert, so by keeping your questions and updates public, you’ll probably also get better help than I can offer
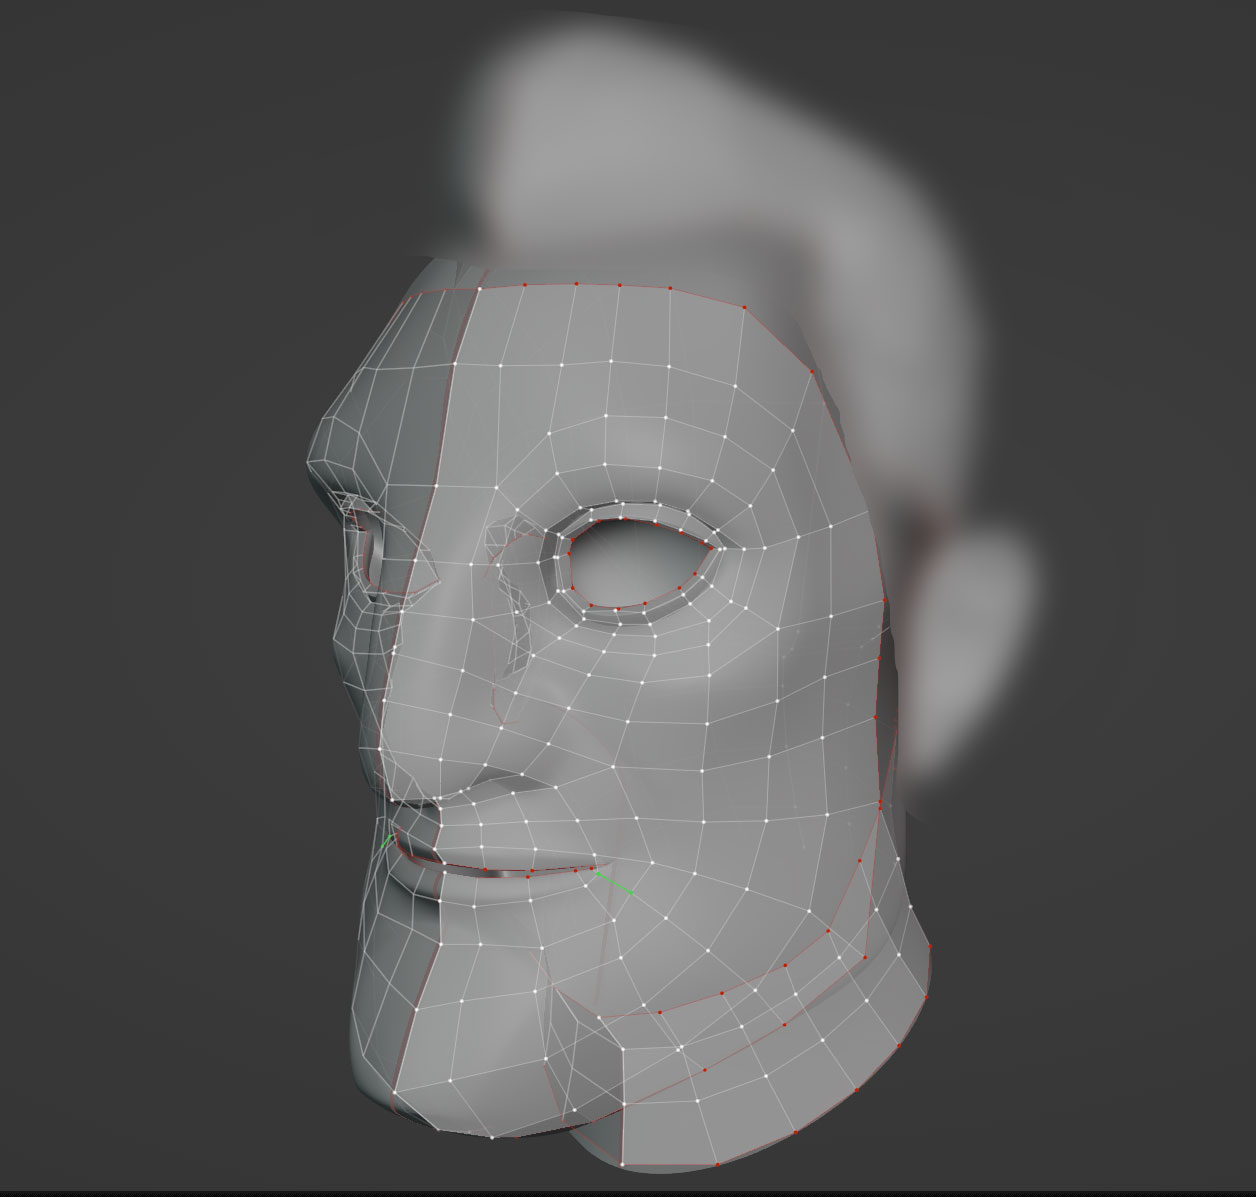
I decided to start over from scratch and perform a new retopo on my head. I’m not really sure if that’s any good at all. Tried to simplify it and keep the important loops yet somehow I got around 1500 tris, which for a max budget of 7k for the whole character (clash royale-inspired) should be too much for a head?
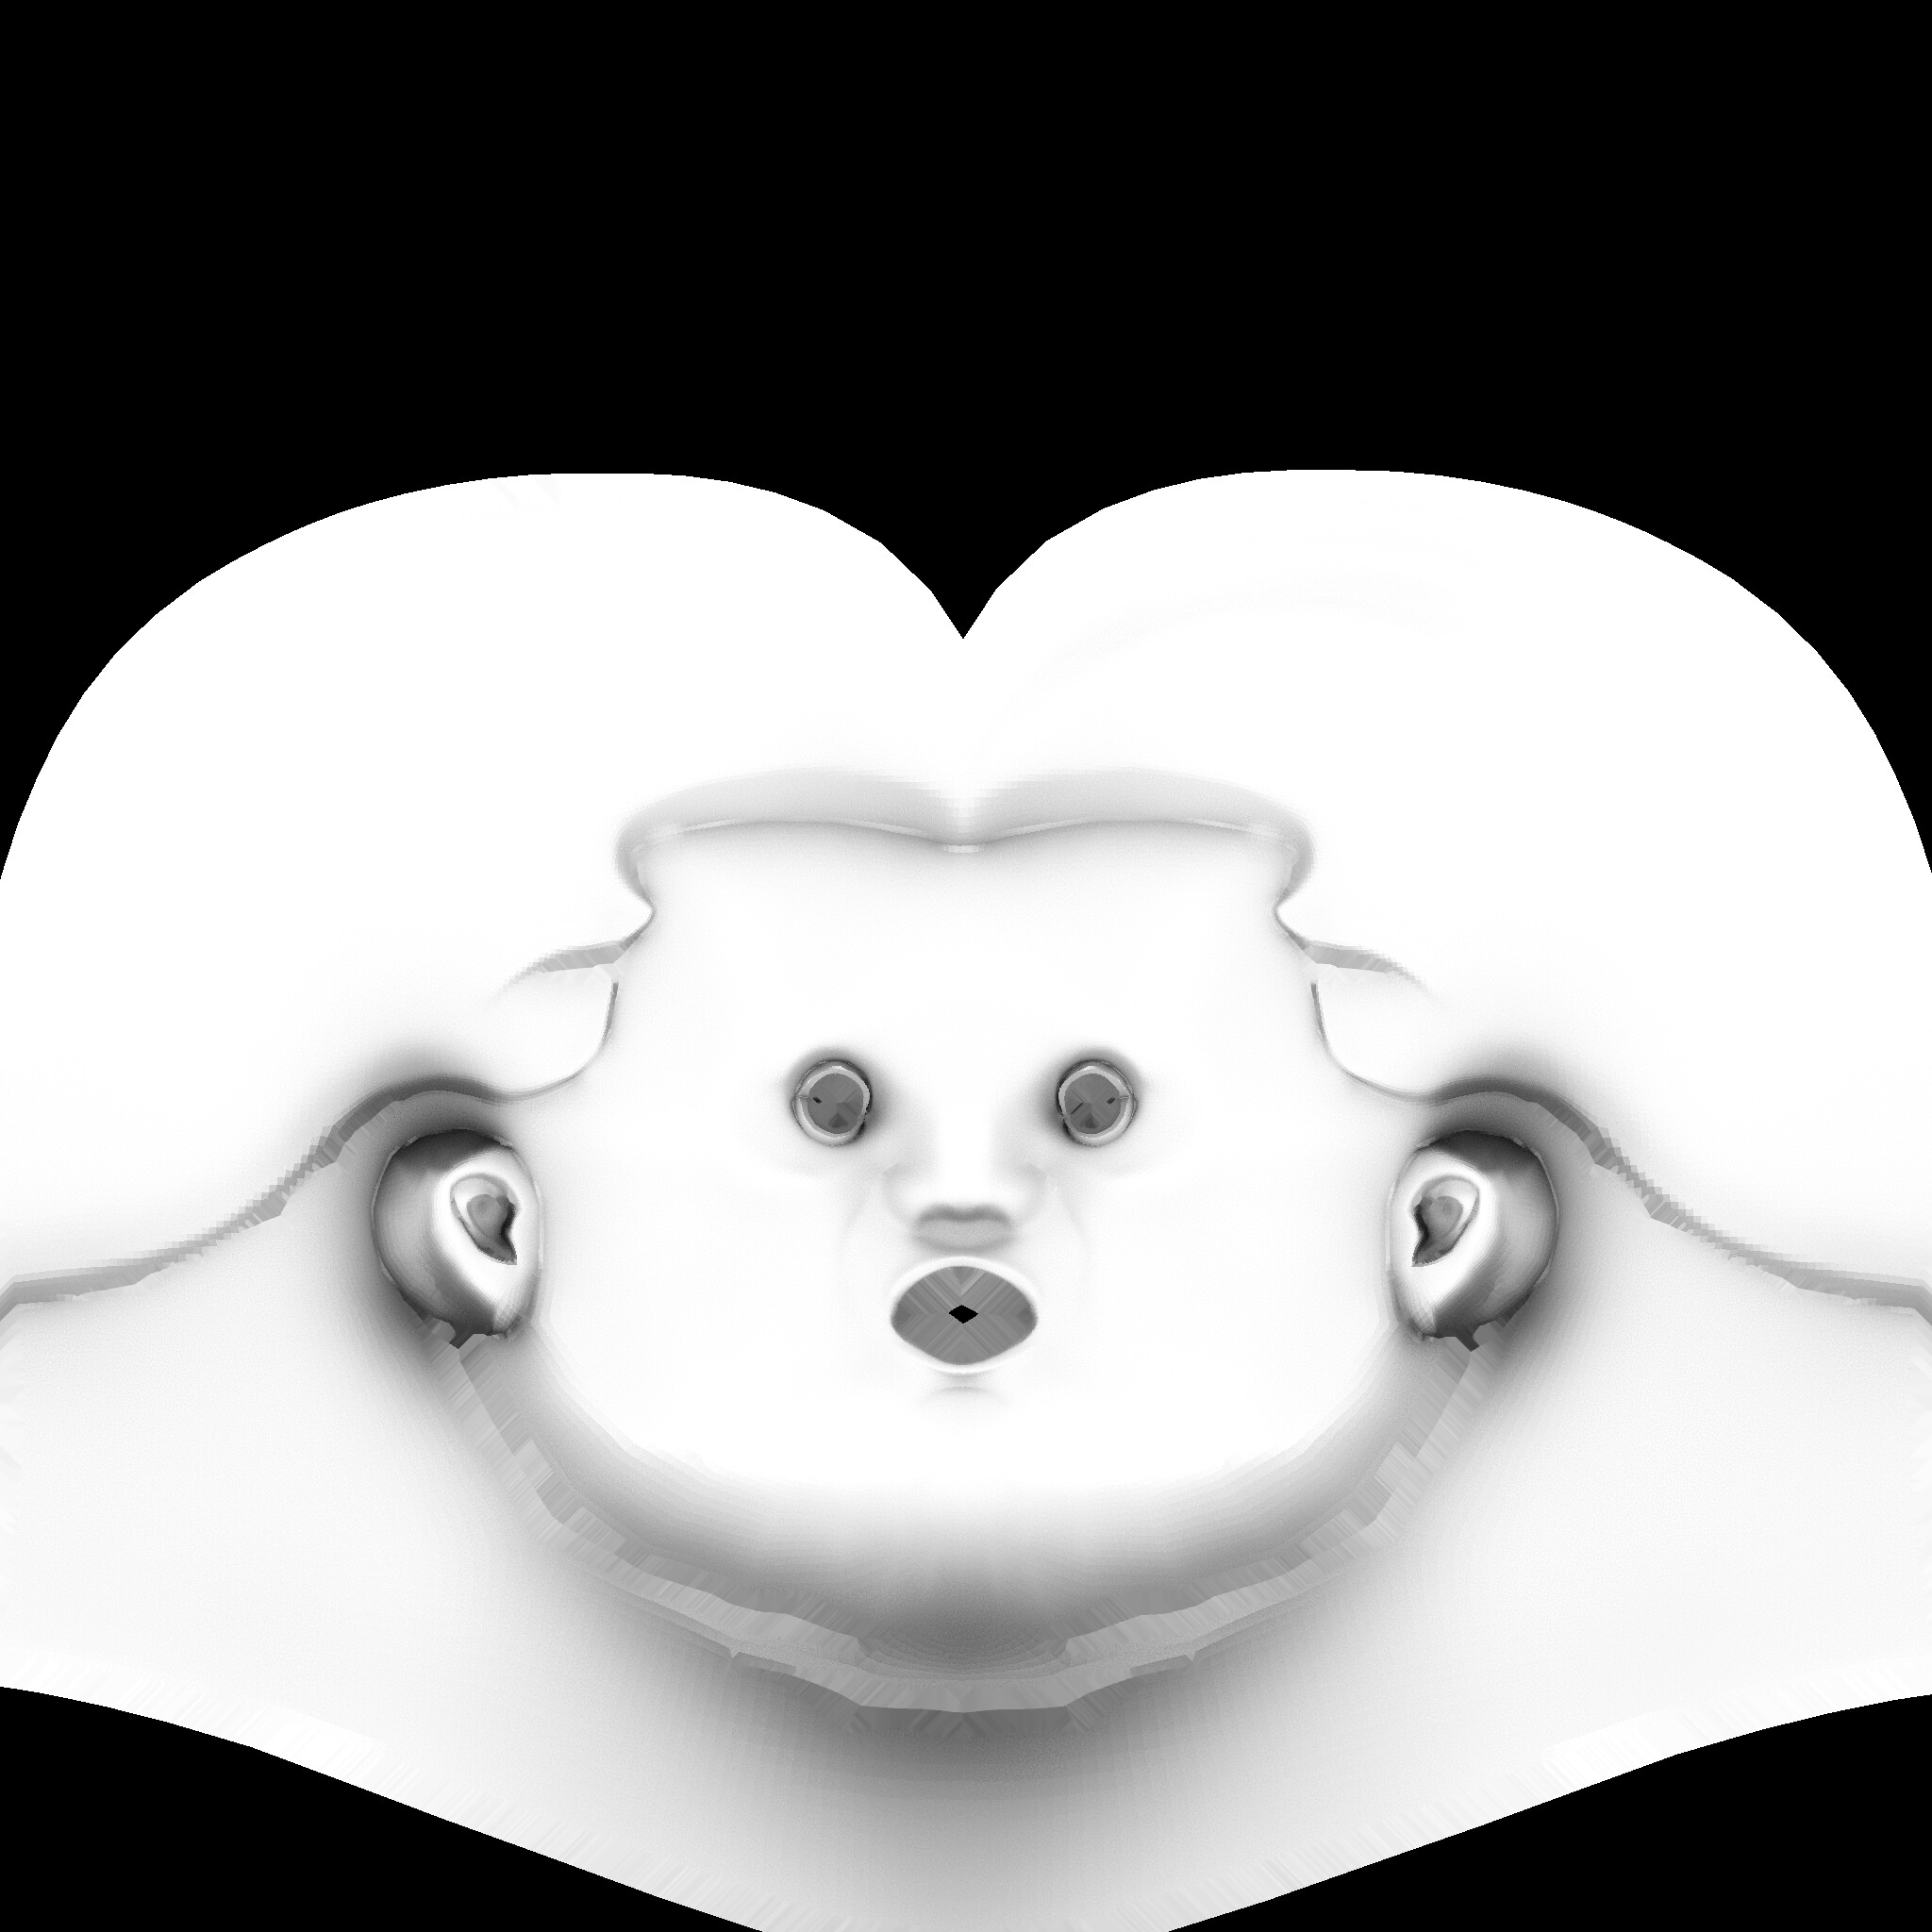
Anyway, when I reprojected the highpoly to the retopo mesh in Zbrush, I got some nasty surface errors and I’m not sure what I’ve done wrong. Check it out:
When I tried another way by importing the low poly into the lowest subdiv of the high poly, thus update its geometry, it worked better, however, part of the hair on the side was eaten much like the example above.
Poly count can be optimized by using triangles. You do not need that many loops (and correct topology) on the hair and back of the head
What about reprojecting anything in Zbrush, if I remember correctly, the best way was to reproject the lowpoly on highpoly, then add one subdivision level to lowpoly, then repeat those stages as many times as needed. Reprojecting step by step usually took care abouth most artifacts
Tried it and while it could work out by fixing it and re-sculpting some of the details, when I tried to bake, it all went down the drain. I tried baking in both Marmoset and Substance and I got awful results. Check out the maps below:
Normalmap looks like it was calculated against flat shaded mesh. Check if you can force smooth shading either in Blender or your baker of choice
If nothing helps, try baking tangent normals in Zbrush. If ZB tangent baker is still crap (it was giving me seam artifacts ~10 years ago), there is hack to fix it. Export Object space normal from ZB, create a material with Object space normal in Blender, put it on your mesh and bake tangent normals of that mesh (without using Selected to Active)
Sorry for the newbie question but what is a flat shaded mesh? I tried to find information on how to force smooth in Substance Painter but nothing popped up; do you have a clue on how to tackle this?
By the way, I tried to bake another prop belonging to the character and basically the same thing happened. I tried to adjust the cage distance yet to no avail. It’s getting even more confusing, to be honest
It looks faceted in the viewport, no interpolation between individual faces. Edit - Face - Shade Flat (as opposite to Shade Smooth). If it is not a setting in Substance, then you have to set it in Blender
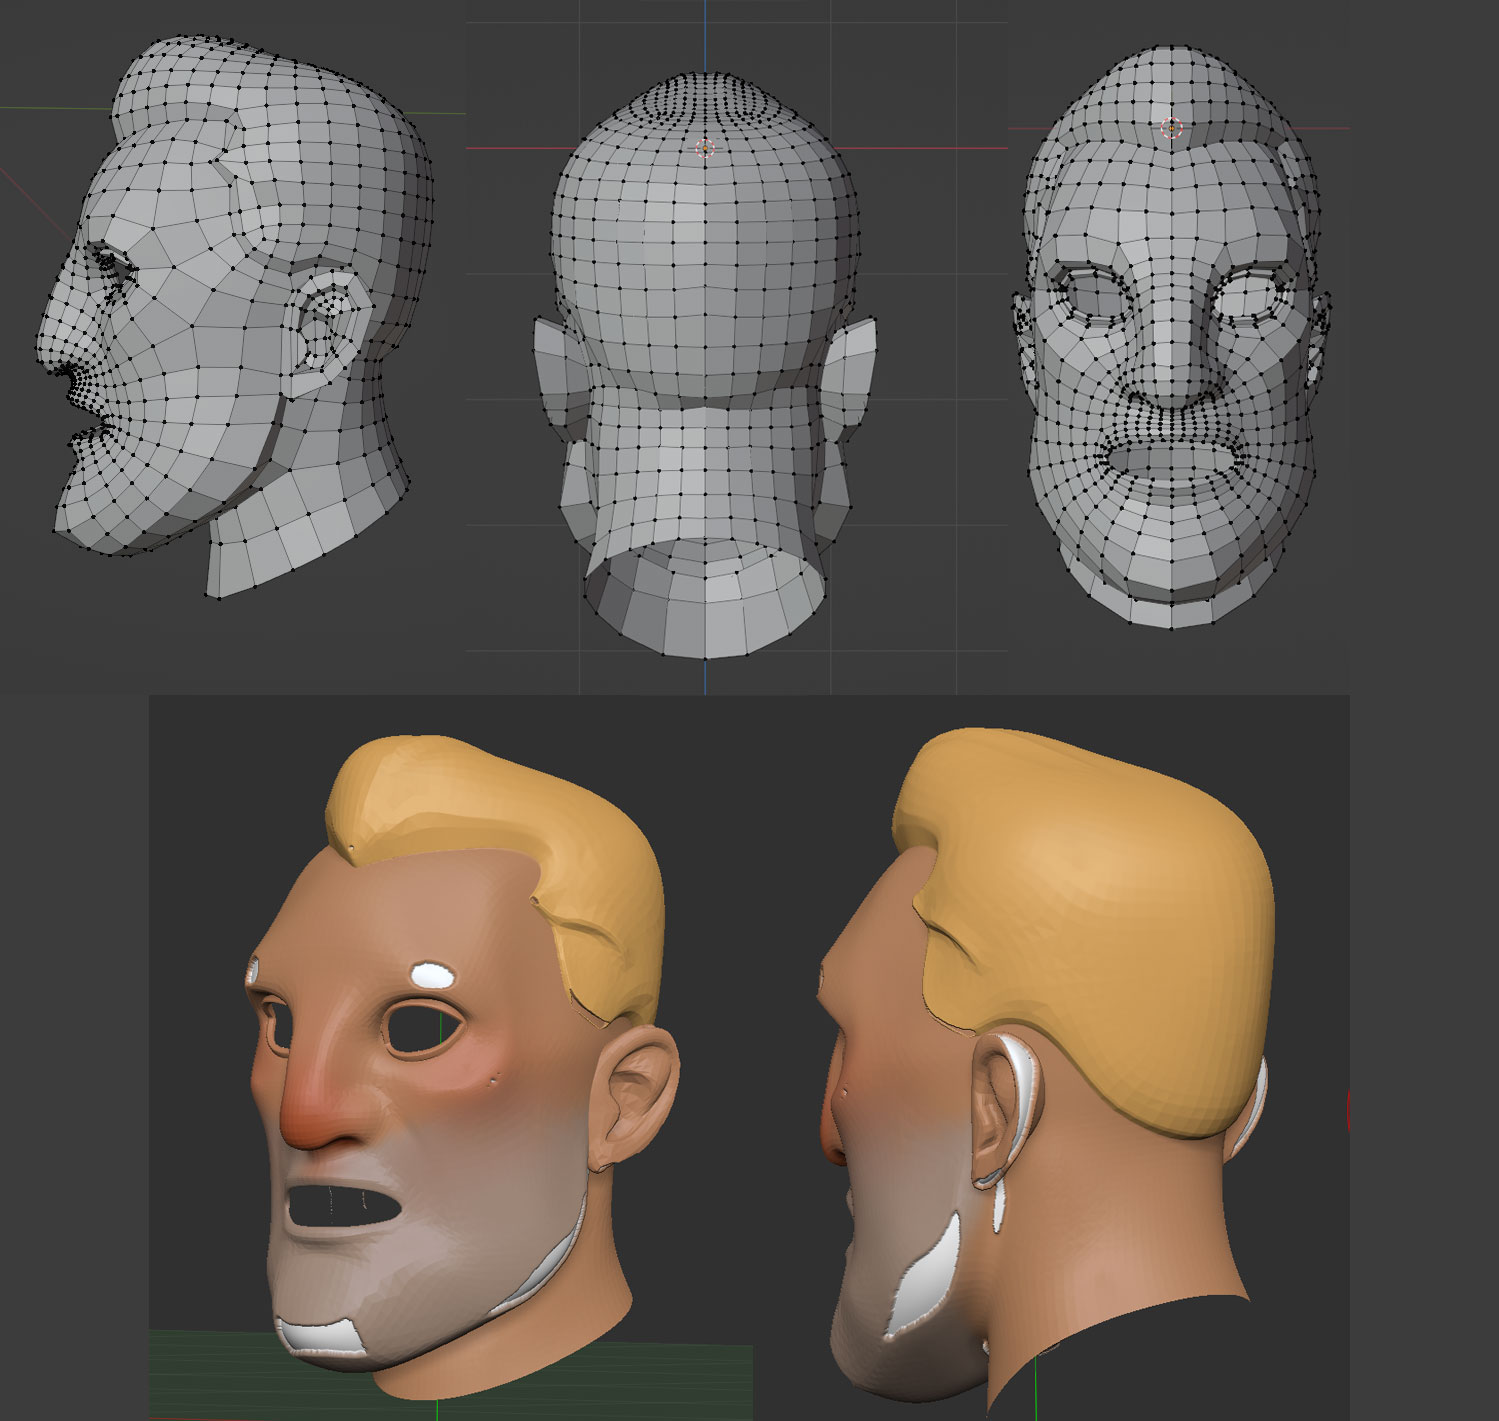
You should be consolidating/merging head loops down into the neck, the neck usually has 12 or so vertices but for a low poly budget, you may want even less. You have a ton of wasted polygons at the back of the head- you could save yourself probably 300+ tris by simplifying by merging in the back. In the video I linked earlier, you can learn how to do that
Did you set faces to Shade Smooth? Maybe I was confusing; you need a smoothed mesh to bake properly. (Edit Mode - Ctrl+F - Shade Smooth should be there)