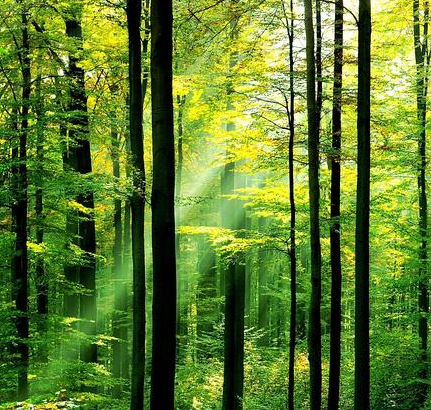
I’m trying to get that effect where leaves that are a regular green look yellow in direct sunlight, like in the photo above. I can’t seem to quite get the effect. Here’s what I tried so far (partially also based on this shader), any ideas for improvements? It doesn’t have to be in cycles, I just tried those cause the regular diffuse ramp didn’t really bring satisfying results.
It doesn’t nearly have enough contrast between the highlighted yellow leaves and the rest.
Or could there be some possibility for improvement with the light?
The sun’s “size” is 0.1, but I don’t know if that’s the same thing as strength in blender render. I tried switching to a spot or hemi, not much improvement.
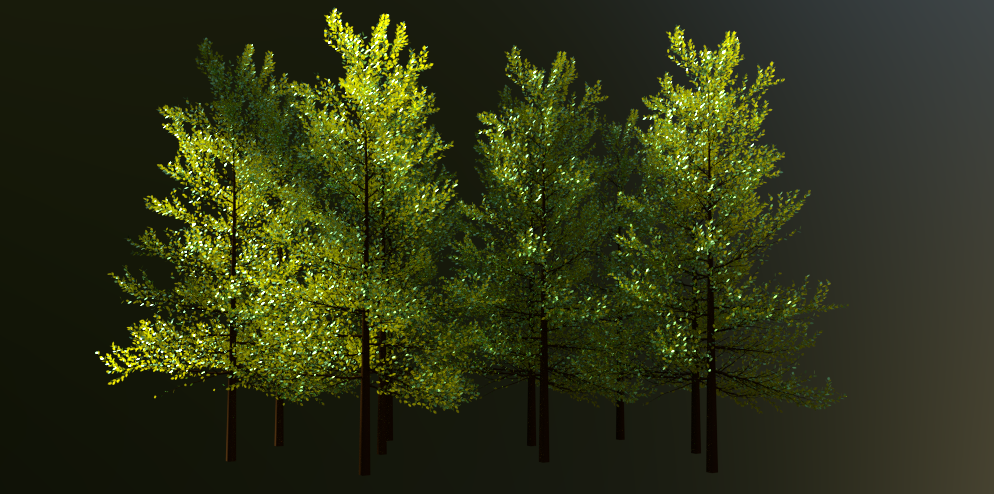
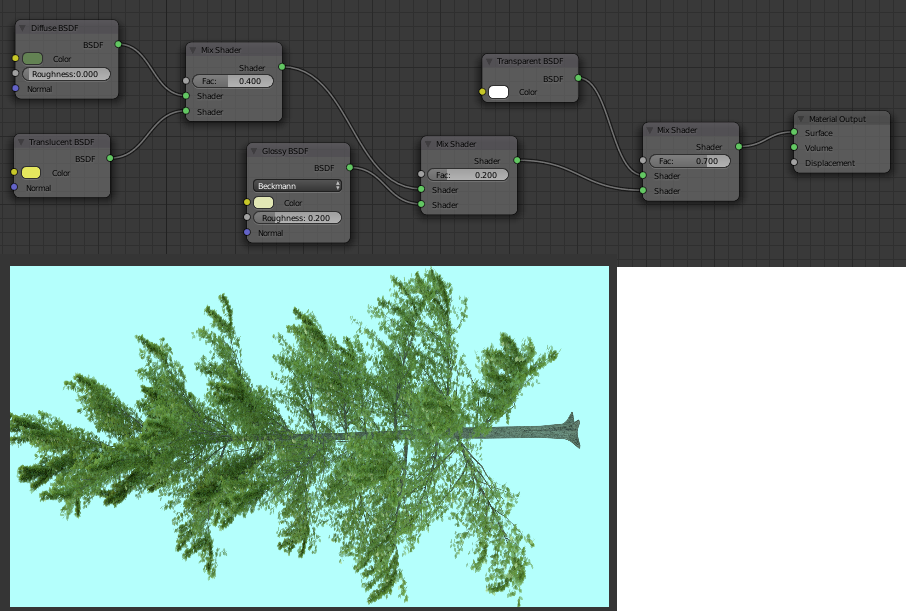
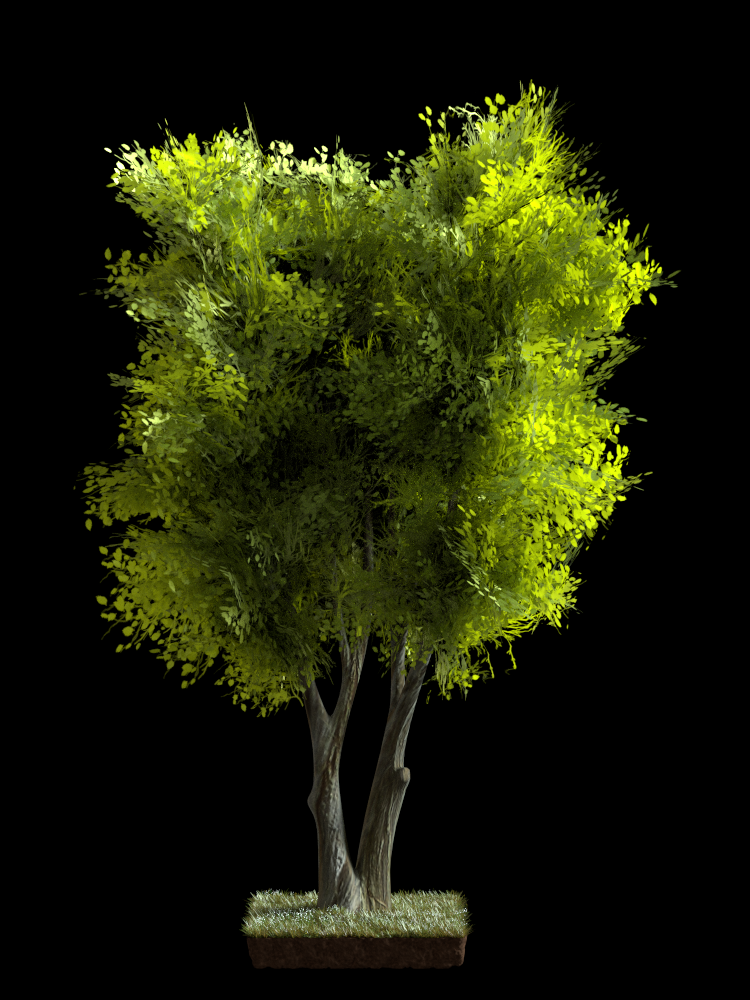
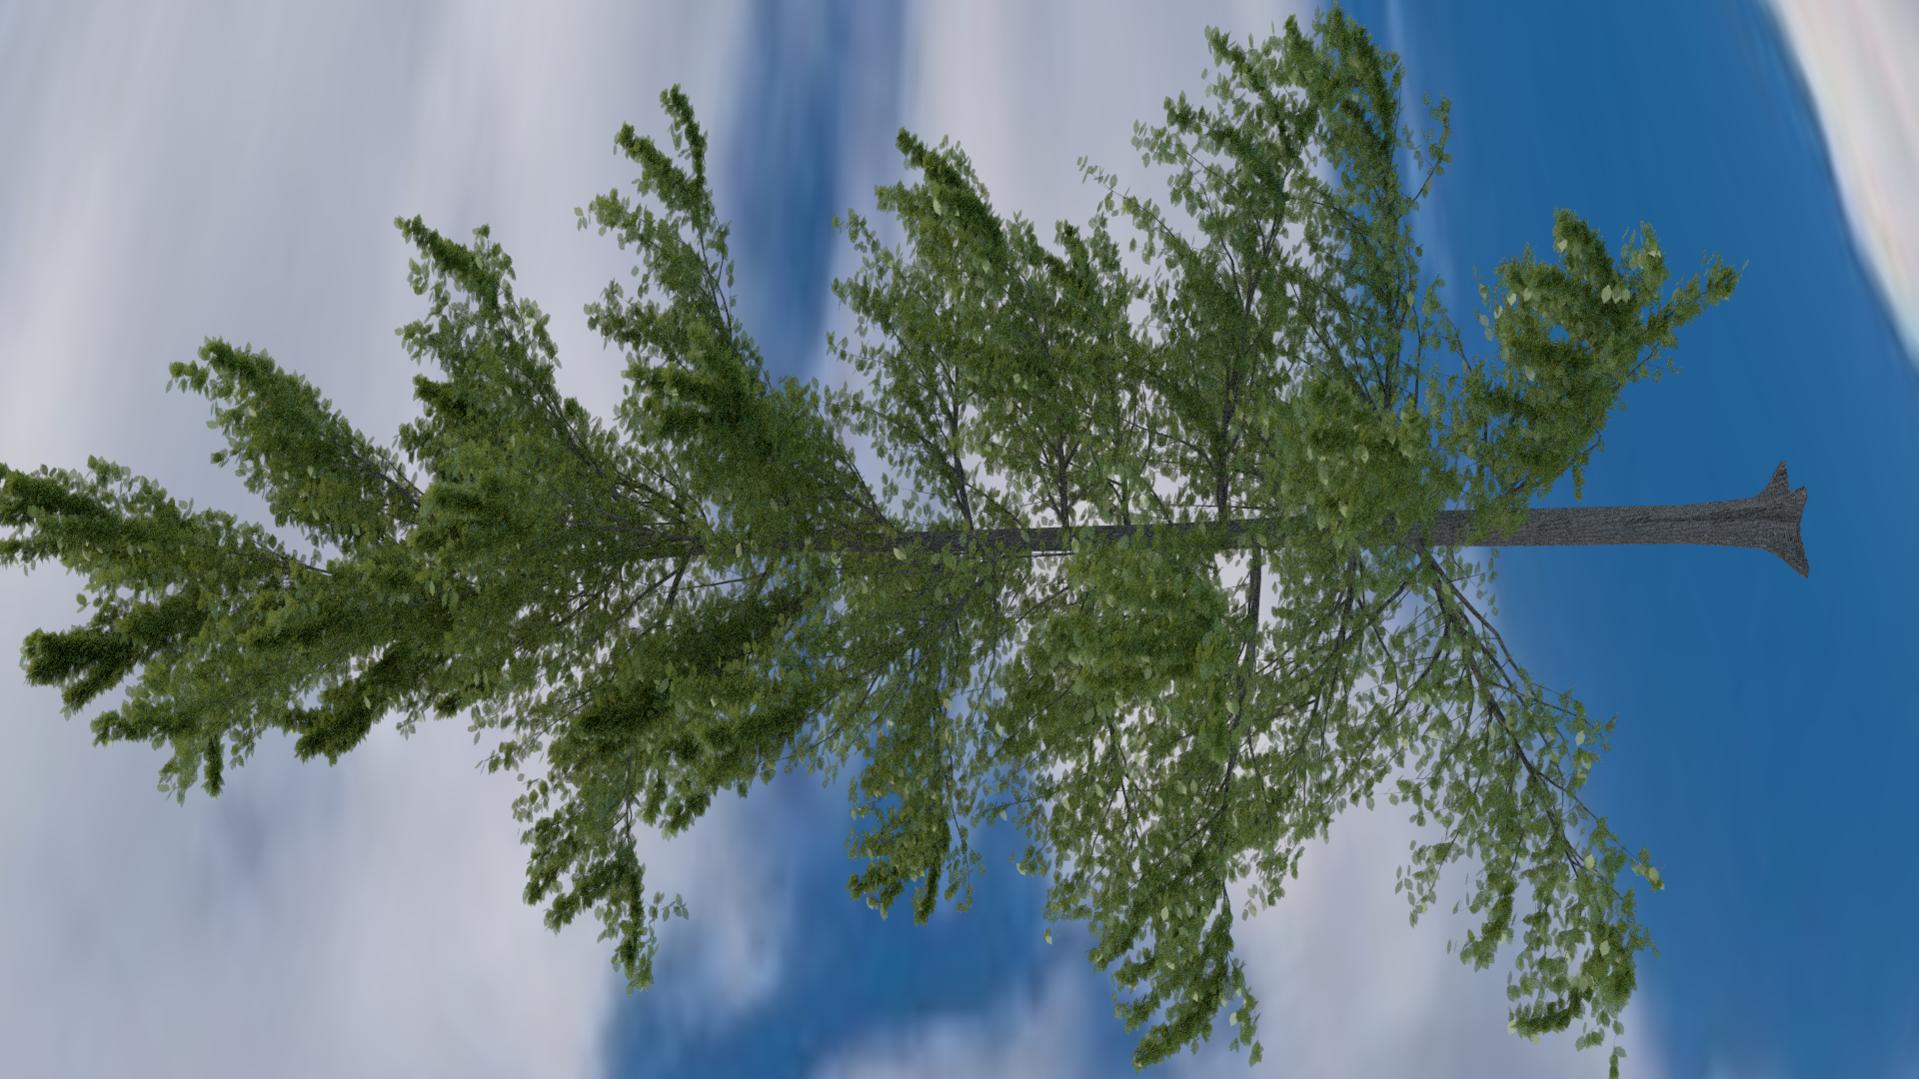
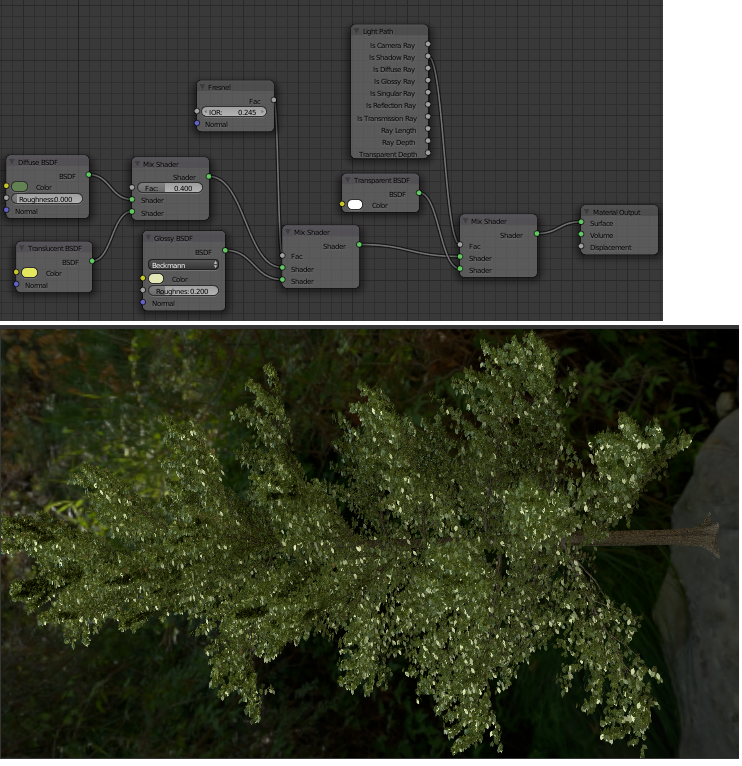
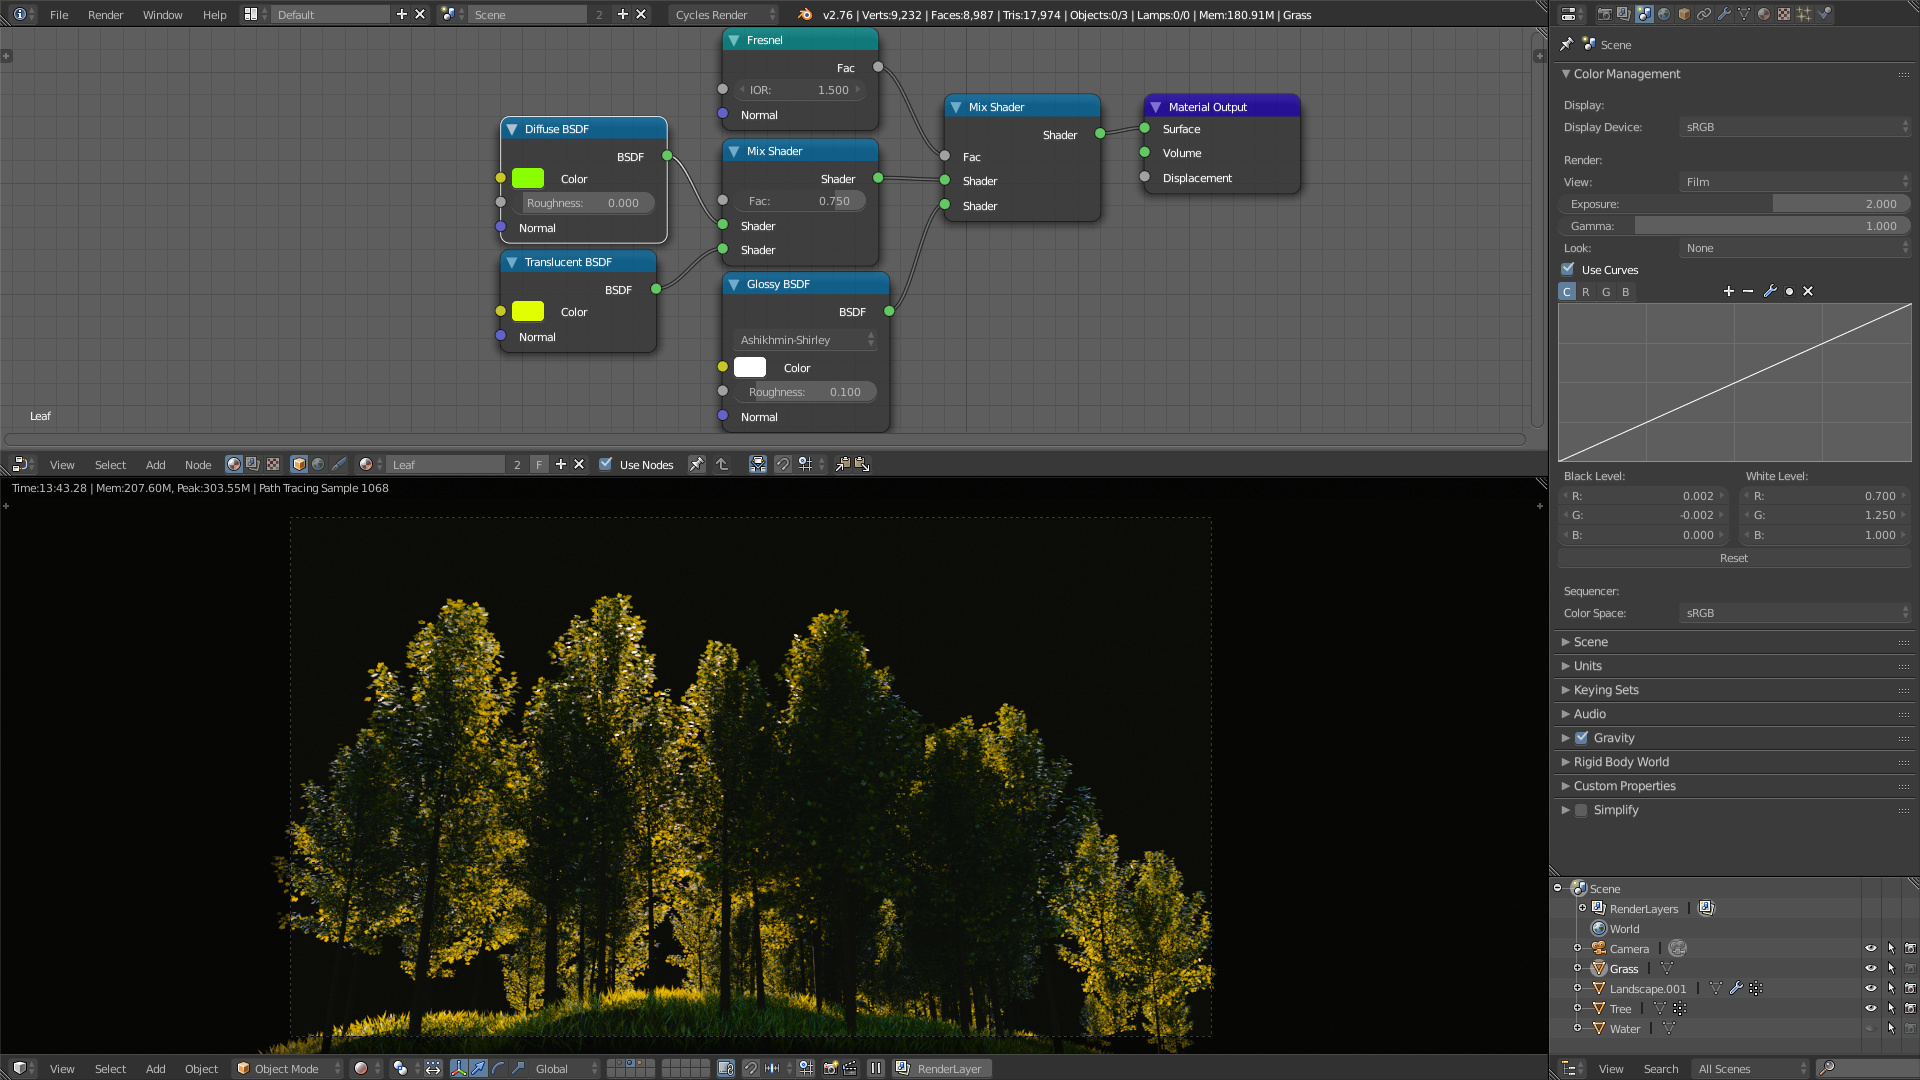
I have a feeling you rather need a dramatic lighting situation to bring your leaves to life. This is basically your node setup (with some minor adjustments) for the leaves, lit just by a HDRI:
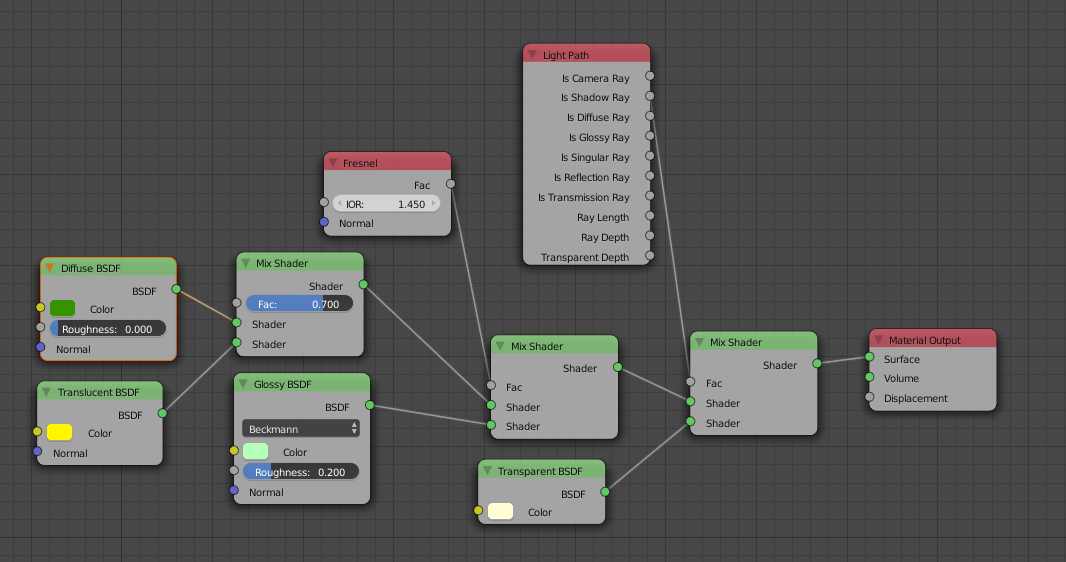
One thing I don’t quite understand in your node setup is the last Mix shader: Why mix a Transparent shader back in, based on a constant mixing factor? Leaves usually are not transparent, but translucent. Look closely at the shading example you linked to: Using a Light Path > Is Shadow Ray as mixing factor for the transparency makes much more sense, as it basically stops the leaves from casting shadows, but keeps their opacity for all other ray types.
Rule of thumb: Using constant mixing factors in a Mix shader is almost always a suboptimal idea. Dynamic mixing factors like Fresnel, Layer Weight etc. will most likely produce superior results.
And no, the sun’s size setting is not for the sun’s strength, but - if you will - for the size of the virtual sun sphere: The smaller the sun’s size, the harder the shadows it produces.
One thing I don’t quite understand in your node setup is the last Mix shader: Why mix a Transparent shader back in, based on a constant mixing factor? Look closely at the shading example you linked to: Using a Light Path > Is Shadow Ray as mixing factor for the transparency makes much more sense.
It’s entirely possible I did something wrong there, since I’m pretty new to nodes. I was just trying to imitate the effect of writing “Alpha: 0.7” in the transparency section of a material.
I don’t quite understand the “Light path is shadow ray” factor though. Sounds like a boolean? So the material acts 100% transparent to certain light paths, and 100% opaque to others? Shouldn’t it be partially transparent to all rays, so it weakens the light ray as it passes through or makes it more green or something like that?
This is actually the first time I’m hearing about HDRIs. I’ll look into them some more. Are you saying that if I use HDRI, I don’t need any other light sources at all?
Can you make the HDRI visible in the 3D viewport, or turn it, or otherwise control which part of the image is shown in the render?
Can you make the HDRI invisible, so it’s not rendered at all, just the effects it has on other objects? (You seem to have done that with your tree). Same question for other objects, by the way. Can I render only a mirror with the reflection of a cube in it, with the actual cube being invisible?
I’ve now rendered the picture with several different HDRIs, but the tree always seems to look the same, like the background picture isn’t really influencing it. What sort of background did you use? And I assume it should also work if I use a .jpg and not a .hdr?
Rule of thumb: Using constant mixing factors in a Mix shader is almost always a suboptimal idea. Dynamic mixing factors like Fresnel, Layer Weight etc. will most likely produce superior results.
Ok. Where in the above shader do you recommend I add for example a Fresnel? (Don’t really have experience with what any of these are.)
Yes, but why? You can’t see through a leaf. You can see the light passing through it, but that’s already dealt with by the Translucent shader. Transparent = “can be seen through”, translucent = “light can pass through”…
Yes, that’s how the Light Path node works in this case: Make the leaf invisible for shadow rays (= it casts no shadow), but have it opaque (= not transparent) for all other ray types. Again, what is typical for a leaf is its translucency, not transparency.
That depends on the individual HDRI, but theoretically: yes - see my render.
Yes to all. The selective reflection might get tricky, though, the more complex the setup is supposed to be.
Simple example: The blue sphere is visible to shadow rays (= casts a shadow) and to reflection rays (= can be seen in the mirror), but is invisible to camera and all other rays.
Care to post the .blend file? Would make troubleshooting easier.
And no, a .jpg (= LDRI!) for the environment texture will not remotely come close to the power of a HDRI.
For example to drive the Mix shader between the Diffuse and Glossy shaders. Many reflective objects become more reflective at glancing angles - this is what the Fresnel effect is about.
Oh! I think now I understand it. I didn’t really realize the difference between transparent and translucent upto now.
Can you make something translucent without using nodes? (And you can only use nodes with cycles render, right?)
Ah, thanks for explaining the invisible ball example. Same question here: can that be done without nodes?
And no, a .jpg (= LDRI!) for the environment texture will not remotely come close to the power of a HDRI.
Okay, but for some weird reason, the HDRI-backgrounds are just a blurr with 3 uniform shapes, like they’re zoomed in really far, whereas the .jpg were actual recognizable pictures. So how do you adjust the position of the HDRI-Background, or make it invisible?
For example to drive the Mix shader between the Diffuse and Glossy shaders. Many reflective objects become more reflective at glancing angles - this is what the Fresnel effect is about.
Okay. But this doesn’t sound like an example that would fit for leaves, does it?
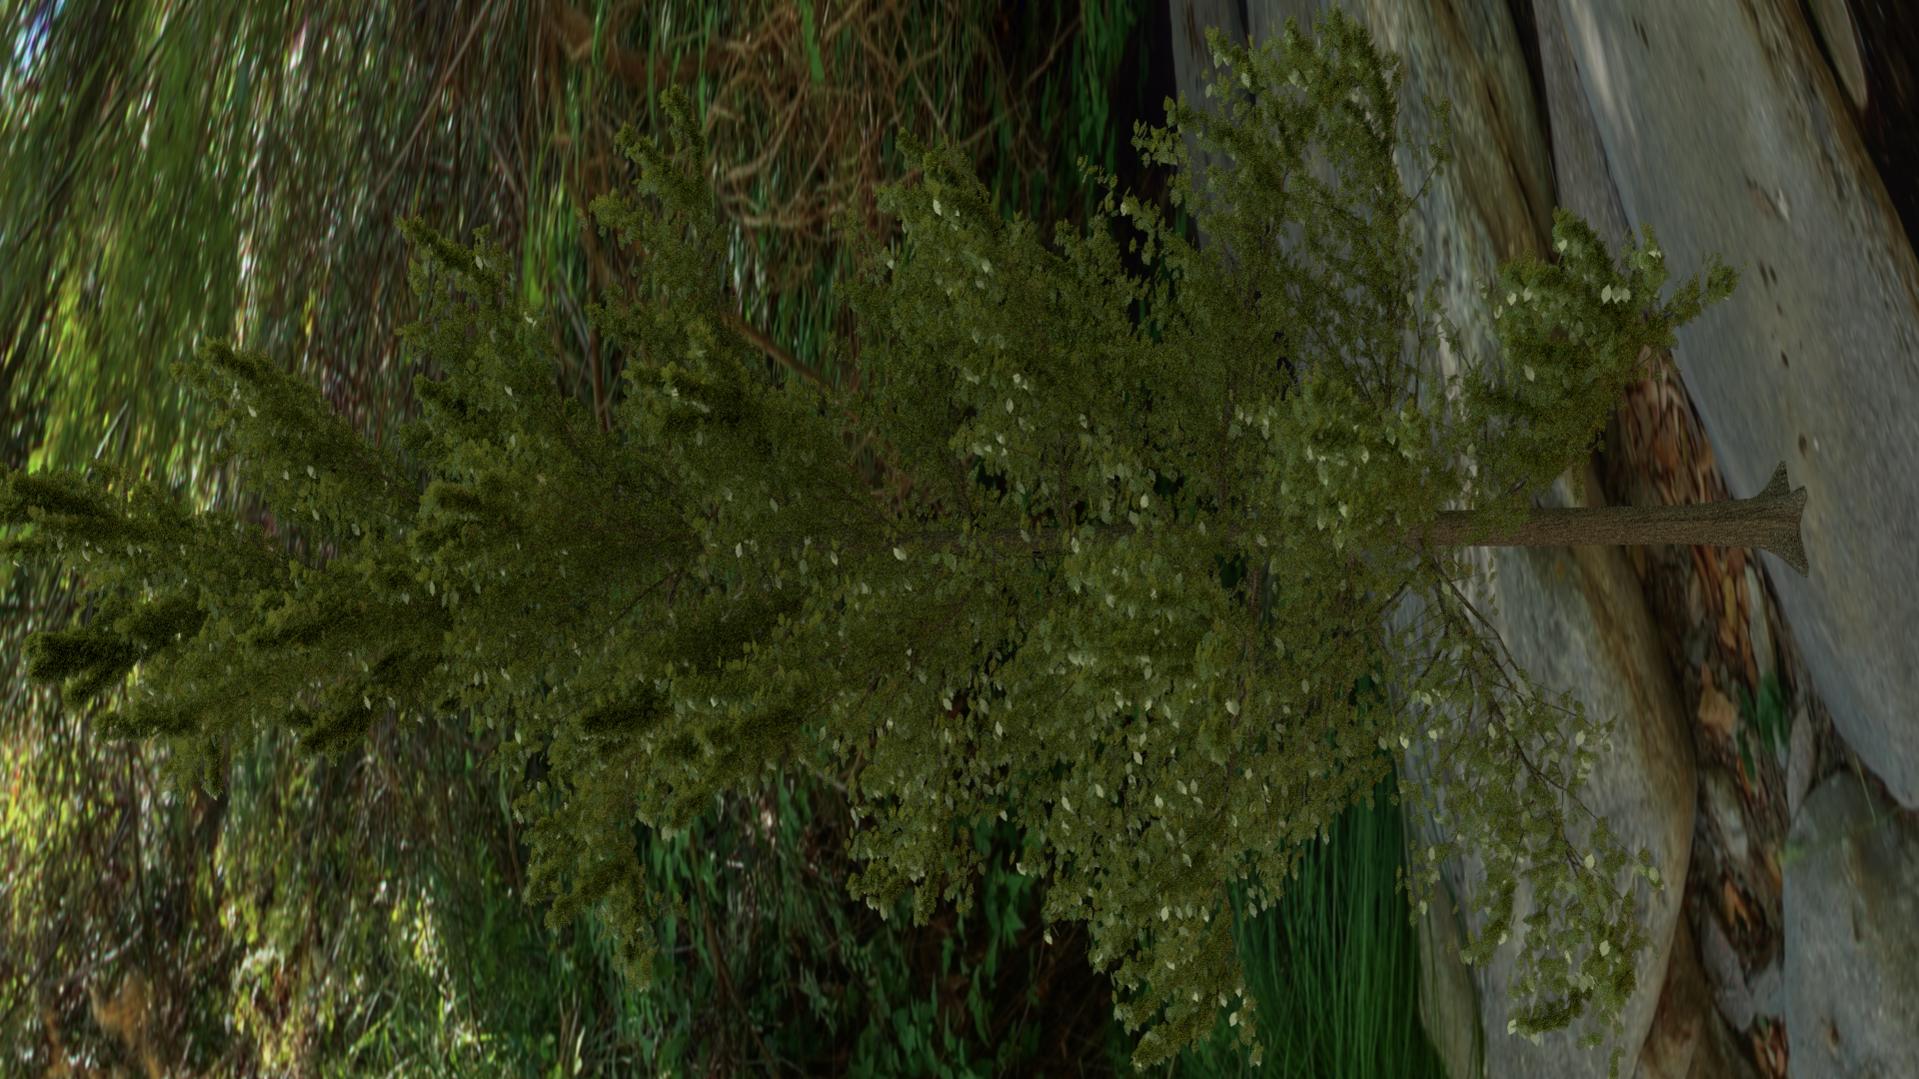
Well I tried it out, and here’s what I’ve got so far:
There’s some nice contrast that’s beginning to develop there. But why are the highlights more white instead of yellow?
By the way, do you understand why, in the shader I linked, it’s just the diffuse green shader for non-camera-rays, and the combination of diffuse and translucent for camera rays?
Care to post the .blend file? Would make troubleshooting easier.
The file’s 1.34 GB large. (Man, if even such a simple file is too large, how are these attachments ever useful for .blend files?)
Okay, if Blender Render doesn’t have translucency (and it seems the option to make an object invisible isn’t there either) I guess I’m stuck with cycles. But I take it cycles are pretty much better anyway. (Though all the noise is annoying. Blender render seems so much smoother.)
Thanks, now that I know how to move the HDRI around (more or less) I should be able to push it in the right direction. Yeah I’d already tried Mirror ball and equirectangular, they were both blurred. But hopefully next time I have that problem I can zoom it right.
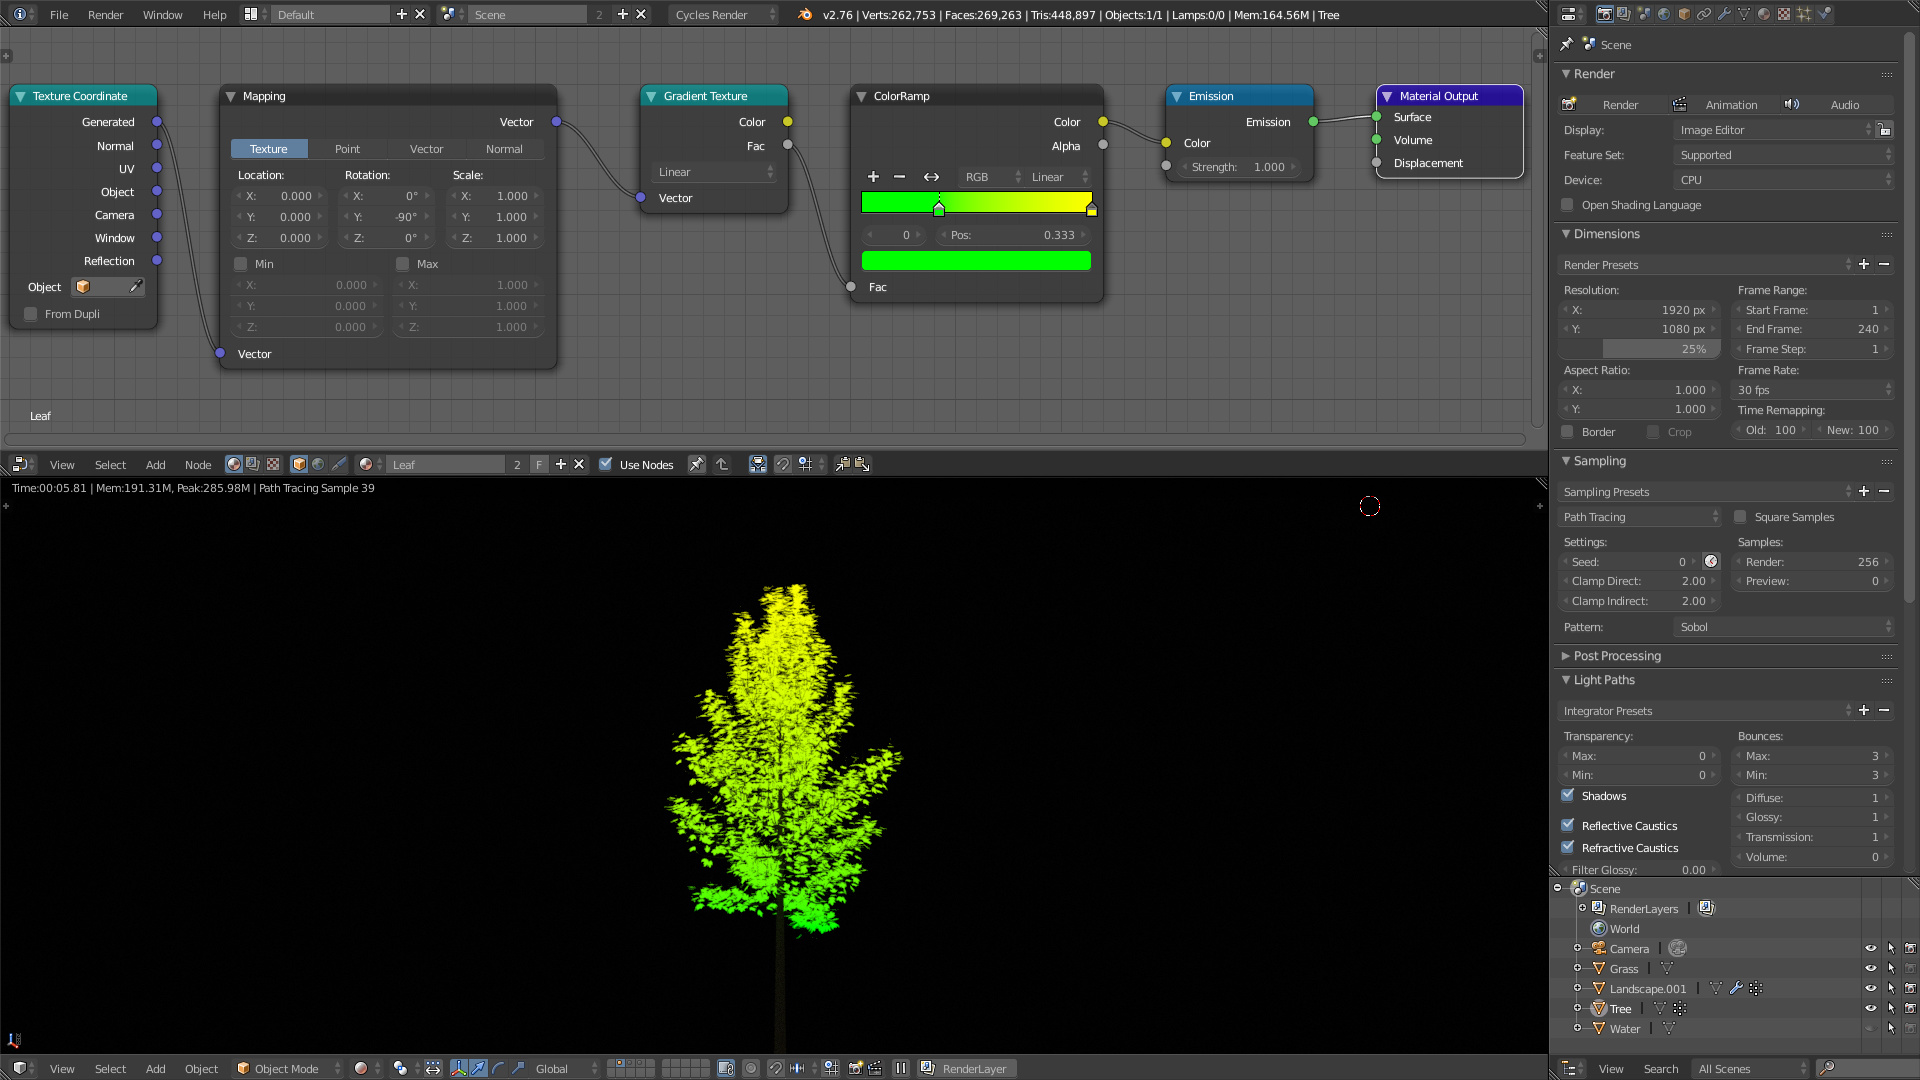
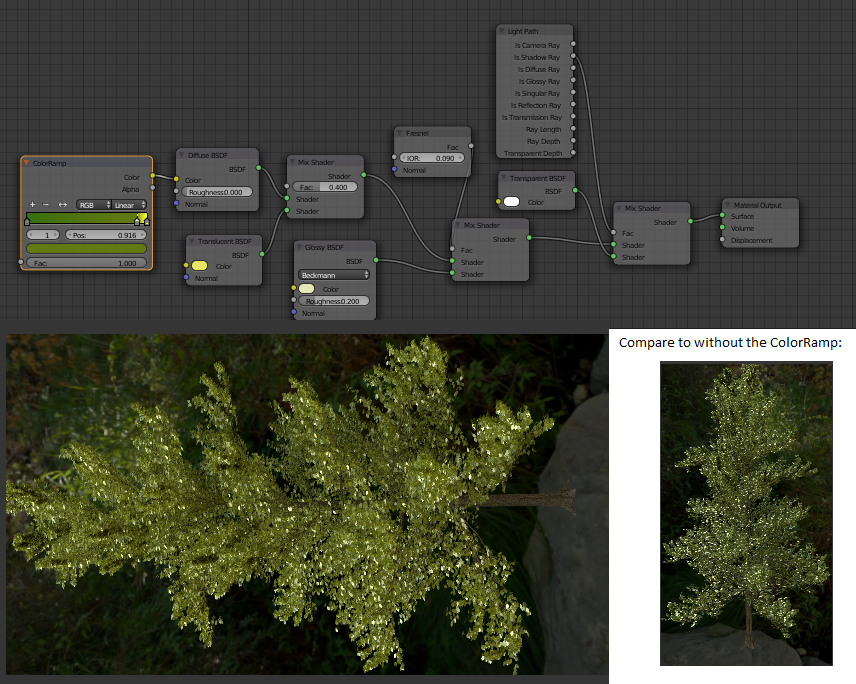
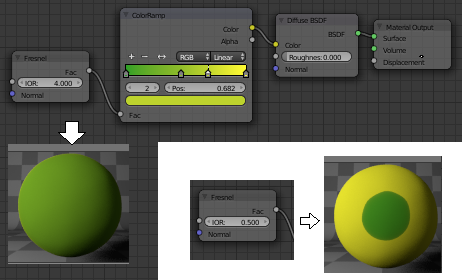
Okay, here’s a new experiment: I added a color ramp in the hopes of getting that green-to-yellow transition. But for some weird reason it seems to be turning just about the whole tree in the direction of yellow, even though I limited the yellow portion as much as I could to the light part. Any idea why? Or is that not how color ramps work?
The color ramp drives the diffuse color - but what drives the color ramp?
In other words: How does Blender know where to apply which color within the ramp…?
Oh I see. You need the input for how bright the light is. But I can’t find that anywhere, and I’ve checked through almost all the nodes. Which one is it?
If you really want to you could use a pure yellow for the color of your translucent shader but a much better way of achieving that effect is to make use of the color grading tools in blender.
Color grading tools? What are those?
I love the pictures you posted, they look great. But I can’t see what the difference is in the settings between the two pictures (apart from the output).
Your method with the separate diffuse and translucent shaders is giving me some nice results, but is there a way to increase the contrast, and make the light parts lighter (or yellower) and the dark parts darker (or greener), sharpening the difference?
And if anyone could enlighten me on the riddle of what input goes into the color ramp, I’d still like to know.
the color ramp works as a color palette… the input should be a number between 0 and 1, and the output will be the color corresponding to that input (in the ramp). The big thing about color ramps is that the Factor value should be variable. If it isn’t, than the color ramp works just like the RGB node, showing the color at the factor position.
Now, for what to plug into the color ramp is a more wide subject. It will depend from what properties you want to affect the color in the final.
For example, some materials have color variations based on the light incident angle, and in these cases you can use the fresnel/layer weight or some other Normal/IncidentLight relations.
Another example is color variation between different objects with the same material, and you can use the ObjectInfo>Random to drive that variation (the random value will be different for every object, even if they have the same material).
There are so many possibilities and uses for the color ramp, that we could write a book just with examples.
About the contrast… if you notice in the second shajuke’s image, he is using the color management to control a bit more the final look of the render… It’s located in the ‘Scene’ panel of the ‘Properties’ window.
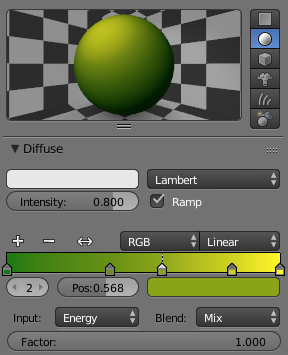
What I want is for the leaves to be more yellow in the light, and more green in the shadow. Basically this:
That’s how it worked in Blender Render, so what’s the equivalent of that in nodes/cycles render?
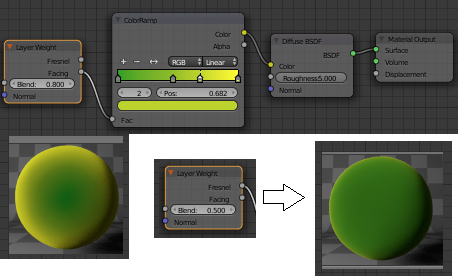
I tried using Fresnel and Layer weight as inputs, but they just seem to affect only the outer rims of the object or the inner part, independent of where the light is.
It doesn’t? Well that seems like quite a missing feature. There’s nothing to make the leaves on top of the tree near the light look yellower than the ones at the bottom, or make those covered by shadow greener than those not covered?
Why does blender make you decide between those two modes, cycles and blender render, and have some features be only available in one and others only in the other, so you never get exactly what you want? -_-
The technology behind both render engines is completely different, so I’m not entirely sure something like the “Energy” input can be implemented into Cycles at all.
However, Cycles is about physical plausibility. In real life the leaves change their color based on the light and their translucency alone (and not because of some color ramp…;)). So I don’t see why this shouldn’t be possible in Cycles based on the very same principles.
It’s a bit unfortunate that we’re not able to examine your file. My render and shajuke’s as well already start to show the effect you’re after. If your tree doesn’t, there must be a reason for it.
I have an idea for circumventing the file size problem. I just removed the tree from the file, but kept the materials and lighting. If you want to have a look, use the sapling generator to add a random tree on layer 1 (Scale 60 is roughly the size that fits nicely in the picture) and give it one of the leaf materials I have there.
shajuke: The shader you made just colors the pixels according to their position, independent of where the light is, doesn’t it?
It’s not possible for a material to know where or how much light is hitting the object, you can cheat by rotating the gradient to point in the direction of your primary light source though.
Your HDRI is super low res and blurry and your sun is quite low powered. As I said: You need a more dynamic lighting setup…
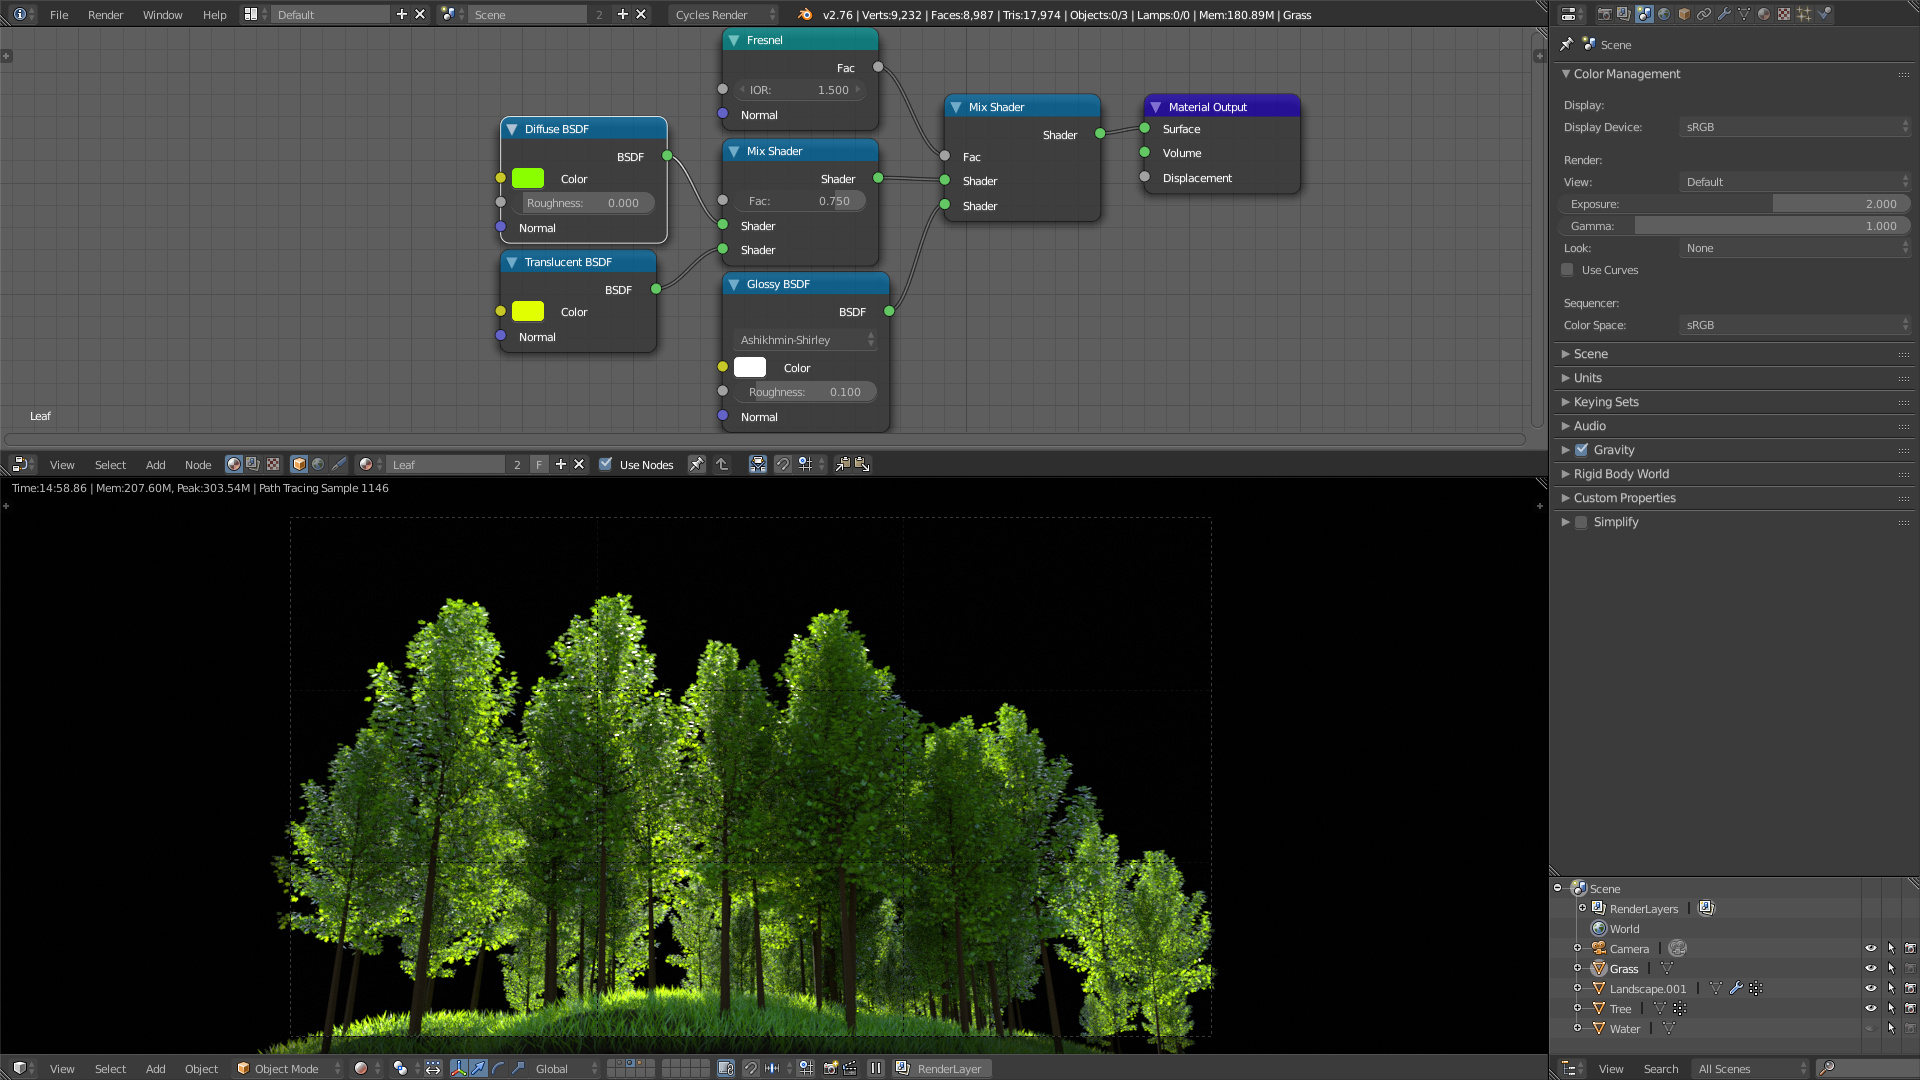
This is a render with a few generic sapling trees, a sun lamp with a power of 5 and a few random planes to put the trees partly in the shadow. Shader for the leaves is the slightly modified “leaf shader from net”:
What I want is for the leaves to be more yellow in the light, and more green in the shadow
You probably could do a quick BI b/w leaves only render using Energy input and then use this as a mask for Cycles mixing however i guess i have one more cheat.
Looking at your original photo - yellow is most where light hits leaves from behind ( and further travels to camera…) so actually you could sort colors by leaf plane normal directions. Kind of works for a different seasons…http://www.pasteall.org/pic/show.php?id=96807


 Well that seems like quite a missing feature. There’s nothing to make the leaves on top of the tree near the light look yellower than the ones at the bottom, or make those covered by shadow greener than those not covered?