I apologize if this issue was already posted but I wasn’t able to find a similar problem.
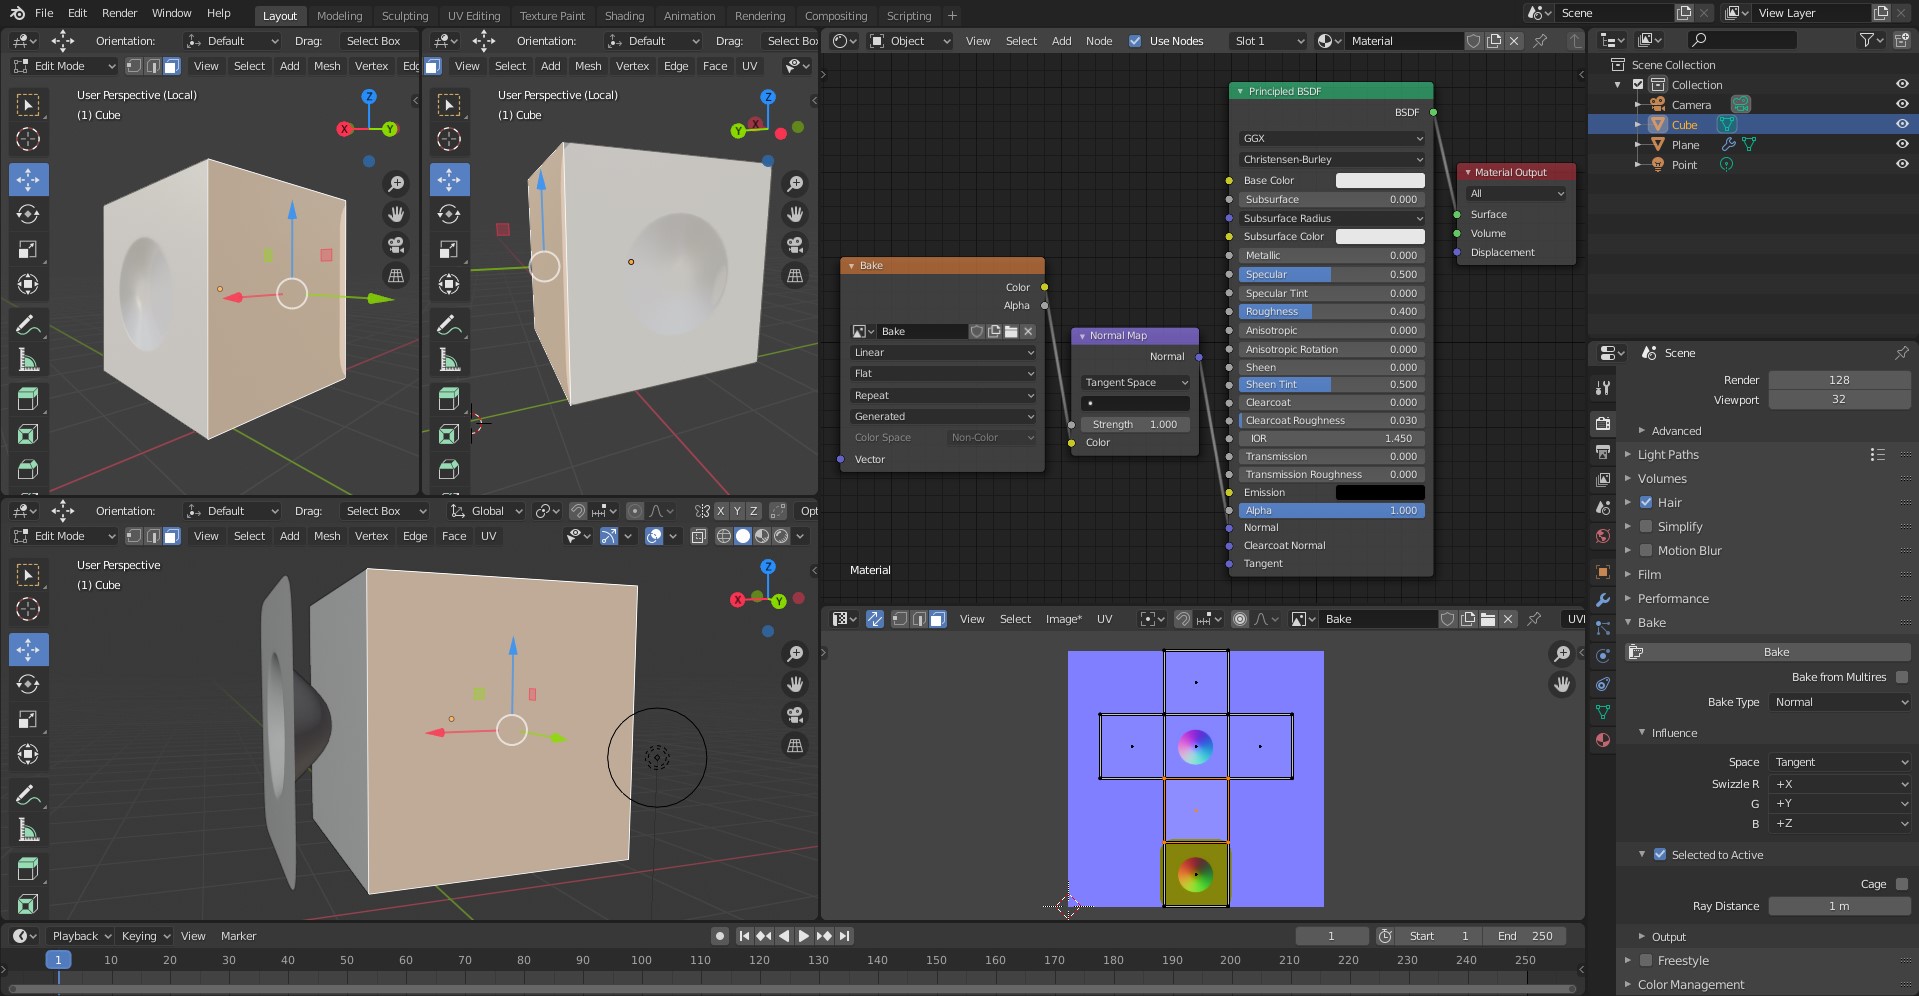
I am trying to bake this floating object on the box as illustrated on the bottom left viewport. Instead of just baking on the front face of the box (next to the floater), it also bakes on the opposite face.
You can see the correct bake on the top left viewport and in the UV Editor (middle face of the unwrap). On the second viewport from the left is the unintended bake which can be seen in the bottom face of the UV Editor.
Even with ray distance set to 0, the wrong one still projects on the map.
This also happened in other projects that I tried so I’m not really sure but I assume it’s some error with my setup in Blender since I haven’t had this sort of issue in other 3D packages.
It shoots out a ray in the direction of its normal. It doesn’t hit anything. It shoots out a ray in the opposite direction. It hits your floater. It measures the difference in normals and writes to the image.
If you want, you can add a plane to your floater so that the opposite face has something closer to hit. Then, it’ll use that instead.
Probably, adjusting ray length could change that as well.
Or, you could just paint over the image. That’s probably fastest solution, no rebake.
(Or, you could separate out the face you want normal mapped and only bake it. Or, you could assign the different faces different materials and only normal map one material. Or…)
Here is the link to the possible solution.
To make it short: I would try to bake it like high poly mesh to a low poly - both geometries should have approximately same volume.
@bandages Didn’t considered the ray of the opposite face would have gone beyond the box mesh and hit the floater. Thanks for pointing that out!
Unfortunately the ray distance doesn’t make a difference in this case. If I lower it, it won’t bake out the part I need but the unwanted bake will still remain, probably because like you mentioned, the ray from the opposite face wont stop till it hits it.
Matching MatID’s for baking as you pointed out are a good solution but I haven’t found how to set them up in Blender. And they would work good in this case but I’m not sure they will in the specific project I’m working on. I will post another reply with pictures of it to clarify. And painting it in post would also work but if I do any changes to the mesh, I would need to repaint the bakes again.
@ikakupa Yeah, seems you’re right… I’m actually coming from 3Ds Max where, I suppose, the rays will stop once they hit the low poly mesh (the one that needs to be baked on) so they wouldn’t continue on and hit an object on the other side. I believe this is how it works because I’ve actually tested the same scene and it came out fine.
So it seems in Blender I would need to make a whole mesh just for the floaters…
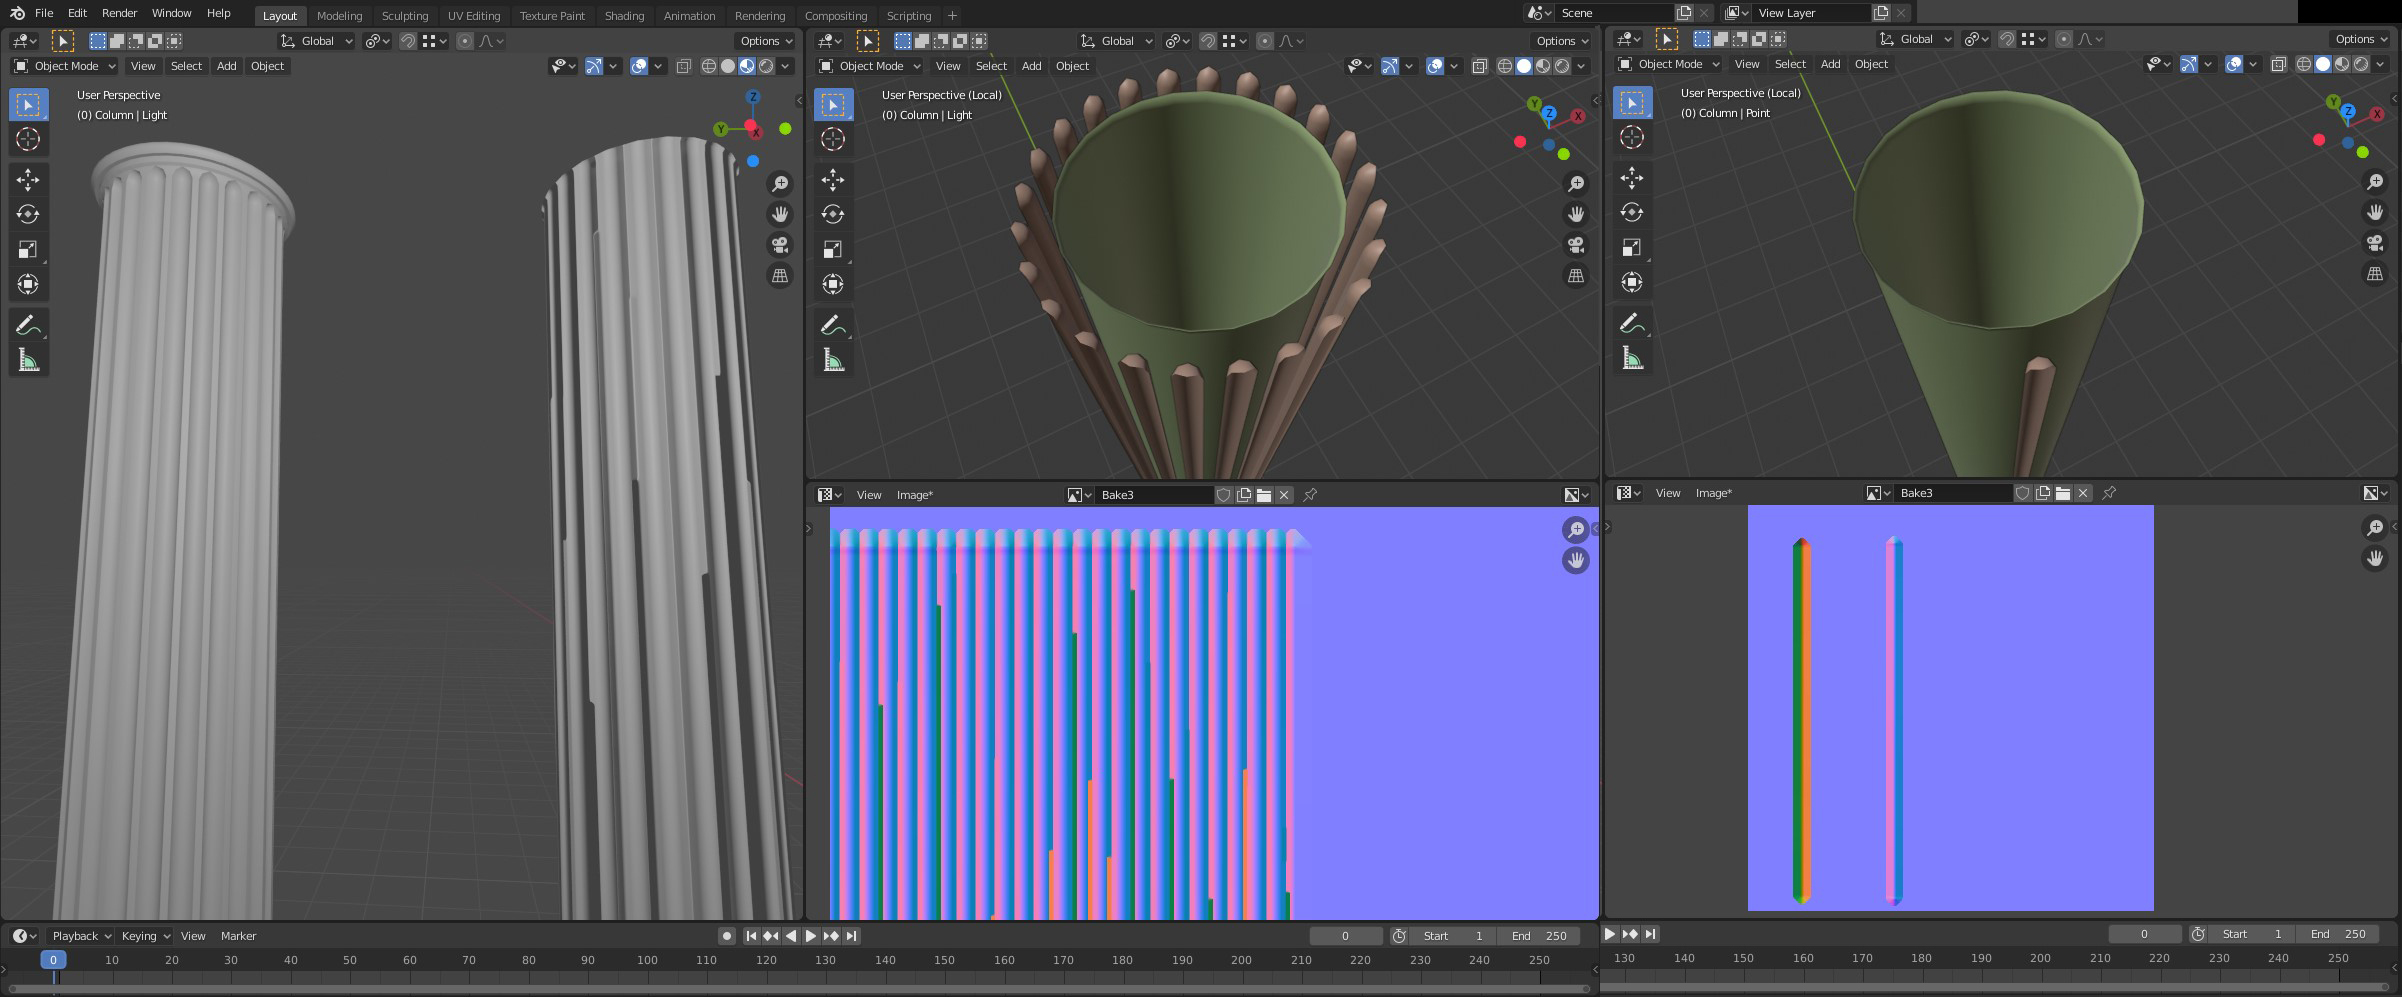
@bandages Here is the specific bake that I want to do.
On the left viewport, the left object is the high poly and next to it, the low poly with baked maps.
If you notice on the UV Editor, the little green streaks that appear are the bakes from the opposite faces (same case like above) so they create a shading error that is apparent on the low poly model. Top right viewport is the arrangements of the floaters for baking.
The second image has only one floater so you can see what is actually happening, where the green streaks are actually coming from.
If you feel like linking a file, I’d share anything that I could figure out. I’m far from an expert on normal map baking, but I like puzzles.
If you decide that you want to use separate materials and need some help, let me know, although yeah, there are plenty of situations where that wouldn’t work, and your pillar looks like one of them. It was an idea offered for your original, simplified version of the problem.
Oh sure, if you have the time It would mean a lot to me if you could check it out! Column bake.blend (744.8 KB)
It would be good if there was an option to limit the ray travel distance and not just the offset for where it should start.
I think in other 3D packages they control that with frontal and rear ray distance (Substance Painter and Max I believe) where you can tell the ray where to start with the Frontal distance option and limit the length it travels with the Rear distance option so that it wont hit a geometry that was from the opposite side, effectively killing the ray. In the case of Blender, there isn’t an option for rear distance (or at least I couldn’t find it) so the ray travels infinitely.
Anyway, for the first project (the box one), I tried a similar approach to what @ikakupa mentioned. I made an additional copy of the low poly mesh so that it wold act as a boundary for the rays and I joined it with the floater. The bake came out as intended but for some reason, that same approach didn’t turn out well in my column project and I’m not sure why…
@Maco, there is a new patch to “Selected to Active” baking option in the alpha version of Blender 2.9.
This setting “limits how far rays can travel before they are excluded from the baking result. Useful for meshes with holes in them.”
I tested this new feature, but it didn’t work with your initial Objects.
After I edited your “Floaters” mesh by closing gaps in between and made it little bit smaller in diameter then the “Column”, it worked well.
Wow, great job with the bake! I wanted to do the same thing by closing the gaps but planned to leave the floaters outside the “Column” mesh. But your solution worked out wonderful nonetheless! Thank you for taking the time to recreate it.
And also great for breaking the news to me about the ray distance option, I wasn’t aware they are implementing it in a future version. It’s going to be a lifesaver for this kind of situations!
I think this covers up my questions so thank you all for your help!