Hi I’m doing a little practice project to push my skills and here’s a wip that I’d really use some focused critique feedback on.
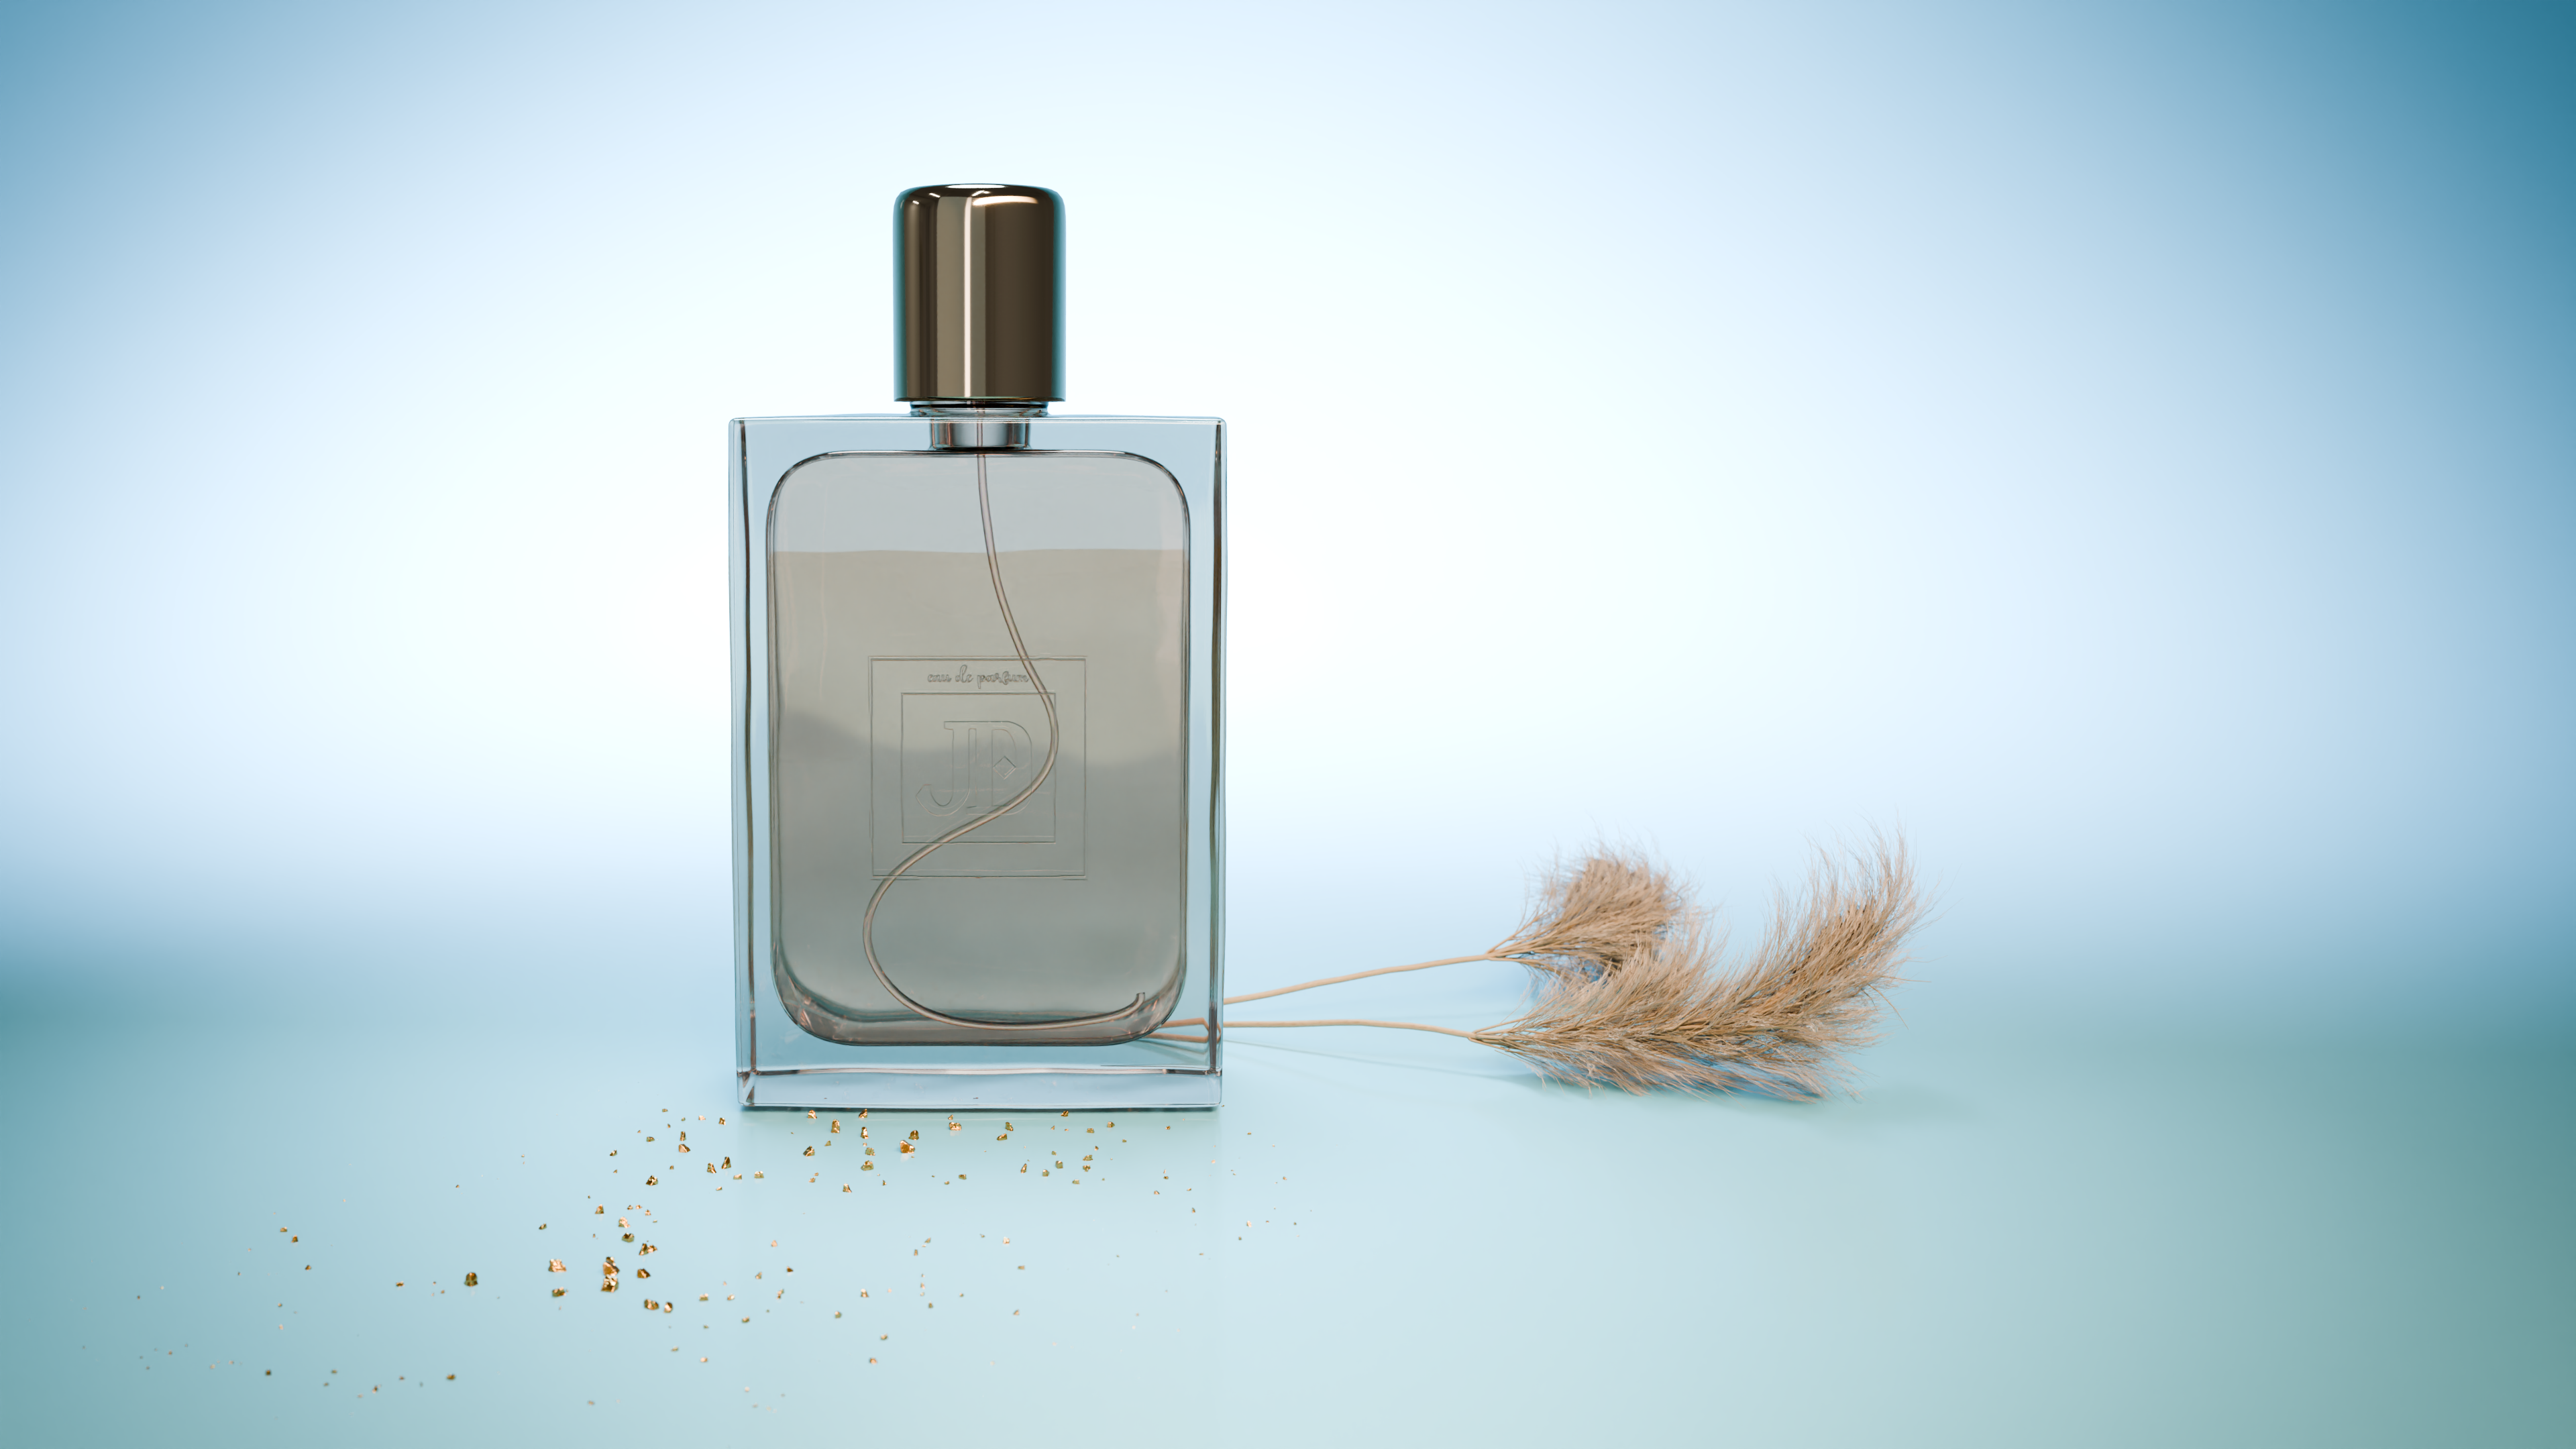
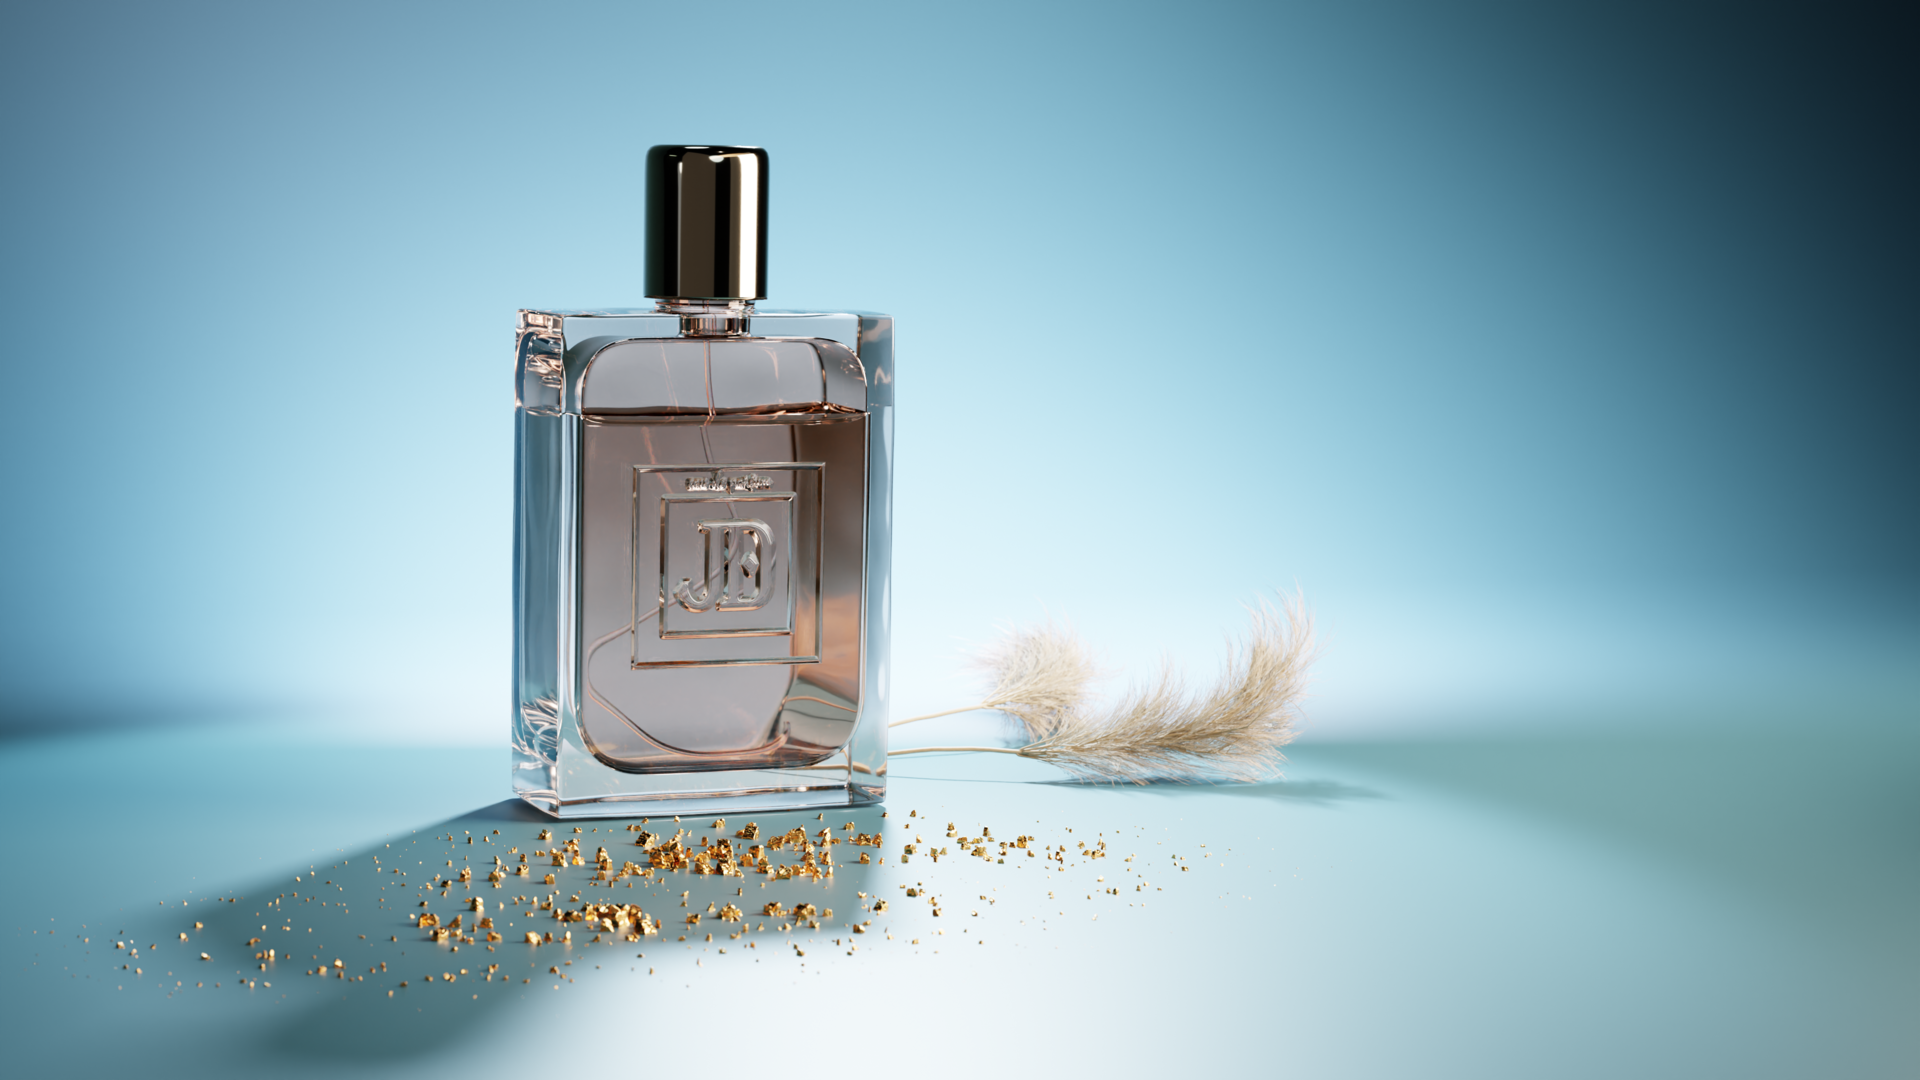
here’s the current version for thumb update:
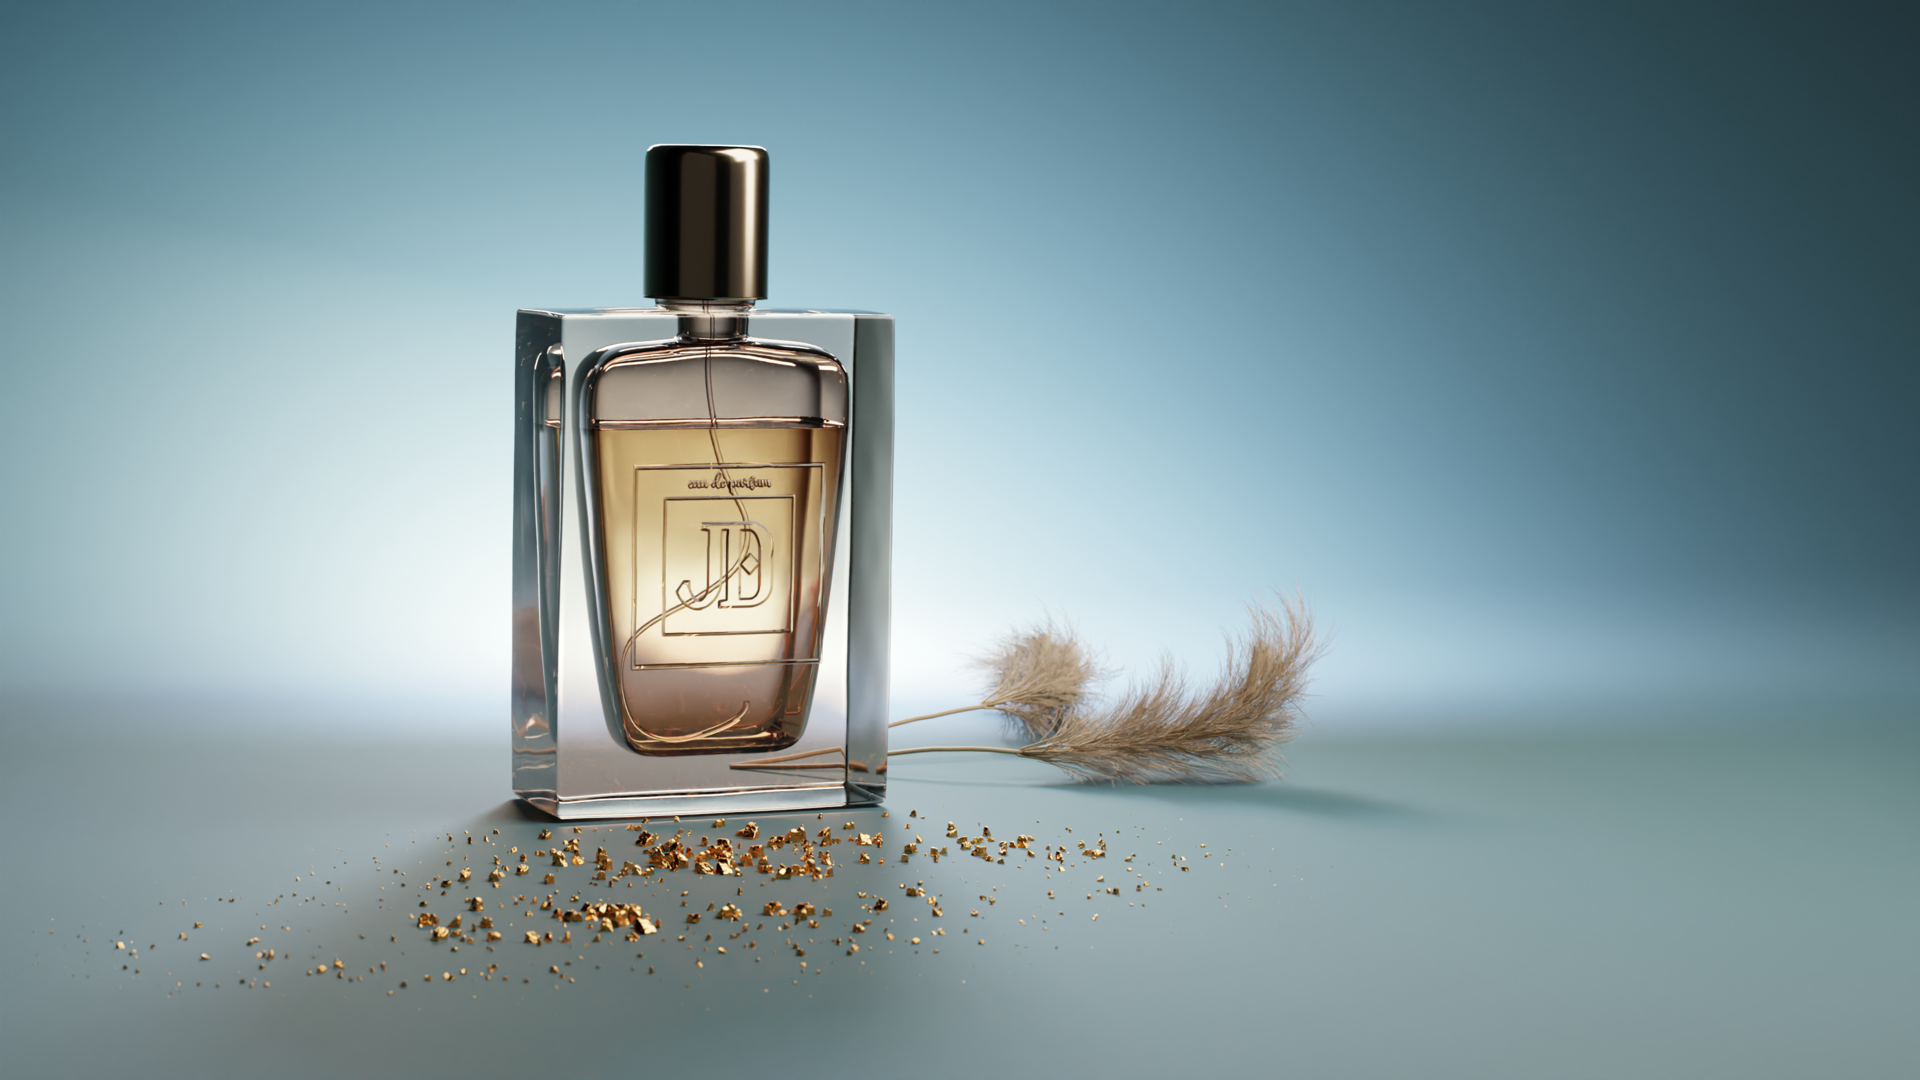
it started like this:
Hi I’m doing a little practice project to push my skills and here’s a wip that I’d really use some focused critique feedback on.
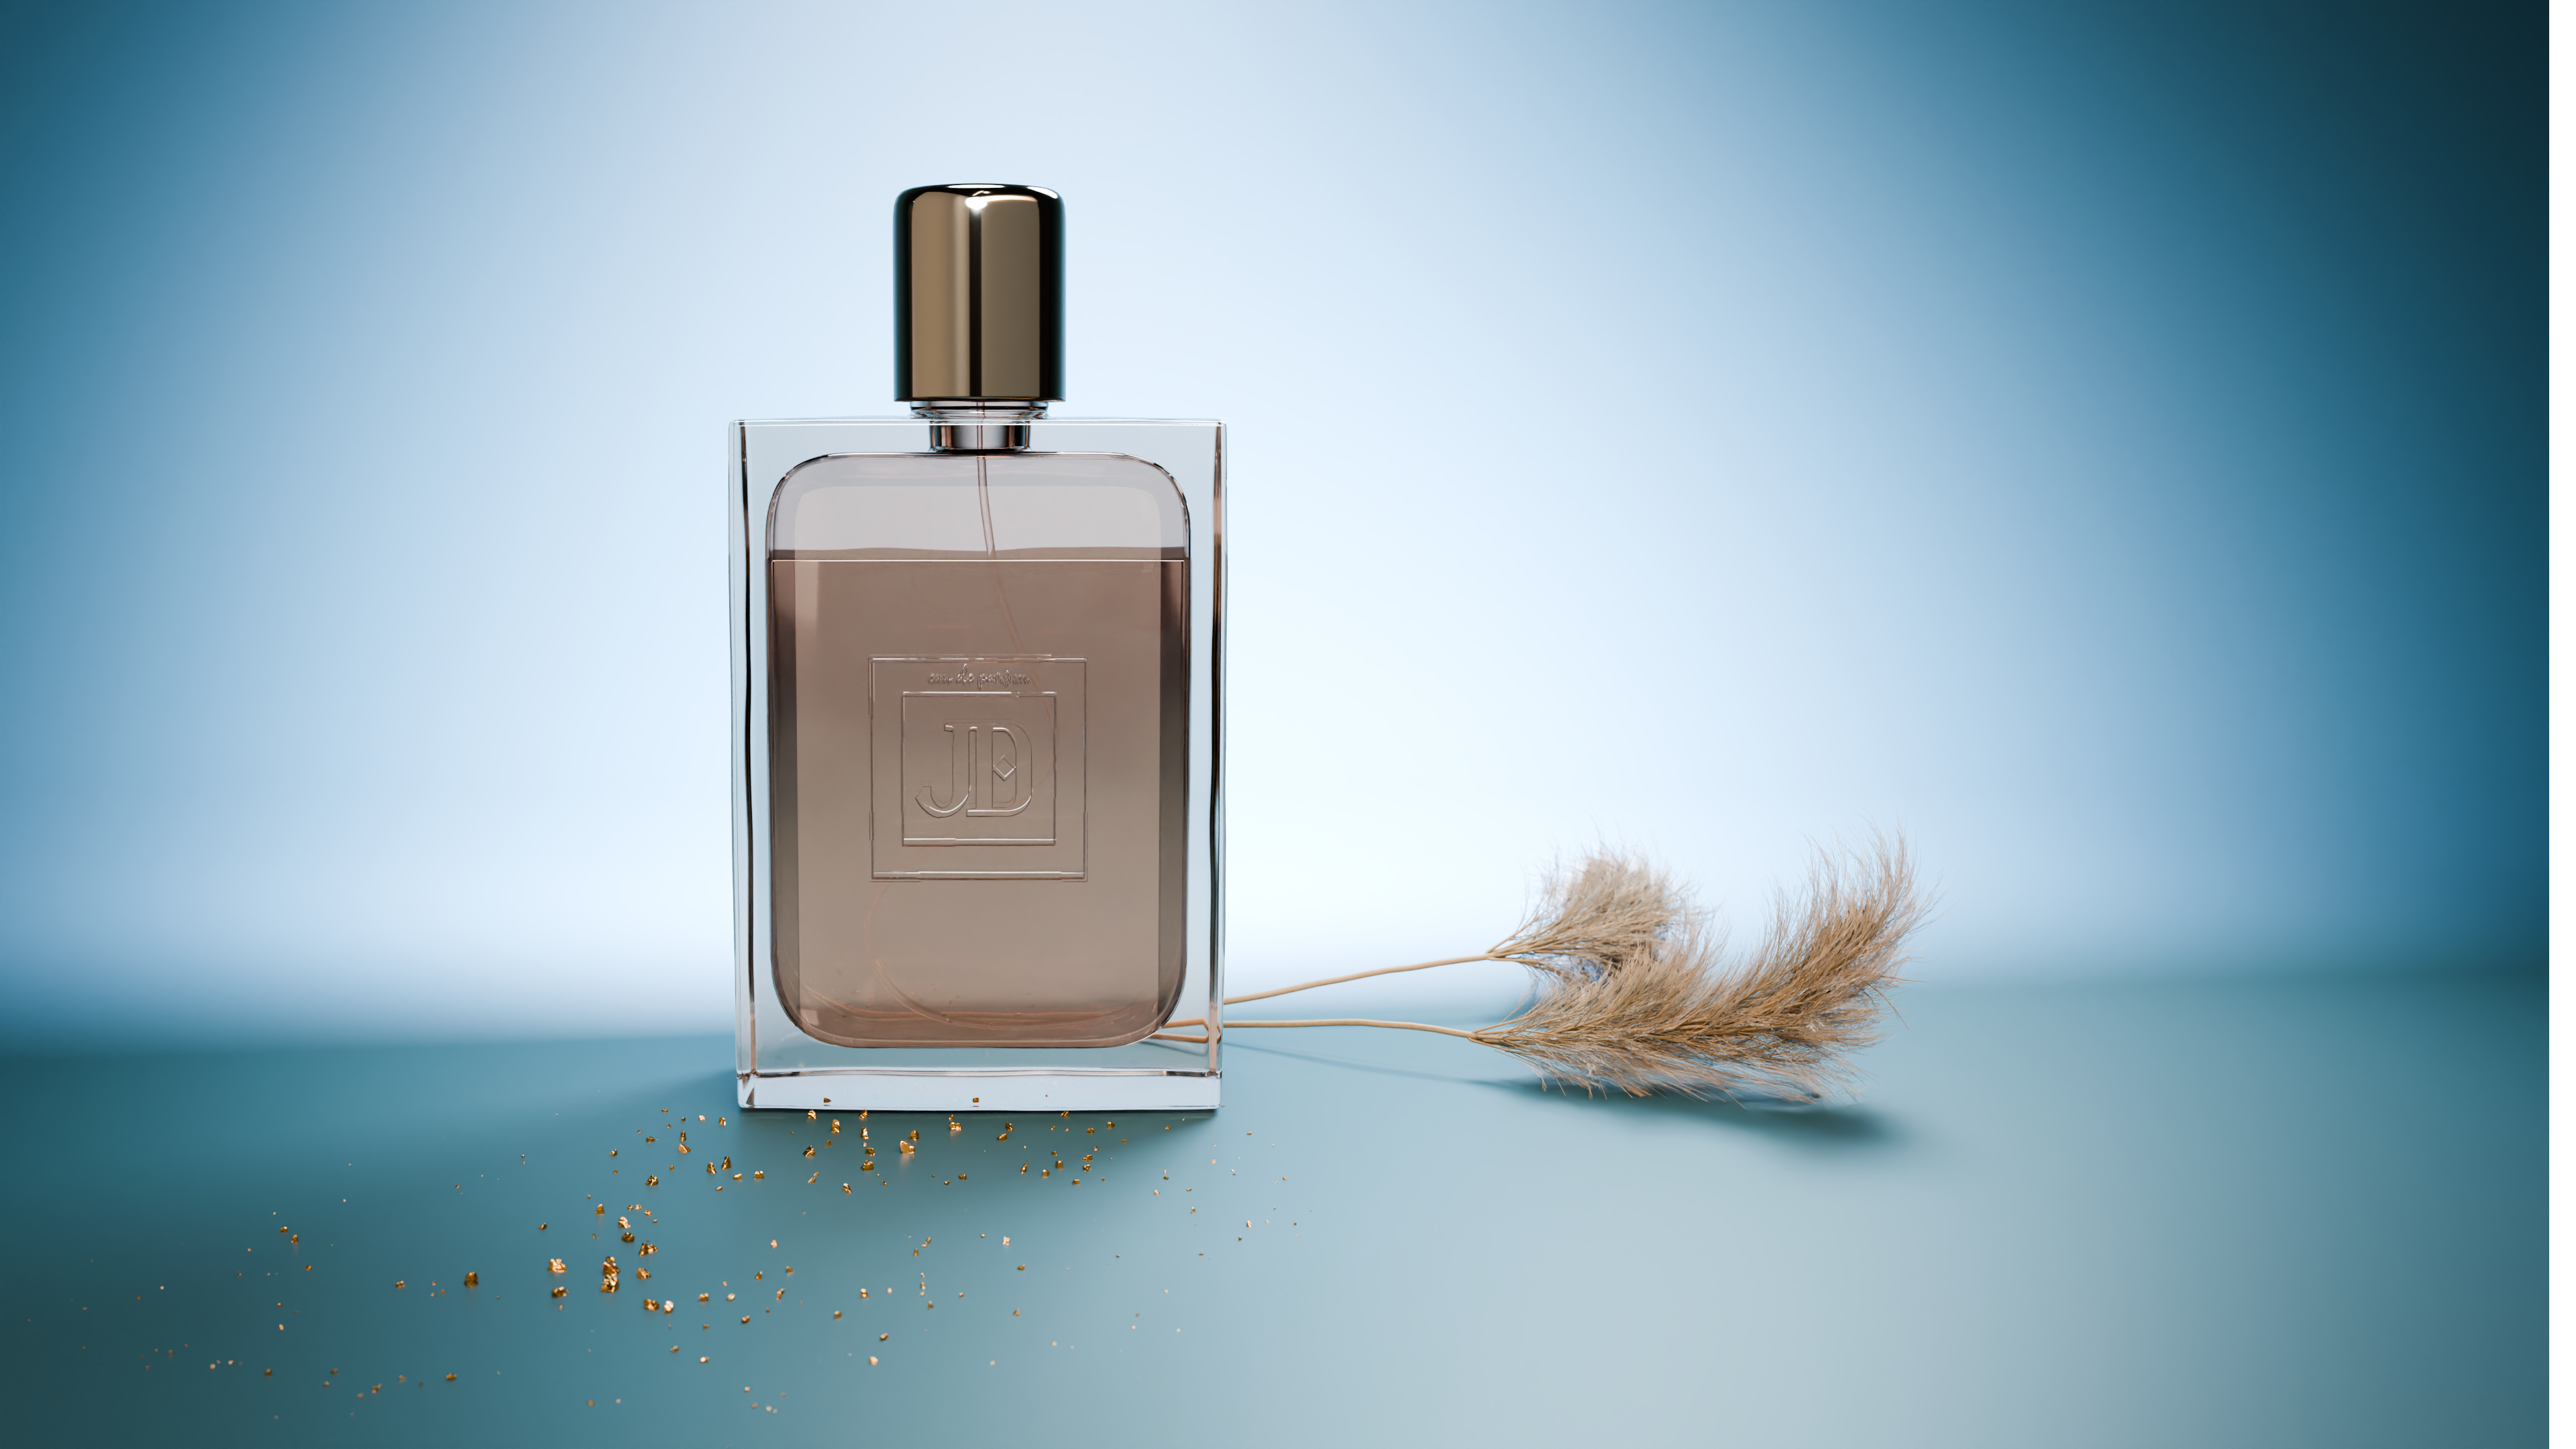
here’s the current version for thumb update:
it started like this:
First thing I notice is that the logo is not very readable especially from further away. I assume that the logo is embossed. You could try moving/adding light so that the grooves in the logo captures some light too. You could also make the logo thicker with more beveled edges so it would capture light easier. Not having the logo stand out is not a good way to do product photography.
Second thing is that the liquid inside looks very fake. liquid usually have a line at the top from the surface tension and refraction.
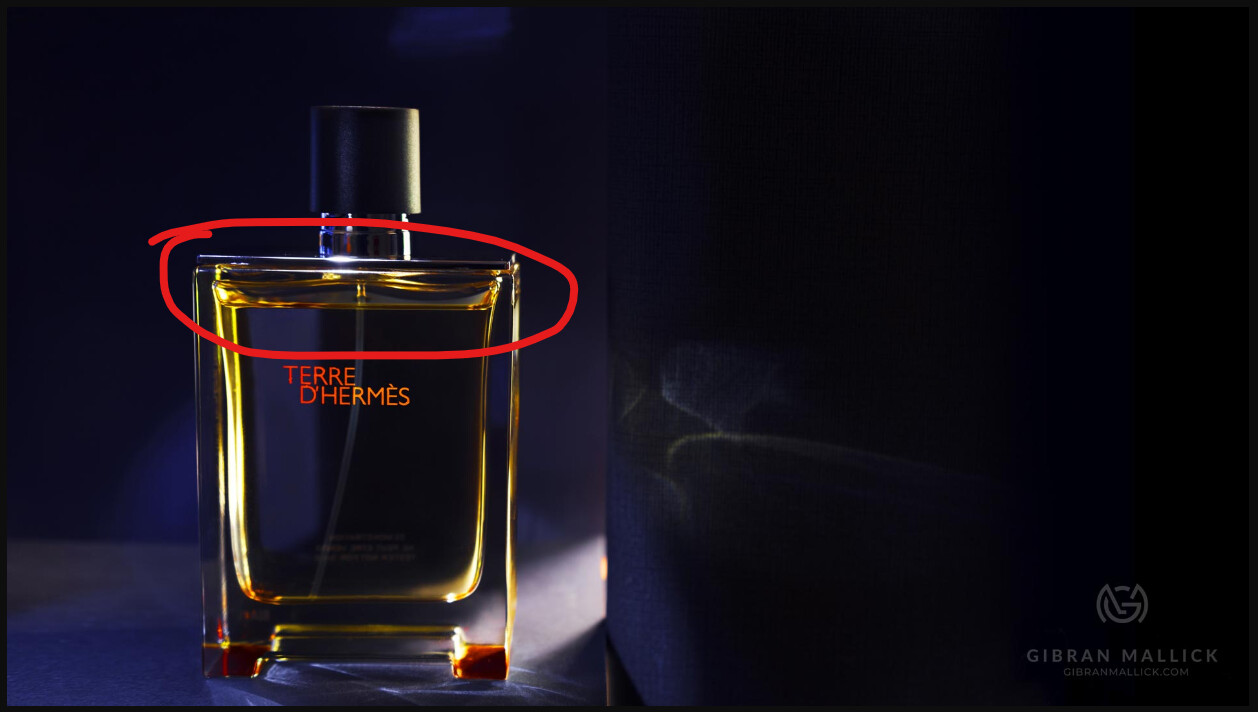
Third thing, caustics. Not only can caustic make the render more realistic, you can also play with it and make patterns to improve the overall scene (see example above). I don’t have much experience with Blender’s caustics though. I’ve experimented with luxcore render and it gives really good caustics, maybe you could try it.
Fourth, the composition looks empty. you could try adding more elements to it such as those leave things (wheat?) or more gold crumbs, because as of now it feels like it’s taking up too little space. You could also try adding more objects that can visualize what the perfume smells like.
Another thing you can do is placing the camera at a more interesting angle and capturing more of the perfume bottle.
It also depends on what kind of message you’re trying to deliver. Do you want the audience to focus more on how it “smells” like or the ingredients inside, or do you want to focus more on the design and branding of the bottle.
Fifth, reflections. I’ve done renders with full metallic objects before and it’s not easy. A lot of product photographers rely on diffusers/reflectors to get a simpler reflection on metallic objects, in your case, the bottle cap. You cold for example use larger area lamps so the cap could reflect just one thing instead of the surroundings and having many line in the reflection like your picture.
You could try looking up some product photography behind the scenes or tutorials to see how the pros do it. Here’s one I found.
Thanks. I know I could try it with luxcore and probably would get the glass looking better much faster. But one of the goals of this scene is to try to get those effects that you mentioned from cycles.
Here’s a next WIP after some playing with the lightnig.
For me the bottle and liquid is the most troubling issue. I need to crack how to get that surface tension and liquid material working the way I want. The scene compositon and other stuff too but first I need the bottle to look right (so thanks for pointing out the areas to look at)
slowly getting somewhere, but not yet.
This is a smaller res and a lot of denoising artifact but the glass and liqud finally start to look a bit better.
Need to work on the shadows more to make the lighting effect pop in the glass like in the references Jaxx has provided.
The surface tension thing at the wall of the glass is called meniscus:
https://en.m.wikipedia.org/wiki/Meniscus_(liquid)
Make sure that the mesh of the fluid is slightly intersecting with the mesh of the bottle (nested dielectrics). Check if the normals are pointing in the right direction and if the materials have the correct IOR.
To color the fluid and the bottle, make the color of your glass shaders completly white and use a Volume Absorption node instead.
And as @Jaxx already said → caustics! Enable Reflective and Refractive Caustics in the render settings and set Filter Glossy to 0. Using the new Path Guiding feature in Cycles could also help (CPU only)
Just saw your comment on my render so thought I’d pop over here to see where you are having problems with the caustics. Do you have the caustics setup correctly, sorry to ask the basic stuff. Is the glass ‘Casting’, the floor ‘Receiving’ and the light caustics switched on?
I think that most perfume advertising visuals don’t show the pipe inside the bottle (which isn’t that long, by the way).
You can get caustics from cycles, not only using the shadow caustics option but also without it, you have to turn off clamping (direct and indirect) and also turn off filters glossy, then render with a ridiculous sample count (40,000 or more!). Cranking up light paths to 12 or 32 for all rays gives better results.
Normal glass shader:
With some tricks: