What do you do with this information exactly?
FYI, I’ve never owned a camera so I have no idea what any of this means.
What do you do with this information exactly?
FYI, I’ve never owned a camera so I have no idea what any of this means.
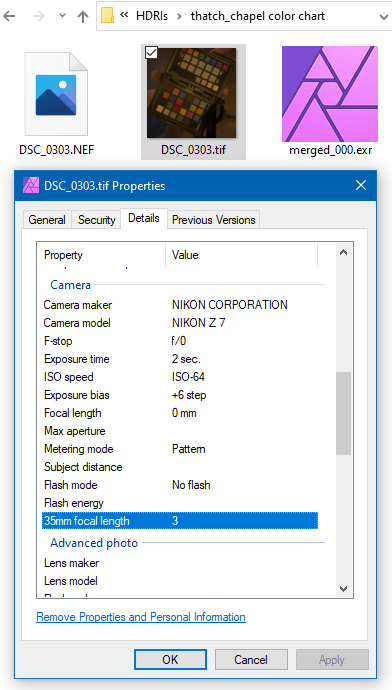
First, look at the .NEF information, just in case the .TIF that was generated lost EXIF data in the process.
Open it in Affinity, you will find the Exposure information at the top: copy them into Blender’s Photographer exposure in Manuel mode.
In Blender, set your HDRI in the World and look through your adjusted camera: if the HDRI image looks brighter or darker than the chart visible in the .NEF file, adjust the HDRI Exposure of the EXR file in Affinity photo, reimport in Blender, rinse and repeat until you get similar brightness.
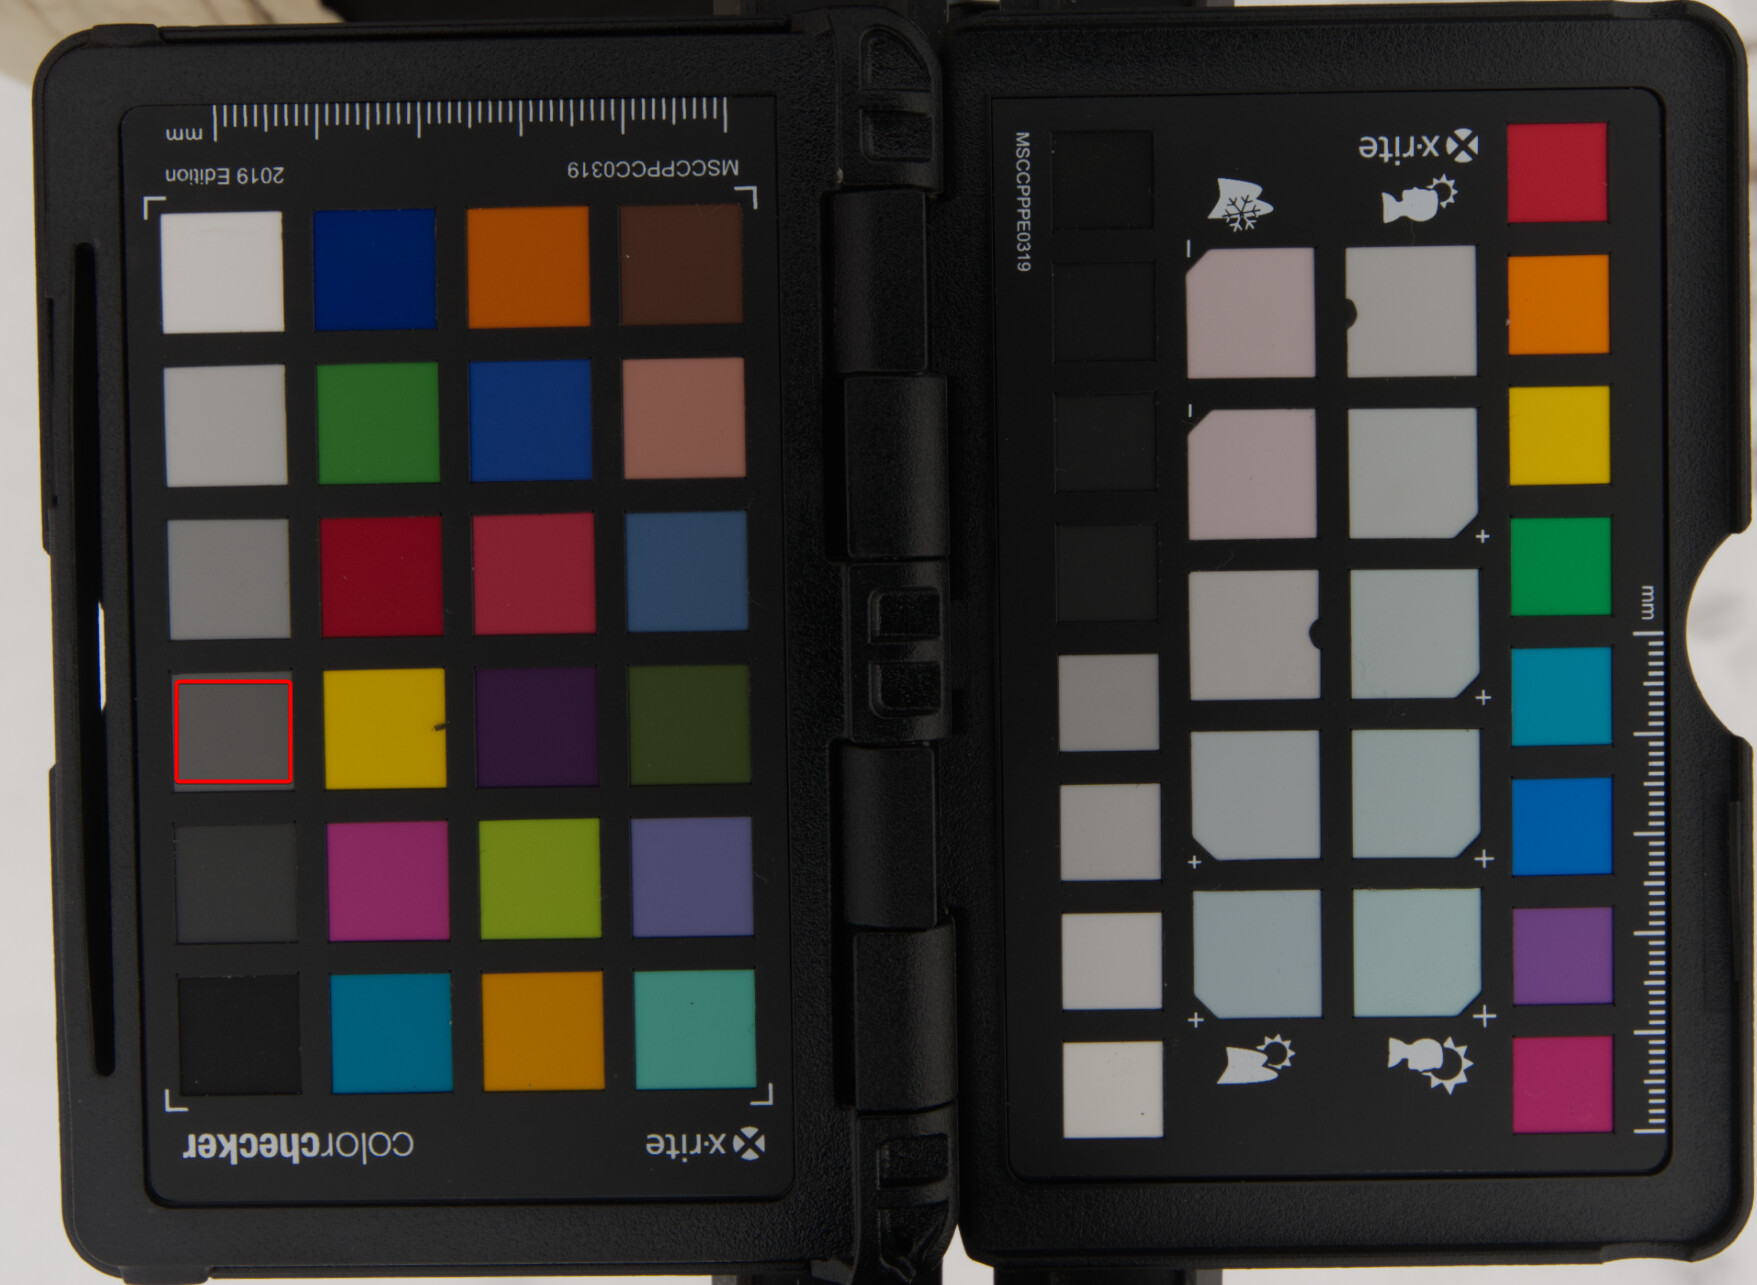
You can use the Gray boxes to make it match more accurately:
Create a plane with a full diffuse material, sRGB 121 color in Blender. Orient it to a similar angle to the photo reference (usually up, towards the sky)
Compare it to the 4th box in the Color chart:
Now for White Balance, the process is similar. On the .NEF file in Affinity Photo, set its White Balance to neutral 6500K, tint at 0.

Input the same WB settings in Blender Photographer. If there is a difference of tone, you will need to adjust the White Balance of the HDRI image in Affinity Photo.
Use the sRGB gray card for more accurate results ![]()
![]() Affinity is exporting hdr files with no adjustments applied to a large rectangular area near the center of the image or that rectangle is completely grey or black
Affinity is exporting hdr files with no adjustments applied to a large rectangular area near the center of the image or that rectangle is completely grey or black
Never had this issue, sounds like a bug? Maybe you could try disabling GPU acceleration in case that would mess up with the export?
Got to play with this and truly the best add-on for camerawork and lights. I’ve seen your every video and your knowledge of filming is very good.
One feedback I would have is to make Render Q optional in the settings like Master Camera. I get this is useful for some, especially in architectural rendering, but when working on heavy scenes with animation accidentally clicking that render button causes some problems. It also adds a clutter in the sidemenu. I had to edit panel_classes.py and remove Render Q panel to avoid accidentally clicking it
@chafouin Just a heads-up,
In recent Blender 3.5.0 branch there’s been some ‘cleanup’ that breaks Photographer 4.8.3:
https://developer.blender.org/rBfea60eccbf49563187ca7025aa68e8547fc2902e
I don’t know if you plan on supporting Photographer4 on what will be 3.5.
Fixed in with version 4.8.4 as this was a simple one. However I usually prefer to wait for the release candidate builds, code is changing too much in alpha versions, you shouldn’t expect add-ons to work with them.
I’ll make version 4 compatible with Blender 3.5 as the v5 release will be late.
Oh, thanks, and sorry, no such expectations, of course. I’m glad if they do keep on working indeed.
Hi. I recently changed the resolution of one of my cameras. Shouldn’t I get a per-camera resolution? I now realize all my cameras have been updated to the new resolution.
Thank you
You need to make sure the resolution panel is checked (= overrides resolution) for your cameras or they will use whatever last resolution that was set.
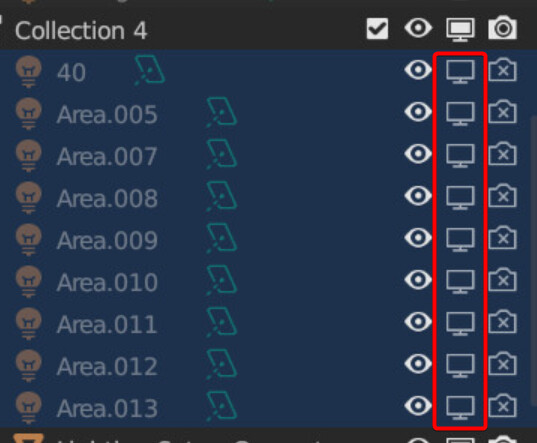
Just something I noticed: disabling the “lamp” icons for the lights in the addon disables the rendering and the “display” icons in the outliner, but not the view, and contrarily to what expected, the light are still visible in the viewport.
For whatever reason, I was convinced that was not the case in Blender 3.2, but it is in 3.4. Am I misremembering and it was always so?
I thought that disabling the display icon made Blender not calculate the object. This makes the “lamp” icon counterintuitive.
No biggie, as long as I remember that’s how it works, if it is.
Are you saying the Lights are rendering in the Viewport, or the Light object manipulator itself is still visible in the viewport, when disabling it through the Lightmixer panel?
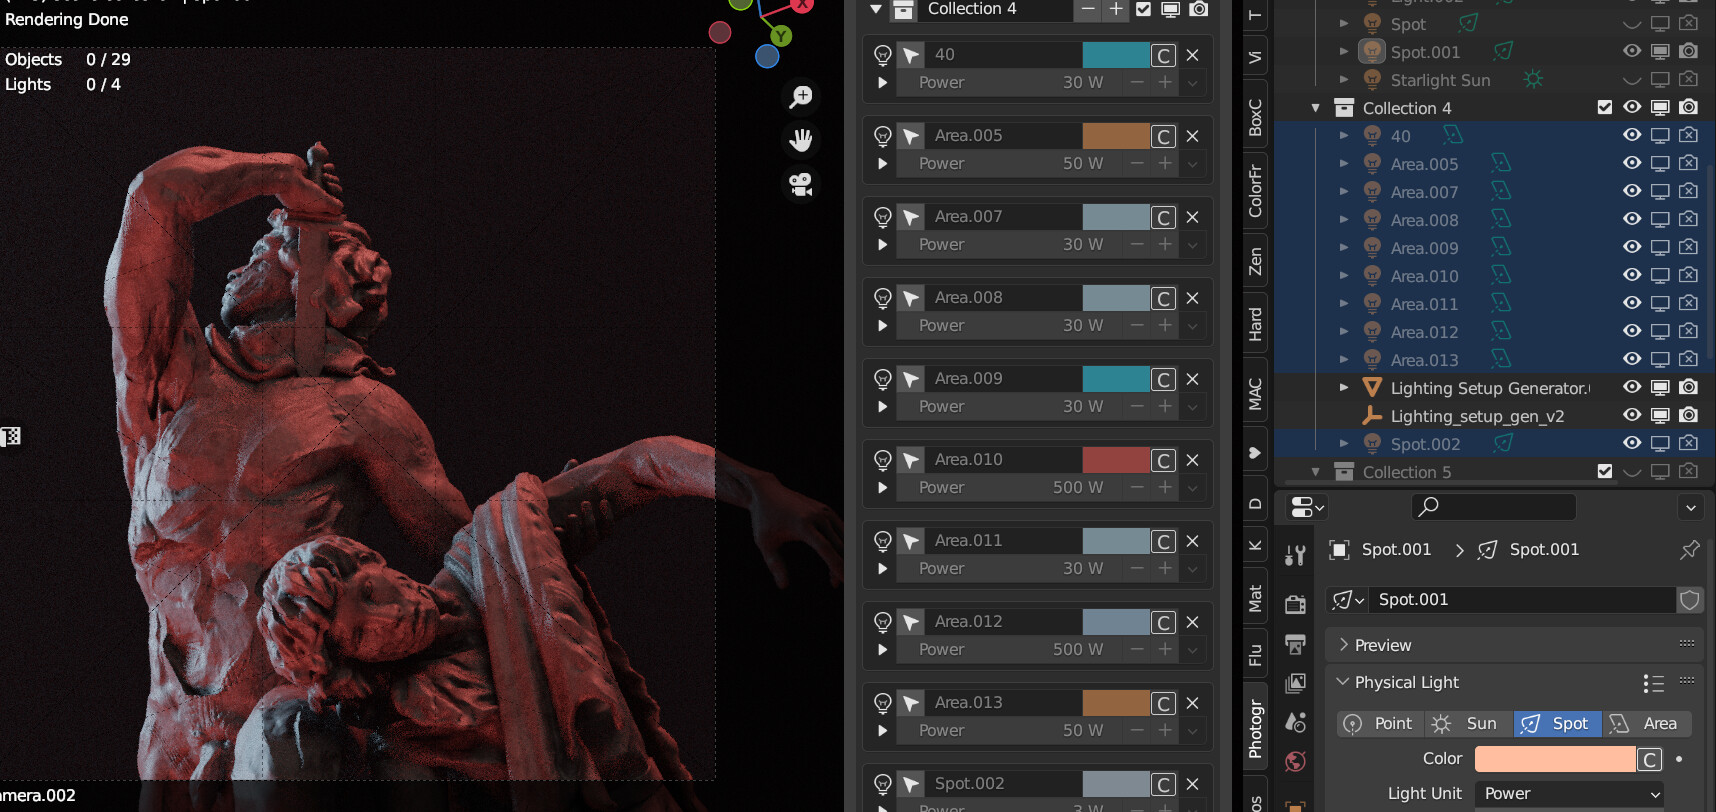
The former (I think); see in the screenshot:
in the outliner the only light collection active in the scene.
To replicate:
[edit:] maybe it’s because they have been created by a geometry node setup? But still it’s odd, because I have realized the instances…
The fact that they are rendered in the viewport while their “Render in the viewport” icon is clearly off makes me think it’s a Blender bug?
I’ll check tomorrow.
I’ve tested with lights created manually and the light mixer seems to work correctly.
It’s caused by the geonode origin, somehow.
Meaning, please don’t worry, it’s a fringe case, not on Photographer. Thank you!
Please send me the scene with just the lights in DM, that would help me debug it.
if you want it, sure, I’ll cut the object and send it
Here. Please note, as said, it’s not important, as long as I know it doesn’t work with geonode created lights (or that generator) I can simply add the lights manually; just check if it’s something of interest to fix or not even a Photographer’s bug.
Thank you!
light setup.blend (1.2 MB)
Hello Chafouin,
Hope all is well.
It has come to my knowledge that either Light Pack, or Photographer, i think it is light pack, disables the Beam Shape preferences panel for lights and lamps.
Blender 3.4.1
/CG
EDIT
Worked after reinstalling the addons
Could this matching be done directly in the shaders instead of affinity since affinity and exports are super slow?