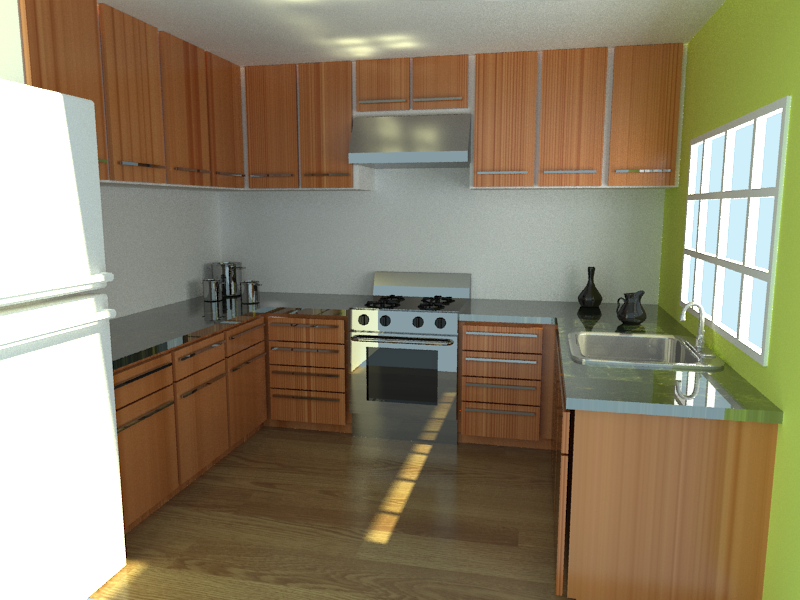
I made this following this tut by Karan Shah which was announced here.
I know it’s not the best but I’m impressed for a couple reasons. First, I’ve never used Yafray before and I really like it :] . Second, this is baby’s first interior right here.
I know there are several obvious flaws (the edges of the countertop, the super even grain in the wood, lighting anomolies, etc.) but for the amount of work I put in, it’s stunning. The modeling’s not great, but it only took a couple of hours (if that) and would have taken half that time if I hadn’t been reading through the tut at the same time.
I’ve not bothered to correct much of the errors since this render took my poor laptop about 2 hrs (maybe more, it’s the only thing I hate about yafray so far :p).
Many thanks and kudos and stuff to Mr Shah! :yes:
I’ve attatched the .blend if anybody wants to play around with it (BTW, the packed file was too big so go get ur own textures :]). I’d like to make some adjustments later on so I’ll post that when I finnish it. Let me know what you think
not bad at all for a first interior, keep on working, next scene though try adding more details, i looked at this tutorial and it skimped on alot of details
This is indeed quite a decent piece of work.
However…
I agree with LazyCoder; add dirt and smears… For example, that stove looks like it’s made of mirrors.
Also, and it’s a minor point, but how do you turn the oven on?
Re: Brados33 I agree. I think the point though was to just learn yafarayand get a hang of the lighting setups fer photoreal stuff.
Re: LazyCoder Fer sher, but again, the point here wasn’t to get too involved. Akshully, I kinda like unrealistically dirt/grime/crap-free renders better anyway…just my arrogant opinion.
Re: JiriH I stand corrected (by mr. jezzebetz), 'twas yafAray (yet another free raytracer). Yeah, it took about 2 hrs, not sure exactly but it was in that department. I have a slow Core2 Duo (Intel) with 2GB ram in an overheated Dell Inspiron 6400 laptop.
Re: jezzebetz Thanks dude! Without you I woulda had to tell him all that myself…er, wait, i just did…
Re: freen Again, was trying not to get TOO involved, but yer totally right. The stove looks like it’s made of mirrors bcuz, well, it is. Oh yeah, and the oven is turned on with a small remote stored in the fridge to make that betteries last longer.
Re: ypoissant oh boy! I’ve got that gamma correcting guy in my thread… jk dude. I still haven’t worked through yer article yet, but I’ll get there someday…
Realistic lighting is about 50% of the battle for photo realism, its just a question of knowing the right buttons to press and having alot of patience. Yafaray’s bidirectional path lighting method is very realistic indeed, and with multiple light bounces i think it can do better than the likes indigo or luxrender, if you are prepaired to wait fir a very long time.
The other half of the battle for realism is attention to detail. I remember once, years ago, Endi i think tried to make a little scene of some mushrooms, fungi, grass; a general foliage scene and even with the limited tools of blender at the time he managed to get it faily realistic with the then very crude blender internal renderer, i think it was blender 2.20 but i cant remember, it was a long time ago.
Attention to detail + realistic lighting and that is what you need for photo realism.
Agreed. The thing about YafaRay that impresses me is the amount of work required to get the lighting right. I mean, you tell the sun to shine in a certain direction, and the render comes out looking like the sun is shining in that direction. No obstraneous tweeking required. BI on the other hand can get nearly the same quality, but not quite and you kinda gotta tweak it to death (i.e. u rully gotta know what ur doin).
Details do count for a TON though. And Endi (and a bunch of others like @ndy and mikepan) tend to get photorealism rather consistently with BI. So no joke, BI’s got what it takes, it’s just not quite as powerful on some fronts. I’m recalling this thread (which for some reason was sadly never completed). In my opinion, Lux would have won had it supported SSS. But the results were close. But if you look at some of the earlier renders, the Lux was closer to photoreal (IMAO), again proving my point that BI generall more tweaking to get photorealsim.
The only reason it takes more tweaking is that BI does not support final gathering (as of right now). And seriously, the lighting you have in the above picture is far from being photoreal…even if you simply take the lighting (since as you said this was a lighting study), it’s clearly not realistic. No matter how fancy your renderer is you definitly will need more than a single light to get a realistic render. Actually maybe you could get a realistic render with some nice setting and all, but it wouldn’t be ‘interesting’. When you look at photoshoot, or live action film in general, that are ‘realist’…all the shots, and I mean, all of them, are relighten with spotligths to get interesting shadows and colors. And it still stay real.
Lighting with a single sunlight, is usually, far from the best looking solution.
I didn’t mean to be rude or anything, so forgive me if it felt that way. Just wanted to give my two cent, since it kinds of poke me when people says yafray (or other raytracing renderers) can light a scene photorealisticly using just a light.
I find it’s a good exercice to actually try and light a scene with pure cg lights, without any fancy Final gathering or global illumination, and try to get as near as possible as ‘realistic’…and once you know the know how, then you can venture in the easyness of final gathering/GI, and you’ll see that your final result will be much better!
I’ve read this tut too.
Your fridge receives light that shouldn’t be there.
Only if I look at the baby blue window in this image you can tell it’s really CG.
try having a variety of wood textures of the same wood for the drawers since now they’re all the same.
previously mentioned the dirt and labels and imperfection and stuff should be added.
But I like how it worked out so far.
Re: Ecks No offense taken I think I’m using the term “photoreal” incorrectly. I didn’t so much mean that the render was flawless as that the light behaves as it would be expected to. Your right; only one light is not realistic. But that one light is doing what it would do in reality. (BTW, I have more than one light present. Take a look at the tut if you haven’t already.) I have no clue what final gethering is, so I’ll have to work on that… Again, it’s not that fancy raytracer makes everything photoreal automatically, it’s that the each light placed in the scene does what it would do in reality, no jury-rigging required.
Re: claus Yeah, that was the first thing that hit me after the render finished. The wall on the right ends just outside the range of the view so the sun lands on the fridge. I’ll have to work on the textures. They’re not even UV-wrapped at this point. Looks like you’ve resolved ur yafaray prob but I’m using blender 2.48 with python 2.5.4 and yafaray 0.1.0
Re: PapaSmurf I appreciate ur going through the time to gamma correct my image, but I’m not really sure I like it. It looks oversaturated and a little bit noobie-BI-ish.
Yes! anatropholeezic blurring! Why didn’t I think of that myself?! totally kidding. You are obviously more enlightened than I bcuz I know not what that means. I look into it
Re: sick You could be right about the numbers; I wouldn’t know. In my opinion, it looks more uncorrected than corrected… no offense papa
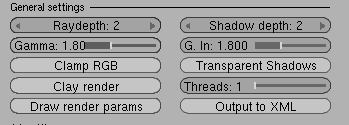
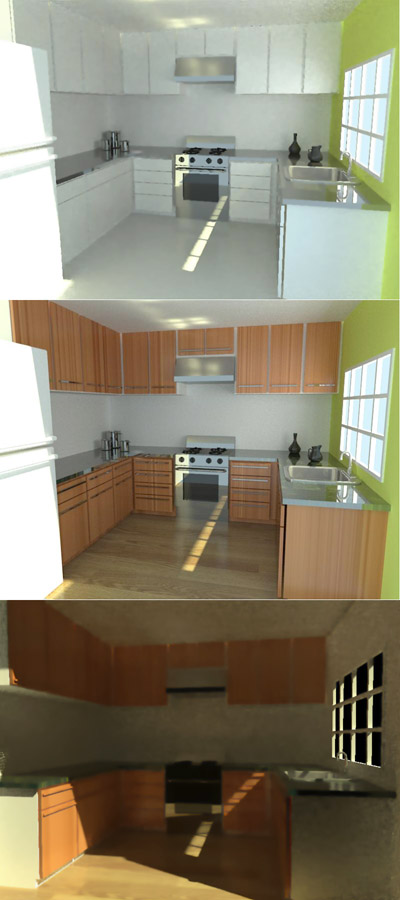
@PapaSmurf, You got it wrong. The gamma value should be 0.45 and the resulting image should be brighter.
I attached a gamma corrected set of renders to show what it should look like. Note that this simle gamma correction does not do justice to the full Linear Workflow because it does not incluides texture and material correction though. The second attachment shows a gamma correction of 1.22 assuming that Yafaray already applied a gamma of 1.8.
@Ecks, While final gathering is definitely a serious technique that is missing in BI to get true photoreal renders, it is definitely not “the only reason” and far from it. BI is still missing physically plausible material definition and physically plausible light definitions. So even if we had final gathering, the fact that the materials are not reflecting light in any physically plausible way would make the achievement of getting true photoreal renders still a huge chore. Final gathering without proper material definition is just a more sophisticated ambiance occlusion.
Also, to me, photoreal is not related to the number of additional lights placed in a scene to make it look real. It is only related to the fact that the render looks like it would look in the real world if the same scene was lit with the same light. In that sense, lighting a scene with only one light, for example one sun, may not be the best choice artistically speaking but it is can definitely be real if the renderer does its job right.
To me, what make the renders look not real are 1) Texturing and material definition that were not defined with linear workflow in mind. 2) The missing wall that falsifies the lighting solution. The only way a scene like that could be seen in the real world would be at an outdoor home remodeling exhibition where exhibitors would build kitchen mockup in the open with one missing wall to attract people in. And 3) Light travel and faloff that are too short because they are not gamma corrected.
I have to admit, after reading your tutorial a number of times (returning for rereads on different occasions), the definition of “full Linear Workflow” is still a big mystery to me. It seems like secret society knowledge and I can’t quite get it after giving myself a headache a fair few times trying.
The conclusion I ultimately came to is that I just need to add a minimum of lights (don’t get carried away with fill lights for example) then a gamma node, and adjust this node “by sight” as a balanced or realistic look never really quite the 0.45 solution so many people think it should be.
“Texture and material correction” just adds to the puzzlement… so does how you mathematically adjust against “Yafaray already applied a gamma of 1.8”
Am I making it all too simplistic or is it rocket science?
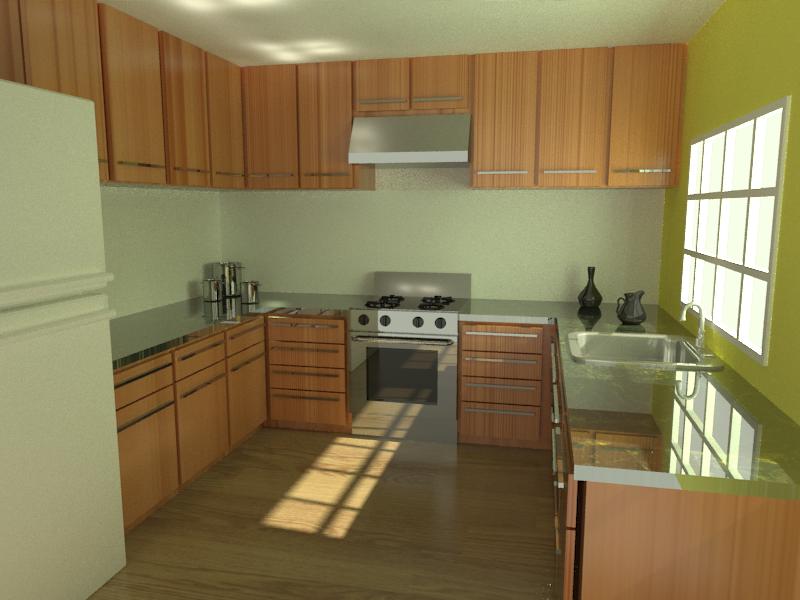
EDIT: I has a quick look at your last render, and a bit of a “within Gimp” squizzle. I would balance the colours out by adding a bit of contrast something like so…
Unfortunately, the highlights are pretty much blown out (too bright) and the majority of areas have a bad lack of contrast (pea-soup tones). I think even in real lighting there would be more contrast in specific areas, making the fridge stand out more, the steel cannisters in the corner etc. Overall, there appears to be a lack of bounced light which colour adjusting won’t fix in itself.
There are several (many) other resources about linear workflow in the Internet. In my tutorial, I try to explain the “why” more than the “how”. I suggest you lookup for “Linear Workflow” in google and read the other resources. Also, broken have a nice set of linear workflow references.
The conclusion I ultimately came to is that I just need to add a minimum of lights (don’t get carried away with fill lights for example) then a gamma node, and adjust this node “by sight” as a balanced or realistic look never really quite the 0.45 solution so many people think it should be.
Well, that is the conclusion that every traditional CG artist came to for years. This results in a lot of trials and errors. The Linear Workflow would ease all of that.
“Texture and material correction” just adds to the puzzlement…
Like I suggested earlier, maybe reading other tutorials and resources would help paste al the pieces together.
so does how you mathematically adjust against “Yafaray already applied a gamma of 1.8”
The mathematics is simple: Assuming Yafaray already apply a gamma correction of 1.8 and I want a gamma correction of 2.2, then the additional gamma correction I need to apply is 2.2/1.8 = 1.22. But personally, if Yafaray already have the input and output gamma correctionvalues available, then I would just set them to 2.2 and work in Yafaray that way. Can it be simpler than that?