Piranha4D's Learning and Practice 2022

2022-06-29 Get Good at Blender Hard Surface Modeling

There are 8 relatively short videos in this sub-series (10 to 20 min each).

Grant Abbitt: https://www.youtube.com/watch?v=qHtxFntZfLM&list=PLn3ukorJv4vvv3ZpWJYvV5Tmvo7ISO-NN&index=5

Not much to say about the first, I call this sort of thing “Grant makes Greebles”.


Select, extrude, make holes, bevel. I already knew 10 ways to make holes in an object thanks to Jan van den Hemel (https://www.youtube.com/watch?v=oFg367w5Cpo), this was a chance to practice some of them more (like Looptools → Circle; Grant likes that one). I find myself generally gravitating towards Knife Project.

Oh look, something more real: https://www.youtube.com/watch?v=qHtxFntZfLM&list=PLn3ukorJv4vvv3ZpWJYvV5Tmvo7ISO-NN&index=6

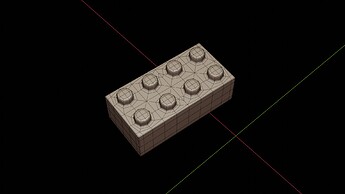
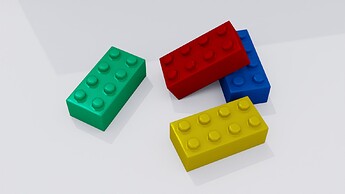
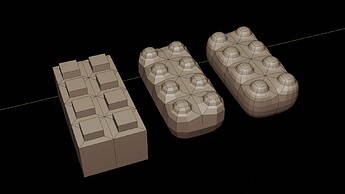
This one uses subdivision, so got my brain gibbering a little. But since it was a tiny thing I didn’t get the completely unreasonable “get away from me” response. It looked both less and more like a Lego brick. Kinda cute and cuddly, if grubs are cute and cuddly. I can easily see how to make a gummi bear instead.


original, 1 level of subdivision, 2 levels of subdivision


Final version. I took lousy notes for this episode. I think I actually decimated it… Yeah, I did, with 2 iterations of un-subdivide. The poly count subdivisions result in is a shock to the system after working so long with very low poly models; I just couldn’t leave the brick alone as it was. And it’s still ridiculously high (2k down from 9k).

3 Likes

2022-06-30 Get Good at Blender Hard Surface Modeling

More exercises: https://www.youtube.com/watch?v=qHtxFntZfLM&list=PLn3ukorJv4vvv3ZpWJYvV5Tmvo7ISO-NN&index=7

Barely having made peace with lego-gummi bears in the previous exercise, we went back to greebling. :ack:. I hates it, I does.

Not that I generally hate imaginary things! I love them, in every which domain you can think of. Imaginary objects, buildings, planets, landscapes, creatures, bring them on. But working on an object that’s not real for the purpose of learning something not related to the unrealness itself doesn’t work well for me. It could work – if it was specifically designed to reduce all the potential complexity down to the few features required for the exercise, then I could probably deal with that. But if it’s just a random thing without purpose, then I get too caught up in not knowing enough about it. Like, how large should it be? What should the proportions of the features be? Should the sides be straight or not? I know it doesn’t really matter, but the back of my mind rabbits on about it, and distracts me from the doing. It’s incredibly hard for me to turn that off.


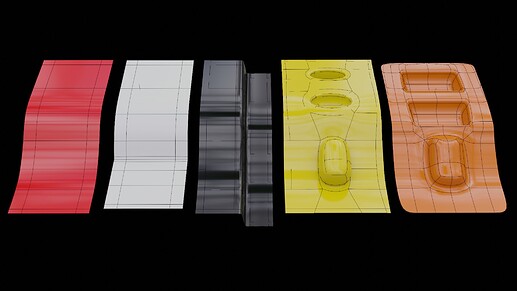
Have some thingies. I am not even sure what I am learning here beyond making loopcuts to control the sharpness of edges.

And the next one: https://www.youtube.com/watch?v=qHtxFntZfLM&list=PLn3ukorJv4vvv3ZpWJYvV5Tmvo7ISO-NN&index=8
It started ok, with something that resembled a button. Made me much happier that I had a label to slap on the thing. I restrained myself from looking up types and sizes of buttons like this. Don’t laugh!

Then we did another greeble thing. I decided it looked kinda of like one of those hotrod hood scoops. I restrained myself from getting reference photos. DON’T LAUGH!

You know, if it doesn’t stop soon with the rabbiting. I’m just gonna go ahead and get references and model real things. I bet I’ll get more out of that than fighting this stupid quirk I seem to be saddled with.


Grant went on a bit about edge flow on the hood scoop but I didn’t get it. That’s a first, me not getting something Grant explains. Maybe I had just tuned out. I made a note to look up edge flow later if he didn’t manage to get this across to me in this series.

On the positive side, the case of the button made me appreciate how quickly subdivision could turn a crude low-poly roughout into a smooth object. I had an immediate idea and tried it out:


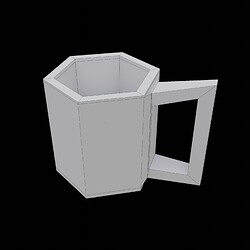
Oh wow, this is awesome. I didn’t actually make the low poly handle, on the left is the mug with the modifier turned off. I started with a 6-sided cylinder, solidified, applied, and then I extruded and shaped the handle after putting the subd modifier on. This was fast, much faster than building a serviceable low-poly model. But of course it’s not low poly anymore. But what if it doesn’t have to be? Then this is kinda like making a basemesh for sculpting; rough out a low poly object, subd modifier, and go to town. I kind of intuitively put control loops in before the subd. I am not sure why neither Andrew nor Grant do that. Probably they’re not as bothered by the initial blobbiness, but I think this feels like a better workflow to me.

One thing that has quickly become apparent is how much topology matters for this. I had basically had in mind to put that off until I did character modeling, but it’ll have to come forward now. I experimented with different mugs, and different methods of construction lead to really different results of the subdivision. It’ll require a lot more study to learn how this actually works, so I can get predictable results. Definitely need to learn about edge flow.

[I have since figured out a lot about topology and edge flow, and my brain is also no longer weirded out about subdivision, yay. Still have the thing about wanting to model real stuff, not purposeless thingies, and liking to use real-life measurements.]

4 Likes

Edge flow is quite simple- let me see if I can explain it better than Grant (not likely :wink: ) Edge loops stop at tris or ngons, which breaks the edge flow. Edge flow means edge loops that continue, un-interrupted, in a loop. On a character, for example, you’ll have a loop around the eyes and around the naso-labial crease, marked in blue and purple here:


These unbroken edge loops are what we call “good edge flow”. In this case, this allows the eyes to open or the mouth to open smoothly- all the faces, all the way around, can deform. With bad edge flow, you’d have faces that were “stuck” by not being part of a continuous loop. They would not deform well.

Edge flow is mostly important for deformation- animation specifically. Good topology is important for hard surface work, of course- in that case, edge flow can help reduce artifacts. You can read more about this here:

4 Likes

Thanks! I feel bad saying this now since you put effort into helping me, and I really appreciate that. But remember the date above the entries? This was back at the end of June. I have since learned about edge flow (only a couple of days after those exercises, in fact).

I really have to find a better way to do this backdated journal thing, since putting the date above probably is kind of invisible to readers. I tried varying the tense accordingly, but I forget too often (because my notes are in present tense). Maybe I need to add a disclaimer at the bottom every time, and vary it enough so it doesn’t become noise. I do it sometimes, but usually I just transcribe and expand on my notes from that day and forget to remind people that the things I describe as problems are usually not problems anymore. I’ll make more of an effort; sorry about that!

1 Like

I… have to admit, I’ve never even paid attention to those dates. That is to say, I never realized that those dates didn’t match up with the current dates. My bad :sweat_smile: Well, I’m glad you know what edge flow is now, and I’ll keep my helpfulness to myself until I read the date going forward :wink:

1 Like

2022-07-01 Hard Surface Modeling: Chess Pieces

Grant Abbitt’s Get Good at Blender Hard Surface Modeling part 9: https://www.youtube.com/watch?v=qHtxFntZfLM&list=PLn3ukorJv4vvv3ZpWJYvV5Tmvo7ISO-NN&index=9

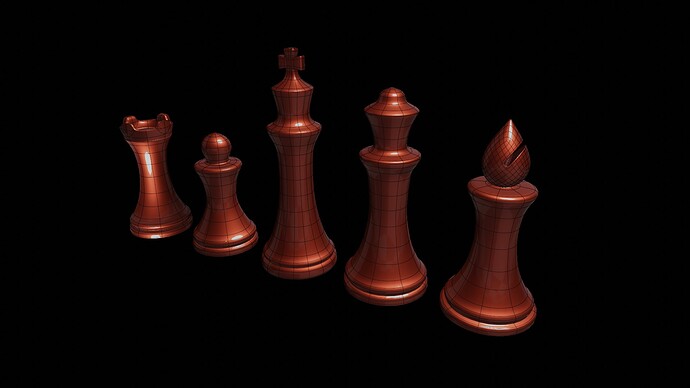
Real life objects! Be still my beating heart. No wayward squabbling by my brain, yay. He used polygon modeling for the roughout and then copied the base after the first; I used that for 2 and curves for the other 3 (just to practice)-- I definitely prefer curves and a screw modifier for when an object is radially symmetrical. Now that I can draw freehand curves, it’s considerably faster too.

When it got to the bishop, Grant left us in the lurch. I was a teensy bit grumpy about it because that’s by far the hardest because of the slice in the head head. I didn’t want to make it with a boolean because that makes messy topology. But I also didn’t see how I could make it clean with the original mesh. So I deleted the head, and made a new one from a cube, subdivided, cast to a sphere, and rotated so the quads were in line with the cut. That worked out much better than I had even expected, I could just inset the faces and then delete them and reconnect the remaining edges to make the cut. I did not do that elegantly, so I definitely would have to return – but one can’t really tell.


I learned to use a shiny matcap to check for smoothness.

I went looking for a good bishop tutorial afterwards, but except for two guys everyone did booleans. One of the guys cut painstakingly face by face (no, thanks), and the other one was very advanced, with a copy of the head as target for a shrinkwrap. I was pleased to see he also used the rounded cube approach, but the rest was over my head. Bookmarked it to return to (https://www.youtube.com/watch?v=8ihNsjiFhQI by Ian McGlasham; he has a whole series on subd, and he’s a good teacher).

[Just a reminder: I am backdating these entries to when I actually did the exercises, which was roughly 3 months ago. I have since progressed (one hopes), and will ask if I still don’t get some basic stuff. Links to cool sites are always appreciated!]

(Thanks for the recommendation of Espanso, Joseph, I am using it now – for everyone else, it’s a text expander to automate frequently typed stuff. Cross-platform and open source, what’s not to like.)

5 Likes

Maybe it’s just the diehard quad modeler in me, but this is honestly quite surprising. Building this shape even with the cut would be quite simple to do with quad modeling, I can picture the wireframe in my head right now :sweat_smile:I feel sometimes like a lot of Blender tutorials get excited about all the fancy bells and whistles and forget about the very simple basics of 3D creation. But hey, I’m glad you figured it out (a couple months ago, I read the date :wink: )

Nice work!

You’re welcome to tag me by the way, if you want, I don’t mind at all. But you are correct in your assumption that I would read this -grin-

2 Likes

Clearly there is a niche left to fill! If you’re ever in the mood… in your “copious” free time! :smirk:

This is why self-guided learning is actually quite difficult; you can’t just pick random tutorials that cover the subject and be sure that you get a solid foundation. I have long since lost count of how many tutorials I start watching just to weed them out after the first 5 min.

Since many Blender tutorials are recorded by people who’re not doing it professionally, but just because they figured out something cool and all their friends want to know how they did it, it even makes sense that they’d primarily get excited about bells and whistles.

That he doesn’t do that this is exactly why I like Grant Abbitt – he teaches the fundamentals. And that’s why I keep looking for people who do similarly well in areas where Grant doesn’t offer much. Hard surface modeling is an area where many YTs love to use commercial add-ons as well and go hog wild with those. On the plus side, I know Blender well enough now that I can take direction from some non-Blender tutorials and translate them, so that gives access to a few more good teachers, but generally free offerings are more plentiful for Blender.

Though I will probably opt for a paid course past the basics once I get back around to it. Gleb Alexandrov has one that looks really attractive, about fixing common problems.

3 Likes

That’s a good one :laughing: I have a YouTube channel where I occasionally upload Blender tutorials, but I simply do not have time to make videos. I’m already multi-tasking 4 or 5 things from 6am to 5pm and - after 5pm is for dinner and hanging out with my wife, usually, but I often get a couple more hours of productivity in- but if you can magically give me more hours in the day? :stuck_out_tongue:

It’s worth paying for a course if it’s an area lacking in quality free information. I’ve bought a rigging course and an animation course from Pierrick Picaut, I’ve haven’t yet found any other course worth paying for. But I’ve had my eye on some of Gleb’s as well, he’s a remarkable artist

2 Likes

2022-07-02 Hard Surface Modeling: Logo

Grant Abbitt’s Get Good at Blender Hard Surface Modeling part x?: https://www.youtube.com/watch?v=qHtxFntZfLM&list=PLn3ukorJv4vvv3ZpWJYvV5Tmvo7ISO-NN&index=10

The numbering is all off here; this isn’t part of his original series, I guess, but he put it in there. Doesn’t really matter.

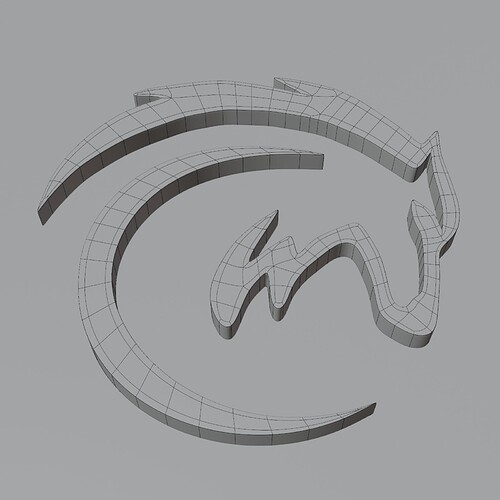
Trace a drawing with vertices; try to have mostly matching pairs on both sides of the outline. Create a huge ngon face between the lot. Inset that face just a little (which creates lovely edge flow all around). Delete the remaining face. Make new faces between the matching pairs of vertices. Extrude. Subdivision modifier. Add extra support loops for edges that need tightening (or crease them). Creases are fine for within Blender (faster than extra loops, and non-destructive), but don’t travel to the outside world.

And finished.

Music: Xenoblade Chronicles 3 OST – came recommended, and I rather like it;. Never played any of the games because I only ever had a Dreamcast until recently.

8 Likes

I mentioned this in a message just now, but you truly have a remarkable ability to make an image interesting. It’s just a black logo on a white background, but the subtle highlight from the lighting adds a level of depth to the logo that makes this a truly excellent render. Nice work!

I’m glad you’re enjoying XC music, I know nothing about the games but they really have excellent music

3 Likes

2022-07-03 Hard Surface Modeling Homework

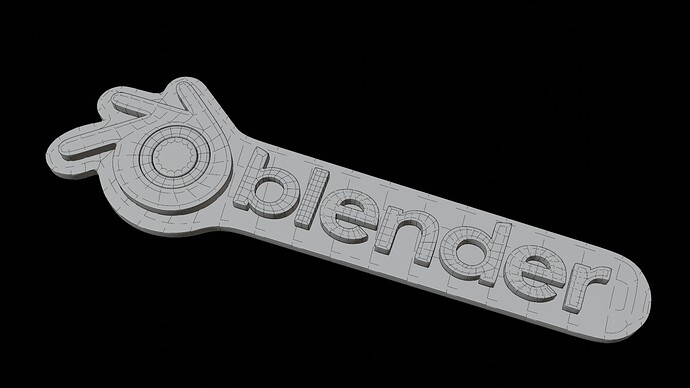
I felt like practicing the previous lesson more, and I especially wanted to try it on text which had previously annoyed me a lot, being hard to clean up. It’s a cinch with this method. I am sure if I wanted to seriously deform it I’d have to make more of an effort, but this is quite serviceable.

I started with an SVG (ergo curves) instead of tracing a raster image, reduced the curve resolution, converted to mesh, cleaned out extraneous vertices, moved the remaining ones around, and then proceeded as the day before.

By the end I had the process down pretty well, but the overall topology still has a ways to go. I figured out by myself how to relatively elegantly reduce 3 faces to 1 (not a big deal but I enjoy small achievements even if I am the 6 billionth person to grok something). That set me off thinking about how to reduce different numbers, and also how to go the other way, increase them. It had to wait til the next day though.

:guh: my eyes are hurting, and it’s hard to keep looking at the screen. They’ve been out of sorts for the last few days, mildly oozing greenish gunk. My partner went up-island for (Canadian) Thanksgiving with relatives, and apparently some of them also had eye trouble – there are some rumours that it’s due to fire suppressant that drifts over here from the large mainland fires. That’s reassuring in a way, since I get mildly panicky when something goes wrong with my eyes.

Music: from the renaissance (originals, not fusion)

9 Likes

This method is fascinating, and it works really well. I’m going to be trying this out for sure

2 Likes

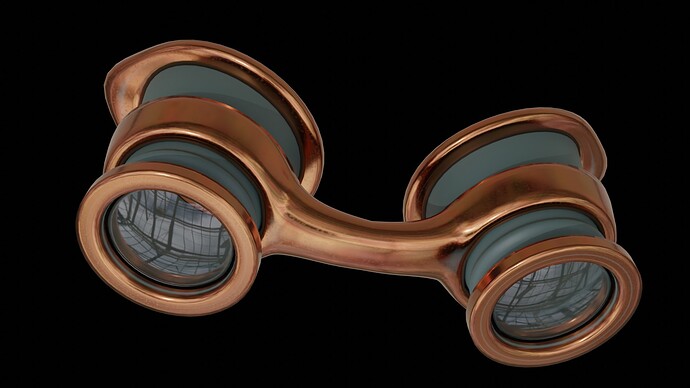
2022-07-04 Hard Surface Modeling: Steampunk Goggles

Grant Abbitt’s Get Good at Blender Hard Surface Modeling part 10: https://www.youtube.com/watch?v=qHtxFntZfLM&list=PLn3ukorJv4vvv3ZpWJYvV5Tmvo7ISO-NN&index=11

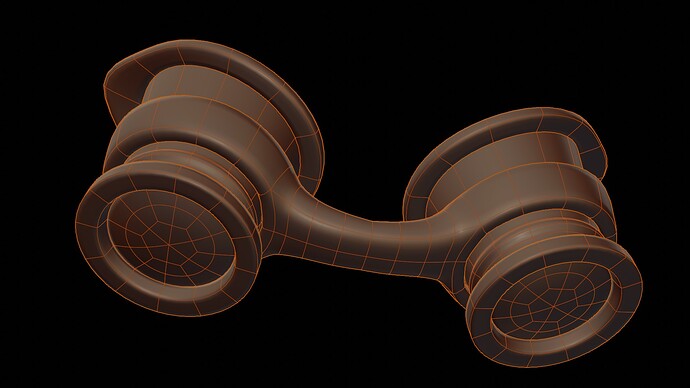
Another real object! Well, for some value of “real” that allows for fictional universes. But people actually hand craft such goggles.

Nothing here was difficult. Did learn something new, a minor thing about rotating several objects to an exact degree.

Made my own shaders, but didn’t spend the time making the cool, aged ones I had in mind:

Music: Steampunk (seemed fitting!) – Abney Park, Dresden Dolls, Dr Steel, Humanvine, The James Gang, The Lisps, Rasputina. Voltaire. Thomas Dolby, Frenchy and the Punk, Lee Presson and the Nails (great band name!), Vernian Process, Rush (Clockwork Angels), The Oh Hellos, Cosmo Sheldrake, Brandon Fiechter, The Cog is Dead, The Crane Wives, Caravan Palace

8 Likes

2022-07-05 Hard Surface Modeling: Hunting Knife

Grant Abbitt’s Get Good at Blender part 11: https://www.youtube.com/watch?v=qHtxFntZfLM&list=PLn3ukorJv4vvv3ZpWJYvV5Tmvo7ISO-NN&index=14

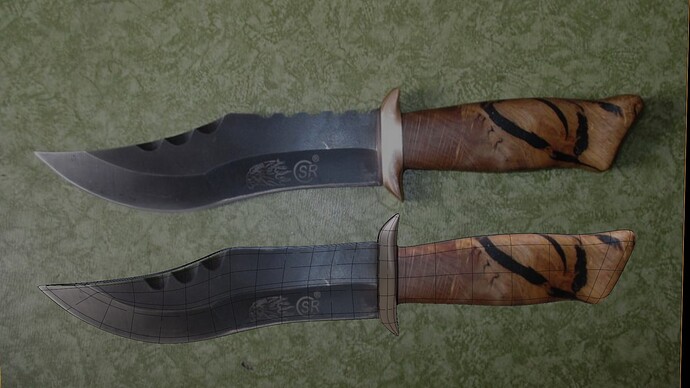
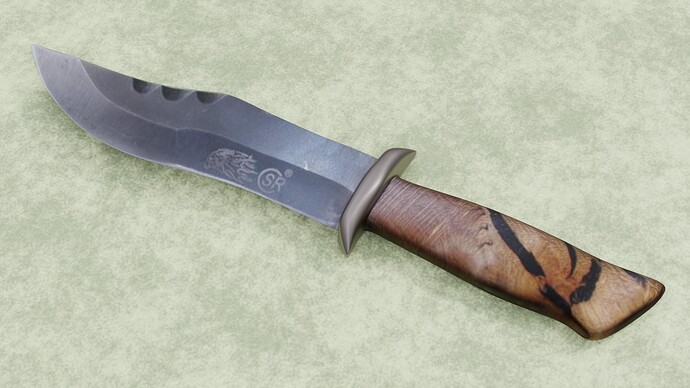
I spent some time on the blade because it actually has tricky geometry for getting the top edge to a roughly equal sharpness along its entire length, and it came out well:


The single reference (and texture) is on top. We didn’t model any of the notches, I put that on my list of things to do eventually. UVmapping of such things is still fun for me.

In retrospect I spent so much time on the blade that I didn’t quite pay enough attention to the guard, and it’s not shaped quite right – Grant made his entirely different, but I like to follow a reference as much as possible while I am learning. I’ll probably go back and do that tonight, since I have the file open already, but I wanted this entry done while my eyes have not yet given up for the day.


I spent a little bit of time making a shader for the background reminiscent of the reference. Then, today, while rendering I couldn’t get any shadows, only to find out belatedly that I had left the shader graph in a state of experimentation, and somehow activated an emission in the PBDSF, which was washing out any shadows. Just one of the many weird little things that can go wrong.

Reference is by David J on Flickr.

Music: Xenoblade Chronicles OST 1 :wink:

10 Likes

Those look nice, man the topology is clean :+1:

3 Likes

On the rare occasion I actually try to model or sculpt something, I put a camera on a circular path and animate it going around the object and put that on the 2nd monitor. I usually have 8 different 3d viewports open to see the object from many angles at all times.

4 Likes

Writing down your thoughts is an excellent exercise, it makes you think about what you are doing in a pragmatic way as you have to choose the wording to express your workflow.

This will help you sort your thoughts and methods out and give you a better understanding of why you do things a certain way. Why some things work and others fail.

I have been reading your process and find it inspiring, your dedication will take you one way – forwards.

7 Likes

When I get two monitors (or maybe just one that’s bigger than this laptop screen) I will endeavour to follow your excellent example. :wink:

Well, except for the animated camera. Moving stuff in my peripheral vision drives me batty. But 3D viewports of all directions? That would be great.

Btw, thanks much for the recommendation of Blender Launcher in Joseph’s Sketchbook – that’s exactly what I need. With any luck I can set this up sooner rather than later.

4 Likes

If you have a desk space and it’s either or - I recommend one big (thing >32") ultrawide monitor. Preferably flat. 3440x1440 is perfect for 3D work. :slight_smile:

And that hunting knife looks good! :slight_smile:

4 Likes