Piranha4D's Learning and Practice 2022

I did fine with the part that wasn’t vague. :wink: I looked for other tutorials on the subject, but none of them – except for 1D_Inc who uses a different method – actually replicated an existing ornament. I’m now thinking that this is probably an ok way to start, but that one can’t finish it the same way because some curves in the ornament actually change profile. Which means one needs to break them into separate curves – I did that for the curves that have the round terminator, but making them look joined was beyond my capabilities. Maybe sculpting is what it needs after the layout is finalized.

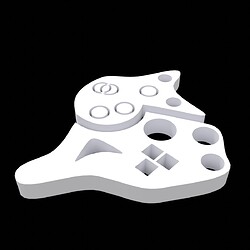
I need to learn so much more about curves before working further on this.

Hey, I just noticed – you changed avatars. Same guy, but different… somethings.

4 Likes

This could work, if you want to keep going the curves route. Personally I like 1D’s method better, but I’m also just so bad at sculpting that I avoid it at all costs :sweat_smile:

Good eye! It’s still Nightwing, just a more recent version (Young Justice season 4 vs Young Justice season… 2, I think):

Honeyview_main-qimg-10b39b081ca0d7c77f661b6ee2e19428-lqgg

3 Likes

Yeah, I want to continue the curves route – but I’ll discard that if it turns out not to work well enough. I want to know (eventually) whether it can be done – because if it can it’ll be much more flexible than the polygon route. I kinda always want to use curves when something is, well, curvy. :wink:

I’m surprised that I like what little sculpting I’ve done, it’s less scary than I thought, and it suits my inclination to make small, stepwise changes and is a fun way to give some randomness to surfaces. I am still scared as heck of “real” sculpting, like the stuff Billie and Omen do. But using it to make one (former) curve blend into another, that I can handle.

He definitely looks older. More volume around the face. Also more stern. A long way from Robin (he used to be Robin, right? Or am I confusing him with somebody else? I’m not very familiar with DC).

3 Likes

I enjoyed reading your learning experience with the ornaments, thank you again for your ongoing insights! Really helps with my own understanding of the different techniques in blender.

And don’t be “scared” to try “real sculpting” (whatever that may be) - just start with a sphere and have fun. Sculpting is extremely addicting.

3 Likes

Yes, yes and yes! <3
The major problem it would seem that ornament curves, as you said, change profile. Some tend to end by spiraling into a disk, or have a floral design, some just very short but wide (yet don’t break on sharp turns). It breaks the uniformity of a standard curve and makes a lot of difference in terms of appeal.
If we could somehow control the profile change and use custom caps…?

Now that the Geometry Nodes are around, maybe true non-destructive ornaments might be achievable after all :face_holding_back_tears: I hope they are.


And seconding Omen’s post, don’t be scared of sculpting - it’s just Edit mode with Proportional Editing always on =D
(well, it’s not, but sometimes it’s enough)

3 Likes

Sculpting on something like this isn’t too bad. It’s when you start trying to sculpt nostrils or the corner of the eye that you realize your level of inexperience. I’m speaking in “you” language but I actually mean “me”, of course :wink:

You are correct, on all counts :slight_smile:

Sorry for the late reply. Busy day at work

2 Likes

Some Notes on Sketchbook Benefits

Something I noticed recently is how valuable this Sketchbook is for me in ways I hadn’t considered originally. I was bemoaning how far behind I still am, and how that presents a problem because I can’t just burble on about the things I am currently excited about. And that’s true, that is a drawback of this format, and it chafes.

But the good thing about posting things I did 3 months ago is that I have to re-engage with the old projects. I almost never saved rendered images back then because nobody but me was gonna see them anyway. I didn’t even always set up lights and an HDRI. I didn’t write notes originally. I didn’t organize my shader graphs. Some things I didn’t finish. And since I am still a beginner, and the distance isn’t that large, revisiting those projects works in my favour instead of being tedious. Now when I go in, I have to set up a bunch of stuff so I can make a decent render to show here, and I have to expend a little effort so it doesn’t look too boring. Which makes me notice shortcomings of the model and think of better ways to do things. I have to look through the file to try and remember what I did. That refreshes my memory of the process. Sometimes I redo a part because I don’t remember enough. I finish some things I hadn’t finished. I do extra homework if I feel the original lesson did not take well enough. I make some mental connections that hadn’t previously clicked.

And all that has improved how I handle my projects now. My default startup is personalized from what it used to be, and more fleshed out. I have a couple of standard lighting setups. I take notes and keep them with the .blend file – the URL of the tutorial, the creator, where any assets came from, what I had extra difficulties with, what I want to do additionally at some later time – anything worth remembering. I am organizing my files better – I have a decent file structure in place and instead of tackling the original mess all at once and overwhelming myself (which would lead to nothing getting fully done), I only reorganize the project I am talking about in any single post. And any file I am currently working on goes immediately into the new system. Eventually (in less than 3 months) I’ll be all done with that and it’ll be a thing of beauty.

Organization is nice, but really, what I am valuing most is the constant reinforcement of what I have learned. I didn’t notice it while it was happening, but I am significantly faster than I was. I can follow tutorials at speed that I found impossible a few weeks ago. I am forensically better too; diagnosing other people’s beginner problems comes much more easily, and I can explain why and how things went wrong. This, to me, is pretty much proof that i have really learned something.

Not to mention that I get tips from y’all which I can incorporate in future projects. And the encouragement helps me keep the Sketchbook going, and so this has become a productive cycle. It’s amusing that I thought originally that I didn’t really need extra motivation to learn. And maybe I still don’t need it; I’ve learned a lot of things all on my own. But it sure is seriously helpful to have a supportive group of people who take an interest and who actually get the subject matter and can participate and contribute to the discussion.

Thank y’all for making this such a positive experience!

7 Likes

This is a really good place. Not too perfectionist like artstation, but a lot of passionate artists. I’m glad too I ended up here. It’s also great for remotivating yourself after months of no progress, people’s arts make me feel like I’m able to finish another project. Thanks for the note!

3 Likes

Seconding this - so, so much.
Sketchbooks not only help telling yourself again what you just learned (a bit like a teacher in a classroom), but the support from people that are on the same path is invaluable. Absolutely underestimated the effect a community can have on ones own progress/motivation. Especially for people like me that never went to film school or anything else.

Teaching yourself can be great, but sometimes (more often than not) I wish I could spend some time in a collaborative space where everyone is learning similar things. This forum fills this gap, at least to some extent. Thank you for your thoughts! :slight_smile:

4 Likes

2022-06-12 Curve Explorations #1

This playlist is basically a survey of a bunch of things that can be done with curves, but it is detailed enough and slow enough for me to follow along anyway. Not all of it stuck, of course, and I am spending some time now doing homework for the things which I haven’t used since.

Curves Encyclopedia by Karim Joseph: https://www.youtube.com/watch?v=jBRbqtpkI8I&list=PLSlMI4YOEdKd5lsh2Vbm459fZx-CaVc9O&index=1

Episode 1:

  • 2D curves modeling
  • Parent object to curve control point
  • Freehand curve animation
  • SVG vector to 3D
  • Animate Object along Curve Method 1: Animate Path (not today)
  • Animate Object along Curve Method 2: Animate Offset (not today)

Y’all probably knew Blender has a video editor, but I didn’t. I zapped the workspace some time ago without even looking at it because surely I wouldn’t need that. Uh hn. Rendering animations as individual frames (advisable with The Potato) requires that one stitch them together into a video. I weaseled out of that with the cell fracture wall, but this lesson really needs it. So I learned how the video editor works (minimal basics), and because geeks just wanna have fun, I synced a bit of sound to it.

Reminder to self: When done with an animation, uncheck Sequencer in Render Output Properties under Post Processing, or Blender will forever render the first frame of that animation, no matter what the camera is pointed at, and regardless of what other things one might check and uncheck in order to get it to behave normally.

2D curves modeling:

Parent object to curve control point:


The red ring is parented to a control point on a NURBS curve which has been moved after parenting.

Karim didn’t mention it, but this does not work with curves whose control points do not lie on the curve itself (like NURBS) which makes sense. And I just realized that what Blender calls Bézier curves are actually Hermite curves, since the control points do lie on the curve. Maybe they’re Bézier internally and they convert them for a nicer interface – in any case, I’m glad for it because that’s easier to work with.

SVG vector to 3D:


Had to clean this up a little. Blender seems to be sensitive with SVGs when they overlap, I first imported another, more windy celtic knot and it made quite a mess out of it.

SVG from freesvg.com

Freehand curve animation:
Hm. Is this going to work? It’s quite small and should ideally upload here, but maybe it can’t play here because of the format? Do I have to store it somewhere else online? Would another format play directly? Anyway, if it does work, be warned, there is sound and it might be loud.

0001-0120.mkv (249.4 KB)

6 Likes


Here you go :slight_smile:

Your words summoned me from the deep, I felt a disturbance in the Force :wink:

Nice work on your SVG vector to 3D, that’s a super cool-looking little knot you made. I keep seeing things that are cool in your sketchbook and saying “oh sweet I should learn more about curves!”, as if I have time :sweat_smile: It’s annoying wanting to know everything and do everything, especially when you have a retopology project unfinished :wink:

4 Likes

Thanks much! So it’s the format, it has to be mpeg4?

Preaching to the choir – have you been to StrayBillie’s Sketchbook yet? … I see you have. :laughing:

2 Likes

… Maybe? I’m not actually sure, I just did a quick pass in Handbrake on the default settings, technically it’s an m4v not a mp4, but they do have the same codec :thinking: maybe I should make a test thread in the lounge and see which video formats work and which don’t.

Or, maybe I should stop procrastinating my retopology… hmm… tough decision

2 Likes

You know what I’m gonna say. I hope. You’ve given me something that works, so I’ll just use that next time.

[Edit – I’ve thought about the format a bit more. The preferred format should probably be what most of the browsers out there can handle, if Discourse accepts it. I’m thinking that’s still mp4. Besides, YouTube likes it too, and I might end up uploading future videos there as well. Problem solved for as long as people are insufficiently evolved :wink: and throw their support behind proprietary, patented formats.]

2 Likes

2022-09-22 Stupidity

Nothing today. First I’ve had insomnia for the last couple of days, then the power was out for 18 hours, then I was grumpy and not feeling creative, and finally I got sucked into a stupid thread on AI here (much stupider than usual because OP acts like a ****), and it took more energy than usual to keep my cool and not call them a ****.

Lesson: social media isn’t the only destructive force, BA can be too if I go down the rabbit hole in the wrong place. I should have used that time to work on today’s Blender task, or at least make the render for today’s entry, or gone for a walk, or cleaned the toilet, or petted my cat, or literally anything even the slightest bit positive – instead I frittered my energy away. And now I feel extra grumpy because I did that.

So in the spirit of posting my failures, this is one, if not an artistic or technical one – getting negatively distracted and diverted by things that Do Not Matter At All. OMG, somebody is wrong on the internet! Let them.

4 Likes

I saw that :sweat_smile:
Don’t worry though, I’ve spent a multitude of hours looking at “good references” on Artstation before realizing I had nothing in my head. Or BA for that matter. Lots of great works here and there, everywhere. Feels like one portfolio was made in a day or something. Paradoxical, demotivating, **** if you ask me :joy: As I stare at a very complex scene, I’m actively replacing it with my ideas, never saw that coming… But in my case, lesson never learned :sweat_smile: It’s going to be web surfing day I guess, look at the weather outside! (Not that I would go out or anything, which is part of this joke)
It’s not a bad thing to revert to something else for a day or two. Although getting mad might not be much of a rest, I get it :smile:
Always refreshing, is a good way to stay away! Smell a lemon or two! :point_left:Just trying to cheer you up at this point, but it must be refreshing for you :ok_hand::pinching_hand:

4 Likes

In the olden days of ICQ chats they had a wonderful animated emoji - “banging its head on a wall in frustration”. Ah, I miss it. Anyway as a nice rule, if you start looking for a way to express this emotion in every post… drop the conversation midsentence and go play something :laughing:
It’s fine to let some days to go by. Take a deep breath. Think of what you’re going to do next, instead of what you should have.
It seems we’re all slowing down lately. It’s a roller coaster. It’s fine the way it is as long as we continue to move on.

4 Likes

2022-06-13 Curve Explorations #1b

My ears must have been burning while StrayBillie was writing, cuz I took a deep breath, and thought of what I was going to do next. I didn’t really want to end my day on this sour tone.

So I rendered this little animation from Episode 1 of Karim Joseph’s Curve Encyclopedia:

  • Animate Object along Curve Method 1: Animate Path

I decided to render it straight to video instead of individual frames since it’s very short. Still had to figure out whether I could render it straight to mp4 instead of converting it afterwards via something like Handbrake. Ok, I can do mp4 container directly, but mp4 encoding isn’t working. Try again. H.264 also not working. Hm. That really should work, maybe it just doesn’t work in the preview? If only they hadn’t called this software “Discourse”; it makes it really hard to find anything specific to it. I’ll submit the post and if it doesn’t work, I’ll download Handbrake and do what Joseph did last time… Ha, it did work; yay. Blender is my hero.

I did make the little airplane myself – it’s sorta kinda an Orion L9, but not super faithfully (it has no undercarriage and I’ve winged (ha) the thickness of the control surfaces, and the propeller, and… I watched a short by Blender Secrets on how to quickly make a propeller (https://www.youtube.com/watch?v=ZmI1gBAyUok). If you try it yourself, be aware that his way of twisting isn’t true to real life; read down in the comments for a correction.

The process is easy, no keyframing; it’s all done with a Follow Path Constraint (to the curve) and a Path Animation for the plane. The tilt is set on specific control points of the curve (where it turns), and the scale on the very last one, so the plane “disappears into the distance” (the curve should really be longer for that to actually look right).

6 Likes

I recognize this isn’t a super realistic airplane, but it still looks really good :slight_smile: I see a lot people getting lost in tiny details of airplanes/trains/cars that are cool to think about but you’ll never actually see (and yes, I’m guilty of this myself), good for you for getting something out immediately recognizable and completely functional without getting lost in details :slight_smile:

3 Likes

So, I am not sleeping again. :sigh:

Thanks! Yeah, I am not always entirely certain where to stop with the details when it comes to stylization, but I hit the right spot with this one. Though it probably helped that modeling an airplane wasn’t part of the lesson; Karim just had one from somewhere and I could have really used anything else I already had. But I like modeling, and when I have an opportunity, I’ll make something new. Still, I knew the purpose of the lesson wasn’t that, and I know how the shiny can distract me, and so I made it as quickly as possible and didn’t spend much time vacillating over how detailed to make it. (But of course I got a reference anyway and made an actual airplane, not just some generic thing. And a propeller, which is hardly visible. It had to have a propeller.)

There are two levels of stylization that I am getting pretty comfortable with – the really low stuff that boils an object down to its essence, with clearly visible faces that define the form, and then this level which is a bit more rounded with a low segment bevel, but not subdivided. As soon as I subdivide, I go off the rails.

I am trying to draw tonight, with paper and pencil. I started when the power was out – what better time – but that also meant I had no instruction available. It is so hard because I do not know what I am doing and I have no natural ability. What brought this on is that I am reading an alternate history series by SM Stirling (“Emberverse”), which has terrible covers – what really annoys me is that there is a magical sword and the cover artist DID NOT READ THE BOOKS, or I should probably blame the publisher for not giving good instructions when hiring the cover artist and so the covers feature a totally generic medieval sword. There are pretty clear descriptions in the books of what the sword really looks like, and I am trying to make a concept drawing so I can model the thing. Maybe send it to the author as a small thank you for so much entertainment.

Oh ghods. A 5 year old could do better. I might have to do this with more generic references, but they’ll be hard to come by because it has a grip made from staghorn and silver (Omen’s stag’s antlers are teasing me!)

4 Likes