I agree fully that the Blender documentation should have more examples. I can’t tell you how many times I’ve read a section, understood how it works technically, and still have no idea if it will solve my problem or not. If it was easier to edit the documentation, I would, but last I checked it’s a whole process and a big pain
4 Likes
2022-06-04 Tear Down the Wall (no political statement implied, though you may infer one if you like.)
This popped up in my YT recommendations and since I was feeling out of sorts I thought “and now for something completely different” would be a good thing. It was. https://www.youtube.com/watch?v=sZPD6OBHyVs. If you wanna learn how to do this without any of the beginner stuff attached, scroll to the end of this post where you’ll find a video that teaches it in a fraction (ha!) of the time.
Nate Dwarika who is YT Black Mixture is generally into VFX and motion graphics (and hipness in a geeky way), but he has a few bits and pieces of Blender sprinkled throughout, mostly not tutorials. This tut was for total beginners to Blender (basically his entire audience), but it was surprisingly well done, didn’t dwell but was pretty easy to follow, and had a very satisfying result. This sort of thing is hard to pull off, though Blender really supported it by making it unexpectedly easy.
It was cool. I had had no idea this existed, and it’s such an easy and effective process, I’ll probably use it more often once I get into animation and designing short pieces. I really wanted to continue on and add a wrecking ball (get out of my head, Miley Cyrus, you are not welcome).
And now I realize I never rendered the animation, I just watched it in the timeline. So you get only a few stills because I’m exhausted today… oh, you don’t get that either, since individual frames are dreadfully blurry when rendered. There is so much about this I do not know. Ok, so you get screenshots of the viewport, and you will like it and be satisfied (makes indistinct witchy hand movements). Oh, wait, there is something like a Viewport Render, isn’t there? Oh yeah. Doing that for F47 and 233. Learned something new!
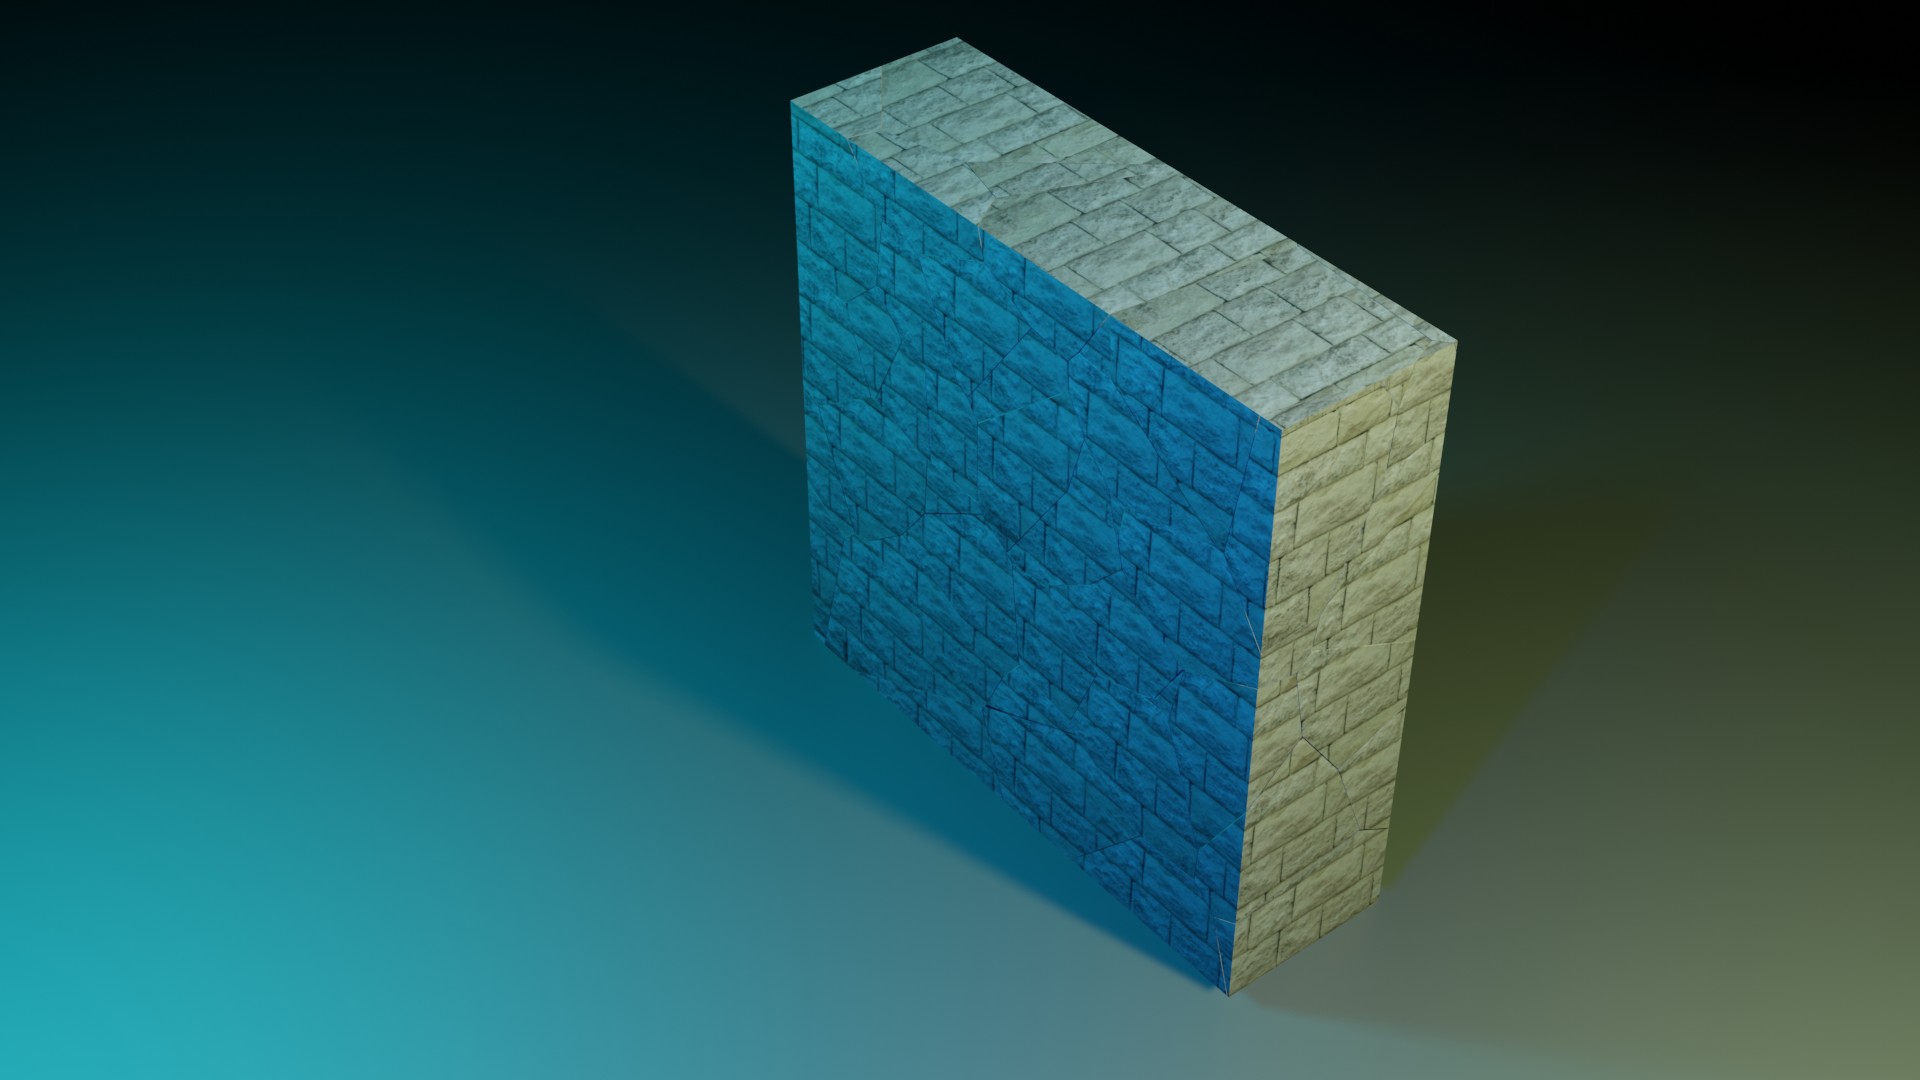

This is done with annotations; you make the wall, and then you scribble on it more or less randomly like you’re a toddler with a jumbo crayon and a pristine living room wall, and the adult supervision on the phone to their BFF, OMG.
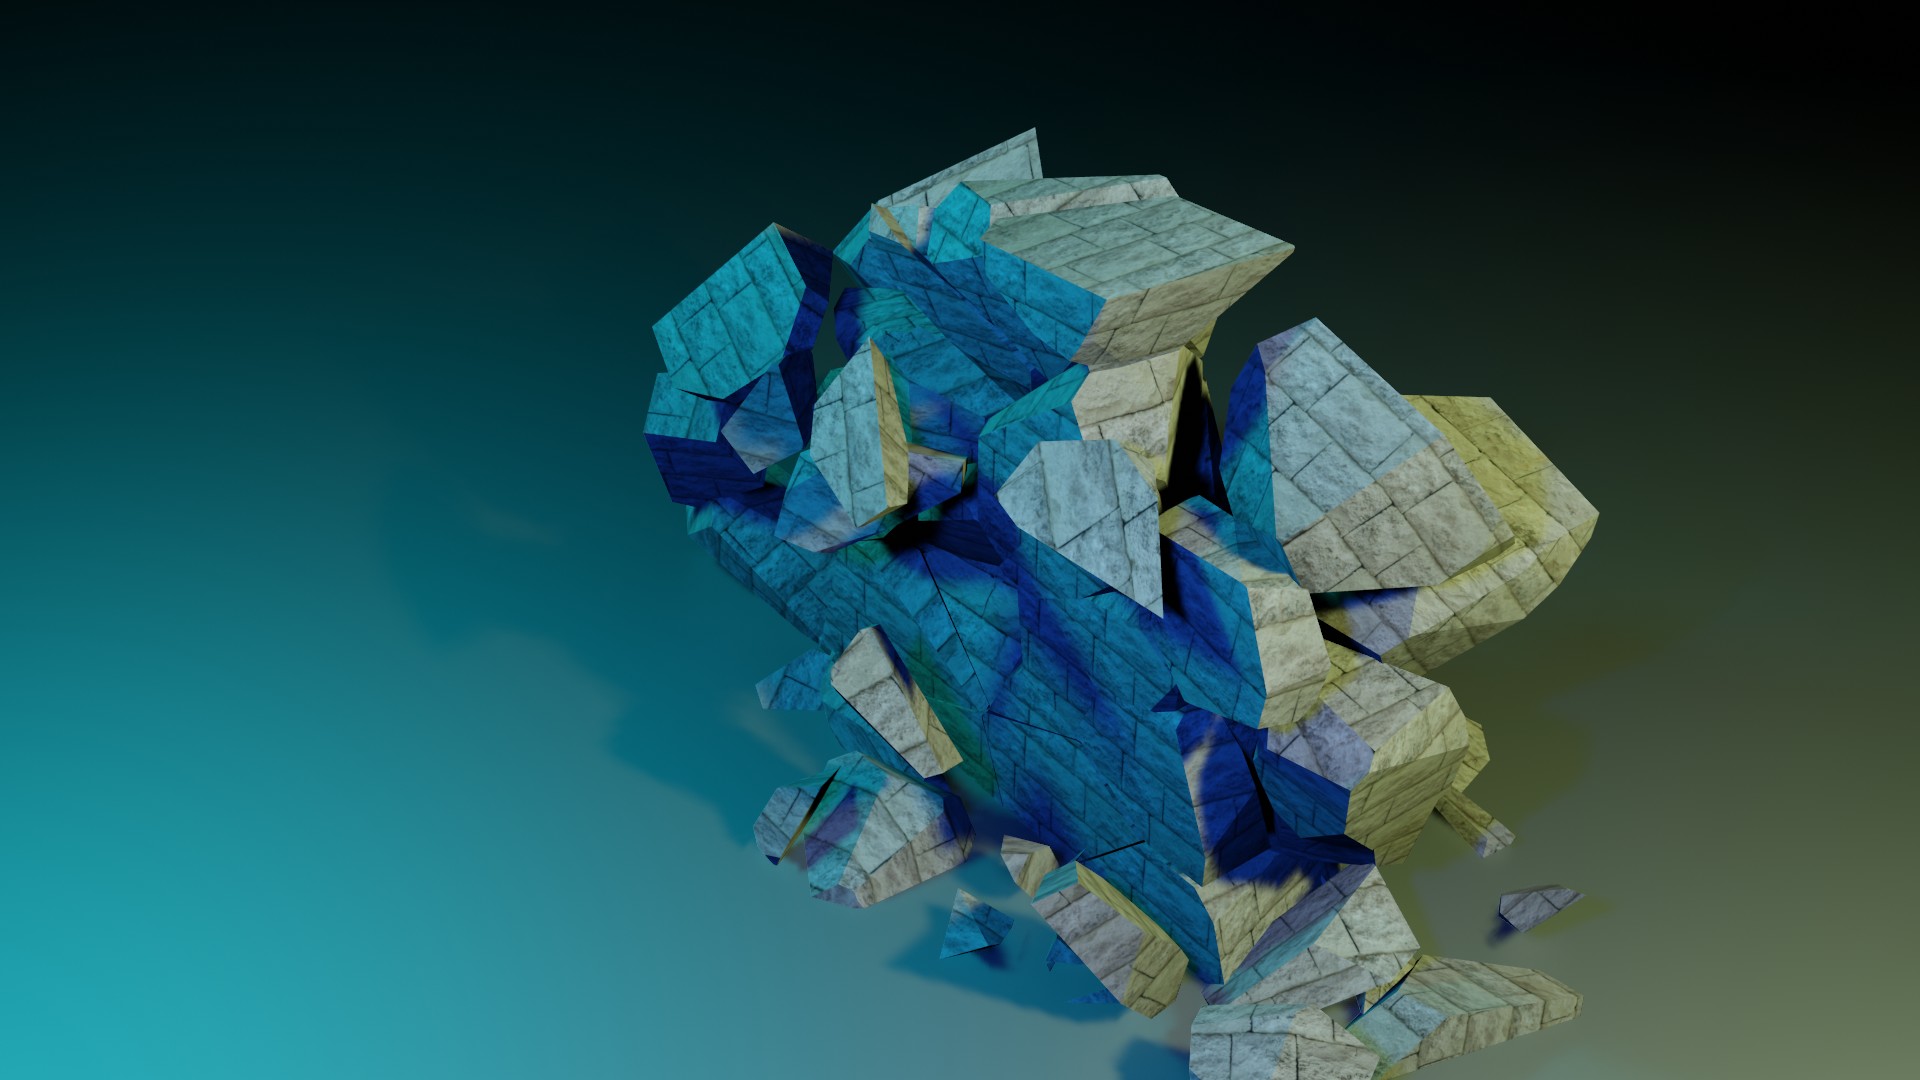
The first time I did this, something went wrong. My wall disintegrated, but the pieces just sorta slid and slithered along each other downwards and there wasn’t much distribution of rubble in all directions at the end. Other people had this problem too in the YT comments, but no solution.
When I looked at my wall closely, all the lines from the cell fracture went straight through the entire depth of the wall. That didn’t look like Nate’s. The physics behaviour made sense when taking that into account. But I had no idea what I had done wrong.
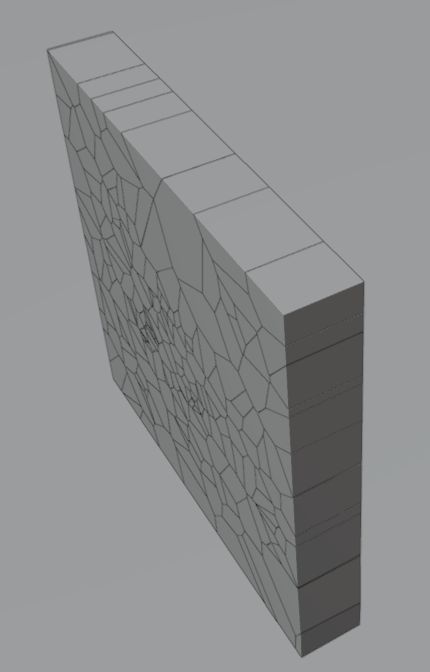
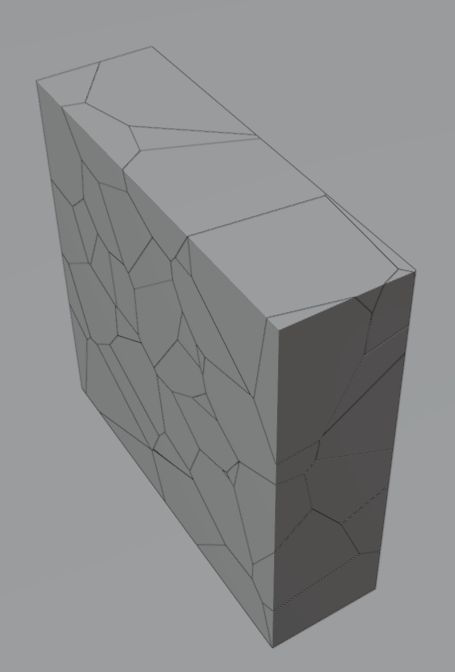
(left how it was, right how it should be).
I looked at another example of cell fracture with annotations; Blender Secrets, my not-so-secret sauce, to the rescue: https://www.youtube.com/shorts/PeiDZsnvRKY. I followed it and this time it worked. I still don’t know what I did wrong, but I know how to do it right; good enough for now.
There was homework, but it gets a post of its own (I didn’t do it on the same day either).
Almost forgot, credit for sandstone block texture goes to somebody not me, but stupidly I didn’t write it down.
5 Likes
Guess people who are more likely to contribute to documentation are also the ones who start to forget that plenty of things are not obvious at all ![]() I spend enough time in support threads to know better but still go: “What do you mean “what elements”? You know, THE elements, of course!”
I spend enough time in support threads to know better but still go: “What do you mean “what elements”? You know, THE elements, of course!” ![]()
I wonder if it really matters on “space” scale ![]() You’d probably make a “proximity” mine, not “collision”, and how close one is likely to end up in an empty space…?
You’d probably make a “proximity” mine, not “collision”, and how close one is likely to end up in an empty space…?
3 Likes
Since these are all things I don’t know anything about, I can’t comment on the technique/tutorials (besides that it looks cool and … its done with annotations? I need to watch the tutorial. Seems like some kind of wizardry.) - but I wanted to comment on your helpful insight in your sketchbook, discipline and learning in general. It helps so much to read along with what you’re doing and what obstacles might have shown up.
Everyone else is giving so much valuable feedback, and I’m just here wanting to say “That’s so cool!”, so here you go. ![]()
4 Likes
Me too ![]()
Blender has wayy too many functions to tackle in a few years and get used to. Amazed ![]()
3 Likes
Yes! But thats also extremely great. Everyone is doing different things, sometimes we’re crossing paths, but in the meantime it’s so beneficial to learn other techniques to incorporate in the personal workflow. Blender feels like a huge playground.
Sorry for going off-topic (I think) in a sketchbook ![]()
3 Likes
2022-06-05 CG Icon
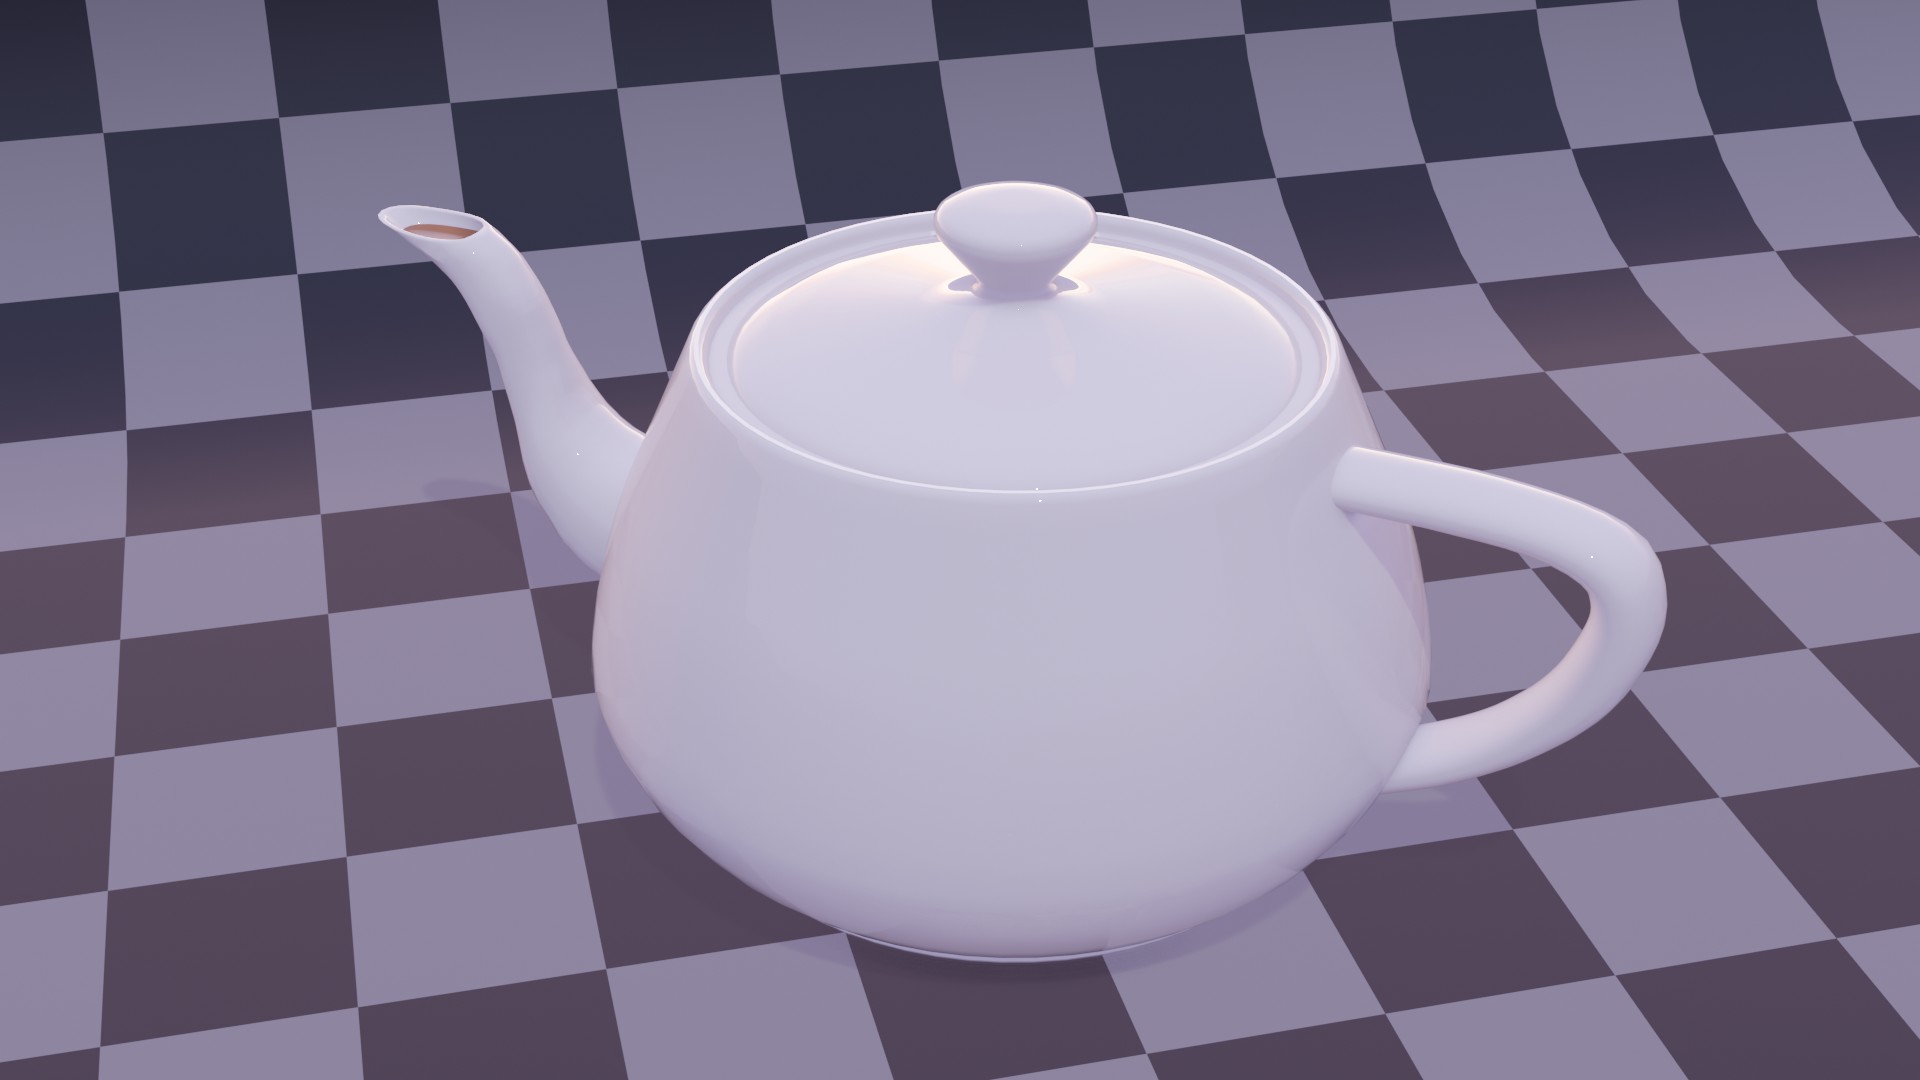
I made my own Utah teapot. I was trying to think of something more complex to shatter than a wall, and there it was, in front of my mind’s eye. No tutorial.
For anyone who doesn’t know, the Utah (or Newell) teapot is an iconic object in computer graphics. It was one of the first objects created with Bézier curves and became a standard reference object for rendering.
Blender has one you can access by enabling Extra Objects in add-ons, but I wanted to make my own.
Despite the spout. which is bad (I am not showing the wireframe because it is so very sad), I am inordinately proud of the rest, especially the handle. I made that with a Bézier curve that has an elliptical curve as its profile (something new to me which I figured out just by reading the manual), and I spent quite some time scaling and weighting the control points so it would end up having the right shape, which is more complex than it looks like at first glance.
I will redo the spout – I should have done that right away, but I still get occasionally into this state where I just try and try to repair something I screwed up instead of simply starting over. It has its benefits, like I did some sculpting to smooth out harsh edges, but that left it just a tad uneven.
And then instead of shattering it, I made a ceramics shader. It turned out pretty decent, though it needs a better light setup to really show it off, subsurface scattering and all.
I’m not doing great health-wise, and I used up all my energy for today already, so I’m not gonna respond to your comments despite enjoying them all (hopefully tomorrow). Thank you though!
Music: Canadian Celtic fusion, mostly rock by Spirit of the West, Ashley MacIsaac, Mudmen, The Paperboys. Great Big Sea, Enter the Haggis, Captain Tractor, Mackeel, Jimmy George, The Mahones.
8 Likes
That’s a nice looking teapot ![]() I say for sketchbooks wireframes can be a secret
I say for sketchbooks wireframes can be a secret ![]() hope you feel better soon!
hope you feel better soon!
2 Likes
Yeah, they can, but… I am reconsidering. Because when I think back on why I started this, it was not only to chronicle my learning, but also to help other people get over their beginner humps, and I was aware that that would mean posting my failures. And I have, at least the major ones. So why stop now? I am feeling crappy, crabby, and vulnerable, that’s why. I am retroactively ashamed over something that’s no big deal. I am a beginner, this is not a contest for the best topology. (I haven’t actually learned much about topology in specific yet.) It’s meant to show that things get better, and to really see that, one needs to show the things that are bad.
Also, I was listening to myself give @good_omen advice on not letting shame hold them back and then I laughed. I really ought to take my own advice.
So here is the pitiful wireframe.
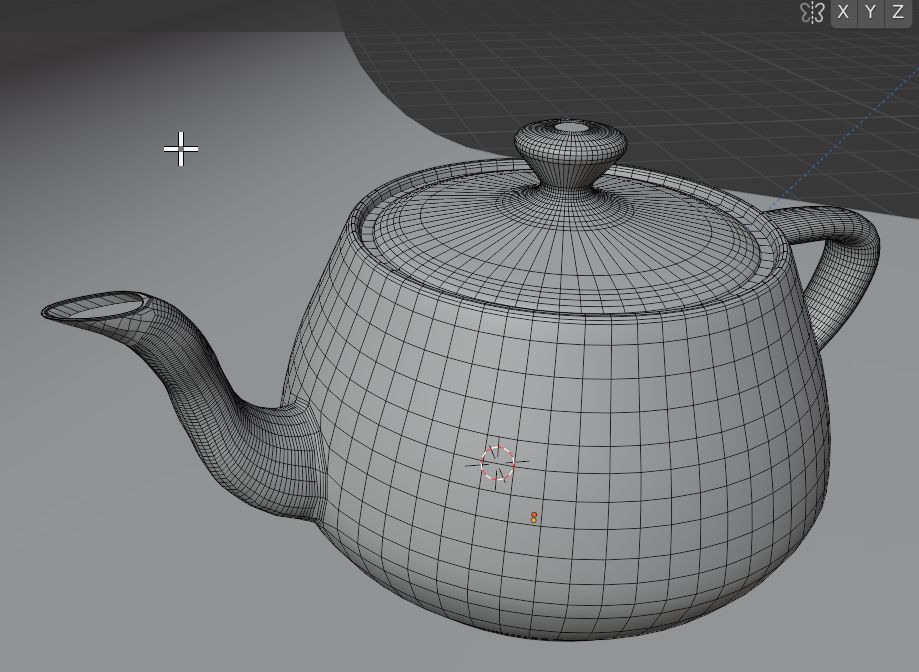
That’s after trying to fix it several times. Should have just deleted the spout and done it over, maybe starting in a different way. Shouldn’t have joined it to the pot before fixing it either. I don’t know what I was thinking; nothing useful. Oh, right, I was thinking that there wasn’t enough resolution to fix it with sculpting, so I subdivided that denser part there, and then smoothed it out. It improved it (it had had sharper edges before), but that just wasn’t the right solution overall.
You can see from the handle that I learned from the too-low resolution of the spout to go higher to begin with. But the handle was also easier topologically because it doesn’t have an opening. And I booleaned it to the pot and did not clean the edges, so that connective topo ain’t pretty either, nor is it filleted as a real teapot should be. I do know now how to do that better.
5 Likes
2022-06-08 Low Poly Well
Grant: https://www.youtube.com/watch?v=bWHhx4uos84&list=PLn3ukorJv4vu6pnoAtivKf5Bo_6oQS0N_&index=1
I was draggy with this one for some reason. Maybe because Grant wasn’t holding our hands as much as he usually does – he was more like: ok I showed you the well head, now you make the beams yourselves; the chunk of work he suggested we “have a go at” was bigger than usual. Not that that was hard, but maybe it was the changed rhythm throwing me off. But weirdly enough I was actually efficient! I used the heck out of the mirror modifier, much more so than Grant did; everything I could mirror, I did. I used the Rock Generator to make rocks and then brutally decimated them instead of gently massaging individual icospheres into shape. I randomized the vertices for the well head stones. I also randomized the colours for the well head, the roof tiles, and the rocks with this easy method that I’ve been using a few times already. And I came up with my own way to make the rope – I took faces from the crank instead of creating a separate cylinder. I’ve been using duplicate geometry ever since I learned the trick, so the new mesh will always fit perfectly with the old. I used sculpting to give the rope some variety. So I was feeling good about it at the end even though I was looking back at about a solid km of a draggy butt leaving big, fat marks.
If I ever write my autobiography (as if) I’m gonna title it “Buttprints in the Sands of Time”.
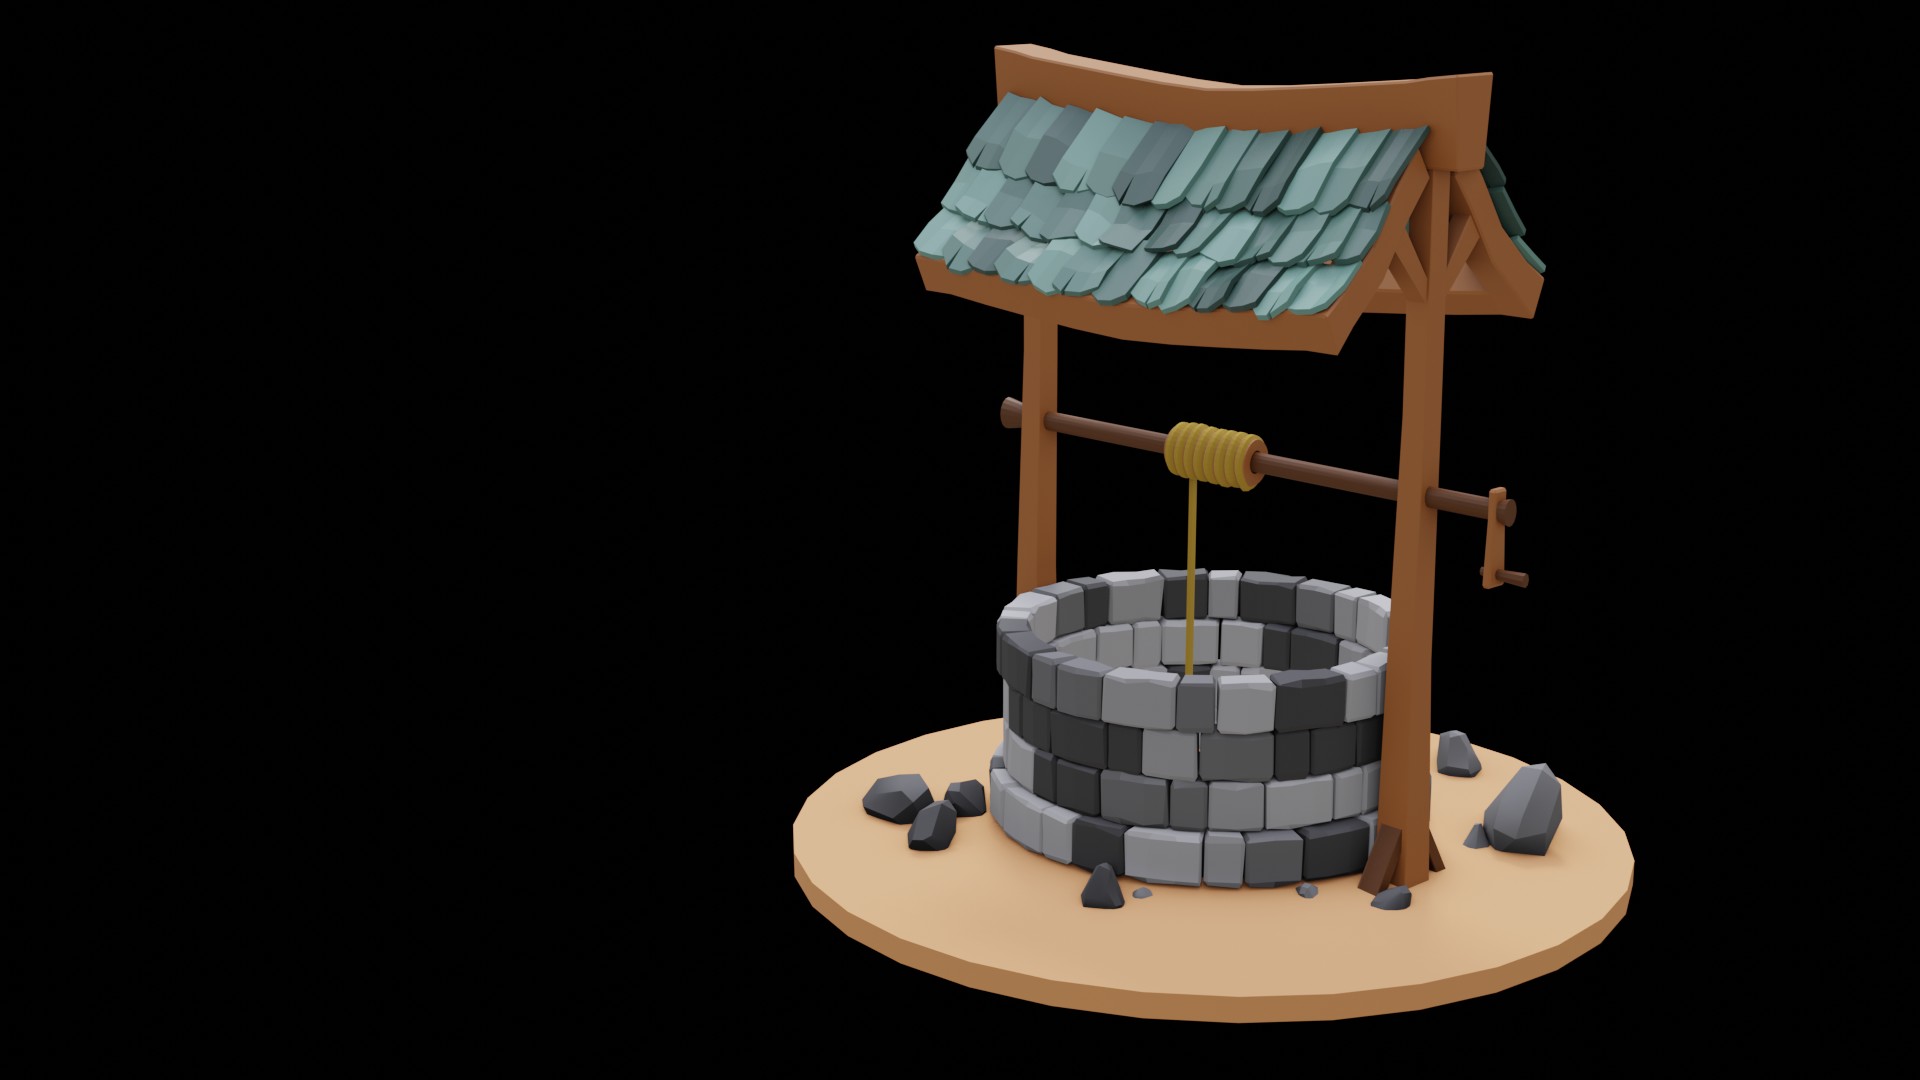
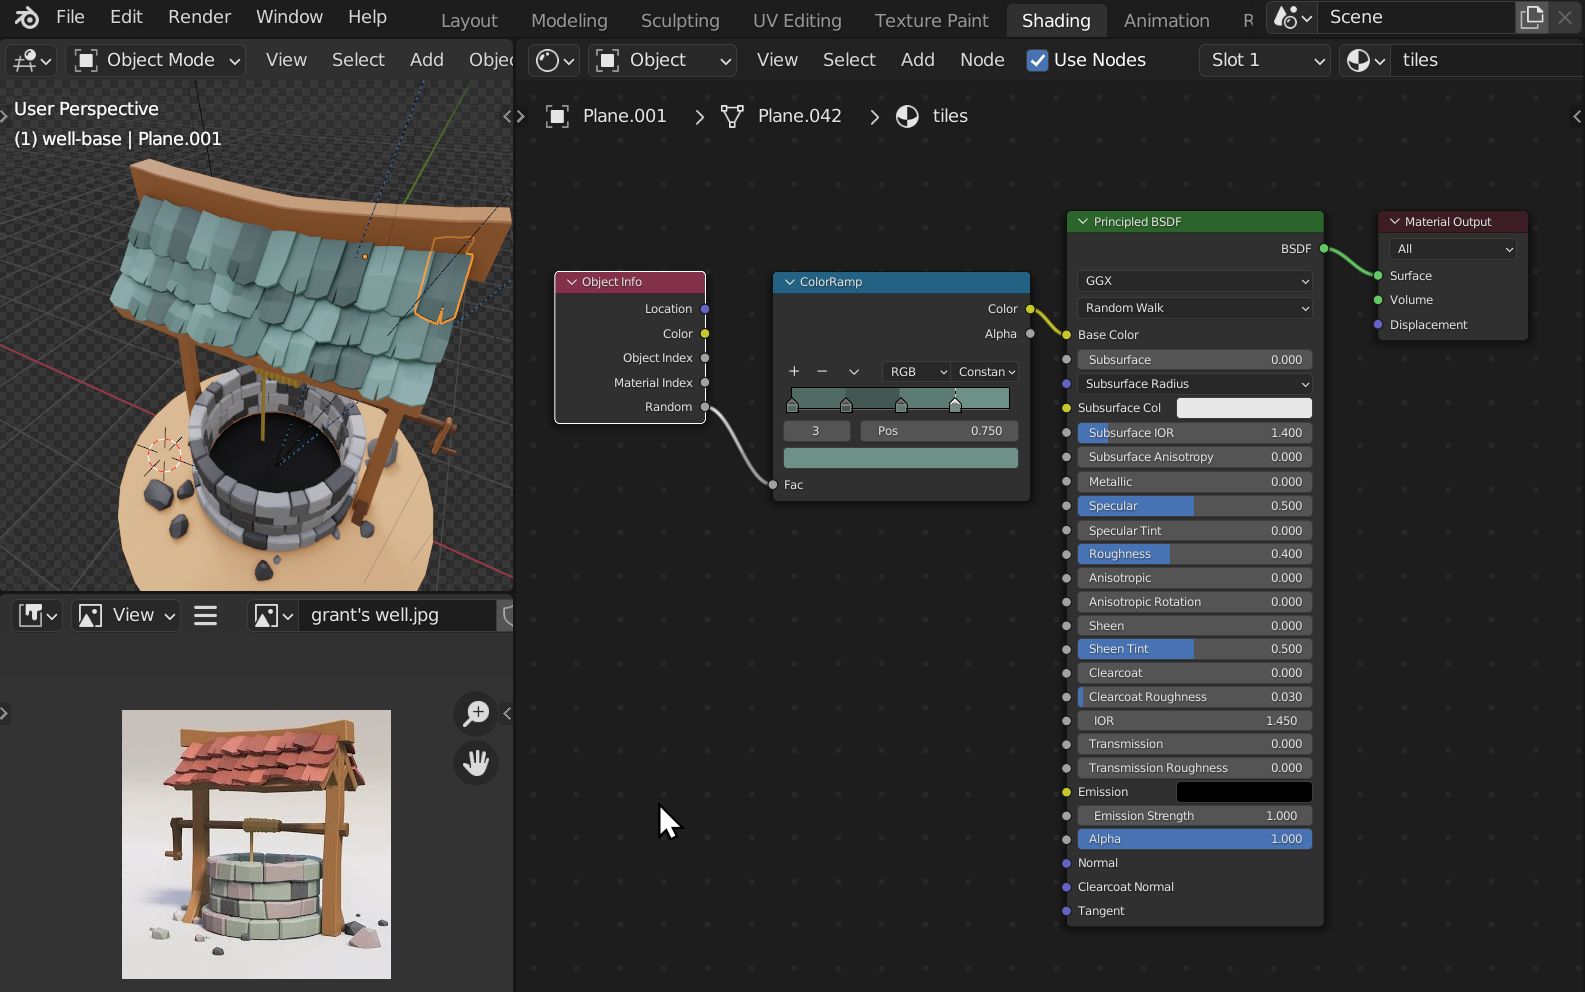
I don’t really like the tiles much. I should have paid more attention to giving them more variety, but have their general shape be a bit more even. I did use sculpting to move around the vertices some instead of proportional editing, because I thought it might be good to have less control over the randomness, but more control would have been better – I don’t like the bendiness in the middle of the tiles. In the end I moved a lot of vertices by hand anyway to minimize overlaps. And I am looking at those chinks. They should differ more than me just flipping the same tile over. It’s no biggie, but it’s a stylization consideration.
Here’s the tile material; super simple:
5 Likes
2022-06-09 Stone Tower
Homework for the well tutorial. I didn’t finish it as a full model because I was really only after practicing circular arrays on a curve, so everything in this except for the ground plate is such an array. I learned how to twist the curve to incline and scale the array. I figured out that more loopcuts orthogonal to the curve make the deformations more smooth. That’s really valuable to know.
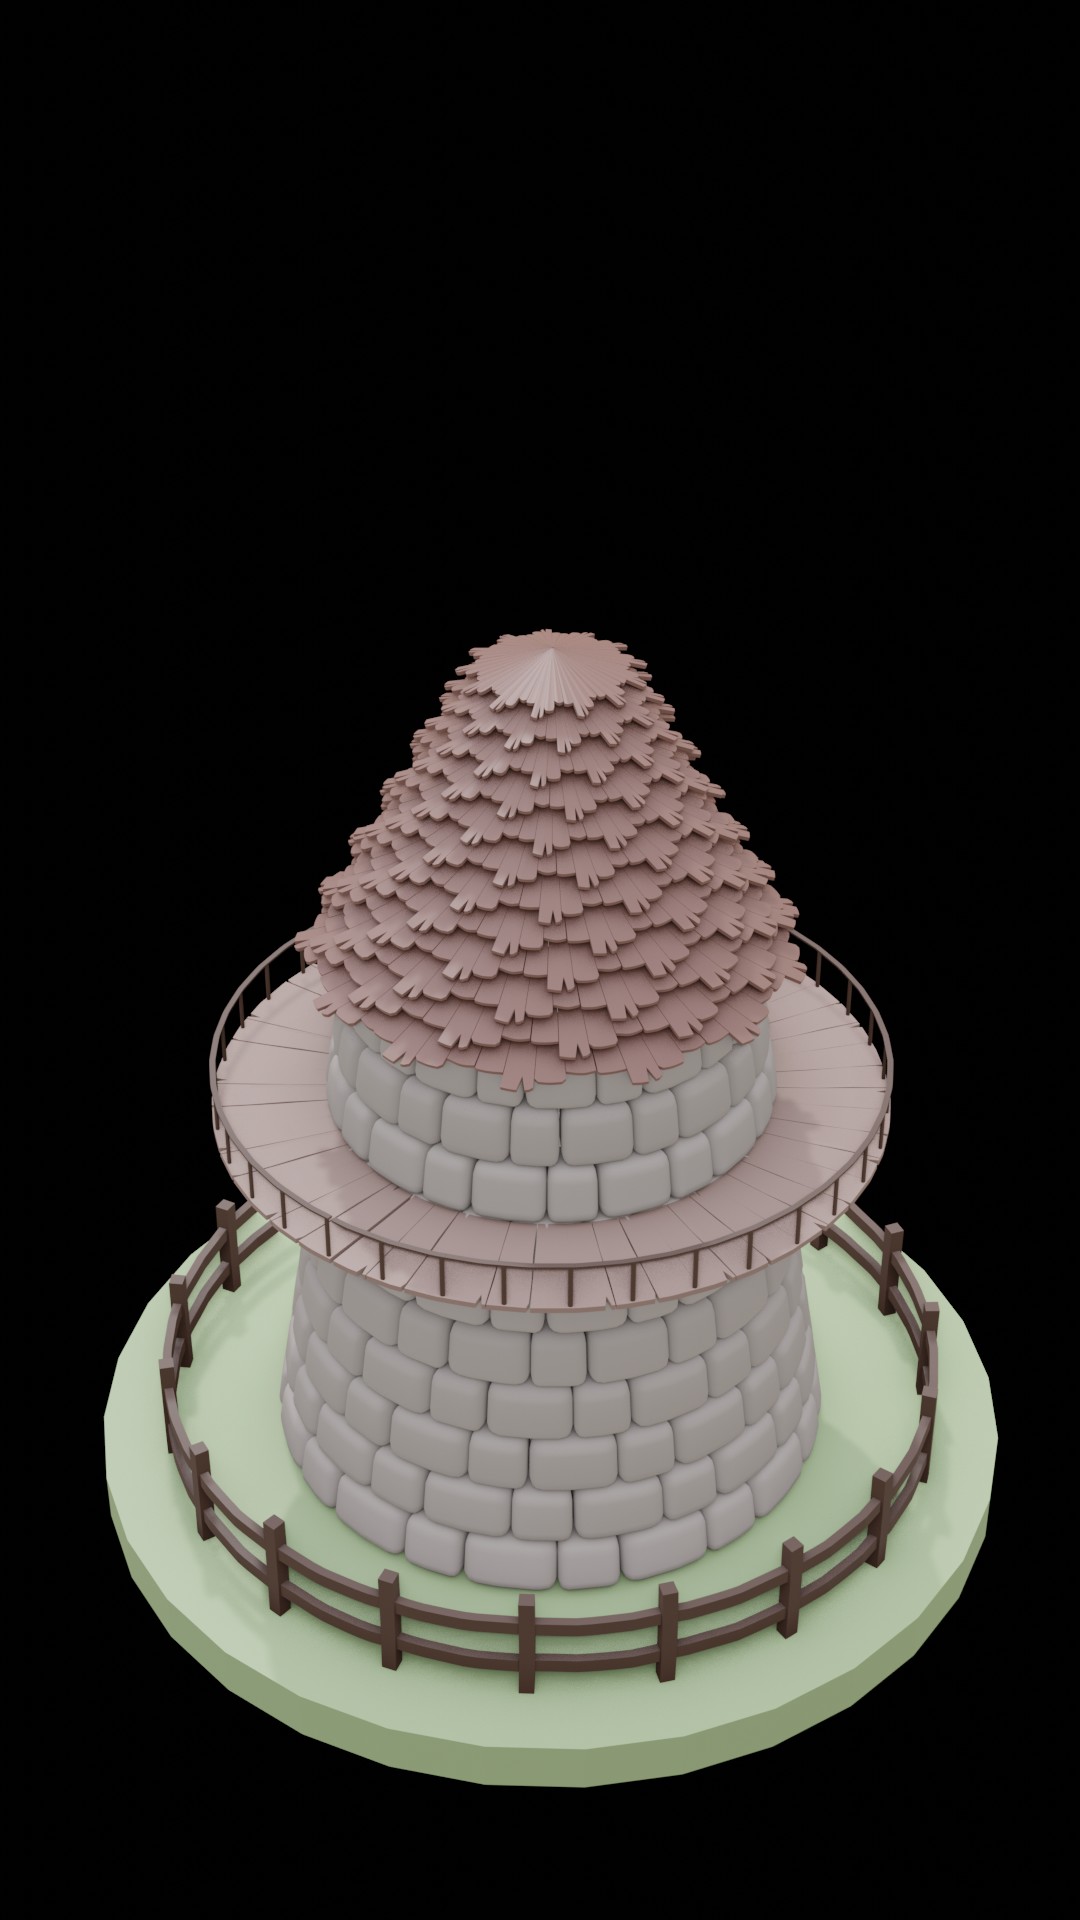
The roof has a problem – I didn’t figure out how to get the tiles to lay right on top of each other and stay rotated the same degree, so they’re really too far apart and it only looks sort of ok from this angle (and I can fake it even better if I turn the AO to a much lower value), but not when one looks up at the roof from a low angle.
Music: calm classical mix (mostly Andante and Adagio bits by Satie, Debussy, Bach, Chopin, Händel, Schumann, Liszt, Mozart), easy comfort music cuz I’m still feeling nauseated all the time.
7 Likes
I know this isn’t the focal point, but your fence looks really good ![]()
Chopin is great anti-nausea medication. A healthy dose of Chopin + a Zofran = my idea of a good time ![]()
3 Likes
Yes, I am really enjoying that probably even more than I’d like it if we were all at the same level doing the same thing. Lots of exposure to different content, different approaches, different ways to work, different artistic goals, different art. It’s all very interesting.
:snrk: No such thing here. I am a voracious collector of “things that make people tick”.
4 Likes
A couple of days ago I was answering a question about selecting, and I found that I had written “drag the Select Box over the elements you want to select”. Cracked me up, thinking of this conversation. Then I changed it. ![]()
You are so sensible! Of course it makes zero sense in retrospect, but I got all caught up in the given context. Now I can’t look at those short little stubby “Hertz horns” without shaking my head.
4 Likes
Today’s youth is clearly all about music and drugs. ![]()
Chopin was amazing. I tend to listen to his music with intent, not just in the background, because he did interesting things, innovative, even improvisational things, but still stayed within the greater, more familiar gestalt instead of breaking any big rules (which I find much harder to listen to initially). Kind of a sensitive way to expose audiences to something new. Always makes me want to learn more about music. Man, much too young when he died, but so much great works left behind.
3 Likes
I like the stone walls a lot. Would’ve struggled to make that if it were me ![]()
2 Likes
I think it’s fun when the design is similar to “the real thing”, but justification for it is different (but logical in-universe): maybe those are some kind of tight-beam signal receptacles, or laser-web connectors, or hyperspace sensor arrays… or any other vaguely sci-fi tech XD
Make it look cool, worry about making sense later!
Now I’m going to worry all day wondering if it was heavy sarcasm or not ![]() I do tend to take these kind of design considerations way TOO seriously and annoy other people. Sorry just in case.
I do tend to take these kind of design considerations way TOO seriously and annoy other people. Sorry just in case.
4 Likes
Not! You are, and it is a good thing. I like my designs to be logical in-universe, definitely.
2 Likes
2022-06-10 Baroque Ornament
We now enter the wild and whirly world of curves.
I started with Polygon Runway (Roman Klčo): https://www.youtube.com/watch?v=Wyvnk9w9Csk
Roman entered my bookmarks because he makes the cutest 3D isometric dioramas. I’ve since done a couple of those (and am happy with them), but this was his first tutorial I followed. It is an ok tut, but not great. He does not actually teach how to reproduce this exact ornament, he just uses the reference to create some ornament that vaguely conforms to it. That was disappointing since the first time I do something I am looking for a precise recipe; improv is for when I understand what I am doing.
Aside: he used a tiny, pixelated reference. I can’t stand that, so I upscaled it. A few weeks ago I came upon a fabulous, cutting-edge research project upscaler (I’m pretty sure I “found” it by reading a post in BA, but didn’t mark that): https://replicate.com/jingyunliang/swinir; much better than what I had been using, and free at this point.
Back to the main course: Roman showed a pretty good workflow to rough out the shapes – extruding verts, subsurf of 1 to smooth, convert to curves, add geometry. Then refine the curves by scaling the control points. But he barely touched on using the bevel profile to change the depth, which is a major part of this. Instead he spent 6 minutes on mirroring, lighting, and rendering his “finished” ornament; waste of time.
State of the ornament after the tutorial:

Aside #2: to get this image, today’s excursion off the beaten path went into rendering matcaps in Eevee. I wanted to show the reference because it makes it easy to see where I want to get to, but the clay ornament didn’t really stand out much against that. Recently I’ve tended to work more and more in matcaps, because they make things clearer than plain clay and are also not so bright (which is hard on my eyes). Workbench can render matcaps just fine, but of course it doesn’t show references images. For Eevee I could reimport my reference as Image to Plane, but it doesn’t render matcaps out of the box. So I went looking for how to do that, and Curtis Holt has a nice solution: https://www.youtube.com/watch?v=QdlBB4-uW_E.
In the middle of that I remembered the Viewport Render. :duh: Never mind though, Curtis’ method provides more control. I also found a bunch of free matcaps here: https://github.com/nidorx/matcaps
Back to the struggle session. I spent some time first refining the curves (converting to Bézier to smooth them, upping the res), and then trying to figure out how to do the exact ornament. I wasn’t really successful yet. I did find out much to my chagrin that one cannot currently save bevel profiles as presets for the curve (that’s a sad Blender shortcoming). But I already knew from the teapot that one can create a separate profile for a curve, and that’s actually more powerful. Bevel profiles allow you to define one quarter of the profile, but if you don’t want symmetry, you’re out of luck – well, you can cut the curve geo in half, but you can’t have different profiles on different quarters of it. While with a separate profile curve you can do whatever you want, symmetry, asymmetry, it’s all possible.
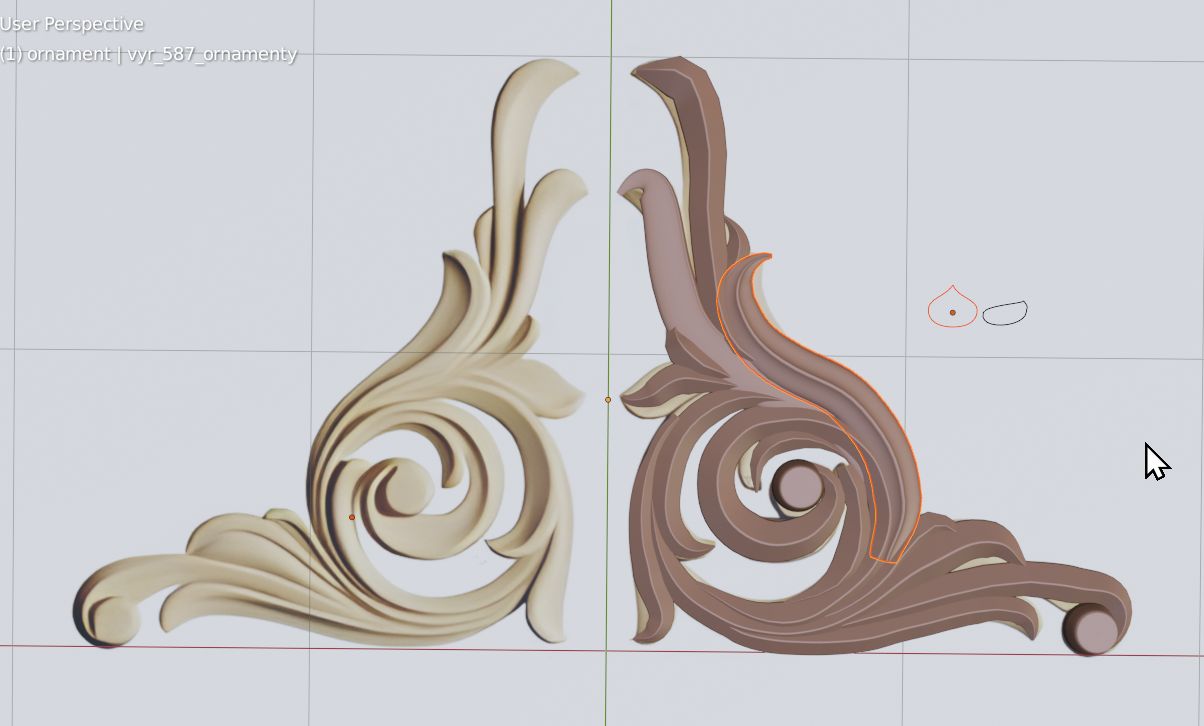
Selected are a curve and its profile.
If one doesn’t use curves, one can of course polygon-model it, and if one only did one ornament that’s faster (unless one is 1D_Inc, a YTer who is a speed demon at that sort of thing). But I wanted to do this with curves. I like curves because they’re so flexible, easily reusable, and the workflow is non-destructive. It was pretty obvious that I needed a lot more practice in the days to come.
Music: more calm classical mix. I’m just a quiet little lump on a log.
7 Likes
This looks really good ![]() truth be told, I have absolutely no idea how you did this, I haven’t worked much with curves. I’m impressed you got such a good result from a vague tutorial. Maybe someday you’ll have to make your own, better, tutorial
truth be told, I have absolutely no idea how you did this, I haven’t worked much with curves. I’m impressed you got such a good result from a vague tutorial. Maybe someday you’ll have to make your own, better, tutorial ![]()
1 Like