Post-Processing Workshop: Learn, Ask, Post Images, Get Help!

Welcome to the Post-Processing Workshop!

Post-processing is an essential yet often misunderstood or ignored aspect of digital art. I would like this thread to focus expressly on various post-processing related questions, suggestions, and techniques.

This thread will not be for debating whether or not post-processing is a “valid” practice: professional cg artists can and do use any degree of post-processing methods to reach the best possible end product. We will proceed here with the idea that post processing is indeed valid if not vital to the success of an image.

I will define post-processing as follows:

Post-processing involves performing any number of editing actions on a render, usually in an attempt to finalize and enhance the image. These actions usually take place in an external image editing program, such as GIMP or Photoshop.

If you do not have an external image editing program, consider getting GIMP.

So this will be an ongoing study and workshop open to everyone, especially those who have images they want to improve and get attain professional results from their Blender projects, both current and future.

You can use the new forum image hosting to post examples of your work that you would like to improve so that recommendations may be made by anyone. Such work should have been taken as far as possible by you within Blender before posting it here.

Warning: Only post images here if you are open minded and honestly want to improve. Try to keep images to 800x600 or lower resolution, and try to keep compression as minimal as possible so images contain the fewest amount of jpeg artifacts.

While I may post some examples and mini-tutorials here from time to time, I want others to feel they can do the same. After all, we are all here to learn and to enhance our skills :wink:

Next to the Render button in Blender’s interface you should see a Post Process button. Blender supports some minimal post processing through this tab, including color saturation control.

In addition to this, Blender has something called a Sequencer, which can be used with a variety of sequencer plugins to achieve different effects. Blender has some internal sequencer effects, such as Glow.

I will post examples and more information as time permits. In the meantime I encourage everyone to post comments, questions, personal tips, et cetera.

More to come!

RobertT

Okay, I’ll begin by dispelling some misconceptions about post-processing.

Post-processing, I find, is best used for enhancement purposes and only under certain circumstances. There are many reasons one would post-process an image.

In the long term, as long as you are modeling and rendering images in 3d, post-processing is not to be used to eliminate or mask certain imperfections in your workflow.

Meaning, if you are having consistent problems with lighting, for example, you should try working on improving your lighting skills in Blender and not rely on post-processing to bail you out repeatedly.

Sometimes, though, we don’t have a choice. We may have reached a certain deadline and cannot afford to wait another several hours for a new render. In such circumstances, post-processing may be the only short term solution.

For example, say you rendered something but the color came out too pale or too saturated, and you need to have that image ready in an hour. It took three or so hours to render. Do you stick with the lesser image or do you post-process it?

Depending on the circumstances regarding your submission, you may or may not be able to post-process an image, such as for a contest where no post work is permissible.

If it is permissible, what would you then do? If you had the Fbuf button in the Output window toggled on, it would simply be a matter of clicking the Post process button and adjusting the saturation level accordingly.

I would suggest turning and leaving this on and make this a part of your default Blend set up.

Alternately, you could have loaded the image into your favorite image editor and accessed the Color > Saturation function and make adjustments there.

When post-processing an image, you can be making up for a defect, so it helps to understand where defects continue to arise and then to work on those areas in Blender so you do less post work and get better or best results in Blender alone.

Such results requires numerous test renders, but if you want the best results you will need to render and tweak, and repeat that process until you cannot anymore, either due to time constraints or you’ve hit a point where little more progress can be made under the scene conditions you’ve defined in Blender.

And that’s where the fun begins :slight_smile:

More to come…

RobertT

As was hinted at earlier, post-processing is not just about making up for certian problems: it can be used to reach results otherwise unobtainable through a program like Blender.

Blender is unbelievably capable and can do so many amazing things. Not one of us has tapped its full potential yet, I think :slight_smile:

Many users new to Blender focus on what the program does not directly and neatly support. Sometimes these unapparent features are deemed weaknesses.

As Blender is still a young program, some of those observations might be valid, while other statements of the like might be the result of a lack of imaginative application of existing functions and properties native to Blender.

On the other hand, there have been many users who, through accident and experimentation and diligence, have discovered techniques for achieving certain results and effects, like fire, for example. There is no “fire” function or texture within Blender, per se, but it is something a number of us have found different ways to reach.

The same goes for things like caustics, subsurface scattering, and so on: there are workarounds to existing limitations, and, all the while, those limitations become fewer with every Blender update :slight_smile:

Regardless of what 3d package someone uses, there will always be shortcomings, some desired effect that no workarounds in the program can produce.

One way to better gauge when post-processing is an appropriate activity is to make a thorough tour of your program, to learn as much of it and its capabilities as possible. Your skills may be just fine, but you may not know your program well enough.

It may very well be you can get caustics “in Blender” – and, in fact, you can – if you learned about Yafray, the external renderer currently integrated with Blender.

I have always encouraged people to explore Blender’s potential and experiment with different settings and techniques, and, in the sense of this thread, such experimentation may make the difference between a satisfactory image and one that requires tweaking/re-rendering or substantial post-processing.

More to come…

RobertT

robertt you are out of your mind

its good to see you are passionate about almost all aspects of art

my opinion on post processing-yes, i like it :o :stuck_out_tongue:

Thank you very much Robertt for this super interensting post!!! Would it be possible to speak about monitor color calibrating?? It’s a subject that drives me crazy, and I don’t know how to tune my monitor fine.

Thank you!!

Thank you, RobertT, for this thread and for the useful beginning. I have ever skipped the post-process, because I don’t know how to do it. I think the post-processing enhances the quality of an image a lot.
I would like to know if it is possible to change the lightning in a scene (after rendered it in Blender). I mean not in general, but some tuning like the intensity etc.

Wu: :smiley: Cool! Yes, I consider this very important stuff, so I hope this thread could benefit lots of people. Plus, I hope lots contribute their insight. I think even something like whatever you do to make Simple Toons come to life would be cool to learn about :wink:

elGordo: You’re welcome :slight_smile: One of the biggest problems necessitating pictures to be post-processed are the lack of calibrated monitors, so yes we can definitely get into that here. Lots to talk about!

ilia: You’re welcome, ilia. Yes, it’s definitely possible. In fact, if you look at the recent Chapel post in Finished Projects, I posted an example in that thread for another user to show how lighting can be altered afterwards. We’ll get into that kind of stuff here too and how to do it :wink:

RobertT

I remember back in the days harkyman posted a simple, yet too simple so there is alot of place for improvement, image. The challenge was to take it in an external program and see how much better we could get it to look using only post process effect. Maybe we could revive such a challenge. I’m willing to create a simple image so everyone to play around while RobertT and others gives advices about PP work.

Anyone think it’s a good idea?

This is a great idea, Ecks. I will be very thankful. And RobertT - thank you for the fast reply - I have read the post.

I think post-processing / Digital-Matte painting
deserves its own forum.

I used to think that Post Processing was “cheating”, until I realized that CG imaging software doesn’t always have what you want. Again, as I always said, Blender is one of many tools used to created a piece of digital art.

My latest works used enhanced blur for the background (I used PaintShop). Of course I used the built-in blur within Blender, but the final render from Blender just didn’t look quite right.

I have been doing photography for 25 years (I have a darkroom), and own over 6 different cameras, each for a different purpose. This probably explains why most of my renderings here are photo realistic.

Anyhow, there’s nothing wrong with post processing, but I usually tend to get most of the tweaks that I can get done within Blender.

In the long term, as long as you are modeling and rendering images in 3d, post-processing is not to be used to eliminate or mask certain imperfections in your workflow.

Well great deal in mine postprocessing is to hide all the error and strange color i get when i get out a rendered pic.

I think all is legit when it comes to postprocess.

Ecks: Great idea! :smiley: I say go for it. And be sure to post some of your advice too here at some point Ecks! :wink:
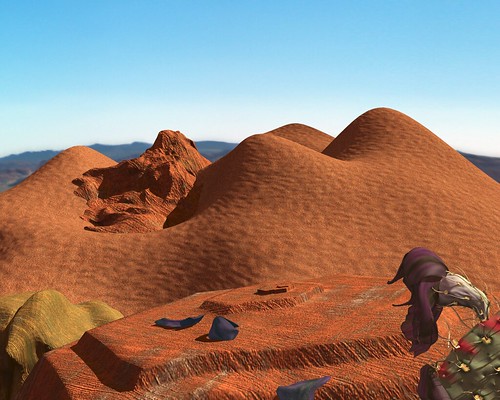
JoOngle: Maybe :smiley: It’s such a big topic. Matte painting and compositing are major parts of this too that should get discussed eventually.

Spin: Excellent post! Your experience with photography has definitely given you deep insight, so feel free to share any and all your experience here :slight_smile:

bigbad: Yes it’s definitely all legit :wink: I just meant that things like constant modeling errors (like inverted normals, bad geometry), constant lighting errors (underlit/overlit), and other repeat mistakes should be addressed at the source some point, so that way those tendencies are minimized or eliminated and not having to be fixed so late in the process. Color correction is another topic I’m sure we’ll get into here at some point.


Well I’m excited to see there’s real interest in this topic :smiley: Part of my strategy in creating this thread is to help us all (myself included) to make the best use of our tools and to become better artists and Blender users in the long run.

In my experience I have learned there are many ways to avoid the need for post-processing through careful planning and execution of a project, but there will always be exceptions and challenges.

We don’t always have the luxury of limitless time. There are aspects of an image we may not be able to control, for whatever reasons, during the rendering process. And there will always be certain results and styles that demand additional image processing. And that’s okay :slight_smile:

What we are really concerning ourselves with here are creating good images, great images even, optimizing our efforts and polishing every aspect of our work, to visually express our ideas as fully as possible.

Even if you don’t intend on being a CG “professional” and just treat CG as a “hobby,” there’s no excuse to leave an image unfinished, no excuse to prematurely abandon a concept deserving of your time, and our attention, certainly no excuse to not do your best when there is ample opportunity to do so.

To that end, this workshop is a challenge to all of you, to re-examine your work, to review all your habits in and beyond Blender, and, wherever necessary, to make changes, to or try new things that can empower you to create better things, more things in less time, all while avoiding certain mistakes that may later need to be undone.

We’ll be looking at some specific examples in the near future…

RobertT

Finally, a thread all about post-processing! :smiley:

This looks really exciting, I’ll make sure to keep an eye on this.

I can also contribute some tips on color, composition, alpha stuff, etc., if you feel they would be welcome here. :slight_smile:

Jumped on the post pro bandwagon myself awhile ago :). It made me realise that it can quickly make a render have more zing with minor tweaking.
I think the most post pro I’ve done was when I composited my garg. Merely duplicating the layer and applying minor changes to hue, saturation, some other basic tweaks and altering transparencies allowed the render to become nearly photorealistic (I think). The problems being the shadows, which should have been tweaked with the lighting in Blender :slight_smile:

I find it very handy to test different colours. Do a decent render then in GIMP select areas and alter the hue to different colours, it still looks very good and lets you try different colours in seconds, as opposed to having to render out the entire thing again.

Great idea for a thread. Maybe better as a sticky in “Other Software” though.

Heres a few quick processes I use:

  1. Open the image in gimp
    http://photos21.flickr.com/25288959_7c75087097.jpg

  2. for Quick contrast enhancement:

Ctrl-L (brings up layers dialog), hit the dup layer button, choose mode: Overlay
http://photos23.flickr.com/30304442_1ef3e0be63_o.jpg

  1. or, if the image is underexposed (too dark):

Ctrl-L, layer dup, choose mode: Screen
http://photos22.flickr.com/30304443_ad08f10679_o.jpg

  1. You can continue hitting dup layer and choosing overlay or screen as much as needed. Use the opacity slider to fine tune.

Monitor calibration and gamma
by Norman Koren
http://www.normankoren.com/makingfineprints1A.html

RANT (or Reasoned Discourse, if you prefer), followed by a TIP:

RANT: I think that a lot of people who deem post-pro “cheating” are unaware how much post-pro goes into actual photographs before they ever see the pages of a magazine or a billboard, or how much post-pro is done on live action film footage before it shows up on our screens. I’ve been a photoshop pro for almost a decade, and in that time have retouched and post-processed hundreds, if not thousands of images that ended up printed in one fashion or another. The end product is often significantly different than the raw image, and in many cases, the raw photographs would have looked like crap if printed exactly as they were shot, and not due to a lack of skill or knowledge on the part of the photographer.

Also, take a look at the deleted/unfinished scenes sections on some DVD’s extended features. Often, the cut material was never finished in post-production. It looks flat, crappy, and would clearly be of unacceptable quality for a feature film. It’s the post-work that makes it shine in the end.

I’ve seen people here talk about setting up your lighting/materials more carefully in order to avoid post-pro, but really, if reality itself cannot be set up to avoid post-pro, how can we expect our virtual creations to surpass that? And if you can make an image look real with one minute of post-pro, and then automate those settings into a batch procedure, is it worth endlessly tweaking each and every scene and camera angle to avoid? And if the goal is, as it is for many people, to achieve photorealism, why should we skip what is already a part of almost every bit of professional photography, both motion and still, that we see?

Post-Processing. It’s what’s for dinner.

POST-PRO TIP: For stills, I’ve lately been introducing a tiny bit of color noise to mimic the DCT artifacts of .jpeg compression and the CCDs found in most consumer digital cameras. Photoshop instructions:

  1. Create new layer. Fill with White.
  2. Filters->Noise->Add Noise (use color noise, try 50%)
  3. Select smallish area of noise image, about 1/6 of overall size.
  4. Hit Ctrl-T to bring up the Transform handles.
  5. Resize the 1/6 selection to fill the entire canvas, blowing up the selected section of the noise pattern considerably.
  6. Hit enter to accept the transform.
  7. Set the layer’s opacity to 1-3%.

This adds a little bit of life to both heavy highlight and shadow areas. It will also smooth out graded areas that may have started to show banding. You don’t want the effect to be obvious, but our eyes are growing used to seeing this sort of very subtle blocky color noise, and expect to see it in a photograph. They miss it when it’s not there.

lemmy: Thanks! Yes, please contribute!

=KH=Lupus: Some excellent points in your post, especially regarding compositing and color tests. Please consider posting some examples of stuff you’ve done :wink:

Ezz: Thanks Ezz, and thanks for posting some examples of yours!

Alvaro: Good link :wink: I’ll follow up soon with some stuff more on that. Important topic!

harkyman: What an awesome post :smiley: You are absolutely right. Your experience here really helps illuminate all these important points. That’s why I started this thread as I did, to reaffirm this is a valid and essential process. I think what has helped create confusion and certain opinions over the years in CG art is that all too often digital artists aren’t so forthcoming on this topic. It would be great if every time we rendered something or snapped a photograph the image came out perfect. Every now and then that can happen, but for the most part it doesn’t and extra work is required. Just think how few magazines would sell, how few movies would look good if they didn’t experience some degree of post-processing. Stars society celebrates are not really how they appear in real life. PP is a fact of life, here to stay, so, the sooner everyone recognizes that, the better. As for my comments regarding avoiding pp, I tried to clarify them in my reply to bigbad, to say avoidable basic errors should be avoided wherever possible before rendering, and that’s all I mean. Personally, I have put in unmentionable hours trying to avoid the need for adjustments in post for certain renders, but in the end it can be nearly unavoidable. And why re-render for another several hours or days if something can be fixed in minutes or seconds in post? So much of this, when really considered, comes down to common sense, but it’s a sense a lot of people (myself included) could develop better. I must say, your noise tip is exceptionally valuable! I hope you have time to contribute more of your knowledge in this thread :slight_smile:

RobertT

Hello!
Thank you Robertt for this thread, I will follow this as closely I can and just absorb everything that mentions here :smiley:

Well, I tryed some postpro (first time for me) on this image. I think it went out to be too blurry and too much color. Because the smoke didn’t went out like I wanted in blender (still trying though), I added this in photoshop.

What I wanna know is: how would you guys do the postpro on this image? and how do you think my version turned out like? (crap, superb or …)

before

http://photos21.flickr.com/30431277_4ef11e6056_d.jpg
after
http://photos21.flickr.com/30431275_3efe6da3a5_d.jpg

Im curious of what you will say :wink:
t3d