I’m beginning to look into the UILayout options to see if I can change the checkboxes to buttons as this might leave more room for text. And then there’s the alignment of the whole shebang to think about next. And then tooltips, and then … sigh
The changes in the post above (sans a few small details) are now available for testing in v1.1.7 over at @clockmender’s github PDT project.
The goal was to try to group PDT Design input fields and buttons inside boxes, hopefully making it slightly less intimidating/confusing to get started with PDT.
Constructive criticism welcome as always, be it in the form of UI mockups, Filing issues or submitting code Pull Requests.
So, over a long period of rest and relaxation over Xmas, Ha! I came up with this:
Two things to note:
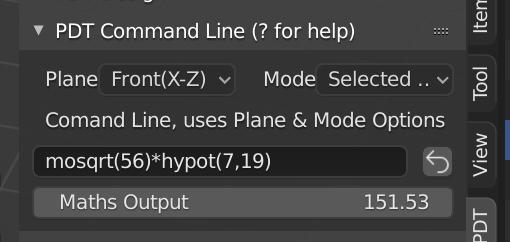
We now have a “re-run last command line value” button by the command line input (the LoopBack icon).
We can now output the maths calculation to the Maths Output field.
In the example shown above I entered the command mosqrt(56)*hypot(7,19) thus making the Maths Output 151.526 - to use this simply float your cursor over the box and press CMD+C (Mac), or CTRL+C (Other), then you can paste this wherever you like, no don’t tempt me…
This will be on the GitHub once I have proven to myself that it will not break anything.
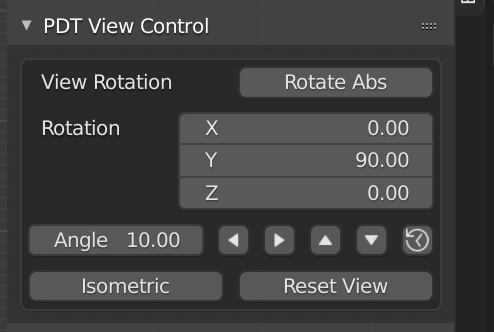
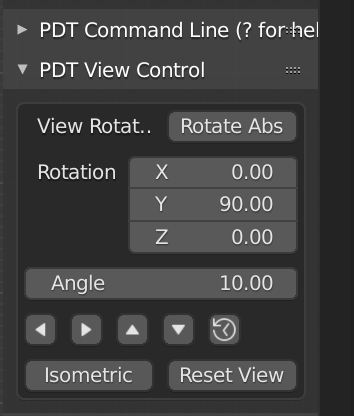
@ThatAsherGuy Thanks for the code some while ago, I have now had time to implement this so the menu adjusts as you change the width, two images below:
I have modified all menus, but this shows the effect on the View Control. The menus are slightly taller now when not re-arranged as I have made the Vector Inputs easier to use. This will be in the next release once fully tested. The cut-off width is now set in the Add-on Preferences:
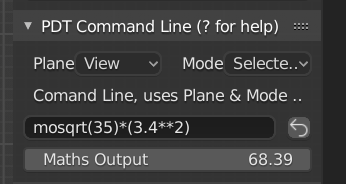
I have also modified the command line so you can use it as a Calculator, the output from say a command of mosqrt(35)*(3.4**2) goes to the Maths Output field where you can copy it by floating your mouse over this box and using CTRL+C, then you can paste it where you like…
Command is Maths Output Square Root of 35 times 3.4 squared.
Not sure how it works
I suppose you be able to draw parallel and can do degrees based intersections and extend lines till it hits another line.
I hope Blender will get a lot more engineering improvements like nurbs, and step saving format.
Ea be able to draw without triangled exports to better exchange with CAD / CAM world.
Its heavily focused on animation games, but maybe a new precision object type or so could change the world Artist can be sculpture artists as well
The Add-on Mesh Tools (also shipped with Blender) provides a lot of functions including Copy Parallel - called Offset Edges and PDT provides Intersection tools in a variety of formats.
I too would like to see more Nurbs and Step support in Blender, along with more CAD friendly snapping. Exporting triangles is also a little worrying for CAD modellers…
Not yet! We will look at modifying the code to work with curves, I guess a lot of the work will be just to check for curves, then use curve routines rather than Bmesh operations.
We have now released v1.2.0 - not much in the way of new functions, but a major internal improvement in terms of code structure. Some obscure and annoying little niggles have been ironed out and now all functions called from buttons display the equivalent Command Line entry in that section of the UI.
We have also completed a major renaming of variables to make the code easier to read, along with much more strict compliance to Pylint & Black formatters. New version is on our GitHub and on Blender’s Repo.
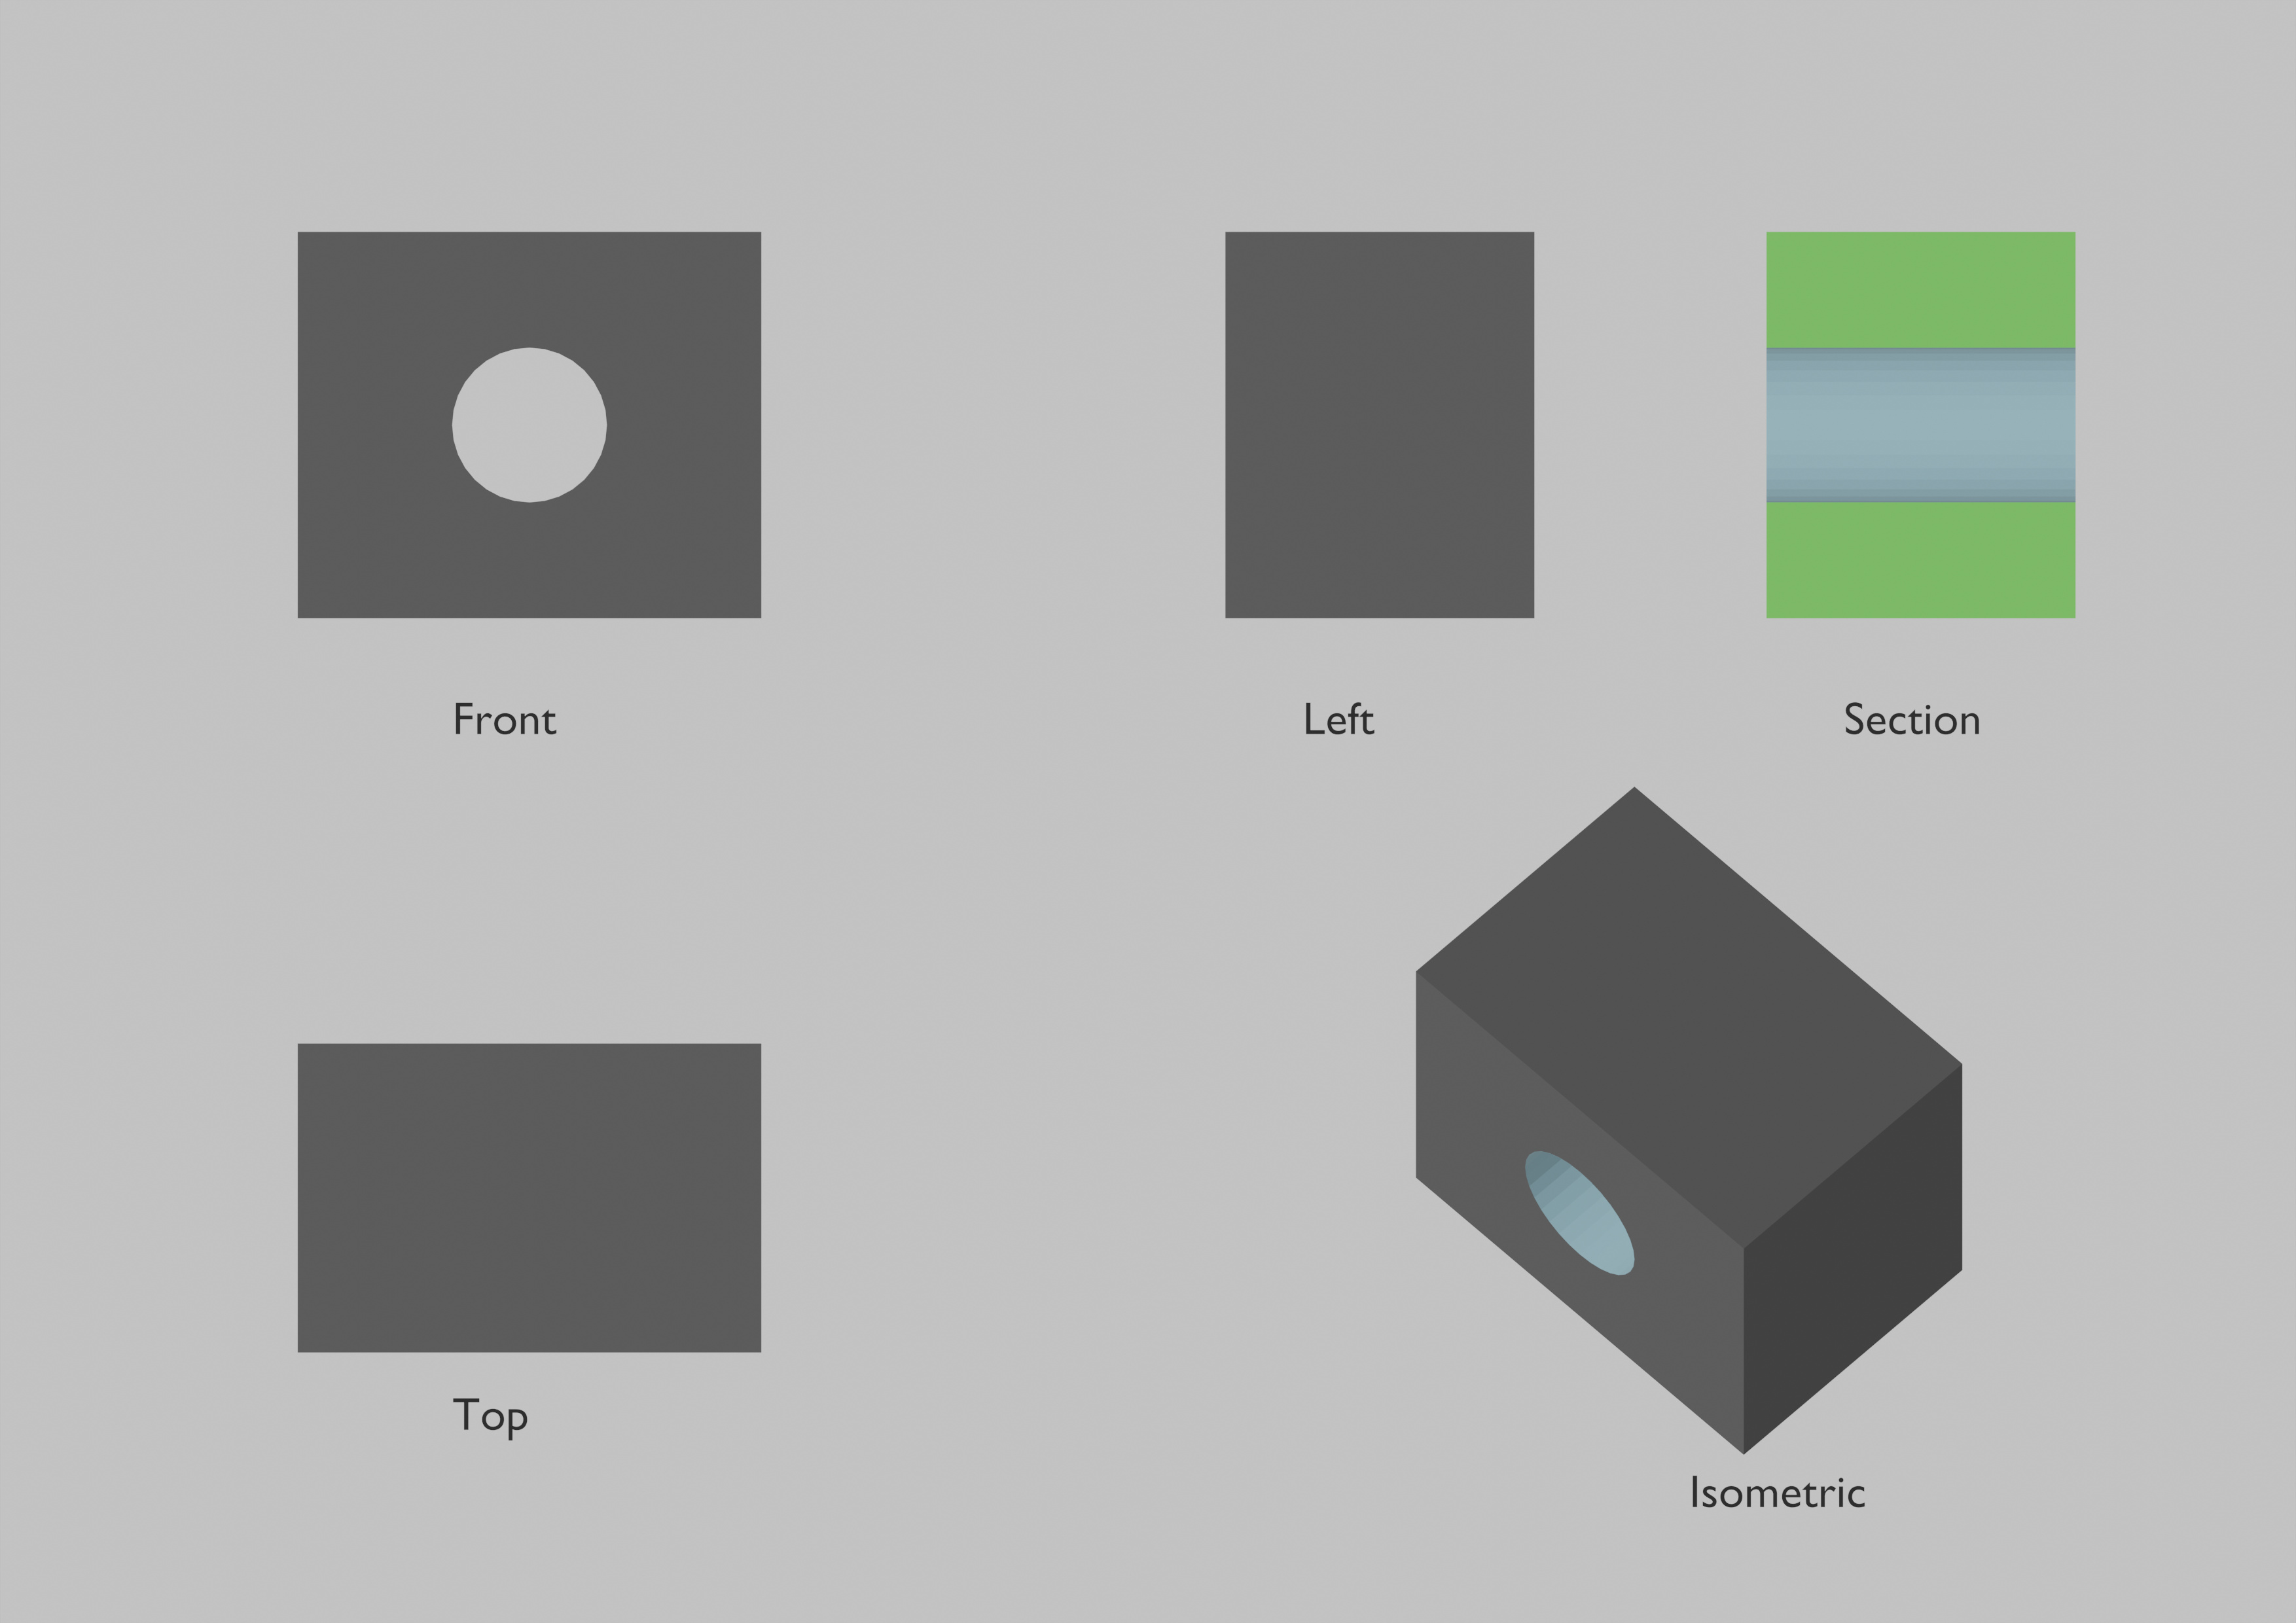
On another matter, we have started looking at 2D drawings, taking a script someone kindly posted on DevTalk. This is an initial result, I have not added line work, or dimensions yet, shows some promise:
someone gotta make a video on how to use this addon. I’ve no clue where to start. 0_o I can’t find any videos that will teach me how to use the addon’s feature.
We have a Wiki on our GitHub and more information on the website. Videos are on the horizon, but time is a bit of a killer for this just now, I am not very good at videos either, I can type for ever though. We will be updating the Wiki for v1.2.0 very shortly.
Cheers, Clock.
We did link to the Documentation on the Add-on page in Preferences:
yeah I knew your addon have a wiki that can tell on how to use these features.
so I apologized for saying this: The wiki doesn’t help me in most cases, but the videos can help me learn a lot.
sigh…
the video doesn’t have to be so perfect. you can show us how to use these features as an examples. it’s very simple.
There are two worked examples on this page, if you are really struggling with written tutorials we can look at videos, however, with me being retired from working, I don’t have so much time just now and the refactor was a major exercise…
Leave this with us, we will try to do some animations of workflow, without commentary as that is where I really struggle with these videos.
EDIT: There is the start if another worked example on this page, this is a large project, so will take some time to complete.
So, I just found out Screencast has gone from Blender, fortunately I also found out the SHIFT+CMD+5 on a Mac does the same thing and that there is an Add-on for keystrokes, maybe now I can try a short video… Better not try to talk over it though, you would not like the language when I get this wrong.
Well, here we go then, no commentary yet but it should show the workflow for making a simple part. I will try to add a bit of voice later, once I know that the format is OK-ish.
So any critiques gratefully received, don’t mind if you are all down right rude, I have to learn how to do this some how!
I tend to go at a sensible pace, I could have done the thing in less than half the time, but that would not be very good to learn from would it?
That teach me a lot more about your addon. It’s powerful and useful just as the video showed it is. Keep it up.
you should show a video where you can use 1 feature in many different way. like fillet feature or other features. Hope that give you some ideas to make more videos.
if that’s your first video, then congratulation! it’s excellent and it teaching people the basic about the addon! I understand everything you have done in the video. well done!
The way you divided clips into short sequences is excellent
I look forward to you adding small text banners on the screen (like old school silent movies) which relate the goals of the procedure you’re performing.
It’ll be interesting to hear how many tries it took you to not to swear once you begin adding audio…


 I can’t find any videos that will teach me how to use the addon’s feature.
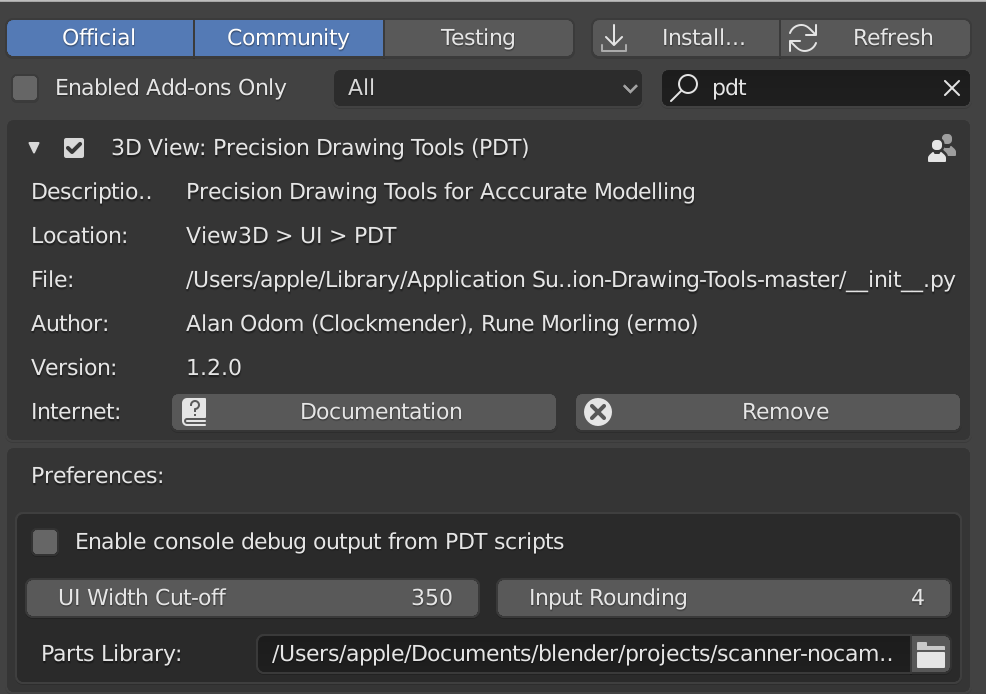

 Video Tutorial 1")
 That teach me a lot more about your addon. It’s powerful and useful just as the video showed it is. Keep it up.