Hey @sozap , thanks for OuiOui too!
2 Likes
looks Cool Alredy.
I Tryed simillar with particles few years ago. Now With Geo nodes its much more easyer to Contol random staf.
1 Like
Brilliant! Kindly create a youtube tutorial for this, since most blender beginner users don’t understand geometry nodes at all. It will be helpful for many people to get into Blender too. Anyways, amazing production. 


1 Like
a really interesting, beautiful experiment. an entire village can be built, even much more varied than many real residential districts. congratulations, great idea.
1 Like
What an amazing achievement ,this really shows the path to do more amazing stuff in blender ,wow👏
1 Like
This is nuts, amazing work.
I’d love to try it out, will you release it as a product?
1 Like
Hello,
The basis for the destruction is rather simple, I add a few points (2/3 is enough) on the roof basemesh using a distribute points on faces.
Then using a Geometry proximity node I have access to the distance from these points.
It’s then possible to delete some parts if they are close to these points. The Destruction factor is in fact a value that says from which distance the deletion starts to append.
From there you can do many things, like moving geometry, or rotate the roof tiles if they are close to the “destruction” points but not deleted yet.
To make things works better, instead of deleting face or points from the final mesh, I delete them during their construction.
For example, the roof structure, like many other parts, are made of curves that are then turned into a mesh with a curve to mesh node.
Instead of deleting the final mesh I delete the curve points so they get meshed properly.
That’s basically it ! Feel free to ask more questions if needed and I’ll try to answer as best as I can !
6 Likes
polyhaven
2 Likes
Thanks,
It was an experiment to learn so it ends up to be quite messy, I won’t release it at least how it is now.
I’m still experimenting with what I’ve learned, trying to simplify things a bit and probably from there I’ll either make some tutorials or release some basic building blocks that can be useful in many cases.
1 Like
Oups ! 
Thanks ! It’s fixed !!
All I see about geometry nodes is “how to scatter rocks with geometry nodes”, you take this to the next level. Congratulations, man, this is the most impressive use of geometry nodes I ever see
1 Like
This work blows my mind! I’ve been trying to make something similar myself, but with a more modular approach. Your results look so much nicer and more organic.
Was wondering if the base shape shown at 00:41 in the video is handmade or generated? If generated, how did you go about it?
2 Likes
Thanks !!
It’s generated !
But I started on handmade geometry first so I can have both methods.
One node tree create the base mesh , the other one add detail and do most of the work.
It starts with a plane subdivided once. randomize scale, location, then delete a few faces, extrude them Up , extrude them again and scale them in one direction to form the roof.
That gives something like that :
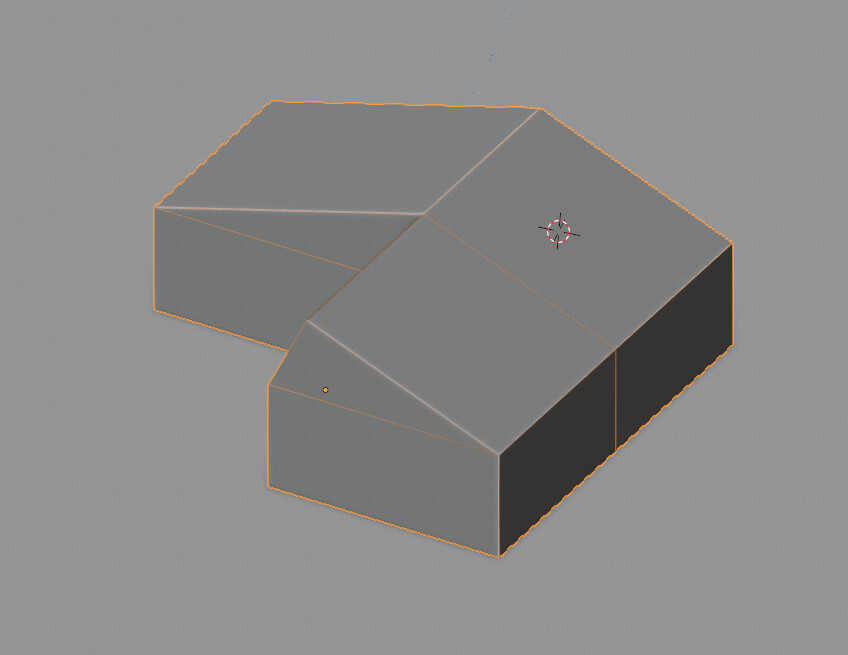
To add more detail I added some cubes at the points of the initial plane and do some boolean :


I’ve also used the same technique but by rotating the cubes 45° to get some beveled corner.
All this goes into a node group, and I use it again in the perpendicular direction :
And merge them with bolean set to union.
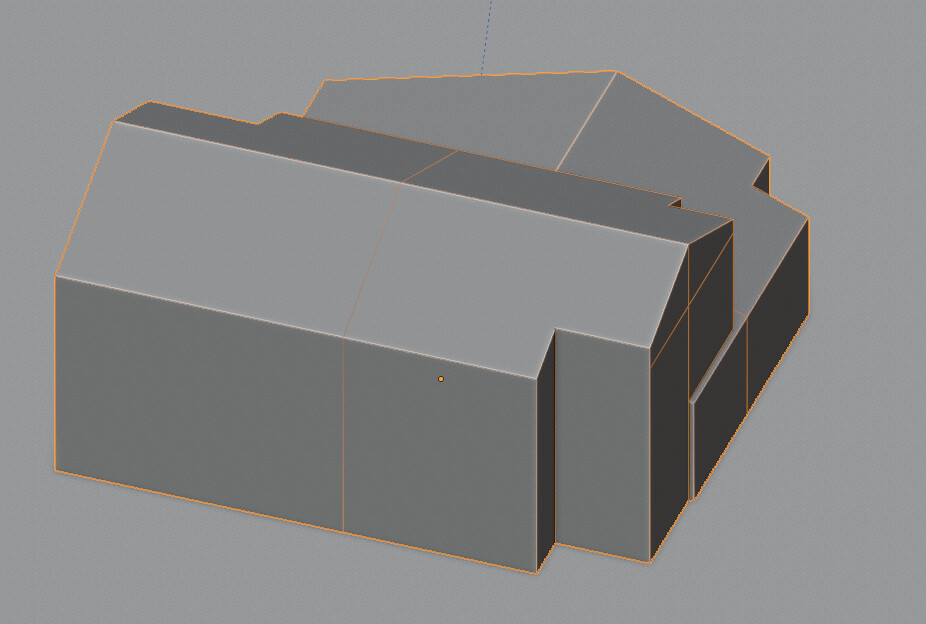
Then I added some parts by separating the wall faces , and added some cubic shapes here :
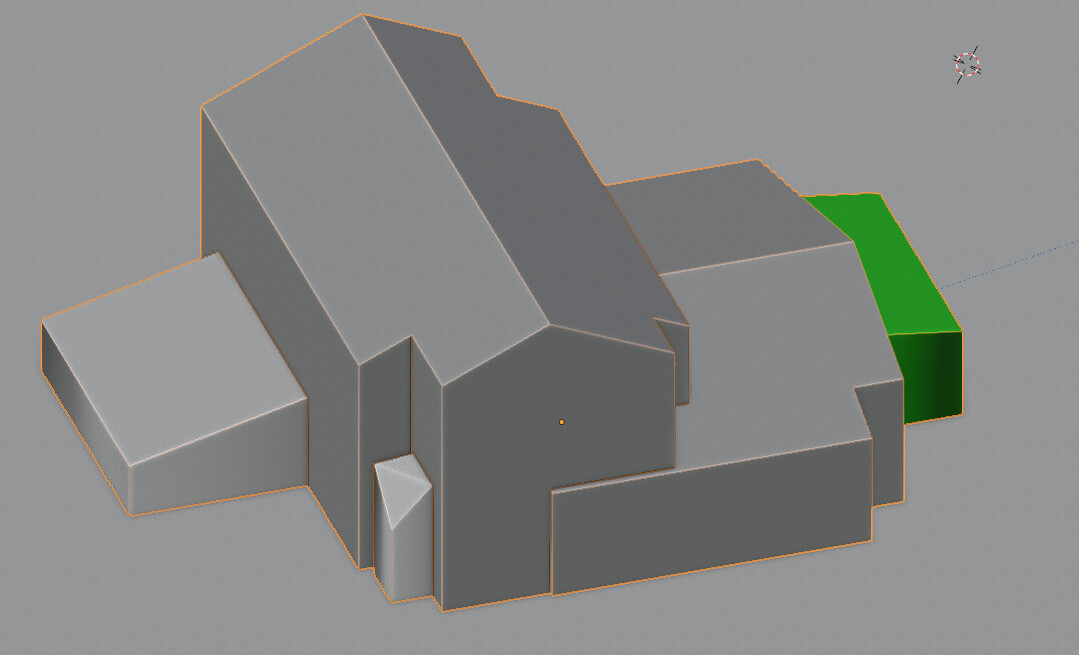
In green it’s the entrance, but that last part was quite tedious to do, and the extrude node wasn’t available when I looked into that. That’s some things I’d simplify if I had to start all over again.
One things that I wanted to do is to have an initial rotation on the first plane that build the house. So I can scatter some planes with random scale and rotation and use that to build a village.
But that was getting a bit too complicated to manage orientations. It would probably have been way simpler if I assumed that the starting mesh has no rotation and all the houses are pointing in the same direction. And rotate them latter in the process if needed.
8 Likes
How long have you been working with geo nodes? And how long did this project take? Thanks for a glimpse of geo nodes potential.
1 Like
I’ve followed the geometry nodes project from the beginning and tried a few things. But later the field nodes where released and I had to start over.
I spend like one big month on small exercises and tutorials to get the basics. Before I was doing some scripting and that helped a lot to get the logic, and also to have a basic knowledge of vectors.
Then I started working on this, and that takes me a month (25 days) to get to that result.
Given that I was learning in the process and I haven’t a clear idea of the specifications I lost some time investing ideas I later abandoned. I also over-complicated some things for the same reasons.
If I had to start over It will probably take a similar amount of time but probably less longer days
I’d also use more regular, hand modeled geometry because I spend many time trying to model things with nodes that wasn’t really relevant. That can save a bunch of time too.
Clearly it’s not something that is faster than regular modeling if you don’t have a lot of variations to make. It’s also hard to make a generic tool that fits different uses cases. For now i’m still experimenting and looking for a better balance between hand modeled asset and procedural duplication and randomization, with the help of some utility node groups. Some things that will fit better real projects with real budgets and deadlines
4 Likes
So cool to see this! Definitely convinced me to check out geometry nodes over learning Houdini for now. Thanks for the breakdown as well!
2 Likes
Thank you very much for the detailed explanation. Really fun to see how others have solved a task that you yourself have tried to solve for quite some time.
Looking forward to seeing more from you in the future.
1 Like
Hahaha I often get that feeling !
It’s a great way to learn new things !
2 Likes
I’m very curious about how you did the destruction factor.
Amazing and inspiring work, congrats 
2 Likes
Thanks !
There are a few explanations on this post :
To give more insight , here it is applied on a simpler mesh :
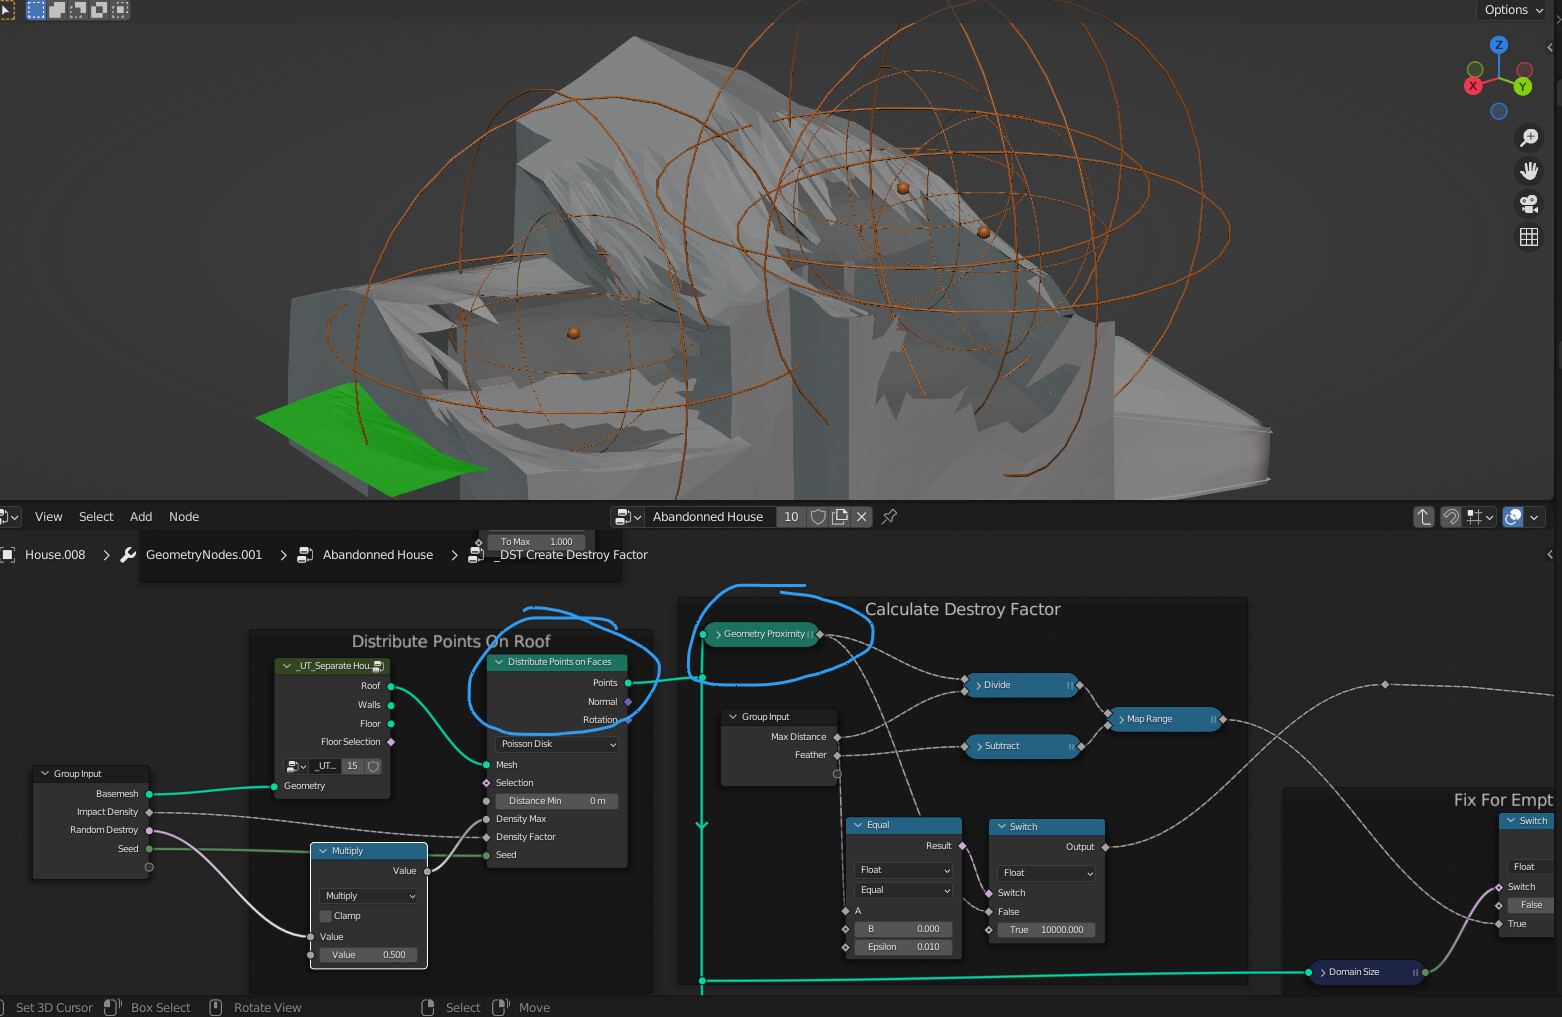
The most important parts are to distribute some points and use a geometry proximity to get how far the points in the mesh are from the distributed points.
From there you set a range where points / faces gets deleted (the map range can help with that) .
You can also add a bit of randomness by mixing the distance with a random value, or a noise texture.
It’s then possible to do many cool things. For example, I moved down the points of the mesh near the destroyed parts to give more weight to the effect.
The orange circles are just a fancy way to visualize the distance and helped me to check if everything worked as expected !
In the end, I think it would have worked less better if the house was a hand modeled mesh.
Because it will delete some face and it will be harder to add things on top of that.
Here I can for example delete some face from a wall, weld the borders and do an extrusion (like a solidify) , this would have been less flexible if the wall was already modeled.
Or I could have used another approach with boolean, but it was really slow on heavy mesh when I tested it.
You can look at this channel : https://www.youtube.com/watch?v=rF-ZSxUKpf8
He does lots of cool things and what I did is quite similar. In fact I would have probably make something a bit better if I had seen his videos before doing all this
10 Likes