That’s it, yes, for me it was a bit cumbersome to setup, but yes, every part get it’s own destruction node with some small variations. Basically, one node create the points and proximity attribute, then it output this value that is then plugged into every nodes that created house parts, and in each of these nodes there was a “destruction node”.
What I’ve done is to destroy the curves before meshing them, that was easier to bend them at this point to get a better look. But they ended up being flat, it was missing some shards. For that I emitted some simple shard geometry, with some points and instances at the tips of the curves when they are meshed.
But it can be interesting to try your merge by proximity approach, in the end it’s great if you find your own ways of doing things.
Hum, it’s basically the same thing as before, you can add some randomness to the points of the curve before meshing them.
There was a lot of conversion in these curves, at first it’s a very dense line when it’s in the instance grid on face stage. Then it’s resampled with a count of 2 to get long planks, then deformed, probably converted to mesh for the destroy part, then converted back to curves. And I’m sure I missed a few extra steps
Of course, the more randomness you add , the greater chances are that they end up intersecting. So it’s either a broad transformations like with a noise texture or even just a direction, so every curves bends in the same direction, or very small variations with a random node.
Yah, it’s weird that boolean is so insanely slow. I wrote a boolean modifier in geo nodes that works in real time. It’s surprisingly easy, and surprisingly fast.
Before I knew enough to even attempt that, I made my own building generator, but for skyscrapers… with interiors.
You mean writing it in C/C++ ?
I think it’s slow because of the internal back and forth conversion to Bmesh, and a lot of extra calculation for corner cases.
I would be awesome to have a faster alternative. Is what you’ve done something you’re willing to share ?
Also great about building generators, it would be great to see the results and a bit of how it works under the hood !
No… In geo nodes. It’s easy, Raytrace + Dot-product of hit normal + source normal will tell you if a point is inside or outside of another mesth.
It’s 26 nodes or so.
This particular one is a type of join, but it’s quite simple to convert to what you’re doing. If you want me to write a difference and make a tutorial, I can.
Hey ! That’s a neat trick !
Indeed that can work in place of boolean , even if the more subdiv you got the least artifact you get.
It probably won’t work in all the cases that the bolean nodes could cover. But that’s great to know about such alternatives . It’s similar to my technique to cut windows holes by using proximity. No need for true boolean in that case !
And well done for the procedural character ! I’ve seen your progress on the blender chat.
I’m quite curious about how it will evolve, it’s a great showcase of what’s possible to do with GN that we don’t think about in the first place !
Problem with proximity is it’s only to “shell”, not the interior. In your house, you’d end up with artifacts just floating in mid air. Raycast would find all points inside another mesh. It’d work incredibly well with what your doing. Just use an object with render turned off, and delete all points of the house that are inside the object, then use EdgeNeighbors FaceCount=1 to select the edges with only one face, plug that into selection of scale elements, and scale to 0 and merge the points to close off all the open ends. I use a lot of techniques like this, that I’ve developed for my model. I’ve done some CRAZY stuff that no one else is doing. Go see my tutorial on using RGB curves to shape a mesh in 3D space… it’s the only way to get things like a leg/arm/torso.
Exactly the reason I’m doing it. It’s a showcase for the POWER of GN.
I’ve even discovered a method of using Vertex Groups on fully procedural models, that Hans said wasn’t possible.
So, I’m in the process of rigging the character… which is really rough when auto-weights don’t work. -_-
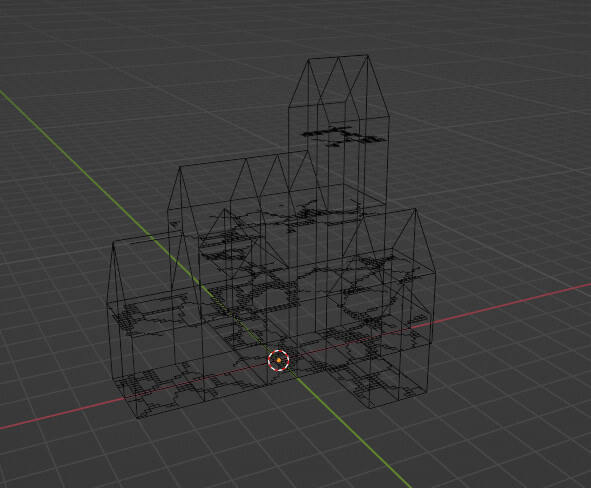
I’m just started to create procedural house.
I did separate roof from the house. But How did I increase the roof size so that it fits with order parts and also add some thickness to it?
anyone help?
It’s hard to tell from here, my advice is that you create a new topic so you can ask questions specific to how you approached the problem. Even if the result is the same you’re probably not doing 100% the same way I did. Feel free to poke me there, and also it would be much simpler if you share a .blend or at least some screenshots to explain well your problem.
Increasing the roof size is quite tricky, I don’t recall exactly how I did it , but I think it’s the border and tiles that give the impression that the roof is broader than the walls.
So maybe something else is needed in your case, you can look into the scale elements node, I’m not sure it will work, but that’s the first thing I’ll try to do. To give thickness you can look at the extrude node. Or convert the roof to a curve and give it some thickness with the curve to mesh node.
I think first you need to have a good understanding of what each available node is doing, play a bit with it on some very simple cases. Then you can start to do things by hand and look for a way to redo-it with nodes. That’s the fun of geometry nodes and these kind of big project, it’s a lot of little problems to solve , many time I felt stuck for a few days before finding a solution !
I’ve been on a self-learning odyssey over the last few months, tinkering with Blender’s latest iteration since forming an opinion earlier this year in maybe switching disciplines from modeling all things hard surface too environment concept art?! which must be said, is extremely beyond ones comfort zone but we live in the hope acquiring just a basic level of competency at this stage would suffice.
So only skimming through various techniques either procedural and/or non destructive offered here, really empowers one with renewed impetus to continue toward an envisioned goal.
@sozap This work is incredible. I love the fact that you pushed the geometry nodes to the max, despite your reservations about the extremity of it. For someone trying to learn the capabilities of geometry node fields, your experience is golden. Would you consider doing a tutorial series on how you built this? Even if you were just to walk through your node network and explain how you ended up with the components. It seems to me the real value in your work here is the learning you’ve done and sharing that - rather than a plugin that just does it for us - would be a huge contribution to the community. I personally would pay a premium for it. I think creators like you deserve to be financially supported for such contributions.
Hi Logan and thank you very much for the kind words !
I’m thinking about doing some educational content with blender but that might take some time for me to do them. I can see how interesting it could be to have a more precise breakdown of each step even if it’s just a run-through that doesn’t explain all the details ( that might be really long and tedious to do a step by step) …
For now it’s just an idea and I don’t have much time right now to work on these anyway.
What I can give you as advice in the meantime, is that’s really similar to many things in CG : You need to have a strong basis ( which we tend to neglect in the beginning) in order to pile up some simple stuff. And all these simple stuff together give an impression of complexity.
Of course while doing the house I find some little tricks that are a bit more advanced and using them helped a lot. But it’s more about taking the time to pile-up these rather simple things than some super mega-advanced clever trick.
I think it’s similar to modeling, say you want to model a factory. In the beginning you may be overwhelmed by all the details. While with experience you manage to break things down in small and simple chunks, and also see some repetitive pattern. It’s not that you really have an magic technique that help to model everything nice and fast. Rather you organize the work better, break things into manageable chunks and eventually put together a complex result.
Probably the difficult part in learning modeling and even more procedural modeling, is being able to grow in complexity, or it’s getting that organisational mindset that can take some time .
Hopes that helps at least a bit, as soon as I put together some more in depth tutorial that may be more or less related to this I’ll run through all the comments to notify people that it’s there ! I’ll make you know then, and in the meantime feel free to poke me if you want me to look at something !
Thank you for the thoughtful response @sozap. Your advice about breaking down large/complex problems into smaller/simpler ones is well taken. I also program and this is something very important, but often missed in designing systems.
The reason I figured a tutorial from you would be appreciated is precisely this. Not only your experience, but also workflow should be enlightening to watch. For newbs against the new GN Fields, such abstractions are hard to imagine.
EDIT: In the meantime, do you have a Patreon or Open Collective I can contribute to?
Hey !
I don’t have a patreon at the moment, that probably come when I start doing tutorials or produce assets on a more regular basis.
I’ll probably base some educational content on the workflow and how to put simple things together to form a more elaborated result. Of course it’s a tricky one and that’s a road you need to take by yourself regardless of the field. But having some examples and methodology can be inspiring and help to get on track faster !
If you have experience in programming you may find geometry nodes easier to get, it’s really a mix between programming and hand modeling !
Hi @sozap this thread has been very inspiring for me and based on your instructions I’ve been trying to piece together a geometry node setup to make walls and floors inside of building meshes and then populate them with assets. I’m not very experienced with geometry nodes so I’m just trying it out as a learning experience. I managed to use raycasting to put floors inside the base mesh.
Now I can’t figure out how to use the voronoi texture to select an edge on the grid or how to delete points using it. My attempt just kind of left holes in the floor. I have it set to Distance to Edges and am deleting a selection based on whether the distance is greater than some threshold.